

Page 1

Operation
1
Optional Functions
2
User Tools
3
Replenishing Supplies
4
Troubleshooting
5
Remarks
6
Specifications
7
Operating Instructions
Read this manual carefully before you use this machine and keep it handy for future reference. For safe and correct use, be sure to read the
Safety Information before using the machine.
Page 2

Introduction
This manual contains detailed instructions and notes on the operation and use of this machine. For your
safety and benefit, read this manual carefully before using the machine. Keep this manual in a handy
place for quick reference.
Important
Contents of this manual are subject to change without prior notice. In no event will the company be liable for direct, indirect, special, incidental, or consequential damages as a result of handling or operating the machine.
Notes:
Some illustrations in this manual might be slightly different from the machine.
Certain options might not be available in some countries. For details, please contact your local dealer.
Two kinds of size notation are employed in this manual. With this machine refer to the inch version.
For good print quality, the supplier recommends that you use genuine master and ink from the supplier.
The supplier shall not be responsible for any damage or expense that might result from the use of parts
other than genuine parts from the supplier with your office products.
Power Source
120V, 60Hz, 3.1A or more
Please be sure to connect the power cord to a power source as above. For details about power source,
see p.127 “Power Connection”.
Page 3

Safety Information
R
R
When using this machine, the following safety precautions should always be followed.
Safety During Operation
In this manual, the following important symbols are used:
WARNING:
CAUTION:
Indicates a potentially hazardous situation which, if instructions
are not followed, could result in death or serious injury.
Indicates a potentially hazardous situation which, if instructions are not
followed, may result in minor or moderate injury or damage to property.
R WARNING:
• Do not damage, break or make any modifications to the power cord.
Do not place heavy objects on it. Do not pull it hard nor bend it more
than necessary. These actions could cause an electric shock or fire.
• Disconnect the power plug (by pulling the plug, not the cable) if the
power cable or plug becomes frayed or otherwise damaged.
• To avoid hazardous electric shock, do not remove any covers or
screws other than those specified in this manual.
• Turn off the power and disconnect the power plug (by pulling the plug,
not the cable) if any of the following occurs:
• You spill something into the machine.
• You suspect that your machine needs service or repair.
• The external housing of your machine has been damaged.
• Keep the machine away from flammable liquids, gases, and aerosols.
A fire or an electric shock might occur.
• Connect the power cord directly into a wall outlet and never use an extension cord.
• Only connect the machine to the power source described in this manual.
• Disposal can take place at our authorized dealer or at appropriate col-
lection sites.
i
Page 4

R CAUTION:
• After you move the machine, use the caster fixture to fix it in place. Otherwise the machine might move or come down to cause an injury.
• If you use the machine in a confined space, make sure there is a continuous
air turnover.
• Keep the machine away from humidity and dust. Otherwise a fire or an electric shock might occur.
• Protect the machine from dampness or wet weather, such as rain and snow.
• Do not place the machine on an unstable or tilted surface. If it topples over,
an injury might occur.
• Unplug the power cord from the wall outlet before you move the machine.
While moving the machine, you should take care that the power cord will not
be damaged under the machine.
• When you disconnect the power plug from the wall outlet, always pull the
plug (not the cable).
• Do not allow paper clips, staples, or other small metallic objects to fall inside
the machine.
• For environmental reasons, do not dispose of the machine or expended
supply waste at household waste collection points. Disposal can take place
at an authorized dealer.
• When disposing of a used ink container, reattach the cap to prevent ink from
splattering.
• Be careful not to get ink on your clothes when replacing an ink container. Ink
stains on clothes are hard to remove.
• Be careful not to cut yourself on any sharp edges when you reach inside the
machine to remove misfed sheets of paper or masters.
• If ink comes into contact with your eyes, rinse immediately in running water.
For other symptoms, consult a doctor.
• Keep the ink or ink container out of reach of children.
• If ink is ingested, induce vomiting by drinking a strong saline solution. Con-
sult a doctor immediately.
• If your skin comes into contact with ink, wash the affected area thoroughly
with soap and water.
• While printing, do not touch the belt at the end of the paper delivery tray or
the job separator. Otherwise, an injury might occur.
• Our products are engineered to meet the high standards of quality and functionality, and we recommend that you only use the expendable supplies
available at an authorized dealer.
ii
Page 5

Position of Label for RCAUTION
This machine has a RCAUTION label at the position indicated below. For your
own safety, always adhere to the instructions on the label.
ABL020D
iii
Page 6

How to Read This Manual
R
R
Symbols
In this manual, the following symbols are used:
WARNING:
This symbol indicates a potentially hazardous situation that might result in
death or serious injury when you misuse the machine without following the instructions under this symbol. Be sure to read the instructions, all of which are described in the Safety Information section.
CAUTION:
This symbol indicates a potentially hazardous situation that might result in minor or moderate injury or property damage that does not involve personal injury
when you misuse the machine without following the instructions under this
symbol. Be sure to read the instructions, all of which are described in the Safety
Information section.
* The statements above are notes for your safety.
Important
If this instruction is not followed, paper might be misfed, originals might be
damaged, or data might be lost. Be sure to read this.
Preparation
This symbol indicates the prior knowledge or preparations required before operating the machine.
Note
This symbol indicates precautions for operation, or actions to take after misoperation.
Limitation
This symbol indicates numerical limits, functions that cannot be used together,
or conditions in which a particular function cannot be used.
Reference
This symbol indicates a reference.
[]
Keys that appear on the machine's display panel.
{}
Keys built into the machine's control panel.
iv
Page 7

What You Can Do with this Machine
Below is a quick summary of this machine's features and where to look for
more information.
❖ Standard Printing
See p.17 “Standard Printing”.
❖ Saving Energy
See p.20 “Saving Energy”.
❖ Adjusting the Print Image Position
See p.23 “Adjusting the Print Image Position”.
GRPOSI0E
* Paper feed direction
❖ Adjusting the Print Image Density
See p.25 “Adjusting the Print Image Density”.
❖ Making Halftone Prints
See p.26 “Tint Mode”.
❖ Reducing and Enlarging by Preset Ra-
tios
See p.29 “Preset Reduce/Enlarge”.
GRRATI0E
❖ Fine-tuning the Reproduction Ratio
See p.31 “Zoom”.
GRZOOM0E
❖ Erasing Margins
See p.32 “Edge Erase”.
AB AB
❖ Changing the Printing Speed
See p.27 “Changing the Printing
Speed”.
GRTINT0E
GRERAS0E
❖ Printing on Thick or Thin Paper
See p.34 “Printing on Thick or Thin
Paper”.
❖ Selecting the Type of Original
See p.35 “Type of Original”.
❖ Saving Ink
See p.37 “Economy Mode”.
❖ Making Masters and Prints at One Go
See p.38 “Auto Cycle”.
v
Page 8

❖ Memory/Class Modes
See p.39 “Memory/Class”.
❖ Combining Two Originals onto One
Print
See p.53 “Combine”.
1
2
2
1
❖ Repeating Images
See p.55 “Repeat”.
❖ Skip Feed Printing
See p.56 “Skip Feed Printing”.
❖ Printing in Two Colors
See p.72 “Printing in Two Colors”.
R
P
R
P
GRCOLO0E
❖ Storing Print Settings
See p.57 “Program”.
❖ Printing Confidential Documents
See p.59 “Security Mode”.
❖ Entering a User Code to Use the Ma-
chine
See p.60 “Entering a User Code to
Use the Machine”.
❖ Restoring Image Quality
See p.61 “Quality Start Mode”.
❖ On Line Printing
See p.62 “On Line Printing”.
❖ Making Color Prints
See p.72 “Making Color Prints”.
vi
Page 9

Making Prints
This section explains the basic procedure for making prints.
A Lift the exposure glass cover.
ZFRH060E
Reference
For details on how to place originals in the optional document
feeder, see p.66 “Placing Originals in the Document Feeder”.
B Place the original face down on the
exposure glass. The original
should be aligned with the reference mark and the left corner scale.
C Lower the exposure glass cover.
ZFRH061E
D Specify your print settings.
E Enter the number of prints with the
number keys.
AQN023S
A Left corner scale
B Reference mark
ACY058S
vii
Page 10

F Press the {Master Making} key.
AQN024S
Printing starts automatically after
the trial print.
Note
❒ If you wish to check the image
before printing, press the {Auto
Cycle} key before pressing the
{Master Making} key, in order to
disable Auto Cycle mode. See
p.18 “When Auto Cycle mode is
off”.
G When the print job is finished,
press the {Clear Modes/Energy Sav-
er} key.
viii
AQN025S
Your print settings are cleared and
the machine returns to its initial
condition.
Page 11

TABLE OF CONTENTS
Safety Information .................................................................................................. i
Safety During Operation.............................................................................................. i
Position of Label for RCAUTION ........................................................................ iii
How to Read This Manual ....................................................................................iv
What You Can Do with this Machine.................................................................... v
Making Prints ....................................................................................................... vii
Machine Exterior ....................................................................................................1
Machine Interior ..................................................................................................... 2
Options ................................................................................................................... 3
Control Panel.......................................................................................................... 4
Keys ........................................................................................................................... 4
Indicators.................................................................................................................... 6
Panel Display.......................................................................................................... 7
Panel Display Layout ................................................................................................. 8
1. Operation
Print Paper.............................................................................................................. 9
Originals ...............................................................................................................11
Printing Preparations .......................................................................................... 12
Loading Paper..........................................................................................................12
Setting Up the Paper Delivery Tray..........................................................................12
Adjusting the Paper Alignment Wings and Chocks..................................................13
Turn on the Power.................................................................................................... 14
After Printing ........................................................................................................15
Turn off the power .................................................................................................... 16
Standard Printing.................................................................................................17
Saving Energy ......................................................................................................20
Auto Off Timer...................................................................................................... 21
Auto Reset ............................................................................................................ 22
Adjusting the Print Image Position .................................................................... 23
Forwards or Backwards ........................................................................................... 23
Right or Left.............................................................................................................. 24
Adjusting the Print Image Density ..................................................................... 25
Tint Mode ..............................................................................................................26
Changing the Printing Speed.............................................................................. 27
Stopping a Multi-print Run..................................................................................28
Stopping a Multi-print Run to Print Another Original ................................................28
Changing the Number of Prints and Checking the Completed Prints ......................28
Preset Reduce/Enlarge........................................................................................29
Zoom ..................................................................................................................... 31
Edge Erase ........................................................................................................... 32
Printing on Thick or Thin Paper ......................................................................... 34
Pressure Lever Position ........................................................................................... 34
Type of Original....................................................................................................35
Economy Mode .................................................................................................... 37
ix
Page 12

Auto Cycle ............................................................................................................ 38
Memory/Class....................................................................................................... 39
Select Class/Year .................................................................................................41
Registering Class/Year ............................................................................................ 41
Printing for All Years ................................................................................................42
Printing for Selected Classes ................................................................................... 43
Memory Mode.......................................................................................................44
Normal Memory Mode.............................................................................................. 44
Stack Memory Mode ................................................................................................ 45
Class Mode ...........................................................................................................47
Recall ....................................................................................................................49
Storing Memory Mode Settings................................................................................49
Storing Class Mode Settings....................................................................................51
Recalling the Stored Settings ...................................................................................52
Combine................................................................................................................ 53
Repeat ...................................................................................................................55
Skip Feed Printing ............................................................................................... 56
Program ................................................................................................................ 57
Storing Print Settings ............................................................................................... 57
Recalling a Program................................................................................................. 58
Security Mode ...................................................................................................... 59
Entering a User Code to Use the Machine.........................................................60
Quality Start Mode ...............................................................................................61
On Line Printing ...................................................................................................62
Auto On Line ............................................................................................................ 63
2. Optional Functions
Optional Document Feeder ................................................................................. 65
Originals ................................................................................................................... 65
Placing Originals in the Document Feeder...............................................................66
Using the Document Feeder when Combining Originals .........................................67
Using the Document Feeder in Memory Mode ........................................................67
Color Printing Using the Optional Color Drum ................................................. 70
Changing the Color Drum Unit.................................................................................70
Making Color Prints .................................................................................................. 72
Printing in Two Colors ..............................................................................................72
3. User Tools
Accessing the User Tools ................................................................................... 75
Quitting User Tools .................................................................................................. 75
User Tools Menu .................................................................................................. 76
1 System ..................................................................................................................76
2 Set Operat'n Mode ................................................................................................ 77
3 Initial Setting.......................................................................................................... 78
4 Mode Setting .........................................................................................................79
5 Admin. Mode .........................................................................................................81
6 Online Paramet's ...................................................................................................81
x
Page 13

User Tool Menus in Detail ................................................................................... 82
3-5 Edge Erase Area................................................................................................ 82
4-11 No. of Q.Start ................................................................................................... 82
5-2 Reset Counters ..................................................................................................83
4. Replenishing Supplies
Loading Paper on the Paper Feed Tray ............................................................. 85
Replenishing Paper..................................................................................................85
Changing the Paper Size .........................................................................................85
When the Add Ink Indicator (j) Lights ............................................................. 87
When the Master End Indicator (C) Lights .......................................................91
Placing a New Roll of Tape in the Optional Tape Dispenser ...........................93
5. Troubleshooting
Machine Operation Problems ............................................................................. 95
Printing Problems ................................................................................................ 97
Printing Problems When Using Combine Mode ....................................................... 97
x Clearing Misfeeds ........................................................................................... 98
When “x” lights and “P” is indicated .......................................................................98
When “x” lights and “A” is indicated ..................................................................... 101
When “x” lights and “B” is indicated ..................................................................... 101
When “x” lights and “C” is indicated ..................................................................... 103
When “x” lights and “D” is indicated ..................................................................... 106
When “x” lights and “A”, “B” are indicated ............................................................ 107
When “x”lights and “B”, “E” are indicated.............................................................109
When the Open Cover/Unit Indicator (M) Lights and a Message is Displayed
Front Cover is Open ...............................................................................................112
Cover of Optional Document Feeder is Open........................................................112
When the Master End Indicator (C) Lights and a Message is Displayed ....113
Master Feeding Cover is Open ..............................................................................113
Master Tray is Not Set Properly.............................................................................113
Lower Master Tray is Open.................................................................................... 113
When the Master Eject Indicator (k) Lights ................................................... 114
When Other Indicators Light............................................................................. 115
When the Prints are Thrown Over the Paper Delivery Tray ...........................116
Poor Printing ...................................................................................................... 117
Dirt on the Back Side of Paper...............................................................................117
Dirt on the Front Side of Paper (Black Line/Stain) ................................................. 119
Blank Prints or Incomplete Prints ........................................................................... 120
...112
6. Remarks
Operation Notes ................................................................................................. 123
General Cautions ...................................................................................................123
Print Paper ............................................................................................................. 125
Originals ................................................................................................................. 125
Where to Put the Machine ................................................................................. 126
Environmental Conditions ......................................................................................126
Power Connection .................................................................................................. 127
Access to Machine ................................................................................................. 127
xi
Page 14

Maintaining the Machine ................................................................................... 128
Main Frame ............................................................................................................128
Optional Document Feeder....................................................................................129
Combination Chart.............................................................................................130
7. Specifications
Main Frame ......................................................................................................... 131
Document Feeder (Option)................................................................................ 134
Consumables ..................................................................................................... 135
INDEX....................................................................................................... 136
xii
Page 15

Machine Exterior
AQN002S
1. Front cover
Open for access to the inside of the machine.
2. Control panel
Operator controls and indicators are located here. See p.4 “Control Panel”.
3. Exposure glass cover or document
feeder (option)
When using the exposure glass, lower its
cover over an original before master
making.
When using the optional document feeder, place a stack of originals in the feeder.
4. Master tray
Open to replace the master roll or to clear
a master misfeed.
5. Lower master tray
Pull out this tray to clear a master misfeed.
6. Feed roller pressure lever
Use to adjust the contact pressure of the
paper feed roller according to paper
thickness.
7. Paper feed side plates
Use to prevent paper skew.
8. Paper feed tray
Set paper on this tray for printing.
9. Paper feed side plate lock lever
Use to lock or unlock the paper feed side
plates.
10. Side tray fine adjusting dial
Use to shift the paper feed tray sideways.
11. Paper feed tray down key
Press to lower the paper feed tray.
12. Behind cover
Flip up to use the keys underneath.
1
Page 16

Machine Interior
AQN020S
1. Main switch
Use to turn the power on or off.
2. Master eject box
Used masters are stored here.
3. Paper alignment wings
Lift or lower the wings according to the
type of paper used.
4. Paper delivery side plates
Use to align the prints on the paper delivery tray.
5. Paper delivery end plate
Use to align the leading edge of the
prints.
6. Paper delivery tray
Completed prints are delivered here.
7. Chocks
Use to adjust the buffer fins.
8. Drum unit
The master is wrapped around this unit.
2
9. Drum unit lock lever
Lift to unlock and pull out the drum unit.
10. Ink holder
Set the ink cartridge in this holder.
11. Drum position indicator
It is shown that the drum is in the standard position when a green lamp is on.
12. Exposure glass
Position originals face down on the exposure glass.
Page 17

Options
❖ Document feeder
1. Document feeder
❖ Exposure glass cover
AQN003S
AQN004S
1. Exposure glass cover
Note
❒ Other options:
• A3, 11" × 17" Color Drum
1
• A4, 11" × 8
/2" Black Drum
• Tape Dispenser
•Key Counter
3
Page 18

Control Panel
Keys
AQN026S
1. {Quality Start} key
Press to have the machine perform a few
idle spins before printing. See p.61
“Quality Start Mode”.
2. {Security} key
Press to make prints from confidential
documents. See p.59 “Security Mode”.
3. {Skip Feed} key
Press to select skip feed printing. See p.56
“Skip Feed Printing”.
4. {} and {} keys (Zoom keys)
Press to fine-tune the reproduction ratio.
See p.31 “Zoom”.
5. {Edge Erase} key
Press to select erase margins on the
prints. See p.32 “Edge Erase”.
6. {Tint} key
Press to make halftone prints. See p.26
“Tint Mode”.
7. {Economy Mode} key
Press to save ink. See p.37 “Economy
Mode”.
8. {Job Reset} key
Press to stop the optional PC controller.
9. {Type of Original} key
Press to select Letter, Photo, Letter/Photo, or Pencil mode. See p.35 “Type of
Original”.
4
10. {Reduce/Enlarge} key
Press to reduce or enlarge the image by
preset ratios. See p.29 “Preset Reduce/Enlarge”.
11. {Full Size} key
Press to make full size prints.
12. {Combine/Repeat} key
Press to combine two originals onto one
print. See p.53 “Combine”.
Press to repeat the image of an original
on one print. See p.55 “Repeat”.
13. {Memory/Class} key
Press to select Memory or Class modes.
See p.39 “Memory/Class”.
14. {W} and {V} keys (Speed keys)
Press to adjust the printing speed. See
p.27 “Changing the Printing Speed”.
15. {Image Position} keys
Press to shift the image forwards or backwards. See p.23 “Adjusting the Print Image Position”.
16. Number keys
Press to enter the desired number of
prints as well as data for certain modes.
17. {q} key
Press to confirm an entry that you have
made.
Page 19

18. {Clear/Stop} key
Press to cancel a number that you have
entered or to stop printing.
19. {User Tools} key
Press to change the default settings to
suit your requirements. See p.75 “User
Tools”.
20. {Image Density} key
Press to make prints darker or lighter. See
p.25 “Adjusting the Print Image Density”.
21. {On Line} key
See p.62 “On Line Printing”.
22. {Auto On Line} key
See p.63 “Auto On Line”.
23. {Escape} key
Press to cancel a selection or an entry,
and to return to the previous display.
24. {~}{}} keys
Press to select an item on the panel display.
25. {OK} key
Press to confirm a selection or an entry.
26. {Program} key
Press to store print settings, or to recall
stored print settings. See p.57 “Program”.
27. {Clear Modes/Energy Saver} key
•Clear Modes
Press to clear previously entered print
settings.
•Energy Saver
Press to switch to and from Energy
Saver mode. See p.20 “Saving Energy”.
28. {Auto Cycle} key
Press to make masters and prints in a single operation. See p.38 “Auto Cycle”.
29. {Proof} key
Press to make a proof print.
30. {Master Making} key
Press to make a master.
31. {Print} key
Press to start printing.
5
Page 20

Indicators
AQN027S
1. Special feature indicator
Lets you know when one or more of the
keys under the behind cover has been selected.
2. Color drum indicator
Lets you know that a color drum is installed, and that the machine is ready for
color printing.
1
3. 8
/2" drum indicator
Lets you know that an A4, 11" × 81/2"
drum is installed.
4. Monitor indicators
Let you know the status of the machine.
u: Set Key Counter indicator
See p.115 “When Other Indicators Light”.
j: Add Ink indicator
See p.87 “When the Add Ink Indicator
(j) Lights”.
C: Master End indicator
See p.91 “When the Master End Indicator
(C) Lights”.
See p.113 “When the Master End Indica-
tor (C) Lights and a Message is Displayed”.
6
k: Master Eject indicator
See p.114 “When the Master Eject Indica-
tor (k) Lights”.
M: Open Cover/Unit indicator
See p.112 “When the Open Cover/Unit
Indicator (M) Lights and a Message is
Displayed”.
x: Misfeed indicator
See p.98 “x Clearing Misfeeds”.
B: Load Paper indicator
See p.85 “Replenishing Paper”.
5. Counter
Shows the number of prints entered.
While printing, it shows the remainder
that is to be printed.
6. Printer error indicator
7. Data In indicator
Page 21

Panel Display
The panel display shows the machine status, error messages, and function
menus.
Important
❒ Do not subject the panel display to strong impact or a force equivalent to 30N
or more, otherwise it could be damaged.
Note
❒ When you select an item on the panel display, it is highlighted (e.g. ).
2
AQN028S
1. Menu for the function selected
2. Machine status or messages
❖ Common keys
{OK} key Press to confirm a selection or an entry.
{Escape} key Press to cancel a selection or entry, and to return to the previ-
ous display.
{~}{}} keys Press to select items on the panel display.
100
7
Page 22

Panel Display Layout
The basic elements of the panel display are explained below. Understanding
their meaning helps you use this machine's features quickly and easily.
❖ Sample display when selecting the {Reduce/Enlarge} key
AQN029S
1. Machine status or messages
When the {Reduce/Enlarge} key is pressed, the following display is shown.
ZLKS070N
1. Functions and settings available:
• Press the {~}{}} keys to select an item.
• Press the {OK} key to confirm your settings.
• Press the {Escape} key to return to the previous display.
8
Page 23

1. Operation
Print Paper
The following limitations apply:
Paper Size Paper
Metric Inch
Paper feed tray A3 L, B4 JIS (Japanese Industrial
Standard) L, A4 L K,
B5 JIS L K, A5 L, B6 JIS L,
A6 L,
Others (Vertical: 70 - 297mm,
Horizontal: 148 - 432mm)
11" × 17" L, 8
1
8
/2" × 11" L K,
1
5
/2" × 81/2" L K,
Others
(Vertical: 2.76" - 11.7",
Horizontal: 5.83" - 17")
1
/2" × 14" L,
The following types of paper are not recommended for this machine:
• Roughly-cut paper
• Paper of different thickness in the same stack
2
• Envelopes heavier than 85 g/m
, 22 lb.
• Folded, curled, creased, or damaged paper
• Damp paper
•Torn paper
• Slippery paper
• Rough paper
• Paper with any kind of coating (such as carbon)
• Short grain paper
• Thin and flimsy paper
• Paper that is prone to generate a lot of paper dust
• Grained paper loaded with the direction of the grain perpendicular to the
feed direction
• Certain types of long thin envelopes e.g. international mail envelopes
Weight
47.1 - 209.3
g/m2,
12.5 - 55.6 lb
ZFXX040E
9
Page 24

Operation
• The following types of envelopes:
1
If you print on rough grained paper, the copy image might be blurred.
You can use A3 (297 × 420mm) or 11" × 17" originals or printing paper. However,
use the Reduce mode to ensure that the entire image is printed. This is because
the maximum print areas are as follows:
• Metric version: 290 × 410mm, 11.4" × 16.1"
• Inch version: 290 × 420mm, 11.4" × 16.5"
When you use A3, 11" × 17" and 209.3 g/m
speed down to Setting 1, 2 or 3.
Important
❒ Correct curls in the paper before placing it in the machine. When you are un-
able to correct the paper curl, stack the paper with the curl either face up or
face down as shown below. If paper is curled, it might wrap around the drum
or cause the prints to be stained.
2
, 55.6 lb paper, slow the printing
10
TPEY990E
Page 25

Originals
Originals
The maximum original size that you can place on the exposure glass is 304.8 ×
432mm, 12" × 17".
If your originals have bold letters or solid images at the leading edges, you might
get prints with dirty edges. In this case, place the original face down on the exposure glass, with its widest margin toward the paper delivery tray.
Place originals on the exposure glass only after the ink or correction fluid on
them is completely dry. Not taking this precaution could stain the exposure
glass and cause the stains to be printed.
As a general rule, place originals on the exposure glass as shown below.
ZDZX030E
The first 5mm, 0.2", of the leading edge cannot be printed. When using the optional document feeder, the first 5mm, 0.2", of the leading edge as well as the last
2mm, 0.08", of the trailing edge cannot be printed.
Original Print
1
a = 5mm, 0.2"
11
Page 26

Operation
Printing Preparations
1
Loading Paper
D Make sure that the paper feed
side plates touch the paper lightly. Shift the lock lever back to its
A Gently open the paper feed tray.
TSLH026E
original position.
TSLY015E
B Release the paper feed side plate
lock lever and adjust the side
plates to match the paper size.
Setting Up the Paper Delivery
Tray
A Raise the paper delivery tray slight-
1
B5
F
A4B4A5
B5
TSLH01BE
1: Paper feed side plate lock lever
ly before lowering it down gently.
ABL022S
C Load paper onto the paper feed
tray.
12
ZFRY020E
Page 27

Printing Preparations
B Lift the paper delivery side plates
and adjust them to match the paper size.
ABL024S
C Lift the paper delivery end plate
and adjust it to match the paper
size.
ACY064S
Adjusting the Paper Alignment
Wings and Chocks
Use the paper alignment wings and
chocks to stack printed paper neatly.
Note
❒ Prints may be delivered curled up
if they contain large areas of solid
image. If this happens, raise the
paper alignment wings to about 45
degrees. When printing on B5
JISL K or A4K of 52.3 g/m
lb or thinner, slide the chocks up
together.
❒ Depending on the type of paper
you are using, you may not be able
to load to capacity (1000 sheets)
when the wings are raised.
❒ When printing on 52.3 g/m
lb or thinner at a fast speed, paper
jams (C) may occur in the paper
exit area. If this happens, do the
following:
• Decrease print speed.
Reference
p.27 “Changing the Printing
Speed”
• Lower the paper alignment wings.
• Push the end plate toward the
paper delivery tray edge.
❒ When the paper alignment wings
are raised, prints may not be delivered neatly stacked, depending on
paper type. If this happens, lower
the wings.
2
, 13.9
2
, 13.9
1
13
Page 28

Operation
❖ Paper alignment wings
Adjust the paper alignment wings.
1
ACY053S
1. Raise the wings fully.
2. Raise the wings to about 45 degrees.
❖ Chocks
Slide the chocks up or down to adjust the buffer fins to match the paper size and thickness.
Paper
Weight
128 g/m
34 lb or
thicker
52.3 g/m
– 128
2
g/m
,
13.9 lb to
34 lb
52.3 g/m
13.9 lb or
thinner
2
,
2
2
,
Paper
Size
A3 L,
11" ×
17"L,
B4 JIS L
A4 LK,
B5 JIS
LK
A3 L,
11" ×
17"L,
B4 JIS L
A4 LK,
B5 JIS
LK
A3 L,
11" ×
17"L,
B4 JIS L
A4 LK,
B5 JIS
LK
Paper
alignment
wings
Lower
the
wings.
Lower
the
wings.
Raise the
wings
fully.
Raise the
wings to
about 45
degrees.
Raise the
wings to
about 45
degrees.
Raise the
wings to
about 45
degrees.
Chocks
Down
Down
Up
Up
Down
Down
Adjust the paper alignment wings
and chocks according to paper size
and thickness, as follows:
14
Turn on the Power
A Turn on the main switch.
ACY054S
ZFRH090E
Reference
When the prints are not delivered in a neat stack, see p.116
“When the Prints are Thrown
Over the Paper Delivery Tray”.
Page 29

After Printing
After Printing
A Remove the paper from the paper
feed tray.
ZFRY030E
The paper feed tray will lower.
B Gently close the paper feed tray.
TSLH020E
C Slightly lower one of the side plates.
D Remove the prints from the paper
delivery tray.
AFG050S
E Lower the paper alignment wings.
ABL040S
F Slide the chocks down.
1
ABL043S
ABL038S
15
Page 30

Operation
G Move the paper delivery end plate
until its handle is flush with the
end of the tray.
J Close the paper delivery tray.
1
ABL023S
ZFRH190E
H Lower the paper delivery end plate.
ABL054S
I Move the side plates to each side,
and then lower them.
Turn off the power
A Turn off the main switch.
ZFRH100E
16
ABL044S
Page 31

Standard Printing
Standard Printing
This section explains the basic procedure for making prints. The procedure differs depending on whether or
not the machine is in Auto Cycle
mode.
With Auto Cycle mode, you can process masters and make prints in a single operation. The default is On, but
you can change the setting using the
user tools. To do so, see “1 Auto Cycle
ON/OFF” on p.79 “4 Mode Setting”.
A Check that the machine is ready
for printing.
B If User Code mode has been set to
“On”, enter your user code with
the number keys, and then press
the {OK} key.
Reference
See p.60 “Entering a User Code
to Use the Machine”.
D Lift the exposure glass cover.
1
ZFRH060E
Reference
For details on how to place originals in the optional document
feeder, see p.66 “Placing Originals in the Document Feeder”.
E Place the original face down on
the exposure glass. The original
should be aligned with the reference mark and the left corner
scale.
C Make sure that previous print set-
tings have been cleared.
Note
❒ To clear previous print settings,
press the {Clear Modes/Energy
Saver} key.
ACY058S
A Left corner scale
B Reference mark
17
Page 32

Operation
F Lower the exposure glass cover.
When Auto Cycle mode is on
A Check that Auto Cycle mode is
on.
1
ZFRH061E
G Specify the print settings.
H Enter the number of prints with
the number keys.
AQN023S
Note
❒ If you have made a wrong en-
try, press the {Clear/Stop} key
and then enter the number
again.
B Press the {Master Making} key.
Printing starts automatically after the trial print.
When Auto Cycle mode is off
A Check that Auto Cycle mode has
been disabled.
AQN030S
AQN024S
18
AQN030S
Page 33

Standard Printing
B Press the {Master Making} key.
Note
❒ If necessary, press the {Proof}
key and check the print image.
I When the print job is finished,
press the {Clear Modes/Energy Sav-
er} key.
1
AQN024S
AQN025S
Your print settings are cleared and
the machine returns to its initial
condition.
AQN031S
Reference
If the image position is not
correct, adjust it using the
{Image Position} key. See p.23
“Adjusting the Print Image
Position”.
C Press the {Print} key.
AQN032S
19
Page 34

Operation
Saving Energy
If not used for a certain period of time
1
after printing, the machine will enter
the Energy Saver or Auto Off mode to
reduce energy consumption.
❖ Energy Saver mode
The display goes off. Printing from
a computer is possible in this
mode.
To operate the machine, press the
Operation switch, or place originals on the exposure glass or in the
ADF.
To go back into the Energy Saver
mode, press the Operation switch.
❖ Auto Off mode
The machine turns off automatically. To use it, turn the main switch
on.
Note
❒ You can select which mode the ma-
chine enters after a specified period has passed following job
completion. See “7 Energy Saver
Opt.” on p.76 “1 System”.
❒ You can change the time the ma-
chine waits before Energy Saver or
Auto Off mode starts. See “8 Energy Saver Timer” on p.76 “1 System”.
Note
❒ The machine will not automatical-
ly enter the Energy Saver or Auto
Off mode in the following cases if:
• a warning message appears
• there is no ink
• originals or paper are jammed
• it is making master or printing
• the machine is printing the second page of a combine repeat.
• there is no paper
• the master eject box is full
• there is no master
• originals are left in the ADF
•a cover is open
• you are making changes with
User Tools
• the user code entry screen is displayed
• the Data In indicator is lit or
blinking
• you are setting the mode on the
control panel
20
Page 35

Auto Off Timer
You can set the machine to turn itself
off at a specified time everyday.
Make the timer setting in User Tools.
See “9 Auto Off Timer” on p.76 “1
System”.
Note
❒ The machine will not automatical-
ly turn itself off if you are using it
at the set time.
Auto Off Timer
1
21
Page 36

Operation
Auto Reset
This machine can be set to return au-
1
tomatically to its initial condition if it
has not been operated for a certain period of time. This is called “Auto Reset”.
Note
❒ The Auto Reset time can be set
from 1 to 5 minutes, or to “Off”.
See “1 Auto Reset” on p.76 “1 System”.
❒ The default for Auto Reset is Off.
❒ In the following cases, Auto Reset
will not take place.
• If there is no ink
• If originals are or paper is jammed
• If the machine has not finished
making masters or prints
• If the machine is printing the
second page of a Combine print
•If there is no paper
• If there is no master
• If the master eject box is full
• If there is an original in the optional document feeder
• If the “cover open” indicator is
lit
• If you are in the process of making changes to the user tools
• If you have set Auto Reset to
“Off”
22
Page 37
Adjusting the Print Image Position
Adjusting the Print Image Position
You can adjust the print image position in two ways:
❖ Forwards or Backwards
Use the {Image Position} keys.
❖ Right or Left
Use the side tray fine adjusting dial.
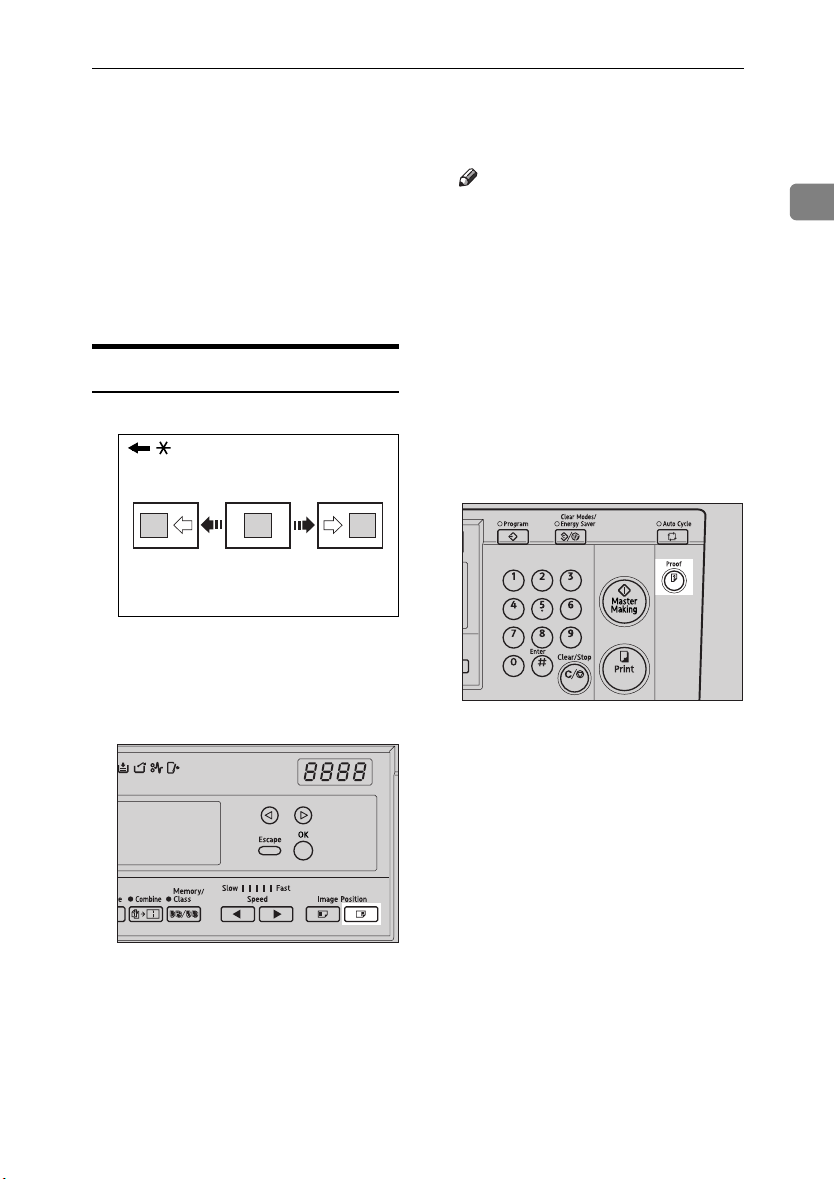
Forwards or Backwards
GRFORW0E
* Paper feed direction
A Press the left {Image Position} key
to move the image forwards, the
right key to move it backwards.
Note
❒ One push of either {Image Posi-
tion} key shifts the image posi-
tion by 0.5mm, 0.02" , up to a
maximum of 15mm, 0.6" in each
direction.
❒ When you shift the image for-
wards, leave a margin of more
than 5mm, 0.2" on the leading
edge. If there is no margin, paper might wrap around the
drum and cause a misfeed.
B Press the {Proof} key to check the
image position.
AQN031S
1
AQN033S
23
Page 38
Operation
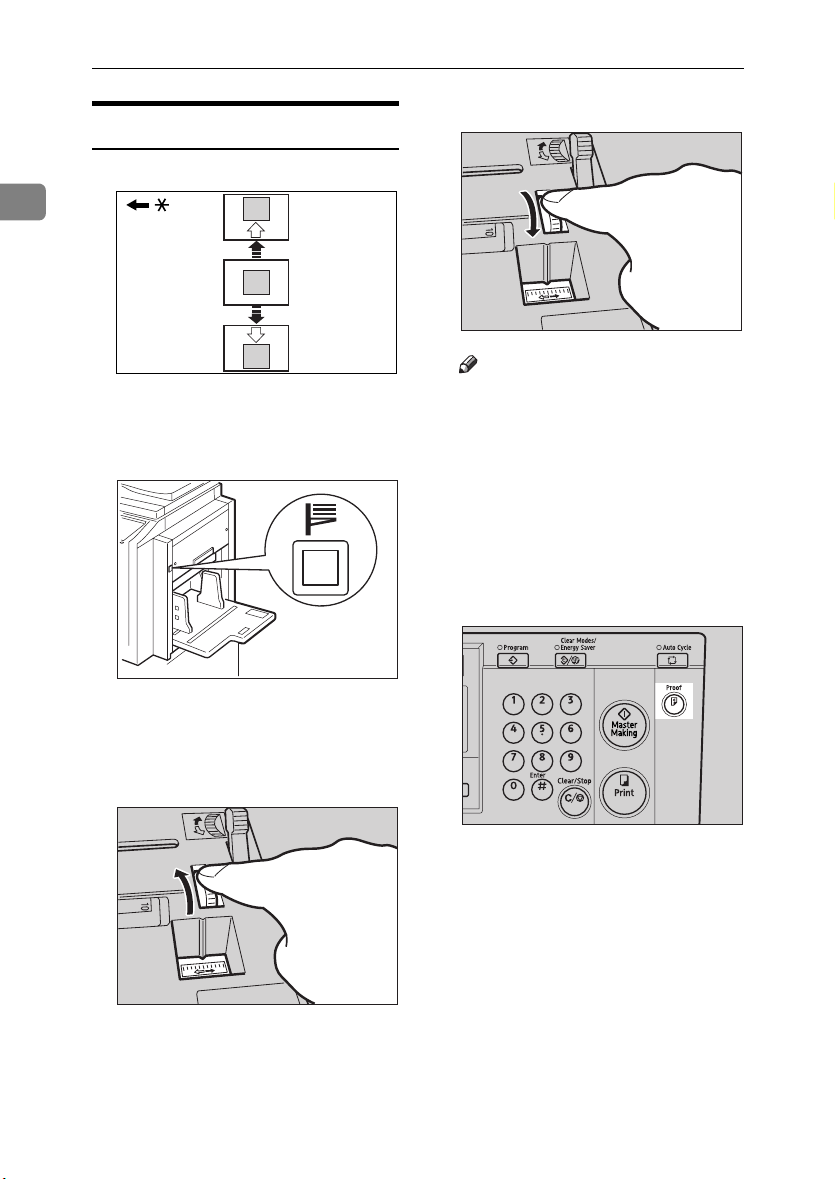
❖ Shifting the image to the left
Right or Left
1
TSLH02JE
GRLEFT0E
* Paper feed direction
A Press the paper feed tray down
key to lower the paper feed tray.
ZFRH031E
B Turn the side tray fine adjusting
dial as shown below.
❖ Shifting the image to the right
Note
❒ The image position can be shift-
ed up to 10mm, 0.4" in each direction. Each division on the
scale represents a shift of 2mm,
0.08".
❒ Adjust the paper delivery side
plates to match the new image
position.
C Press the {Proof} key to check the
image position.
AQN031S
24
TSLH02IE
Page 39

Adjusting the Print Image Density
Adjusting the Print Image Density
You can adjust the print image density to suit your needs.
Note
❒ You can specify the image density
that is selected by default when the
power is turned on. See “1 MSTR
Makg.Density” on p.78 “3 Initial
Setting”.
A Press the {Image Density} key.
ZLKS080N
Note
❒ If your original has a colored
background such as red or blue,
select a lighter image density to
prevent the prints from appearing dirty.
D Press the {Master Making} key.
1
AQN024S
Printing starts automatically after
the trial print.
Note
❒ If you wish to check the image
before printing, press the {Auto
Cycle} key before pressing the
{Master Making} key, in order to
disable Auto Cycle mode. See
p.18 “When Auto Cycle mode is
off”.
B Set your original.
C Enter the number of prints with the
number keys.
AQN023S
25
Page 40
Operation
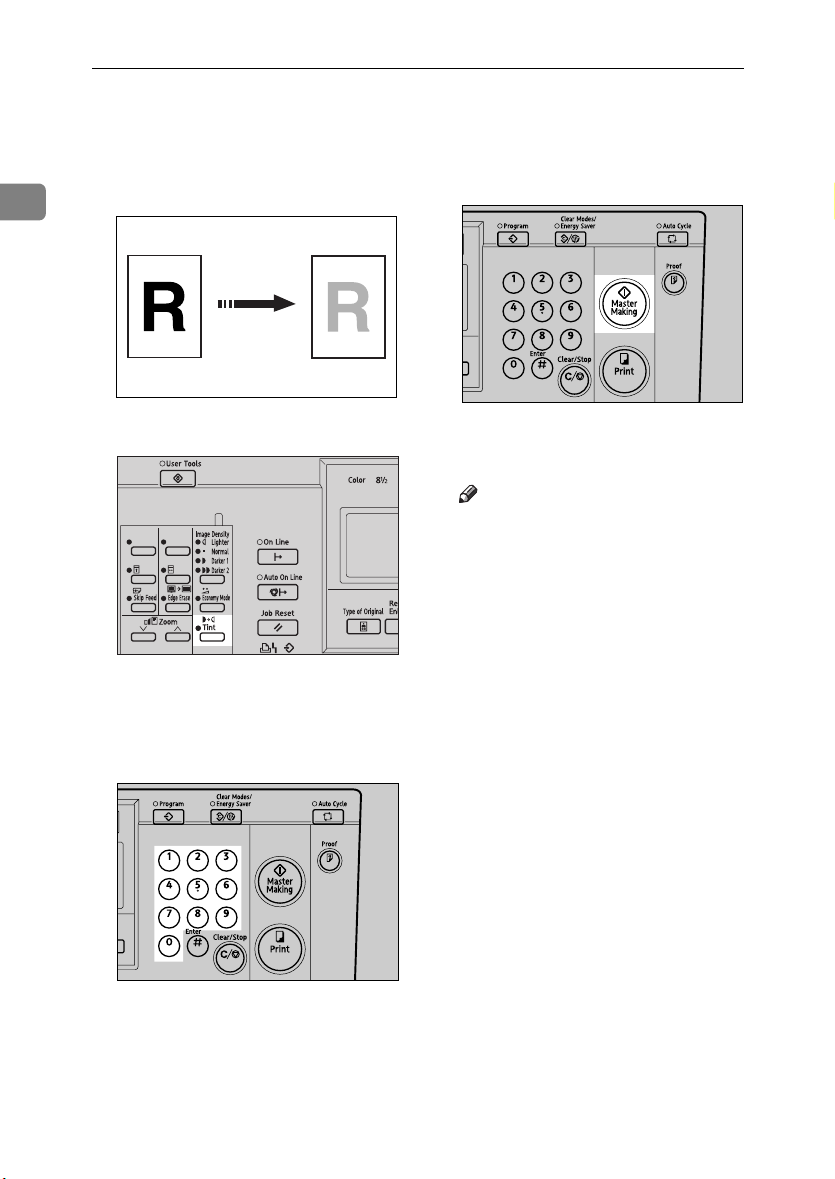
Tint Mode
Use this function to make halftone
1
prints.
GRTINT0E
A Press the {Tint} key.
ZLKS08AN
D Press the {Master Making} key.
AQN024S
Printing starts automatically after
the trial print.
Note
❒ If you wish to check the image
before printing, press the {Auto
Cycle} key before pressing the
{Master Making} key, in order to
disable Auto Cycle mode. See
p.18 “When Auto Cycle mode is
off”.
B Set your original.
C Enter the number of prints with the
number keys.
26
AQN023S
Page 41

Changing the Printing Speed
Use the {W}{V} keys (Speed keys) to
adjust the printing speed to suit the
type of printing paper.
A Press the {V} key to increase the
speed, or the {W} key to reduce
the speed.
AQN034S
Note
❒ The following speeds are avail-
able:
•Setting 1:
60 sheets/minute
•Setting 2:
75 sheets/minute
•Setting 3:
90 sheets/minute
•Setting 4:
105 sheets/minute
•Setting 5:
120 sheets/minute
❒ The default is Setting 3.
Changing the Printing Speed
1
27
Page 42

Operation
Stopping a Multi-print Run
1
Stopping a Multi-print Run to
Print Another Original
Changing the Number of
Prints and Checking the
Completed Prints
A Press the {Clear/Stop} key.
A Press the {Clear/Stop} key.
AQN035S
B Set the new original.
C Enter the number of prints and
press the {Master Making} key.
B Change the number of prints or
check the completed prints.
Note
❒ To change the number of prints,
press the {Clear/Stop} key, and
then enter the new number with
the number keys.
AQN035S
C Press the {Print} key to resume
printing.
28
AQN024S
AQN032S
Page 43

Preset Reduce/Enlarge
Preset Reduce/Enlarge
Use this function to reduce or enlarge
originals by a preset ratio.
GRRATI0E
Note
❒ The leading edge of the print im-
age remains constant even when
the image itself is enlarged or reduced.
GCRATI0E
1. When using the exposure glass
2. When using the optional document
feeder
* Paper feed direction
a = 5mm, 0.2"
❒ You can select a ratio regardless of
the size of the original or the printing paper. However, with some ratios, parts of the image might not
be printed or margins will appear
on prints.
❒ You can choose from 7 preset ra-
tios (3 enlargement ratios and 4 reduction ratios).
❖ Metric version
Ratio (%) Original → Print paper size
141 A4 → A3, A5 → A4,
122 A4 → B4 JIS, A5 → B5 JIS
115 B4 JIS → A3, B5 JIS → A4
93 —
87 A3 → B4 JIS, A4 → B5 JIS
82 B4 JIS → A4, B5 JIS → A5
71 A3 → A4, A4 → A5,
B5 JIS → B4 JIS
B4 JIS → B5 JIS
❖ Inch version
Ratio (%) Original → Print paper size
155
129
121
93 —
77
74
65
1
/2" × 8 1/2" → 8 1/2" × 14"
5
1
8
/2" × 11" → 11" × 17",
1
5
/2" × 8 1/2" → 8 1/2" × 11"
1
8
/2" × 14" → 11" × 17"
1
/2" × 14" → 8 1/2" × 11"
8
11" × 15" → 8
11" × 17" → 8
1
8
/2" × 11" → 5 1/2" × 8 1/2"
1
/2" × 11"
1
/2" × 11",
1
❒ You can specify the reproduction
ratio that is selected by default
when the power is turned on. See
“3 Ratio Priority” on p.78 “3 Initial
Setting”.
29
Page 44

Operation
A Press the {Reduce/Enlarge} key.
F Press the {Master Making} key.
1
ZLKS051N
B Use the {~}{}} keys to select
your desired reproduction ratio,
and press the {OK} key.
C Check that the original and the
print paper are of the correct size.
D Set your original.
E Enter the number of prints with the
number keys.
Printing starts automatically after
the trial print.
Note
❒ If you wish to check the image
before printing, press the {Auto
Cycle} key before pressing the
{Master Making} key, in order to
disable Auto Cycle mode. See
p.18 “When Auto Cycle mode is
off”.
AQN024S
30
AQN023S
Page 45

Zoom
Zoom
Use this function to fine-tune the reproduction ratio in 1% steps.
GRZOOM0E
Note
❒ You can select from a range of 50–
200%.
A Specify the reproduction ratio
with the {}{} keys (Zoom
keys).
ZLKS081N
Note
❒ Alternatively, you can first se-
lect a preset ratio which is near
to your desired ratio, then fineadjust it with the {} or {}
key.
B Set your original.
C Enter the number of prints with the
number keys.
AQN023S
D Press the {Master Making} key.
AQN024S
Printing starts automatically after
the trial print.
Note
❒ If you wish to check the image
before printing, press the {Auto
Cycle} key before pressing the
{Master Making} key, in order to
disable Auto Cycle mode. See
p.18 “When Auto Cycle mode is
off”.
1
31
Page 46

Operation
Edge Erase
When printing from thick books, or
1
similar originals, a shadow caused by
the binding may show up on the
prints. If you print using the Edge
Erase mode, such shadows will be
erased automatically.
A Press the {Edge Erase} key.
❖ With Edge Erase mode
AB AB
ZLKS082N
B Use the {~}{}}keys to select the
GRERAS0E
❖ Without Edge Erase mode
AB
original size and orientation, and
then press the {OK} key.
C Set your original.
D Enter the number of prints with the
GRERAS1E
Note
❒ You can specify within a range of 0
to 20mm, 0" to 0.8", the width of
the margin to be erased. See “5
Margin Eras.Area” on p.78 “3 Initial Setting”.
❒ The default is 5mm, 0.2".
number keys.
32
AQN023S
Page 47

E Press the {Master Making} key.
Printing starts automatically after
the trial print.
Note
❒ If you wish to check the image
before printing, press the {Auto
Cycle} key before pressing the
{Master Making} key, in order to
disable Auto Cycle mode. See
p.18 “When Auto Cycle mode is
off”.
Edge Erase
1
AQN024S
33
Page 48

Operation
Printing on Thick or Thin Paper
Perform the following steps when
1
you make prints on thick (127.9 to
209.3g/m
(52.3 to 127.9g/m
thin (47.1 to 52.3g/m
2
, 34.0 to 55.6 lb), standard
2
, 13.9 to 34.0 lb) or
2
, 12.5 to 13.9 lb)
B Make sure that paper feed side
plates touch the paper lightly.
paper.
Pressure Lever Position
A Shift the feed roller pressure le-
ver to either Thick, Standard, or
Thin paper position.
ZCTH150E
C After you have finished printing,
return the feed roller pressure lever to the Standard paper position.
ZFRH210E
Note
❒ Choose the correct lever posi-
tion according to the paper
weights as shown in the following table.
Metric
Version
Thick 127.9 —
209.3g/m
Standard 52.3 —
127.9g/m
*1
Thin
*1
When the paper is smaller than
B5 JIS, 5
than 81.4g/m
Thin paper position.
47.1 —
52.3g/m
1
/2" × 81/2" and heavier
Inch Version
34.0 —
2
55.6 lb
13.9 —
2
34.0 lb
12.5 —
2
13.9 lb
2
(21.6 lb), use the
ZFRH210E
34
Page 49

Type of Original
Type of Original
Select from the following original
types to match your originals:
❖ Letter mode
Use this mode when the original
contains only text (no pictures).
❖ Letter/Photo mode
Use this mode when the original
contains photographs or text with
pictures.
❖ Photo mode
Delicate tones of photographs and
pictures can be reproduced with
this mode.
❖ Pencil mode
Use this mode when the originals
are written in pencil.
Note
❒ You can specify the original type
that is selected by default when the
power is turned on. See “2 Original
Priority” on p.78 “3 Initial Setting”.
❒ The default is Letter mode.
❒ Moire patterns may occur when
you are printing from screened
originals.
❒ When using Photo mode to print
originals with both text and photographs, the text might appear faint.
To avoid this, use Letter/Photo
mode instead.
A Press the {Type of Original} key.
1
ZLKS050N
B Use the {~}{}} keys to select the
type of original, and then press
the {OK} key.
C Set your original.
D Enter the number of prints with the
number keys.
AQN023S
35
Page 50

Operation
E Press the {Master Making} key.
1
AQN024S
Printing starts automatically after
the trial print.
Note
❒ If you wish to check the image
before printing, press the {Auto
Cycle} key before pressing the
{Master Making} key, in order to
disable Auto Cycle mode. See
p.18 “When Auto Cycle mode is
off”.
36
Page 51

Economy Mode
Economy Mode
Use this function to save ink.
Note
❒ Prints will appear lighter when
Economy mode is used.
❒ The default is Off. To select either
“On” or “Off” for Economy mode,
see “4 Eco. Mode ON/OFF” on
p.78 “3 Initial Setting”.
A Press the {Economy Mode} key.
ZLKS083N
B Set your original.
C Enter the number of prints with the
number keys.
D Press the {Master Making} key.
1
AQN024S
Printing starts automatically after
the trial print.
Note
❒ If you wish to check the image
before printing, press the {Auto
Cycle} key before pressing the
{Master Making} key, in order to
disable Auto Cycle mode. See
p.18 “When Auto Cycle mode is
off”.
AQN023S
37
Page 52
Operation
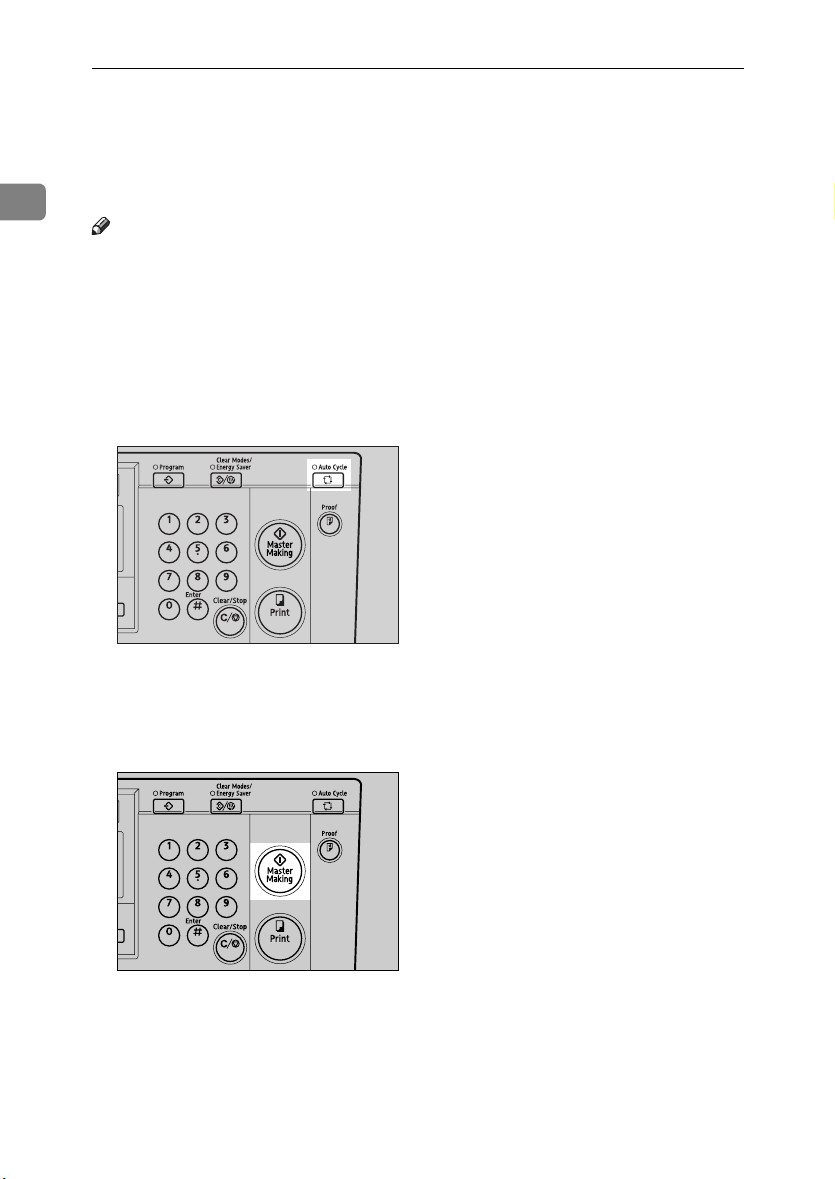
Auto Cycle
Use this function to process masters
1
and make prints in a single operation.
Note
❒ The default is On.
❒ You can specify whether Auto Cy-
cle mode is enabled or not when
the power is turned on. See “1
Auto Cycle ON/OFF” on p.79 “4
Mode Setting”.
A If Auto Cycle is Off, press the {Au-
to Cycle} key to enable it.
B Set the original and enter the num-
ber of prints.
Press the {Master Making} key.
C
Printing starts immediately after
the master is made.
38
AQN030S
AQN024S
Page 53
Memory/Class
Memory/Class
The Memory/Class function is useful
especially for people such as teachers,
who often have to make different
numbers of prints from the same original for different classes or have to
make the same number of prints from
a number of different originals for the
same class.
Under the Memory/Class function,
the following modes are available:
❖ Select Class/Year Mode
Reference
If the use of this machine is not
limited to school or college, you
can choose to have this mode
displayed as “Select Department” displayed instead of “Select Class/Year”. See “5 Class
Display” on p.77 “2 Set Operat'n
Mode”.
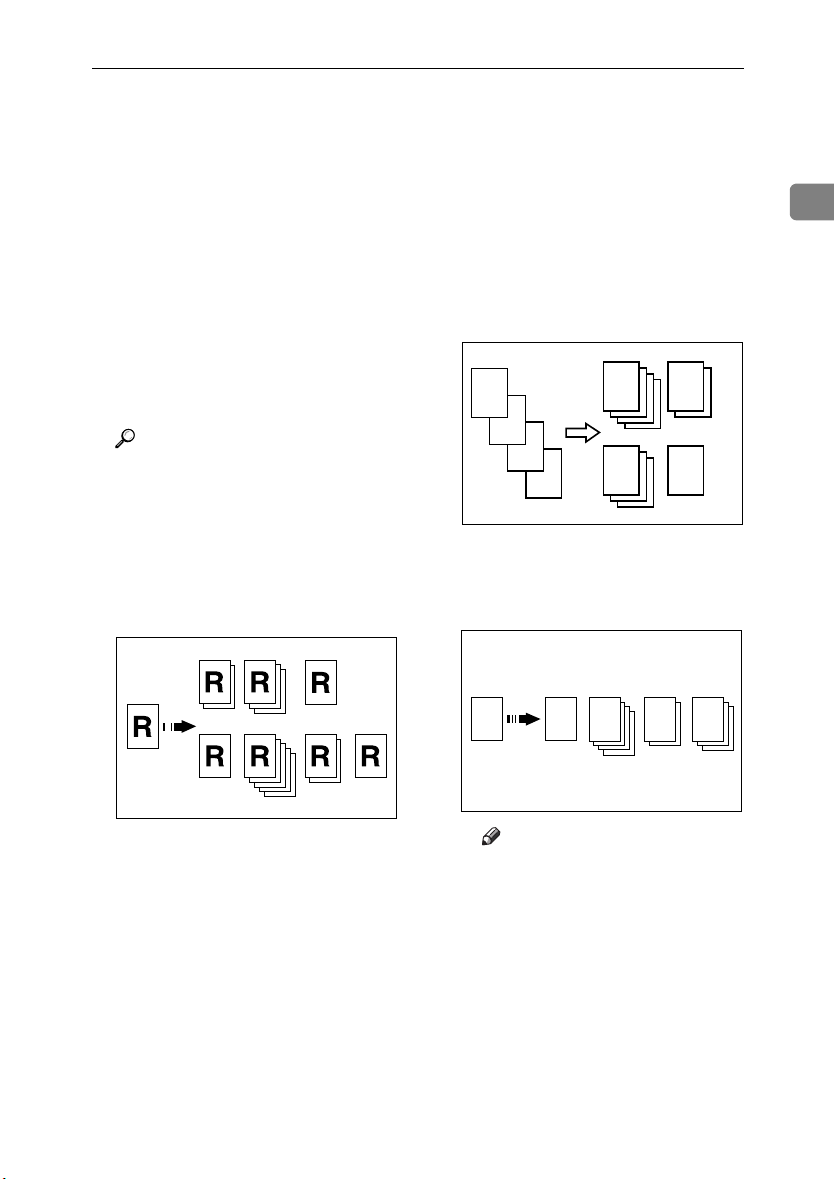
❖ Memory Mode
You can choose from the following
two types of Memory mode:
• Normal Memory Mode
Use to make prints from a number of different originals. A different number of prints is made
from each original.
A
A
B
B
C
D
• Stack Memory Mode
Use to make prints from one
original, with a different number of prints for each class.
A
A
C D
AAA
1
GRCLAS1E
•All
Use to make prints from the
same original for all the registered classes in all the school
years.
•Class
Select to make prints from the
same original for only the classes selected.
•Households
Use to make prints from the
same original for all the registered student households in the
school.
GRCLAS2E
STKMEM1E
Note
❒ You can specify either Normal
Memory Mode or Stack Memory Mode as the default. See
“12 Memory Mode” on p.79
“4 Mode Setting”.
39
Page 54
Operation
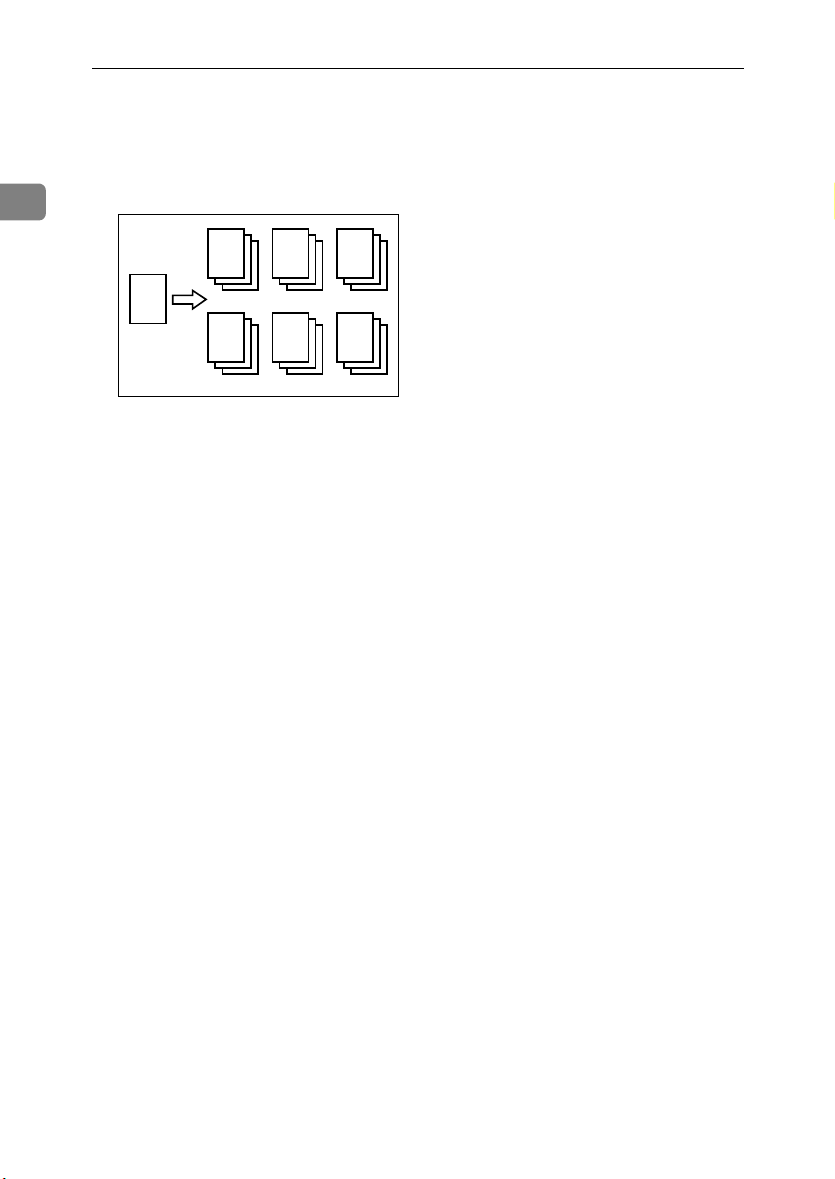
❖ Class Mode
Use to make prints from one original for multiple classes, with the
same number of prints for each
1
class.
R
R R
R
R R R
❖ Recall
Use to recall settings that you have
stored under the Memory Mode
and Class Mode.
GRCLAS0E
40
Page 55

Select Class/Year
Select Class/Year
Preparation
To use this mode, you need to first
register the number of prints required for each class.
Registering Class/Year
Note
❒ You can register for up to 108 class-
es (up to 12 classes per school year
for a maximum of 9 school years).
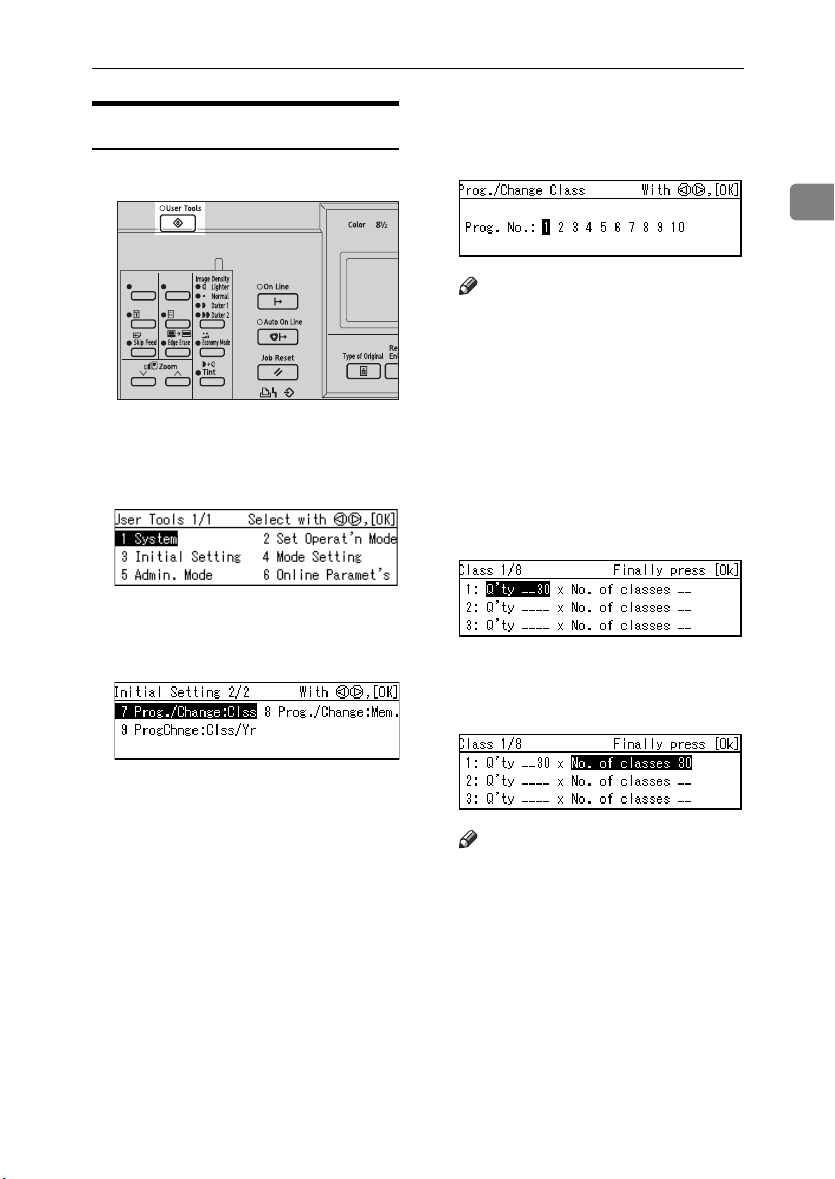
A Press the {User Tools} key.
ZLKS084N
B Use the {~}{}} keys to select 3
Initial Setting, and then press the
{OK} key.
D Use the {~}{}} keys to select the
desired school year, and then
press the {OK} key.
E With the number keys, enter the
number of prints for a class, and
then press the {q} key.
Note
❒ Repeat Steps D and E to register
all your classes.
F Press the {OK} key.
G Press the {Clear Modes/Energy Sav-
er} key.
The contents that you have registered are now effective.
1
C Use the {~}{}} keys to select 9
ProgChnge:Clss/Yr, and then
press the {OK} key.
41
Page 56
Operation
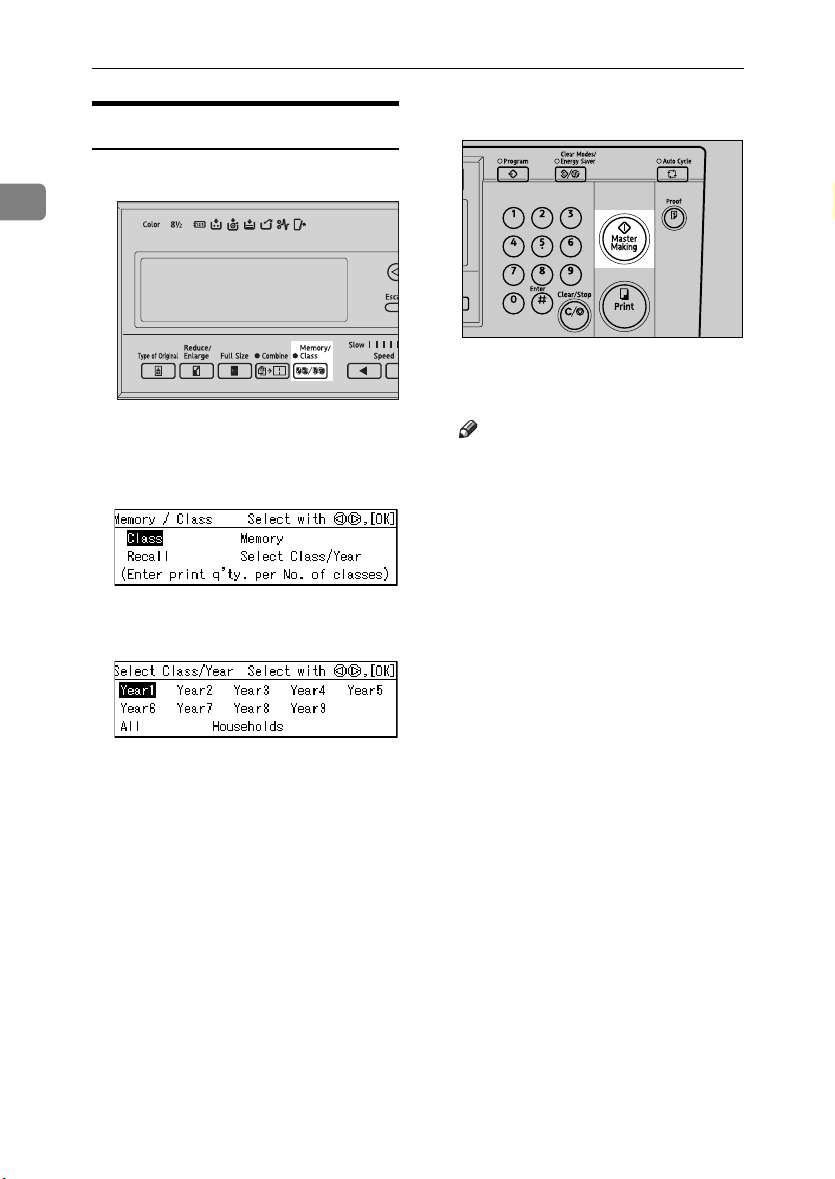
Printing for All Years
E Press the {Master Making} key.
A Press the {Memory/Class} key.
1
AQN024S
Printing starts automatically after
AQN036S
B Use the {~}{}} keys to select Se-
lect Class/Year, and then press the
{OK} key.
Use the {~}{}} keys to select All,
C
and then press the {OK} key.
the trial print.
Note
❒ If you wish to check the image
before printing, press the {Auto
Cycle} key before pressing the
{Master Making} key, in order to
disable Auto Cycle mode. See
p.18 “When Auto Cycle mode is
off”.
D Set your original.
42
Page 57
Select Class/Year
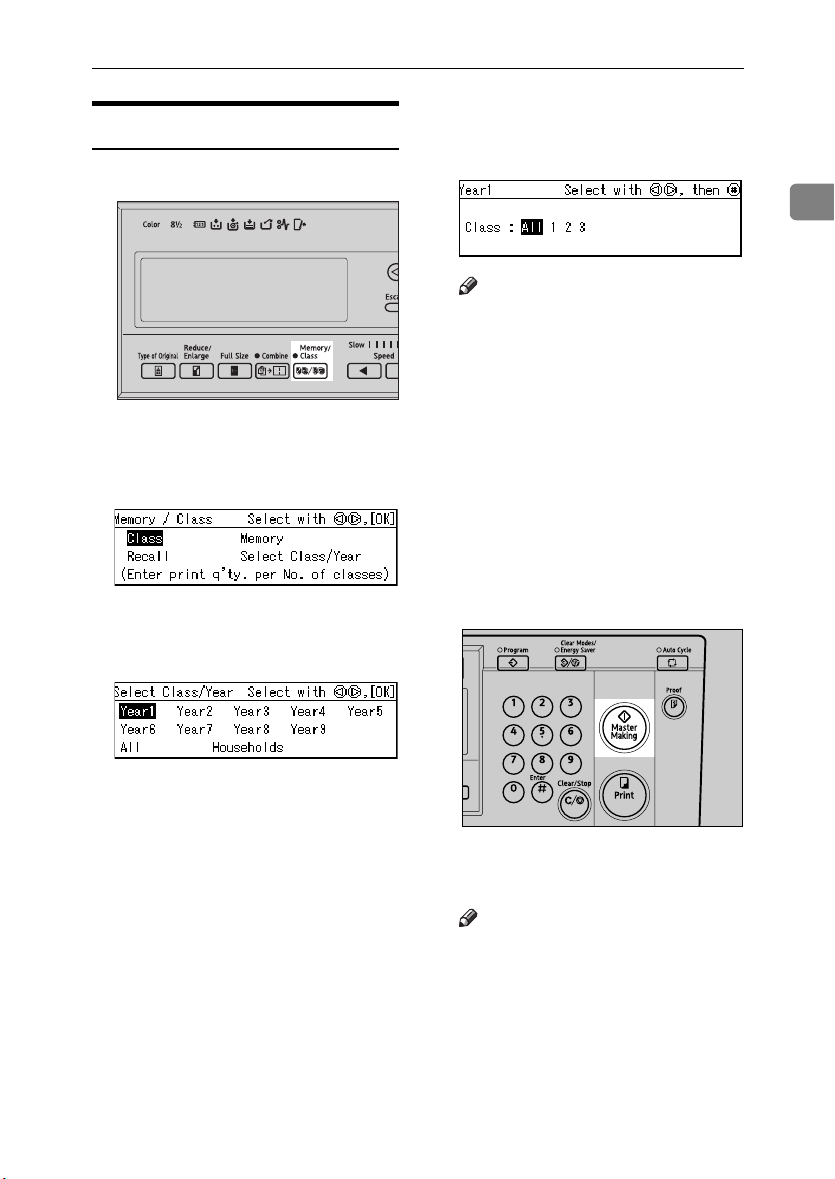
Printing for Selected Classes
A Press the {Memory/Class} key.
AQN036S
B Use the {~}{}} keys to select Se-
lect Class/Year, and then press the
{OK} key.
Use the {~}{}} keys to select the
C
school year, and then press the
{OK} key.
D Use the {~}{}} keys to select the
class that you wish to print for,
and then press the {q} key.
1
Note
❒ Repeat Step D to select more
classes.
❒ You can only select classes from
the same school year.
❒ If you have selected the wrong
class, indicate it again using the
{~}{}} keys, and then press
the {q} key to cancel its selection.
E Press the {OK} key.
F Set your original.
G Press the {Master Making} key.
AQN024S
Printing starts automatically after
the trial print.
Note
❒ If you wish to check the image
before printing, press the {Auto
Cycle} key before pressing the
{Master Making} key, in order to
disable Auto Cycle mode. See
p.18 “When Auto Cycle mode is
off”.
43
Page 58

Operation
Memory Mode
1
Normal Memory Mode
Note
❒ You can make prints from up to 30
originals at one time.
E If you are using the optional tape
dispenser, turn on the tape dispenser switch.
A Press the {Memory/Class} key.
On
Off
TSLP013E
Note
❒ The optional tape dispenser au-
tomatically feeds out strips of
AQN036S
B Use the {~}{}} keys to select
Memory, and the press the {OK}
key.
paper to separate the prints
made from each original.
F Set your original.
Note
❒ Set the originals in the same or-
der as you have registered them
in Step
.
C
C With the number keys, enter the
desired number of prints for each
original, and then press the {q}
key.
Note
❒ Repeat this step until you have
entered for all the originals.
D Press the {OK} key.
44
Page 59

Memory Mode
G Press the {Master Making} key.
Printing starts automatically after
the trial print.
Note
❒ If you wish to check the image
before printing, press the {Auto
Cycle} key before pressing the
{Master Making} key, in order to
disable Auto Cycle mode. See
p.18 “When Auto Cycle mode is
off”.
Reference
For details on how to use the
optional document feeder when
printing in Memory mode, see
p.67 “Using the Document
Feeder in Normal Memory
Mode”.
AQN024S
Stack Memory Mode
Limitation
❒ To use Stack Memory mode, you
need to first set Memory Mode to
“Stack” using the user tools. See
“12 Memory Mode” on p.79 “4
Mode Setting”.
Note
❒ You can make prints for up to 30
classes at one time.
A Press the {Memory/Class} key.
AQN036S
B Use the {~}{}} keys to select
Memory, and then press the {OK}
key.
1
C With the number keys, enter the
desired number of prints for each
class, and then press the {q} key.
Note
❒ Repeat this step until you have
entered for all your classes.
45
Page 60

Operation
D Press the {OK} key.
E If you are using the optional tape
dispenser, turn on the tape dis-
1
penser switch.
F Set your original.
G Press the {Master Making} key.
AQN024S
Printing starts automatically after
the trial print.
Note
❒ If you wish to check the image
before printing, press the {Auto
Cycle} key before pressing the
{Master Making} key, in order to
disable Auto Cycle mode. See
p.18 “When Auto Cycle mode is
off”.
46
Reference
For details on how to use the
optional document feeder when
printing in Stack Memory
mode, see p.69 “Using the Document Feeder in Stack Memory
Mode”.
Page 61

Class Mode
Class Mode
Note
❒ You can print for up to 24 combi-
nations of number of prints and
number of classes.
❒ The maximum possible number of
classes in one combination is 99.
A Press the {Memory/Class} key.
AQN036S
B Use the {~}{}} keys to select
Class, and then press the {OK}
key.
C With the number keys, enter the
desired number of prints, and the
press the {q} key.
D With the number keys, enter the
desired number of classes, and
then press the {q} key.
Note
❒ Repeat Steps C to D as desired.
E Press the {OK} key.
F If you are using the optional tape
dispenser, turn on the tape dispenser switch.
On
Off
TSLP013E
Note
❒ The optional tape dispenser au-
tomatically feeds out strips of
paper to separate each group of
prints.
1
G Set your original.
47
Page 62

Operation
H Press the {Master Making} key.
1
AQN024S
Printing starts automatically after
the trial print.
Note
❒ If you wish to check the image
before printing, press the {Auto
Cycle} key before pressing the
{Master Making} key, in order to
disable Auto Cycle mode. See
p.18 “When Auto Cycle mode is
off”.
48
Page 63

Recall
Recall
Note
❒ You can store up to 10 entries for
Memory mode with each entry
containing settings for up to 30
originals (Normal Memory mode),
or settings for up to 30 classes
(Stack Memory mode).
❒ You can store up to 10 entries for
Class mode with each entry containing settings for up to 24 combinations of classes and numbers of
prints.
Storing Memory Mode Settings
Storing Normal Memory Mode Settings
A Press the {User Tools} key.
C Use the {~}{}} keys to select 8
Prog./Change:Mem., and then
press the {OK} key.
D Use the {~}{}} keys to select a
number, and then press the {OK}
key.
Note
❒ If the number is already in use,
a message will be displayed
asking if you wish to overwrite
the settings stored. To overwrite, press the {OK} key. Otherwise press the {Escape} key to
return to the previous display,
and then select another number.
E With the number keys, enter the
number of prints for each original, and then press the {q} key.
1
ZLKS084N
B Use the {~}{}} keys to select 3
Initial Setting, and then press the
{OK} key.
Note
❒ Repeat Steps D and E to register
all your originals.
F Press the {OK} key.
G Press the {Clear Modes/Energy Sav-
er} key.
The contents that you have stored
are now effective.
49
Page 64

Operation
Storing Stack Memory Mode Settings
Limitation
1
❒ To use Stack Memory mode, you
need to first set Memory Mode to
“Stack” using the user tools. See
“12 Memory Mode” on p.79 “4
Mode Setting”.
A Press the {User Tools} key.
D Use the {~}{}} keys to select a
number, and then press the {OK}
key.
Note
❒ If the number is already in use,
a message will be displayed
asking if you wish to overwrite
the settings stored. To overwrite, press the {OK} key. Otherwise press the {Escape} key to
return to the previous display,
and then select another number.
E With the number keys, enter the
ZLKS084N
number of prints for each class,
and then press the {q} key.
B Use the {~}{}} keys to select 3
Initial Setting, and then press the
{OK} key.
Note
❒ Repeat Steps D and E to register
all your classes.
C Use the {~}{}} keys to select 8
Prog./Change:Mem., and then
press the {OK} key.
50
F Press the {OK} key.
G Press the {Clear Modes/Energy Sav-
er} key.
The contents that you have stored
are now effective.
Page 65
Recall
Storing Class Mode Settings
A Press the {User Tools} key.
ZLKS084N
B Use the {~}{}} keys to select 3
Initial Setting, and then press the
{OK} key.
Use the {~}{}} keys to select 7
C
Prog./Change:Clss, and then
press the {OK} key.
D Use the {~}{}} keys to select a
number, and then press the {OK}
key.
1
Note
❒ If the number is already in use,
a message will be displayed
asking if you wish to overwrite
the settings stored. To overwrite, press the {OK} key. Otherwise press the {Escape} key to
return to the previous display,
and then select another number.
E With the number keys, enter the
number of prints, and then press
the {q} key.
F With the number keys, enter the
number of classes, and then press
the {q} key.
Note
❒ Repeat Steps D to F to register
all your classes.
G Press the {OK} key.
H Press the {Clear Modes/Energy Sav-
er} key.
The contents that you have stored
are now effective.
51
Page 66

Operation
Recalling the Stored Settings
F Press the {Master Making} key.
A Press the {Memory/Class} key.
1
AQN024S
Printing starts automatically after
AQN036S
B Use the {~}{}} keys to select Re-
call, and the press the {OK} key.
C Use the {~}{}} keys to select the
number to recall, and then press
the {OK} key.
the trial print.
Note
❒ If you wish to check the image
before printing, press the {Auto
Cycle} key before pressing the
{Master Making} key, in order to
disable Auto Cycle mode. See
p.18 “When Auto Cycle mode is
off”.
D Confirm that the settings are cor-
rect, and then press the {OK} key.
Note
❒ To change the stored settings,
use the {~}{}} keys to select
the item that you wish to
change, and then overwrite using the number keys.
E Set your original.
52
Page 67

Combine
Combine
Use this function to combine two
originals onto one sheet of paper.
1
2
2
1
Note
❒ When the two originals are com-
bined, their sizes would be reduced or enlarged as follows:
❖ Metric version
Original Size
A4
K B5KA5K B6K
A3L100% 115% 141% 163%
Paper
B4L
Size
87% 100% 122% 141%
L
71% 82% 100% 115%
A4
B5L
61% 71% 87% 100%
L
50% 58% 71% 82%
A5
B6L
— 50% 61% 71%
❖ Inch version
Original Size
1
/2" ×
51/2" ×
1
8
/2"K
Paper
Size
11" ×
17"L
1
8
/2" ×
14"L
1
/2" ×
8
11"L
1
/2" ×
5
1
8
/2"L
8
11"K
100% 129%
77% 100%
65% 100%
50% 65%
❒ If the length of the first original is
shorter than 91mm, 3.6" , Combine
mode will be disabled.
❒ You can set the machine to auto-
matically cancel Combine/Repeat
mode once you have finished using it. See “7 Cancel Comb.” on
p.79 “4 Mode Setting”.
❒ Any image closer than 5mm, 0.2"
to the leading edge of the first original will not be printed. Also, any
image closer than 4mm, 0.16" to
the leading edge of the second
original will not be printed. When
the image is too close to the leading
edge, make duplicates of the originals with the image shifted away
from the leading edge, and then
print from the duplicates.
❒ You can select different image set-
tings for the first and second originals.
❒ Make sure that the paper feed side
plates touch the paper lightly. If
they do not, then the two images
will not be properly aligned on the
prints.
Reference
For details on how to use the optional document feeder when combining originals, see p.67 “Using
the Document Feeder when Combining Originals”.
1
53
Page 68
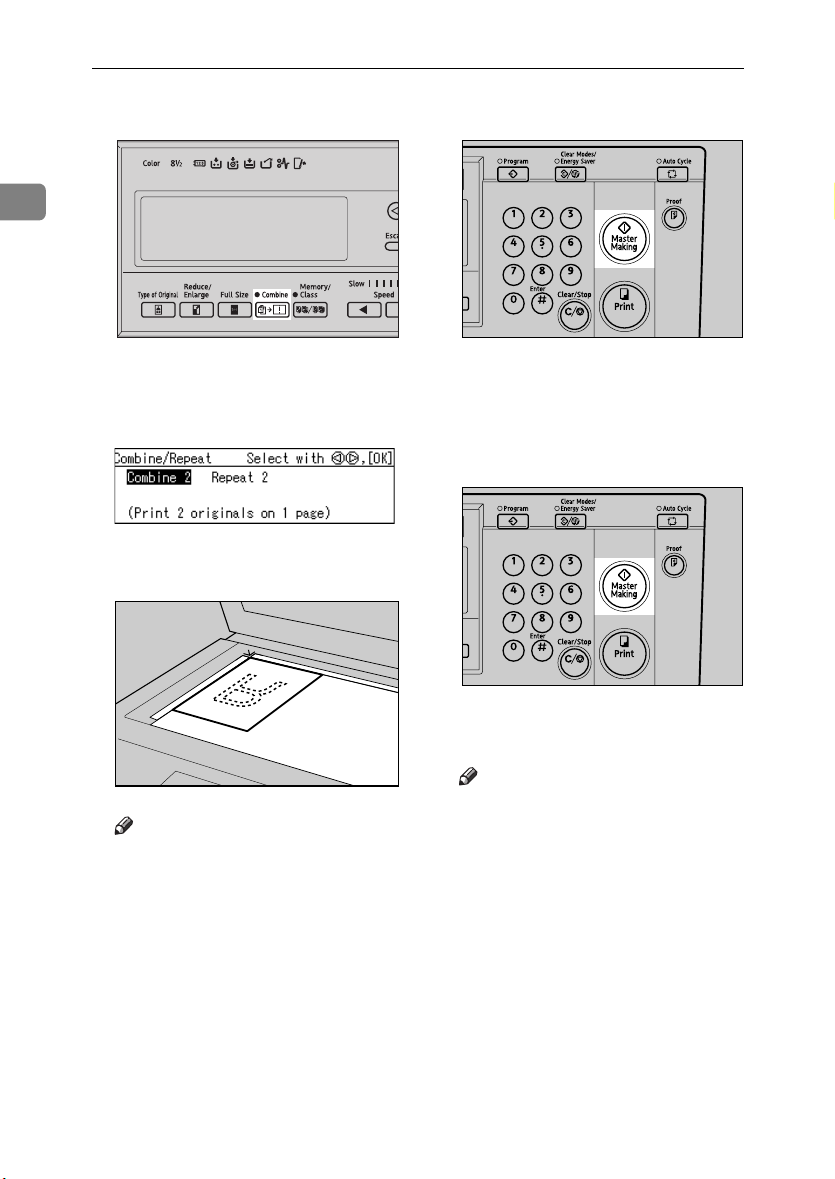
Operation
A Press the {Combine/Repeat} key.
D Press the {Master Making} key.
1
AQN037S
B Use the {~}{}} keys to select
Combine 2, and then press the
{OK} key.
C Place the first original face down
on the exposure glass.
E After the first original has been
scanned, place the second original in the same way.
F Press the {Master Making} key.
AQN024S
AQN024S
54
ZDCH110E
Note
❒ When combining originals, place
the original face down on the exposure glass with its leading edge
towards you, as shown above.
Printing starts automatically after
the trial print.
Note
❒ If you wish to check the image
before printing, press the {Auto
Cycle} key before pressing the
{Master Making} key, in order to
disable Auto Cycle mode. See
p.18 “When Auto Cycle mode is
off”.
Page 69
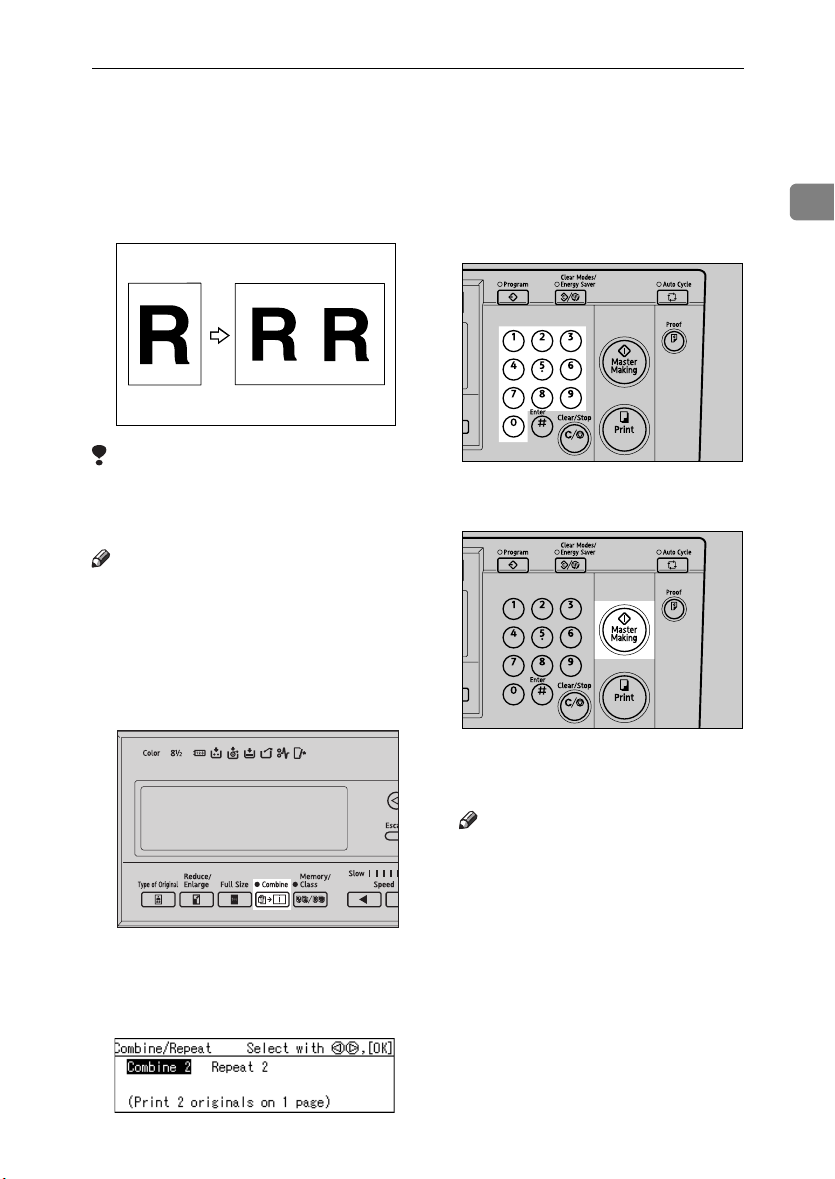
Repeat
Repeat
Use this function to repeat the image
twice on the same sheet of paper.
Limitation
❒ You cannot use the optional docu-
ment feeder with the Repeat function.
Note
❒ You can choose to have either Com-
bine or Repeat selected by default
when the power is turned on. See “6
Combine/Repeat” on p.79 “4 Mode
Setting”.
A Press the {Combine/Repeat} key.
C Set your original.
D Enter the number of prints with
the number keys.
AQN023S
E Press the {Master Making} key.
AQN024S
1
AQN037S
B Use the {~}{}}keys to select 2
Repeat, and then press the {OK}
key.
Printing starts automatically after
the trial print.
Note
❒ If you wish to check the image
before printing, press the {Auto
Cycle} key before pressing the
{Master Making} key, in order to
disable Auto Cycle mode. See
p.18 “When Auto Cycle mode is
off”.
55
Page 70

Operation
Skip Feed Printing
If the backs of prints are dirty, you
1
can use the {Skip Feed} key to make
the drum rotate twice instead of once
with every sheet of paper fed. This
gives you time to remove prints one
by one from the paper delivery tray,
or to insert a sheet of paper between
two prints.
Note
❒ You can specify how many times
that the drum rotates when the
power is turned on. Alternatively,
you can also choose whether or not
to change the number of rotations
temporarily when the {Skip Feed}
key is pressed. See “8 No. of Skip
Feed” on p.79 “4 Mode Setting”.
❒ The number of rotations can be set
from 2 to 9.
❒ The default is 2.
A Press the {Skip Feed} key.
D Press the {Master Making} key.
AQN024S
Printing starts automatically after
the trial print.
Note
❒ If you wish to check the image
before printing, press the {Auto
Cycle} key before pressing the
{Master Making} key, in order to
disable Auto Cycle mode. See
p.18 “When Auto Cycle mode is
off”.
B Set your original.
C Enter the number of prints with
the number keys.
56
ZLKS085N
Page 71
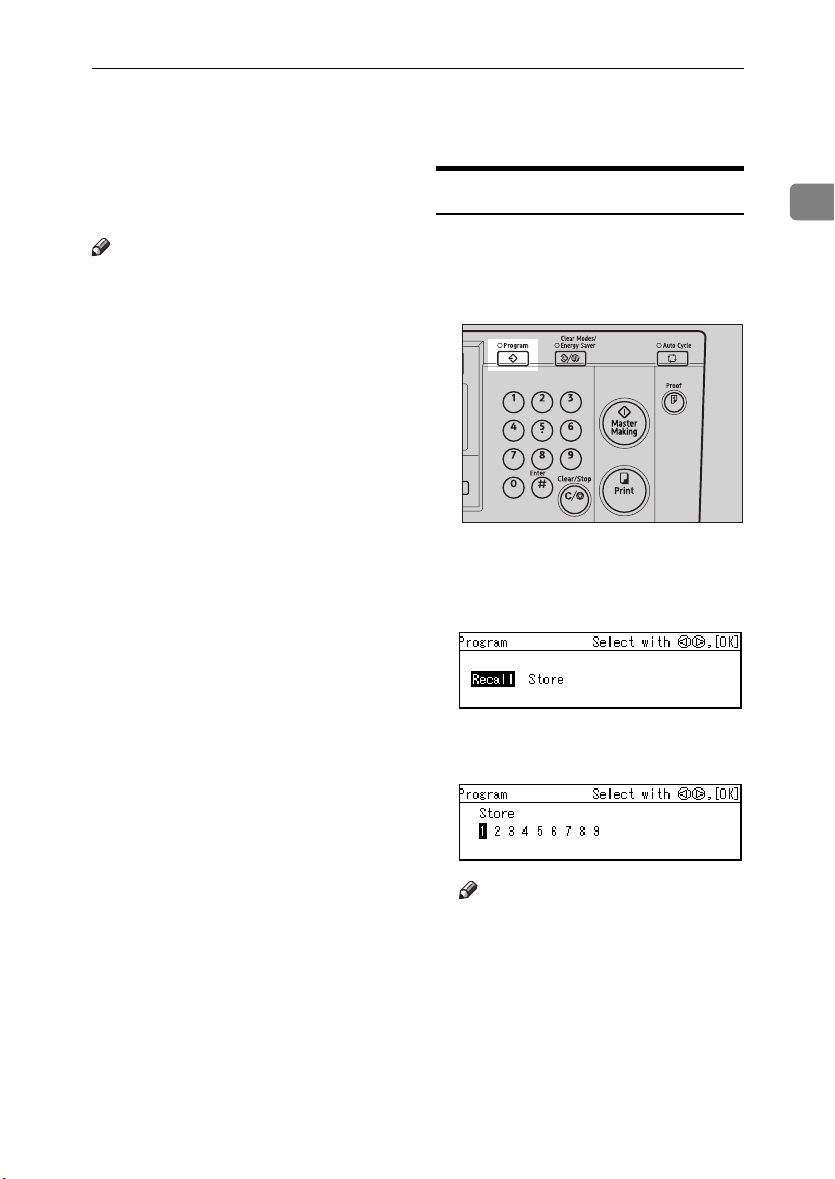
Program
Use this function to store up to nine
frequently used print job settings and
to recall them for future use.
Note
❒ The stored contents will not be
cleared even when you turn off the
main switch.
❒ The stored contents cannot be de-
leted. To change the contents of a
program, overwrite it with new
print settings.
❒ You can store settings for the fol-
lowing functions:
•Memory/Class
•Edge Erase
•Preset Reduce/Enlarge
• Type of Original
•Printing Speed
•Auto Cycle
•Combine/Repeat
❒ You cannot store settings for Secu-
rity mode, nor for the Program
function itself.
Program
Storing Print Settings
A First specify the print settings that
you wish to store.
B Press the {Program} key.
AQN038S
C Use the {~}{}} keys to select
Store, and then press the {OK}
key.
D Use the {~}{}} keys to select a
number.
1
Note
❒ If the number is already in use,
a message will be displayed
asking whether you wish to
overwrite the settings stored. To
overwrite, press the {OK} key.
Otherwise press the {Escape}
key to return to the previous
display, and then select another
number.
E Press the {OK} key.
57
Page 72
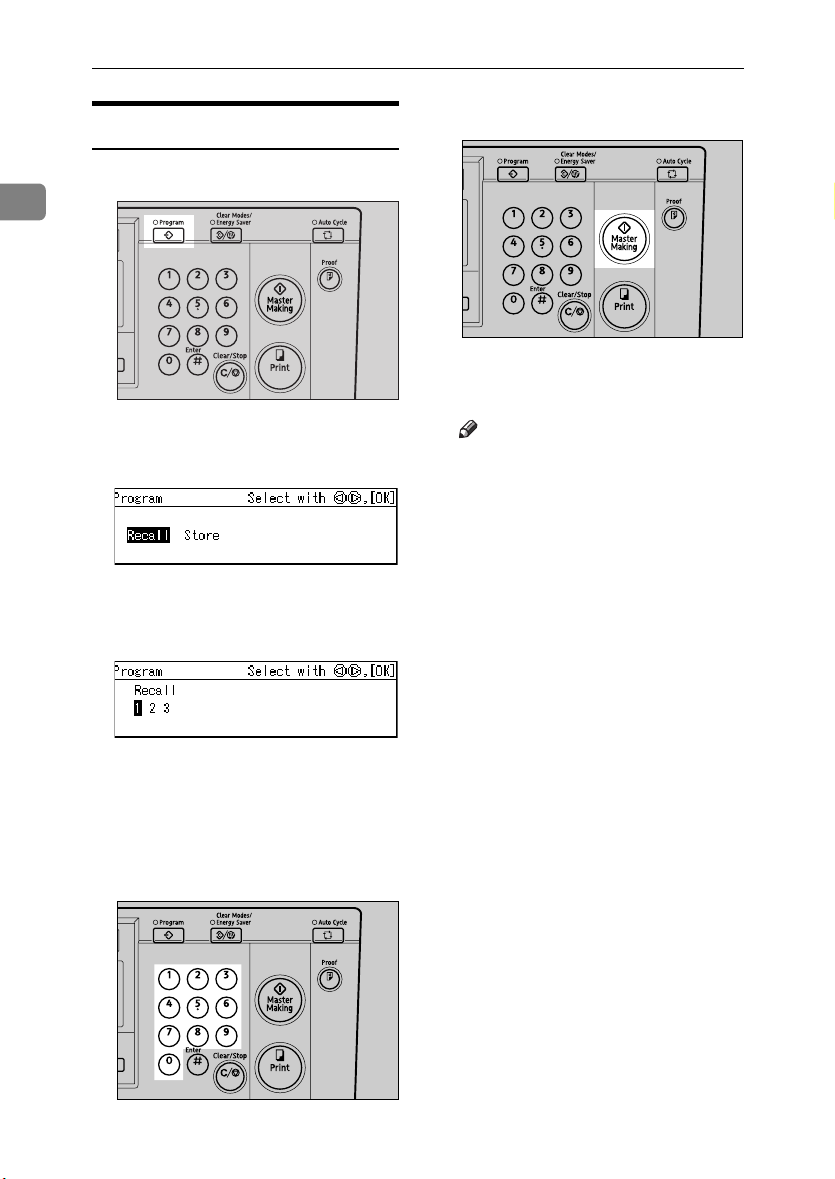
Operation
Recalling a Program
F Press the {Master Making} key.
A Press the {Program} key.
1
AQN024S
Printing starts automatically after
AQN038S
B Use the {~}{}} keys to select Re-
call, and then press the {OK} key.
C Use the {~}{}} keys to select the
number to recall, and then press
the {OK} key.
the trial print.
Note
❒ If you wish to check the image
before printing, press the {Auto
Cycle} key before pressing the
{Master Making} key, in order to
disable Auto Cycle mode. See
p.18 “When Auto Cycle mode is
off”.
The stored settings are displayed.
D Confirm that the settings are cor-
rect, and then set your original.
Enter the number of prints with the
E
number keys.
58
AQN023S
Page 73
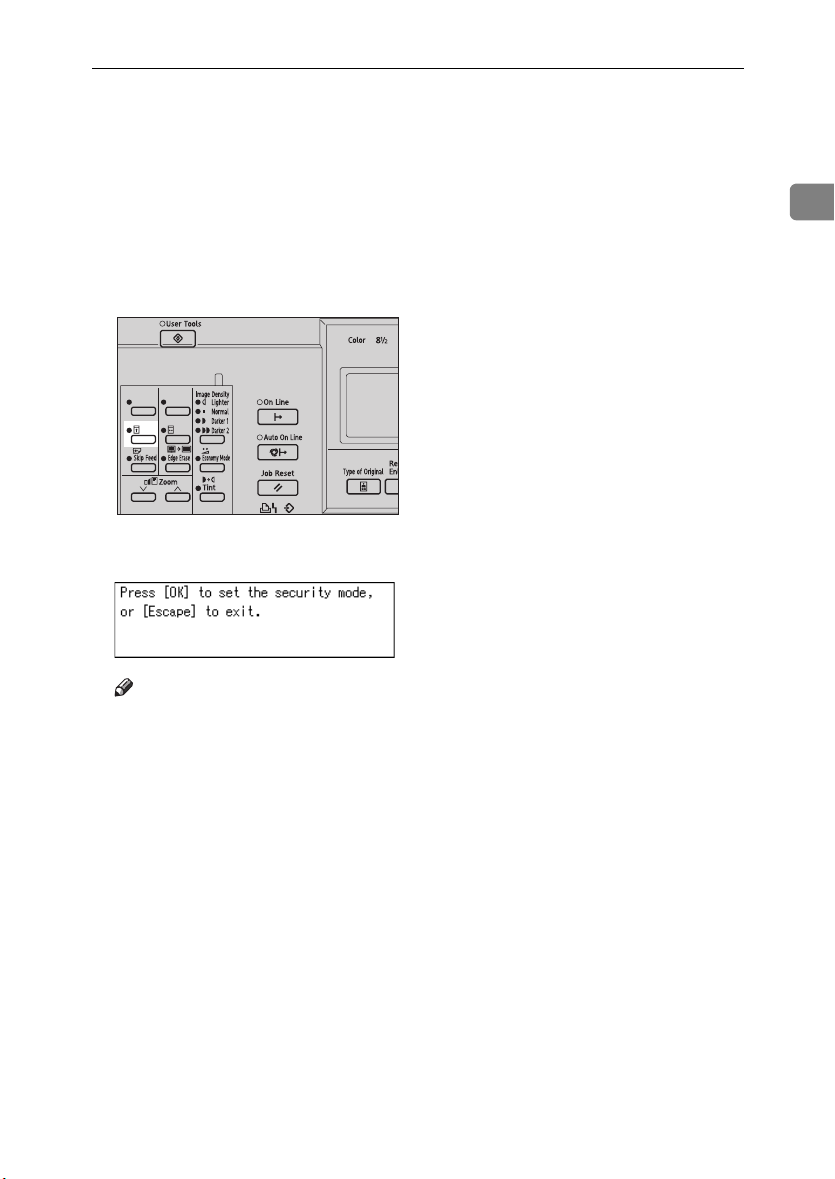
Security Mode
Use this function to prevent others
from accessing your masters and
making prints of confidential documents after you have done so.
A After you have made your prints,
press the {Security} key.
ZLKS086N
B Press the {OK} key.
Security Mode
1
Note
❒ Once Security mode is set, you
will not be able to press the
{Proof} key or the {Print} key,
nor will you be able to pull out
the drum unit.
❒ Security mode cannot be cleared
by turning off the main switch.
❒ Security mode will be cancelled
when you set a new original
and press the {Master Making}
key.
59
Page 74

Operation
Entering a User Code to Use the Machine
Under the User Code mode, users
1
need to enter a user code before they
can use the machine. The machine
keeps count of the number of copies
made under each user code.
Note
❒ To use this feature, User Code
mode must be set to “On”. See “3
Set User Code” on p.81 “5 Admin.
Mode”.
❒ When the User Code mode is on,
the machine will prompt you for
your user code when you turn on
the main switch, or after the machine has been reset.
❒ The following user codes are avail-
able:
• 000, 019, 028, 037, 046, 055, 064,
073, 082, 091, 100, 119, 128, 137,
146, 155, 164, 173, 182, 191, 200,
219, 228, 237, 246, 255, 264, 273,
282, 291, 300, 319, 328, 337, 346,
355, 364, 373, 382, 391, 400, 419,
428, 437, 446, 455, 464, 473, 482,
491, 500, 519, 528, 537, 546, 555,
564, 573, 582, 591, 600, 619, 628,
637, 646, 655, 664, 673, 682, 691,
700, 719, 728, 737, 746, 755, 764,
773, 782, 791, 800, 819, 828, 837,
846, 855, 864, 873, 882, 891, 900,
919, 928, 937, 946, 955, 964, 973,
982, 991
A Enter your 3–digit user code with
the number keys.
Note
❒ The user code will not displayed
on the panel display.
❒ If you have made a wrong en-
try, press the {Clear/Stop} key
and enter the number again.
B Press the {OK} key.
C After printing, hold down the
{Clear Modes/Energy Saver} key, and
then press the {Clear/Stop} key.
The User Code mode is once again
set. Other users will not be able to
make prints using your user code.
60
Page 75

Quality Start Mode
Quality Start Mode
If the machine is not used for a long
time, or when you change to a color
drum that has not been used recently,
the ink on the drum may dry up. This
might affect the print quality. To
solve this problem, you can have the
machine carry out a few idle spins of
the drum before a print run.
Note
❒ You can change the number of
spins. See “9 Idling for Q.Mode”
p.79 “4 Mode Setting”.
❒ The number of spins can be set from
1 to 5.
❒ The default is 2.
A Press the {Quality Start} key.
ZLKS087N
B Set your original.
C Press the {Master Making} key.
1
AQN024S
Printing starts automatically after
the trial print.
Note
❒ If you wish to check the image
before printing, press the {Auto
Cycle} key before pressing the
{Master Making} key, in order to
disable Auto Cycle mode. See
p.18 “When Auto Cycle mode is
off”.
-Auto Quality Start
You can program the machine to automatically carry out idle spins. This
is called Auto Quality Start.
Note
❒ To use this function, you need to
set Auto Quality Start to “On” using the user tools. See “10 Setting
Q.Mode” on p.79 “4 Mode Setting”.
❒ To specify the number of idle spins
according to the length of time for
which the machine is not used, see
p.82 “4-11 No. of Q.Start”.
61
Page 76

Operation
On Line Printing
On Line printing allows you to use
1
this machine as a PC printer.
Limitation
❒ The optional PC controller is re-
quired.
Note
❒ When printing onto sizes other
than A5K, 5
tom sizes, refer to the manual for
the PC controller.
1
/2" × 81/2" K, or cus-
When printing on A5K, 51/2" ×
81/2" K paper
A Press the {User Tools}key.
A Press the {On Line} key.
ZLKS084N
B Use the {~}{}} keys to select 6
Online Paramet's, and then
press the {OK} key.
ZLKS088N
When a print job is still in progress
C Use the {~}{}} keys to select 2
Print Size, and then press the
{OK} key.
62
If a print job is still in progress, it
has to be cancelled before the machine can accept the data coming
from the PC.
A Press the {OK} key.
The messages “Print is not finished. (Online)” and “Press
[OK] to start the next master”
are displayed alternately.
D Use the {~}{}} keys to select
A5K, 5
E Press the {OK} key.
1
/2" × 81/2"K.
Page 77

On Line Printing
When printing on custom size paper
Limitation
❒ When printing on custom sizes,
always set the paper in the L
direction.
A Press the {User Tools}key.
ZLKS084N
B Use the {~}{}} keys to select 6
Online Paramet's, and then
press the {OK} key.
C Use the {~}{}} keys to select 2
Print Size, and then press the
{OK} key.
Auto On Line
You can select whether or not the machine automatically switches to On
Line mode when it receives data from
a PC.
Preparation
• The default is On. If the Auto
On Line indicator is lit, then
Auto On Line is active.
•Press the {Auto On Line} key to
switch it on or off.
• When the Auto On Line mode is
on, the machine gives priority to
data received from a PC. If you
are making prints and do not
wish to have your print job interrupted by a PC, press the
{Auto On Line} key to turn it off.
A Press the {Auto On Line} key.
1
D Use the {~}{}} keys to select a
paper size that is one size larger than the custom size.
Example: If you are printing on
paper of a size 200 × 280mm,
7.9" × 11" , the nearest size
would be A4, 8
1
/2" × 11".
E Press the {OK} key.
ZLKS089N
63
Page 78

Operation
1
64
Page 79

2. Optional Functions
Optional Document Feeder
Place a stack of originals in the optional document feeder. They will be
fed into the machine automatically.
Originals
Placing the following originals in the
document feeder might damage the
originals or cause misfeeds. Use the
exposure glass instead.
• Originals heavier than 127.9 g/m
34 lb
• Originals lighter than 52.3 g/m
• Originals smaller than 148mm × 210mm,
5.9" × 8.3"
• Originals larger than 297mm × 864mm,
11.7" × 34.0"
• Stapled or clipped originals
• Perforated or torn originals
• Curled, folded, or creased originals
• Originals with any kind of coating,
such as thermal fax paper, art paper, aluminum foil, carbon paper,
or conductive paper
• Bound originals such as books
• Damaged originals
• Originals with glue on them
•Pasted originals
• Originals written in pencil
• Thin and flimsy originals
• Originals with index tabs
• Transparent originals such as OHP
transparencies or translucent paper
2
, 14 lb
This machine can detect the following
original sizes when the original is
placed in the optional document feeder.
Metric version A3 L, B4 JIS L, A4 KL,
Inch version
2
,
Note
❒ Set originals only after the ink or
correction fluid on them is completely dry. Not taking this precaution could stain the exposure glass
and cause the stains to be printed.
For standard printing, set originals as
shown below.
B5 JIS KL, A5KL
11" × 17" L, 8
1
8
/2" × 11"KL,
1
5
/2" × 81/2"KL
R
R
You cannot place originals of different sizes at the same time.
For thin originals, place them in the
document feeder one at a time, or use
the exposure glass instead.
The first 5mm, 0.2", of the leading
edge and the last 2mm, 0.08" of the
trailing edge cannot be printed. Make
sure the leading edge margin is at
least 5mm, 0.2", and the trailing edge
margin is at least 2mm, 0.08".
1
/2" × 14" L,
GRSETT1E
65
Page 80
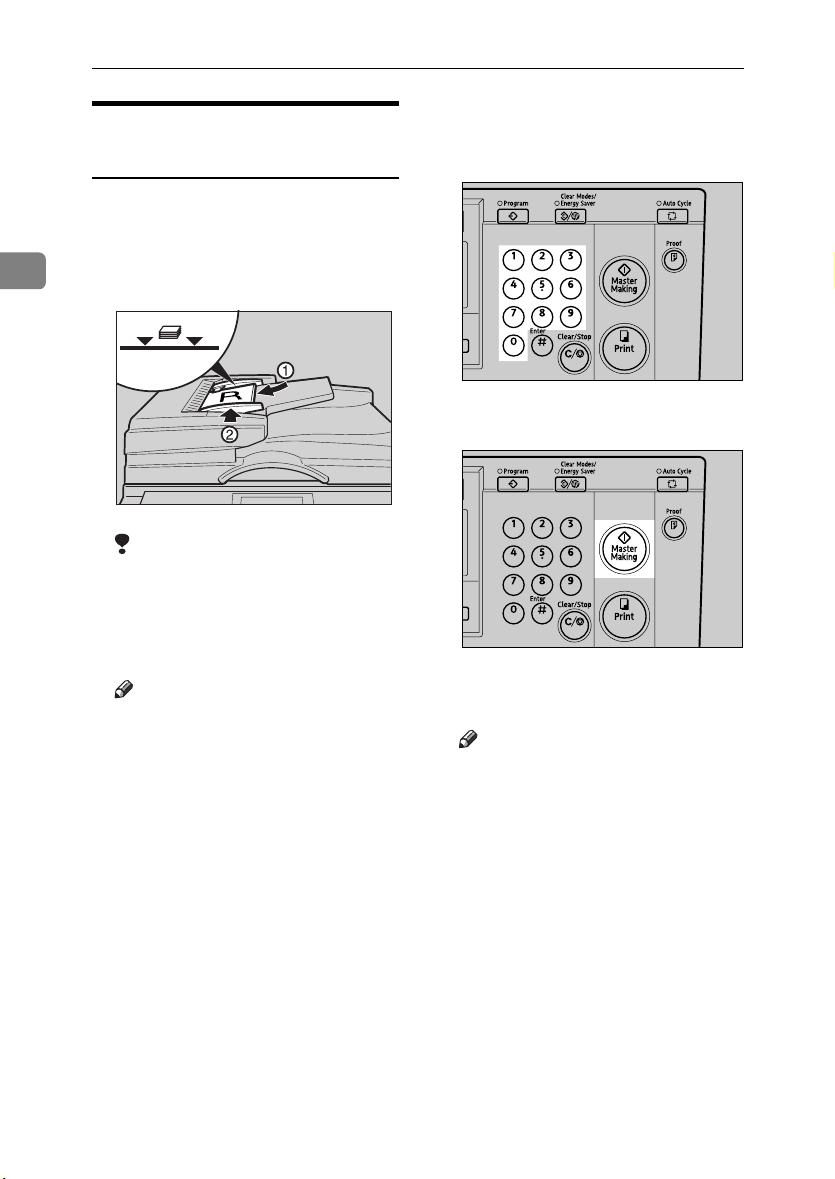
Optional Functions
Placing Originals in the
Document Feeder
C Specify the print settings, and then
enter the number of prints with the
number keys.
A Adjust the guides to match the orig-
inal size.
2
B Align the originals and place them
in a stack facing up.
AQN023S
D Press the {Master Making} key.
ZDCH120E
Limitation
❒ Approximately 50 originals (80
❒ Do not stack originals above the
❒ To prevent a double feed or an
❒ Both guides should touch the
2
, 21 lb) can be placed in the
g/m
document feeder at one time.
The first (top) original will be
fed in first.
Note
limit mark.
original misfeed, fan the originals before placing them in the
document feeder.
originals lightly.
AQN024S
Printing starts automatically after
the trial print.
Note
❒ If you wish to check the image
before printing, press the {Auto
Cycle} key before pressing the
{Master Making} key, in order to
disable Auto Cycle mode. See
p.18 “When Auto Cycle mode is
off”.
66
Page 81

Optional Document Feeder
Using the Document Feeder
when Combining Originals
Reference
For details on combining originals,
see p.53 “Combine”.
A Press the {Combine/Repeat} key.
AQN037S
B Use the {~}{}} keys to select
Combine 2, and then press the
{OK} key.
E Press the {Master Making} key.
2
AQN024S
Printing starts automatically after
the trial print.
Note
❒ If you wish to check the image
before printing, press the {Auto
Cycle} key before pressing the
{Master Making} key, in order to
disable Auto Cycle mode. See
p.18 “When Auto Cycle mode is
off”.
Using the Document Feeder in
Memory Mode
C Place the originals face up in the
document feeder.
ZDCH120E
Note
❒ The first (top) original will be
printed on the left side of the
print.
D Enter the number of prints with the
number keys.
Using the Document Feeder in Normal
Memory Mode
Reference
For details of the Memory mode,
see p.44 “Memory Mode”.
A Press the {Memory/Class} key.
AQN036S
67
Page 82
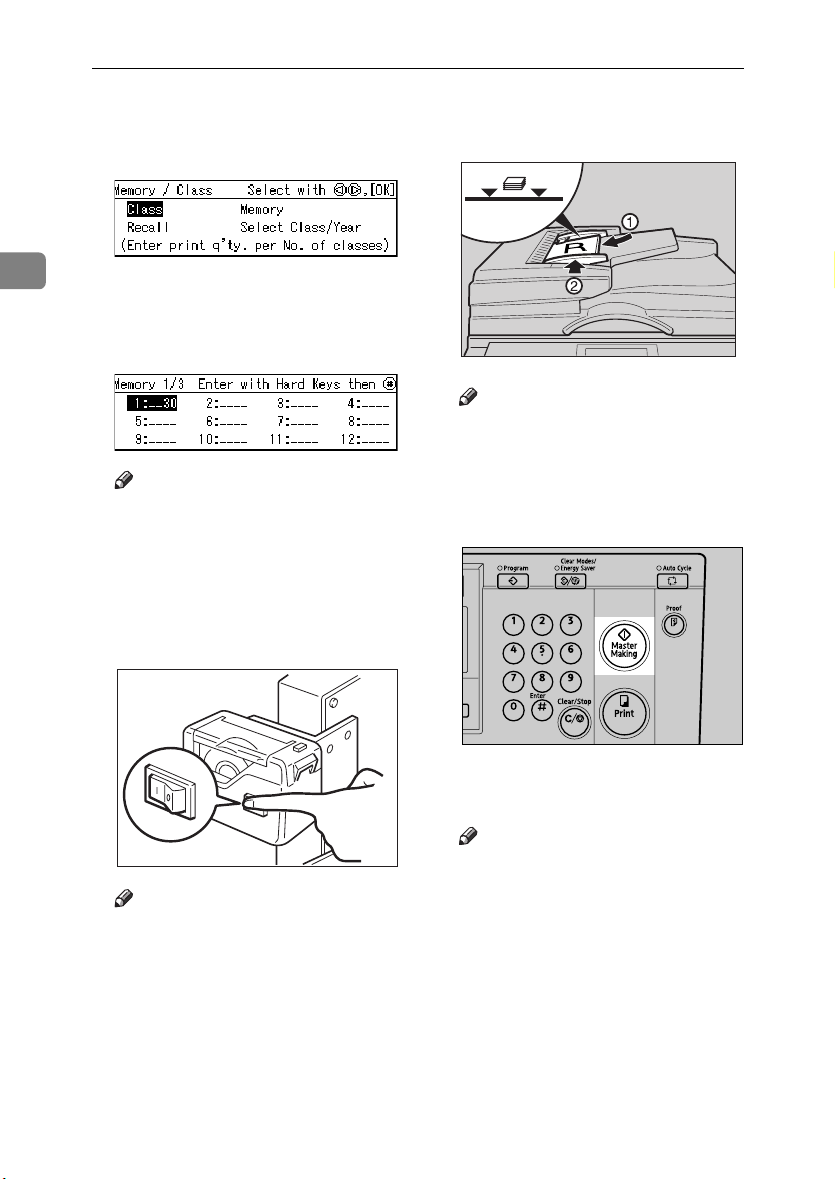
Optional Functions
B Use the {~}{}} keys to select
Memory, and then press the {OK}
key.
2
C With the number keys, enter the
desired number of prints for each
original, and then press the {q}
key.
Note
❒ Repeat this step until you have
entered for all the originals.
F Place the originals face up in the
document feeder.
ZDCH120E
Note
❒ Stack the originals in the same
order as you have registered
them in Step
original on top.
, with the first
C
G Press the {Master Making} key.
D Press the {OK} key.
E If you are using the optional tape
dispenser, turn on the tape dispenser switch.
68
On
Off
TSLP013E
Note
❒ The optional tape dispenser au-
tomatically feeds out strips of
paper to separate the prints
made from each original.
AQN024S
Printing starts automatically after
the trial print.
Note
❒ If you wish to check the image
before printing, press the {Auto
Cycle} key before pressing the
{Master Making} key, in order to
disable Auto Cycle mode. See
p.18 “When Auto Cycle mode is
off”.
Page 83

Optional Document Feeder
Using the Document Feeder in Stack
Memory Mode
Reference
For details of the Stack Memory
mode, see p.45 “Stack Memory
Mode”.
A Press the {Memory/Class} key.
AQN036S
B Use the {~}{}} keys to select
Memory, and then press the {OK}
key.
F Place the original face up in the
document feeder.
G Press the {Master Making} key.
2
AQN024S
Printing starts automatically after
the trial print.
Note
❒ If you wish to check the image
before printing, press the {Auto
Cycle} key before pressing the
{Master Making} key, in order to
disable Auto Cycle mode. See
p.18 “When Auto Cycle mode is
off”.
C With the number keys, enter the
desired number of prints for each
class, and then press the {q} key.
Note
❒ Repeat this step until you have
entered for all your classes.
D Press the {OK} key.
E If you are using the optional tape
dispenser, turn on the tape dispenser switch.
69
Page 84

Optional Functions
Color Printing Using the Optional Color
Drum
A3, 11" × 17" color drum units in red,
blue, green, brown, yellow, purple,
navy, maroon, orange, teal and grey
2
are available as options in addition to
the standard black unit. To make color prints, a separate drum unit is
needed for each color.
B Lift to unlock the drum unit lock
lever.
Changing the Color Drum Unit
A Open the front cover.
AQN008S
C Pull out the drum unit by its han-
dle.
AQN006S
Note
❒ Make sure the green lamp be-
side the drum unit lock lever is
on before sliding out the drum.
If the red lamp is on, close the
front cover, wait for five seconds, and then open it.
Note
❒ If you cannot pull out the drum
unit, push the drum unit handle
once before pulling.
AQN009S
70
AQN007S
Page 85
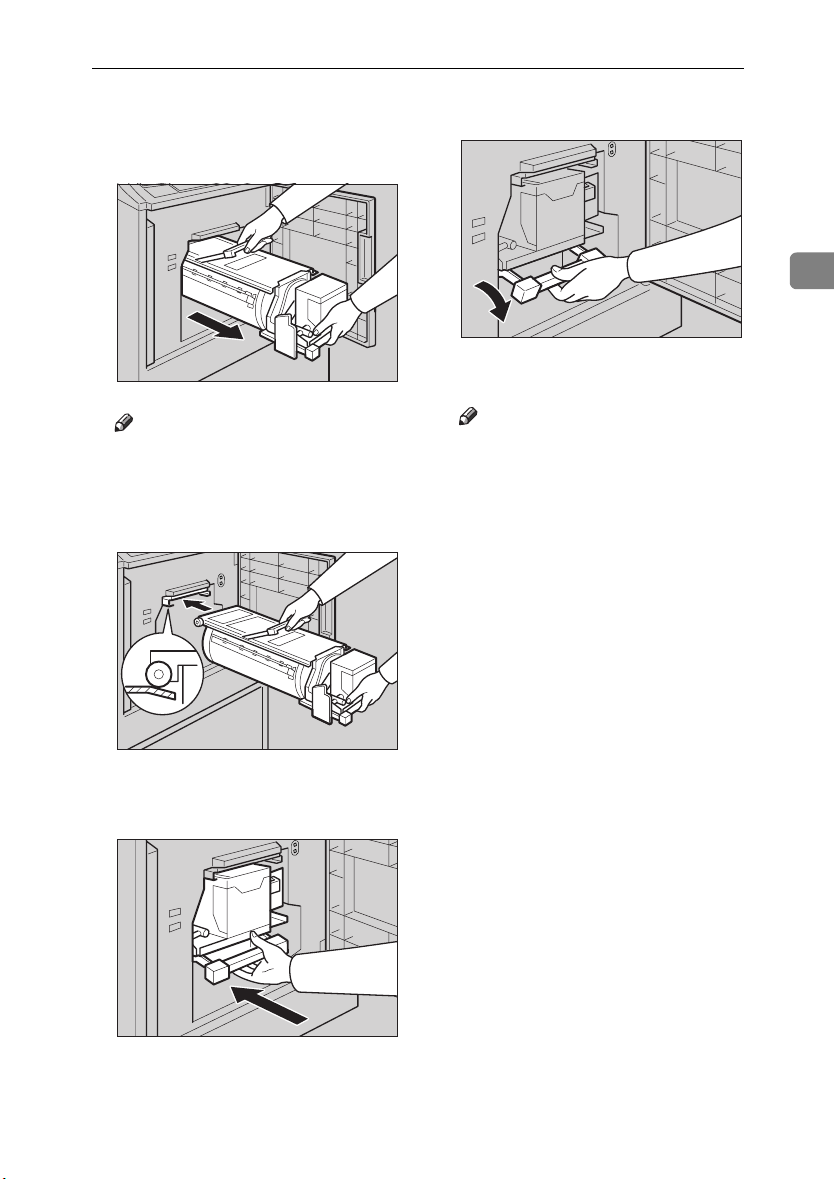
Color Printing Using the Optional Color Drum
D Hold the upper drum stay and re-
move the drum unit from the machine.
ZFRH360E
Note
❒ Be careful not to let the drum unit
fall.
E Set the color drum unit on the guide
rail.
G Lower the drum unit lock lever.
2
AQN015S
H Close the front cover.
Note
❒ Make sure that the open cov-
er/unit indicator (M) goes off,
and the color drum indicator on
the panel display lights.
AQN013S
F Slide in the drum unit until it locks
into position.
AQN014S
71
Page 86
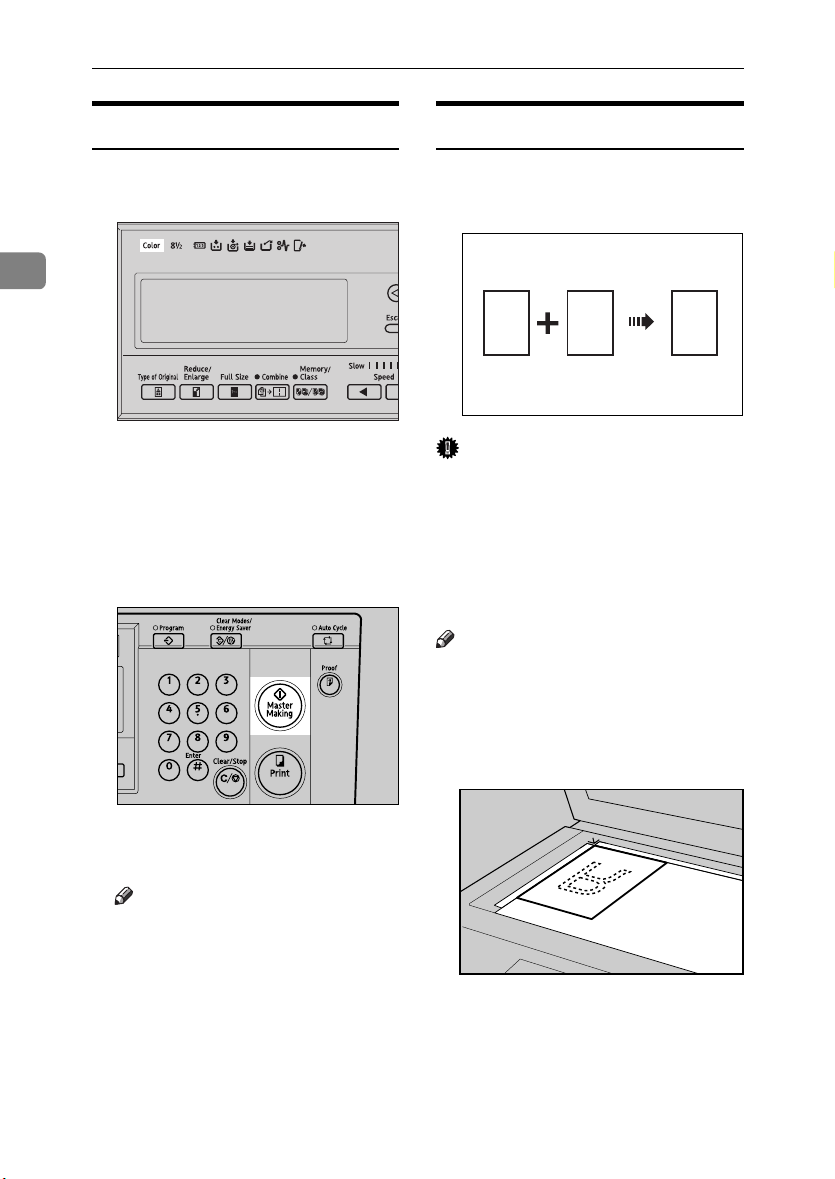
Optional Functions
Making Color Prints
A Make sure that the color drum in-
dicator on the panel display is lit.
Printing in Two Colors
After printing in one color, you can
print in another color on the same
side of the print.
2
AQN040S
B Set your original.
C Specify the print settings and en-
ter the number of prints with the
number keys.
D Press the {Master Making} key.
R
P
Important
❒ Let the ink on the prints dry for a
while before printing on them
again.
❒ If the prints are still wet when you
print on them again, the paper feed
roller might become dirty. In this
case, wipe the roller with a cloth.
Note
❒ You cannot print in two colors at a
time.
R
P
GRCOLO0E
72
AQN024S
Printing starts automatically after
the trial print.
Note
❒ If you wish to check the image
before printing, press the {Auto
Cycle} key before pressing the
{Master Making} key, in order to
disable Auto Cycle mode. See
p.18 “When Auto Cycle mode is
off”.
A Prepare two originals. Place the
first on the exposure glass or in
the optional document feeder.
ZDCH110E
Page 87
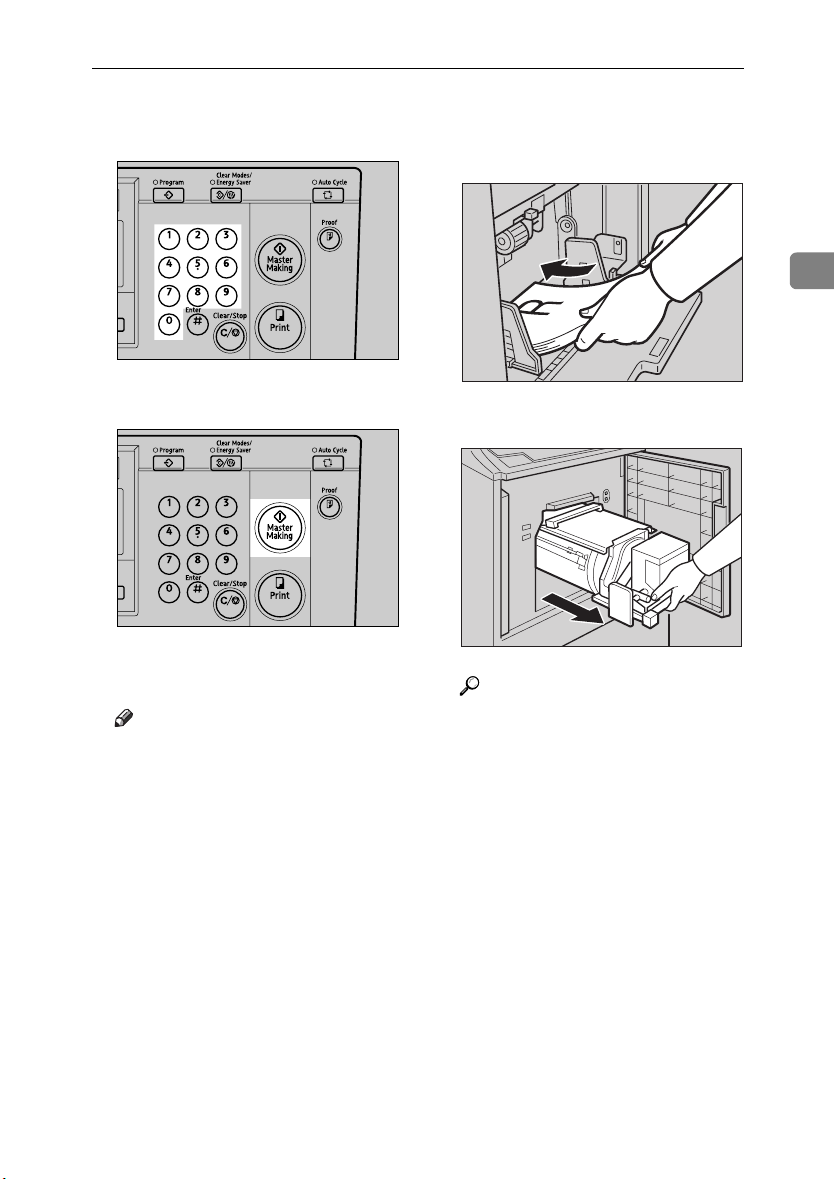
Color Printing Using the Optional Color Drum
B Enter the number of prints with the
number keys.
AQN023S
C Press the {Master Making} key.
AQN024S
Printing starts automatically after
the trial print.
Note
❒ If you wish to check the image
before printing, press the {Auto
Cycle} key before pressing the
{Master Making} key, in order to
disable Auto Cycle mode. See
p.18 “When Auto Cycle mode is
off”.
D Remove the prints from the paper
delivery tray and place them onto
the paper feed tray again as shown.
2
ZFRY040E
E Change the drum unit.
AQN012S
Reference
See p.70 “Changing the Color
Drum Unit”.
73
Page 88
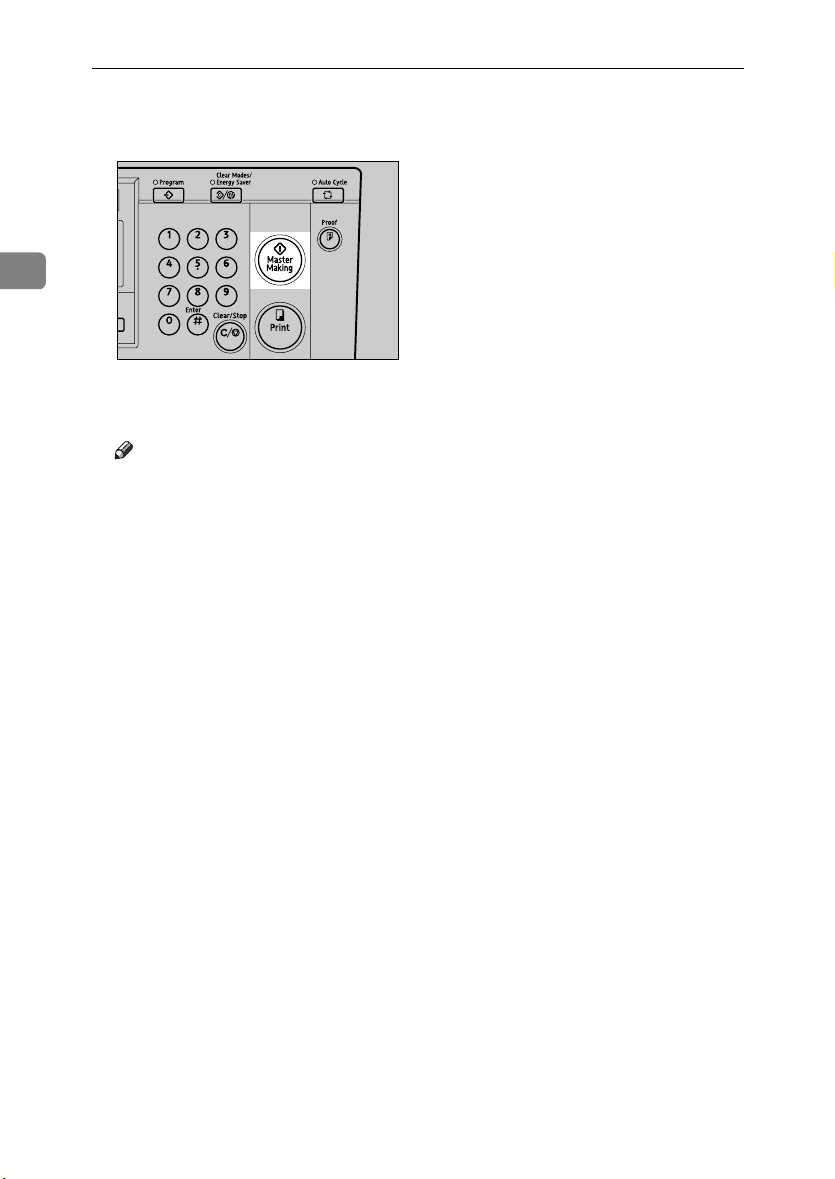
Optional Functions
F Place the second original, and then
press the {Master Making} key.
2
AQN024S
Printing starts automatically after
the trial print.
Note
❒ If you wish to check the image
before printing, press the {Auto
Cycle} key before pressing the
{Master Making} key, in order to
disable Auto Cycle mode. See
p.18 “When Auto Cycle mode is
off”.
74
Page 89

Accessing the User Tools
This section is intended for the machine administrator. The user tools allow the administrator to customize
the default settings of this machine.
Reference
For the detailed user tool menu,
see p.76 “User Tools Menu”.
A Press the {User Tools} key.
ZLKS084N
B Use the {~}{}} keys to select the
desired user tool.
Quitting User Tools
A To quit the User Tools menu, press
the {User Tools} key.
❒ Changes made to the following
3. User Tools
ZLKS084N
Note
user tools become effective
when you press the {Clear
Modes/Energy Saver} key.
•Prog./Change:Clss
•Prog./Change:Mem.
• ProgChnge:Clss/Yr
• No. of Skip Feed
Reference
See p.76 “User Tools Menu”.
C Enter a number or select the desired
mode using the number keys.
D Press the {OK} key.
75
Page 90

User Tools
User Tools Menu
1 System
No. Mode Description
1 Auto Reset The machine automatically returns to its initial condition if it has
3
2 R.Counter Display Shows the total number of masters and prints.
3 Reset R. Counter You can select whether or not to reset the total number of masters
4 mm/inch You can select the units of measurement used on the panel dis-
5 Language on LCD You can select the language for the panel display.
6 Date/Time You can set the date and time for the machine's internal clock us-
7 Energy Saver Opt. You can select the Energy Saver mode from Enery Saving or
8 Energ. Saver Timer You can specify the time taken for the machine to enter Energy
9 Auto Off Timer You can select to use the auto off timer.
not been operated for a certain period of time.
Note
❒ Default: Off
Note
❒ The trial print will not be counted as part of the total.
and prints.
Note
❒ Default: Do not clear
play.
Note
❒ Default:
•Metric version: mm
• Inch version: inch
Note
❒ Default: English
ing the number keys.
Auto Off.
Note
❒ Default: Energy Saving
Saver mode.
Note
❒ Default: 3 mins (minutes)
Note
❒ Default: Off
76
Page 91

User Tools Menu
2 Set Operat'n Mode
No. Mode Description
1 Min. quantity You can set a minimum print quantity between 0 and 9999.
Any number below the minimum will not be printed.
Note
❒ Default: 0
2 Max. quantity You can set a maximum print quantity between 0 and 9999.
Note
❒ Default: 9999
3 Panel Beeper You can turn the beeper on or off.
Note
❒ Default: STD. (standard)
❒ Available settings:
• ALL OFF (The beeper does not sound at all.)
•STD. (The beeper sounds only when warning messages are
shown on the panel display and not when you press a key.)
• ALL ON (The beeper sounds either when you press a key
or when warning messages are shown on the panel display.)
4 LCD Contrast You can adjust the brightness of the panel display.
5 Class Display Under the Memory/Class function, you can select to have “Select
Class/Year” displayed as “Select Department” instead, when the
machine is not limited to school or college use.
Note
❒ Default: School year (Select Class/Year)
3
77
Page 92

User Tools
3 Initial Setting
No. Mode Description
1MSTR
Makg.Density
2 Original Priority You can specify the original type that is selected by default when
3
3 Ratio Priority You can specify the reproduction ratio that is selected by default
4 Eco. Mode
ON/OFF
5 Margin Eras.
Area
6 Margin Non-S.
Size
7 Prog./Change:
Clss
8 Prog./Change:
Mem.
9ProgChnge:
Clss/Yr
You can specify the image density that is selected by default
when the power is turned on.
Note
❒ Default: Std.(Standard)
the power is turned on.
Note
❒ Default: Letter
when the power is turned on.
Note
❒ Default: 100%
You can select to have Economy mode as either“ON” or
“OFF”when the power is turned on, or after mode settings have
been cleared.
Note
❒ Default: OFF
You can specify the edge erase margin.
Note
❒ Default: 5 mm, 0.2"
Reference
To specify the edge erase margin, see p.82 “3-5 Edge Erase Area”.
You can use the number keys to specify the edge erase margin for
an original of custom size.
Note
❒ Default: 70 × 165mm, 2.8" × 6.5"
To store settings of the Class mode, see p.51 “Storing Class Mode
Settings”.
To store settings of the Memory mode, see p.49 “Storing Memory
Mode Settings”.
To store settings of the Select Class/Year or All Year modes, see
p.41 “Registering Class/Year”.
78
Page 93

User Tools Menu
4 Mode Setting
No. Mode Description
1Auto Cycle
ON/OFF
2 Ignore Paper Size If you are making prints on paper of custom sizes, you can set pa-
3No Orig.
Size(ADF)
4Background
ON/OFF
5 Longer Paper You can select “Use” to allow the use of paper longer than
6 Combine/Repeat You can choose to have either Combine or Repeat selected by de-
7 Cancel Comb. You can specify whether Combine/Repeat mode will be auto-
8 No. of Skip Feed You can specify the number of times that the drum rotates when
Yo u can sel ect t o have Auto C ycle m ode as eith er “ ON” o r “OFF ”
when the power is turned on.
Note
❒ Default: ON
per size detection to “Ignore”.
Note
❒ Default: Do not Ignore
If you are setting long originals in the optional document feeder
(ADF), you can set original detection to “Ignore”.
Note
❒ Default: Do not Ignore
When you make prints in Photo, Letter/Photo, or Tint mode, the
ba ckg rou nd o f th e pr int s mi ght app ear d irt y. I n th is c ase , yo u ca n
select “Back. Correction” to improve the clarity of your prints.
Note
❒ Default: W/O back. correction
432mm, 17.0".
Note
❒ Default: Do not use
fault when the power is turned on.
Note
❒ Default: Use (Combine)
matically cleared after you have finished your print job.
Note
❒ Default: Do not cancel
in Skip Feed mode. You can also choose whether or not to change
the number of drum rotations temporarily when you press the
{Skip Feed} key. See p.56 “Skip Feed Printing”.
Note
❒ Default:
• Number of Skip Feed: 2
3
79
Page 94

User Tools
No. Mode Description
9Idling for
Q.Mode
You can specify the number of times that the drum unit idles
when in Quality Start mode.
Note
❒ Default: 2
10 Setting Q.Mode You can select “Yes” to have the machine automatically carry out
3
11 No. of Q.Start You can specify the number of times that the drum idles when in
a few idle spins when the power is turned on. If Auto Quality
Start mode is set to “No”, you can restore the density by making
a few extra prints or by using the Manual Quality Start mode.
Note
❒ Default: Yes
Auto Quality Start mode.
To increase the print image density, increase the number of drum
rotations.
Note
❒ Default: See p.82 “4-11 No. of Q.Start”
Reference
To change the number of idle spins, see p.82 “4-11 No. of
Q.Start”.
12 Memory Mode You can choose to have either Memory mode or Stack Memory
mode as the default.
Note
❒ Default: Normal (Memory mode)
13 Auto Class Under the Class mode, the machine stops after it is finished a
Class print job. When you select Auto Class, the machine stops
for 2 seconds and then goes on to the next Class print job.
Note
❒ Default: Stop
80
Page 95

User Tools Menu
5 Admin. Mode
❖ User Codes
If user codes are turned on, operators must enter their user codes before they can operate
the machine. The machine keeps count of the number of copies made under each user code.
See “3 Set User Code” below.
1 Check Counter You can check the number of masters and copies made under
each user code.
2 Reset Counters You can clear each or all user code counters.
Note
❒ Default: Single
Reference
To clear the number of masters and copies, see p.83 “5-2 Reset Counters”.
3 Set User Code You can select whether or not to use User Code mode.
Note
❒ Default: Do not use
4 Key Counter Adj. Normally, the optional key counter counts the number of prints
regardless of the number of masters used. You can, however,
add to the key counter a value between 0 and 50 to the key
counter each time a new master is used.
Note
❒ Default: 0
❒ Range of adjustment: 0–50
3
6 Online Paramet's
Limitation
❒ The optional PC controller is required.
No. Mode Description
1 Auto Online You can select to have Auto On Line mode as either “On” or
“Off” when the power is turned on, or after mode settings have
been cleared.
Note
❒ Default: On
2 Print Size You can specify the paper size that is selected by default when
you press the {On Line} key.
Note
❒ Default: Auto
81
Page 96
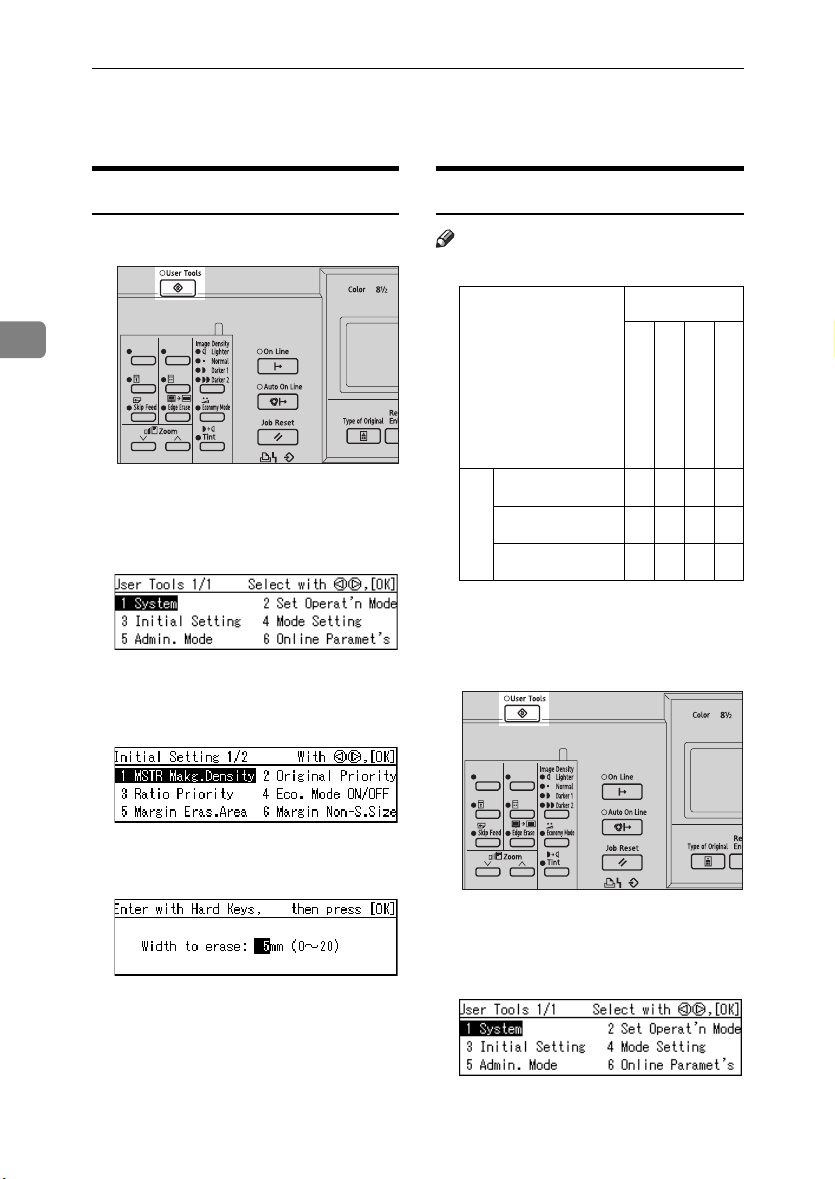
User Tools
User Tool Menus in Detail
3-5 Edge Erase Area
A Press the {User Tools} key.
4-11 No. of Q.Start
Note
❒ The defaults are as follows:
Time interval
3
0 – 2 hours
2 – 4 hours
4 – 24 hours
ZLKS084N
B Use the {~}{}} keys to select 3
Initial Setting, and then press the
{OK} key.
C Use the {~}{}} keys to select 5
Margin Eras.Area, and then press
the {OK} key.
*1
*2
*3
0233
0023
0023
Low Tmp.
Normal Tmp.
High Tmp.
Temperature
*1
(10 – 18°C, 50 – 64.4°F)
*2
(18 – 28°C, 64.4 – 82.4°F)
*3
(28°C – , 82.4°F –)
A Press the {User Tools} key.
More than 24 hours
Enter the margin to be erased us-
D
ing the number keys.
E Press the {OK} key.
82
ZLKS084N
B Use the {~}{}} keys to select 4
Mode Setting, and then press the
{OK} key.
Page 97
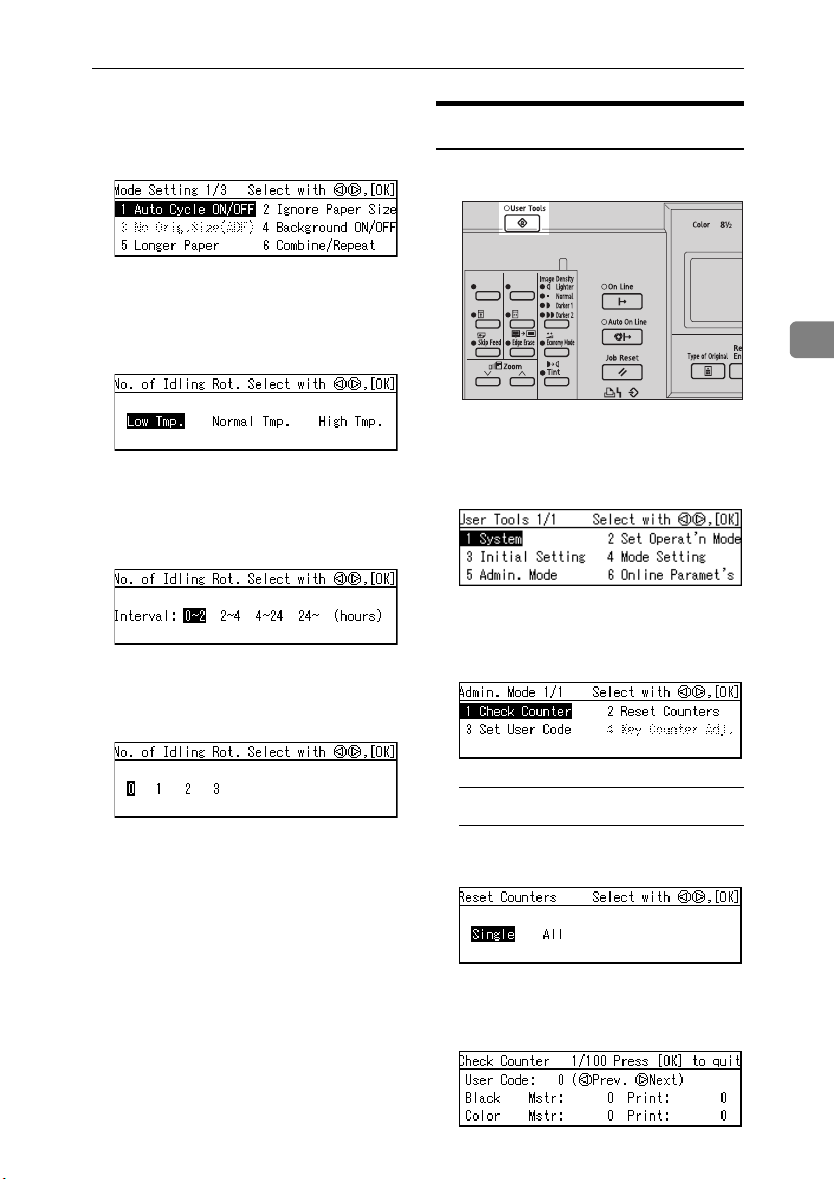
User Tool Menus in Detail
C Use the {~}{}} keys to select 11
No. of Q.Start, and then press the
{OK} key.
D Use the {~}{}} keys to select the
temperature range in which you
are using this machine, and then
press the {OK} key.
E Use the {~}{}} keys to select the
length of time for which the machine has not been used, and then
press the {OK} key.
F Use the {~}{}} keys to select the
number of times that the drum
unit idles.
5-2 Reset Counters
A Press the {User Tools} key.
ZLKS084N
B Use the {~}{}} keys to select 5
Admin. Mode, and then press the
{OK} key.
Use the {~}{}} keys to select 2
C
Reset Counters, and then press
the {OK} key.
3
G Press the {OK} key.
To clear only one counter
A Use the {~}{}} keys to select
Single.
B Use the {~}{}} keys to select
the user code that you wish to
clear.
83
Page 98
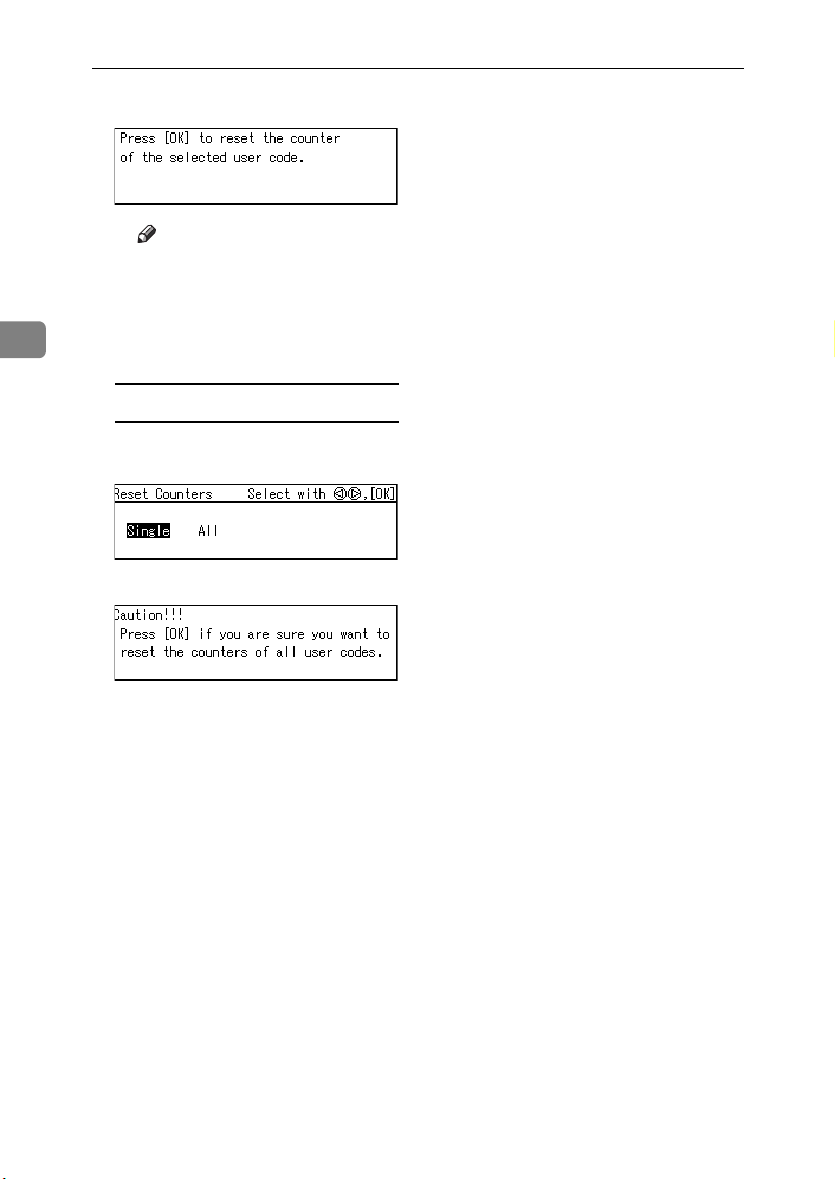
User Tools
C Press the {OK} key.
Note
❒ If you have selected the wrong
user code, press the {Escape}
key to return to the previous
3
display.
D Press the {OK} key.
To clear all counters
A Use the {~}{}} keys to select
All.
B Press the {OK} key.
84
Page 99
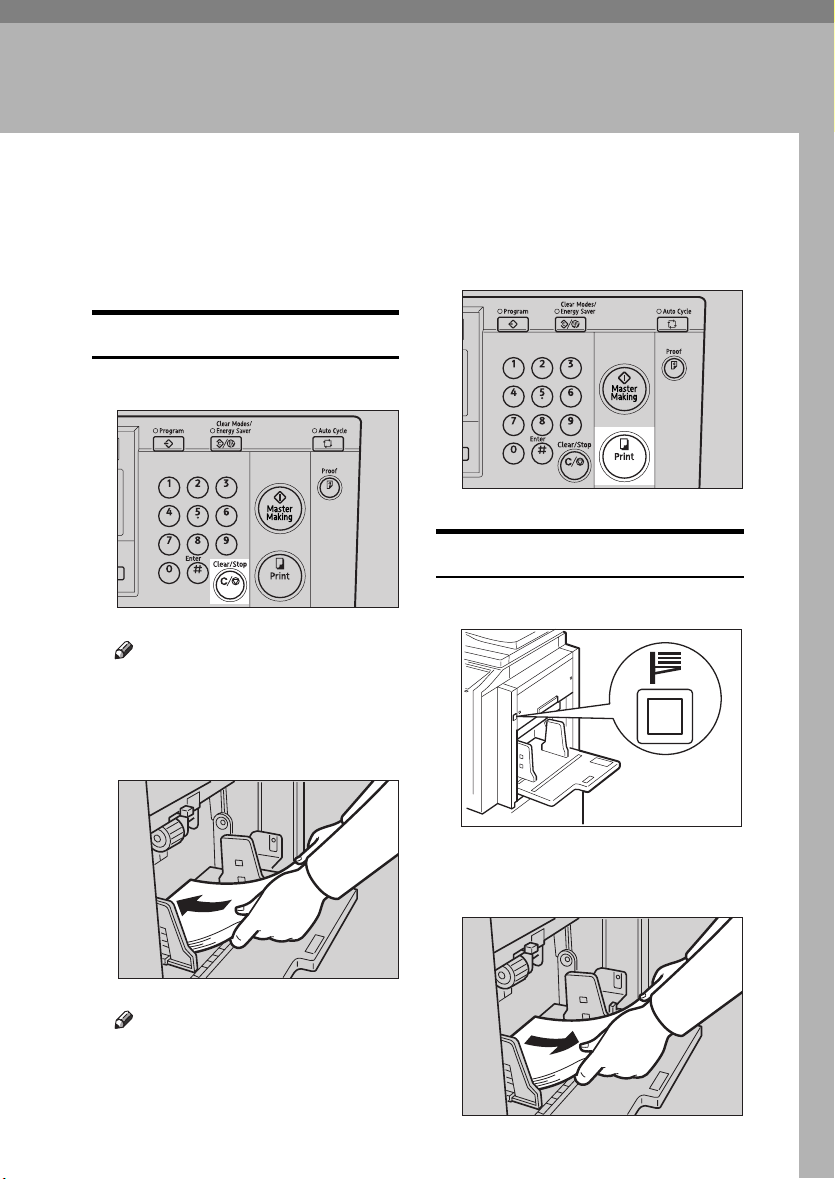
4. Replenishing Supplies
Loading Paper on the Paper Feed Tray
The load paper indicator (B) lights
when the paper feed tray runs out of
paper.
Replenishing Paper
A Press the {Clear/Stop} key.
AQN035S
Note
❒ This step is necessary only if you
wish to pause a print run to replenish paper.
B Load paper on the paper feed tray.
C Press the {Print} key to resume print-
ing.
AQN032S
Changing the Paper Size
A Press the paper feed tray down key.
ZFRY020E
Note
❒ Correct paper curl before setting
the paper.
ZFRH031E
B Remove the paper from the paper
feed tray.
ZFRY030E
85
Page 100

Replenishing Supplies
C Shift the paper feed side plate lock
lever forward. Adjust the paper
feed side plates to match the paper
size.
1
B5
F
A4B4A5
B5
4
TSLH01BE
1: Paper feed side plate lock lever
D Load paper onto the paper feed tray.
E Make sure that the paper feed side
plates touch the paper lightly. Shift
the lock lever back to its original
position.
TSLY015E
F Adjust the side plates of the paper
delivery tray to match the new paper size.
86
ZFRY020E
Note
❒ Correct any paper curl before
setting the paper.
ABL024S
G Adjust the end plate to match the
new paper size.
AQN010S
 Loading...