


Series Cabinets
USER MANUAL
MODEL : CT10
CT12
CT15
CS115
CT Manual
Concept
1

Concept
We at Laney are extremely pleased that you have decided to select a Concept product for your sound requirements and
we wish to reinforce your judgement by ensuring you get off to a flying start by including this comprehensive user manual
to assist you in getting to know your equipment.
Before switching on please read this manual carefully since whilst you may well be an experienced user no two brands
are the same, and on reading this manual you will become aware of the subtle advantageous differences that Concept
offers over its competitors.
UNPACKING
On unpacking your Concept please check carefully for any signs of damage that may have occurred whilst in transit from
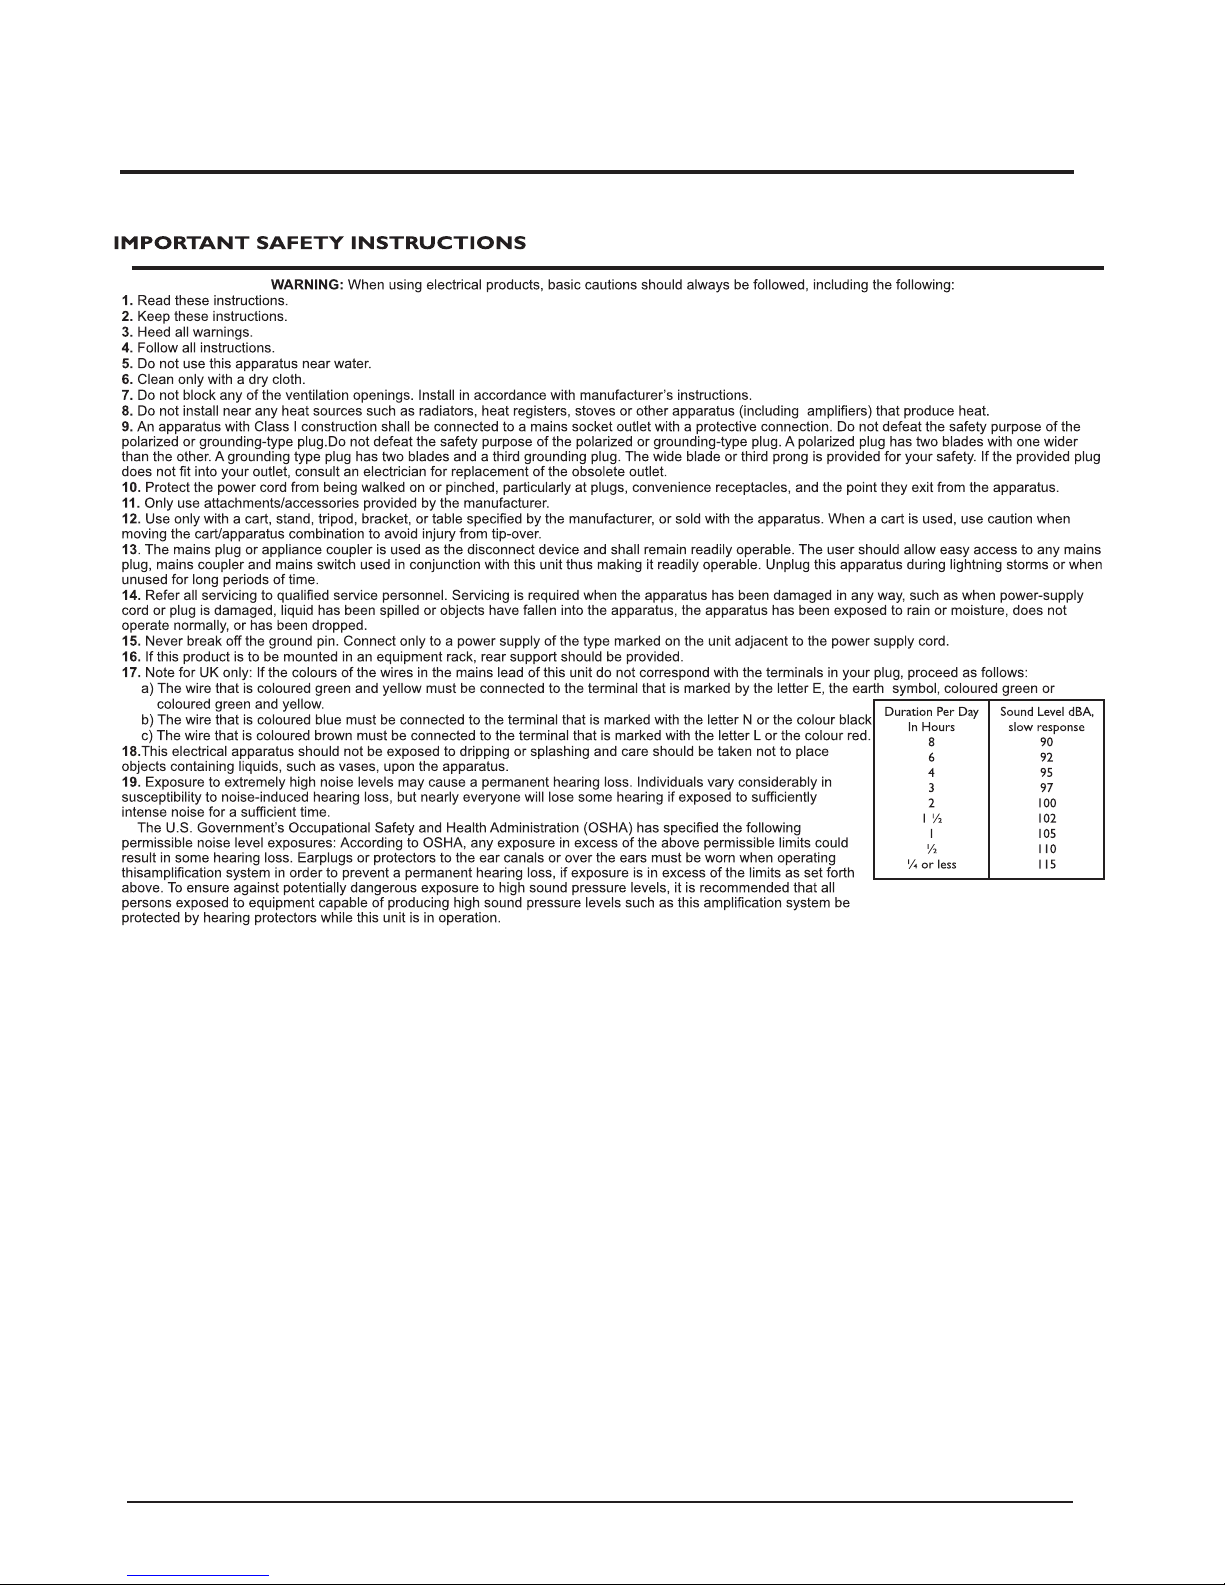
the Laney factory to your dealer. In the unlikely event that there has been damage please repack your unit in its original
carton and consult your dealer.
We would strongly advise you to store away your original transit carton since in the unlikely event that some time in the
future your unit should develop a fault, you will be able to return it to your dealer for rectification securely packed.
Your Concept powered monitors product should be fitted with a three pin 'grounded' (or 'earthed') plug. Please make sure
that the mixer is powered from a 'grounded/earthed' outlet.
If changing or fitting a plug yourself, ensure that the applicable wiring code is adhered to, for example in the UK the cable
colour code for connections are as follows:
The Concept product should never be exposed to moisture or wetness under any circumstances since this would
represent a possible shock or fire hazard, and may cause expensive damage to your valuable possession.
In the unlikely event that a fuse should blow, it is imperative that you or your engineer, use a correctly rated replacement.
Details of the fuse required is printed on the powered monitor, please take special care to use a 'time delay' fuse wherever
stated.
THANK YOU
IMPORTANT SAFETY INFORMATION
EARTH OR GROUND
NEUTRAL
LIVE
GREEN/YELLOW
BLUE
BROWN
2
CT Manual

Connection procedure.
Unpack the speakers and place them in their appropriate positions, in most instances this will be left and right of the sound
source.
With the sound source turned off, connect the left output of the sound source to the left speaker enclosure, using either jack
socket. In turn connect the right output of sound source to the right speaker enclosure.
Connect all external sound devices to the sound source for example CD players, mic's etc.
With the volume of the sound source turned down switch the power on.
Set the sound source at a low level and check that signal is present at the speakers.
If signal is present then sound check at the desired level.
If there is no signal then check to connections and make sure they are secure, make sure the sound source is functioning
correctly.
When packing up, make sure the sound source is switched off first - before the speakers are disconnected.
When connecting a sub bass unit such as the CS115, in conjunction with another cabinet such as a CT12, optimum sound
quality is achieved by firstly connecting the sound source to the CS115 and then link out of the CS115 to the remaining
cabinet. This procedure is the same for both channels of the sound source.
When connecting a pair of speaker to a mono sound source with only one output. Connect the first speaker to the amplifier
and then using the link out connect to the second speaker.
Concept Cabinets
Connecting your cabinets.
The Laney range of Concept cabinets are ideally suited for all types of rehearsal and performance sound applications. Each
cabinet is constructed using the best materials in order to provide the highest sound quality available.
When connecting your enclosures to a sound source please ensure that you use good quality speaker cable. It is important to
use speaker cable, as instrument cable is not designed to carry signal loads associated with PA applications.
Each Concept cabinet is equipped with two jack sockets on the rear which function as either an input jack or a link jack. The
jack sockets are connected in parallel, which means it is not critical which jack you decide to use as the input jack, the other will
automatically become the link jack.
Concept
3
Rear Panel view of a CT Cabinet
2
1
2
Input : Socket for connecting the
external sound source
Link : Socket provided for
connecting additional cabinets in
Parallel with the input socket.
1
EXPLANATION OF TERMS
N.B. Please note : if 1 is used as the main input then 2 becomes the link. If
2 is used as themain input then 1 becomes the link
CT Manual

 Loading...