

Land of Nod OSLO CRIB User Manual
Thank you for selecting a ducduc for nod product.
Please check contents against the components list in these
instructions. Also, please ensure there was no damage that
may have occurred in shipping. If any components are
missing or you find any damage, please contact The Land
of Nod at 800-933-9904 before continuing.
Read all the instructions before use of the CRIB.
Please remember to securely tighten all bolts and fasteners
and periodically check to make sure every component is
properly and securely in place.
OSLO CRIB
Pay close attention to the safety warnings in these
instructions and on CRIB labels.
A minimum of two people is required to safely assemble
and move the CRIB. Do not attempt to move this CRIB
alone - dragging or sliding it across the floor may cause
structural damage.
CAUTION:
Any mattress
used in this CRIB must be at
least 27
1/4
inches by 51
5/8
inches with a thickness not
exceeding 6 inches.
Keep instructions for future use.
pictures are not drawn to scale
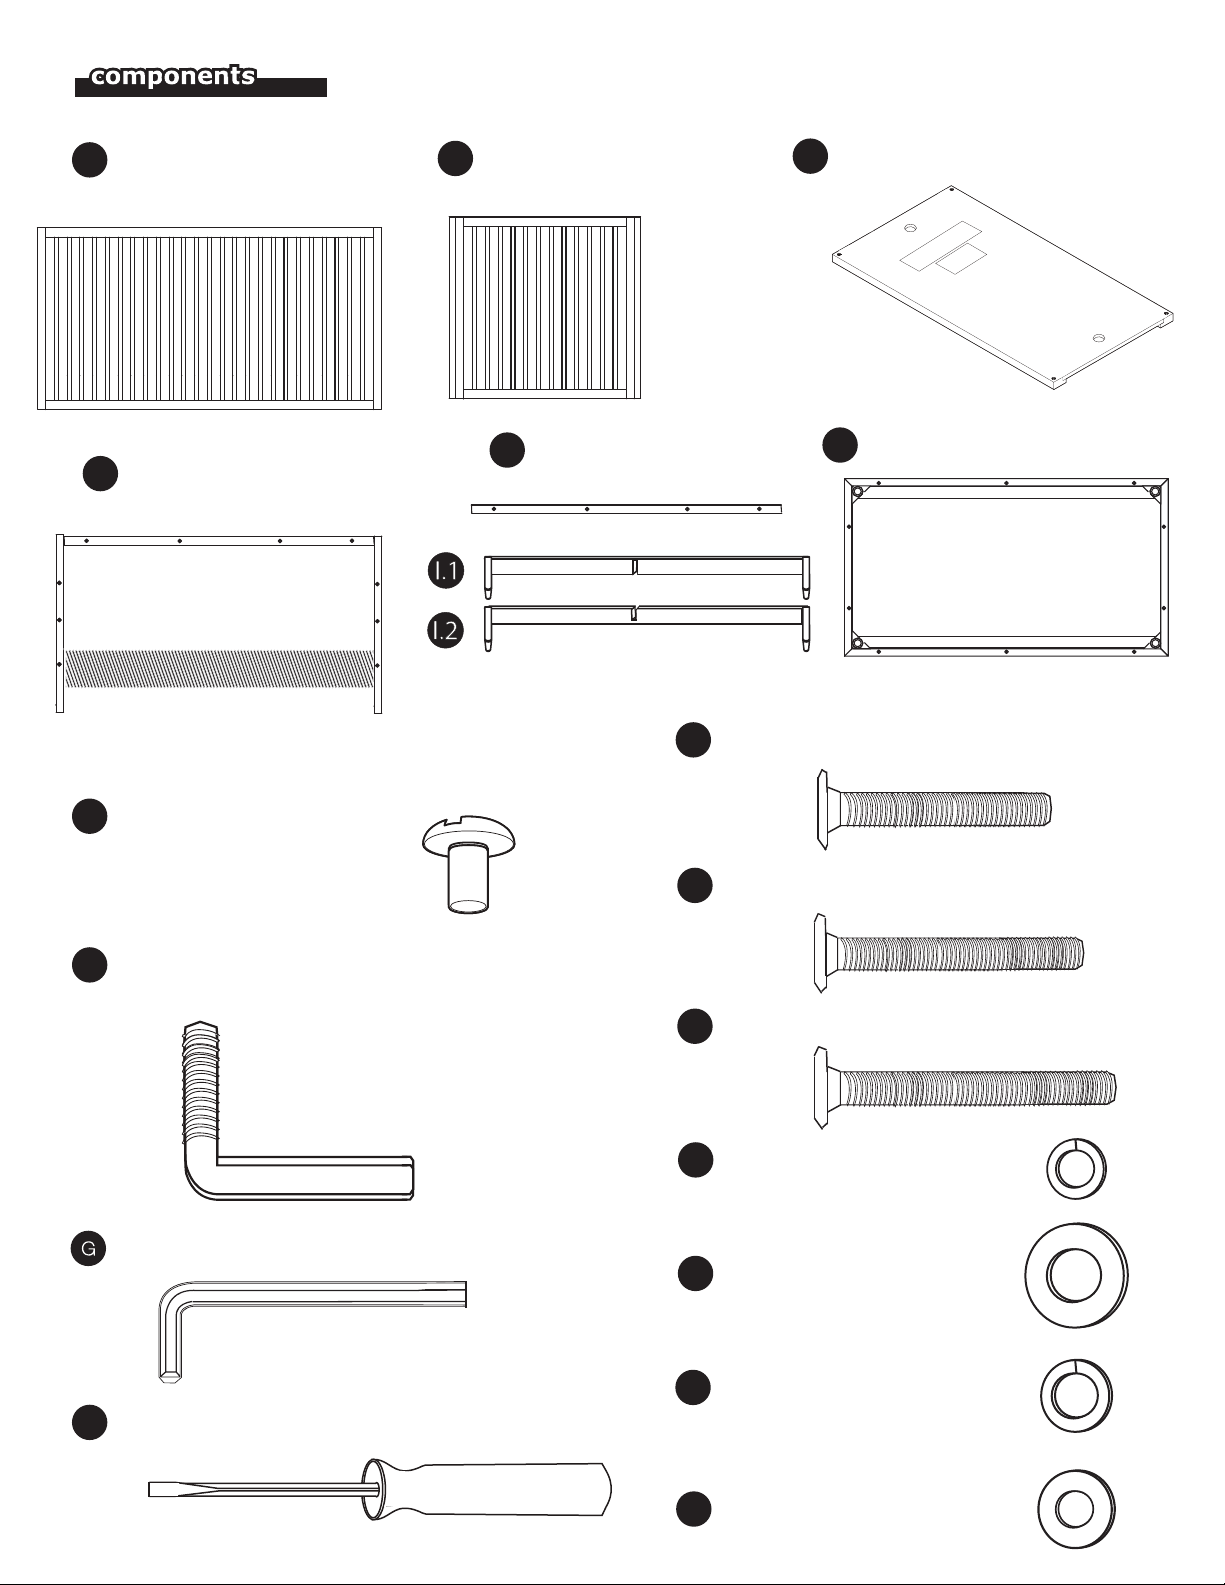
A SIDE RAIL
X 2
M TOP FRAME ASSEMBLY
X1
removable support
B END RAIL
X 2
M.1 TOP FRAME RAIL
X1
C MATTRESS SUPPORT PANEL
I BASE
D MATTRESS SUPPORT BOLT
X 4
E MATTRESS SUPPORT PIN
X 4
ALLEN WRENCH
RAIL CONNECTOR BOLT (40MM)F
X 12
J CONNECTOR BOLT (45MM)
X 14
P
BASE CONNECTOR BOLT (50MM)
X 10
K.1
LOCKING WASHER (5/16”)
X 4
L.1
REGULAR WASHER (5/16”)
X 4
H SCREWDRIVER (not included)
K.2
L.2
LOCKING WASHER (1/4”)
X 36
REGULAR WASHER (1/4”)
X 36
assembly
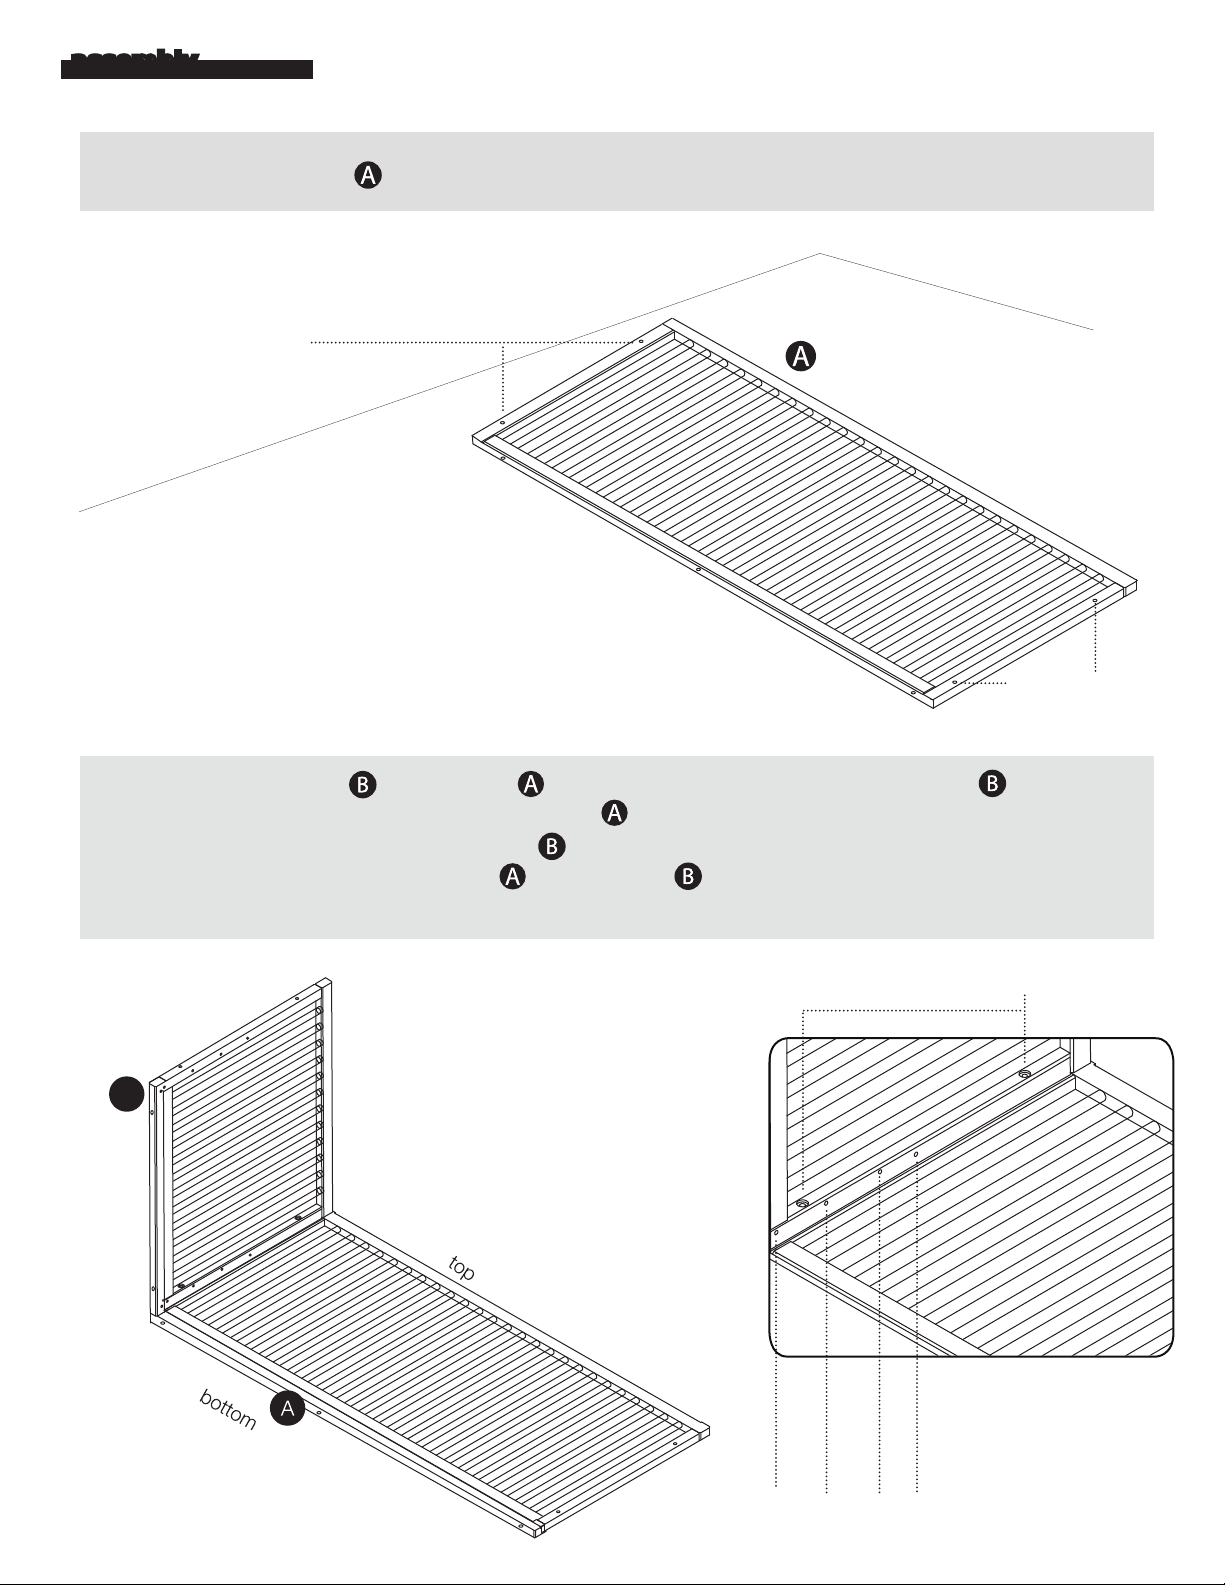
1
rail connector holes
Lay SIDE RAIL on floor with rail connector holes facing up.
A
B
2
B
rail connector holes
Align END RAIL to SIDE RAIL so that the rail connector holes on END RAIL line up
with the rail connector holes on SIDE RAIL . Make sure the four mattress support holes face
the bottom and inside of END RAIL . Refer to diagram for correct orientation.
Labels on bottom of SIDE RAIL and END RAIL that read “Bottom” should be facing the
bottom of the crib.
rail connector holes
A
mattress support holes
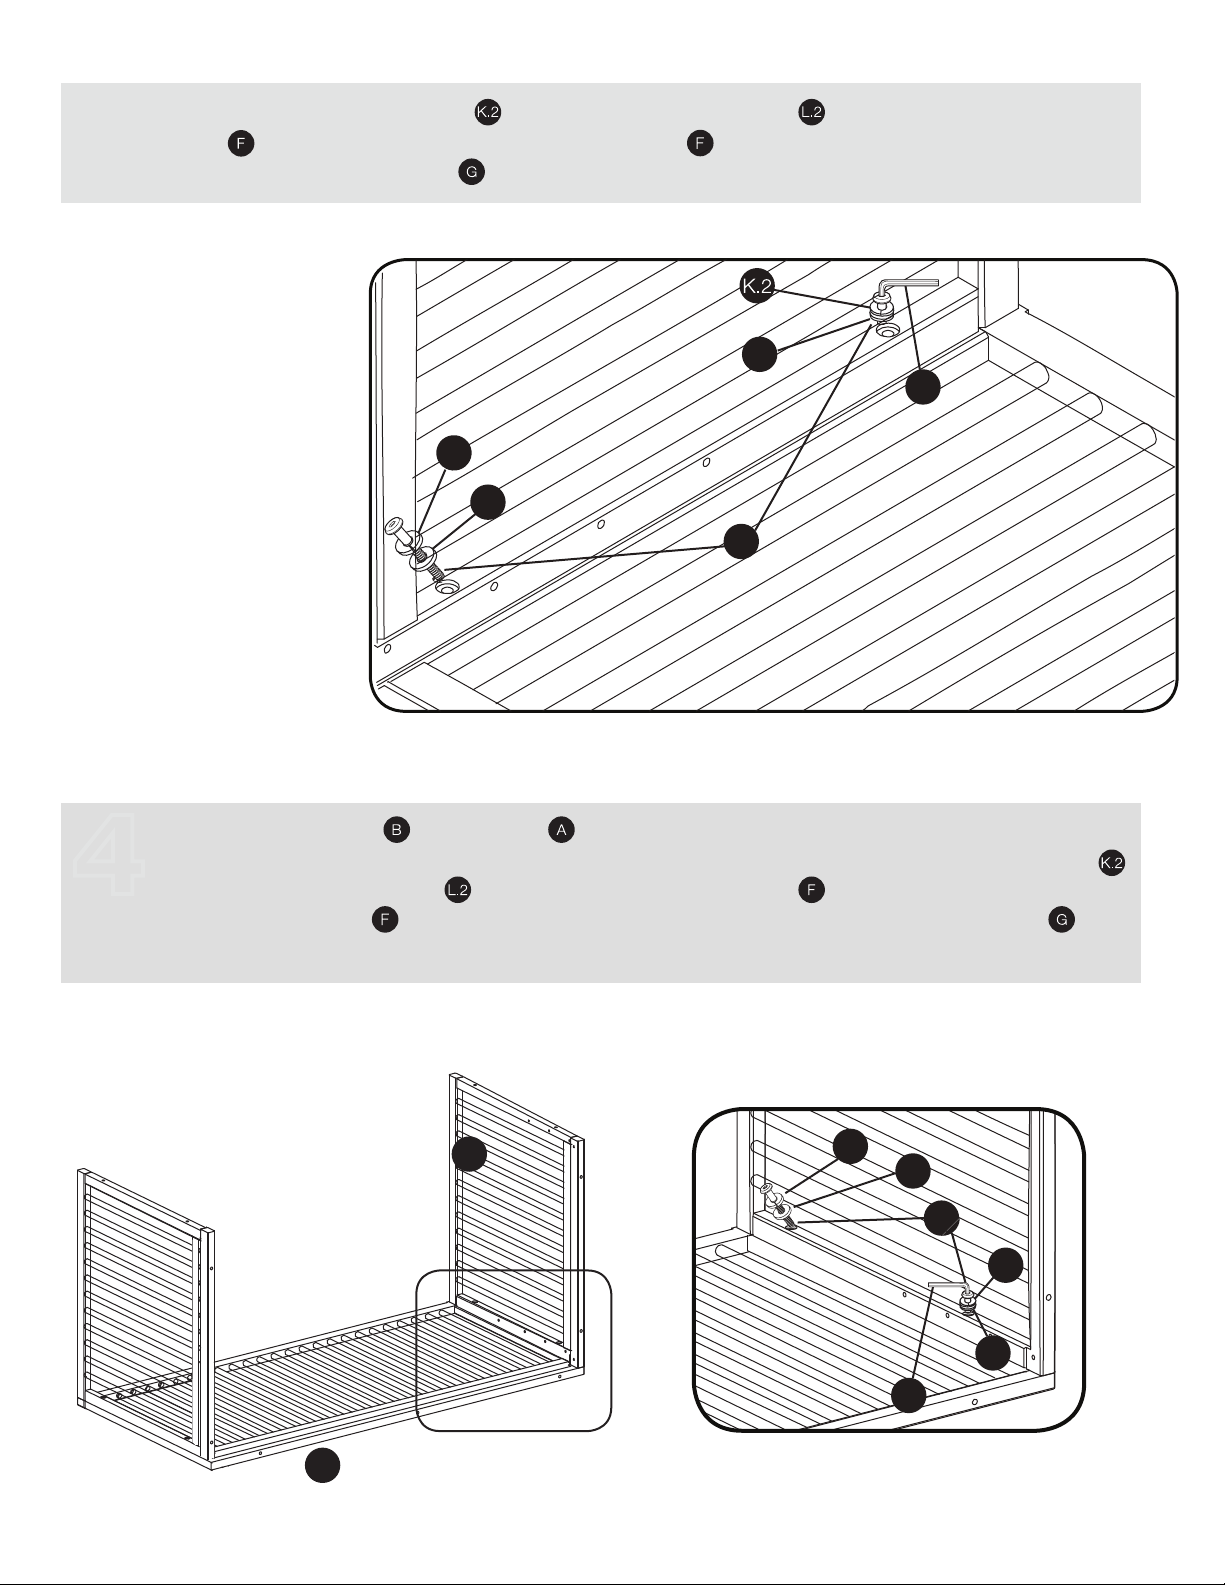
3
F
K.2
L.2
Do not tighten all the way.
3
Do not tighten all the way.
333
3
3
Attach one LOCKING WASHER and one REGULAR WASHER to two RAIL CONNECTOR
BOLT and insert each RAIL CONNECTOR BOLTS in rail connector holes and slightly
tighten with ALLEN WRENCH . Do not tighten all the way.
L.2
G
K.2
L.2
F
4
Align second END RAIL to SIDE RAIL making sure that mattress support holes face the
bottom and inside of CRIB. Refer to diagram for proper orientation. Attach one LOCKING WASHER
and one REGULAR WASHER to two RAIL CONNECTOR BOLT and insert each RAIL
CONNECTOR BOLTS in rail connector holes and slightly tighten with ALLEN WRENCH .
Do not tighten all the way.
B
K.2
L.2
F
K.2
L.2
G
A
 Loading...