

Landmann 42259, 42224 Assembly, Care And Use Instructions
Español p. 26
ASSEMBLY, CARE AND USE INSTRUCTIONS
RETAIN THESE INSTRUCTIONS FOR FUTURE REFERENCE
3 Burner LP Barbecue Grill
Questions, problems, missing parts? Before returning to your retailer, call our customer
service department at: 1-800-321-3473 8:00 AM - 5:00 PM (EST) English Only,
or Email CustomerService@landmann-usa.com
READ CAREFULLY
IMPORTANT:
MODEL 42259
1
This appliance is for
outdoor use only.
This is not a
commercial appliance.
5005342

Table of Contents
Important Safety Information ................................3-4
Liquid Propane (LP) Safety Information....................5
Package Contents .................................................6-7
Preparation................................................................8
Hardware Contents ..................................................8
Tools Required..........................................................8
Assembly Instructions ........................................8-17
Connecting Gas Cylinder ..................................18
Lighting Instructions ..........................................19
Care and Maintenance .................................20-21
Cooking Methods and Grilling Tips ...................22
Troubleshooting .................................................23
Grilling Guidelines ........................................24-25
Replacement Parts ......................................26-27
Warranty ............................................................28
Assembler/Installer
This instruction manual contains important information necessary for the proper assembly and safe use of this
appliance. Read and follow all warnings and instructions before assembling and using this appliance.
Leave these instructions with the consumer.
Consumer/User
Follow all warnings and instructions when using this appliance.
Keep these instructions for future reference.
If you smell gas:
1. Shut off gas to the appliance.
2. Extinguish any open flame.
3. Open lid.
4. If odor continues, keep away from the
appliance and immediately call your gas
supplier or your fire department.
5. Failure to follow these instructions could
result in explosion, or burn hazard which
could cause property damage, personal
injury or death.
1. DO NOT store or use gasoline or other flam-
mable liquids or vapors in the vicinity of this or
any other appliance.
2. An LP (liquid propane) cylinder not connected
for use should not be stored in the vicinity of
this or any other appliance.
3. This grill is FOR OUTDOOR USE only and
shall not be used in a building, garage, under
overhangs or any other enclosed area.
4. DO NOT leave a lit grill unattended. Keep chil-
dren and pets away from the grill at all times.
5. This appliance is for Household use only.
This is not a commercial appliance.
2

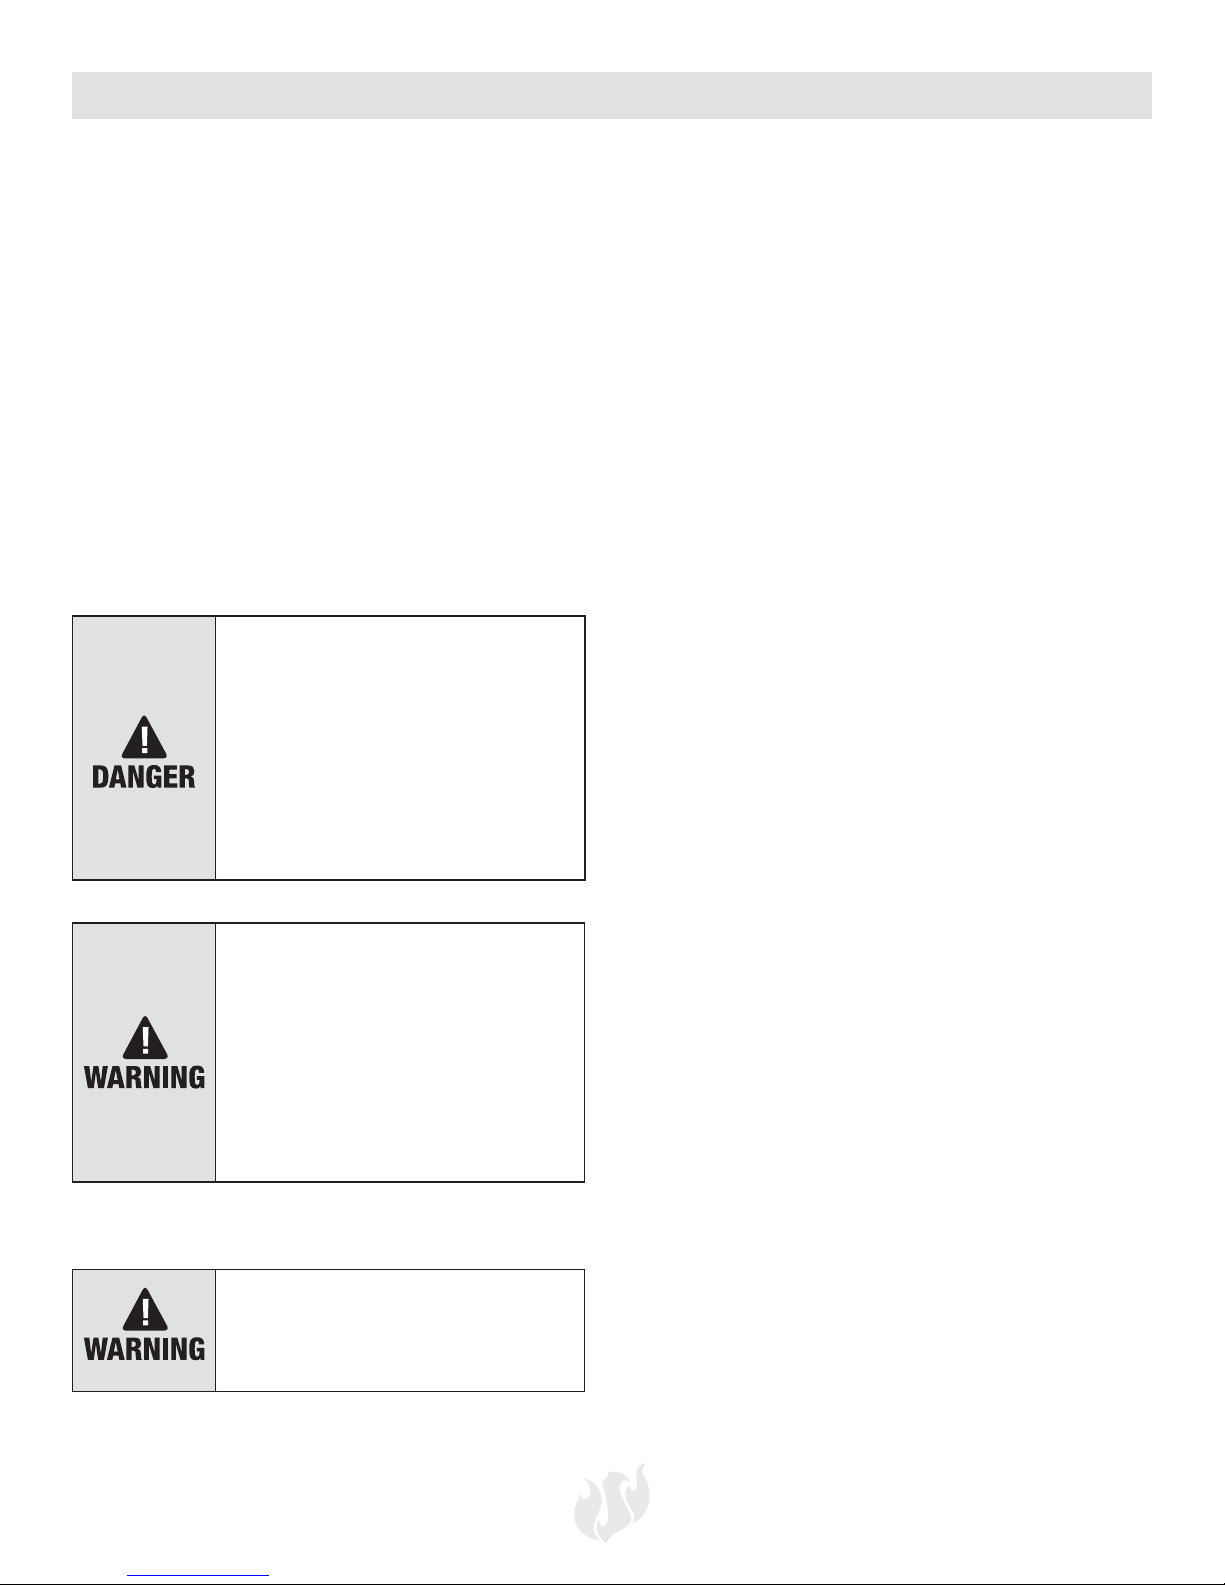
Important Safety Information
Warnings and Cautions contained
in this instruction manual may result in
serious bodily injury or death, or may
result in a fire or explosion causing
damage to property.
• Make sure to follow all assembly instructions
carefully. Improper assembly of this grill may be
dangerous.
• NEVER use charcoal, lighter fluid, gasoline, kerosene
or alcohol to ignite this grill.
• NEVER place more than 10 pounds on a side table.
DO NOT lean on grill.
• NEVER use charcoal briquettes or lighter fluid in a
gas grill. DO NOT move grill while it is lit.
• When igniting the grill or cooking, DO NOT lean over
the open grill.
• Always open the grill lid slowly and carefully as heat
trapped inside the grill can cause severe burns.
• DO NOT place hands or fingers at edge of the
firebox and the lid when the lid is open or the grill is
hot.
• Keep children and pets away from the grill when in
use. Accessible parts may be very hot.
• DO NOT attempt to disconnect the gas regulator
and hose assembly or any gas fitting while your grill
is operating.
• This grill SHOULD NOT be located under any
overhead unprotected combustible construction.
Always allow at least 24” from the top, bottom,
back and 24” from the sides of the grill (see below).
24’’
(609mm)
24’’
(609mm)
ventilation air. Keep the ventilation openings of the
cylinder enclosure free and clear of debris.
• Should the burners go out while the grill is in
operation, turn all gas valves off. Open the lid and
wait five minutes before attempting to relight the
grill, using the igniting instructions.
• Keep this grill clear and free from combustible
material, gasoline and other flammable vapors and
liquids.
• NEVER store an extra or disconnected liquid
propane cylinder under or near this grill.
• Always use heat-resistant barbecue mitts or
gloves when operating the grill.
• DO NOT leave a hot grill unattended or move it
during operation.
• This grill is not intended to be used in or installed
on recreational vehicles, boats, portable trailers, or
in any moving location.
• DO NOT put a grill cover or anything flammable
on the grill while the grill is in operation or is hot.
• Storage of an outdoor cooking gas appliance
indoors is permissible only if the cylinder is
disconnected and removed from the outdoor
cooking gas appliance.
• When the grill is not in use, make sure the gas is
turned • OFF at the supply cylinder.
• Cylinders must be stored outdoors and out of the
reach of children. Cylinder must not be stored in a
building, garage or other enclosed areas.
• Always inspect the gas supply hose before every
use. If the hose shows any signs of abrasions or
cuts, DO NOT use the grill. The hose must be
replaced before using again.
• Always check the burners and venturi tubes for
insects and insect nests. A clogged tube can lead
to a fire beneath the grill.
• Always check the connections for leaks each time
you connect and disconnect the LP gas supply
cylinder.
• This grill is an outside appliance and SHOULD
NOT be operated in a building, garage, or any other
enclosed area.
• DO NOT obstruct the flow of combustion and
The pressure regulator and hose
assembly supplied with this grill
must be used. Any requirements for
a replacement regulator and hose
assembly must be made through the
manufacturer, LANDMANN-USA.
• DO NOT enlarge the valve orifices or burner
ports when cleaning the valves or burners.
3
Important Safety Information
• If you see, smell or hear hissing of gas escaping
from the LP gas cylinder, move away from the
LP gas cylinder. DO NOT attempt to correct the
problem yourself and call the fire department.
• If a grease fire occurs, turn • OFF the burner and
leave the lid closed until the fire is out.
• DO NOT alter this grill in any manner. Any
alteration automatically voids the warranty.
• DO NOT use the grill in high wind situations.
The LP gas supply cylinder to be used must be
constructed and marked in accordance with the
Specification for LP Gas Cylinders of the U.S.
Department of Transportation (DOT) or the National
Standard of Canada, CAN/CSA-b339 (Cylinders,
Spheres, and Tubes for transportation of Dangerous
Goods).
A fire causing death or serious
injury may occur if the following
is not followed exactly:
NEVER store or use gasoline or
other volatile substances in the
vicinity of this grill. NEVER store
a spare propane cylinder in the
vicinity of this grill, or in the vicinity
of another potential heat source.
To avoid the possibility of tipping over the grill,
NEVER place more than 10 pounds on the side table.
NEVER leave cooking food unattended. Continually
observing the food will help in maintaining an even
temperature, conserve fuel, improve the food’s flavor
and lessen flare-ups.
DO NOT store spare gas cylinder
in or near grill.
Place dust cap on cylinder valve
outlet whenever the cylinder is not
in use. Install only the type of dust
cap on cylinder valve outlet that is
provided with the cylinder valve.
Other types of caps or plugs may
result in leakage of propane.
State of California Proposition 65 Warnings
This product contains chemicals
known to the State of California
to cause cancer and birth defects
or other reproductive harm.
4

Liquid Propane (LP) Safety Information
Please review the below guidelines and safety information when using Liquid Propane (LP) gas.
General Information
• This grill is designed certified by ETL for use with a
standard 20 lb. LP gas cylinder.
• This grill CANNOT be converted to natural gas.
DO NOT attempt to convert this grill with a different
gas type.
Safety Information
• LP gas has an odor similar to natural gas.
• LP gas is heavier than air and leaking gas may collect
in low areas and resist dispersion.
• LP cylinders should not be dropped or handled
roughly.
• DO NOT use a damaged LP cylinder. A dented or
rusty LP cylinder or an LP cylinder with a damaged
valve may be hazardous and should be replaced with
a new cylinder immediately.
• ALWAYS close the cylinder valve after use.
• ALWAYS close the cylinder valve when disconnecting
the regulator.
• ALWAYS treat possible empty LP cylinders with the
same care as a full LP cylinder. There may still be gas
pressure inside a possible empty LP cylinder.
• NEVER store or transport an LP cylinder where the
temperature can reach 125ºF.
• Keep LP cylinders away from children and pets.
• DO NOT store disconnected LP cylinders in a
building, garage or other enclosed areas.
• If the LP cylinder is kept in the grill between
uses, make sure to keep both the grill and
the cylinder in an outdoor area with good
ventilation.
• ALWAYS leak test the LP cylinder
connection to the regulator when ever
changing LP cylinders.
Installation of LP Cylinder
1. Make sure all burner controls are in the OFF
position.
2. Open the cabinet door.
3. Carefully position in the large hole on the
bottom panel.
4. To secure the LP cylinder in place, screw the
tank holding tray bolt through the bottom
section of the LP cylinder.
5. Attach the regulator to the cylinder by
carefully HAND TIGHTENING only.
6. NEVER use a wrench or other tool to tighten
this connection.
7. Observe all governing codes and
ordinances.
Important
The United States LP gas appliance installation
must conform with local codes and ordinances.
In the absence of local codes, appliance
installation must conform with either the
National Fuel Gas Code, ANSI Z223.1/NFPA54,
Natural Gas and Propane Appliance code,
CSA B149.1, or Propane Storage and Handling
Code, B149.2, as applicable.
For Canada, installation of this grill must comply
with local codes and/or Standard CSA B149.2
(Propane Storage and Handling Code).
5

Package Contens
Part Description Quantity
1
2
3
4
5
6
7
8
9
10
11
12
13
14
15
16
17
18
Cart base panel
Cart base front trim
Cart left side panel
Cart right side panel
Locking caster
Non-locking caster
Caster support left
Caster support right
LP tank bolt
Grease tray support right
Grease tray support left
Cart door right
Cart door left
Cart door handle
Match lighting tool & chain
Cart top cross brace
Cart back panel
Cart door handle sleeve
1
1
1
1
2
2
1
1
1
1
1
1
1
2
1
1
1
4
19
20
21
22
23
24
25
26
27
28
29
30
31
Grease cup
Grease tray
Control knob
Lid handle
Folding side shelf bracket B
Folding side shelf bracket A
Folding side shelf left
Folding side shelf right
Heat tent
Cooking grate
Warming rack
Grill firebox
LP tank bolt end cap
1
1
3
1
2
2
1
1
3
2
1
1
1
6

Package Contents
27
19
18
25
28
24
23
29
30
26
21
22
20
17
15
14
13
16
12
3
11
4
10
6
5
31
9
8
7
1
2
7
Preparation
Before beginning assembly of this grill, please remove all packing material and verify that all of the
assembly parts are included (see Package Contents on page 6). If any part is missing or damaged,
DO NOT attempt to assemble the product.
Estimated assembly time: 45 minutes with two people.
Tools Needed: Phillips Head screw driver.
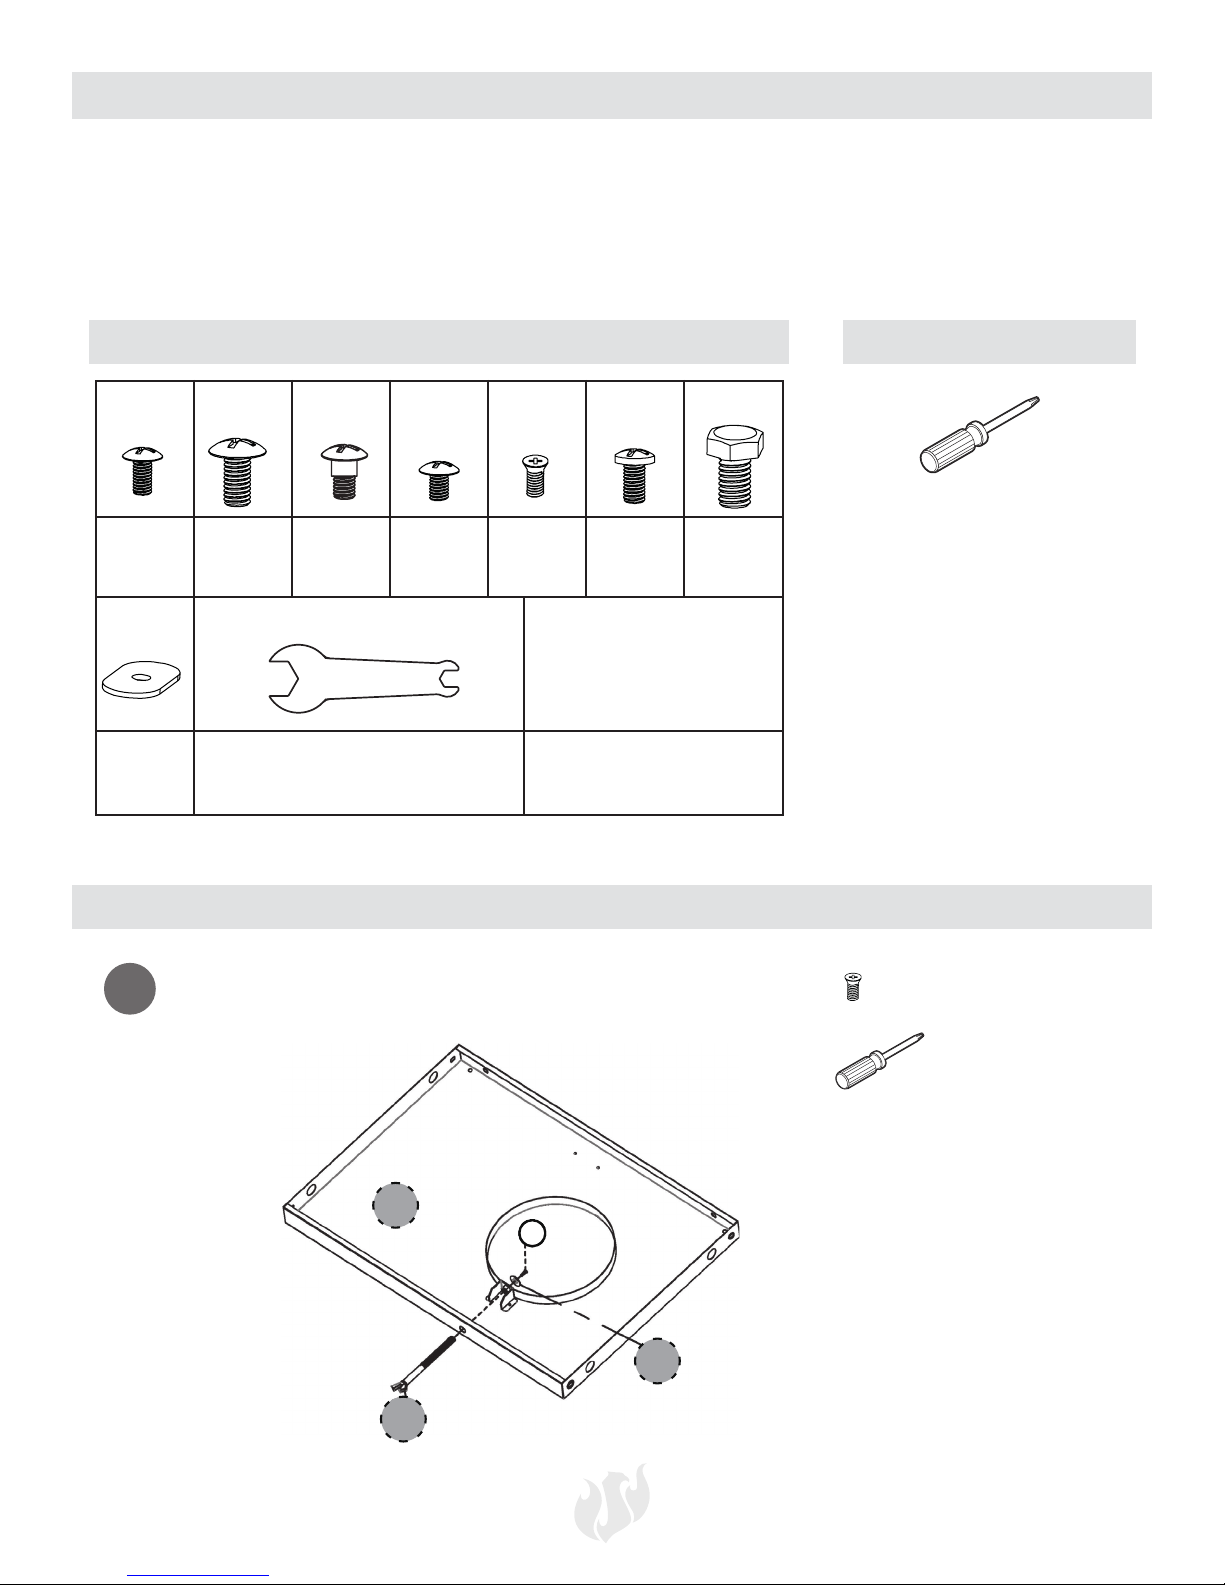
Hardware Contents
B
M4 x 10 M6 x 12 M6 x 18 M5 x 10 M4 x 8 M6 x 10
x 16 x 30 x 8 x 1x 1 x 4
H
x 2
C D E F GA
Wrench
x 1
Assembly Instructions
Tools Required
2 pt Phillips Screwdriver
M10 x 12
x 2
1.
1
9
E M4X8 mm Screw (x1)
E
31
8
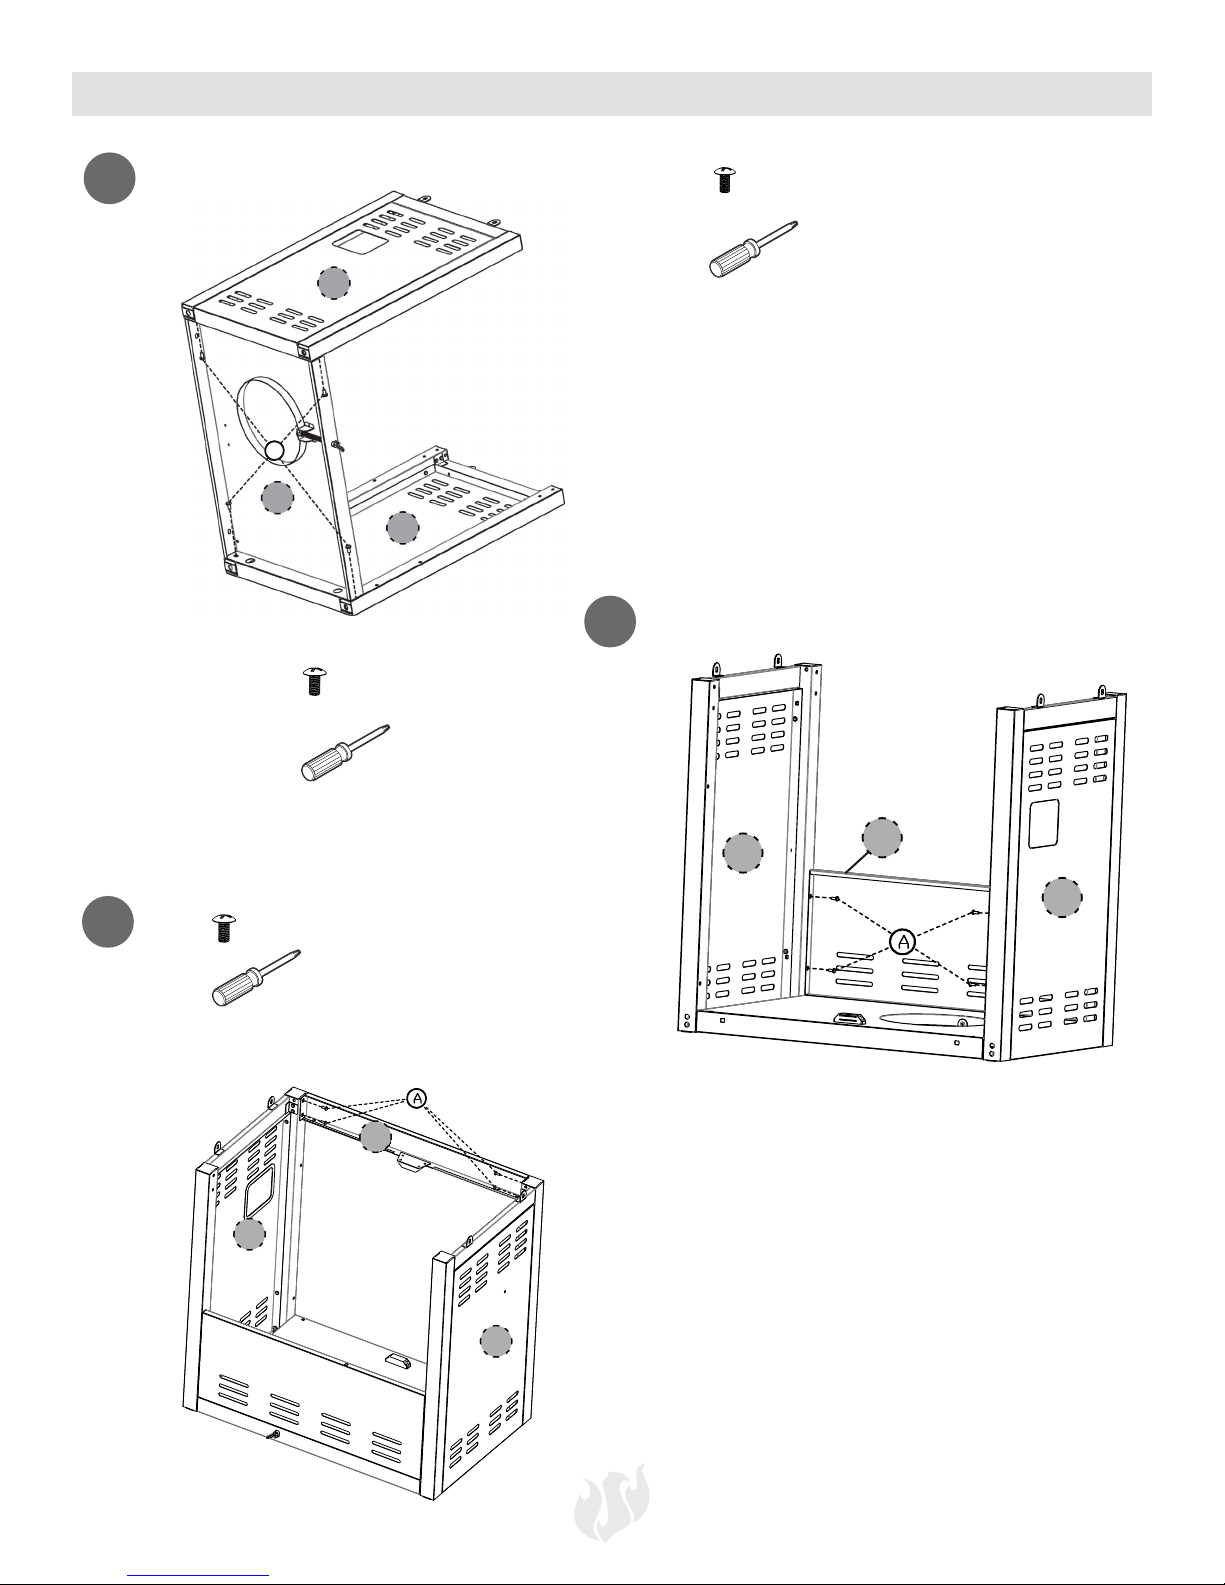
Assembly Instructions
31
1
E
9
4
3
17
2.
B M6X12 mm Screw (x4)
4
B
1
3
3.
A M4X10 mm Screw (x4)
4.
A M4X10 mm Screw (x4)
16
4
3
17
4
3
9
Assembly Instructions
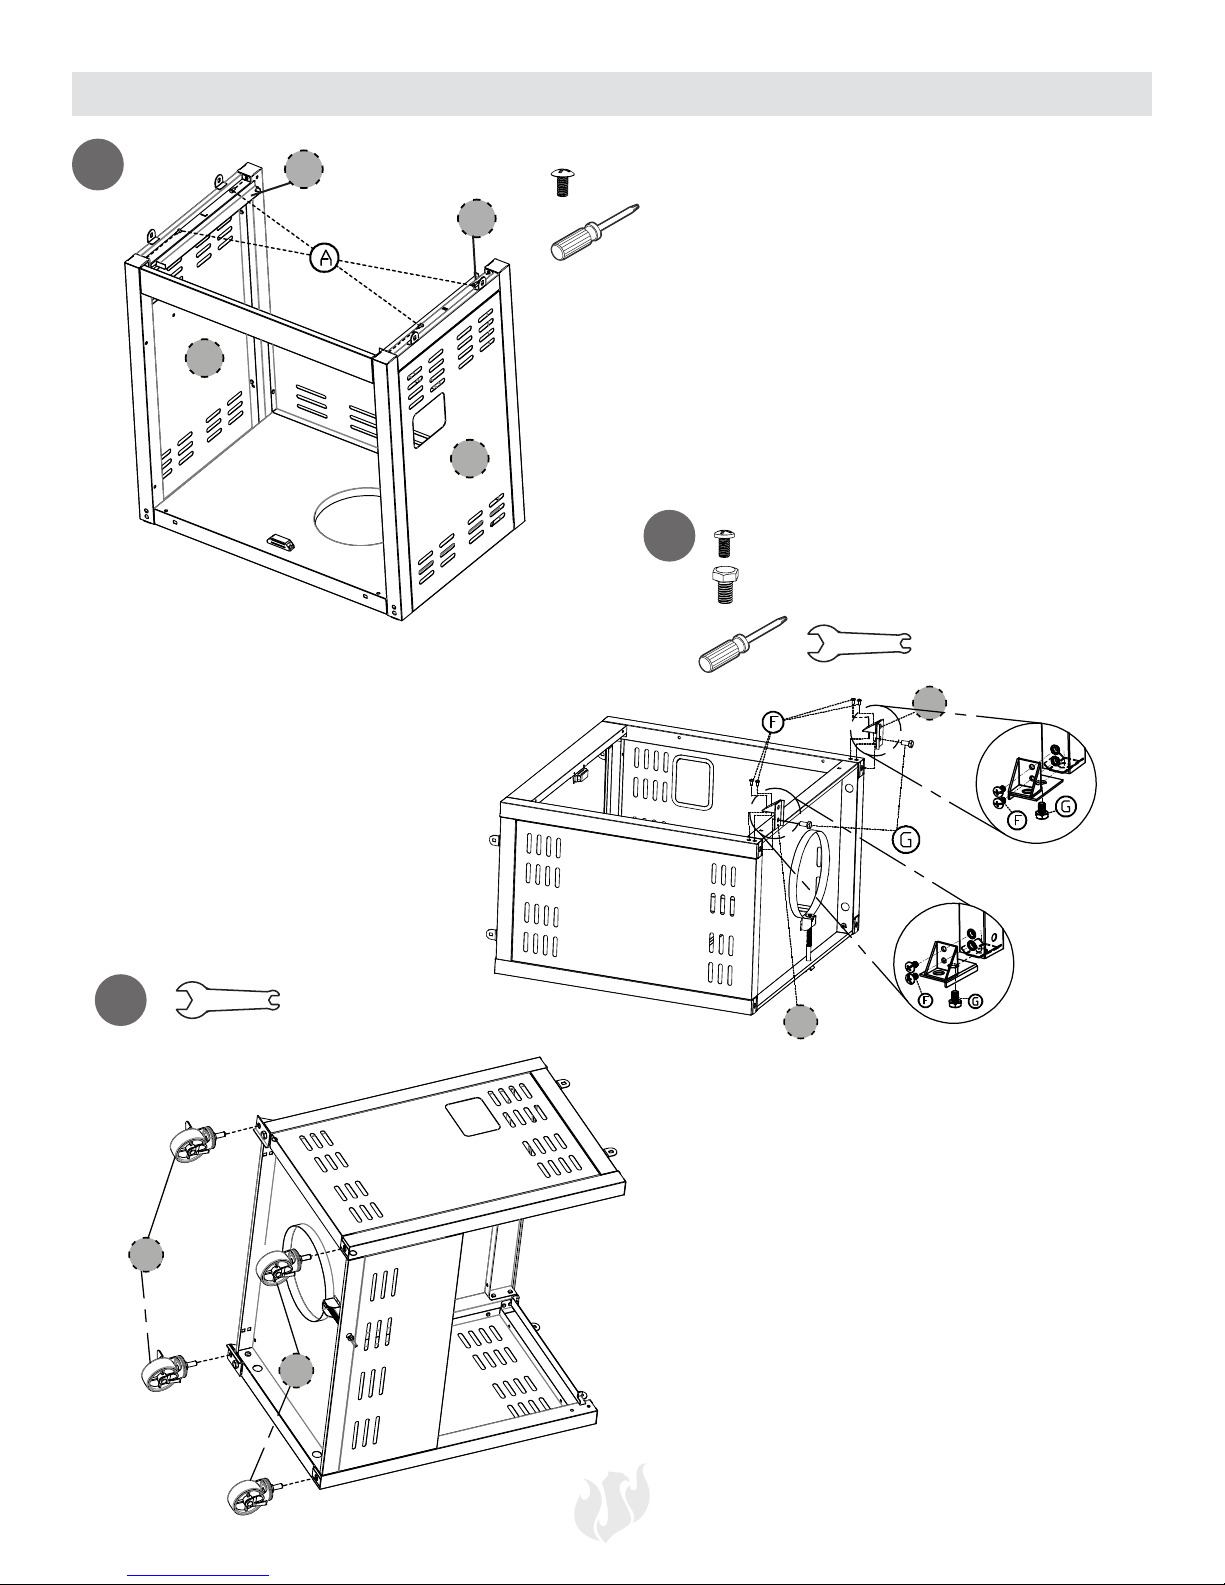
5.
11
A M4X10 mm Screw (x4)
10
3
4
6.
F M6X10 mm Screw (x4)
G M10X12 mm Screw (x2)
8
7.
5
6
7
10

Assembly Instructions
6
8.
A M4X10 mm Screw (x4)
2
1
9.
B M6X12 mm Screw (x4)
30
B
11

10.
23
24
Assembly Instructions
B M6X12 mm Screw (x16)
11.
C M6X18 mm Screw (x8)
25
26
12

Assembly Instructions
12.
14
13
12
14
B M6X12 mm Screw (x4)
13
12
13.
D M5X10 mm Screw (x1)
12
15
13

14
15
12
Assembly Instructions
21
15.
22
B M6X12 mm Screw (x2)
H (x2)
14

16.
Assembly Instructions
27
17
29
28
15
 Loading...