


EN USER MANUAL
LAMAX
S7 Dual

CONTENT
INTRODUCTION ................................................................................................................................................ 2
FEATURES AND FUNCTIONS .......................................................................................................................2
PACK CONTENTS ...............................................................................................................................................2
PRODUCT LAYOUT ...........................................................................................................................................3
PRODUCT INSTALLATION .............................................................................................................................3
QUICK FUNCTIONS .......................................................................................................................................... 3
ICON KEY ..............................................................................................................................................................4
OPERATING THE CAMERA .............................................................................................................................4
DASHCAM SETTINGS ...................................................................................................................................... 6
CAR CAMERA PARAMETERS ........................................................................................................................9
INTRODUCTION
Thank you for purchasing the LAMAX S7 Dual car camera. You are now the proud owner of
a reliable travel companion on your car journeys. Throughout most of the EU you can now
capture valuable footage to protect yourself and your property.
FEATURES AND FUNCTIONS
- Full HD video 1920×1080 – front camera
- HD video 1280×720 – rear camera
- G-Sensor
- Loop Recording
- Motion Sensor
- Parking Mode
- Parking Camera
PACK CONTENTS
- LAMAX S7 Dual dashcam
- Rear camera
- GPS module
HR SLO LT HU PL SK CZ DE EN
- Cable to connect front and rear camera
- USB power cable to cigarette lighter
- Rubber rearview mirror mounts
- Cable clips
- Manual
- MicroSD-USB adapter
2

PRODUCT LAYOUT
1. ON/OFF
2. Mode
3. Menu
4. Left arrow
5. Right arrow
6. OK
7. Power connector (mini USB)
8. Rear camera connector
9. Micro SDHC card slot
10. GPS module connector
PRODUCT INSTALLATION
1) Guide the power cable to the cigarette lighter around the windscreen so as to ensure it
does not obstruct the driver’s view and then x it securely in place with the cable clips.
Connect one end of the cable to the front camera and the other end to the car charger.
Attach the front camera to the rearview mirror using the rubber mounts. Adjust the cam
era so it is pointing straight ahead in the car.
2) Install the rear camera on the rear windscreen using the 3M adhesive pads.
3) Connect the front and rear cameras using the connecting cable. Guide the cable along
the chassis of the car so as to be unobtrusive and to avoid possible damage when oper
ating the vehicle. To use the par king camera feature, connect the red cable from the rear
camera’s connecting cable to the reversing lights.
4) When using the device for the rst time, the battery may be low. If you cannot switch
on the device due to low power, manually connect the external power cable to charge
the battery.
5) Use only a high-quality micro SDHC card of class 10 or higher. For optimal recording use,
we recommend cards with a capacity of at least 8 GB up to a maximum of 32 GB. If this
is the rst use of the card, we recommend formatting it in a PC and then in the camera.
1 2 3 4 5 6
7 8 9 10
QUICK FUNCTIONS
1) Screen on/o – tap ON/OFF button
2) Manual video lock/unlock – tap MODE button whilst recording to lock current video
3) Toggle display preview between front and rear camera – tap LEFT arrow
4) Turn audio recording on/o – long press LEFT arrow
5) Take a quick photo – whilst recording tap RIGHT arrow
6) Activate parking mode – long press RIGHT arrow
-
-
HR SLO LT HU PL SK CZ DE EN
3

ICON KEY
Video Mode G-Sensor
Photo Mode Parking Mode
Microphone o Battery is Charging
Memory Card Detected
No Memory Card Detected
Exposure
OPERATING THE CAMERA
1) Inserting a MicroSDHC Card
Insert or remove the microSDHC card from the card slot only when the camera is turned o
and not connected to a computer or power supply. We recommend using class 10 memory
cards with a maximum capacity of 32 GB.
2) Power Supply
a) Camera can be powered by both a USB cable or a car charger plugged directly into the
car cigarette lighter.
b) Camera is designed to be powered continuously.
c) Integrated battery is primarily to provide power for functions such as delayed shutdown
or parking mode.
3) Turning the Camera On/O
a) Turn the camera on by pressing ON/OFF button.
b) Camera automatically turns on when connected to a power supply.
c) Turn the camera o by pressing and holding the ON/OFF button for 3-5 seconds.
d) Camera automatically turns o when disconnected from the power supply. The delayed
shutdown function can be set to the desired length. When disconnecting the camera
from the power whilst recording, the camera saves the video currently being shot after
a specied amount of time and shuts down.
4) Switching Modes and Navigating the Menu
a) Tap the MODE button to toggle between video/camera/video gallery/photo gallery.
b) The camera menu is divided into two sections. Two dierent menus can be accessed
from video mode by pressing the MENU button. Video settings and camera settings.
c) In video gallery mode, pressing MENU navigates to two submenus: manage videos and
camera settings. Manage videos is described in 5) – 7).
d) In photo gallery mode, pressing MENU navigates to two submenus: manage photos
and camera settings.
HR SLO LT HU PL SK CZ DE EN
e) Press the MENU button to switch between menus. Once in the menu, use the LEFT and
RIGHT arrow keys to navigate. After choosing an item, press OK and use the arrow keys
and press OK again to select the desired setting.
4

5) Recording/Taking Photos/Viewing Gallery
a) To begin recording, press the OK button. Press again to stop recording. Camera must
be in video mode.
b) Auto-record – automatic recording is always on. Auto-recording begins when the
camera is turned on. If the car’s power supply is ignition dependant, the camera turns
on and begins recording after car ignition.
c) To take a photo, press the OK button. Camera must be in photo mode.
d) When you enter video gallery/photo gallery mode, a list of videos or photos is displayed.
Use the LEFT and RIGHT arrows to navigate between individual videos and photos. In
video gallery mode, videos are divided into folders. The VIDEO folder is used to store
regular videos, the LOCK folder is used to store locked videos and the EVENT folder is
used to store motion detection triggered recordings. Use the LEFT and RIGHT arrow keys
to navigate between folders and videos/photos. To go back to the folder from the video,
press the MENU button.
6) Deleting Entries Directly on the Camera
a) Deleting individual entries directly on the camera can be done in the gallery. After se-
lecting the desired item, press the MENU button (press twice in the video gallery), select
DELETE and select DELETE ONE.
b) Deleting all entries can be done in the gallery. Press the MENU button, select DELETE
and then select DELETE ALL.
7) File Protection
When the memory card is full, the camera automatically overwrites the oldest recordings
with the newest recordings. In order to protect videos from being overwritten, these les
can be locked.
a) When G-sensor is activated, recordings will be automatically locked against being over
written in the event of an impact.
b) Footage being recorded can be manually locked by pressing MODE.
c) Entries can also be locked in the gallery later:
- Locking a single entry – After selecting the desired item, press the MENU button (press
twice in the video gallery), select LOCK and select LOCK ONE.
- Locking all entries – Press the MENU button, select LOCK and select LOCK ALL.
- Unlocking a single entry – After selecting the desired item, press the MENU button
(press twice in the video gallery), select UNLOCK and select UNLOCK ONE.
- Unlocking all entries – Press the MENU button, select UNLOCK and select UNLOCK ALL.
8) Connecting to PC
A USB micro SDHC adapter is included. Insert the memory card into the adapter and con-
nect the adapter to the PC.
9) Switching between Front and Rear Cameras
When connected correctly, the front camera view is displayed as the main image and the
rear camera in a picture-in-picture window in the top right corner of the display. Switching
between views can be done with the LEFT arrow.
-
HR SLO LT HU PL SK CZ DE EN
5

10) Parking Camera
If you connect the red cable from the back of the rear camera to the reversing lights, the
parking camera is activated. When reversing, the image from the rear camera plus the re
versing lines are automatically displayed.
Recommendation: We recommend you get the red cable installed to the reversing light at
an authorized service centre.
11) Connecting the GPS Module
As soon as the module is connected to the camera and detects a signal, the GPS icon
turns green and the current coordinates appear on the display. On the product page at
www.lamax-electronics.com
addition to the recordings, the player will display the current speed and the route travelled
on Google Maps.
DASHCAM SETTINGS
In video mode, press the MENU button. The settings are subdivided into two sections:
video settings and camera settings.
, download LAMAX Player to play back camera recordings. In
1) Video Settings
a) Video Resolution – oers two options HD and full HD at 30 FPS. Press OK to get to the
settings, use the arrow keys to select the desired resolution and conrm with OK.
b) Video Time (loop length) – sets the length of each recording. Camera shoots 1-5 min
utes of video. When the memory card is full, the camera starts overwriting the oldest
recordings. Individual videos are continuously linked to each other and do not create
blind spots between loops. Press OK to get to the settings, use the arrow keys to select
the desired loop length and conrm with OK.
c) Delayed Shutdown – allows you to set the delay time between disconnecting the power
and the camera shutting down. This feature is suitable, for example, for cars with a start
stop system. Press the OK button to get to the setting and use the arrows to select the
desired delay time, or to turn o the function completely. Press the OK button again to
conrm.
d) Audio Recording – lets you mute the microphone being recorded on the video. For ex
ample, when you want to make a private call. This can also be done via a quick function.
Press the OK button to get to the settings and use the arrow keys to turn on or o the
microphone and conrm by pressing the OK button again.
e) Exposure – allows you to adjust the exposure as needed from 0-10. Press the OK button
to get to the setting, use the arrows to select the desired level and conrm with OK.
f) LDWS – is a lane tracking function. Calibrate this feature in the “Camera Settings” menu.
HR SLO LT HU PL SK CZ DE EN
Press the OK button to get to the setting, use the arrows to turn the feature on or o and
conrm with OK.
2) General Settings
a) Language – the LAMAX S7 Dual has a multilingual menu. To change the language, press
the OK button, use the arrow keys to select the desired language and conrm by press
ing OK again.
b) Date and Time Settings – sets the current date and date. When you have a GPS module
-
-
-
-
-
6

connected to the camera, the date and time are automatically synchronized. Press the
OK button to get to the settings and use the arrow keys to set each part (year, month,
day, hours, minutes and seconds). You must conrm each setting by pressing OK. Once
everything is set, press OK again to conrm the changes.
c) Key Sound – enables or disables key tones. Press the OK button to get to the settings,
use the arrows to select yes or no and press OK again to conrm.
d) Auto Shutdown – allows you to set the time after which the device automatically shuts
down when idle after 1 or 5 minutes. Press the OK button to get to the settings, use
the arrows to select the time period, or to turn o the function and press OK again to
conrm.
e) Volume – adjusts the volume of the camera output (video playback and voice instruc
tions). Press OK to get to the settings and use the arrow keys to select the level 0-10 and
conrm with the OK button.
f) Power Save Mode – sets the display to automatically turn o when idle after 1 or 3
minutes or the function may be turned o completely. Screen timeout also works when
the camera is recording. Press the OK button to get to the settings, use the arrow keys to
select the desired option and then press OK again to conrm.
g) Grid Frequency – allows you to select the frequency in accordance with the grid fre
quency (on the European continent the frequency is 50 Hz and the Americas and parts
of Asia it is 60 Hz).
h) G-Sensor – the G-sensor enables the camera to record impacts, for example, in a traf
c accident. Once the camera detects the impact, the current recording is immediately
locked so that it cannot be overwritten. The sensor can be set to several dierent sen
sitivities (high, low, medium) or switched o completely. Press the OK button to get to
the settings, use the arrow keys to select the desired option and then press OK again
to conrm.
i) Parking Mode – parking mode functions even when the camera is not being powered,
thanks to the integrated battery. The camera automatically turns on and starts recording
when the g-sensor detects an impact. If there is no further impact detected, after about
20-30 seconds the recording is saved, locked and the camera turns o again. When park
ing mode is active, the camera turns o the display to prevent it being noticed.
Parking Mode settings allow you to adjust the sensitivity of the G-Sensor: Low, Medium,
High or completely o. Select the settings as needed depending on the circumstances.
In order for Parking Mode to function it is necessary to fully charge the battery. If the
battery is not charged, the camera will not have the power necessary to begin recording.
j) Motion Detection – when motion detection is on, the camera automatically starts re
cording when it detects movement in the front camera eld of view. The camera records
for about 20 seconds, locks the recording and stops recording if not further movement
is detected. Press the OK button to get to the settings, use the arrow keys to select on or
o and press OK again to conrm. The motion detection function only works when the
camera is turned on. For prolonged use, the camera must be permanently connected to
the power supply.
k) GPS Status – as soon as the module connects to the camera and picks up a signal, the
GPS icon turns green and the current coordinates appear on the display. In the settings,
-
-
-
-
-
-
HR SLO LT HU PL SK CZ DE EN
7

you can choose whether or not to display the coordinates on screen. You can also see all
the current data of the connected satellites (position, signal strength, etc.).
l) Time Zone Select – under this setting you can change the time zone to match your cur
rent location.
m) Daylight Saving Time – when this function is turned on, the time automatically adjusts
when daylight savings time begins or ends.
n) Factory Settings – allows you to restore the camera’s or iginal factory settings. Press the
OK button to get to the settings, use the arrow keys to select yes or no and press OK
again to conrm.
o) Formatting the SD Card – we recommend formatting the card before using it for the
rst time, either in a PC or directly in the camera. Press the OK button to get to the
settings, use the arrows to select yes or no and press OK again to conrm. The card will
be formatted within a few seconds. Note that all data on the card is deleted when for
matting.
p) LDWS Calibration – the Lane Departure Warning System (LDWS) is a system that alerts
the driver as soon as their vehicle starts to drift out of its lane. This system is designed
to minimise trac accidents due to the driver’s inattention which may be caused by
distractions or drowsiness. For LDWS to work properly, you need to rst calibrate the
device. Press OK to get to the settings.
Step 1 – Press the LEFT or RIGHT key to set the point of intersection of the centre of the
vehicle with the horizon, then press OK to conrm and go to the next step.
Step 2 – Press the LEFT or RIGHT key to set the point of intersection of the left lane with
the bonnet, then press OK to conrm and go to the next step.
Step 3 – Repeat the same process for with the point of intersection of the right lane with
the bonnet, then press OK to conrm and quit LDWS calibration.
HR SLO LT HU PL SK CZ DE EN
-
-
q) FW Version – press the OK button to get information about the rmware version cur-
rently installed.
8

CAR CAMERA PARAMETERS
Front camera resolution: 1920×1080 30 FPS, 1280×720 30 FPS
Rear camera resolution: 1280×720 25 FPS
Display: 4.3“
Angle of view: 140°
Video format: MOV
Photo format: JPG
Memory type: microSDHC up to 32 GB
Connectivity: USB
Length of connecting cable: approx. 5 m
Grid frequency: 50/60 Hz
Specications are subject to change when replacing parts of the device or when updating
the software.
Manufacturer:
elem6 s.r.o., Braškovská 308/158, 161 00 Prague 6
http://www.lamax-electronics.com
Printing error and changes to the manual reserved.
HR SLO LT HU PL SK CZ DE EN
9

HR SLO LT HU PL SK CZ DE EN
10

DE BENUTZERHANDBUCH
LAMAX
S7 Dual

INHALTSVERZEICHNIS
EINFÜHRUNG ..................................................................................................................................................... 2
EIGENSCHAFTEN UND FUNKTIONEN .....................................................................................................2
VERPACKUNGSINHALT ................................................................................................................................... 2
PRODUKTSKIZZE .............................................................................................................................................. 3
INSTALLATION DES PRODUKTS.................................................................................................................. 3
KURZWAHLFUNKTIONEN .............................................................................................................................3
ERLÄUTERUNG DER SYMBOLE ...................................................................................................................4
BENUTZUNG DER AUTOKAMERA ..............................................................................................................4
EINSTELLEN DER AUTOKAMERA................................................................................................................6
PARAMETER DER AUTOKAMERA .............................................................................................................10
EINFÜHRUNG
Danke, dass Sie sich für die Autokamera LAMAX S7 Dual entschieden haben. Sie haben
somit einen zuverlässigen Begleiter auf der Straße erworben. In den meisten EU-Ländern
könnenn Sie so während der Fahrt sich selbst und ihren Besitz schützen.
EIGENSCHAFTEN UND FUNKTIONEN
- Full HD-Video 1920×1080 – Frontkamera
- HD-Video 1280×720 – Hintere Kamera
- G-Sensor
- Fahrradaufnahmen
- Bewegungssensor
- Parkmodus
- Parkkamera
VERPACKUNGSINHALT
- Autokamera LAMAX S7 Dual
- Hintere Kamera
- GPS-Modul
HR SLO LT HU PL SK CZ DE EN
- Verbindungskabel zwischen hinterer und vorderer Kamera
- USB-Ladekabel für den Zigarettenanzünder
- Gummihalterung für den Rückspiegel
- Kabelhalter
- Gebrauchsanweisung
- MicroSD-USB Adapter
2

PRODUKTSKIZZE
1. EIN/AUS
2. Mode
3. Menu
4. Pfeil nach links
5. Pfeil nach rechts
6. OK
7. Ladeanschluss (mini USB)
8. Anschluss für die hintere Kamera
9. Micro-SDHC Kartenslot
10. Anschluss für das GPS-Modul
INSTALLATION DES PRODUKTS
1) Führen Sie das Netzkabel des Geräts am Rande der Windschutzscheibe entlang, damit
es die Sicht nicht behindert und befestigen Sie es sicher mit den Kabelhaltern. Ein Ka
belende an die Frontkamera und das andere an das Auto-Ladegerät / den Zigarettenan-
zünder anschließen. Bringen Sie die vordere Kamera mit den Gummi-Halterungen an
den Innenspiegel an. Drehen Sie das Kameraobjektiv so, dass es geradeaus aus dem
Auto zeigt.
2) Kleben Sie die hintere Kamera mithilfe des 3M-Stickers von Innen an die Heckscheibe.
3) Verbinden Sie die vorderen und hinteren Kameras über das Verbindungskabel. Ver
legen Sie das Kabel entlang der Karkasse, damit es nicht stört. Dies vermeidet mögli-
che Schäden im Autobetrieb. Wenn Sie die Funktion der Parkkamera nutzen wollen,
schließen Sie das rote Kabel von dem Verbindungskabel für die Rückfahrkamera an die
Parkleuchte an.
4) Wenn Sie das Gerät zum ersten Mal benutzen, kann die Batterie in einem niedrigen
Ladestatus sein. Wenn das Gerät aufgrund geringer Batterie abgeschaltet werden
musste, schließen Sie es an das externe Netzkabel an, um den Akku aufzuladen.
5) Verwenden Sie Marken-SDHC-Karten der Klasse 10 oder höher. Wir empfehlen Karten
mit einer Kapazität von mindestens 8 GB, bis zu 32 GB, für eine optimale Ausnutzung
Aufnahmezeit. Wenn Sie die Speicherkarte zum ersten Mal verwenden, empehlt es
sich, sie zunächst im PC und dann in der Kamera zu formatieren.
1 2 3 4 5 6
7 8 9 10
KURZWAHLFUNKTIONEN
1) Ein-/Ausschalten des Bildschirms – kurzes Drücken der Taste EIN/AUS
2) Manuelles Sperren / Entsperren des Videos – kurzes Drücken der Taste MODE während
der Aufnahme sperrt das aktuell aufgenommene Video
3) Umschalten der Anzeige zwischen der vorderen und hinteren Kamera – kurzes
Drücken der Taste LINKS
4) Mikrofon Aufnahme ein-/ausschalten – langes Drücken der Taste LINKS
5) Schnappschuss – während der Videoaufnahme kurzes Drücken der Taste RECHTS
6) Aktivieren des Parkmodus – langes Drücken der Taste RECHTS
-
-
HR SLO LT HU PL SK CZ DE EN
3

ERLÄUTERUNG DER SYMBOLE
Videomodus G-Sensor
Fotomodus Parkmodus
Mikrofon aus Batterie wird geladen
Speicherkarte erkannt
Fehlende Speicherkarte
Exposition
BENUTZUNG DER AUTOKAMERA
1) Einsetzen der Mikro-SDHC-Karte
Sie können die Micro- SDHC-Karte einlegen und entfernen, wenn die Kamera ausge-
schaltet und nicht an den Computer angeschlossen ist. Wir empfehlen qualitative Karten
der Klasse 10 und mit einer maximalen Kapazität von 32 GB zu verwenden.
2) Stromversorgung
a) Sie können die K amera mithilfe des USB Kabels an den Computer anschließen oder auch
aber mithilfe des Adapters direkt im Auto über den Zigarettenanzünder auaden.
b) Die Kamera ist für eine permanente Stromversorgung vorgesehen.
c) Die integrierte Batterie dient nur einigen Funktionen, wie z.B. dem verzögerten Herunt
erfahren oder dem Parkmodus.
3) Ein- und Ausschlaten der Kamera
a) Die Kamera wird mit der Taste EIN/AUS eingeschaltet.
b) Die Kamera schaltet sich automatisch ein,w enn sie an die Stromversorgung angeschlos
sen wird.
c) Schalten Sie die Kamera aus indem die Taste EIN/AUS 3-5 Sekunden gedrückt halten.
d) Die Kamera schaltet sich automatisch aus, wenn sie von der Stromversorgung getrennt
wird. Die Kamera verfügt über eine Funktion zum verzögereten Ausschlaten, dess Dauer
eingestellt werden kann. Wenn Sie die Kamera während der Aufnahme von der Strom
versorgung entfernen, speichert sie nach einer gewissen Zeit die aktuellen Aufnahmen
und schaltet sich ab.
4) Zwischen den Modi umschalten und Menü
a) Durch kurzes Drücken der MODE-Taste können Sie zwischen den Modi Video/Fotoap-
parat/Videogalerie/Fotogalerie umschalten.
b) Das Kamera-Menü ist in zwei Bereiche unterteilt. Im Videoaufnahme-Modus werden
nach dem Drücken der MENÜ-Taste zwei verschiedene Menüs eingeblendet. Video-
Einstellungen und Kamera-Einstellungen.
HR SLO LT HU PL SK CZ DE EN
c) Im Videogalerie-Modus erscheinen nach dem Drücken der MENU-Taste zwei ver
schiedene Menüs. Verwalten von Videos und Kameraeinstellungen. Das Verwalten von
Videos ist in 5) – 7) erklärt.
d) Im Fotomodus-Modus erscheinen zwei verschiedene Menüs, wenn die MENU-Taste
gedrückt wird. Verwalten von Fotos und Kameraeinstellungen. Fotomanagement ist in
5) – 7 erklärt.
e) Drücken Sie die MENU-Taste, um zwischen den Menüs zu wechseln. Im entsprechenden
Menü benutzen Sie die Pfeiltasten LINKS und RECHTS. Drücken Sie nach dem Auswählen
-
-
-
-
4

eines Elements die Taste OK und verwenden Sie die Pfeile und drücken Sie erneut die
Taste OK, um die gewünschte Einstellung auszuwählen.
5) Aufnehmen/Fotograeren/Anschauen der Galerie
a) Die Aufnahme startet, wenn die OK-Taste gedrückt wird. Wiederholen, um die Aufnahme
zu beenden. Die Kamera muss sich dazu im Videoaufnahmemodus benden.
b) Automatische Aufnahme – Die automatische Aufnahme ist dauerhaft eingeschaltet. Die
automatische Aufnahme beginnt, wenn die Kamera eingeschaltet ist. Im Falle eines Au
tos, bei dem die Stromversorgung vom Starter abhängig ist, schaltet sich die Kamera ein
und startet die Aufnahme nach dem Start.
c) Drücken Sie die Taste OK, um Fotos aufzunehmen. Die Kamera muss sich im Fotomodus
benden.
d) Wenn Sie auf Video / Fotogalerie wechseln, wird eine Liste mit aufgenommenen Videos
oder Fotos angezeigt. Sie können mit den LINKS- und RECHTS-Pfeilen zwischen einzel
nen Aufnahmen und Fotos bewegen. Im Video-Galerie-Modus werden Videos in Ordner
unterteilt. Der VIDEO-Ordner wir verwendet, um aktuelle Videos zu speichern. Der Ord
ner „LOCK“ wird verwendet, um gesperrte Videos zu speichern. Der EVENT-Ordner wird
verwendet, um Bewegungserkennungsaufzeichnungen zu speichern. Mit den Tasten
LINKS und RECHTS können Sie zwischen Ordnern und Videos / Fotos wechseln. Um vom
Video zurück zum Ordner zu wechseln, drücken Sie die MENU-Taste.
6) Löschen des aufgenommenen Materials direkt in der Kamera
a) Löschen einzelner Materialien direkt in der Kamera – kann in der Galerie durchgeführt
werden. Drücken Sie nach Auswahl des gewünschten Eintrags die MENU-Taste (zweimal
in der Videogalerie), wählen Sie LÖSCHEN und wählen Sie EINS LÖSCHEN.
b) Alle Datensätze löschen – kann in der Galerie durchgeführt werden. Drücken Sie die
MENU-Taste, wählen Sie LÖSCHEN und wählen Sie ALLE LÖSCHEN.
7) Schutz des aufegnommenen Materials in der Kamera
Wenn die Speicherkarte voll ist, wird die Kamera automatisch die ältesten Videos mit den
neuen überspielen. Wenn Sie einige Videos vor dem Überschreiben schützen möchten,
müssen Sie diese Videos sperren.
a) Der aktivier te G-Sensor sperrt automatisch die aktuell aufgenommene Aufzeichnung im
Falle eines Aufpralls. Und schützt sie so vor dem Überschreiben.
b) Sie können die aktuell aufgenommene Aufnahme auch manuell durch Drücken der
Taste “Mode” sperren.
c) Aufzeichnungen können auch später in der Galerie gesperrt werden:
- Sperren eines einzelnen Datensatzes – Nach Auswahl des gewünschten Objekts drück
en Sie die MENU-Taste (zweimal im Ansichtsfenster), wählen Sie SPERREN und wählen
Sie EINS SPERREN.
- Alle Datensätze sperren – Drücken Sie die MENU-Taste, wählen Sie SPERREN und
wählen Sie ALLE SPERREN.
- Entriegeln eines einzelnen Eintrags – Nach Auswahl des gewünschten Eintrags drücken
Sie die MENU-Taste (zweimal im Ansichtsfenster), wählen Sie ENTSPERREN und wählen
Sie EINS ENTSPERREN.
-
-
-
-
HR SLO LT HU PL SK CZ DE EN
5

- Alle Records freischalten – Drücken Sie die MENU-Taste, wählen Sie ENTSPERREN und
wählen Sie ALLE ENTSPERREN.
8) Anschluss an den PC
USB Adapter mit micro SDHC Anschluß gibt es in der Verpackung. Setzen Sie die Spei-
cherkarte in den Adapter ein und verbinden Sie den Anschlussadapter mit PC.
9) Umschalten zwischen vorderer und hinterer Kamera auf dem Display
Wenn die vorderen und hinteren Kameras richtig angeschlossen sind, wird das vordere
Kamerabild als Hauptanzeige angezeigt. Das Bild von der hinteren Kamera erscheint in der
rechten oberen Ecke als Bild im Bild. Das Umschalten zwischen den vorderen und hinteren
Kameras ist mit Drücken der Taste LINKS möglich.
10) Parkkamera
Wenn Sie das rote Kabel von dem Verbindungskabel für die Rückfahrkamera an die Par-
kleuchte anschließen, wird die sog. Parkkamera aktiviert. Bei Rückwärtsgang erscheint
automatisch die Anzeige der hinteren Kamera auf dem Display und die Umkehrlinien er
scheinen.
Empfehlung: Wir empfehlen den Anschluss des roten Kabels an die Parkleuchte in einer
autorisierten Servicewerkstatt durchführen zu lassen.
11) Anschließen des GPS-Moduls
Sobald das Modul mit der Kamera verbunden ist und das Signal aufnimmt, wird das GPS
Symbol grün und die aktuellen Koordinaten erscheinen auf dem Display. Auf der Produkt
seite unter
www.lamax-electronics.com
aaufnahmen wiederzugeben. Neben der Aufnahme zeigt der Spieler sowohl die aktuelle
Geschwindigkeit als auch die zurückgelegte Strecke aus Google Maps an.
EINSTELLEN DER AUTOKAMERA
Drücken Sie im Videomodus die Taste MENU. Die Einstellungen umfassen zwei Abschnitte,
Videoeinstellungen und Kameraeinstellungen.
laden Sie den LAMAX Player herunter, um Kamer-
1) Videoeinstellungen
a) Videoauösung – bietet zwei Optionen, HD und Full HD bei 30 FPS. Drücken Sie die OK
Taste, um zur Einstellung zu gelangen, wählen Sie mit den Pfeiltasten die gewünschte
Auösung aus und bestätigen mit OK.
b) Videozeit (Schleifenlänge) – die Länge jedes Datensatzes. Die Kamera nimmt 1-5 Mi
nuten auf. Wenn die Speicherkarte voll ist, beginnt die Kamera, die ältesten Aufnahmen
zu spielen. Einzelne Videos werden kontinuierlich miteinander verknüpft und sogen
annte blinde Flecken zwischen den Aufnahmen werden vermieden. Drücken Sie die
HR SLO LT HU PL SK CZ DE EN
OK-Taste, um zu den Einstellungen zu gelangen und verwenden Sie die Pfeile, um die
gewünschte Schleifenlänge auszuwählen und bestätigen Sie mit OK.
c) Verzögertes Ausschalten – ermöglicht die sofortige Abschaltung nach dem Trennen
der Kamera von der Stromversorgung. Diese Funktion eignet sich beispielsweise für
Fahrzeuge mit Start / Stopp-Gerät. Drücken Sie die OK-Taste, um zur Einstellung zu
gelangen, und verwenden Sie die Pfeile, um die gewünschte Verzögerungszeit auszu
wählen, oder um die Funktion vollständig auszuschalten. Drücken Sie zur Bestätigung
erneut die OK-Taste.
-
-
-
-
-
6

d) Audioaufnahme – ermöglicht das Ein- oder Ausschalten dem Mikrofon während der
Aufnahme eines Videos. Zum Beispiel, wenn Sie Ihre Anrufe privat halten möchten.
Diese Funktion hat auch eine Schnellwahloption. Drücken Sie OK, um zu den Einstel
lungen zu gelangen, und verwenden Sie die Pfeiltasten, um den Mikrofon ein- oder
auszuschalten und bestätigen Sie mit der OK-Taste.
e) Belichtung – passt die Belichtung im Bereich von 0-10 an. Drücken Sie die OK-Taste, um
zur Einstellung zu gelangen, wählen Sie mit den Pfeilen den gewünschten Pegel aus und
bestätigen Sie mit OK.
f) LDWS – ist eine Spurverfolgungsfunktion. Sie müssen diese Funktion zuerst im Menü
“Kameraeinstellungen” kalibrieren. Drücken Sie die OK-Taste, um zu den Einstellungen
zu gelangen, mit den Pfeiltasten können Sie die Funktion ein- oder auszuschalten und
mit OK bestätigen.
2) Allgemeine Einstellungen
a) Sprache – die Autokamera verfügt über ein mehrsprachiges Menü. Sprache wird durch
Drücken der OK-Taste ausgewählt. Mithilfe der Pfeile wählen Sie die Sprache aus und
drücken dann erneut OK, um zu bestätigen.
b) Datum und Uhrzeit-Einstellungen – hier können Sie das aktuelle Datum und die
Uhrzeit einzustellen. Wenn Sie ein GPS-Modul an Ihre Kamera angeschlossen haben,
werden die Uhrzeit und das Datum automatisch synchronisiert. Drücken Sie OK, um zu
der Einstellung zu gelangen und stellen Sie mit den Pfeilen die einzelnen Teile ein ( Jahr,
Monat, Tag, Stunde, Minute und Sekunde). Jeder einzelne Einstellung müssen Sie mit OK
bestätigen. Wenn alles eingestellt ist, bestätigen Sie mit OK die Änderungen.
c) Lautstärke – regelt die Lautstärke der Autokamera (Videowiedergabe, Sprachführung).
Drücken Sie die OK-Taste, um zur Einstellung zu gelangen und mit den Pfeiltasten die
0-10-Stufe zu wählen und mit OK zu bestätigen.
d) Automatische Abschaltung – ermöglicht die automatische Abschaltung der Kamera
wenn diese für 1 bis 5 Minuten nicht verwendet wird. Drücken Sie auf OK, um zu Einstel
lungen zu gekangen und verwenden Sie die Pfeile, um das Intervall auszuwählen oder
die Funktion auszuschalten und bstätigen Sie erneut mit OK.
e) Tastentöne – ermöglicht das Ein-/Ausschalten der Tastentöne. Drücken Sie auf OK, um
zu den Einstellungen zu gelangen und verwenden Sie die Pfeile, um zu Ja / Nein zu gel
angen und drücken Sie erneut OK zum Bestätigen.
f) Energiesparmodus – schaltet das Display, wenn es für 1 oder 3 Minuten nicht verwendet
wird, automatisch ab, es ist aber auch möglich, diese Funktion auszuschalten. Automa
tische Abschaltung des LCD funktioniert auch, wenn die Kamera aufzeichnet. Drücken
Sie auf OK, zu den Einstellungen zu gelangen, verwenden Sie die Pfeiltasten um zur
gewünschten Option zu gelangen und drücken Sie OK zum bestätigen.
g) Frequenz Networks – ermöglicht es Ihnen, die Frequenz in Übereinstimmung mit der
Frequenz des Landes einzustellen (auf dem europäischen Kontinent zu wählen ist Strom
in einer Frequenz von 50 Hz gehalten, in Nord- und Südamerika und in Teilen Asiens,
sind es 60 Hz).
h) G-Sensor – mit G-Sensor kann die Kamera zum Beispiel bei einem Verkehrsunfall so
fort aufnehmen. Sobald die Kamera aufzeichnet werden diese Daten gesperrt. Dieser
Datensatz kann dann nicht überschrieben werden. G-Sensor kann in mehrere unter
-
-
-
-
HR SLO LT HU PL SK CZ DE EN
-
-
7

schiedlichen Empndlichkeiten (hoch, mittel, niedrig) eingestellt werden oder ganz
ausgeschaltet. Drücken Sie auf OK, um zu den Einstellungen zu gekangen, verwenden
Sie die Pfeiltasten um zur gewünschten Option zu gelangen und bestätigen Sie mit OK.
i) Parkmodus – der Parkmodus funktioniert auch, wenn die Kamera nicht an den Strom
angeschlossen ist und die Energie aus der integrierten Batterie bezogen wird. Bei jedem
Aufprall, den der G-Sensor registriert, wird die Kamera automatisch eingeschaltet und
beginnt mit der Aufnahme. Nach etwa 20 bis 30 Sekunden ohne Aufprall schaltet sich
die Kamera wieder aus. Bei aktiviertem Parkmodus bleibt das LCD-Display ausgeschaltet,
um keine Aufmerksamkeit zu erregen. Unter den Einstellungen des Parkmodus kann
auch die Einstellung der Empndlichkeit des G-Sensors - niedrig, mittel, hoch oder aus -
vorgenommen werden. Wählen Sie die Einstellung je nach Bedarf und Umständen.
Eine Voraussetzung für den funktionsfähigen Parkmodus ist natürlich die volle Aua
dung der Batterie zu 100 %. Wenn die Batterie nicht aufgeladen ist, kann sie keine Ener-
gie für den Start und die Aufnahme der Aufzeichnung beziehen.
j) Bewegungserkennung – bei eingeschalteter Bewegungserkennung beginnt die kam
era automatisch mit der Aufnahme, wenn eine Bewegung in dem Gesichtsfeld der Linse
der Frontkamera erkannt wird. Die Kamera macht eine etwa 20-Sekunden-Aufnahme,
speichert sie, und macht im Falle weiterer erkannter Bewegung eine neue Aufnahme.
Drücken Sie auf OK, um zu den Einstellungen zu gelangen, verwenden Sie die Pfeiltasten
zur Auswahl von Ein / Aus, und drücken Sie erneut auf OK, um zu bestätigen.
Der Bewegungserkennungsmodus funktioniert nur, wenn die Kamera eingeschaltet ist.
Bei langfristiger Verwendung muss die Kamera an die Stromversorgung dauerhaft an
geschlossen sein.
k) GPS Status – sobald das Modul an der Kamera angeschlossen ist und ein Signal auängt,
wird die GPS-Ikone grün und am Display werden die aktuellen Koordinaten angezeigt.
Unter diesen Einstellungen können Sie die Koordinatenanzeige an der Kamera auss
chalten oder eingeschaltet lassen. Beziehungsweise können Sie sich die aktuellen Daten
der angeschlossenen Satelliten (Position, Signalstärke usw.) ansehen.
l) Zeitzone – unter diesen Einstellungen können Sie die Zeitzone ändern, sodass sie Ihrer
aktuellen geographischen Position entspricht.
m) Sommerzeit - beim Einschalten dieser Funktion wird die Uhrzeit beim Wechsel zur
Sommerzeit und umgekehrt automatisch geändert.
n) Werkseinstellungen – hier können Sie die Kameraeinstellungen auf die Werkseinstel
lungen zurücksetzen. Gehen Sie zu den Einstellungen, verwenden Sie die Pfeiltasten zur
Auswahl von Ja / Nein und drücken Sie OK zum Bestätigen.
o) SD-Karte formatieren – wir empfehlen, die Karte vor dem ersten Gebrauch entweder
auf dem PC oder direkt in der Kamera zu formatieren. Drücken Sie auf OK, um zu den
HR SLO LT HU PL SK CZ DE EN
Einstellungen zu gelangen und verwenden Sie die Pfeile, um zu Ja / Nein zu gelangen
und drücken Sie erneut OK um zu bestätigen. Die Karte wird in wenigen Sekunden for
matiert. Achtung, alle Daten auf der Karte werden durch diesen Vorgang gelöscht.
p) Kalibrierung LDWS – zum Einstellen der Funktion um Fahrspuren zu überwachen. Die
Systemwarnung beim Verlassen der Spur (LDWS) ist ein Mechanismus, der den Fahrer
warnt, wenn das Fahrzeug seine Spur verlässt. Das System ist so entwickelt um die
Verkehrsunfälle zu minimalisieren, die durch Ablenkung oder Schläfrigkeit des Fahrers
-
-
-
-
-
-
8

verusacht werden können. Für das richtige Funktionieren des Systems LDWS ist es nötig,
eine Kalibrierung des Gerätes durchzuführen. Drücken Sie OK, um zu den Einstellungen
zu gelangen.
Schritt 1.: M it der Hilfe der Tasten LINKS / RECHTS stellen Sie den vertikalen Schnittpunkt
in die Mitte Ihrer Spur, und bestätigen Sie es mit der Taste OK. Die selbe Ein
stellung machen Sie dann auch horizontal und bestätigen es wieder mit der
Taste OK.
Schritt 2.: Jetzt wiederholen Sie alles ganz genau mit dem linken Schnittpunkt - für die
linke Gränze Ihrer Spur vertikal, dann horizontal und wieder mit der Taste OK
bestätigen.
Schritt 3.: Die gleiche Einstellung benutzen Sie auch für den rechten Schnittpunkt Ihrer
Spur und bestätigen Sie es wieder mit der Taste OK. Am Ende wird die Ka
librierung gespeichert. Schauen Sie sich das Probebild an.
q) FW – Drücken Sie OK, um Informationen über die aktuell installierte Firmware-Version
zu erhalten.
-
-
HR SLO LT HU PL SK CZ DE EN
9

PARAMETER DER AUTOKAMERA
Auösung vordere Kamera: 1920×1080 30 FPS, 1280×720 30 FPS
Auösung hintere Kamera: 1280×720 25 FPS
Display: 4.3“
Aufnahmewinkel: 140°
Videoformat: MOV
Fotoformat: JPG
Typ Speicherkarte: Micro SDHC bis zu 32 GB
Anschluss: USB
Länge des Anschlusskabels: cca 5 m
Stromfrequenz: 50/60 Hz
Die Spezikationen können sich bei Änderung einiger Teile oder bei Software-Updates
ändern.
Vertrieb:
elem6 s.r.o., Braškovská 308/158, 161 00 Praha 6
http://www.lamax-electronics.com
Druckfehler und Änderungen im Handbuch vorbehalten.
HR SLO LT HU PL SK CZ DE EN
10

CZ UŽIVATELSKÁ PŘÍRUČKA
LAMAX
S7 Dual

OBSAH
ÚVOD ..................................................................................................................................................................... 2
VLASTNOSTI A FUNKCE .................................................................................................................................2
OBSAH BALENÍ ..................................................................................................................................................2
NÁKRES PRODUKTU ........................................................................................................................................3
INSTALACE PRODUKTU .................................................................................................................................3
FUNKCE OVLÁDANÉ RYCHLOU VOLBOU ............................................................................................... 3
VYSVĚTLIVKY K IKONÁM ...............................................................................................................................4
POUŽÍVÁNÍ AUTOKAMERY ...........................................................................................................................4
NASTAVENÍ AUTOKAMERY ...........................................................................................................................6
PARAMETRY AUTOKAMERY .......................................................................................................................10
ÚVOD
Děkujeme Vám, že jste si zakoupili autokameru LAMAX S7 Dual. Získali jste tak spole-
hlivého společníka na cesty Vaším automobilem. Ve většině zemí EU můžete pořizovat
záběry z jízdy a chránit tak svůj majetek a zdraví.
VLASTNOSTI A FUNKCE
- Full HD video 1920×1080 – přední kamera
- HD video 1280×720 – zadní kamera
- G-senzor
- Cyklické nahrávání
- Pohybový senzor
- Parkovací mód
- Parkovací kamera
OBSAH BALENÍ
- Autokamera LAMAX S7 Dual
- Zadní kamera
- GPS modul
HR SLO LT HU PL SK CZ DE EN
- Propojovací kabel mezi přední a zadní kamerou
- Napájecí USB kabel do zapalovače
- Gumové úchyty ke zpětnému zrcátku
- Držáky na kabely
- Manuál
- MicroSD-USB adaptér
2

NÁKRES PRODUKTU
1. ZAP/VYP
2. Mode
3. Menu
4. Šipka vlevo
5. Šipka vpravo
6. OK
7. Napájecí konektor (mini USB)
8. Konektor pro připojení zadní kamery
9. Slot na micro SDHC kartu
10. Konektor pro připojení GPS modulu
INSTALACE PRODUKTU
1) Kabel napájení do autozapalovače veďte okolo předního skla tak, aby nepřekážel řidiči
ve výhledu a bezpečně ho upevněte pomocí držáků na kabely. Jeden konec kabelu
připojte do přední autokamery a druhý do autozapalovače. Přední kameru připevněte
pomocí gumových úchytů na vnitřní zpětné zrcátko. Objektiv kamery natočte tak, aby
mířil přímo před automobil.
2) Zadní kameru přilepte pomocí 3M samolepky na zadní sklo.
3) Pomocí propojovacího kabelu propojte přední a zadní kameru. Kabel veďte podél kostry
automobilu tak, aby nikde nepřekážel. Vyhnete se tak případnému poškození během
provozu automobilu. Chcete-li používat funkci parkovací kamery, připojte červený kabel
z propojovacího kabelu pro zadní kameru do parkovacího světla.
4) Pokud používáte zařízení poprvé, baterie může být málo nabitá. Jestliže nelze zařízení
spustit z důvodů nízké energie, připojte ručně kabel externího napájení a nabijte tak
baterii.
5) Používejte značkové micro SDHC karty třídy 10 a vyšší. Pro optimální využití délky zázna
mu doporučujeme karty o kapacitě alespoň 8 GB, maximálně však 32 GB. V případě
prvního použití paměťové karty ji doporučujeme naformátovat v PC a následně
v kameře.
1 2 3 4 5 6
7 8 9 10
FUNKCE OVLÁDANÉ RYCHLOU VOLBOU
1) Vypnutí / zapnutí obrazovky – stisknutím tlačítka ZAP/VYP
2) Manuální zamknutí / odemknutí videa – stisknutím tlačítka MODE během nahrávání
zamknete aktuálně nahrávané video
3) Přepínání náhledu na displeji mezi přední a zadní kamerou – stisknutím šipky VLEVO
4) Vypnutí / zapnutí nahrávání mikrofonu – přidržením šipky VLEVO
5) Rychlé pořízení fotograe – v průběhu natáčení stisknutím šipky VPRAVO
6) Aktivování parkovacího režimu – přidržením šipky VPRAVO
-
HR SLO LT HU PL SK CZ DE EN
3

VYSVĚTLIVKY K IKONÁM
Režim video G-senzor
Režim fotoaparát Parkovací režim
Mikrofon vypnut Baterie se nabíjí
Paměťová karta detekována
Bez paměťové karty
Expozice
POUŽÍVÁNÍ AUTOKAMERY
1) Vložení micro SDHC karty
Micro SDHC kartu můžete vložit a vyjmout ze slotu pro micro SDHC kartu, když je kame-
ra vypnutá a není připojená k počítači nebo napájení. Doporučujeme používat značkové
paměťové karty class 10 o maximální kapacitě 32 GB.
2) Napájení
a) Kameru můžete připojit ke zdroji jak pomocí USB kabelu do počítače, tak pomocí
nabíječky do autozapalovače přímo ve voze.
b) Kamera je určena k trvalému napájení.
c) Integrovaná baterie slouží pouze k zajištění některých funkcí, jako je zpožděné vypnutí
nebo parkovací mód.
3) Zapnutí a vypnutí kamery
a) Kameru zapnete stisknutím tlačítka ZAP/VYP.
b) Kamera se automaticky zapne po připojení do napájení.
c) Kameru vypnete přidržením tlačítka ZAP/VYP po dobu 3–5 vteřin.
d) Kamera se automaticky vypne po odpojení z napájení. Kamera obsahuje funkci
zpožděného vypnutí, jehož délku lze nastavit. Pokud vyjmete kameru z napájení během
natáčení, kamera po stanovené době uloží aktuálně nahrávané video a vypne se.
4) Přepínání režimů a pohyb v menu
a) Postupným krátkým stisknutím tlačítka MODE můžete přepínat mezi režimy vide-
ozáznam/fotoaparát/videogalerie/fotogalerie.
b) Menu kamery je rozděleno na dvě části. Z režimu videozáznamu se po stisknutí tlačítka
MENU objeví dvě různá menu. Nastavení videa a nastavení kamery.
c) Z režimu videogalerie se po stisknutí tlačítka MENU objeví dvě různá menu. Správa videí
a nastavení kamery. Správa videí je popsána v bodě 5) – 7).
d) Z režimu fotogalerie se po stisknutí tlačítka MENU objeví dvě různá menu. Správa foto
graí a nastavení kamery. Správa fotograí je popsána v bodě 5) – 7).
HR SLO LT HU PL SK CZ DE EN
e) Přepínání mezi jednotlivými druhy menu provedete stisknutím tlačítka MENU.
V příslušném menu se pohybujete pomocí šipek VLEVO a VPRAVO. Po vybrání položky
stiskněte tlačítko OK a pomocí šipek a opětovném stisknutí tlačítka OK vyberete
požadované nastavení.
-
4

5) Nahrávání/focení/prohlížení galerie
a) Nahrávání záznamu na kameru započne po stisknutí tlačítka OK. Jeho opětovným stisk-
nutím nahrávání ukončíte. Kamera se musí nacházet v režimu videozáznam.
b) Automatické nahrávání – funkce automatického nahrávání je trvale zapnuta. Auto
matické nahrávání se spustí po zapojení kamery do napájení. V případě automobilu
s napájením závislým na startéru, se kamera zapne a spustí nahrávání po nastartování.
c) Fotograe se pořizují stisknutím tlačítka OK. Kamera se musí nacházet v režimu foto
grae.
d) Po přepnutí do režimů videogalerie/fotogalerie se zobrazí seznam nahraných videí,
respektive pořízených fotograí. Pro pohyb mezi jednotlivými nahrávkami a snímky
slouží šipky VLEVO a VPRAVO. V režimu videogalerie jsou videa rozdělená do složek.
Složka VIDEO slouží k uchovávání běžných videí. Složka „ZÁMEK“ slouží k ukládání
uzamknutých videí. Složka EVENT slouží k uchovávání záznamů z detekce pohybu. Pro
pohyb mezi jednotlivými složkami a videi/fotograemi slouží tlačítka VLEVO a VPRAVO.
Přepnutí z videa zpět na složku provedete stisknutím tlačítka MENU.
6) Mazání pořízeného materiálu přímo v kameře
a) Smazání jednotlivého materiálu přímo v kameře – lze provést v galerii. Po vybrání
požadované položky stiskněte tlačítko MENU (ve videogalerii ji stiskněte 2×), vyberte
položku SMAZAT a vyberte možnost SMAZAT JEDEN.
b) Smazání všech záznamů – lze provést v galerii. Stiskněte tlačítko MENU, vyberte položku
SMAZAT a vyberte možnost SMAZAT VŠE.
7) Ochrana pořízeného materiálu v kameře
Kamera v případě zaplnění paměťové karty začne automaticky přehrávat nejstarší pořízená
videa novými. Chcete-li některá videa ochránit před jejich případným přemazáním, je nut
né tato videa uzamknout.
a) Aktivovaný G-senzor zaručí to, že v případě nárazu automaticky uzamkne aktuálně nah
rávaný záznam. A uchrání ho tak proti přepsání.
b) Aktuálně nahrávaný záznam lze také ručně zamknout stisknutím tlačítka „Mode“.
c) Záznamy lze také zamknout dodatečně v galerii kamery:
- Uzamčení jednotlivého záznamu – Po vybrání požadované položky stiskněte tlačítko
MENU (ve videogalerii ji stiskněte 2×), vyberte položku UZAMKNOUT a vyberte
možnost UZAMKNOUT JEDEN.
- Uzamčení všech záznamů – Stiskněte tlačítko MENU, vyberte položku UZAMKNOUT
a vyberte možnost UZAMKNOUT VŠE.
- Odemčení jednotlivého záznamu – Po vybrání požadované položky stiskněte tlačítko
MENU (ve videogalerii ji stiskněte 2×), vyberte položku ODEMKNOUT a vyberte
možnost ODEMKNOUT JEDEN.
- Odemčení všech záznamů – Stiskněte tlačítko MENU, vyberte položku ODEMKNOUT
a vyberte možnost ODEMKNOUT VŠE.
8) Připojení k PC
USB adaptér na micro SDHC je součástí balení. Paměťovou kartu vložte do adaptéru
a adaptér připojte k PC.
-
-
-
-
HR SLO LT HU PL SK CZ DE EN
5

9) Přepínání přední a zadní kamery na displeji
Při správném zapojení přední a zadní kamery se na displeji jako hlavní zobrazí obraz
z přední kamery. Obraz ze zadní kamery se objeví v pravém horním rohu jako obraz
v obraze. Přepínání mezi přední a zadní kamerou je možné pomocí šipky VLEVO.
10) Parkovací kamera
Připojíte-li červený kabel z propojovacího kabelu zadní kamery do parkovacího světla,
aktivujete tzv. parkovací kameru. V případě zařazení zpátečky se na displeji automaticky
zobrazí obraz ze zadní kamery a objeví se couvací linky.
: Instalaci červeného kabelu do parkovacího světla doporučujeme provést v autorizo
vaném servise.
11) Připojení GPS modulu
Jakmile se modul připojí ke kameře a zachytí signál, ikona GPS zezelená a na displeji se ob-
jeví aktuální souřadnice. Na stránce produktu na
LAMAX Player pro přehrání záznamů z kamery. Přehrávač zobrazí kromě záznamu i aktuální
rychlost a projížděnou trasu na Google mapách.
NASTAVENÍ AUTOKAMERY
V režimu video stiskněte tlačítko MENU. Nastavení obsahuje dvě části – nastavení videa
a nastavení kamery.
www.lamax-electronics.com
1) Nastavení videa
a) Rozlišení videa – nabízí dvě možnosti, a to HD a full HD při 30 FPS. Stisknutím tlačítka
OK se dostanete do nastavení a pomocí šipek zvolíte požadované rozlišení a potvrdíte
stisknutím tlačítka OK.
b) Čas videa (délka smyčky) – zde se nastavuje délka jednotlivých záznamů. Kamera natáčí
do smyčky videa o délce 1–5 minut. V případě, že se zaplní paměťová karta, kamera
začne přehrávat nejstarší záznamy. Jednotlivá videa na sebe plynule navazují a nevytváří
tzv. slepá místa mezi jednotlivými smyčkami. Stisknutím tlačítka OK se dostanete do
nastavení a pomocí šipek zvolíte požadovanou délku smyčky a opět potvrdíte tlačítkem
OK.
c) Zpožděné vypnutí – umožňuje odložit okamžité vypnutí po vypojení kamery
z napájení. Tato funkce je vhodná například u automobilů se zařízením start/stop. Stisk
nutím tlačítka OK se dostanete do nastavení a pomocí šipek zvolíte požadovanou délku
zpoždění, případně tuto funkci úplně vypnete. Opětovným stisknutím tlačítka OK volbu
potvrdíte.
d) Nahrávání zvuku – umožňuje vypnout či zapnout mikrofon při nahrávání videa. Vhodné
HR SLO LT HU PL SK CZ DE EN
například pokud chcete zachovat soukromí Vašich hovorů. Tato funkce má i možnost
rychlé volby. Stisknutím tlačítka OK se dostanete do nastavení a pomocí šipek mikrofon
zapnete či vypnete a potvrdíte opětovným stisknutím tlačítka OK.
e) Expozice – umožňuje upravit expozici dle potřeby v rozmezí 0–10. Stisknutím tlačítka
OK se dostanete do nastavení a pomocí šipek zvolíte požadovanou úroveň a potvrdíte
tlačítkem OK.
-
si stáhněte
-
6

f) LDWS – je funkce hlídání jízdy v pruzích. Tuto funkci je nejprve nutné nakalibrovat
v menu „Nastavení kamery“. Stisknutím tlačítka OK se dostanete do nastavení a pomocí
šipek funkci zapnete či vypnete a potvrdíte tlačítkem OK.
2) Obecné nastavení
a) Jazyk – autokamera má multijazyčné menu. Jazyk změníte stisknutím tlačítka OK, po-
mocí šipek vyberete požadovaný jazyk a potvrdíte opětovným stisknutím tlačítka OK.
b) Nastavení data a času – umožňuje nastavení aktuální datumu a času. V případě že máte
ke kameře připojen GPS modul, datum a čas se automaticky synchronizuje. Stisknutím
tlačítka OK se dostanete do nastavení a postupně pomocí šipek nastavujete jednotlivé
části (rok, měsíc, den, hodiny, minuty a vteřiny). Každé jednotlivé nastavení musíte
potvrdit tlačítkem OK. Jakmile vše nastavíte, opětovným stisknutím tlačítka OK změny
potvrdíte.
c) Zvuk kláves – umožňuje zapnout, respektive vypnout tón tlačítek. Stisknutím tlačítka
OK se dostanete do nastavení a pomocí šipek vyberete volbu ano/ne a opětovným stisk
nutím tlačítka OK volbu potvrdíte.
d) Automatické vypnutí – umožňuje nastavit automatické vypnutí autokamery při
nečinnosti po 1 nebo 5 minutách. Stisknutím tlačítka OK se dostanete do nastavení a po
mocí šipek vyberete interval, případně funkci přímo vypnete a opětovným stisknutím
tlačítka OK volbu potvrdíte.
e) Hlasitost – reguluje hlasitost produkce autokamery (přehrávání videí, hlasové pokyn).
Stisknutím tlačítka OK se dostanete do nastavení a pomocí šipek zvolíte úroveň 0–10
a potvrdíte tlačítkem OK.
f) Úsporný režim – nastavuje automatické vypnutí displeje v případě nečinnosti po 1
nebo 3 minutách, případně je možné úsporný režim úplně vypnout. Automatické vyp
nutí LCD funguje i v případě, že kamera nahrává. Stisknutím tlačítka OK se dostanete do
nastavení, pomocí šipek vyberete požadovanou volbu a opětovným stisknutím tlačítka
OK volbu potvrdíte.
g) Frekvence sítě – umožňuje vybrat frekvenci v souladu s frekvencí rozvodné sítě (na Ev
ropském kontinentu je veden v síti proud o frekvenci 50 Hz, v Americe a části Asie je to
pak 60 Hz).
h) G-senzor – díky g-senzoru dokáže kamera zaznamenat náraz například při dopravní
nehodě. Jakmile kamera náraz zaznamená, okamžitě uzamkne aktuálně natáčený
záznam. Záznam pak nelze přemazat. G-senzor lze nastavit v několika různých citliv
ostech (vysoký, střední, nízký) nebo jej úplně vypnout. Stisknutím tlačítka OK se dos-
tanete do nastavení, pomocí šipek vyberete požadovanou volbu a stisknutím tlačítka
OK volbu potvrdíte.
i) Parkovací režim – zapnutý parkovací režim je funkční i když kamera není napájena
a energii bere z integrované baterie. Při jakémkoliv nárazu, který zaregistruje g-senzor
se kamera automaticky zapne a spustí natáčení. Po zhruba 20–30 vteřinách bez nárazu
záznam uloží, uzamkne a kamera se opět vypne. Kamera při aktivaci parkovacího režimu
nechá vypnutý LCD displej, aby nepřitáhla pozornost. Součástí nastavení Parkovacího
režimu je i nastavení citlivosti g-senzoru: nízká, střední, vysoká nebo úplné vypnutí.
Nastavení zvolte podle potřeby a okolností.
Předpokladem pro funkční Parkovací režim je samozřejmě úplné nabití baterie do 100 %.
-
-
-
-
-
HR SLO LT HU PL SK CZ DE EN
7

Pokud nebude baterie nabitá, kamera nebude mít odkud brát energii pro spuštění a nah-
rávání záznamu.
j) Detekce pohybu – při zapnuté detekci pohybu kamera začne automaticky nahrávat
v momentě, kdy zaznamená pohyb v zorném poli objektivu přední kamery. Kamera
natočí cca 20vteřinový záznam, uzamkne jej a v případě, že nezaznamená další pohyb,
záznam ukončí. Stisknutím tlačítka OK se dostanete do nastavení, pomocí šipek vybere
volbu zap/vyp a opětovným stisknutím tlačítka OK volbu potvrdíte.
Režim detekce pohybu je funkční pouze v případě, že je kamera zapnutá. V případě
dlouhodobějšího použití musí být kamera neustále připojená k napájení.
k) GPS Status – jakmile se modul připojí ke kameře a zachytí signál, ikona GPS zez
elená a na displeji se objeví aktuální souřadnice. V tomto nastavení můžete zobrazení
souřadnic na kameře vypnout nebo ponechat zapnuté. Případně se podívat na aktuální
údaje připojených satelitů (pozice, síla signálu atd.)
l) Časová zóna – v tomto nastavení můžete změnit časové pásmo tak, aby odpovídalo Vaší
aktuální zeměpisné poloze.
m) Letní čas – při zapnutí této funkce se čas automaticky upraví při přechodu na letní čas
a naopak.
n) Tovární nastavení – umožňuje přepnout nastavení kamery do původního továrního
nastavení. Stisknutím tlačítka OK se dostanete do nastavení, pomocí šipek vybere volbu
ano/ne a opětovným stisknutím tlačítka OK volbu potvrdíte.
o) Formátovat SD kartu – kartu doporučujeme před prvním použití naformátovat buď
v PC nebo přímo v kameře. Stisknutím tlačítka OK se dostanete do nastavení a pomocí
šipek vyberete volbu ano/ne a opětovným stisknutím tlačítka OK volbu potvrdíte. Kar
ta se během několika vteřin zformátuje. Pozor veškerá data na kartě se touto operací
vymažou.
p) Kalibrace LDWS – systém varování při opuštění jízdního pruhu (LDWS) je mechanismus,
který upozorní řidiče, jakmile vozidlo začne vybočovat z jízdního pruhu. Tento systém je
navržen tak, aby minimalizoval dopravní nehody zapříčiněné nepozorností řidiče voz
idla jako je například rozptýlení nebo ospalost. Pro správné fungování systému LDWS je
třeba provést kalibraci zařízení. Stisknutím tlačítka OK se dostanete do nastavení.
Krok 1 – Pomocí tlačítek VLEVO / VPRAVO nastavte vertikálně průsečík doprostřed Va-
šeho jízdního pruhu, poté potvrďte tlačítkem OK. Stejné nastavení udělejte
poté i horizontálně a potvrďte opět tlačítkem OK.
Krok 2 – Nyní opakujte stejným způsobem s levým průsečíkem – pro levou krajnici
Vašeho jízdního pruhu vertikálně, poté horizontálně a opět potvrďte tlačítkem
HR SLO LT HU PL SK CZ DE EN
OK.
Krok 3 – Stejné nastavení použijte i pro pravý průsečík – pro pravou krajnici Vašeho
jízdního pruhu a opět potvrďte tlačítkem OK. Na konci bude kalibrace takto
uložena. Podívejte se na ukázkový příklad na obrázku.
-
-
-
8

q) Verze FW – stisknutím tlačítka OK získáte informaci o aktuálně nainstalované verzi rm-
waru.
9
HR SLO LT HU PL SK CZ DE EN

PARAMETRY AUTOKAMERY
Rozlišení přední kamery: 1920×1080 30 FPS, 1280×720 30 FPS
Rozlišení zadní kamery: 1280×720 25 FPS
Displej: 4.3“
Úhel záběru: 140°
Video formát: MOV
Formát fotograe: JPG
Typ paměti: Micro SDHC až 32 GB
Konektivita: USB
Délka propojovacího kabelu: cca 5 m
Frekvence sítě: 50/60 Hz
Specikace se může změnit výměnou některé části zařízení nebo aktualizací softwaru.
Výrobce:
elem6 s.r.o., Braškovská 308/158, 161 00 Praha 6
http://www.lamax-electronics.com
Tiskové chyby a změny v manuálu jsou vyhrazeny.
HR SLO LT HU PL SK CZ DE EN
10

SK UŽÍVATEĽSKÝ MANUÁL
LAMAX
S7 Dual

OBSAH
ÚVOD ..................................................................................................................................................................... 2
VLASTNOSTI A FUNKCIE ................................................................................................................................2
OBSAH BALENIA ...............................................................................................................................................2
NÁKRES PRODUKTU ........................................................................................................................................3
INŠTALÁCIA PRODUKTU ...............................................................................................................................3
FUNKCIE OVLÁDANÉ RÝCHLOU VOĽBOU .............................................................................................. 3
VYSVETLIVKY K IKONÁM ...............................................................................................................................4
POUŽÍVANIE AUTOKAMERY .........................................................................................................................4
NASTAVENIE AUTOKAMERY ........................................................................................................................6
PARAMETRE AUTOKAMERY .......................................................................................................................10
ÚVOD
Ďakujeme Vám, že ste si zakúpili autokameru LAMAX S7 Dual. Získali ste tak spoľahlivého
spoločníka na cesty Vašim automobilom. Vo väčšine krajín EÚ môžete zhotovovať zábery
z jazdy a chrániť tak svoj majetok a zdravie.
VLASTNOSTI A FUNKCIE
- Full HD video 1920×1080 – predná kamera
- HD video 1280×720 – zadná kamera
- G-senzor
- Cyklické nahrávanie
- Pohybový senzor
- Parkovací mód
- Parkovacia kamera
OBSAH BALENIA
- Autokamera LAMAX S7 Dual
- Zadná kamera
- GPS modul
HR SLO LT HU PL SK CZ DE EN
- Spojovací kábel medzi prednou a zadnou kamerou
- Napájací USB kábel do zapaľovača
- Gumové úchyty k spätnému zrkadlu
- Držiaky na káble
- Manuál
- MicroSD-USB adaptér
2

NÁKRES PRODUKTU
1. ZAP/VYP
2. Mode
3. Menu
4. Šípka vľavo
5. Šípka vpravo
6. OK
7. Napájací konektor (mini USB)
8. Konektor pre pripojenie zadnej kamery
9. Slot na micro SDHC kartu
10. Konektor pre pripojenie GPS modulu
INŠTALÁCIA PRODUKTU
1) Kábel napájania do autozapaľovača veďte okolo predného skla tak, aby neprekážal
vodičovi vo výhľade a bezpečne ho upevnite pomocou držiakov na káble Jeden ko
niec kábla pripojte do prednej auto kamery a druhý do nabíjačky / zapaľovača cigariet.
Prednú kameru pripevnite pomocou gumových úchytov na vnútorné spätné zrkadielko.
Objektív kamery nasmerujte tak, aby mieril priamo pred automobil.
2) Zadnú kameru prilepte pomocou 3M nálepky na zadné sklo.
3) Pomocou prepájacieho kábla prepojte prednú a zadnú kameru. Kábel veďte pozdĺž
kostry automobilu tak, aby nikde neprekážal. Vyhnete sa tak prípadnému poškodeniu
počas prevádzky automobilu. Ak chcete používať funkciu parkovacej kamery, pripojte
červený kábel z prepájacieho káblu pre zadnú kameru do parkovacieho svetla.
4) V prípade, že používate zariadenie po prvýkrát, batéria môže byť málo nabitá. Ak nie
je možné zariadenie spustiť z dôvodov nízkeho stavu batérie, pripojte ručne kábel ex
terného napájania a nabite tak batériu.
5) Používajte značkové micro SDHC karty triedy 10 a vyššie. Pre optimálne využitie dĺžky
záznamu odporúčame karty s kapacitou aspoň 8 GB, maximálne však 32 GB. V prí
pade prvého použitia pamäťovej karty ju odporúčame naformátovať v PC a následne
v kamere.
1 2 3 4 5 6
7 8 9 10
FUNKCIE OVLÁDANÉ RÝCHLOU VOĽBOU
1) Vypnutie / zapnutie obrazovky – krátkym stlačením tlačidla ZAP/VYP
2) Manuálne zamknutie / odomknutie videa – krátkym stlačením tlačidla MODE v prie
behu nahrávania zamknete aktuálne nahrávané video
3) Prepínanie náhľadu na displeji medzi prednou a zadnou kamerou – krátkym stlačením
šípky VĽAVO
4) Vypnutie / zapnutie nahrávania mikrofónu – dlhým stlačením šípky VĽAVO
5) Rýchle zhotovenie fotograe – v priebehu nahrávania krátkym stlačením šípky VPRAVO
6) Aktivácia parkovacieho režimu – dlhým stlačením šípky VPRAVO
-
-
-
-
HR SLO LT HU PL SK CZ DE EN
3

VYSVETLIVKY K IKONÁM
Režim video G-senzor
Režim fotoaparát Parkovací režim
Mikrofón vypnúť Batéria sa nabíja
Pamäťová karta detekovaná
Bez pamäťovej karty
Expozícia
POUŽÍVANIE AUTOKAMERY
1) Vloženie micro SDHC karty
Micro SDHC kartu môžete vložiť a vybrať zo slotu pre micro SDHC kartu, keď je kamera
vypnutá a nie je pripojená k počítaču alebo nabíjaniu. Odporúčame používať značkové
pamäťové karty class 10 s maximálnou kapacitou 32 GB.
2) Napájanie
a) Kameru môžete pripojiť k zdroju ako pomocou USB kábla do počítaču, tak aj pomocou
nabíjačky do autozapaľovača priamo vo vozidle.
b) Kamera je určená k trvalému napájaniu.
c) Integrovaná batéria slúži len k zaisteniu niektorých funkcií, ako je oneskorené vypnutie
alebo parkovací mód.
3) Zapnutie a vypnutie kamery
a) Kameru zapnete stlačením tlačidla ZAP/VYP.
b) Kamera sa automaticky zapne po pripojení do napájania.
c) Kameru vypnete stlačením a podržaním tlačidla ZAP/VYP po dobu 3–5 sekúnd.
d) Kamera sa automaticky vypne po odpojení z napájania. Kamera obsahuje funkciu
oneskoreného vypnutia, ktorého dĺžku je možné si nastaviť. Pokiaľ vyberiete kameru
z napájania v priebehu natáčania, kamera si po stanovenej dobe aktuálne nahrávané
video a vypne sa.
4) Prepínanie režimov a pohyb v menu
a) Postupným krátkym stlačením tlačidla MODE môžete prepínať medzi režimami video-
záznam/fotoaparát/ videogaléria/ fotogaléria.
b) Menu kamery je rozdelené na dve časti. Z režimu videozáznamu sa po stlačení tlačidla
MENU objavia dve rôzne menu. Nastavenie videa a nastavenie kamery.
c) Z režimu video-galérie sa po stlačení tlačidla MENU objavia dve rôzne menu. Správa videí
a nastavenie kamery. Správa videí je popísaná v bode 5) – 7).
d) Z režimu foto-galérie sa po stisnutí tlačidla MENU objavia dve rôzne menu. Správa foto
HR SLO LT HU PL SK CZ DE EN
graí a nastavenie kamery. Správa fotograí je popísaná v bode 5) – 7).
e) Prepínanie medzi jednotlivými druhmi menu vykonáte stlačením tlačidla MENU.
V príslušnom menu sa pohybujete pomocou šípok VĽAVO a VPR AVO. Po zvolení položky
stlačte tlačidlo OK a pomocí šípok a opätovného stlačenia OK, vyberte požadované
nastavenie.
-
4

5) Nahrávanie/fotenie/prehliadanie galérie
a) Nahrávanie záznamu na kameru započne po stlačení tlačidla OK. Jeho opätovným
stlačením nahrávania ukončíte. Kamera sa musí nachádzať v režime videozáznam.
b) Automatické nahrávanie – funkcia automatického nahrávania je trvale zapnutá. Auto
matické nahrávanie sa spustí po zapojení kamery do napájania. V prípade automobilu
s napájaním závislým na štartéri, sa kamera zapne a spustí nahrávanie po naštartovaní.
c) Fotograe sa zhotovujú stlačením tlačidla OK. Kamera sa musí nachádzať v režime fo
tograe.
d) Po prepnutí do režimov video-galérie/foto-galérie sa zobrazí zoznam nahraných videí
respektíve zhotovených fotograí. Pre pohyb medzi jednotlivými nahrávkami a sním
kami slúžia šípky VĽAVO a VPRAVO. V režime video-galérie sú videá rozdelené do zložiek.
Zložka VIDEO slúži k uchovaniu bežných videí. Zložka „ZÁMOK“ slúži k ukladaniu uzam
knutých videí. Zložka EVENT slúži k uchovaniu záznamov z detekcie pohybu. Pre pohyb
medzi jednotlivými zložkami a videami/fotograami slúžia tlačidlá VĽAVO a VPRAVO.
Prepnutie z videa späť na zložku preveďte stlačením tlačidla MENU.
6) Vymazanie zhotoveného materiálu priamo v kamere
a) Z mazanie jednotlivého materiálu priamo v kamere – je možné vykonať v galérii. Po zvo-
lení požadovanej položky stlačte tlačidlo MENU (vo video-galérii ju stlačte 2×), vyberte
položku ZMAZAŤ a vyberte možnosť ZMAZAŤ JEDEN.
b) Z mazanie všetkých záznamov – je možné vykonať v galérii. Stlačte tlačidlo MENU, vy
berte položku ZMAZAŤ a vyberte možnosť ZMAZAŤ VŠETKO.
7) Ochrana zhotoveného materiálu v kamere
Kamera v prípade zaplnenia pamäťovej karty začne automaticky premazávať najstaršie
zhotovené videá novými. Ak chcete niektoré videá ochrániť pred ich prípadným
premazaním, je nutné tieto videá uzamknúť.
a) Aktivovaný G-senzor zaručí to, že v prípade nárazu automaticky uzamkne aktuálne nah
rávaný záznam. A Uchráni ho tak pred prepísaním.
b) Aktuálne nahrávaný záznam je takisto možné uzamknúť ručne, stlačením tlačidla
„Mode“.
c) Záznamy možno takisto zamknúť dodatočne v galérii kamery:
- Uzamknutie jednotlivého záznamu – Po vybraní požadovanej položky stlačte tlačidlo
MENU (vo video-galérii ho stlačte 2×), vyberte položku UZAMKNÚŤ a vyberte možnosť
UZAMKNÚŤ JEDEN.
- Uzamknutie všetkých záznamov – Stlačte tlačidlo MENU, vyberte položku UZAMKNÚŤ
a vyberte možnosť UZAMKNÚŤ VŠETKO.
- Odomknutie jednotlivého záznamu – Po vybraní požadovanej položky stlačte tlačidlo
MENU (vo video-galérii ho stlačte 2×), vyberte položku ODOMKNÚŤ a vyberte možnosť
ODOMKNÚŤ JEDEN.
- Odomknutie všetk ých záznamov – Stlačte tlačidlo MENU, vyberte položku ODOMKNÚŤ
a vyberte možnosť ODOMKNÚŤ VŠETKO.
8) Pripojenie k PC
K dispozícii je aj USB adaptér pre micro SDHC. Vložte pamäťovú kartu do adaptéra a pripo-
jte adaptér k počítaču.
-
-
-
-
-
-
HR SLO LT HU PL SK CZ DE EN
5

9) Prepínanie prednej a zadnej kamery na displeji
Pri správnom zapojení prednej a zadnej kamery sa na displeji ako hlavný zobrazí pred-
ný obraz z kamery. Obraz zo zadnej kamery sa objaví v pravom hornom rohu ako obraz
v obraze. Prepínanie medzi prednou a zadnou kamerou je možné pomocou šípky VĽAVO.
10) Parkovacia kamera
Ak pripojíte červený kábel z prepájacieho káblu zadnej kamery do parkovacieho svetla, ak-
tivujete tzv. parkovaciu kameru. V prípade zaradenia spiatočky, sa na displeji automaticky
zobrazí obraz zo zadnej kamery a objavia sa cúvacie linky.
Odporučenie: Inštaláciu červeného káblu do parkovacieho svetla odporúčame vykonávať
v autorizovanom servise.
11) Pripojenie GPS modulu
Akonáhle sa modul pripojí ku kamere a zachytí signál, ikona GPS zozelená a na displeji sa
objavia aktuálne súradnice. Na stránke produktu
LAMAX Player pre prehrávanie záznamov z kamery. Prehrávač zobrazí okrem záznamu aj
aktuálnu rýchlosť a trasu na Google mapách.
NASTAVENIE AUTOKAMERY
V režime video stlačte tlačidlo MENU. Nastavenie obsahuje dve časti, nastavenie videa
a nastavenie kamery.
www.lamax-electronics.com
1) Nastavenie videa
a) Rozlíšenie videa – ponúka dve možnosti a to HD a full HD pri 30 FPS. Stlačením tlačidla
OK sa dostanete do nastavení a pomocí šípok zvolíte požadované rozlíšenie a potvrdíte
stlačením tlačidla OK.
b) Čas videa (dĺžka slučky) – tu sa nastavuje dĺžka jednotlivých záznamov. Kamera nahráva
v slučke videá v dĺžke 1–5 minút. V prípade, že sa pamäťová karta zaplní, kamera začne
premazávať najstaršie záznamy. Jednotlivé videá na seba plynule nadväzujú a nevyt
várajú tzv. slepé miesta medzi jednotlivými slučkami. Stlačením tlačidla OK sa dostanete
do nastavenia a pomocou šípok si zvolíte požadovanú dĺžku slučky a opäť potvrdíte
tlačidlom OK.
c) Oneskorené vypnutie – umožňuje odložiť okamžité vypnutie po vypojení kamery
z napájania. Táto funkcia je vhodná napríklad pri automobiloch so zariadením štart/stop.
Stlačením tlačidla OK sa dostanete do nastavenia a pomocou šípok zvolíte požadovanú
dĺžku oneskorenia, prípadne túto funkciu úplne vypnite. Opätovným stlačením tlačidla
OK, voľbu potvrdíte.
d) Nahrávanie zvuku – umožňuje vypnúť či zapnúť mikrofón pri nahrávaní videa, vhodné
HR SLO LT HU PL SK CZ DE EN
napríklad pokiaľ chcete zachovať súkromie Vašich hovorov. Táto funkcia má aj možnosť
rýchlej voľby. Stlačením tlačidla OK sa dostanete do nastavenia a pomocou šípok mik
rofón zapnete alebo vypnete a potvrdíte opätovným stlačením tlačidla OK.
e) Expozícia – umožňuje upraviť expozíciu podľa potreby v rozmedzí 0-10. Stlačením
tlačidla OK sa dostanete do nastavenia a pomocou šípok zvolíte požadovanú úroveň
a potvrdíte tlačidlom OK.
f) LDWS – je funkcia stráženia jazdy v pruhoch. Tú to funkciu je nutné najskôr kalibrovať
si stiahnite
-
-
6

v menu „Nastavenie kamery“. Stlačením tlačidla OK sa dostanete do nastavení a pomocí
šípok funkciu zapnete či vypnete potvrdením tlačidlom OK.
2) Všeobecné nastavenie
a) Jazyk – autokamera má multijazyčné menu. Jazyk zmeníte stlačením tlačidla OK, po-
mocou šípok vyberiete požadovaný jazyk a potvrdíte opätovným stlačením tlačidla OK.
b) Nastavenie dátumu a času – umožňuje nastavenie aktuálneho dátumu a času. V prí
pade, že máte ku kamere pripojený GPS modul, dátum a čas sa automaticky synchro-
nizuje. Stlačením tlačidla OK sa dostanete do nastavenia a postupne pomocou šípok
nastavujete jednotlivé časti (rok, mesiac, deň, hodiny, minúty a sekundy). Každé jednot
livé nastavenie musíte potvrdiť tlačidlom OK. Akonáhle všetko nastavíte, opätovným
stlačením tlačidla OK zmeny potvrdíte.
c) Zvuk kláves – umožňuje zapnúť, respektíve vypnúť tón tlačidiel. Stlačením tlačidla OK
sa dostanete do nastavenia a pomocou šípok vyberiete voľbu áno/nie a opätovným
stlačením tlačidla OK voľbu potvrdíte.
d) Automatické vypnutie – umožňuje nastaviť automatické vypnutie autokamery pri
nečinnosti po 1 alebo 5 minútach. Stlačením tlačidla OK sa dostanete do nastavenia
a pomocou šípok vyberiete interval, prípadne funkciu priamo vypnete a opätovným
stlačením tlačidla OK voľbu potvrdíte.
e) Hlasitosť – reguluje hlasitosť produkcie autokamery (prehrávanie videí, hlasové pokyny).
Stlačením tlačidla OK sa dostanete do nastavení a pomocou šípok zvolíte úroveň 0-10
a potvrdíte tlačidlom OK.
f) Úsporný režim – nastavuje automatické vypnutie displeja v prípade nečinnosti po 1
nebo 3 minútach, prípadne je možné úsporný režim úplne vypnúť. Automatické vyp
nutie LCD funguje aj v prípade, že kamera nahráva. Stlačením tlačidla OK sa dostanete do
nastavenia, pomocou šípok vyberiete požadovanú voľbu a opätovným stlačením tlačidla
OK voľbu potvrdíte.
g) Frekvencia siete – umožňuje vybrať frekvenciu v súlade s frekvenciou rozvodnej siete
(na Európskom kontinente je vedený v sieti prúd o frekvencii 50 Hz, v Amerike a časti
Ázie je to potom 60 Hz).
h) G-senzor – vďaka g-senzoru dokáže kamera zaznamenať náraz napríklad pri dopravnej
nehode. Akonáhle kamera náraz zaznamená, natočený záznam automaticky uzamkne.
Záznam potom nie je možné premazať. G-senzor možno nastaviť v niekoľkých rôznych
citlivostiach (vysoká, stredná, nízka) alebo ho úplne vypnúť. Stlačením tlačidla OK sa
dostanete do nastavenia, pomocou šípok vyberiete požadovanú voľbu a stlačením
tlačidla OK voľbu potvrdíte.
i) Parkovací režim – zapnutý parkovací režim je funkčný aj keď nie je kamera napájaná,
pretože energiu získava z integrovanej batérie. Pri akomkoľvek náraze, ktorý zaregistruje
g-senzor sa kamera automaticky zapne a spustí nahrávanie. Po zhruba 20-30 sekundách
bez nárazu záznam uloží, uzamkne a kamera sa opäť vypne. Súčasťou nastavenia Parko
vacieho režimu je aj nastavenie citlivosti g-senzoru: nízka, stredná, vysoká, alebo úplné
vypnutie. Nastavenie zvoľte podľa potreby a okolností. Kamera pri aktivácii parkovacieho
režimu nechá vypnutý LCD displej, aby nepriťahovala pozornosť.
Predpokladom pre funkčný Parkovací režim je samozrejme úplné nabitie batérie do
100%. V prípade, že nebude batéria nabitá, kamera nebude mať odkiaľ čerpať energiu
pre spustenie a nahrávania záznamu.
-
-
-
HR SLO LT HU PL SK CZ DE EN
-
7

j) Detekcia pohybu – pri zapnutej detekcii pohybu kamera začne automaticky nahrávať
v momente, kedy zaznamená pohyb v zornom poli objektívu prednej kamery. Kamera
natočí cca 20 sekundový záznam, uzamkne ho a v prípade, že nezaznamená ďalší pohyb,
záznam ukončí. Stlačením tlačidla OK sa dostanete do nastavení, pomocou šípok vyberi
ete voľbu zap/vyp a opätovným stlačením tlačidla OK voľbu potvrdíte.
Režim detekcie pohybu je funkčný len v prípade, že je kamera zapnutá. V prípade dlho
dobého použitia musí byť kamera neustále pripojená k napájaniu.
k) GPS Status – akonáhle sa modul pripojí ku kamere a zachytí signál, ikona GPS zozelenie
a na displeji sa objavia aktuálne súradnice. V tomto nastavení môžete zobrazenie súrad
níc na kamere vypnúť alebo ponechať zapnuté. Prípadne sa môžete pozrieť na aktuálne
údaje pripojených satelitov (pozícia, sila signálu, atď.).
l) Časová zóna – v tomto nastavení môžete zmeniť časové pásmo tak, aby odpovedalo
Vašej aktuálnej zemepisnej polohe.
m) Letný čas – pri zapnutí tejto funkcie sa čas automaticky upraví pri prechode na letný
čas a naopak.
n) Továrenské nastavenia – umožňuje prepnúť nastavenie kamery do pôvodného tová
renského nastavenia. Stlačením tlačidla OK sa dostanete do nastavenia, pomocou šípok
vyberiete voľbu áno/nie a opätovným stlačením tlačidla OK voľbu potvrdíte.
o) Formátovať SD kartu – kartu odporúčame pred prvým použitím naformátovať buď v PC
alebo priamo v kamere. Stlačením tlačidla OK sa dostanete do nastavenia a pomocou
šípok vyberiete voľbu áno/nie a opätovným stlačením tlačidla OK voľbu potvrdíte. Karta
sa v priebehu niekoľkých sekúnd naformátuje. Pozor, všetky dáta na karte sa touto op
eráciou vymažú.
p) Kalibrácia LDWS – slúži na nastavenie funkcie stráženia jazdy v pruhoch. Systém varo
vania pri opustení jazdného pruhu (LDWS) je mechanizmus, ktorý upozorní vodiča,
akonáhle začne vozidlo odbočovať z jazdného pruhu. Tento systém je navrhnutý tak,
aby minimalizoval dopravné nehody zapríčinené nepozornosťou vodiča vozidla ako je
napríklad rozptýlenie alebo ospalosť. Pre správne fungovanie systému LDWS je potreb
né previesť kalibráciu zariadenia. Stlačením tlačidla OK sa dostanete do nastavenia.
Krok 1 – Pomocou tlačidiel VĽAVO / VPRAVO nastavte vertikálne priesečník doprostred
Vášho jazdného pruhu, potom potvrďte tlačidlom OK. Rovnaké nastavenie vy
konajte potom aj horizontálne a potvrďte opäť tlačidlom OK.
Krok 2 – Teraz opakujte rovnakým spôsobom s ľavým priesečníkom – pre ľavú hran
icu Vášho jazdného pruhu vertikálne, potom horizontálne a opäť potvrďte
tlačidlom OK.
Krok 3 – Rovnaké nastavenie použite aj pre pravý priesečník – pre pravú krajnicu Vášho
HR SLO LT HU PL SK CZ DE EN
jazdného pruhu a opäť potvrďte tlačidlom OK. Na konci bude kalibrácia takto
uložená. Pozrite sa na ukážkový príklad na obrázku.
-
-
-
-
-
-
-
-
-
8

q) Verzia FW – stlačením tlačidla OK získate informáciu o aktuálne nainštalovanej verzii
rmvéru.
9
HR SLO LT HU PL SK CZ DE EN

PARAMETRE AUTOKAMERY
Rozlíšenie prednej kamery: 1920×1080 30 FPS, 1280×720 30 FPS
Rozlíšenie zadnej kamery: 1280×720 25 FPS
Displej: 4.3“
Uhol záberu: 140°
Video formát: MOV
Formát fotograe: JPG
Typ pamäti: Micro SDHC až 32 GB
Konektivita: USB
Dĺžka prepájacieho kábla: cca 5 m
Frekvencia siete: 50/60 Hz
Špecikácia sa môže zmeniť výmenou niektorej časti zariadenia alebo aktualizáciou soft
véru.
Výrobca:
elem6 s.r.o., Braškovská 308/158, 161 00 Praha 6
http://www.lamax-electronics.com
Tlačové chyby a zmeny v manuáli sú vyhradené.
HR SLO LT HU PL SK CZ DE EN
-
10

PL INSTRUKCJA OBSŁUGI
LAMAX
S7 Dual

SPIS TREŚCI
WSTĘP ................................................................................................................................................................... 2
WŁAŚCIWOŚCI I FUNKCJE ............................................................................................................................2
ZAWARTOŚĆ ZESTAWU .................................................................................................................................. 2
SCHEMAT PRODUKTU ....................................................................................................................................3
INSTALACJA PRODUKTU ...............................................................................................................................3
FUNKCJE SZYBKIEGO WYBORU ..................................................................................................................3
OBJAŚNIENIA DOTYCZĄCE IKON ..............................................................................................................4
UŻYTKOWANIE KAMERY SAMOCHODOWEJ ........................................................................................4
USTAWIENIA KAMERY SAMOCHODOWEJ .............................................................................................6
PARAMETRY KAMERY SAMOCHODOWEJ ............................................................................................10
WSTĘP
Dziękujemy za zakup kamery samochodowej LAMAX S7 Dual. Właśnie zdobyłeś nowego
towarzysza podróży, na którym zawsze możesz polegać. W większości krajów UE możesz
dokumentować przebieg trasy, a tym samym chronić siebie i swoje mienie.
WŁAŚCIWOŚCI I FUNKCJE
- Wideo Full HD 1920×1080 – przednia kamera
- Wideo HD 1280×720 – tylna kamera
- G-sensor
- Nagrywanie w pętli
- Czujnik ruchu
- Tryb parkowania
- Kamera parkowania
ZAWARTOŚĆ ZESTAWU
- Kamera samochodowa LAMAX S7 Dual
- Tylna kamera
- GPS modul
HR SLO LT HU PL SK CZ DE EN
- Kabel łączący przednią i tylną kamerę
- Kabel zasilający USB do zapalniczki samochodowej
- Gumowe uchwyty do mocowania na lusterku wstecznym
- Uchwyty na kable
- Instrukcja obsługi
- MicroSD-USB adapter
2

SCHEMAT PRODUKTU
1. WŁ/WYŁ
2. Mode
3. Menu
4. Strzałka w lewo
5. Strzałka w prawo
6. OK
7. Konektor zasilający (mini USB)
8. Konektor do podłączania tylnej kamery
9. Wejście na kartę micro SDHC
10. Konektor do podłączania modułu GPS
INSTALACJA PRODUKTU
1) Kabel zasilania do zapalniczki samochodowej poprowadź wokoł przedniej szyby w taki
sposób, aby nie zakłócał dobrej widoczności z punktu widzenia kierowcy, a następnie
bezpiecznie go przymocuj za pomocą uchwytów na kable. Jeden koniec kabla należy
podłączyć do kamery samochodowej, a drugi do ładowarki samochodowej / zapalniczki.
Przednią kamerę zamontuj za pomocą gumek na wewnętrznym lusterku wstecznym.
Obiektyw kamery obróć tak, aby był skierowany bezpośrednio na widok przed samo
chodem.
2) Tylną kamerę przyklej za pomocą naklejki 3M na tylnej szybie.
3) Z a pomocą kaabla łączącego połącz przednią i tylną kamerę. Kabel poprowadź wzdłuż
szkieletu samochodu tak, aby w żaden sposób nie przeszkadzał. Dzięki temu unikniesz
ewentualnych incydentów w trakcie prowadzenia auta. Jeżeli chcesz korzystać z funkcji
kamery parkowania, podłącz czerwony kabel od kabla połączeniowego tylnej kamery
do światła parkowania.
4) Jeżeli korzystasz z urządzenia po raz pierwszy, bateria może być słabo naładowana.
Jeżeli uruchomienie urządzenia nie jest możliwe z powodu niskiego stanu baterii,
podłącz ręcznie kabel zasilania i w ten sposób ładuj baterię.
5) Z alecamy wykorzystywanie wysokiej jakości kar t micro SDHC klasy 10 i wyższych. W celu
optymalnego wykorzystania długości nagrania polecamy używanie kart o pojemności
co najmniej 8 GB, maksymalnie do 32 GB. Przy pierwszym użyciu karty pamięci zalecamy
jej sformatowanie na komputerze, a następnie w kamerze.
1 2 3 4 5 6
7 8 9 10
FUNKCJE SZYBKIEGO WYBORU
1) Włączanie / wyłączanie ekranu – krótkie wciśnięcie przycisku WŁ/WYŁ
2) Ręczne zabezpieczanie / odbezpieczanie nagrania – krótkie wciśnięcie przycisku
MODE podczas nagrywania zabepieczy aktualnie nagrywane wideo
3) Przełączanie widoku między przednią a tylną kamerą – krótkie wciśnięcie strzałki
W LEWO
4) Wyłączenie / włączenie nagrywania mikrofonu – długie wciśnięcie strzałki W LEWO
5) Szybkie fotografowanie – krótkie wciśnięcie przycisku W PRAWO podczas nagrywania
6) Aktywacja trybu parkowania – długie wciśnięcie strzałki W PRAWO
-
HR SLO LT HU PL SK CZ DE EN
3
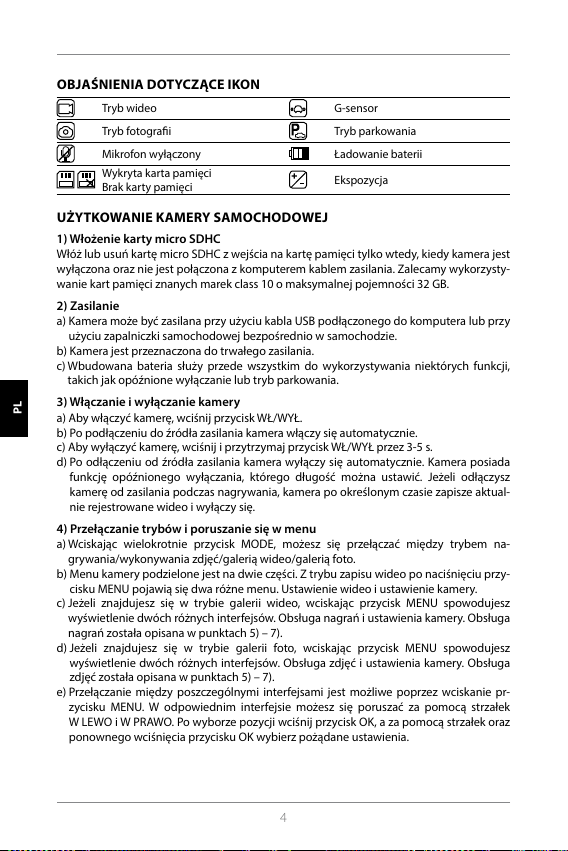
OBJAŚNIENIA DOTYCZĄCE IKON
Tryb wideo G-sensor
Tryb fotograi Tryb parkowania
Mikrofon wyłączony Ładowanie baterii
Wykryta karta pamięci
Brak karty pamięci
Ekspozycja
UŻYTKOWANIE KAMERY SAMOCHODOWEJ
1) Włożenie karty micro SDHC
Włóż lub usuń kartę micro SDHC z wejścia na kartę pamięci tylko wtedy, kiedy kamera jest
wyłączona oraz nie jest połączona z komputerem kablem zasilania. Zalecamy wykorzysty
wanie kart pamięci znanych marek class 10 o maksymalnej pojemności 32 GB.
2) Zasilanie
a) Kamera może być zasilana przy użyciu kabla USB podłączonego do komputera lub przy
użyciu zapalniczki samochodowej bezpośrednio w samochodzie.
b) Kamera jest przeznaczona do trwałego zasilania.
c) Wbudowana bateria służy przede wszystkim do wykorzystywania niektórych funkcji,
takich jak opóźnione wyłączanie lub tryb parkowania.
3) Włączanie i wyłączanie kamery
a) Aby włączyć kamerę, wciśnij przycisk WŁ/WYŁ.
b) Po podłączeniu do źródła zasilania kamera włączy się automatycznie.
c) Aby wyłączyć kamerę, wciśnij i przytrzymaj przycisk WŁ/WYŁ przez 3-5 s.
d) Po odłączeniu od źródła zasilania kamera wyłączy się automatycznie. Kamera posiada
funkcję opóźnionego wyłączania, którego długość można ustawić. Jeżeli odłączysz
kamerę od zasilania podczas nagrywania, kamera po określonym czasie zapisze aktual
nie rejestrowane wideo i wyłączy się.
4) Przełączanie trybów i poruszanie się w menu
a) Wciskając wielokrotnie przycisk MODE, możesz się przełączać między trybem na-
grywania/wykonywania zdjęć/galerią wideo/galerią foto.
b) Menu kamery podzielone jest na dwie części. Z trybu zapisu wideo po naciśnięciu prz y
cisku MENU pojawią się dwa różne menu. Ustawienie wideo i ustawienie kamery.
c) Jeżeli znajdujesz się w trybie galerii wideo, wciskając przycisk MENU spowodujesz
wyświetlenie dwóch różnych interfejsów. Obsługa nagrań i ustawienia kamery. Obsługa
nagrań została opisana w punktach 5) – 7).
HR SLO LT HU PL SK CZ DE EN
d) Jeżeli znajdujesz się w trybie galerii foto, wciskając przycisk MENU spowodujesz
wyświetlenie dwóch różnych interfejsów. Obsługa zdjęć i ustawienia kamery. Obsługa
zdjęć została opisana w punktach 5) – 7).
e) Przełączanie między poszczególnymi interfejsami jest możliwe poprzez wciskanie pr
zycisku MENU. W odpowiednim interfejsie możesz się poruszać za pomocą strzałek
W LEWO i W PRAWO. Po wyborze pozycji wciśnij przycisk OK, a za pomocą strzałek oraz
ponownego wciśnięcia przycisku OK wybierz pożądane ustawienia.
-
-
-
-
4

5) Nagrywanie/fotografowanie/przeglądanie galerii
a) Aby rozpocząć nagrywanie, wciśnij przycisk OK. Jego ponowne wciśnięcie spowoduje
zatrzymanie nagrywania. Podczas tej akcji kamera powinna znajdować w trybie na
grywania.
b) Automatyczne nagrywanie – funkcja automatycznego nagry wania jest zawsze aktywna.
Automatyczne nagrywanie rozpocznie się po podłączeniu kamery do źródła zasilania.
W przypadku samochodu o zasilaniu zależnym od zapłonu, kamera włączy się i zacznie
nagrywać po uruchomieniu silnika.
c) Z djęcia możesz wykonywać poprzez klikanie przycisku OK. Podczas tej akcji kamera
powinna przebywać w trybie fotografowania.
d) Po przejściu do galerii wideo/foto wyświetli się lista nagranych lmów lub wykonanych
zdjęć. Aby przemieszczać się pomiędzy poszczególnymi nagraniami i zdjęciami, należy
korzystać ze strzałek W LEWO i W PRAWO. W trybie galerii wideo nagrania rozdzielone są
do folderów. Folder WIDEO sluż y do przechowywania nagrań bieżących. Folder KŁÓDKA
służy do przechowywania zabezpieczonych nagrań. Folder EVENT służy do przechow
ywania zapisów wykonanych przy detekcji ruchu. Aby przemieszczać się między
poszczególnymi folderami i nagraniami/zdjęciami, korzystaj z przycisków W LEWO i
W PRAWO. Przejście od nagrania z powrotem do folderu możliwe jest poprzez kliknięcie
przycisku MENU.
6) Usuwanie powstałego materiału bezpośrednio w kamerze
a) Usuwanie poszczególnych materiałów bezpośrednio w kamerze – możliwe w galerii. Po
wyborze odpowiednich pozycji wciśnij przycisk MENU (w galerii wideo wciśnij go dwuk
rotnie), wybierz pozycję USUŃ, a następnie opcję USUŃ.
b) Usuwanie wszystkich zapisów – możliwe w galerii. Wciśnij przycisk MENU, wybierz
pozycję USUŃ, a następnie opcję USUŃ WSZYSTKIE.
7) Ochrona powstałego materiału w kamerze
W przypadku zapełnienia karty pamięci, kamera zacznie automatycznie zastępować na-
jstarsze nagrania tymi najnowszymi. Jeżeli chcesz zabezpieczyć niektóre nagrania przed
ich ewentualnym usunięciem, musisz je zabezpieczyć.
a) Aktywowany G-sensor zapewnia to, że w razie uderzenia aktualnie powstające nagranie
zostanie automatycznie zabezpieczone, a tym samym jego zastąpienie w pętli nie
będzie możliwe.
b) Aktualnie powstający zapis można zabezpieczyć ręcznie, wciskając przycisk “Mode”.
c) Pliki można również dodatkowo zabezpieczyć w galerii kamery:
- Z abezpieczenie poszczególnego zapisu – Po wyborze pożądanej pozycji wciśnij
przycisk MENU (w galerii wideo wciśnij go dwukrotnie), wybierz pozycję ZABEZPIECZ,
a następnie opcję ZABEZPIECZ.
- Z abezpieczanie wszystkich zapisów – Wciśnij przycisk MENU, wybierz pozycję ZABEZ
PIECZ i wybierz opcję ZABEZPIECZ WSZYSTKIE.
- Odbezpieczenie poszczególnego zapisu – Po wyborze pożądanej pozycji wciśnij
przycisk MENU (w galerii wideo wciśnij go dwukrotnie), wybierz pozycję ODBEZPIECZ,
a następnie opcję ODBEZPIECZ.
- Odbezpieczanie wszystkich zapisów – Wciśnij przycisk MENU, wybierz pozycję ODBEZ
PIECZ, a następnie opcję ODBEZPIECZ WSZYSTKIE.
-
-
-
HR SLO LT HU PL SK CZ DE EN
-
-
5

8) Podłączanie do PC
Adapter USB micro SDHC w zestawie. Włóż kartę pamięci do adaptera i podłącz go do
komputera.
9) Przełączanie widoku z przedniej / tylnej kamery
W przypadku pomyślnego połączenia przedniej i tylnej kamery, na ekranie jako główny
wyświetli się obraz z przedniej kamery. Obraz z tylnej kamery wyświetli się w prawym gór
nym rogu jako obraz w obrazie. Między poszczególnymi sposobami wyświetlania można
się przełączać, klikając strzałkę W LEWO.
10) Kamera parkowania
Jeżeli podłączymy kabel od kabla połączeniowego kamery tylnej do światła parkowania
nastąpi uaktywnienie tzw. kamery parkowania. Kiedy wrzucisz bieg wsteczny, na ekranie
automatycznie pojawi się obraz z tylnej kamery oraz linie cofania.
Zalecenie: Instalację czerwonego kabla do światła parkowania zalecamy wykonać w au
toryzowanym serwisie.
11) Podłączanie modułu GPS
Jak tylko podłączony do kamery moduł wychwyci sygnał, ikona GPS zmieni kolor
na zielony, a na ekranie pojawią się aktualne współrzędne. Na stronie produktu na
www.lamax-electronics.com
z kamery. Odtwarzacz oprócz nagrania wyświetla również aktualną prędkość oraz
przejechaną trasę na mapach Google.
USTAWIENIA KAMERY SAMOCHODOWEJ
W trybie wideo wciśnij przycisk MENU. Ustawienia posiadają dwie części: ustawienia wideo
i ustawienia kamery.
możesz pobrać LAMAX Player, aby móc odtwarzać dane
1) Ustawienia wideo
a) Rozdzielczość wideo – możliwe dwie opcje: HD i full HD przy 30 FPS. Wciskając przycisk
OK przejdziesz do ustawień, a za pomocą strzałek wybierzesz pożądaną rozdzielczość i
potwierdzisz klikając przycisk OK.
b) Czas wideo (długość pętli) – możliwość ustawień długości poszczególnych nagrań.
Kamera rejestruje w pętli nagrania o długości 1-5 minut. W razie zapełnienia karty
pamięci, kamera zacznie odtwarzać najstarsze nagrania. Poszczególne nagrania płynnie
do siebie nawiązują, nie tworząc tzw. pustych miejsc między poszczególnymi pętlami.
Wciskając przycisk OK przejdziesz do ustawień, a za pomocą strzałek wybierzesz
pożądaną długość pętli. Po dokonaniu wyboru ponownie potwierdź przyciskiem OK.
c) Opóźnione wyłączanie – możliwość ustawienia opóźnionego wyłączania po odłączeniu
HR SLO LT HU PL SK CZ DE EN
kamery od zasilania. Ta funkcja jest idealna na przykład w przypadku wykorzystywania
w samochodach z osprzętem start/stop. Wciskając przycisk OK przejdziesz do ustawień,
a za pomocą strzałek wybierzesz pożądaną długość opóźnienia, ewentualnie całkowicie
wyłączysz tę funkcję. Wciskając ponownie przycisk OK potwierdzisz swój wybór.
d) Nagrywanie dźwięku – możliwość wyłączenia lub włączenia mikrofonu podczas na
grywania wideo. Idealne w sytuacjach, kiedy na przykład zależy ci na zachowaniu
prywatności twoich rozmów. Ta funkcja posiada rówież opcję szybkiego wyboru.
Wciskając przycisk OK przejdziesz do ustawień, a za pomocą strzałek włączysz lub
-
-
-
6

wyłączysz mikrofon, potwierdzając następnie swój wybór poprzez wciśnięcie przycisku
OK.
e) Ekspozycja – umożliwia regulację ekspozycji w zależności od potrzeb w zakresie 0-10.
Wciskając przycisk OK, przejdziesz do ustawień, a za pomocą strzałek wybierzesz
pożądany poziom, potwierdzając następnie swój wybór przyciskiem OK.
f) LDWS – funkcja śledzenia pasów ruchu. Tę funkcję najpierw należy skalibrować w menu
„Ustawienia kamery“. Wciskając przycisk OK przejdziesz do ustawień, a za pomocą
strzałek włączysz lub wyłączysz funkcję, potwierdzając następnie swój wybór przycisk
iem OK.
2) Ustawienia główne
a) Język – kamera samochodowa posiada wielojęzyczne menu. Język możesz zmienić
klikając przycisk OK, a następnie za pomocą strzałek wybierając pożądany język.
Wciskając ponownie przycisk OK potwierdzisz swój wybór.
b) Ustawienia daty i godziny – możliwość ustawień aktualnej daty i godziny. Jeżeli do
kamery podłączony jest moduł GPS, data i godzina zsynchronizują się automatyc
znie. Wciskając przycisk OK przejdziesz do ustawień, a za pomocą strzalek stopniowo
ustawisz poszczególne elementy (rok, miesiąc, dzień, godzinę, minuty i sekundy). Każde
z poszczególnych ustawień musisz potwierdzić przyciskiem OK. Jak tylko dokonasz
wszystkich ustawień, potwierdź zmiany ponownie wciskając przycisk OK.
c) Dźwięk przycisków – umożliwia włączenie lub wyłączenie tonów przycisków. Wciskając
przycisk OK przejdziesz do ustawień, a za pomocą strzałek dokonasz wyboru tak/nie i
potwierdzisz go ponownie klikając przycisk OK.
d) Automatyczne wyłączanie – możliwość ustawienia automatycznego wyłączania
samochodowej w przypadku bezczynności po upłynięciu 1 lub 5 minut.
kamery
Wciskając przycisk OK przejdziesz do ustawień, a za pomocą strzałek wybierzesz
pożądany interwał lub całkowicie wyłączysz funkcję, potwierdzając swój wybór przy
ciskiem OK.
e) Głośność – możliwość regulacji głośności pracy autokamery (odtwarzanie nagrań,
instrukcje głosowe). Wciskając przycisk OK przejdziesz do ustawień, gdzie za pomocą
strzałek wybierzesz jedem z poziomów 0-10 i potwierdzisz przyciskiem OK.
f) Tryb oszczędzania – możliwość ustawienia automatycznego wyłączania ekranu w ra
zie braku aktywności po upłynięciu 1 lub 3 minut lub wyłączenia trybu oszczędzania.
Funkcję automatycznego wyłączania LCD można wykorzystać również wtedy, kiedy
kamera nagrywa. Wciskając przycisk OK przejdziesz do ustawień, a za pomocą strzałek
wybierzesz pożądaną opcję. Wciskając ponownie przycisk OK potwierdzisz swój wybór.
g) Częstotliwość sieci – możliwość wyboru częstotliwości zgodnie z częstotliwością danej
sieci energetycznej (na kontynencie europejskim częstotliwość prądu przewodzona w
sieci wynosi 50 Hz, w Ameryce i części Azji jest to 60 Hz).
h) G-sensor – dzięki G-sensorowi kamera potra rejestrować uderzenie na przykład pod
czas wypadku drogowego. Jak tylko kamera wykryje uderzenie, natychmiast zabez-
pieczy aktualnie powstające nagranie. Zapis nie zostanie dzięki temu usunięty. Istnieje
możliwość ustawienia różnych czułości G-sensora(wysoka,średnia, niska) albo całkowicie
go wyłączyć. Wciskając przycisk OK przejdziesz do ustawień, gdzie za pomocą strzałek
wybierzesz pożądaną opcję. Wciskając przycisk OK potwierdzisz swój wybór.
-
-
-
-
HR SLO LT HU PL SK CZ DE EN
-
7

i) Tryb parkowania – włączony tryb parkowania działa również wtedy, kiedy kamera nie
jest zasilana – energia pobierana jest wówczas z wbudowanej baterii. Przy jakimkolwiek
uderzeniu, który zarejestruje G-sensor, kamera automatycznie się włączy i rozpocznie na
grywanie. Po około 20-30 sekundach bez zarejestrowania kolejnego uderzenia zapisze
nagranie, zabezpieczy je i ponownie się wyłączy. Kiedy funkcja trybu parkowania jest
aktywowana, ekran LCD kamery pozostanie wyłączony, aby niepotrzebnie nie przyciągał
uwagi. Ustawienie Trybu Parkowania obejmuje również ustawienia czułości G-Sensora:
niska, średnia, wysoka lub całkowite wyłączenie. Ustawienie należy dobrać w zależności
od potrzeb i okoliczności użytkownika kamery.
Warunkiem poprawnego fukncjonowania Trybu Parkowania jest wpełni naładowana
bateria. Tylko w 100% naładowana bateria umożliwi poprawne korzystanie z tej funkcji.
Jeżeli bateria nie jest wystarczająco naładowana, kamera utraci możliwość pobierania
energii w celu uruchumienia i dokonania zapisu nagrania
j) Detekcja ruchu – przy uruchomionej detekcji ruchu kamera zacznie automatycznie
nagrywać w momencie, kiedy zarejestruje ruch w polu widzenia obiektywu przed
niej kamery. Kamera stworzy ok. 20-sekundowe nagranie, zabezpieczy je, a następnie
ukończy zapis (o ile nie zarejestruje kolejnego ruchu). Wciskając przycisk OK przejdziesz
do ustawień, gdzie za pomocą strzałek dokonasz wyboru wł/wył. Wciskając ponownie
przycisk OK potwierdzisz swój wybór. Tryb detekcji ruchu działa jedynie wtedy, kiedy
kamera jest włączona. W przypadku dłuższego użytkowania, kamera musi być na stałe
podłączona do źródła zasilania.
k) Status GPS – w chwili podłączenia modułu do kamery, sygnał zostanie zarejestrowany
a ikona GPS zmieni kolor na zielony a na wyświetlaczu pojawią się aktualne współrzęde.
To ustawienie umożliwia wyłączenie lub pozostawienie wyświetlonych współrzędnych
na kamerze lub ewentualny podgląd danych podłączonych staleit (pozycja, siła sygnału
itp).
l) Strefa czasowa – ta opcja umożliwia zmianę strefy czasowej tak, aby była zgodna z Two
im aktualnym położeniem geogracznym.
m) Czas letni – fukncja umożliwia automatyczną zmianę czasu podczas zmiany czasu na
czas letni lub zimowy.
n) Ustawienia fabryczne – możliwość przywracania ustawień kamery do wyjściowych
ustawień fabrycznych. Wciskając przycisk OK przejdziesz do ustawień, gdzie za pomocą
strzałek dokonasz wyboru tak/nie. Wciskając ponownie przycisk OK potwierdzisz swój
wybór.
o) Formatowanie karty SD – zalecamy przed pierwszym wykorzysty waniem sformatować
kartę w komputerze lub bezpośrednio w kamerze. Wciskając przycisk OK przejdziesz
do ustawień, a za pomocą strzałek możesz dokonać wyboru tak/nie, potwierdzając go
HR SLO LT HU PL SK CZ DE EN
poprzez ponowne kliknięcie przycisku OK. Karta w ciągu kilku sekund zostanie sforma
towana. Uwaga! Operacja spowoduje usunięcie wszystkich danych znajdujących się na
karcie.
p) Kalibracja LDWS – możliwość ustawienia funkcji śledzenia pasów ruchu. System os
trzegania przed niezamierzonym opuszczeniem swojego pasa ruchu (LDWS) to mecha-
nizm, który ostrzeże kierowcę, jak tylko pojazd zacznie wykraczać poza wyznaczony pas
ruchu. Ten system został pomyślany tak, aby minimalizował wypadki spowodowane
nieuwagą kierowcy, na przykład w związku z jego dekoncentracją czy sennością. Aby
-
-
-
-
-
8

system LDWS działał prawidłowo, konieczne jest przeprowadzenie kalibracji urządzenia.
Wciskając przycisk OK przejdziesz do ustawień.
Krok 1 – Za pomocą przycisków W LEWO / W PRAWO ustaw w pionie punkt przecięcia
powierzchni, umieszczając go na środku twojego pasa ruchu, a następnie
potwierdź przyciskiem OK. W podobny sposób należy umieścić punkt w pozi
omie, również potwierdzając ustawienia przyciskiem OK.
Krok 2 – Teraz postępuj podobnie w celu ustawienia lewego punktu przecięcia, aby
wyznaczyć lewy kraniec twojego pasa ruchu – najpierw w pionie, później w
poziomie, a następnie potwierdź przyciskiem OK.
Krok 3 – W ten sam sposób ustaw prawy punkt przecięcia, odpowiadający prawemu
krańcowi twojego pasa ruchu, i ponownie potwierdź wybór przyciskiem OK.
W efekcie kalibracja będzie miała następujący układ. Zobacz przykładowe
ustawienie na obrazku poniżej.
q) Wersja FW – wciskając przycisk OK uzyskasz informację o aktualnie zainstalowanej
wersji rmware.
-
HR SLO LT HU PL SK CZ DE EN
9

PARAMETRY KAMERY SAMOCHODOWEJ
Rozdzielczość przedniej kamery: 1920×1080 30 FPS, 1280×720 30 FPS
Rozdzielczość tylnej kamery: 1280×720 25 FPS
Ekran: 4.3“
Kąt widzenia: 140°
Format wideo: MOV
Format foto: JPG
Typ pamięci: Micro SDHC do 32 GB
Możliwość łączenia: USB
Długość kabla łączącego: Ok. 5 m
Częstotliwość sieci: 50/60 Hz
Specykacja może ulec zmianie poprzez wymianę któregoś z elementów urządzenia lub
aktualizację oprogramowania.
Producent:
elem6 s.r.o., Braškovská 308/158, 161 00 Praha 6
http://www.lamax-electronics.com
Błędy w druku i zmiany w instrukcji obsługi zastrzeżone.
HR SLO LT HU PL SK CZ DE EN
10

HU HASZNÁLATI ÚTMUTATÓ
LAMAX
S7 Dual

TARTALOMJEGYZÉK
BEVEZETŐ ............................................................................................................................................................ 2
JELLEMZŐK ÉS FUNKCIÓK ............................................................................................................................2
CSOMAG TARTALMA .......................................................................................................................................2
A TERMÉK RAJZA .............................................................................................................................................. 3
A TERMÉK TELEPÍTÉSE ....................................................................................................................................3
GYORS VÁLASZTÁSSAL VEZÉRELT FUNKCIÓK ......................................................................................3
AZ IKONOK MAGYARÁZATA.........................................................................................................................4
AZ AUTÓS KAMERA HASZNÁLATA ........................................................................................................... 4
AZ AUTÓKAMERA BEÁLLÍTÁSA .................................................................................................................. 6
AZ AUTÓS KAMERA PARAMÉTEREI ......................................................................................................... 10
BEVEZETŐ
Köszönjük, hogy megvásárolta a LAMAX S7 Dual autós kamerát. Lett egy megbízható társa
autós utazásaihoz. A legtöbb EU-országban felvételeket készíthet az utazásról, megvédve
ezzel tulajdonát és egészségét.
JELLEMZŐK ÉS FUNKCIÓK
- Full HD video 1920×1080 – első kamera
- HD video 1280×720 – hátsó kamera
- G-szenzor
- Ciklikus felvétel
- Mozgásérzékelő
- Parkolási üzemmód
- Parkolókamera
CSOMAG TARTALMA
- LAMAX S7 Dual autós kamera
- Hátsó kamera
- GPS modul
HR SLO LT HU PL SK CZ DE EN
- Összekötő kábel az első és a hátsó kamera között
- USB feltöltő kábel a szivargyújtóba
- Gumi rögzítők a visszapillantó tükörhöz
- Kábeltartók
- Kézikönyv
- Mikro SD-USB adapter
2

A TERMÉK RAJZA
1. BE/KI
2. Mode
3. Menü
4. Nyíl balra
5. Nyíl jobbra
6. OK
7. Tápcsatlakozó (mini USB)
8. Csatlakozó a hátsó kamera
csatlakoztatásához
9. Slot a micro SDHC kártyához
10. Csatlakozó a GPS modul
csatlakoztatásához
A TERMÉK TELEPÍTÉSE
1) A tápkábelt a szivargyújtóhoz a szélvédő körül vezesse, hogy ne akadályozza a gép-
kocsivezetőt a kilátásban, és rögzítse biztonságosan a kábeltartó segítségével. Csatla
koztassa a kábel egyik végét az első kamerához, másik végét pedig a szivargyújtóhoz.
Csatlakoztassa az első kamerát a gumi rögzítőkkel a belső visszapillantó tükörre. Fordítsa
a kamera lencséjét úgy, hogy az közvetlenül az autó elé nézzen.
2) Ragassza a hátsó kamerát a 3M matrica segítségével a hátsó üvegre.
3) Az összekötő kábel segítségével kösse össze az első és a hátsó kamerát. Vezesse a kábelt
a gépkocsi vázának hosszában, úgy, hogy sehol ne legyen útban. Ezzel elkerülhető es
etleges sérülése a gépkocsi üzemelése közben. A parkolókamera funkció használatához
csatlakoztassa a hátsó kamera csatlakozó vezetékének piros kábelét a parkolólámpához.
4) Ha először használja a berendezést, az akkumulátor töltése alacsony ehet. Ha a készülék
nem kapcsolható be az alacsony áramellátás miatt, csatlakoztassa kézzel a külső tápel
látás kábelét, és töltse fel az akkumulátort.
5) Használjon 10-es, vagy magasabb osztályú márkás micro SDHC kár tyákat. A felvételi idő
optimális használatához legalább 8 GB, legfeljebb azonban 32 GB kapacitású kártyákat
javasolunk. A memóriakártya első használata esetén ajánlatos formázni a számítógép
ben, majd a kamerában.
1 2 3 4 5 6
7 8 9 10
GYORS VÁLASZTÁSSAL VEZÉRELT FUNKCIÓK
1) A képernyő bekapcsolása / kikapcsolása – a BE / KI gomb megnyomásával
2) A videó kézi zárolása / feloldása – a MODE gomb megnyomásával a felvétel közben
zárolja az éppen felvett videót.
3) Az előnézet átkapcsolása a kijelzőn az első és a hátsó kamera között – nyomja meg
a BALRA mutató nyilat
4) A mikrofon felvételének kikapcsolása / bekapcsolása – a BALRA mutató nyíl lenyomva
tartásával
5) Gyors fényképkészítés – nyomja meg a JOBBRA mutató nyilat felvétel közben
6) Parkolási üzemmód aktiválása – tartsa lenyomva a JOBBRA mutató nyilat
-
-
-
-
HR SLO LT HU PL SK CZ DE EN
3

AZ IKONOK MAGYARÁZATA
Videó üzemmód G-szenzor
Fényképezőgép üzemmód Parkoló üzemmód
Mikrofon kikapcsolva Az elem töltése
Észlelt memóriakártya
Nincs memóriakártya
Expozíció
AZ AUTÓS KAMERA HASZNÁLATA
1) Micro SDHC kártya behelyezése
A Micro SDHC kártya behelyezése és eltávolítása a micro SDHC kártya slot-ból akkor lehet-
séges, ha a kamera ki van kapcsolva, és nincs csatlakoztatva számítógéphez vagy tápegy-
séghez. Javasoljuk a legfeljebb 32 GB kapacitású, 10-es osztályú márkás memóriakártyák
használatát.
2) Tápellátás
a) A kamerát a tápforráshoz USB-kábellel csatlakoztathatja a számítógépbe, vagy a töltő
segítségével közvetlenül az autó szivargyújtójába.
b) A kamerát állandó tápellátásra tervezték.
c) Az integrált akkumulátor csak bizonyos funkciókat biztosít, mint például a késleltetett
leállítás vagy a parkolási üzemmód.
3) A kamera bekapcsolása és kikapcsolása
a) Kapcsolja be az autós kamerát az BE/KI gomb megnyomásával.
b) A kamera automatikusan bekapcsol, amikor csatlakozik a tápellátáshoz.
c) A kamerát a BE/KI gomb 3–5 másodpercig tartó lenyomásával kapcsolja ki.
d) A kamera automatikusan kikapcsol, amikor megszakad a csatlakozás a tápellátáshoz.
A kamera késleltetett leállítási funkcióval rendelkezik, amelynek hossza beállítható. Ha
felvétel közben megszakítja a kamera áramellátását, a kamera egy meghatározott idő
elteltével elmenti az aktuálisan rögzített videót, és kikapcsol.
4) Az üzemmódok átkapcsolás és mozgás a menüben
a) A MODE gomb rövid megnyomásával válthat a videofelvétel / fényképezőgép / videó-
galéria / fotógaléria üzemmódok között.
b) A kamera menüje két részre oszlik. Videó üzemmódban a MENU gomb megnyomása
után két különböző menü jelenik meg. A videó beállítása és a fényképezőgép beállítása.
c) A videógaléria üzemmódból a MENU gomb megnyomása után két különböző menü
jelenik meg. A videók kezelése és a kamera beállítása. A videók kezelésének leírása az
HR SLO LT HU PL SK CZ DE EN
5) – 7) pontokban található.
d) A fotógaléria üzemmódból a MENU gomb megnyomása után két különböző menü jele
nik meg. A fényképek kezelése és a kamera beállítása. A fényképek kezelésének leírása
az 5) – 7) pontokban található.
e) A különböző menütípusok közötti váltás a MENU gomb megnyomásával lehetséges. A
megfelelő menüben a BALRA mutató és a JOBBRA mutató nyilakkal mozoghat. Egy elem
kiválasztása után nyomja meg az OK gombot, és a nyilak, illetve az OK gomb ismételt
megnyomásával válassza ki a kívánt beállítást.
-
4

5) Felvétel/fényképezés/galéria megtekintése
a) A felvétel a kamerán az OK gomb megnyomása után indul el. Ismételt megnyomásával
leállítja a felvételt. A kamerának videofelvétel üzemmódban kell lennie.
b) Automatikus felvétel – az automatikus felvétel funkciója folyamatosan bekapcsolt ál
lapotban van. Az automatikus felvétel akkor indul el, amikor a kamera csatlakozik a
tápellátáshoz. Olyan gépkocsi esetében, amelyben a töltés az indítótól függ, a kamera
az indítás után kapcsol be és kezdi el a felvételt.
c) A fénykép készítése az OK gomb megnyomásával történik. A kamerának fényképezés
üzemmódban kell lennie.
d) Videógaléria / Fotógaléria üzemmódba történő váltás után megjelenik a felvett videók
vagy fényképek listája. Az egyes felvételek és fényképek között a BALRA mutató és a
JOBBRA mutató nyilak segítségével mozoghat. Videógaléria üzemmódban a videók
mappákban elosztva találhatók meg. A VIDEO mappa a szokásos videók tárolására
szolgál A zárolt videók tárolásához használja a “ZÁROLÁS” fület. Az EVENT mappa a
mozgásérzékelő felvételeinek tárolására szolgál. Az egyes mappák és videók/fényképek
között a BALRA mutató és a JOBBRA mutató nyilak segítségével mozoghat. Ha a videóról
vissza szeretne kapcsolni a mappára, nyomja meg a MENU gombot.
6) A rögzített anyag törlése közvetlenül a kamerában
a) Az egyes anyagok törlése közvetlenül a kamerában – a galériában is elvégezhető. Miután
kiválasztotta a kívánt elemet, nyomja meg a MENU gombot (a videógalériában kétszer
nyomja meg), válassza a TÖRLÉS tételt, és válassza az EGY TÖRLÉSE lehetőséget.
b) Az összes felvétel törlése – elvégezhető a galériában. Nyomja meg a MENU gombot,
válassza a TÖRLÉS tételt, és válassza a MINDEN TÖRLÉSE lehetőséget.
7) A rögzített anyag védelme a kamerában
Amikor a memóriakártya megtelik, a kamera a legrégebbi videókat automatikusan felülírja
újakkal. Ha egyes videókat szeretne megvédeni az esetleges törléstől, ezeket a videókat
zárolnia kell.
a) Az aktivált G-szenzor garantálja, hogy ütközés esetén automatikusan zárolja az éppen
rögzített felvételt. Megvédi így a felülírástól.
b) Az éppen rögzített felvételt manuálisan is zárolhatja a „Mode“ gomb megnyomásával.
c) A felvételek később is zárolhatók a kamera galériájában:
- Egyes felvételek zárolása – Miután kiválasztotta a kívánt elemet, nyomja meg a MENU
gombot (a videógalériában kétszer nyomja meg), válassza a ZÁROLÁS tételt, és válassza
az EGY ZÁROLÁS lehetőséget.
- Minden felvétel zárolása – Nyomja meg a MENU gombot, válassza a ZÁROLÁS tételt, és
válassza a MINDEN ZÁROLÁSA lehetőséget.
- Egyes felvételek feloldása – Miután kiválasztotta a kívánt elemet, nyomja meg a MENU
gombot (a videógalériában kétszer nyomja meg), válassza a FELOLDÁS tételt, és
válassza az EGY FELOLDÁSA lehetőséget.
- Minden felvétel feloldása – Nyomja meg a MENU gombot, válassza a FELOLDÁS tételt,
és válassza a MINDEN FELOLDÁSA lehetőséget.
-
HR SLO LT HU PL SK CZ DE EN
5

8) Csatlakozás a számítógéphez
A micro SDHC-hez tartozó USB adapter a csomag tartalma. Helyezze be a memóriakártyát
az adapterbe, és csatlakoztassa az adaptert a számítógéphez.
9) Az első és a hátsó kamera átkapcsolása a kijelzőn
Az első és a hátsó kamera megfelelő csatlakoztatása esetén a kijelzőn fő képként az első
kamera képe jelenik meg. A hátsó kamera képe a jobb felső sarokban jelenik meg, mint
kép a képben. Az első és a hátsó kamera közötti váltás a BALRA mutató nyíl segítségével
lehetséges.
10) Parkolókamera
Ha a hátsó kamera összekötő vezetékének piros kábelét csatlakoztatja a parkolólámpához,
ezzel aktiválja az úgynevezett parkolókamerát. A hátrameneti fokozat bekapcsolása esetén
a kijelzőn automatikusan megjelenik a hátsó kamera képe, és megjelennek a tolatóvon
alak.
Ajánlás: Javasoljuk, hogy a piros kábel telepítését a parkolólámpába hivatalos szervizköz
pontban végeztesse el.
11) A GPS modul csatlakoztatása
Amint a modul csatlakozik a kamerához, és fogja a jelet, a GPS ikon zöldre vált és az ak-
tuális koordináták megjelennek a kijelzőn. A
töltse le a LAMAX Player-t a kamera felvételeinek lejátszásához. A lejátszó a felvételen kívül
megjeleníti az aktuális sebességet és a megtett útvonalat a Google Térképen.
AZ AUTÓKAMERA BEÁLLÍTÁSA
Videó üzemmódban nyomja meg a MENU gombot. A beállítás két részből áll – a videó
beállítása és a fényképezőgép beállítása.
www.lamax-electronics.com
1) Videó beállítása
a) Videófelbontás – két opciót kínál: HD és full HD 30 FPS. Az OK gomb megnyomásával
lépjen be a beállítások menübe, és a nyilak segítségével válassza ki a kívánt felbontást,
majd az OK gomb megnyomásával erősítse meg.
b) A videó időtartama (hurokhossz) – itt állítsa be az egyes felvételek hosszát. A kamera
1–5 perces videofelvételeket készít. Ha a memóriakártya megtelt, a kamera elkezdi a
legrégebbi felvételek felülírását. Az egyes videók követik egymást, és nem hoznak létre
úgynevezett vak pontokat az egyes hurkok között. Az OK gomb megnyomásával lépjen
be a beállítások menübe és a nyilak segítségével válassza ki a hurok kívánt hosszát, majd
az OK gombbal erősítse meg.
c) Késleltetett kikapcsolás – lehetővé teszi a kamera azonnali kikapcsolásának elhalasz
HR SLO LT HU PL SK CZ DE EN
tását, miután a kamerát levette a tápforrásról. Ez a funkció megfelelő például olyan gép-
kocsik esetében, amelyek rendelkeznek start/stop berendezéssel. Az OK gomb megny-
omásával lépjen be a beállítások menübe és a nyilak segítségével válassza ki a késleltetés
kívánt hosszát, vagy teljesen kikapcsolhatja ezt a funkciót. Az OK gomb ismételt megny
omásával erősítse meg a választást.
d) Hangfelvétel – lehetővé teszi a mikrofon kikapcsolását vagy bekapcsolását videofelvé
tel közben. Jól jön, ha például szeretné megőrizni hívásainak bizalmas jellegét. Ez a
funkció gyors kiválasztás opcióval is rendelkezik. Az OK gomb megnyomásával lépjen be
-
-
termékoldalon
-
-
-
6

a beállítások menübe, a nyilak segítségével kapcsolja be vagy kapcsolja ki a mikrofont,
az OK gomb ismételt megnyomásával pedig erősítse meg a választást.
e) Expozíció – lehetővé teszi az expozíció módosítását a 0–10 tartományban. Az OK gomb
megnyomásával lépjen be a beállítások menübe majd az OK gomb megnyomásával
erősítse meg, a nyilak segítségével válassza ki a kívánt szintet, majd az OK gomb meg
nyomásával erősítse meg.
f) LDWS – sávkövető funkció. Ezt a funkciót először kalibrálni kell a “Kamera beállítások”
menüben. Az OK gomb megnyomásával belép a beállítások menübe, és a nyilak segítsé
gével bekapcsolja vagy kikapcsolja a funkciót.
2) Kamera beállítása
a) Nyelv – a kamera többnyelvű menüvel rendelkezik. A nyelvet az OK gomb megny-
omásával változtassa meg, az OK gomb ismételt megnyomásával pedig erősítse meg
a választást.
b) A dátum és az idő beállítása – lehetővé teszi az aktuális dátum és idő beállítását. Ab
ban az esetben, ha a kamerához GPS-modul csatlakozik, megtörténik a dátum és az
idő automatikus szinkronizálása. Az OK gomb megnyomásával lépjen be a beállítások
menübe, a nyilak segítségével pedig fokozatosan állítsa be az egyes elemeket (év,
hónap, nap, óra, perc és másodperc). Minden egyes beállítást meg kell erősítenie az
OK gomb megnyomásával. Miután mindent beállította, az OK gomb ismételt megny
omásával erősítse meg a módosításokat.
c) Billentyűhang – lehetővé teszi a billentyűhangot bekapcsolását/kikapcsolását. Az OK
gomb megnyomásával lépjen be a beállítások menübe, a nyilak segítségével válassza ki
a kívánt felbontást, majd az OK gomb megnyomásával erősítse meg.
d) Automatikus kikapcsolás – lehetővé teszi az autós kamera automatikus kikapcsolását,
ha 1, illetve 5 percen át nem végez műveletet. Az OK gomb megnyomásával lépjen be a
beállítások menübe, a nyilak segítségével válassza ki az intervallumot, majd az OK gomb
megnyomásával erősítse meg.
e) Hangerő – szabályozza az autós kamera működési hangerejét (videólejátszás, hang
vezérlés). Az OK gomb megnyomásával lépjen be a beállítások menübe, a nyilak segítsé-
gével válassza ki a kívánt szintet 0-tól 10-ig, majd az OK gomb megnyomásával erősítse
meg.
f) Alvó üzemmód – a kijelző automatikusan kikapcsol, ha 1 vagy 3 perc után nem végez
tevékenységet, vagy az alvó üzemmód teljesen kikapcsolható. Az LCD automatikus ki
kapcsolása akkor is működik, ha a kamera felvételt készít. Az OK gomb megnyomásával
lépjen be a beállítások menübe, a nyilak segítségével válassza ki a kívánt opciót, majd az
OK gomb megnyomásával erősítse meg.
g) Hálózati frekvencia – lehetővé teszi a frekvencia kiválasztását a hálózat frekvenciájának
megfelelően (az európai hálózatban 50 Hz-es frekvencián történik az áram vezetése,
Amerikában és Ázsiában azonban ez 60 Hz).
h) G-szenzor – a G-szenzornak köszönhetően a kamera képes rögzíteni az ütközést például
egy közlekedési balesetben. Miután a kamera felvette az ütközést, azonnal zárolja az
éppen rögzített felvételt. Így a felvétel nem írható felül. A G-szenzor beállítható néhány
különböző érzékenységi szintre (magas, közepes, alacsony), vagy teljesen kikapcsolható.
Az OK gomb megnyomásával lépjen be a beállítások menübe, a nyilak segítségével
válassza ki a kívánt opciót, majd az OK gomb megnyomásával erősítse meg.
-
-
-
-
-
-
HR SLO LT HU PL SK CZ DE EN
7

i) Parkolási üzemmód – a parkolási üzemmód akkor is működik, ha a kamera nem kap
tápellátást, és az energiát a beépített akkumulátorról kapja. A G-szenzor által észlelt
bármilyen ütközés esetén a kamera automatikusan bekapcsol, és elkezdi a felvételt. Ha
körülbelül 20–30 másodperc ütközés nélkül telik el, a felvételt menti, zárolja, és a kamera
újra kikapcsol. Aktivált parkolási üzemmód mellett a kamera kikapcsolja az LCD kijelzőt,
hogy ne vonzza magára a gyelmet. A Parkolási üzemmód beállításának része a g-szen
zor érzékenységének beállítása is: alacsony, közepes, magas, illetve a teljes kikapcsolás. A
beállításokat szükség szerint, és a körülmények gyelembe vételével válassza ki.
A működő Parkolási üzemmód feltétele természetesen az akkumulátor 100% -os fel-
töltöttségi szintje. Ha az akkumulátor nincs feltöltve, a kamera nem kap energiát a felvé
tel elindításához és rögzítéséhez.
j) Mozgásérzékelés – ha a mozgásérzékelés be van kapcsolva, a kamera automatikusan
elkezdi a felvételt, amikor az első kamera lencséjének látómezőjében mozgást észlel.
A kamera körülbelül 20 másodperces felvételt rögzít, zárolja, és ha nem észlel további
mozgást, a felvételt befejezi. Az OK gomb megnyomásával lépjen be a beállítások
menübe, a nyilak segítségével válassza ki a be/ki opciót, majd az OK gomb ismételt meg
nyomásával erősítse meg.
A mozgásérzékelés üzemmód csak akkor működik, ha a kamera be van kapcsolva. Hossz
abb távú használat esetén a kamerának állandóan csatlakoznia kell a tápegységhez.
k) GPS státusz – amint a modul csatlakozik a kamerához, és fogja a jelet, a GPS ikon zöldre
vált, az aktuális koordináták pedig megjelennek a kijelzőn. Ebben a beállításban kika
pcsolhatja vagy bekapcsolhatja a kamera koordináta-kijelzőjét. Esetleg megnézheti a
csatlakoztatott műholdak aktuális adatait (pozíció, jelerősség, stb.).
l) Időzóna – ebben a beállításban megváltoztathatja az időzónát aktuális földrajzi elhely
ezkedésének megfelelően.
m) Nyári időszámítás – e funkció bekapcsolásával az idő automatikusan módosul, áttérve
a nyári időszámításra, és fordítva.
n) Gyári beállítások – lehetővé teszi a kamera beállításainak eredeti gyári beállításra
történő átváltását. Az OK gomb megnyomásával lépjen be a beállítások menübe, és a
nyilak segítségével válassza ki az igen / nem opciót, majd az OK gomb megnyomásával
erősítse meg.
o) Az SD-kártya formázása – javasoljuk, hogy a kártyát az első használat előtt formázza a
számítógépben, vagy közvetlenül a kamerában. Az OK gomb megnyomásával lépjen
be a beállítások menübe, a nyilak segítségével válassza ki a kívánt felbontást, majd az
OK gomb megnyomásával erősítse meg. A kártya formázása néhány másodpercen belül
befejeződik. Vigyázat, ezzel a művelettel a kártya minden adata törlődik.
p) LDWS kalibrálása – a forgalmi sáv elhagyására gyelmeztető rendszer (LDWS) olyan
HR SLO LT HU PL SK CZ DE EN
mechanizmus, amely gyelmezteti a vezetőt, amikor a jármű kezdi elhagyni a forgalmi
sávot. Ez a rendszer úgy van kialakítva, hogy minimálisra csökkentse a járművezető
gyelmének olyan kihagyása okozta közlekedési baleseteket, mint például a szórako
zottság, vagy az álmosság. Az LDWS rendszer megfelelő működéséhez el kell végezni
a berendezés kalibrálását. Az OK gomb megnyomásával belép a beállítások menübe.
1. lépés – A BALRA / JOBB RA gombokkal állítsa be forgalmi sávjának függőleges
metszéspontját a sáv közepén, majd erősítse meg az OK gombbal. Ezután
-
-
-
-
-
-
-
8

ugyanezt a beállítást végezze el vízszintesen, majd ismét nyomja meg az OK
gombot
2. lépés – Most ismételje meg ugyanígy a bal oldali metszéspontot – forgalmi sávjának
bal szélén függőlegesen, majd vízszintesen, és erősítse meg az OK gombbal.
3. lépés – A jobb oldali metszésponthoz ugyanazt a beállítást használja – forgalmi
sávjának jobb szélén, majd ismét nyomja meg az OK gombot. A végén a kali
brálás mentésre kerül. Nézze meg a példát a képen.
q) FW verzió – az OK gomb megnyomásával adatokat kap a rmware aktuálisan telepített
verziójáról.
-
HR SLO LT HU PL SK CZ DE EN
9

AZ AUTÓS KAMERA PARAMÉTEREI
Az első kamera felbontása: 1920×1080 30 FPS, 1280×720 30 FPS
A hátsó kamera felbontása: 1280×720 25 FPS
Kijelző: 4.3“
Felvételi szög: 140°
Videó formátum: MOV
Formátum: JPG
Memória típusa: Micro SDHC, 32 GB-ig
Kapcsolódási képesség: USB
Csatlakozó kábel hossza: kb. 5 m
Hálózati frekvencia: 50/60 Hz
A specikáció a készülék egyes részegységeinek cseréjével, vagy szoftverfrissítéssel mó
dosulhat.
Gyártó:
elem6 s.r.o., Braškovská 308/158, 161 00 Praha 6
http://www.lamax-electronics.com
A nyomdahibák és a kézikönyv változtatásainak jogát fenntartjuk.
HR SLO LT HU PL SK CZ DE EN
-
10

LT VARTOJIMO INSTRUKCIJA
LAMAX
S7 Dual

TURINYS
ĮVADAS ..................................................................................................................................................................2
SAVYBĖS IR FUNKCIJOS .................................................................................................................................2
RINKINIO TURINYS ...........................................................................................................................................2
PRODUKTO SCHEMA ......................................................................................................................................3
PRODUKTO INSTALIACIJA ............................................................................................................................ 3
GREITO PASIRINKIMO FUNKCIJA ...............................................................................................................3
PIKTOGRAMŲ PAAIŠKINIMAS ..................................................................................................................... 4
NAUDOJIMAS.....................................................................................................................................................4
NUSTAT YMAI ...................................................................................................................................................... 6
PARAMETRAI ....................................................................................................................................................10
ĮVADAS
Dėkojame, kad įsigijote automobilinį registratorių LAMAX S7 Dual. Turite dabar naują
kelionių kompanioną, kuriuo galite visada pasikliauti. Daugumoje ES valstybių galite do
kumentuoti savo vairavimą, o tuo pačiu saugoti savę ir savo turtą
SAVYBĖS IR FUNKCIJOS
- Video Full HD 1920×1080 – priekinė registratorius
- Video HD 1280×720 – galinis registratorius
- G-jutiklis
- Įrašymas kilpoje
- Judesio detektorius
- Parkavimo režimas
- Parkavimo registratorius
RINKINIO TURINYS
- Automobilinis registratorius LAMAX S7 Dual
- Galinis registratorius
- GPS modulis
HR SLO LT HU PL SK CZ DE EN
- Kabelis jungiantis priekinę ir galinį registratorių
- USB maitinimo kabelis automobiliniam lizdui
- Guminiai laikikliai tvirtinimui prie galinio vaizdo veidrodžio
- Kabelių laikikliai
- Naudojimo instrukcija
- MicroSD-USB adapteris
-
2

PRODUKTO SCHEMA
1. ĮJ./IŠJ.
2. Režimas (mode)
3. Meniu
4. Rodyklė kairėn
5. Rodyklė dešinėn
6. OK
7. Maitinimo jungtis (mini USB)
8. Lizdas galinio registratoriaus prijungimui
9. Micro SDHC kortelės lizdas
10. GPS modulio prijungimo lizdas
PRODUKTO INSTALIACIJA
1) Maitinimo kabelį iki automobilinio lizdo nuveskite aplink priekinį stiklą taip, kad ne
ribotų vairuotojui matomumo, o po to pritvirtinkite su kalbelių laikiklių pagalba. Vieną
laido galą prijunkite prie priekinės automobilio kameros, kitą prijunkite prie automo
bilio įkroviklio/cigarečių degiklio. Priekinę kamerą primontuokite su gumytėms prie
galinio vaizdo veidrodžio. Registratoriaus objektyvą apsukite taip, kad būtų nukreiptas
betarpiškai į vaizdą prieš automobilį.
2) Galinį registratorių priklijuokite galiniame stikle su 3M lipduku.
3) Su jungiamuoju kabeliu sujunkite priekinį bei galinį registratorių. Kabelį nuveskite auto
mobilio korpusu taip, kad jokiu būdu netrukdytų. Taip išvengsite nelaimingų atsitikimų
vairavimo metu. Jeigu norite naudoti parkavimo kameros funkciją, prijunkite raudoną
laidą iš užpakalinės kameros sujungimo laido prie parkavimo šviestuvo.
4) Naudojant įrenginį pirmą kartą, baterija bus silpnai pakrauta. Jei negalima įjungti
įrenginio dėl silpno baterijos pakrovimo, prijunkite rankiniu būdu maitinimo kabelį ir
taip pakraukite bateriją.
5) Rekomenduojame naudoti aukštos kokybės micro SDHC korteles, klasė 10 arba
aukštesnė. Siekiant įrašyti kuo ilgesnius įrašus rekomenduojame naudoti mažiausiai
8 GB, o maksimaliai 32 GB talpos korteles. Pirmą kartą naudojant kortelę reikia ją sufor
matuoti kompiuteryje arba kameroje.
1 2 3 4 5 6
7 8 9 10
GREITO PASIRINKIMO FUNKCIJA
1) Ekrano įjungimas/išjungimas – trumpas mygtuko ĮJ./IŠJ. Paspaudimas
2) Rankinis įrašo apsaugojimas /apsaugojimo nuėmimas – trumpas mygtuko REŽIMAS
paspaudimas apsaugos duotu momentu įrašomą įrašą
3) Vaizdo iš priekinio registratoriaus į galinį perjungimas – trumpas rodyklės KAIRĖN
paspaudimas
4) Mikrofono įrašų išjungimas/prijungimas – ilgis rodyklės KAIRĖN paspaudimas
5) Greitas nuotraukų atlikimas – trumpas rodyklės DEŠINĖN paspaudimas įrašymo metu
6) Parkavimo režimo įjungimas – ilgas rodyklės DEŠINĖN paspaudimas
-
-
-
HR SLO LT HU PL SK CZ DE EN
3

PIKTOGRAMŲ PAAIŠKINIMAS
Video režimas G-jutik lis
Nuotraukų režimas Parkavimo režimas
Mikrofonas išjungtas Baterijos pakrovimas
Rasta atminties kortelė
Nėra atminties kortelės
Ekspozicija
NAUDOJIMAS
1) Kortelės Micro SDHC įdėjimas
Įdėkite arba išimkite micro SDHC kortelę iš kortelės atminties lizdo tik tada, kai registrato-
rius yra išjungtas bei kai nėra prijungta prie kompiuterio maitinimo kabeliu. Rekomenduo-
jame naudoti mažiausiai 10, o maksimaliai 32GB talpos korteles.
2) Maitinimas
a) Registratorius gali būti maitinamas su USB kabeliu prijungtu prie kompiuterio arba
panaudojus automobilio lizdą
b) Registratorius suprojektuotas taip, kad būtu pastoviai maitinamas.
c) Integruota baterija skir ta naudoti kai kuriose funkcijose, tokiose kaip atidėtas išjungimas
arba parkavimo režimas.
3) Registratoriaus įjungimas ir išjungimas
a) Norint išjungti registratorių spauskite mygtuką „IŠ./ĮJ.”.
b) Pajungus maitinimo šaltinį registratorius įsijungs automatiškai.
c) Norint išjungti registratorių spauskite ir palaikykite mygtuką „IŠ./ĮJ.” per 3-5 sek.
d) Atjungus maitinimo šaltinį registratorius išsijungs automatiškai. Registratorius turi
atidėto išjungimo funkciją, kurioje galima nustatyti laiką. Jei atjunksite registratorių
iš maitinimo įrašymo metu, registratorius po nustatyto laiko įrašys duotu momentu
įrašomą video ir išsijungs.
4) Režimų perjungimas ir naršymas meniu
a) Kelis kartus spaudžiant mygtuką REŽIMAS galite persijungti tarp įrašymo/nuotraukų
darymo/video galerijos/foto galerijos režimų.
b) Kameros meniu yra atskirtas į dvi dalis. Vaizdo įrašo režime paspaudus mygtuką MENIU
bus rodomi du skirtingi meniu. Vaizdo įrašo nustatymas ir kameros nustatymas.
c) Jei esate video galerijos režime, paspaudus mygtuką MENIU įjungsite dviejų skirtingų
sąsajų rodymą. Įrašymo valdymas ir registratoriaus nustatymai. Įrašų valdymas aprašytas
5) ir 7) punkte.
HR SLO LT HU PL SK CZ DE EN
d) Jei esate foto galerijos režime, paspaudus mygtuką MENIU įjungsite dviejų skirtingų
sąsajų rodymą. Nuotraukų valdymas ir registratoriaus nustatymai. Nuotraukų valdymas
aprašytas 5) ir 7) punkte.
e) Perjungimas tarp paskirų sąsajų galimas spaudžiant mygtuką MENIU. Atitinkamoje
sąsajoje galite naršyti su rodyklių KAIRĖN ir DEŠINĖN pagalba. Po pasirinkimo pas
pauskite mygtuką OK, o su rodyklių pagalba bei pakartotinai paspaudus mygtuką OK
pasirinkite pageidaujamą nustatymą.
-
4

5) Įrašymas / nuotraukų atlikimas / galerijos peržiūra
a) Norint pradėti įrašymą paspauskite mygtuką OK. Dar kartą paspaudus šį mygtuką sust-
abdysite įrašymą. Šio veiksmo metu registratorius turi būti įrašymo režime.
b) Automatinis įrašymas - automatinio įrašymo funkcija yra pastoviai aktyvi. Automatinis
įrašymas prasidės kai registratorius prisijungs prie maitinimo šaltinio. Kai tik pradės veiks
automobilis, įsijungs registratorius ir pradės įrašinėti.
c) Nuotraukas galima atlikti paspaudus mygtuką OK. Šio veiksmo metu registratorius turi
būti fotografavimo režime.
d) Perėjus į galeriją bus matomas atliktų lmų bei nuotraukų sąrašas. Norint peržiūrėti atlik
tas nuotraukas ar įrašus naršykite rodyklėmis AUKŠTYN ir ŽEMYN. Video galerijos režime
įrašai skirstomi į aplankus. Aplankas VIDEO naudojamas esamų įrašų laikymui. Aplankas
SPYNA naudojamas apsaugotų įrašų laikymui. Aplankas EVENT naudojamas judesio de
tekcijos pagalba atliktų įrašų laikymui. Norint naršyti po aplankus ir įrašus/nuotraukas
naudokite mygtukus KAIRĖN ir DEŠINĖN. Perėjimas į rašinėjimą iš aplanko galimas kelis
kartus paspaudys mygtuką MENIU.
6) Failų šalinimas betarpiškai registratoriuje
a) Failus galima šalinti betarpiškai registratoriuje – galima galerijoje. Paspaudus mygtuką
MENIU galite pasirinkti failus pašalinimui (video galerijoje spaudžiant jį du kartus), o po
to pasirinkite poziciją PAŠALINTI, o po to funkciją PAŠALINTI.
b) Visų įrašų pašalinimas – galima galerijoje. Paspauskite mygtuką MENIU, pasirinkite
poziciją PAŠALINTI, o po to funkciją PAŠALINTI VISKĄ.
7) Registratoriaus sukurtos medžiagos apsaugojimas
Atminties kortelės užpildymo atveju, registratorius automatiškai keis seniausius įrašus
naujausiais. Jei norite apsaugoti kai kuriuos įrašus nuo pašalinimo, turite juos apsaugoti.
a) Įjungtas G-jutiklis užtikrina, kad smūgio atveju duotu momentu įrašomas vaizdas bus
automatiškai apsaugotas, o tuo pačiu iškeitimas įrašyme kilpoje nebus galimas.
b) Duotu momentu įrašoma vaizdą galima apsaugoti rankiniu būdų paspaudžiant
mygtuką “Režimas”.
c) Failus galima taip pat papildomai apsaugoti registratoriaus galerijoje:
- Paskirų įrašų apsaugojimas – Pasirinkus norimą poziciją paspauskite mygtuką ME
NIU (video galerijoje paspauskite du kartus), pasirinkite poziciją APSAUGOTI, o po to
funkciją APSAUGOTI.
- Visų įrašų apsaugojimas – Paspauskite mygtuką MENIU, pasirinkite poziciją APSAU
GOTI, o po to funkciją APSAUGOTI VISUS.
- Apsaugos nuo paskirų failų nuėmimas – Pasirinkus norimą poziciją paspauskite
mygtuką MENIU (video galerijoje paspauskite du kartus), pasirinkite poziciją NUIMTI
APSAUGOJIMĄ, o po to funkciją NUIMTI APSAUGOJIMĄ.
- Apsaugos nuo visų failų nuėmimas – Paspauskite mygtuką MENIU, pasirinkite poziciją
NUIMTI APSAUGOJIMĄ, o po to funkciją NUIMTI VISŲ APSAUGOJIMĄ.
8) Prijungimas prie PC
USB adapteris su mikro SDHC jungtimi yra įtrauktas į paketą. Įdėkite atminties kortelę į
adapterį ir prijunkite adapterį prie kompiuterio.
-
-
-
-
HR SLO LT HU PL SK CZ DE EN
5

9) Priekinio ir galinio registratoriaus vaizdo perjungimas
Esant sėkmingam priekinio ir galinio registratoriaus sujungimui ekrane kaip pagrindinis
pasirodys vaizdas iš priekinio registratoriaus. Galinio registratoriaus vaizdas bus rodomas
viršutiniame dešiniame ekrano kampe. Persijungimas tarp abiejų vaizdavimo būdų atlieka
mas spaudžiant rodyklę KAIRĖN.
10) Parkavimo kamera
Jeigu raudoną laidą iš užpakalinės kameros sujungimo laido prijungsite prie parkavimo
šviestuvų, aktyvuosite t.v. parkavimo kamerą. Kai įjungiate atleidžiate atbulinės eigos
pavarą, ekrane automatiškai pasirodys galinės kameros vaizdas bei atbulinės eigos linijos.
Rekomendacijos: Raudono laido instaliavimą į parkavimo šviestuvus rekomenduojame
atlikti profesionaliame servise.
11) GPS modulio prijungimas
Kai tik prijungsime prie registratoriaus modulį pagaus jis signalą, GPS piktograma
pakeis spalvą į žalią, o ekrane pasirodys aktualios koordinatės. Iš produkto tinklapio
www.lamax-electronics.com
peržiūros. Grotuvas išskyrus įrašymą rodo taip pat aktualų greitį bei Google žemėlapiuose
rodo nuvažiuotą maršrutą.
NUSTATYMAI
Video režime paspauskite mygtuką MENIU. Nustatymai turi du dalis: video nustatymai ir
registratoriaus nustatymai.
galite parsisiųsti LAMAX Player, dėl registratoriaus duomenų
1) Video nustatymai
a) Video rezoliucija – galimi du variantai: HD ir full HD prie 30 FPS. Paspaudžiant mygtuką
OK pereisite į nustatymus, o rodyklių pagalba pasirinkite norimą rezoliuciją ir pat
virtinkite mygtuku OK.
b) Video laikas (kilpos ilgis) – galima nustatyti paskirų įrašų ilgį. Registratorius įrašo kilpoje
1-5 minučių ilgio įrašus. Atveju, kai kortelė bus užpildyta, registratorius pradės rodyti
seniausius įrašus. Paskiri įrašai sklandžiai su savimi susiję, nedaro taip vadinamų tuščių
vietų tarp paskirų kilpų. Paspaudžiant mygtuką OK pereisite į nustatymus, o su rodyklių
pagalba pasirinkite norimą kilpos ilgį. Pasirinkus patvirtinkite dar kartą paspaudžiant
mygtuką OK.
c) Atidėtas išjungimas – galima nustatyti atidėtą išjungimą po registratoriaus atjungimo
iš maitinimo. Ši funkcija yra ideali pavyzdžiui, kai naudojame automobilį su įranga start/
stop. Paspaudžiant mygtuką OK pereisite į nustatymus, o su rodyklių pagalba pasiren
kate norimą įjungimo atidėjimo laiką, arba visiškai išjungiate šią funkciją. Dar kartą
paspaudžiant OK patvirtinsite savo pasirinkimą.
HR SLO LT HU PL SK CZ DE EN
d) Garso įrašymas – galima įjungti arba išjungti mikrofono įrašymą video įrašymo metu.
Ideali situacijose, kai pavyzdžiui svarbu Jums turėti privatumą pokalbių metu. Čia yra
turi taip pat greito parinkimo funkcija. Paspaudžiant mygtuką OK pereisite į nustatymus,
o su rodyklių pagalba patvirtinkite mikrofono įjungimą arba išjungimą, patvirtinkite po
to savo pasirinkimą paspaudžiant mygtuką OK.
e) Ekspozicija – leidžia reguliuoti ekspoziciją priklausomai nuo poreikių 0-10 diapazone.
Spaudžiant mygtuką OK, pereisite į nustatymus, o su rodyklių pagalba pasirinksite
norimą lygį, patvirtinkite po to savo pasirinkimą paspaudžiant mygtuką OK.
-
-
-
6

f) LDWS – judėjimo juostų stebėjimo funkcija. Šią funkciją galite kalibruoti meniu
„Registratoriaus nustatymai“. Paspaudžiant mygtuką OK pereisite į nustatymus, o su
rodyklių pagalba įjungsite arba išjungsite funkciją, patvirtinkite po to savo pasirinkimą
paspaudžiant mygtuką OK.
2) Bendrieji nustatymai
a) Kalba – automobilinis registratorius turi daugiakalbę meniu. Kalbą galite pakeisti
spaudžiant mygtuką OK, o po to rodyklių pagalba pasirenkate norimą kalbą. Dar kartą
paspaudžiant OK patvirtinsite savo pasirinkimą.
b) Datos ir valandos nustatymai – galima nustatyti aktualią datą ir valandą. Jei prie reg
istratoriaus prijungtas GPS modulis, data ir valanda sinchronizuojasi automatiškai.
Paspaudžiant mygtuką OK pereisite į nustatymus, o su rodyklių pagalba palaipsniui
nustatysite kiekvieną elementą(metus, mėnesį, dieną, valandą, minutes ir sekundes).
Kiekvieną iš paskirų nustatymų turite patvirtinti mygtuku OK. Kai tik atliksite visus nus
tatymus, patvirtinkite pakitimus dar kartą spaudžiant mygtuką OK.
c) Mygtukų garsas – leidžia įjungti arba išjungti mygtukų garsą. Paspaudžiant mygtuką
OK pereisite į nustatymus, o rodyklių pagalba pasirinkite taip/ne ir patvirtinkite
paspaudžiant dar kartą mygtuką OK.
d) Automatinis išjungimas – galima nustatyti automatinį automobilinio registratoriaus
išjungimą po 1 arba 5 minučių neveiklumo. Paspaudžiant mygtuką OK pereisite į nus
tatymus, o su rodyklių pagalba pasirinksite norimą intervalą arba išjungsite visiškai
funkciją, patvirtinkite pasirinkimą paspaudžiant mygtuką OK.
e) Garsumas – galima reguliuoti registratoriaus darbo garsumą (įrašų atkūrimas, garsinės
instrukcijos). Spaudžiant mygtuką OK pereisite į nustatymus, kur rodyklių pagalba pa
sirinksite lygi 0-10 ir patvirtinsite mygtuku OK.
f) Taupymo režimas – leidžia nustatyti automatinį ekrano išjungimą neaktyvumo atveju
praėjus 1 arba 3 minutėms arba išjungti taupymo režimą. Automatinio LCD išjungimo
funkciją galima naudoti net tada, kai registratorius įrašinėja. Paspaudžiant mygtuką
OK pereisite į nustatymus, o su rodyklių pagalba pasirinksite norimą funkciją. Dar kartą
paspaudžiant OK patvirtinsite savo pasirinkimą.
g) Tinklo dažnis – leidžia pasirinkti dažnį pagal elektros tinklo dažnį (Europos kontinente
elektros tinkle yra elektra 50 HZ, Amerikoje ir Azijos dalyje – 60 Hz).
h) G-jutiklis – G-jutiklio dėka registratorius gali įrašyti smūgį pavyzdžiui kelio avarijos
metu. Kai tik registratorius aptiks smūgį, iškart apsaugos tuo metu įrašomą įrašą. Todėl
tas įrašas nebus pašalintas. Yra galimybė nustatyti įvairius G-jutiklio jautrumus (aukštas,
vidutinis, žemas) arba galima jį visiškai išjungti. Paspaudžiant mygtuką OK pereisite į
nustatymus, kur rodyklių pagalbą pasirinksite norimą funkciją. Spaudžiant mygtuką OK
patvirtinsite savo pasirinkimą.
i) Parkavimo režimas – įjungtas parkavimo režimas veikia ir tada, kai registratorius nėra
maitinamas - energija imama tada iš integruotos baterijos. Prie bent kokio smūgio, kurį
įrašys G-jutiklis, registratorius automatiškai įjungs ir pradės įrašymą. Po 20-30 sekundžių
be smūgio, išsaugos įrašą, apsaugos jį ir pradės vėl įrašinėti. Kai parkavimo režimo funkci
ja aktyvi, LCD ekranas yra išjungtas, kad nereikalingai nepritrauktų dėmesio. Parkavimo
režimo nustatymas taip pat apima ir g-jutiklio jautrumo nustatymą: žemas, vidutinis,
aukštas arba visiškas išjungimas. Nustatymą pasirinkite pagal poreikį ir aplinkybes.
-
-
-
-
HR SLO LT HU PL SK CZ DE EN
-
7

Parkavimo režimo veikimo būtina sąlyga yra visiškai iki 100 % įkrauta baterija. Jeigu
baterija nebus įkrauta, kamera neturės iš kur imti energiją paleidimui ir vaizdo įrašo
įrašymui.
j) Judesio detekcija – įjungiant judesio detekciją registratorius pradės automatiškai
įrašinėti, kai patiks judesį priekinio registratoriaus matomumo srityje. Registratorius
sukurs apie 20 sekundžių ilgio įrašą, apsaugos jį, o po to užbaigs įrašinėjimą (jei neap
tiks kito judesio). Paspaudžiant mygtuką OK pereisite į nustatymus, kur rodyklių pagalba
pasirinksite ĮJ./ IŠJ.. Dar kartą paspaudžiant OK patvirtinsite savo pasirinkimą. Judesio
detekcijos režimas veikia tik tada, kai registratorius yra įjungtas. Dėl ilgalaikio naudojimo
kamera turi būti nuolat prijungta prie maitinimo.
k) GPS Statusas – kai tik modulis prisijungs prie kameros ir priims signalą, GPS pikto
grama taps žalia, o ekrane bus rodomos esamos koordinatės. Šiame nustatyme galite
koordinačių rodymą kameroje išjungti arba palikti įjungtą.Taip pat galite peržiūrėti
prijungtų satelitų aktualius duomenis (padėtį, signalo stiprumą ir t.t.).
l) Zona – šiame nustatyme galite pakeisti laiko juostą taip, kad atitiktų Jūsų esamą
geogranę padėtį.
m) Vasaros laikas – Įjungus šią funkciją laikas bus automatiškai nustatomas į vasaros laiką
ir atvirkščiai.
n) Gamykliniai nustatymai – leidžia grąžinti gamyklinius kameros nustatymus. Pas-
paudžiant mygtuką OK pereisite į nustatymus, kur rodyklių pagalba pasirinksite taip/ne.
Dar kartą paspaudžiant OK patvirtinsite savo pasirinkimą.
o) SD kortelės formatavimas – rekomenduojama prieš pirmą panaudojimą suformatuoti
kortelę kompiuteryje arba betarpiškai kameroje. Paspaudžiant mygtuką OK pereisite į
nustatymus, o su rodyklių pagalba galite pasirinkti taip/ne, patvirtinant paspaudžiant
dar kartą mygtuką OK. Kortelė kelių sekundžių bėgyje bus suformatuota. Dėmesio! Šis
veiksmas pašalins visus duomenis esančius kortelėje.
p) LDWS kalibravimas – leidžia nustatyti judėjimo juostų stenėjimo funkciją. Nukrypimo
nuo kelio juostos įspėjimo sistema – „Lane Departure Warning System“ (LDWS) yra
mechanizmas, kuris įspėja vairuotoją, kai tik transporto priemonė pradeda išvažinėti
iš nurodytos eismo juostos. Ši sistema buvo sukurta taip, kad sumažintų nelaimingų
atsitikimų dėl vairuotojo neatsargumo, pavyzdžiui, dėl jo išsiblaškymo ar mieguistumo,
skaičių. Paspaudžiant mygtuką OK pereisite į nustatymus. Kad LDWS sistema veiktų
tinkamai, būtina prietaisą kalibruoti.
1 žingsnis – Naudojant mygtukus Į KAIRĘ / Į DEŠINĘ vertikaliai sureguliuokite paviršiaus
HR SLO LT HU PL SK CZ DE EN
2 žingsnis – Dabar tokiu pačiu būdu nustatykite kairįjį sankirtos tašką, kad nusta-
3 žingsnis – Tuo pačiu būdu nustatykite dešinįjį sankirtos tašką, atitinkantį dešiniai Jūsų
sankirtos tašką, nustatydami jį savo juostos centre ir patvirtinkite mygtuku
OK. Panašiai nustatykite tašką horizontalioje pozicijoje, taip pat patvirtin
dami nustatymus mygtuku OK.
tytumėte kairiąją Jūsų juostos pusę – pirmiausia vertikaliai, tada horizon
taliai, viską patvirtinkite mygtuku OK.
juostos pusei, ir dar kartą patvirtinkite mygtuku OK. Kalibravimas turės
sekantį vaizdą. Žemiau esančiame paveikslėlyje pateikiamas pavyzdinis
nustatymas.
-
-
-
-
8

q) Programinės įrangos versija – spaudžiant mygtuką OK gausite informaciją apie aktual-
iai įdiegtą programinės įrnaogs versiją.
9
HR SLO LT HU PL SK CZ DE EN

PARAMETRAI
Priekinio registratoriaus rezoliucija: 1920×1080 30 FPS, 1280×720 30 FPS
Galinio registratoriaus rezoliucija: 1280×720 25 FPS
Ekranas: 4.3“
Matomumo kampas: 140°
Video formatas: MOV
Foto formatas: JPG
Atminties tipas: Micro SDHC iki 32 GB
Jungimo galimybė: USB
Jungiamojo kabelio ilgis: Apie 5 m
Tinklo dažnis: 50/60 Hz
Specikacija gali pasikeisti dėl vieno iš įrenginio komponentų pakeitimo arba programinės
įrangos atnaujinimo.
Gamintojas:
elem6 s.r.o., Braškovská 308/158, 161 00 Praha 6
http://www.lamax-electronics.com
Spausdinimo klaidos ir pokyčiai naudojimo instrukcijoje saugomos.
HR SLO LT HU PL SK CZ DE EN
10

SLO UPORABNIŠKI PRIROČNIK
LAMAX
S7 Dual

KAZ ALO
UVOD ..................................................................................................................................................................... 2
LASTNOSTI IN FUNKCIJE ...............................................................................................................................2
VSEBINA EMBALAŽE .......................................................................................................................................2
SKICA IZDELKA .................................................................................................................................................. 3
INŠTALACIJA IZDELKA.................................................................................................................................... 3
FUNKCIJA UPRAVLJANJA PREKO HITRE IZBIRE ................................................................................... 3
POJASNILA K IKONAM ...................................................................................................................................4
UPORABA AVTOMOBILSKE KAMERE ........................................................................................................4
NASTAVITEV AVTOMOBILSKE KAMERE ...................................................................................................6
PARAMETRI AVTOMOBILSKE KAMERE ..................................................................................................10
UVOD
Zahvaljujemo se vam za nakup avtomobilske kamere LAMAX S7 Dual. Sedaj imate zanes-
ljivega partnerja poteh z vašim avtomobilom. V večini držav EU lahko snemate/slikate med
vožnjo in navkljub temu varujete svoje premoženje/zdravje.
LASTNOSTI IN FUNKCIJE
- Full HD video 1920×1080 – sprednja kamera
- HD video 1280×720 – zadnja kamera
- G-senzor
- Ciklično snemanje
- Senzor gibanja
- Modul za parkiranje
- Parkirna kamera
VSEBINA EMBALAŽE
- Avtomobilska kamera LAMAX S7 Dual
- Zadnja kamera
- GPS modul
HR SLO LT HU PL SK CZ DE EN
- Povezovalni kabel med sprednjo in zadnjo kamero
- Napajalni USB kabel za cigaretni vžigalnik
- Gumijasti priseski za vzvratno ogledalo
- Držala za kable
- Navodila za uporabo
- MicroSD-USB adapter
2

SKICA IZDELKA
1. VKL/IZK
2. Način
3. Meni
4. Puščica levo
5. Puščica desno
6. OK
7. Napajalni konektor (mini USB)
8. Konektor za priključitev zadnje kamere
9. Reža za micro SDHC kartico
10. Konektor za priključitev GPS modula
INŠTALACIJA IZDELKA
1) K abel napajanja v cigaretni vžigalnik potegnite okrog sprednjega stekla tako, da voznika
ne bo oviral pri vidljivosti in ga s pomočjo držal varno pritrdite kable. En konec kabla
priključite v sprednjo avtomobilsko kamero, drug konec pa v cigaretni vžigalnik. Spred
njo kamero pritrdite s pomočjo gumijastih priseskov na notranje vzvratno ogledalo. Ob-
jektiv kamere obrnite tako, da bo neposredno pred avtomobilom.
2) Zadnjo kamero prilepite s pomočjo 3M samolepilne nalepke na zadnje steklo.
3) S pomočjo povezovalnega kabla povežite sprednjo in zadnjo kamero. Kabel napeljite
vzdolž ohišja avtomobila tako, da ni v napoto. S tem se izognite morebitni poškodbi med
samim delovanjem vozila. Če želite uporabljati parkirno kamero, priključite rdeč kabel iz
povezovalnega kabla za zadnjo kamero v parkirno luč.
4) Če napravo uporabljate prvič, je možno, da baterija ni čisto polna. V primer, na naprave ni
možno zagnati zaradi premalo energije, ročno priključite kabel zunanjega el. napajanja
in napolnite baterijo.
5) Uporabljajte originalne micro SDHC kartice, hitrostni razred 10 in več. Za optimalno upo
rabo dolžine posnetka priporočamo kartice s kapaciteto vsaj 8 GB in največ 32 GB. V pri-
meru prve uporabe spominske kartice priporočamo, da se najprej izvede formatiranje v
računalniku in nato še v kameri.
1 2 3 4 5 6
7 8 9 10
FUNKCIJA UPRAVLJANJA PREKO HITRE IZBIRE
1) Izklop / vklop zaslona – s pritiskom na tipko VKL/IZK
2) Ročno zakleniti / odkleniti video – s pritiskom na tipko NAČIN med snemanjem zakle
nete trenutno sneman video posnetek
3) Preklop med prikazom na zaslonu med sprednjo in zadnjo – s pritiskom na tipko NA
LEVO
4) Izklop / vklop snemanja mikrofona – podržite puščico NA LEVO
5) Hitro fotograranje – med samim snemanjem podržite puščico NA DESNO
6) Aktiviranje parkirnega načina – podržite puščico NA DESNO
-
-
-
HR SLO LT HU PL SK CZ DE EN
3

POJASNILA K IKONAM
Način video G-senzor
Način fotoaparat Parkirni način
Mikrofon izključen Baterija se polni
Spominska kartica zaznana
Brez spominske kartice
Ekspozicija
UPORABA AVTOMOBILSKE KAMERE
1) Vložitev micro SDHC kartice
Micro SDHC kartico lahko vložite in vzamete iz reže za micro SDHC kartico, ko je kamera iz-
klopljena in ni priključena k računalniku ali el. napajanju. Priporočamo uporabo originalne
spominske kartice hitrostni razred 10, s maksimalno kapaciteto 32 GB.
2) El. napajanje
a) Kamero lahko priključite k viru s pomočjo ali USB kabla v računalnik, kot tudi s pomočjo
polnilca za v cigaretni vžigalnik neposredno v vozilu.
b) Kamera je namenjena za trajno el. napajanje.
c) Vgrajena baterija je namenjena samo za zagotavljanje nekaterih funkcij, kot je zakasnel
izklop ali parkirni način.
3) Vklop in izklop kamere
a) Kamero prižgite tako, da tipko VKL/IZK.
b) Kamera se samodejno prižge po priključitvi v el. napajanje.
c) Kamero ugasnite tako, da tipko VKL/IZK podržite za obdobje 3-5 sekund.
d) Kamera se samodejno izklopi, ko se izključi iz el. napajanja. Kamera ima funkcijo zakas
nelega izklopa, katerega dolžina se lahko nastavi. Če kamero potegnete iz el. polnjenja
med snemanjem, kamera po določenem času shrani trenutno posnet video in se izklopi.
4) Preklapljane načinov in premikanje po menijih
a) S postopnim kratkim pritiskom tipke NAČIN lahko preklapljate med načini video pos-
netek/fotoaparat/video galerija/foto galerija.
b) Meni kamere je razdeljen na dva dela. Iz načina video posnetka se po pritisku na tipko
MENI prikaže prikažeta dva različna menija. Nastavitev videa in nastavitev kamere.
c) I z načina video galerije se po pritisku na tipko MENI prikažeta dva različna menija. Uprav
ljanje z videi je opisana v točki 5) – 7).
d) Preklapljanje med posameznimi vrstami menija izvedite s pritiskom na tipko MENI.
V konkretnem meniju se premikajte s pomočjo puščic NA LEVO in NA DESNO. Ko ste
HR SLO LT HU PL SK CZ DE EN
izbrali postavke, pritisnite tipko OK in s pomočjo puščic ter s ponovnim pritiskom na
tipko OK izberite želeno nastavitev.
5) Snemanje/fotograranje/ogled galerije
a) Snemanje posnetk a na kamero se začne po pritisku na tipo OK. S ponovnim pritiskom na
to tipko se snemanje preneha. Kamera mora ostati v načinu video posnetek.
b) Samodejno snemanje – funkcija samodejnega snemanja je trajno prižgana. Samodejno
snemanje se začne potem, ko se kamera priključi v el. napajanje. V primeru avtomobila
-
-
4

z el. napajanjem odvisno od zaganjalnika, se kamera prižge in vključi se snemanje po
zagoni.
c) Fotograja se naredi s pritiskom na tipko OK. Kamera mora biti v načinu fotograja.
d) Po preklopu v načina video galerija/foto galerija se prikaže seznam video posnetkov,
oziroma fotograj. Za premikanje med posameznimi video posnetki in fotograjami
stana razpolago puščici NA LEVO in NA DESNO. V načinu video galerija so video posnetki
ločeni po mapah. Mapa VIDEO je namenjena za shranjevanje tekočih video posnetkov.
Mapa „KLJUČAVNICA“ je namenjena za shranjevanje zaklenjenih video posnetkov. Mapa
EVENT je namenjena za shranjevanje posnetkov iz detekcije gibanja. Ta premikanje med
posameznimi mapami in video posnetki/fotograjami sta na razpolago tipki NA LEVO
in NA DESNO. Preklop iz video posnetka nazaj na mapo izvedete s pritiskom na tipko.
6) Brisanje posnetega materiala direktno v kameri
a) Brisanje posameznega materiala direktno v kameri – lahko izvedete v galeriji. Ko ste iz-
brali želeno postavko, pritisnite tipko MENI (v video galeriji pritisnite na njo 2×), izberite
postavko IZBRISATI in izberite možnost IZBRISATI EN.
b) Brisane vseh posnetkov – lahko izvedete v galeriji. Pritisnete tipko MENI, izberete post
avko IZBRISATI in izberite možnost IZBRISATI VSE.
7) Zaščita posnetega materiala v kameri
Kamera začne za primere, ko je spominska kartica polna, samodejno presnemavati
najstarejše video posnetke z novimi. Če želite nekatere od video posnetkov zaščiti pred
eventualnim brisanjem, morate te video posnetke pod nujno zakleniti.
a) Vključen G-senzor jamči, da v primeru udarca samodejno zaklene trenuten posnetek. In
ga s tem zaščiti pred prepisovanjem.
b) Trenuten posnetek se lahko ročno zaklene s pritiskom na tipko „Način“.
c) Posnetke se lahko še dodatno zaklenejo v galeriji kamere:
- Zaklepanje posameznega posnetka – Ko ste izbrali želeno postavko, pritisnite tipko
MENI (v video galeriji pritisnite na njo 2×), izberite postavko IZBRISATI in izberite
možnost IZBRISATI EDEN.
- Zaklepanje vseh posnetkov – Pritisnete tipko MENI, izberete postavko ZAKLENITI in iz
berite možnost ZAKLENITI VSE.
- Odklepanje posameznega posnetka – Ko ste izbrali želeno postavko, pritisnite tipko
MENI (v video galeriji pritisnite na njo 2×), izberite postavko ODKLENITI EMKNOUT in
izberite možnost ODKLENITI EDEN.
- Odklepanje vseh posnetkov – Pritisnite tipko MENU, izberite postavko ODKLENITI in
izberite možnost ODKLENITI VSE.
8) Priključitev k računalniku
USB adapter na micro SDHC kartici je sestavni del izdelka. Spominsko kartico vložite
v adapter in adapter priključite k PC.
9) Preklapljanje sprednje in zadnje kamere na zaslonu
V primeru, da je priključitev sprednje in zadnje kamere pravilna se na zaslonu kot glavna
prikaže slika iz sprednje kamere. Slika iz zadnje kamere se na zaslonu prikaže v desnem
zgornjem kotu kot slika v sliki. Preklapljanje med sprednjo in zadnjo kamero omogoča
puščica NA LEVO.
-
-
HR SLO LT HU PL SK CZ DE EN
5

10) Parkirna kamera
Če rdeči kabel iz povezovalnega kabla zadnje kamere priključite v parkirno luč, aktivirate
parkirno kamero. Ko menjalnik v vozilu premaknete v vzvratno prestavo, vključite ti. parkir
no kamero. V primeru vzvratne prestave se na zaslonu samodejno prikaže slika iz zadnje
kamere in se nariše črta vzvratne vožnje.
Priporočila: Inštalacijo rdečega kabla v parkirno luč naj izvedejo v pooblaščenem servisu.
11) Priključitev GPS modula
V trenutku, ko se modul priključi h kameri in zazna signal, postane ikona GPS
zelena in na zaslonu se prikažejo trenutne koordinate. Na spletni strani izdelka na
www.lamax-electronics.com
mere. Predvajalnik prikaže poleg posnetka tudi trenutno hitrost in prevoženo traso na
Google zemljevidih.
NASTAVITEV AVTOMOBILSKE KAMERE
V načinu video pritisnite tipko MENI. Nastavitev vsebuje dva dela – nastavitev videa in
nastavitev kamere.
si naložite LAMAX Player za predvajanje posnetkov iz ka-
1) Nastavitev videa
a) Resolucija videa – obstajata dve možnosti in to HD ter full HD pri 30 FPS. S pritiskom na
tipko OK greste v nastavitev in s puščicami izberete resolucijo ter potrdite s pritiskom
na tipko OK.
b) Čas videa (dolžina zavoja) – tu se nastavlja dolžina posameznih posnetkov. Kamera
snema v zavoj videa z dolžino 1–5 minut. V primeru, da se spominska kartica napolni,
začne kamera predvajati najstarejše posnetke. Posamezni video posnetki imajo tekoče
zaporedje in tako ne nastanejo ti. slepa mesta med posameznimi zavoji. S pritiskom na
tipko OK pridete v nastavitev, s pomočjo puščice pa izberete želeno dolžino zavoja in
spet potrdite s tipko OK.
c) Zakasnel izklop – omogoča zakasnitev takojšnega izklopa potem, ko ste kamero izk
lopili iz el. napajanja. Ta funkcija je primerna na primer pri avtomobilih z opremo start/
stop. S pritiskom na tipko OK pridete v nastavitev, s pomočjo puščice pa izberete želeno
dolžino zakasnitve, oziroma lahko to funkcijo izklopite. S ponovnim pritiskom na tipko
OK potrdite izbiro.
d) Snemanje zvoka – omogoča izklopiti ali vklopiti mikrofon pri snemanju videa. Primerno,
ko na primer želite, da se ohrani zasebnost vaših klicev. Ta funkcija ima tudi možnost
hitrega izbora. S pritiskom na tipko OK pridete v nastavitev in s puščicami prižgete ali
ugasnete mikrofon ter potrdite s ponovnim pritiskom na OK.
e) Ekspozicija – omogoča ureditev ekspozicije v mejah 0–10. S pritiskom na tipko OK pri
HR SLO LT HU PL SK CZ DE EN
dete v nastavitev in s puščicami izberete želen nivo ter potrdite s tipko OK.
f) LDWS – je funkcija opozorilnik spremembe voznega pasu. Za to funkcijo morate na
jprej izvesti kalibriranje v meniju „Nastavitev kamere“. S pritiskom na tipko OK pridete
v nastavitev in s puščicami prižgete ali ugasnete ter potrdite s tipko OK.
-
-
-
-
6

2) Nastavitev kamere
a) Jezik – avtomobilska kamera ima večjezični meni. Jezik spremenite s pritiskom na tipko
OK, s puščicami izberete želen jezik in potrdite s ponovnim pritiskom na tipko OK.
b) Nastavitev datuma in časa – omogoča nastavitev trenutnega datuma in časa. V prim
eru, da imate h kameri priključen GPS modul, datum in čas se samodejno sinhronizirata.
S pritiskom na tipko OK pridete v nastavitev in s puščicami postopoma nastavljate posa
mezne dele (rok, mesec, dan, ura, minute in sekunde). Prav vsako posamezno nastavitev
je potrebno potrditi s tipko OK. Ko vse nastavite, s ponovnim pritiskom na tipko OK
potrdite spremembe.
c) Zvok tipk – omogoča vklopiti oziroma izklopiti ton tipk. S pritiskom na tipko OK pridete
v nastavitev in s puščicami izberete izbor da/ne ter s ponovnim pritiskom na tipko OK
potrdite izbor.
d) Samodejni izklop – omogoča nastavitev samodejnega izklopa avtomobilske kamere v
primeru nedejavnosti od ene do pet minut. S pritiskom na tipko OK pridete v nastavitev
in s puščicami izberete, ali pa funkcijo direktno izklopite ter s ponovnim pritiskom na
tipko OK potrdite izbor.
e) Glas – regulira glasnost produktov avtomobilske kamere (predvajanje video posnetkov,
glasovni napotki). S pritiskom na tipko OK pridete v nastavitev in s puščicami izberete
nivo 0-10 ter potrdite s tipko OK.
f) Način varčevanja – samodejno nastavi izklop zaslona v primeru nedejavnosti po eni
ali treh minutah, po želji pa se lahko način varčevanja popolnoma izklopi. Samodejni
izklop LCD deluje tudi v primeru, da kamera snema. S pritiskom na tipko OK pridete v
nastavitev, s puščicami izberete želen izbor in s ponovnim pritiskom na tipko OK potrdite
izbor.
g) Frekvenca omrežja – omogoča izbrati frekvenco v skladu s frekvenco omrežne napel
jave (na Evropski celini je v omrežju tok s frekvenco 50 Hz, v Ameriki in delu Azije pa je
60 Hz).
h) G-senzor – zahvaljujoč g-senzorju lahko kamera zabeleži na primer udarec pri prometni
nesreči. V trenutku, ko kamera zabeleži udarec, v trenutku zaklene trenutno narejen pos
netek. Posnetka ni mogoče prepisati. G-senzor ima različne faze nastavitve občutljivosti
(visoka, sredna, nizka) ali pa se lahko popolnoma izklopi. S pritiskom na tipko OK pri
dete v nastavitev, s puščicami izberete želen izbor in s ponovnim pritiskom na tipko OK
potrdite izbor.
i) Parkirni način – prižgan parkirni način deluje tudi, ko se kamera ne napaja in jemlje ener
gijo iz vgrajene baterije. V primeru udarca, ki ga g-senzor zabeleži, se kamera samodejno
prižge in snemanje se zažene. Po približno 20-30 sekundah brez udarca posnetek shrani,
zaklene in kamera se spet izklopi. Kamera ima v primeru aktivacije parkirnega načina
izključen LCD zaslon, da ne izziva pozornosti. Sestavni del nastavitve Parkirnega načina je
tudi nastavitev občutljivosti g-senzorja: nizka, srednja, visoka ali izklop. Nastavitev izbira
jte po potrebni in okoliščinah.
Predpostavka za delujoč Parkirni način je seveda popolnoma poln telefon do 100 %. Če
kamera ni napolnjena, kamera ne bo mogla od nikjer jemati energije za zagon in sne
manje posnetka.
j) Detekcija gibanja – pri vključeni detekciji gibanja začne kamera samodejno snemati v
trenutku, ko zazna gibanje v zornem kotu objektiva sprednje kamere. Kamera posname
-
-
-
-
-
-
HR SLO LT HU PL SK CZ DE EN
-
-
7

ca 20 sekundni posnetek, ga zaklene in v primeru, da ne zabeleži novega gibanja, kočna
s semanjem. S pritiskom na tipko OK pridete v nastavitev, s puščicami izberete izbor vkl/
izkl in s ponovnim pritiskom na tipko OK potrdite izbor.
k) GPS Status – v trenutku, ko se modul priključi h kameri in zazna signal, postane ikona
GPS zelena in na zaslonu se prikažejo trenutne koordinate. V tej nastavitvi lahko prikaz
koordinat na kameri ugasnete ali pa pustite vključene. Ali pa preverite trenutne podatke
priključenih satelitov (lega, moč signala itd.)
l) Časovna cona – v tej nastavitvi lahko spreminjate časovni pas tako, da odgovarja vaši
trenutni zemljepisni legi.
m) Poletni čas – pri vklopu te funkcije se čas samodejno prilagodi ob prehodu na poletni
čas in obratno.
n) Tovarniške nastavitve – omogočajo preklopiti nastavitev kamere v prvotno tovarniško
nastavitev. S pritiskom na tipko OK pridete v nastavitev, s puščicami izberete izbor vkl/
izkl in s ponovnim pritiskom na tipko OK potrdite izbor.
o) Formatirati SD kartico – priporočamo, da kartico pred prvo uporabo formatirate ali
v računalniku ali pa direktno v kameri. S pritiskom na tipko OK pridete v nastavitev in
s puščicami izberete izbor da/ne ter s ponovnim pritiskom na tipko OK potrdite izbor.
Formatiranje kartice se izvede v nekaj sekundah. Pozor – vsi podatki na kartici se s to
operacijo izbrišejo.
Način detekcija gibanja deluje samo v primeru, da je kamera vključena. V primeru daljše
uporabe mora biti kamera nenehno priključena k el. napajanju.
p) Kalibriranje LDWS – funkcija opozorilnik spremembe voznega pasu (LDWS) je meha
nizem, ki voznika opozarja, ko začne vozilo izstopati iz voznega pasu. Ta sistem je izdelan
tako, da minimalizira prometne nesreče, katerih vzrok je na primer slaba koncentracija
ali zaspanost. Za pravilno delovanje sistema LDWS je potrebno izvesti kalibriranje nap
rave. S pritiskom na tipko OK pridete v nastavitev.
Korak 1 – S pomočjo tipk NA LEVO / NA DESNO nastavite vertikalno presečišče na sredini
vašega voznega pasu, nato vse to potrdite s tipko OK. Enako nastavitev nato
izvedite tudi horizontalno in ponovno potrdite s tipko OK
Krok 2 – Sedaj ponovite na enak način z levim presečiščem – za levo bankino vašega
voznega pasu vertikalno, nato horizontalno in spet potrdite s tipko OK.
Krok 3 – Enako nastavitev uporabite tudi za desno presečišče – za desno bankino vašega
voznega pasu in ponovno potrdite s tipko OK. Na koncu bo kalibriranje tako
shranjeno. Poglejte na vzorčni primer na spodnji sliki.
HR SLO LT HU PL SK CZ DE EN
-
-
8

q) Verzija FW – s pritiskom na tipko OK prejmete informacije o trenutno inštalirani verziji
vdelane programske opreme.
9
HR SLO LT HU PL SK CZ DE EN

PARAMETRI AVTOMOBILSKE KAMERE
Resolucija sprednje kamere: 1920×1080 30 FPS, 1280×720 30 FPS
Resolucija zadnje kamere: 1280×720 25 FPS
Zaslon: 4.3“
Kot posnetka: 140°
Video format: MOV
Format fotograje: JPG
Tip spomina: Micro SDHC do 32 GB
Povezivost: USB
Dolžina povezovalnega kabla: ca 5 m
Frekvenca omrežja: 50/60 H z
Specikacija se lahko sprememni v primeru menjave nekaterih delov naprave ali v primeru
aktualizacije programske opreme.
Proizvajalec:
elem6 s.r.o., Braškovská 308/158, 161 00 Praha 6
http://www.lamax-electronics.com
Pridružujemo si pravico do napak v tisku in sprememb v teh navodilih.
HR SLO LT HU PL SK CZ DE EN
10

HR PRIRUČNIK ZA KORISNIKA
LAMAX
S7 Dual

SADRŽAJ
UVOD ..................................................................................................................................................................... 2
KARAKTERISTIKE I FUNKCIJE ....................................................................................................................... 2
SADRŽAJ PAKIRANJA......................................................................................................................................2
NACRT PRODUKTA ..........................................................................................................................................3
NAMJEŠTANJE PROIZVODA ......................................................................................................................... 3
BRZE FUNKCIJE..................................................................................................................................................3
OBJAŠNJENJA ZNAČENJA IKONA .............................................................................................................4
NAČIN UPORABE AUTOKAMERE ................................................................................................................4
POSTAVKE AUTO KAMERE ............................................................................................................................6
PARAMETRI AUTOKAMERE .........................................................................................................................10
UVOD
Zahvaljujemo Vam se na kupnji našeg proizvoda auto kamere LAMAX S7 Dual. Dobili ste
pouzdanog pomoćnika za putovanja vašim vozilom. U većini zemalja EU možete snimati
vožnju kako biste zaštitili sebe, svoju imovinu i zdravlje.
KARAKTERISTIKE I FUNKCIJE
- Full HD video 1920×1080 – prednja kamera
- HD video 1280×720 – stražnja kamera
- G-senzor
- Ciklično snimanje
- Osjetilo kretanja
- Način „parkiranje“
- Parkirna kamera
SADRŽAJ PAKIRANJA
- Autokamera LAMAX S7 Dual
- Stražnja kamera
- GPS modul
HR SLO LT HU PL SK CZ DE EN
- Priključni kabel između prednje i stražnje kamere
- USB kabel za napajanje, s priključkom na auto upaljač
- Gumeni učvršćivači za montažu na retrovizor
- Držači za montažu kabela
- Priručnik
- Adapter MicroSD-USB
2

NACRT PRODUKTA
1. UKLJ./ISKLJ.
2. Način rada
3. Meni
4. Strelica ‘Lijevo’
5. Strelica ‘Desno’
6. OK
7. Električni priključak (mini USB)
8. Priključak za priključenje stražnje kamere
9. Utor za Micro SDHC karticu
10. Priključak za priključenje GPS modula
NAMJEŠTANJE PROIZVODA
1) Kabel za napajanje s priključkom na auto upaljač treba voditi duž vjetrobranskog stakla
tako da ne ometa pogled vozača tijekom vožnje, i mora biti dobro pričvršćen. Jedan
kraj kabela priključite na prednju autokameru, a drugi u upaljač u automobilu. Prednju
kameru učvrstite pomoću gumenih učvršćivača na unutarnji retrovizor. Objektiv kamere
postavite kako bi bio usmjeren na situaciju ispred automobila.
2) Stražnju kameru učvrstite pomoću 3M trake na stražnje staklo.
3) Prednje i stražnje kamere povežite pomoću priključnog kabela. Kabel namjestite duž
skeleta kako ne bi nigdje smetao. Time ćete izbjeći moguća oštećenja u toku korištenja
automobila. Kako biste koristili funkciju parkirne kamere, povežite crvenu žicu prikl-
jučnog kabela od stražnje kamere do parkirnog svjetla.
4) Prilikom prve uporabe uređaja baterija može biti ispražnjena. Ako se uređaj ne može
uključiti zbog niske razine baterije, priključite ručno kabel za eksterno napajanje i na
punite bateriju.
5) Koristite originalne mikro SD karticu klase 10 ili više klase. Za optimalno iskorištenje
duljine preporučljivo je koristiti kartice kapaciteta od najmanje 8 GB, a najviše 32 GB.
Prilikom prve uporabe memorijske kartice, preporučujemo formatiranje na računalu ili
u kameri.
1 2 3 4 5 6
7 8 9 10
BRZE FUNKCIJE
1) Isključivanje/uključivanje zaslona – pritiskanjem gumba UKLJ./ISKLJ.
2) Ručno „zaključavanje“ / „otključavanje“ video sadržaja – pritisnite gumb ‘MODE’ tije
kom snimanja kako biste „zaključali“ trenutno snimljeni video sadržaj
3) Za prebacivanje pogleda na zaslonu između prednje i stražnje kamere – pritisnuti
strelicu ‘LIJEVO’
4) Uključivanje / isključivanje snimanja mikrofonom – držati strelicu ‘LIJEVO’
5) Za brzo snimanje fotograja – u toku snimanja pritisnite strelicu ‘DESNO’
6) Za aktiviranje načina „parkiranje“ – držati strelicu ‘DESNO’
-
-
HR SLO LT HU PL SK CZ DE EN
3

OBJAŠNJENJA ZNAČENJA IKONA
Način rada „video“ G-senzor
Način rada „fotoaparat“ Način rada „parkiranje“
Mikrofon je ugašen Baterija se puni
Memorijska kartica je otkrivena
Nema memorijske kartice
Ekspozicija
NAČIN UPORABE AUTOKAMERE
1) Stavljanje micro SDHC karticE
Mikro SDHC karticu možete ubacivati i vaditi iz slota za mikro SDHC karticu samo ako je
kamera isključena i ako nije priključena na računalo ili na napajanje. Preporučujemo koris
titi kvalitetne memorijske kartice klase 10 s maksimalnim kapacitetom od 32 GB.
2) Način punjenja baterije
a) Kameru možete priključiti na izvor napajanja preko USB kabela u računalo ili preko auto
upaljača u vozilu.
b) Kamera je namijenjena za neprekidno priključenje na el. mrežu.
c) Ugrađena baterija služi samo za reguliranje određenih funkcija kao što je odgođeno
gašenje ili način „parkiranje“.
3) Uključenje i isključenje kamere
a) Kameru uključite pritiskom gumba ON / OFF (UKLJ / ISKLJ.).
b) Kamera se automatski uključuje nakon priključivanja na električni krug.
c) Kameru isključite držanjem gumba ON / OFF (UKLJ / ISKLJ.) približno 3–5 sekundi.
d) Kamera se automatski gasi nakon odspajanja od izvora napajanja. Kamera ima funkciju
odgođenog isključivanja čiju duljinu možete podesiti. Ako prekinete električni krug tije
kom snimanja, kamera će pohraniti trenutno snimljeni video sadržaj i isključiti se.
4) Prebacivanje režima i kretanje u izborniku
a) Kratkim pritiskanjem na gumb MODE možete prebacivati između više načina kao što je:
video zapis / fotoaparat / video galerija / foto galerija.
b) Izbornik kamere podijeljen je na dva dijela. Iz načina rada ‘Video zapis’, nakon pritisk anja
tipke ‘MENU’ pojavljuju se dva različita izbornika. Postavke videa i postavke kamere.
c) Iz načina rada ‘Video galerija’, nakon pritiskanja tipke ‘MENU’ pojavljuju se dva različita
izbornika. Uređivanje videa i postavljanje kamere. Upravljanje videom opisano je u točki
5) - 7).
d) Iz načina foto galerija, nakon pritiskanja tipke MENU pojavljuju se dva različita izbornika.
HR SLO LT HU PL SK CZ DE EN
Upravljanje fotograjama i postavkama kamere. Upravljanje fotograjama i postavkama
kamere.
e) Prebacivanje između pojedinih vrsta menu vrši se pritiskanjem gumba MENU (izbornik).
U određenom izborniku koristite strelice za pomicanje ‘LIJEVO’ i ‘DESNO’. Nakon odabira
stavke, pritisnite gumb ‘OK’ te pomoću strelica i ponovnim pritiskanjem gumba ‘OK’ iza
berite tražene postavke.
-
-
-
4

5) Snimanje / slikanje / pregledavanje galerije
a) Snimanje zapisa pomoću kamere počinje pritiskom na gumb „OK”. Snimanje se završava
ponovnim pritiskom na istu tipku. Kamera se mora nalaziti u režimu video-zapis.
b) Automatsko snimanje – funkcija automatskog snimanja je trajno uključena. Automat
sko snimanje se uključuje nakon priključenja kamere na napajanje. Kod automobila u
kojima je napajanje ovisno o starteru, kamera se pali i snimanje uključuje tek nakon
paljenja motora.
c) Za slikanje pritisnite tipku „OK”. Kamera se mora nalaziti v režimu slikanje.
d) Kada prebacite u načine rada za video / foto galeriju, prikazuje se popis snimljenih video
sadržaja ili fotograja. Za kretanje između pojedinih zapisa i snimaka koriste se strelice
„LIJEVO” i „DESNO”. U načinu rada ‘Video galerija’, video sadržaji su podijeljeni u mape.
Mapa ‘VIDEO’ se koristi za spremanje videa. Mapa ‘ZAKLJUČAVANJE’ se koristi za pohran
jivanje „zaključanih“ video sadržaja. Mapa ‘EVENT’ se koristi za pohranjivanje zapisa o na-
dzoru pokreta. Za kretanje između pojedinih mapa te video sadržaja/fotograja, možete
koristiti tipke ‘LIJEVO’ i ‘DESNO’. Kako biste se vratili iz videa natrag u mapu, pritisnite
gumb ‘MENU’.
6) Brisanje snimaka izravno u kameri
a) Pojedine snimke možete obrisati izravno u kameri, u galeriji snimaka. Nakon odabira
željene stavke, pritisnite gumb ‘MENU’ (znači u video galeriji pritisnite dva puta), odaber
ite stavku ‘DELETE’ i odaberite opciju ‘OBRIŠI JEDNU’.
b) Brisanje svih zapisa – može se izvršiti u galeriji. Pritisnite gumb ‘MENU’, odaberite stavku
‘OBRIŠI’ i odaberite opciju ‘OBRIŠI SVE’.
7) Zaštita snimljenih podataka u kameri
Kad se memorijska kartica napuni, kamera će automatski brisati najstariji video i umjesto
njega snimiti novi. Ako želite neke video zapise zaštititi od mogućeg brisanja, morate ih
elektronski „zaključati“.
a) Aktivirano G-osjetilo automatski će zaključati tj. zaštititi trenutno snimljeni zapis ako
dođe do slučajnog udarca. Time će ga zaštititi od brisanja.
b) Trenutno snimljeni zapis možete zaključati i ručno – pritiskanjem tipke “Mode”.
c) Zapisi se kasnije mogu dodatno „zaključati“ u galeriji kamere:
- „Zaključavanje“ pojedinog zapisa – Nakon odabira željene stavke, pritisnite tipku
‘MENU’ (u video galeriji je pritisnite dvaput), odaberite poziciju ‘ZAKLJUČATI’ i odaberite
‘ZAKLJUČATI JEDNU’.
- „Zak ljučavanje“ svih zapisa – Pritisnite gumb ‘MENU’, odaberite ‘ZAKLJUČATI’ i odaberite
‘ZAKLJUČATI SVE’.
- „Otključavanje“ pojedinog zapisa – Nakon odabira željene stavke, pritisnite tipku
‘MENU’ (u video galeriji je pritisnite dvaput), odaberite poziciju ‘OTKLJUČATI’ i odaberite
‘OTKLJUČATI JEDNU’.
- „Otključavanje“ svih zapisa – Pritisnite gumb ‘MENU’, odaberite stavku ‘OTKLJUČATI’, a
poslije stavku ‘OTKLJUČATI SVE’.
8) Povezivanje s računalom
USB micro SDHC adapter se nalazi uz proizvod. Memorijsku karticu stavite u adapter i
priključite ga na računalo.
-
-
-
HR SLO LT HU PL SK CZ DE EN
5

9) Prebacivanje prednje i stražnje kamere na zaslon
Ako su prednje i stražnje kamere pravilno spojene, na zaslonu se prikaže slika prednje
kamere kao glavna. Situacija sa stražnje kamere pojavljuje se u gornjem desnom kutu kao
manja slika u slici. Prebacivanje između prednje i stražnje kamere može se izvesti pomoću
strelice ‘LIJEVO’.
10) Parkirna kamera
Ako crvenu žicu priključnog kabela stražnje kamere priključite na parkirno svjetlo, aktivirat
ćete tzv. parkirnu kameru. U slučaju prebacivanja mjenjača brzine za vožnju unatrag, auto
matski se na zaslonu pojavljuje situacija iz stražnje kamere kao i mrakirne linije za vožnju
unatrag.
Preporuke: Preporučujemo da crvenu žicu u parkirno svjetlo priključi stručnjak ovlaštenog
servisnog centra.
11) Priključivanje GPS modula
Čim se modul priključi na kameru i prihvati signal, ikona GPS zasvijetli zeleno, a na zaslonu
se pojave trenutne koordinate. Na stranici proizvoda, na
preuzmite ‘LAMAX Player’ (zvučnik) za reprodukciju snimaka iz kamere. Osim snimanja,
‘Player’ će prikazati i trenutnu brzinu te Vaš put prikazan na Google kartama.
POSTAVKE AUTO KAMERE
U načinu funkcioniranja ‘VIDEO’, pritisnite gumb ‘MENU’. Postavke sadrže dva dijela – po-
stavljanje videa i postavljanje kamere.
www.lamax-electronics.com
1) Postavljanje videa
a) Rezolucija videa – nudi dvije opcije, HD i full HD pri 30 FPS. Pritiskanjem gumba ‘OK’
uđite u postavke i pomoću strelica odaberite željenu rezoluciju i pritisnite ‘OK’ za pot
vrdu.
b) Vrijeme videa (duljina „petlje“) – ovdje se podešava duljina pojedinih zapisa. Kamera
snima video zapis u „petljama“ duljine od 1-5 minuta. Kada se memorijska kartica na
puni, kamera započinje reprodukciju najstarijih zapisa. Pojedinačna videa slijede i ne
stvaraju tzv. mrtve točke između pojedinih „petlji“. Pritiskanjem gumba ‘OK’ možete doći
u postavke, a pomoću tipki sa strelicama odaberite željenu duljinu „petlje“ i ponovno
potvrdite s ‘OK’.
c) Odgođeno isključivanje – omogućuje odgoditi trenutno isključivanje kamere nakon
isključivanja kamere iz elektro-napajanja. Ova funkcija je prikladna na primjer kod voz
ila s funkcijom start/stop. Pritiskanjem gumba ‘OK’ ulazite u postavke pomoću strelica i
odaberite željeno vrijeme odgode ili možete ovu funkciju potpuno isključiti. Ponovnim
pritiskanjem tipke ‘OK’ potvrdite ovu opciju.
HR SLO LT HU PL SK CZ DE EN
d) Snimanje zvuka – omogućuje Vam da uključite ili isključite mikrofon tijekom snimanja
video sadržaja. To je prikladno na primjer kada želite očuvati privatnost vaših razgovora.
Ova funkcija ima i mogućnost brzog biranja. Pritisnite gumb ‘OK’ kako biste otvorili
postavke. Koristite tipke sa strelicama za uključivanje ili isključivanje mikrofona. Opciju
potvrdite ponovnim pritiskom na gumb ‘OK’.
-
,
-
-
-
6

e) Ekspozicija – omogućuje podešavanje ekspozicije u rasponu od 0–10. Pritiskanjem
gumba ‘OK’ dođite do postavke i pomoću tipki sa strelicama odaberite željenu razinu
te potvrdite s ‘OK’.
f) LDWS – je funkcija nadzora vožnje u trakama. Najprije morate ovu funkciju kalibrirati u
izborniku ‘Postavke kamere’. Pritiskanjem gumba ‘OK’ možete doći u postavke i pomoću
tipki sa strelicama uključite i isključite značajku i potvrdite s gumbom ‘OK’.
2) Postavljanje kamere
a) Jezik – auto kamera ima višejezični izbornik. Za promjenu jezika pritisnite gumb ‘OK’,
pomoću tipki sa strelicama odaberite željeni jezik i ponovno potvrdite pritiskom gumba
‘ OK ’.
b) Postavljanje datuma i vremena – omogućuje postavljanje trenutnog datuma i vre
mena. Ako je na fotoaparat priključen GPS modul, datum i vrijeme se automatski sink-
roniziraju. Pritiskanjem gumba ‘OK’ ulazite u postavke, a zatim pomoću strelica postavite
pojedinačne dijelove (godinu, mjesec, dan, sate, minute i sekunde). Svaku pojedinačnu
postavku morate potvrditi pritiskom gumba ‘OK’. Nakon što postavite sve što želite,
ponovno pritisnite ‘OK’ i potvrdite promjene.
c) Zvuk tipki – omogućuje uključiti ili isključiti tonove tipki. Pritiskanjem gumba ‘OK’ uđite
u postavke te pomoću tipki sa strelicama odaberite opciju ‘Da’/’Ne’ i ponovno pritisnite
gumb ‘OK’ za potvrdu odabira.
d) Automatsko isključivanje – omogućuje postavljanje funkcije automatskog isključivanja
nakon 1 ili 5 minuta. Pritiskanjem gumba ‘OK’ uđite u postavke i pomoću strelica oda
berite interval. Funkciju možete isključiti i neposredno i ponovnim pritiskanjem gumba
‘OK’ kako biste potvrdili odabir.
e) Glasnoća – podešava glasnoću reprodukcije autokamere (reprodukcija video sadržaja,
biranje glasom). Pritiskanjem gumba ‘OK’ uđite u postavke i pomoću gumba sa streli
cama odaberite razinu 0-10 te potvrdite s ‘OK’.
f) Ušteda energije – postavite automatsko isključivanje zaslona u slučaju neaktivnosti
nakon 1 ili 3 minute ili možete režim uštede energije i potpuno isključiti. Automatsko
isključivanje LCD zaslona radi čak i kada kamera snima. Pritiskanjem gumba ‘OK’ ponov
no ulazite u postavke, pomoću strelica odaberite željenu opciju, a zatim ponovno pritis-
nite gumb ‘OK’ za potvrdu odabira.
g) Frekvencija mreže – omogućuje biranje frekvencije u skladu s frekvencijom distribu
tivne mreže (na Europskom kontinentu frekvencija struje u mreži je 50 Hz, u Americi i
nekim državama Azije frekvencija je 60 Hz).
h) G-senzor – zahvaljujući G-senzoru, kamera može snimiti situaciju za slučaj prometne
nesreće. Nakon što kamera snimi sudar, odmah „zaključava“ trenutno snimljeni zapis.
“Zaključan“ zapis ne može se izbrisati prepisivanjem. G-senzor možete postaviti u ne
koliko različitih osjetljivosti (visoka, srednja, niska) ili ga potpuno isključiti. Pritiskanjem
gumba ‘OK’ ponovno ulazite u postavke, pomoću strelica odaberite željenu opciju, a za
tim pritisnite gumb ‘OK’ za potvrdu odabira.
i) Način „Parkiranje“ – način parkiranja je uključen, čak i ako kamera nije priključena i en
ergiju uzima iz ugrađene baterije. U slučaju bilo kakvog sudara koji registrira G-senzor,
kamera se automatski uključuje i počinje snimati. Nakon otprilike 20–30 sekundi bez
sudara, snimanje se memorira a kamera se ponovno isključuje. Kad je uključen način
-
-
-
-
-
-
HR SLO LT HU PL SK CZ DE EN
-
-
7

„Parkiranje“, kamera ostavlja isključen LCD zaslon kako ne bi skretao pažnju. Sastavni dio
postavke načina „Parkiranje“ uključuje i postavku osjetljivosti G-senzora: niska, srednja,
visoka ili potpuno isključena. Prema potrebi odaberite postavke i okolnosti.
Kako bi mogao biti aktivirani način „Parkiranje“, bezuvjetno mora biti napunjena baterija
na 100 %. Ako baterija nije napunjena, kamera neće imati energiju za uključivanje i sn
imanje.
j) Detekcije kretanja – kod uključene funkcije detektiranja pokreta kamera automatski
započinje snimanje čim zabilježi pokret u vidnom polju objektiva prednje kamere.
Kamera snima lm u duljini od približno 20 sekundi, „zaključava“ ga i gasi se ako ne
primijeti dalje kretanje. Pritiskanjem gumba ‘OK’ ponovno ulazite u postavke, pomoću
strelica odaberite opciju ‘Uključi’/’Isključi’, a zatim ponovno pritisnite gumb ‘OK’ za
potvrdu odabira.
Način za detekciju pokreta radi samo kada je kamera uključena. U slučaju korištenja tije
kom dužeg vremena, kamera mora biti trajno priključena na napajanje.
k) GPS Status – čim se modul priključi na kameru i prihvati signal, ikonica GPS zasvijetli
zeleno, a na zaslonu se pojave trenutne koordinate. U toj postavci možete isključiti pri
kazane koordinate na kameri ili ih ostaviti uključenim. Alternativno možete pogledati i
trenutne podatke povezanih satelita (položaj, jačina signala, itd.).
l) Vremenska zona – u ovoj postavci možete promijeniti vremensku zonu kako bi odgo
varala Vašem trenutnom zemljopisnom položaju.
m) Ljetno vrijeme – kada je ova funkcija uključena, vrijeme se automatski podešava iz zim
skog na ljetno i obrnuto.
n) Tvorničke postavke – omogućuje promjenu postavki kamere na izvorne tvorničke post
avke. Pritiskanjem gumba ‘OK’ uđite u postavke te pomoću tipki sa strelicama odaberite
opciju ‘Da’/’Ne’ i ponovno pritisnite gumb ‘OK’ za potvrdu odabira.
o) Formatiranje SD kartice – preporučujemo formatiranje kartice prije prve uporabe na
računalu ili neposredno u kameri. Pritiskanjem gumba ‘OK’ uđite u postavke te pomoću
tipki sa strelicama odaberite opciju ‘Da’/’Ne’ i ponovno pritisnite gumb ‘OK’ za potvrdu
odabira. Kartica će biti formatirana u roku nekoliko sekundi. Imajte na umu da će svi
podaci na kartici ovom operacijom biti izbrisani.
p) Umjeravanje LDWS – sistem upozorenja o napuštanju trake (LDWS) je mehanizam
koji upozorava vozača čim vozilo počne napuštati traku. Ovaj je sustav dizajniran tako
kako bi smanjio prometne nezgode uzrokovane nepažnjom vozača, kao što je dekon
centracija ili pospanost. Za ispravno funkcioniranje sustava LDWS neophodno je izvršiti
umjeravanje uređaja. Pritisnite ‘OK’ da biste došli do postavki.
1. korak – Pomoću gumba ‘LIJEVO’ / ‘DESNO’ podesite sjecište vertikalno, u središtu svoje
HR SLO LT HU PL SK CZ DE EN
trake, a zatim potvrdite gumbom ‘OK’. Na isti način postavite postavku i vodor
avno te ponovno potvrdite s ‘OK’.•
2. korak – Sada ponovite na isti način kod lijevog sjecišta, dakle za lijevu stranu svoje
trake okomito, zatim vodoravno, i potvrdite gumbom ‘OK’.
3. korak – Na isti način postavite i desno sjecište - za desnu stranu Vaše trake te ponovno
potvrdite gumbom ‘OK’. Na kraju će se umjeravanje pohraniti na taj način. Po
gledajte tipičan primjer koji je prikazan na slici.
-
-
-
-
-
-
-
-
-
8

q) Verzija FW – pritiskanjem gumba ‘OK’ dobivate informaciju o aktualno namještenoj ver-
ziji softvera koji kontrolira osnovne funkcije hardvera (rmware).
9
HR SLO LT HU PL SK CZ DE EN

PARAMETRI AUTOKAMERE
Rezolucija prednje kamere: 1920×1080 30 FPS, 1280×720 30 FPS
Rezolucija stražnje kamere: 1280×720 25 FPS
Displej: 4.3“
Kut snimanja: 140°
Video format: MOV
Format fotograje: JPG
Tip memorije: Micro SDHC do 32 GB
Priključivanje preko: USB
Duljina priključnog kabla: ca. 5 m
Frekvencija mreže: 50/60 Hz
Specikacija se može promijeniti zamjenom nekih dijelova uređaja ili aktualizacijom soft
vera.
Proizvođač:
elem6 s.r.o., Braškovská 308/158, 161 00 Praha 6
http://www.lamax-electronics.com
Pridržano pravo na eventualne tiskarske greške i tehničke izmjene u ovom priručniku.
HR SLO LT HU PL SK CZ DE EN
-
10

HR SLO LT HU PL SK CZ DE EN

 Loading...