

Page 1
Model: 308-1451 www.lacrossetechnology.com/support Page | 1
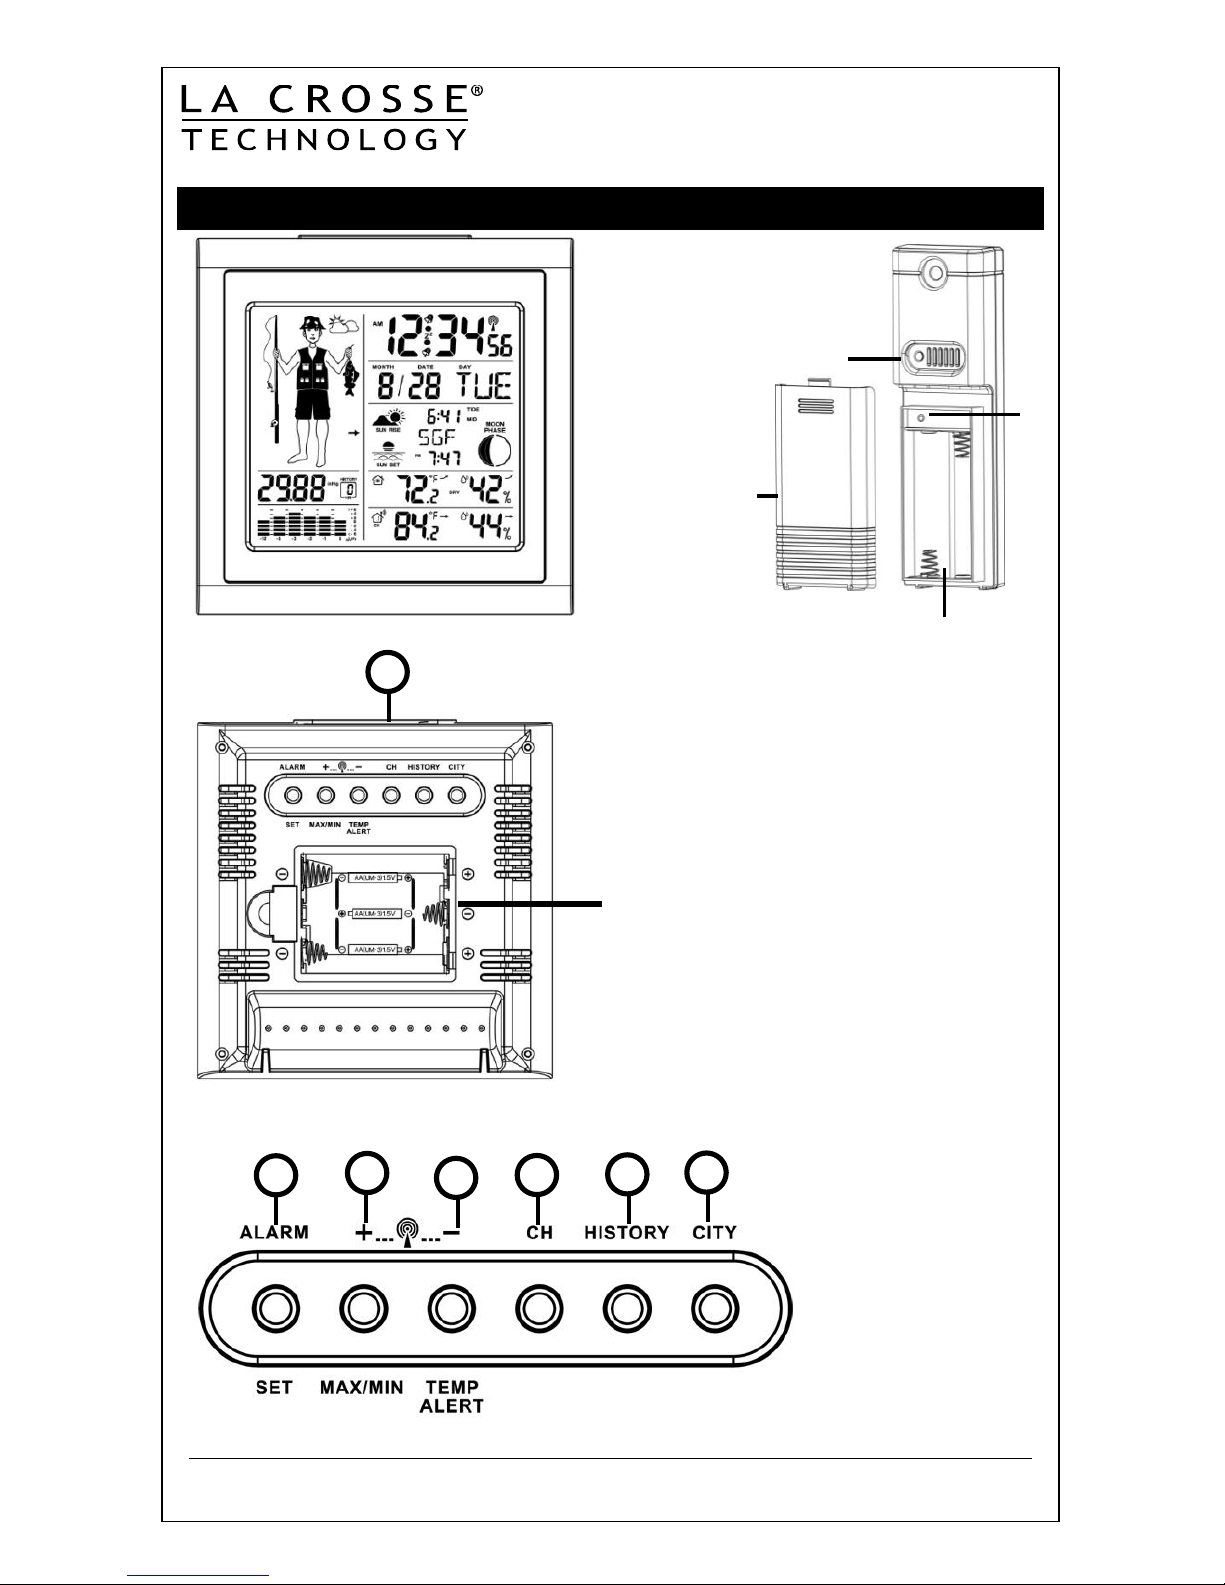
Model: 308-1451
Quick Setup Guide
WIRELESS COLOR FORECAST STATION
Sensor
Battery Cover
Sensor Battery
Compartment
2 “AA”
SENSOR
TX-142TH
LED
TX
Battery
Compartment
3 “AA”
FRONT
VIEW
Buttons
BACK
VIEW
Note: The forecast station is
sold with one TX142TH
transmitter or one TX14TH
transmitter. These sensors
are interchangeable.
SNOOZE/LIGHT
Page 2
Model: 308-1451 www.lacrossetechnology.com/support Page | 2
GET STARTED
Step 1: Insert 3 new AA batteries (not included) into the forecast station.
Observe the correct polarity.
Step 2: Insert 2 new AA batteries (not included) into the outdoor transmitter.
Observe the correct polarity. The red LED will flash when transmitting.
Restart: If the outdoor temperature is not displayed after 3 minutes, remove
batteries from the station & transmitter for 15 minutes. Return to Step 1 above.
SET TIME, DATE AND TEMPERATURE UNITS
1. Hold button 1 (SET) to enter time set mode.
2. To adjust values press buttons 2 or 3 (+ or -).
3. Press button 1 (SET) to confirm adjustments and move to the next item.
Settings order: 1. WWVB Reception, 2. Time Zone, 3. DST Indicator, 4. 12/24
Hour Time Format, 5. Fahrenheit/Celsius 6. Hour, 7. Minutes,
8. Seconds, 9. Year, 10. Month, 11. Date
Press button 1 (SET) to exit, or wait 20 seconds without pressing buttons to
return to the normal time display.
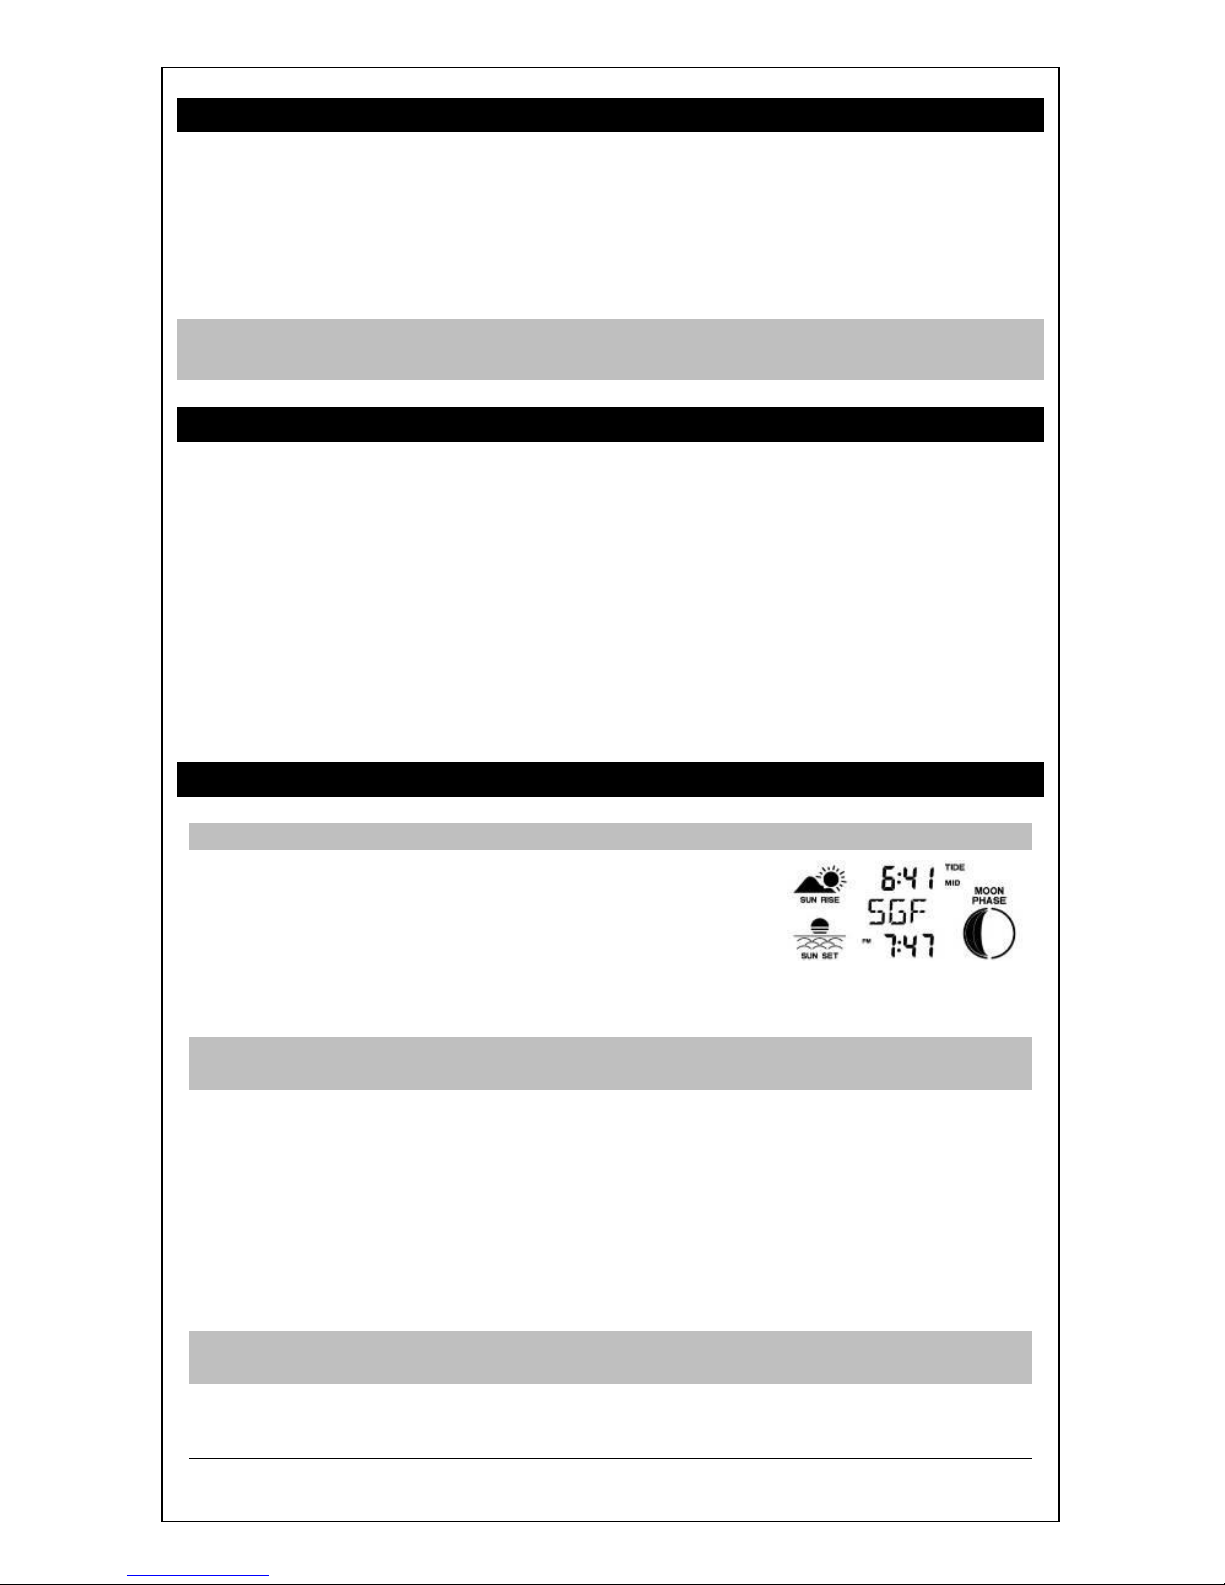
CITY SELECTION-SUNRISE/SUNSET TIMES
Note: Preset City abbreviations are at the end of this guide.
COUNTRY:
1. Press button 6 (CITY) and the Country will flash.
2. Select the country with buttons 2 or 3 (+ or -).
(USA, Canada or Mexico)
3. Press button 6 (CITY) to confirm and enter state selection.
Note: When either Canada or Mexico is chosen you will move directly to city
selection.
STATE:
4. Select the state with buttons 2 or 3 (+ or -).
5. Press button 6 (CITY) to confirm and enter city selection.
CITY:
6. Select the city with buttons 2 or 3 (+ or -).
7. Press button 6 (CITY) to confirm and exit.
Note: Use the city location closest to you in a North/South line even in another
state or country. This will provide the most accurate sunrise/sunset times.
Page 3
Model: 308-1451 www.lacrossetechnology.com/support Page | 3
TIDE
The tides reflected on this station are based on the ebb and neap tides of the
lunar month. Not daily high and low tides. When it reads high, your tides will be
higher than usual, etc.
Full & new moon = spring tide (TIDE HI).
Quarter = neap tide (TIDE LO)
Other = mean water level (TIDE MID)
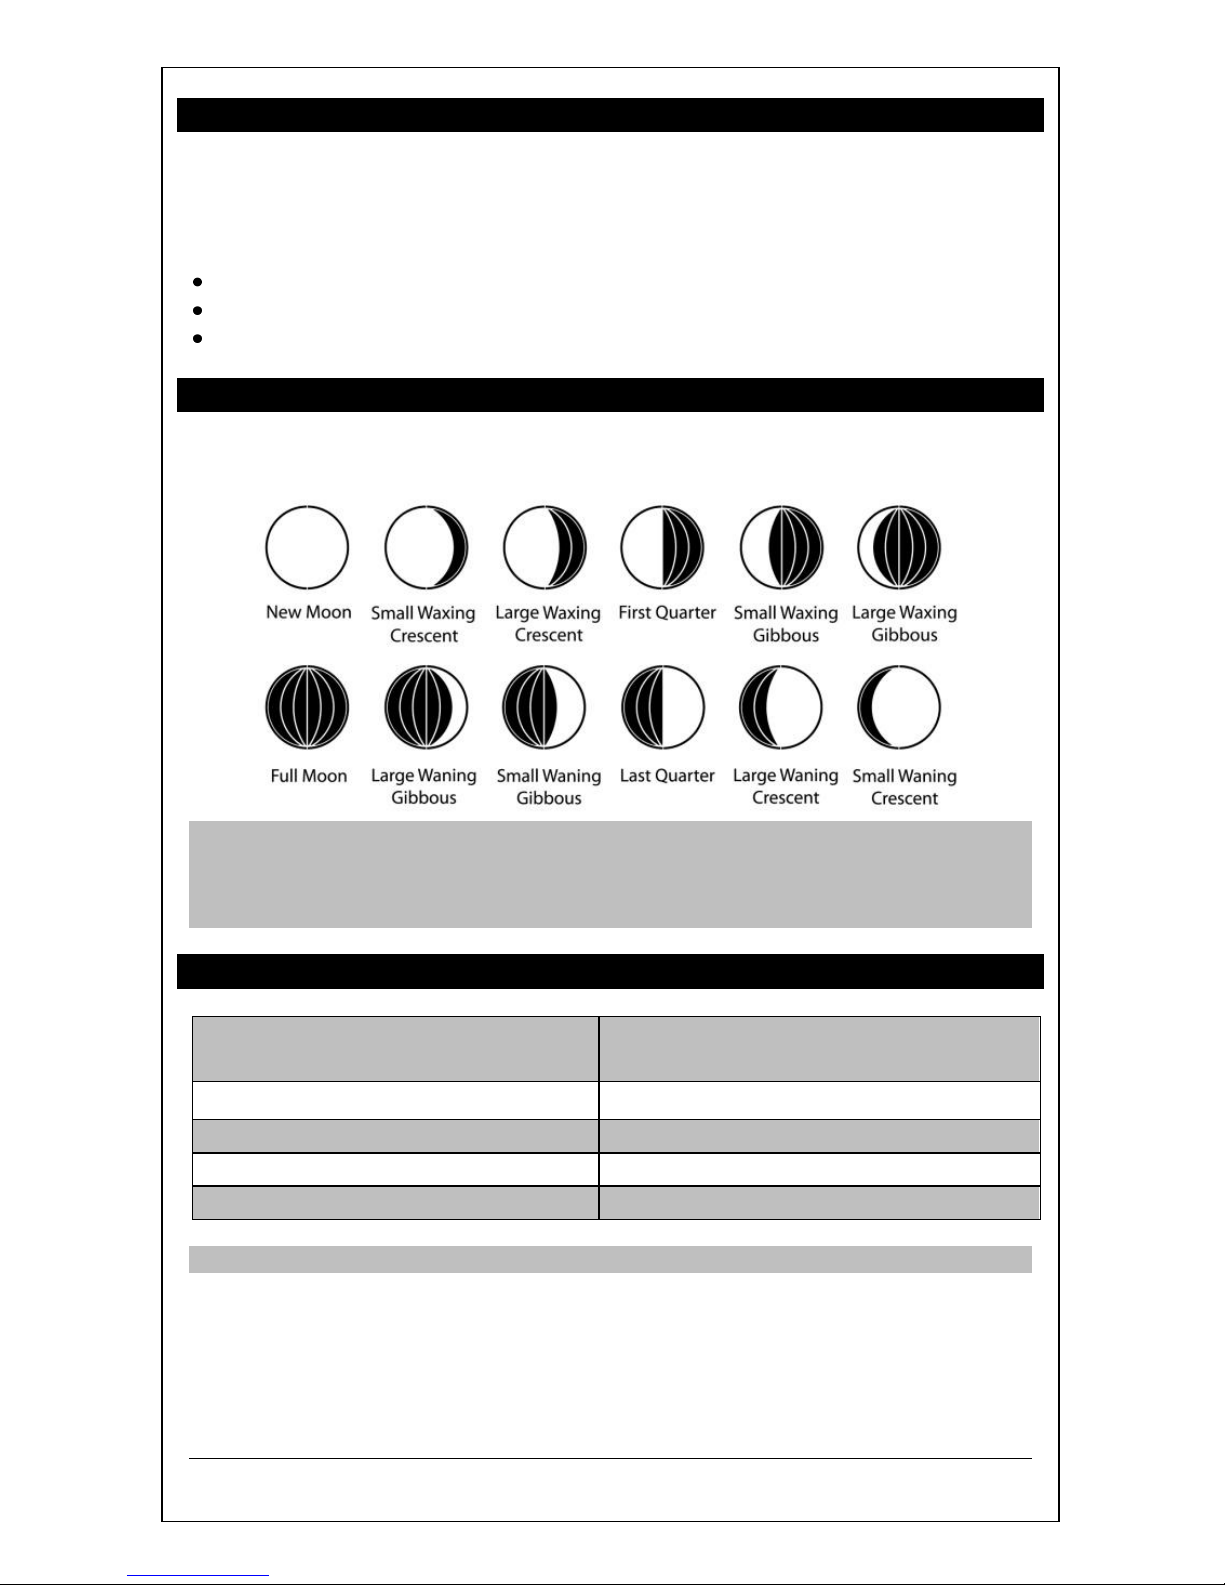
MOON PHASE
The LCD Moon phase is divided by 6 sections, showing a total of 12 phases of
the moon.
Note: With the moon shown against a light colored background, the phases will
show opposite to a paper calendar. The segments that are highlighted will portray
the part of the moon that is lit. For instance, the moon will be blank during a new
moon and dark during a full moon.
ALARMS
Time Alarm #1
With additional TX142TH or
TX14TH transmitters:
Time Alarm #2
High Temperature Alarm CH #2
Frost Alarm
Low Temperature Alarm CH #2
High Temperature Alarm CH #1
High Temperature Alarm CH #3
Low Temperature Alarm CH #1
Low Temperature Alarm CH #3
TIME ALARMS
Set Alarm 1:
1. Press button 1 (ALARM) to enter alarm 1 (A1) mode.
2. Hold button 1 (ALARM) to enter alarm set mode.
3. To adjust values press buttons 2 or 3 (+ or -).
Page 4
Model: 308-1451 www.lacrossetechnology.com/support Page | 4
Set Alarm 2:
1. Press button 1 (ALARM) twice to enter alarm 2 (A2) mode.
2. Hold button 1 (ALARM) to enter alarm set mode.
3. To adjust values press buttons 2 or 3 (+ or -).
Activate:
1. Press and release button 1 (ALARM) to enter the correct alarm mode.
2. Press and release button 2 (+) and the bell icon will appear.
(Above the time, alarm 1, below the time, alarm 2)
Deactivate:
3. Press and release button 1 (ALARM) to enter the correct alarm mode.
4. Press and release button 2 (+) and the bell icon will disappear.
Snooze:
1. When either alarm sounds, press button 7 (SNOOZE/LIGHT) to activate
the snooze feature for 10 minutes.
2. Press any button to deactivate the snooze feature.
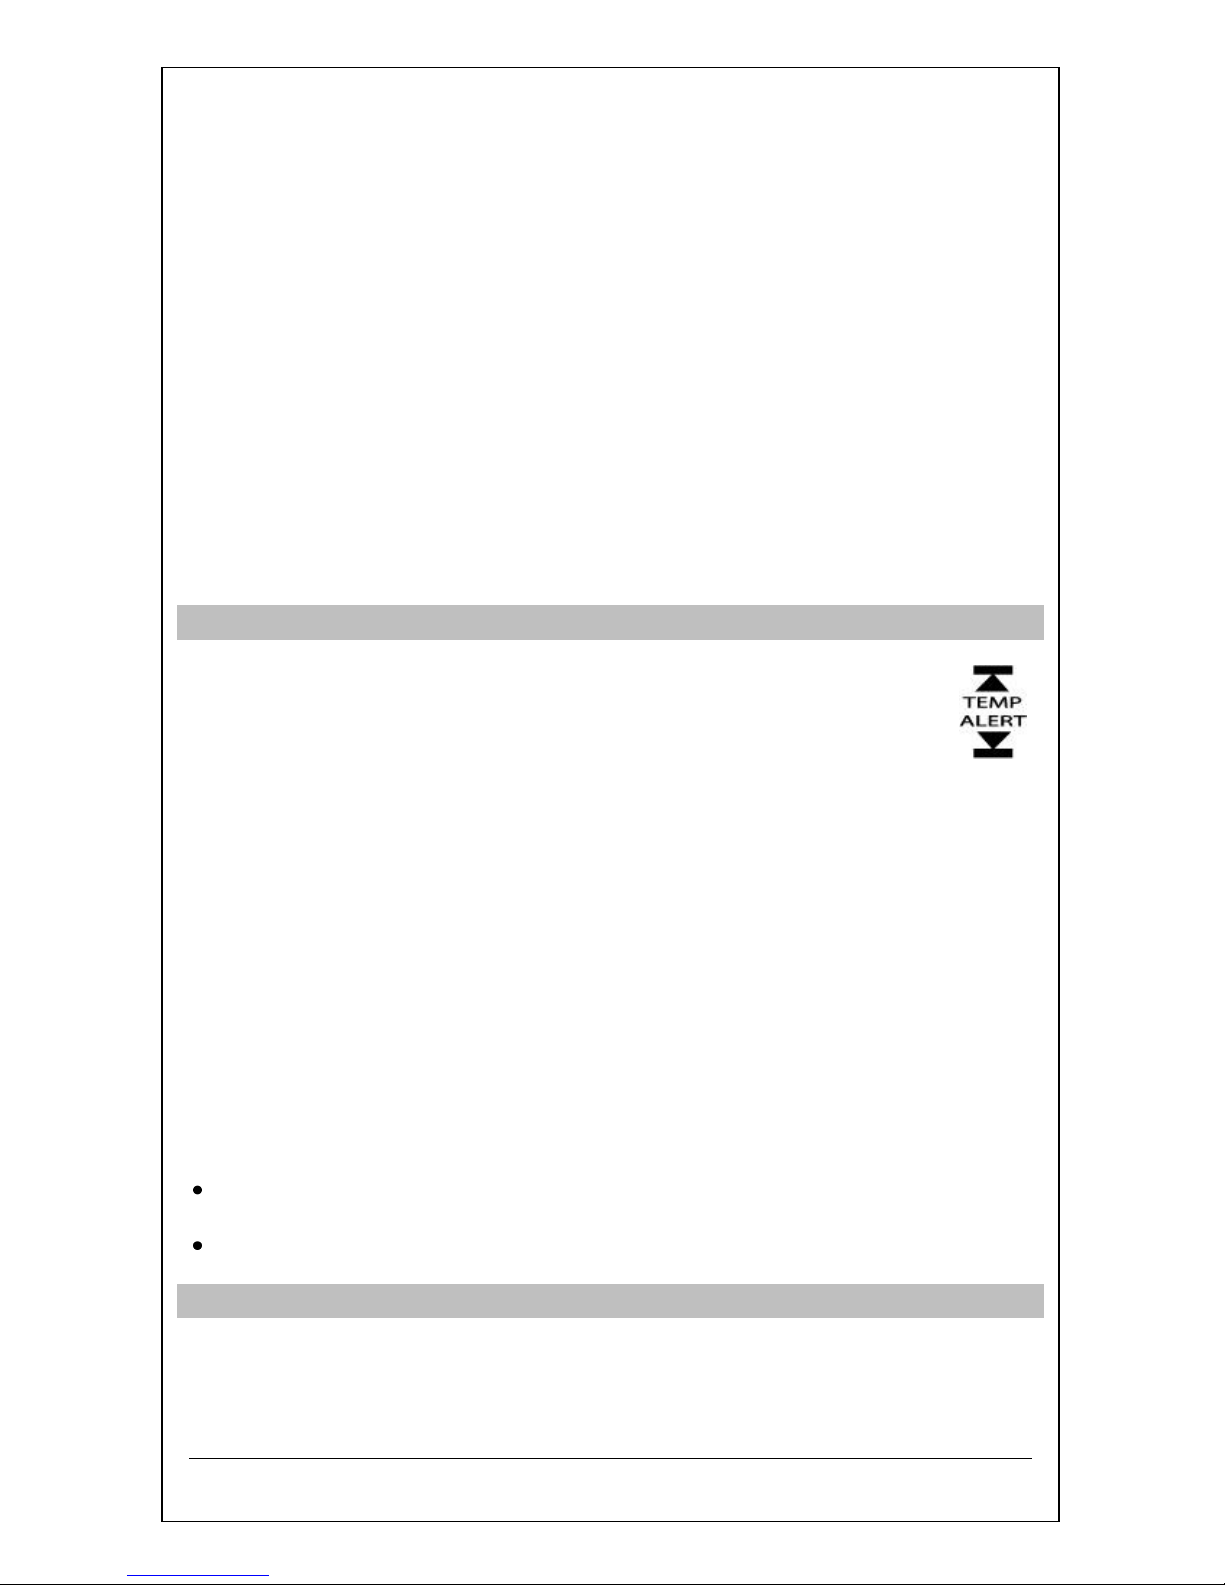
OUTDOOR TEMPERATURE ALERTS
High and low outdoor temperature alerts may be set on the forecast
station for each channel that has a transmitter attached.
Set Temperature Alert Channel 1:
1. Hold button 3 (TEMP ALERT) and the High Temp Alert icon appears.
2. Press buttons 2 or 3 (+ or -) to adjust values.
3. Press button 1 (SET) to move to the Low Temp alert.
4. The Low Temp Alert icon will appear.
5. Press buttons 2 or 3 (+ or -) to adjust values
6. Press button 1 (SET) to confirm and exit to current temperature.
7. The Temp Alert icon will show in the outdoor temperature area.
8. When alert sounds, the temperature value will flash.
9. Press any button to silence the alert temporarily.
Set Temperature Alerts Channels 2 or 3:
1. Press button 4 (CH) to select the channel.
2. Follow steps 2-4 above to set temperature alerts on other channels.
Deactivate Temperature Alert:
Press and release button 3 (TEMP ALERTS) three times to deactivate all
temperature alerts.
The alert icon will disappear.
FROST ALARM
The Frost Alert sounds when outdoor temperature is between:
(34°F~37°F (1.1 °C~2.7°C))
Page 5
Model: 308-1451 www.lacrossetechnology.com/support Page | 5
1. Activate: Press and release button 3 (TEMP ALERT) to activate
the Frost Alarm. The FROST ALERT icon will appear in the outdoor
temperature area when active.
2. Deactivate: Press and release the TEMP ALERT button until
the FROST ALERT icon no longer shows.
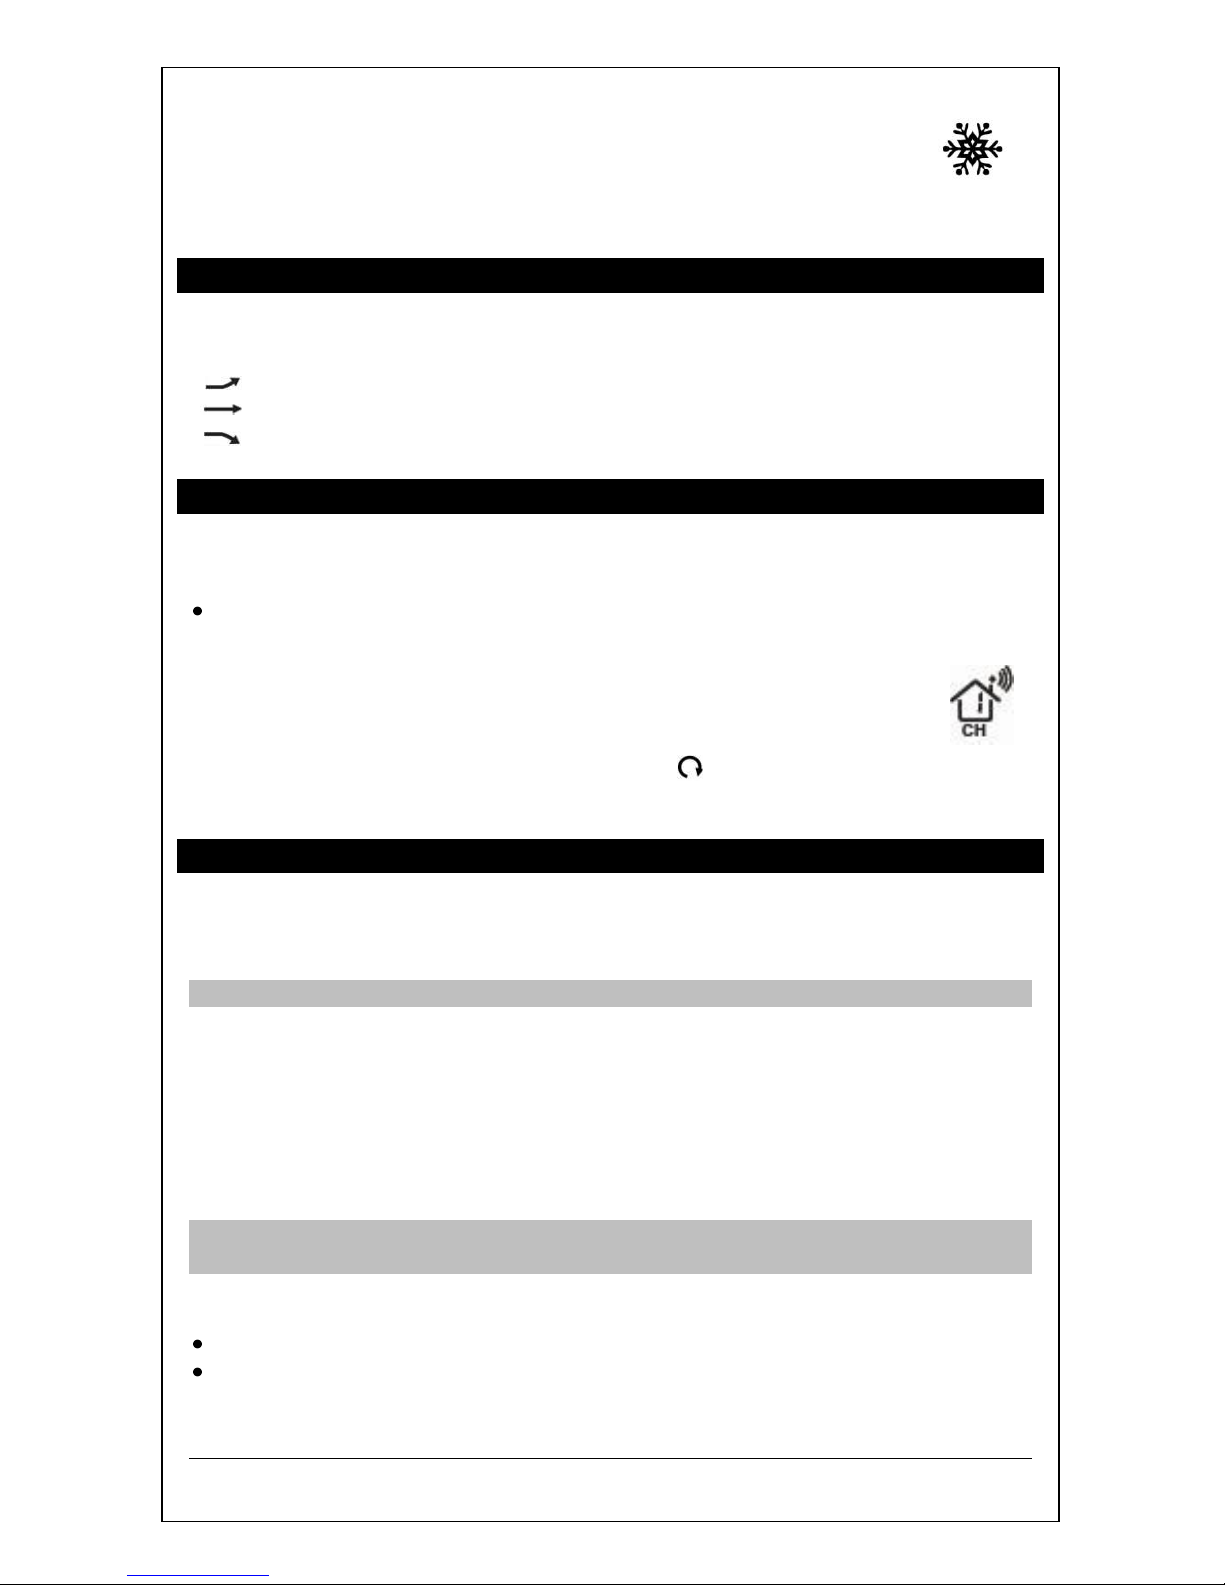
TEMPERATURE TREND ICONS
The temperature (2°F/1°C) trend indicators update every 30 minutes or less.
Temperature rose in the past three hours
Temperature has not changed in the past three hours.
Temperature fell in the past three hours
CHANNELS-AUTO SCROLL
Channels: The Forecast Station can receive up to 3 outdoor transmitters
(TX142TH or TX14TH).
When more than one transmitter is used, set each transmitter to a different
channel number then hold button 4 (CH) to search for the transmitters.
View Channels: Press button 4 (CH) to select Ch1, Ch2, Ch3 or autochannel scrolling ALARM.
Auto scroll-channel will show a circling arrow below the channel number and
will rotate through each channel approximately every 3-5 seconds
PRESSURE
Absolute Pressure Number: Barometric Pressure is read by the Forecast
Station. Since this number is absolute pressure it may not be the same as a local
reporting station that reads in relative pressure.
Note: The number cannot be calibrated.
Unit of Measure: (InHg or hPa): Hold the button 5 (HISTORY) to switch from
InHg (inches or mercury) or hPa (Hecto Pascal).
Pressure History:
1. Press and release button 5 (HISTORY) to view numeric pressure history.
2. 0 is current pressure. -1 through -12 reflects the history in one-hour
increments.
Note: The history graph and forecast icons will not change while you view
pressure history.
12-Hour Pressure History Graph:
The bar chart indicates the air pressure history trend over the last 12 hours.
The columns represent the pressure change (”InHg” or “hPa”) readings at
specific times.
Frost
Alert
Page 6
Model: 308-1451 www.lacrossetechnology.com/support Page | 6
The “0” is equal to the current pressure and each bar represents how past
pressure was compared to the current pressure.
Read the graph from left to right. If the bars are rising, it means that the
weather is getting better due to the increase of air pressure.
If the bars go down, it means the air pressure has dropped and the weather
is expected to get worse from the present time.
Note: The bar graph will scroll continually to prevent LCD burnout.
COMFORT STATEMENT
The comfort statement is based on the indoor humidity.
WET: Humidity is above 70%
COMFORTABLE: Temperature is between 68°F and 82°F. Humidity is
between 40% and 70%
DRY: Humidity is below 40%
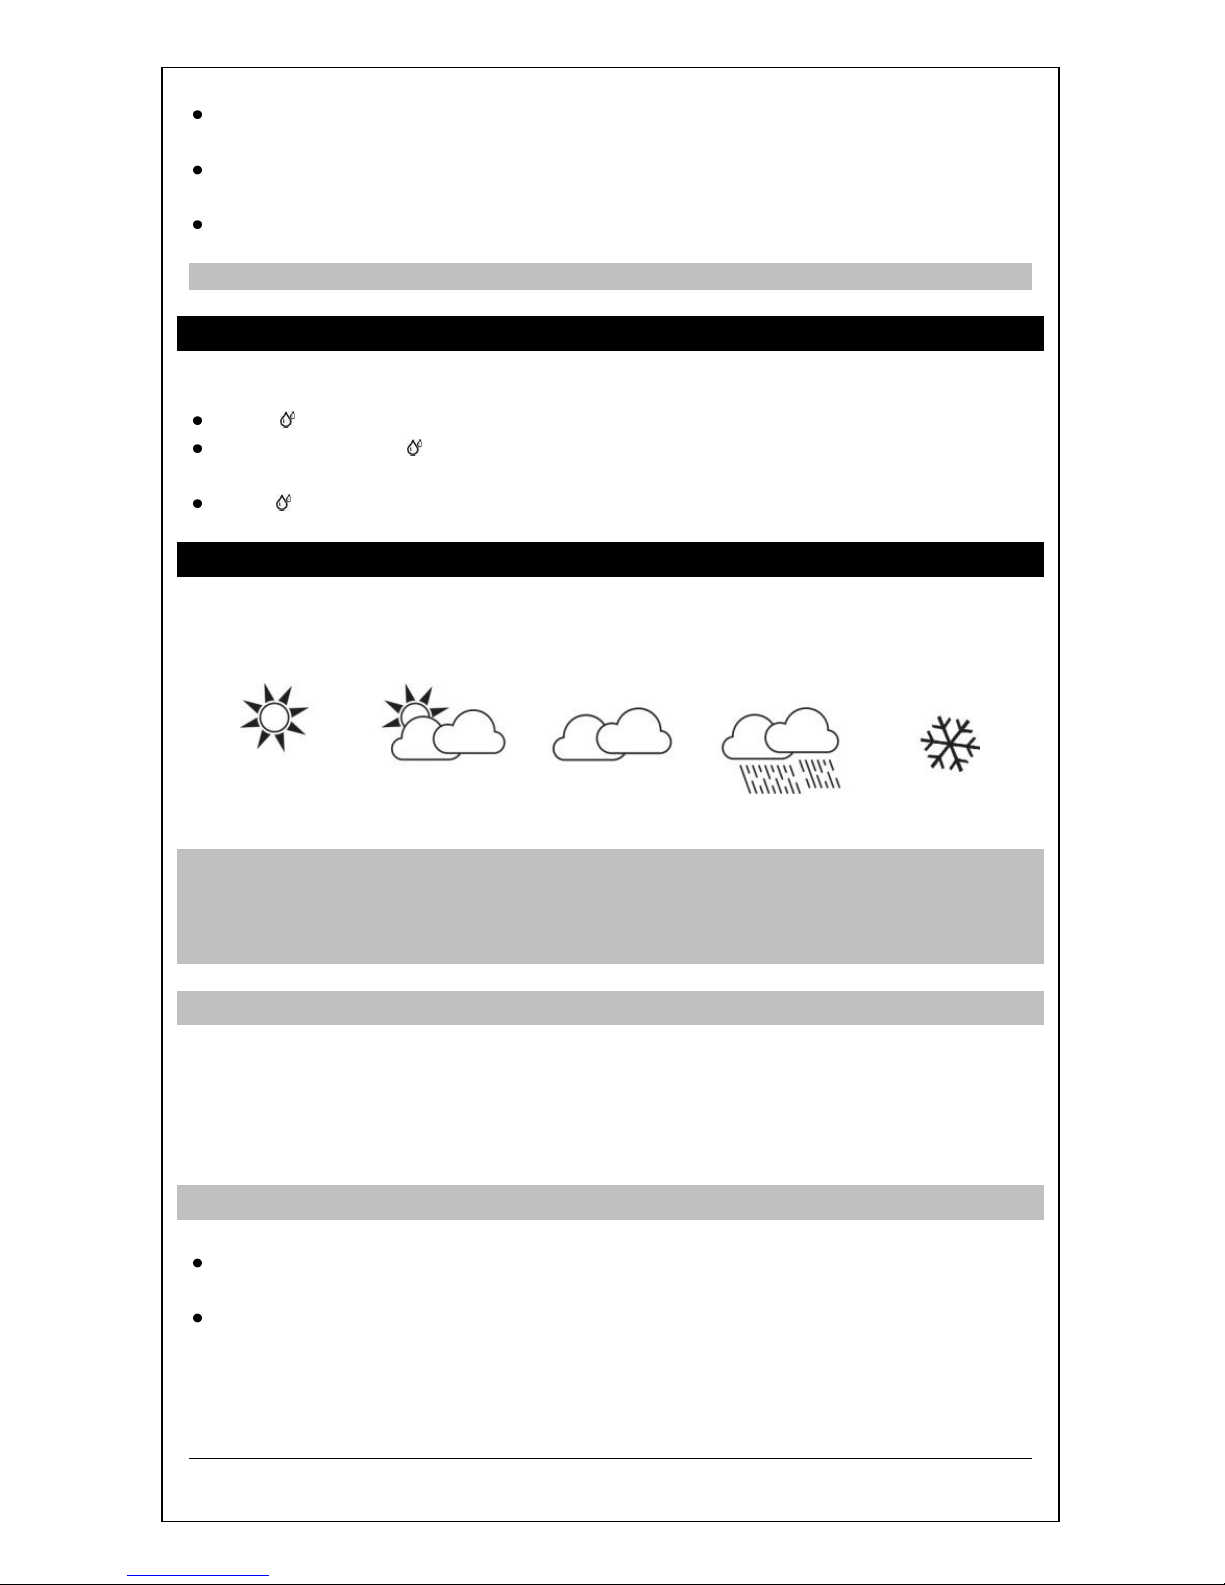
WEATHER FORECAST ICONS
These icons forecast the weather in the next 12-24 hours. The forecast icons
displayed, predict the weather in terms of getting better or worse.
SUNNY SLIGHTLY CLOUDY CLOUDY RAINY SNOWY
Note: After set up, readings for weather forecasts should be disregarded for the
next 48-60 hours. This will allow sufficient time for the forecast station to collect
air pressure data at a constant altitude and therefore result in a more accurate
forecast.
Weather Tendency Indicator (up or down arrows)
UP ARROW: means that the Air-pressure is increasing and the weather is
expected to improve.
DOWN ARROW: the Air-pressure is falling and the weather is expected to
become worse.
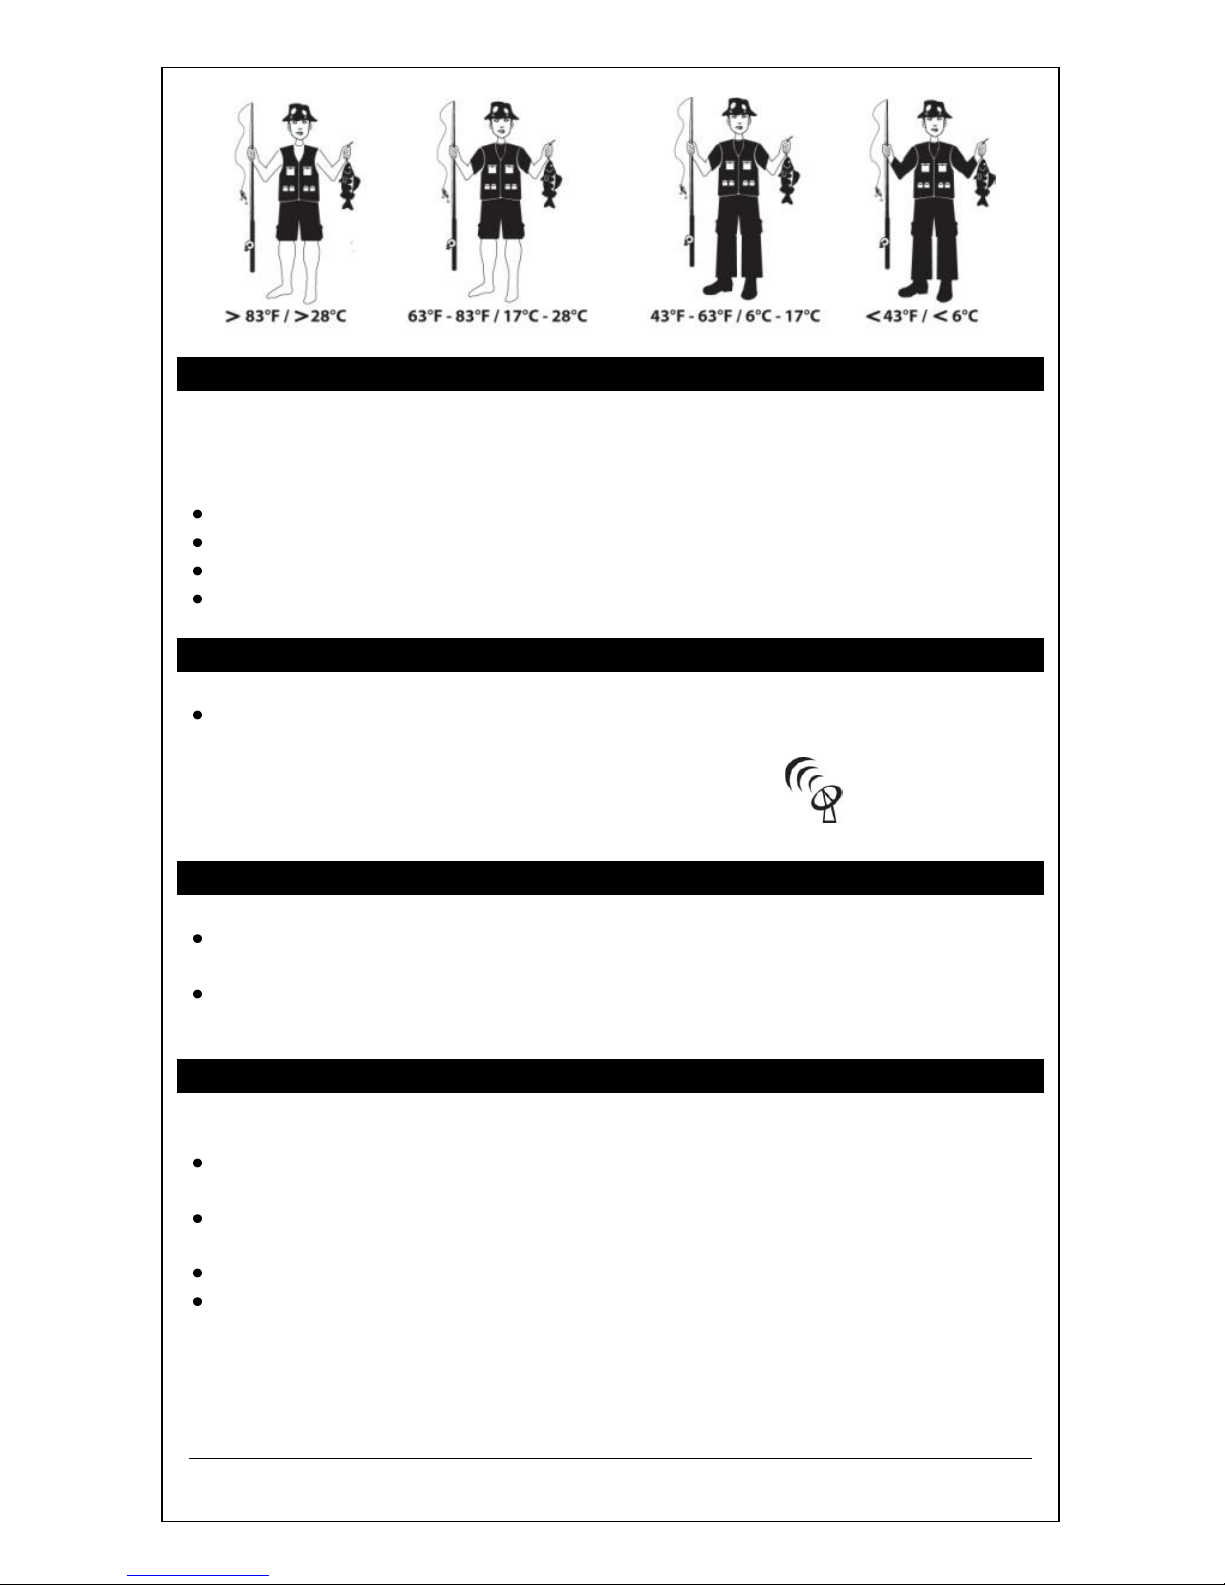
Clothing Index
The Fisherman’s clothing icon combinations are displayed based on Outdoor
Temperature from the transmitter on channel 1 only.
The Fisherman represents CURRENT TRENDS in Temperature.
Page 7
Model: 308-1451 www.lacrossetechnology.com/support Page | 7
VIEW/RESET MIN/MAX VALUES
The station automatically resets minimum and maximum values daily at midnight
(12:00 AM).
Press button 5 (MIN/MAX) to view maximum values.
Hold button 5 (MIN/MAX) to reset maximum values.
Press button 5 (MIN/MAX) to view minimum values.
Hold button 5 (MIN/MAX) to reset minimum values.
MANUAL WWVB RADIO-CONTROLLED TIME SEARCH
Hold buttons 2 or 3 (+ or -) to start or stop a manual signal search. WWVB
Icon will flash
For information about WWVB visit:
www.nist.gov/pml/div688/grp40/wwvb.cfm
POSITION OUTDOOR TRANSMITTER
Mount the outdoor transmitter on a north-facing wall or in any well shaded
area. Under an eave or deck rail is preferred.
The maximum transmitting range to the forecast station is over 200 feet (60
meters) in open air, not including walls.
POSITION THE FORECAST STATION
The forecast station has a wide base to sit on a desk or table.
For best WWVB reception orientate the forecast station with the front of the
back facing Ft. Collins, Colorado.
Choose a location 6 feet or more from electronics such as cordless phones,
gaming systems, televisions, microwaves, routers etc.
Place within range of the outdoor transmitter.
The maximum transmitting range in open air is 200 feet (60 meters).
Obstacles such as walls, windows, stucco, concrete and large metal objects
can reduce the range.
WWVB
Icon
Page 8
Model: 308-1451 www.lacrossetechnology.com/support Page | 8
LOW BATTERY ICON
Low battery icon indicates low battery for station or sensor.
If the icon is displayed in Outdoor Temperature section,
replace batteries in the outdoor sensor.
If the icon is displayed in Indoor Temperature section,
replace batteries in the Forecast Station.
SPECIFICATIONS
Indoor:
Temperature Range:
+32°F to +122°F (0°C to 50°C)
Humidity Range:
19%-97% (RH)
Interval:
About every 30 seconds
Outdoor:
Temperature Range:
-40°F to 140°F (-40°C to 60°C)
Alkaline Batteries:
-20°F to 140°F (-28.8°C to 60°C)
Lithium Batteries:
-40°F to 140°F (-40°C to 60°C)
NOTE:
Temperatures below - 20°F (-28.8°C)
require Lithium batteries in the
outdoor sensor.
Humidity Range:
19%-97% (RH)
Distance:
Over 200 ft. (60 meters) RF 433MHz
(open air)
Interval:
About every 50 seconds
Power:
Forecast Station
Primary Power:
5-volt AC power adapter (included)
Optional/Battery Backup
Optional 3-AA, IEC, LR6 batteries
(not included)
TX142TH/TX14TH Transmitter:
2-AA, IEC, LR6 batteries (not
included)
Battery Life:
Forecast Station
Battery Backup:
Battery life is over 24 months when
using the AC adapter for primary
power
TX142TH/TX14TH Transmitter:
Battery life is over 12 months when
using reputable battery brands for
both Alkaline and Lithium batteries
Dimensions:
Forecast Station:
5.12" L x 2.36" W x 5.12" H
(130 x 60 x 130 mm)
TX142TH Transmitter:
1.57" x 0.79" x 5.12"
(40 x 20 x 130mm)
Low Battery
Icon
Page 9

Model: 308-1451 www.lacrossetechnology.com/support Page | 9
WARRANTY AND SUPPORT INFORMATION
La Crosse Technology, Ltd. provides a 1-year limited time warranty (from date of
purchase) on this product relating to manufacturing defects in materials &
workmanship.
View full warranty details online at:
www.lacrossetechnology.com/warranty_info.pdf
For warranty work, technical support or other information contact:
La Crosse Technology, Ltd
2817 Losey Blvd. S.
La Crosse, WI 54601
Contact Support:
1-608-782-1610
Product Registration:
www.lacrossetechnology.com/support/register
Online Product Support:
www.lacrossetechnology.com/308-1451
Protected under U.S. Patents:
5,978,738, 6,076,044, 6,597,990
FCC STATEMENT
This Device complies with Part 15 of the FCC Rules. Operation is subject to the
following two conditions: (1) This device may not cause harmful interference, and
(2) the device must accept any interference received, including interference that
may cause undesired operation.
NOTE: THE MANUFACTURER IS NOT RESPONSIBLE FOR ANY RADIO OR
TV INTERFERENCE CAUSED BY UNAUTHORIZED MODIFICATIONS TO THIS
EQUIPMENT. SUCH MODIFICATIONS COULD VOID THE USER AUTHORITY
TO OPERATE THE EQUIPMENT
All rights reserved. This handbook must not be reproduced in any form, even in
excerpts, or duplicated or processed using electronic, mechanical or chemical
procedures without written permission of the publisher.
This handbook may contain mistakes and printing errors. The information in this
handbook is regularly checked and corrections made in the next issue. We
accept no liability for technical mistakes or printing errors, or their consequences.
All trademarks are acknowledged.
Scan for online
information
Page 10

Model: 308-1451 www.lacrossetechnology.com/support Page | 10
 Loading...