

Labnet Excel E10-1, Excel E20-1, Excel E20-8, Excel E200-8, Excel E1200-8 Operation Manual
...Page 1

LABNET Excel
Single and Multi-channel Electronic Pipettors
Operation Manual
Version: 2.9
www.Labnetlink.com
Page 2

Labnet International
31 Mayfield Ave
Edison, NJ 08837
Declaration of Conformity
Product Name: Labnet Excel Single/Multi-channel Electronic
Pipettors
All models comply with the following European standards:
EMC: EN 55011, Class A
USA
EN 60601-1-2
To the best of my knowledge and belief, these units conform to these
standards.
Name: Mike Revesz
Position: Director of Quality Assurance
Issue Date: 2005/1/1
Page 3

Table of Contents
Safety Precautions...................................................................................1
1.
1.1. Operation Safety Precautions 1
1.2. Battery Safety 1
2. General Description................................................................................3
2.1. Features 3
2.2. Ranges and Specifications 4
3. Getting St arte d........................................................................................4
3.1. Unpacking 4
3.2. Inserting the Battery 5
3.3. Charging the Battery 6
3.4. Start Pipetting 8
3.5. Manual Blow-out Operation 10
3.6. Hanger Installation 10
4. LABNET Excel electronic pipettor Overview.....................................11
4.1. Keypad Function 12
4.2. Audible Signals 13
5. Function Map........................................................................................14
9. SYS (System) Mode...............................................................................15
6.1. Aspirating Speed 15
6.2. Dispensing Speed 16
6.3. Audible Signals 16
6.4. Blow-out 16
6.5. Reverse Pipetting 17
6.6. Setting PROG (Programs) 18
7. AUTO Mode........................................................................................ 19
Page 4

MD (Multiple Dispensing) Mode .........................................................21
8.
9. MIX Mode.... 22
10. SE (Sequential Aspirating/Dispensing) Mode.....................................22
10.1. SA (Seq uent i al Aspirating) M ode 23
10.2. SD (Sequential Dispensing) Mode 24
11. Sterilization.. 26
11.1. Removal of the Lower Piston Assembly 27
11.2. Reattach the lower piston assembly 28
12. Maintenance 30
13. Troubleshooting.....................................................................................31
Appendix A: T echnical Specifications...........................................................33
Appendix B : Tip Ejector Height Adjustment..............................................33
Appendix C: Warranty...................................................................................34
Page 5

1. Safety Precautions
Before using the LABNET Excel electronic pipettor for the first time,
please read this entire operating manual carefully. To guarantee problem
free, safe operation, it is essential to observe the following points:
1.1. Operation Safety Precautions
When using infectious, radioactive, toxic and other solutions which
may pose health risks, please observe appropriate safety precautions.
1. Do not use the LABNET Excel electronic pipettor in a potentially
explosive environment or with potentially explosive chemicals.
2. When using organic solvents or corrosive chemicals, please check their
compatibility with the pipette tips and the LABNET electronic pipettor.
3. Repair should be carried out by LABNET’s authorized service
personnel only. Contact LABNET International, Inc. for information
on authorized service options.
4. Use original spare parts and accessories only.
1.2. Battery Safety
The LABNET Excel electronic pipettors operate on a small but
powerful Lithium-ion battery. Misuse or abuse of the Lithium-ion
battery may cause damage or injury through fire, electric shock, or
chemical leakage. Please read and understand all warnings before using
the battery.
1. When storing the battery, do not allow it to come into contact with an y
metallic surfaces.
1
Page 6

2. Never use the LABNET Excel electronic pipettors while using the
DC-in jack to charge the battery.
3. Do not incinerate the Lithium battery or expo se it to excessive heat.
4. Do not short-circuit, puncture, crush, disassemble, damage, force
over-discharge (reversal) or modify the battery.
5. Do not expose the battery to water or moisture.
6. Do not drop or subject the battery to strong impacts.
7. Only use the battery specified in this manual.
8. Only use the specified, battery charging unit or DC-in jack to charge
the battery.
9. Do not use a leaking battery.
10. If charging is not completed within the specified time period, unplug
the charger and discontinue charging immediately.
11. The charger and battery temperature rises with extended periods of use.
Care should be taken to avoid burns.
12. Burns may result if the battery is removed immed iately after extended
periods of use.
13. If fluid from the battery enters your eye, immediately rinse the eye with
plenty of fresh water and contact a doctor. If fluid from the battery
makes contact with your skin or clothing, wash the area thoroughly
with water.
2
Page 7

2. General Description
LABNET Excel electronic pipettors feature an accurate and efficient, as
well as ergonomic and light-weight design. Researchers can program these
state-of-the-art products to conduct different pipetting tasks. More accurate
and comfortable pipetting can be easily achieved without any concern of
finger stress or injury.
2.1. Features
z High accuracy and precision
z Low forces
z Useful, practical operation protocols, such as Automatic Pipetting
(AUTO) with Mixing (MIX) option, Multiple Dispensing (MD),
Mixing (MIX) and Sequential Aspirating/Dispensing (SE), etc.
z 9 user-defined program sets
z 5 speeds for aspirating and dispensing
z Li-ion battery provides extended use on a single battery charge
z Ergonomic design
z Automatic calibration
z User-friendly graphic operation interface.
z Adjustable tip ejector.
z Automatically remembers the last-used pipetting protocol and settings
z Complies with CE, ISO-8655, GLP
3
Page 8

2.2. Ranges and Specifications
Product No. Channels
Volume
Range (µl)
E10-1 1 0.5 -10 0.1
E20-1 1 2 -20 0.1
E200-1 1 10 -200 1 2.0-0.6% 1.0-0.15%
E1200-1 1 100 -1,200 1 1.5-0.5% 0.6-0.15%
E10-8 8 0.5-10 0.1 4.0-1.0% 2.5-0.4%
E20-8 8 2-20 0.1 5.0-1.0% 2.0-0.3%
E200-8 8 10-200 1 2.0-0.6% 1.0-0.15%
E1200-8 8 100 -1,200 1 1.5-0.5% 0.6-0.15%
Increment
(µl)
Accuracy
(Rel.±)
4.0-1.0% 2.5-0.4%
5.0-1.0% 2.0-0.3%
Precision
( Rel. CV
)
Note:
LABNET Excel electronic pipette Accuracy and Precision Specifications
have been attained using LABNET Excel pipette tips. LABNET
guarantees Accuracy and Precision only if LABNET Excel tips or other
approved tips are used.
3. Getting Started
3.1. Unpacking
Open the LABNET Excel electronic pipettor package and confirm that all
items are included:
z Single/8-channel LABNET
electronic pipette unit
4
z Operation manual
Page 9

z Quality assurance card z AC-DC power adaptor
z LABNET electronic pipette
z Pipette tips
hanger and accessories
If there are any items missing, damaged, or not according to your order,
please contact your distributor or sales representatives for replacement
immediately .
Please charge the battery before first-time operation.
3.2. Inserting the Battery
Remove the battery cover by pressing the battery cover latch (see Figure 1)
and move the cover outward. Insert the battery (see Figure 2). Metallic
contacts must be face down. Close the cover of the battery compartment.
RESET
Press the
button to power on and calibrate the LABNET electronic
pipette.
Figure 1: Open the battery cover. Figure 2: Insert the battery.
5
Page 10

Note: After a charged battery is inserted, the LABNET electronic pipette
will automatically carry out a calibration rou tine.
3.3. Charging the Battery
There are two ways to charge the battery: (1) Attach the included AC-DC
Power Adapter to the pipettor (2) Use the option a l battery charging kit.
Included AC-DC Power Adapter
Insert the battery into the battery compartment. Insert the DC-in plug of the
power adaptor into the DC-in jack (see Figure 3). Connect the power plug
of the power adaptor with the ex ternal pow er sourc e. Connecting the power
plug before inserting the battery will inactivate the charging process. The
indication bar inside battery symbol
will blink during the charging
process. When the battery is fully charged, the blinking will stop and the
LABNET electronic pipette will beep once to remind the user.
Optional Charging Kit
Connect the power plug of the charging unit to the proper external power
source. The indication light will turn green. Insert the battery (see Figure 4).
Once the battery is correctly inserted and charging, the indicator light will
turn red. When the battery capacity is full, the indicator light will turn green
again.
6
Page 11

Figure 3: Using the included AC-DC
adapter to charge the battery
Figure 4: Using the optional
charging kit to charge the battery
Note:
1. For safety reasons, the LABNET Excel electronic pipettors cannot be
used during charging.
2. Please do not over-charge the battery for a long period of time.
7
Page 12

3.4. Start Pipetting
There is no power On/Off button on the LABNET Excel electronic
pipettors. Once users insert the fully-charged battery, the pipettor will be
switched on. It will perform a calibration routine and switch on the LCD
display as in Figure 8. Press any keypad button or the
PLUNGER button to
enter the function mode selection. The LABNET Excel electronic pipettor
will be automatically powered off if it’s not in use for more than 10
minutes.
Select the desired function mode and settings (refer to the following
chapters : 6 ~ 10 ) before pipetting. After the initial set-up, attach the
correct-sized tips to the cone(s) of the pipette before operation.
Product No. Channels
Volume
Range (µl)
SE10-1 1 0.5 -10 10µl
SE20-1 1 2 -20 10µl
SE200-1 1 10 -200 200µl
SE1200-1 1 100 -1,200 1000 µl
SE10-8 8 0.5 -10 10µl
Correct
Pipette Tip
Size
SE20-8 8 2-20 10µl
SE200-8 8 10-200 200 µl
SE1200-8 8 100 -1,200 1000 µl
8
Page 13

The cones of the LABNET Excel electronic pipettor are designed to fit a
wide variety of manufacturers pipette tips. However, the published
accuracy and precision specifications for the LABNET Excel electronic
pipettors are guaranteed only when using LABNET Excel tips. Contact
LABNET International for pipette tip ordering information.
The LABNET Excel electronic pipettor is an ergonomic instrument
designed to reduce hand fatigue and repetitive stress injury. In order to
maximize the benefits of the LABNET Excel electronic pipettor’s design,
the instrument should be held as shown in figure 5. Use your index finger
to press the
PLUNGER button and use your thumb to press the
TIP
ejector.
Figure 5: Correct hand position
9
Page 14

3.5. Manual Blow-out Operation
The automatic blow-out function, in different pipetting modes, simulates
the blow-out function in manual pipettes. With the Blow-out function
selected, the user can press the PLUNGER button once to dispense the
liquid and the piston will travel an extra distance to blow out any remaining
liquid. The piston will then pause and return to its starting position.
Alernatively the user can press and hold the PLUNGER b utton to dispense.
The piston will travel the extra distance to blow out remaining liquid and
remain in that position until the plunger is released. Only when the
PLUNGER button is released, the piston will return back to its starting
position.
3.6. Hanger Installation
The LABNET Excel electronic pipettor hanger can be attached to a shelf or
counter using the sticker as shown in Figure 6. The finger rest of the
LABNET Excel electronic pipettor locks into the hanger and keeps the
pipettor in a vertical position.
Figure 6: LABNET Excel electronic pipettor hanger installation
10
Page 15

4. LABNET Excel electronic pipettor Overview
This section presents an overview of the LABNET Excel electronic
pipettor’s various components and buttons (see Figure 7) as well as the
symbols and indicators on the LCD display (see Figure 8).
LCD Displ ay
"RESET" Bu tton
Keypad
Tip Ejector
Bushin g
Lower Part
Tip Fitting
(Front View)
(Side View)
Figure 7: 1-channel LABNET Excel electronic pipett o r ove r vi ew
Battery Cover
DC In
"PLU N G ER" Bu t ton
Finger Rest
Connector Nut
11
Page 16

System Setting
Auto Pipetting
Mu ltip le Dispensin g
Mixing
Sequential Aspirating/ Dispensing
Direction
Speed
Battery Capacity
"R E S ET" B ut t o n
Count No. / Prog No.
Volume ( )
Au di b l e Si n g a ls
Blow Out
Reverse Pipetting
"Ba ck " B ut t o n
4.1. Keypad Function
Button Symbol Function Description
Set/Enter
Exit/Esc
Up
Down
Reset
PLUNGER
Figure 8: LCD display Panel
RESET
Confirms your choice
Exits to previous mode/setting
Increases volume/ changes parameter
Decreases volume/ changes parameter
Piston automatically determines the
home position
Activates aspirating/dispensing/
PLUNGER
same as
"E n te r" Bu t ton
"Up / D o wn " B u t ton
button
Tip Ejector
TIP
Ejects the tips
12
Page 17

Tips for Efficient Operation: The
PLUNGER button can be used to increase
volumes and to change modes and settings same as the “Up” button during
the function mode selection and volume settings. This operation feature can
speed up the setting processes.
4.2. Audible Signals
The audible signals are beneficial when you are familiarizing yourself with
the operating procedure of the LABNET Excel electronic pipettor. They can
also be switched off if desired (see Section 6.3.)
Audible Sound Operation
Low-tone beep Aspirating
High-tone beep Dispensing/ Tip Ejection/ Error codes
2 beeps
MD/MIX/SE mode cycle or RESET routine is
completed
13
Page 18

(
)
(
)
5. Function Map
The main menu of the LABNET Excel electronic pipettor includes five
function modes (SYS, AUTO, MD, MIX and SE). Each mode includes
various function settings (see Figure 9).
Function
Mode
Function
Settings
Function Map
SYS
Aspirating
Speed
Dispensing
Speed
Audible
Signals
Tip Ejection
Alarm
Blow-out
Reverse
Pipetting
Program
Recall
AUTO
Basic
Aspirating/
Dispensing
MIX
Mix
Number
COUNT
Mix
Volume
MD MIX SE
Dispensing
Number
(COUNT)
Dispensing
Volume
Mix
Number
COUNT
Mix
Volume
Aspirating
Number
(1,2,3,…)
Aspirating
Volume
SD SA
Dispensing
Number
(1,2,3,…)
Dispensing
Volume
Figure 9: Function map
14
Page 19

9. SYS (System) Mode
SYS mode is used to set up the function settings before pipetting. Once
users select and store these settings, they will no longer need to set up the
settings before every pipetting. There are 6 function settings (Aspirating
Speed, Dispensing Speed, Audible Signals, Blow-out, Reverse Pipetting
and Program Recall) in SYS mode.
Note :
1. These 6 function settings are sequential procedures. To store these
settings in memory, users have to complete the whole setting procedure
and press
2. Users can use the
«SET» when the LCD displays .
«Up/Down» button to move back and forth to the
previous function settings.
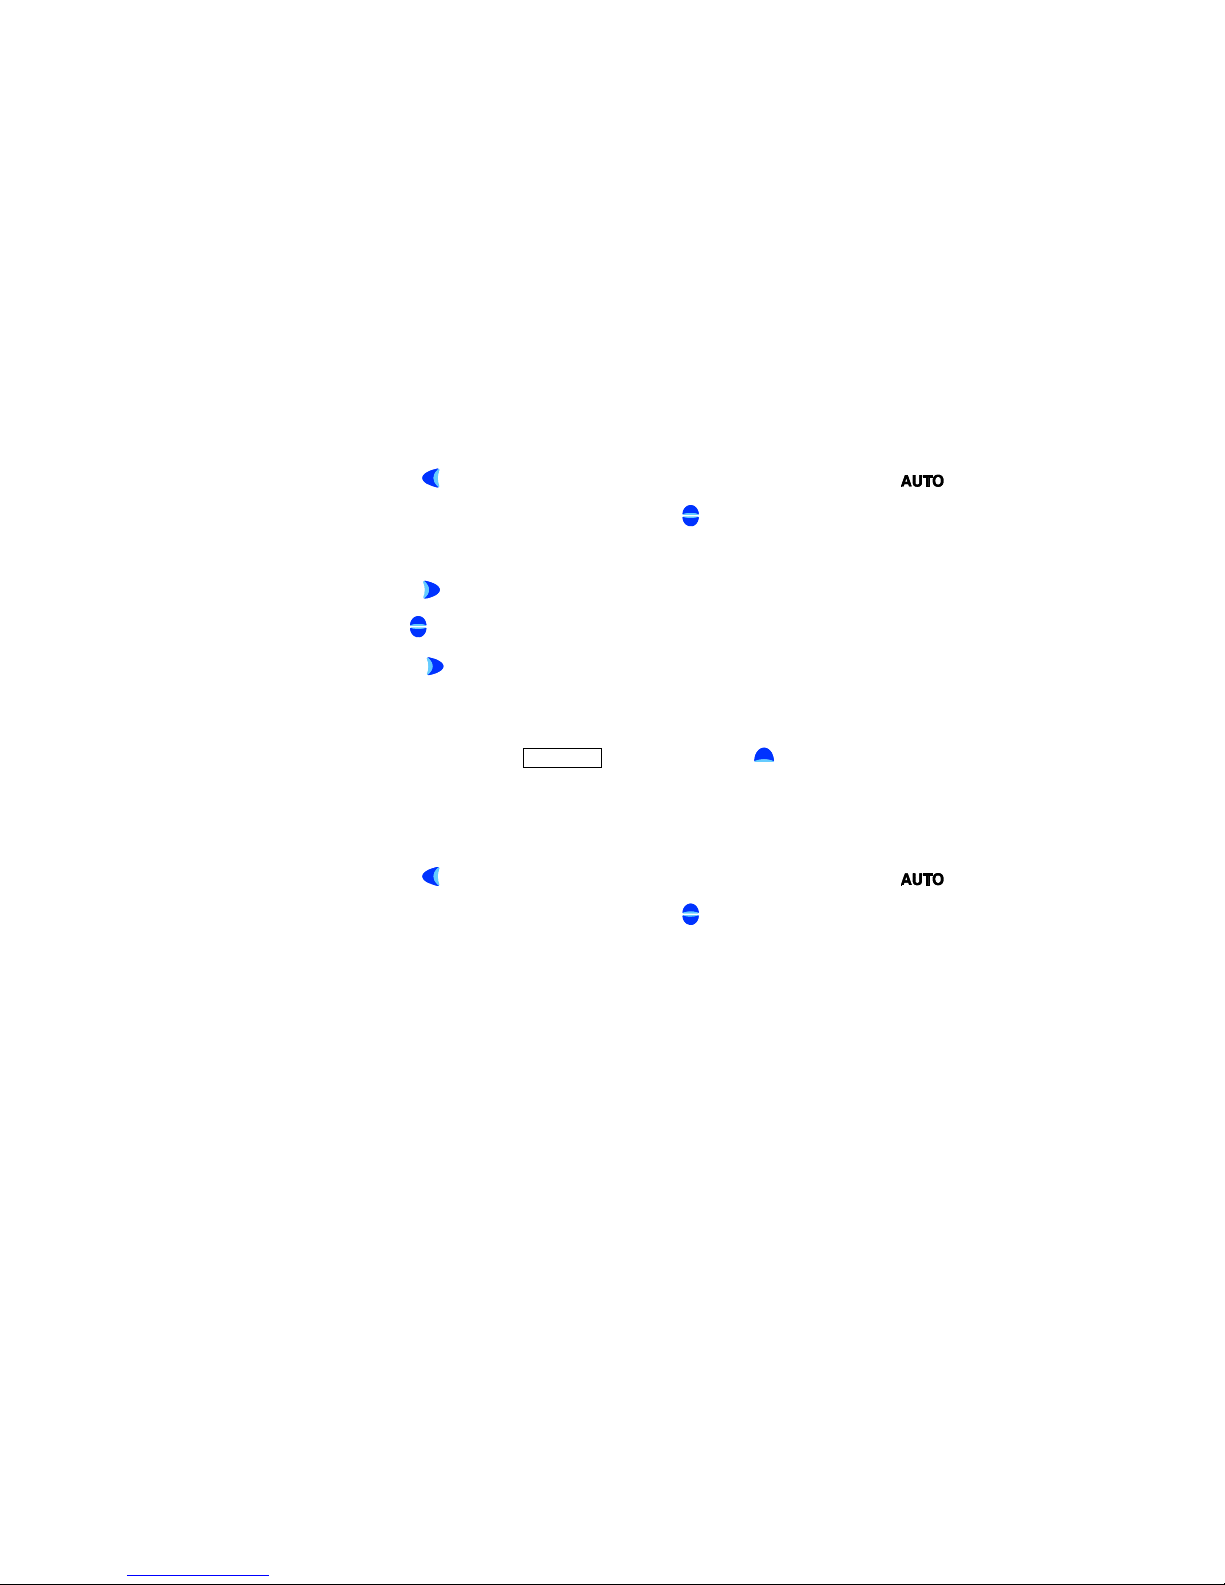
6.1. Aspirating Speed
There are 5 speeds available for both aspirating and dispensing:
1. Press
«Up/Down» to select the
2. Press
aspirating speed symbol
3. Press
«EXIT» to enter the function mode selection. Then press
symbol (flashing).
«SET» to confirm the selection of mode and the
will start flashing.
«Up/Down» to change the aspirating speed ( : Slowest, :
Fastest).
4. Press
«SET» to confirm the speed selection and move to the
“Dispensing Speed” function setting.
15
Page 20

6.2. Dispensing Speed
1. The “Dispensing Speed” symbol
2. Press
«Up/Down» to change the aspirating speed ( : Slowest, :
should now be flashing.
Fastest).
3. Press
«SET» to confirm the speed selection and move to the
“Audible Signals” function setting.
6.3. Audible Signals
Please refer to Section 4.2 for the definition of “Audible Signal s ” .
1. The “Audible Signals” symbol
2. Press
3. Press
«Up/Down» to select the preference ( : On, : Off).
«SET» to confirm the selection and move to the “Tip
should now be flashing.
Ejection Alarm” setting.
6.4. Blow-out
The automatic blow-out function, in different pipetting modes, simulates
the blow-out function in manual pipettes. To avoid the leftover final droplet
in tips, the blow-out setting is recommended in all protocols. The blow-out
setting will not be performed in “Reverse Pipetting” setting.
1. The “Blow-out” symbol
2. Press
«Up/Down» to select the preference ( : On, :
should now be flashing.
Off).
16
Page 21

3. If
is selected, pressing «SET» will con firm the selection and
move to the “PROG” setting. If
is selected, pressing «SET»
will confirm the selection and move to the “Reverse Pipetting” setting.
Note: It is important to withdraw the tip quickly from the dispensed sample
vessel after dispensing if Blow-out is selected, because the piston will
automatically retract a short distance. By holding the
PLUNGER button
during dispensing, the piston will travel the distance to blow out, and
remain there until the
PLUNGER button is released.
6.5. Reverse Pipetting
The automatic reverse pipetting, in different pipetting modes, is to reserve
the final drop of sample. The LABNET Excel electronic pipettor will not
perform reverse pipetting in MIX or SE modes.
1. The “Reverse Pipetting” symbol
2. Press
«Up/Down» to choose the preference ( : On, :
should now be flashing.
Off).
3. Press
«SET» to confirm the selection and move to the “PROG”
setting.
Note: If Reverse Pipetting is selected, users have to press the
PLUNGER
button one more time after pipetting to dispense the remaining liquid
during the pipetting.
will appear on the LCD to remind users to
dispense the remaining liquid.
17
Page 22

6.6. Setting PROG (Programs)
The memory program in cludes 9 different storage locations (PROG 01 ~
09). Your favorite operating modes with user-selected settings can be stored
to these locations for future recalls. Before setting the programs, you must
have programmed operating mode (e.g. AUTO, MD mode, etc).
Store Operating Mode to Storage Locations
1. Complete the setup of function mode (e.g. AUTO, MD, MIX mode).
2. Press and hold
3. Press
4. Press
«Up/Down» to select PROG number from 01 ~ 09.
«SET » to confirm the location selection and save the
«SET» for 3 seconds to enter PROG mode.
functions.
Recall Stored Programs from the Storage Location
1. Press
«Up/Down» until the
2. Press
settings until the
3. Press
4. Press
5. Press the
«EXIT» to enter the function mode selection. Then press
symbol starts flashing.
«SET» repeatedly to confirm the selection of all 6 function
symbol starts flashing.
«Up/Down» to select the PROG number.
«SET» to confirm the selection.
PLUNGER button to operate the LABNET Excel electronic
pipettor in the selected program.
Note: During the recall process, the changes of other settings will not be
stored.
18
Page 23
7. AUTO Mode
AUTO mode includes ; 1) AUTO mode only and 2) AUTO + MIX mode. In
AUTO mode only, the LABNET Excel electronic pipettor performs the
aspirating and dispensing of a set liquid volume. In AUTO + MIX mode,
the LABNET Excel electronic pipettor performs mixing after automatic
pipetting is completed. This mode is ideal for serial dilution applications.
7.1. AUTO mode only
Please follow the steps below to set up the automatic pipette volume.
1. Press
«EXIT» to enter the mode selection, which causes the
symbol to start flashing. If not, press
mode.
2. Press
3. Use
4. Press
«SET» to confirm the mode selection.
«Up/Down» to select the desired pipetting volume.
«SET» to confirm selected volume and the LABNET
electronic pipette is ready for pipetting.
Tip: Users can use the
the volume setting.
7.2. AUTO + MIX mode
1. Press
«EXIT» to enter the mode selection, which causes the
symbol to start flashing. If not, press
mode.
«Up/Down» to select AUTO
PLUNGER button instead of «Up» to speed up
«Up/Down» to select AUTO
19
Page 24

2. Press and hold
selection. Both AUTO and MIX symbols will appear. The pipetting
volume will appear and start flashing.
«SET» for 2 seconds to enter AUTO + MIX mode
3. Use
4. Press
5. Press
6. Press
«Up/Down» to select the desired pipetting volume.
«SET» to confirm selected volume and enter MIX mode
setting. The
symbol will start flashing.
«Up/Down» to select the desired mixing cycle counts.
«SET» to confirm selected mixing cycle counts. The mixing
volume will start flashing.
7. Press
8. Press
Press the
«Up/Down» to select the desired mixing volume.
«SET» to confirm selected mixing volume.
PLUNGER button to aspirate the sample. Press the PLUNGER
button again to dispense the sample and the LCD will display the mixing
cycle counts and volume. Press the
PLUNGER to mix and dispense the
sample. In the end of mixing, sample will remain in the tip and LCD will
display
Press the PLUNGER to dispense the remaining sample with
.
blow-out function.
20
Page 25

8. MD (Multiple Dispensing) Mode
In MD mode, the LABNET Excel electronic pipettor performs repetitive
dispensing of a selected volume. When using Multiple Dispensing (MD)
mode, users “MUST” select Reverse Pipetting in the System (SYS)
settings. Reverse Pipettin g is used in Multiple Dispensing (MD) mode to
provide better accuracy and precision with repeated dispensing. Reverse
Pipetting means that an extra volume of liquid will be left in the tip at the
end of a multiple dispensing cycle, and the display will show
to
remind the user to dispense this residual volume before repeating the
multiple dispense cycle.
1. Press «EXIT» to enter the mode selection.
2. Press
3. Press
«Up/Down» to make th e symbol flash.
«SET» to confirm the selection. The symbol will
then appear.
4. Use
5. Press
«Up/Down» to select the desired pipetting count.
«SET» to confirm the selection of count. The default
pipetting volume will start flashing.
6. Use
7. Press
«Up/Down» to select the desired pipetting volume.
«SET» to confirm the pipetting volume. The pipetting
volume will show the total aspirating volume.
After the settings are completed, first press the
PLUNGER button to aspirate
the sample according to the pipetting volume. Then press the PLUNGER
button repeatedly to dispense the samples accord ing to th e pipettin g counts.
For the last count, you will hear two beeps to indicate that the next dispense
is the last and the display will show
PLUNGER button and dispense the extra remaining amount of liquid. After
to remind the user to press the
21
Page 26

completing the Multiple Dispensing cycle, pressing the
PLUNGER button
again will aspirate liquid into the tip and repeat the set MD cycle.
9. MIX Mode
After the settings are completed (see instructions below), Mixing is
performed automatically by pressing the
PLUNGER button once.
1. Press «EXIT» to enter mode selection.
2. Press
«Up/Down» repeatedly until the symbol starts
flashing.
3. Press
«SET» to confirm the selection. The symbol will
then appear.
4. Use
5. Press
«Up/Down» to select the desired mixing count.
«SET» to confirm the selection. The default pipetting volu me
will start flashing.
6. Use
7. Press
«Up/Down» to select the desired mixing volume.
«SET» to confirm the selection. The total mixing volume and
counts will be displayed.
Press the
PLUNGER button to start the mixing function. After the
completion of mixing, pressing the PLUNGER button will re-activate the
mixing process until the user changes the function mode.
10. SE (Sequential Aspirating/Dispensing) Mode
SE mode includes SA (Sequential Aspirating) mode and SD (Sequential
Dispensing) mode.
22
Page 27

10.1. SA (Sequential Aspirating) Mode
Not available on 1200ul models because the diameter of 1000/1200ul tips
does not allow the required air gap to be maintained.
The LABNET Excel electronic pipettor performs repetitive aspirations of
the selected volumes. An air gap will be created automatically between two
aspirations. When the sequential aspiration is completed, the next operation
will dispense all of the aspiration volume together.
1. Press
2. Press
3. Press
4. Use
5. Press
6. Under the
«EXIT» to enter function mode selection.
«Up/Down» repeated ly until the
symbol starts flashing.
«SET» to confirm the selection.
«Up/Down» until the symbol starts flashing.
«SET» to confirm the selection.
symbol, “01” will appear. Press «Up/Down» to
set the volume of the first aspiration.
7. Press
«SET» to confirm the selection.
8. Repeat steps 6 and 7 to set the sequential aspiration volumes. Th e total
aspirating volume (including air gap volume) cannot exceed maximum
volume range.
9. Press
«SET» to confirm the selection.
10. The count “01” and aspirating volume will appear on the display. The
pipetting direction and speed
electronic pipette is ready for liquid pick-up. Press the
will flash to indicate that the LABNET
PLUNGER
button to aspirate the samples. will appear to remind users to create
an air gap (by pressing the
sample) between sample aspirations.
PLUNGER button with the tip out of the
23
Page 28

11. When the aspirations are completed, the LABNET Excel electronic
pipettor will make two beeping sounds and
will flash to indicate
the LABNET electronic pipette is ready for dispensing.
12. After the sequential aspirating cycle has been completed and the liquid
has been dispensed, pressing the
PLUNGER button will re-activate the
whole cycle again until users change the function mode.
Note:
1. If the blow-out setting is selected, the LABNET Excel electronic
pipettor will automatically blow-out the liquid during sequential
aspiration mode.
2. 1200ul models do not include the Sequential Aspirating (SA) function,
because the air gap is not strong enough to support the weight of
samples.
3. Sequential Aspira ting (SA) function will not perform Reverse Pipetting
even if it is selected in System (SYS) mode.
10.2. SD (Sequential Dispensing) Mode
The LABNET Excel electronic pipettor performs repetitive dispensing of
various selected volumes. As with Multiple Dispensing mode, for best
accuracy in SD Mode, it is recommended to select Reverse Pipetting in
System Mode.
1. Press
2. Press
3. Press
4. Press
«EXIT» to enter function mode selection.
«Up/Down» repeatedly until
symbol starts flashing.
«SET» to confirm the selection.
«Up/Down» repeatedly until symbol starts flashing.
24
Page 29

5. Press
«SET» to confirm the selection.
6. Under
symbol, “01” will appear. Press «Up/Down» to set
the volume of the first dispense.
7. Press
«SET» to confirm the selection.
8. Repeat steps 6 and 7 to set the sequen tial dispensing vo lumes. The total
dispensing volume cannot exceed the maximum volume range.
9. Press
«SET» to confirm the selection.
10. The count “01” and the total aspirating volume will appear on the
display. The pipetting direction and speed
will flash to indicate the
LABNET Excel electronic pipettor is ready for liquid pick-up. Press the
PLUNGER button to aspirate the sample. When the aspiration is
completed, the dispensing count and volume will appear and will
flash to indicate that the LABNET Excel electronic pipettor is ready for
dispensing.
11. The LABNET Excel electronic pipettor will make two beeping sounds
to remind the user of the last measured volume to dispense. At the
end of the sequential dispensing cycle, if Reverse Pipette mode is
selected,
will be displayed to remind the user to press PLUNGER
button to the dispense the remaining extra amount of sample. After
completing the dispensing, pressing the
PLUNGER button again will
re-activate the whole cycle until the user changes the function mode.
Note: If the blow-out setting is selected, the LABNET Excel electronic
pipettor will automatically blow-out the liquid at the end of a sequential
dispensing cycle.
25
Page 30

11. Sterilization
Only the lower piston assembly of LABNET Excel electronic pipettor can
be steam-autoclaved (121
to exceed the the temperature of 121
autoclaving cycle. Autoclaving at a higher temperature or for longer
period of time will damage the manifold and void the warranty. The
autoclaved parts must be allowed to dry completely at room temperature for
at least 2 hours before reassembly. Users can follow Figures 11~14 to
disassemble the LABNET Excel electronic pipettor. Please “DO NOT” use
excessive force to pull down the lower part before releasing the cylinder
lock as shown in Figure 10. This action will break the connection
mechanism of the lower part, permenently damaging the instrument and
will void the warranty.
o
C, 1 bar, 20 minutes). NOTE: It is important not
o
C or 20 minute time during the
Cylinder lock
Don't use force to pull the lower portion before
release the cylinder lock.
Figure 10: Incorrect removal of the lower piston assembly.
26
Page 31

p
11.1. Removal of the Lower Piston Assembly
Always remember to press
RESET
button before you disassemble the
lower part of LABNET Excel electronic pipettor.
RESET
1. Press the
button. Wait until you hear two beeps.
2. Loosen the lower part of LABNET Excel electronic pipettor by
unscrewing the connecting nut in counter-clockwise direction as shown
in Figure 11.
3. Pull the lower piston assembly downward slowly until the metal
cylinder lock appears as shown in Figure 12.
4. Lay the LABNET Excel electronic pipettor down on a flat surface.
Push the metal cylinder lock downward until you hear a click sound as
shown in Figure 13.
5. The lower piston assembly will come off easily and automatically as
shown in Figure 14.
Figure 11: Loosen the connecting nut
by unscrewing counter-clockwise.
27
Figure 12: Pull the lower
iston
assembly downward slowly until
the cylinder lock appears.
Page 32

Cylinder lock
Figure 13: Push the metal cylinder
lock downward until you hear a click
sound.
Figure 14: The lower piston
assembly will come off easily and
automatically.
11.2. Reattach the lower piston assembly
Always remember to press
RESET
button after you reattach the lower
piston assembly of LABNET Excel electronic pipettor.
Follow these steps to reassemble LABNET Excel electronic pipettor:
1. Press the
PLUNGER button or any button of the keyp ad to make the step
motor shaft retract about 1cm back into the handle. The step motor will
automatically retract inside if users do not touch any button for 10
minutes.
2. Connect the lower part with connecting nut. Tighten up the connecting
nut.
28
Page 33

3. Press the
piston of the lower part automatically. After the connection is
completed, the LABNET Excel electronic pipettor will beep twice.
RESET
button. The step motor shaft will connect with the
29
Page 34

12. Maintenance
The outside of LABNET Excel electronic pipettor may be wiped clean
with 60% Isopropanol, 70% ethanol or mild detergent, and then wiped dry
with a lint-free cloth. If the pipette is severely contaminated or if very
corrosive chemicals are dispensed, the lower part of the LABNET
electronic pipette should be disassembled. The individual parts should be
rinsed in distilled water and then air dried. Fo r complete information on
proper disassembly of the LABNET Excel electronic pipettor, contact
LABNET ’s service department.
It is recommended to clean the LABNET Excel electronic pipettor at
regular intervals depending on how much the pipette is used, as well as
lubricating it once per year. If the pipette is autoclaved often, you may
need to lubricate the pipette more frequently. Lubrication of the piston
should be performed only by authorized LABNET service personnel, or
trained users, and only the proper LABNET Excel electronic pipettor
lubricant available from LABNET International should be used*. For
complete information on proper service of your LABNET Excel electronic
pipettor, contact LABNET International’s Service Department.
It is recommended to check the performance of your LABNET Excel
electronic pipettor regularly (e.g. every 3 ~ 6 months) and always after
maintenance or service. More frequent testing of the LABNET Excel
electronic pipettor may be desired depending upon requirements of the
application, frequency of use, number of operators using the pipette, nature
of the liquid dispensed and the acceptable maximum permissible errors
established by the user (ISO 8655-1). For more in formation of LABNET
Excel electronic pipettor calibration procedures, contact LABNET’s
Technical Support Department.
30
Page 35

*Note: Using improper lubricants will deter or block the movement of
LABNET electronic pipette’s piston.
13. Troubleshooting
To ensure the product’s quality and performance, the LABNET Excel
electronic pipettor is designed with a self-diagnosis program. This program
will constantly monitor the accuracy of pipetting volume, battery status and
auto-calibration function. Error (Err) messages will appear on the display if
the LABNET Excel electronic pipettor fails to perform the attempted action
properly. In the case of Error (Err) messages or faults, please refer to the
solutions in the following table to clear the error messages or faults.
If the following solutions are not able to resolve the problem, please contact
LABNET International’s Service Department to arrange for authorized
service.
Symptom Possible Cause Solution
“Err 01”
Bad battery Charge the
battery
Bad power adaptor Replace the
power adaptor
“Err 02” Auto-calibration is not
working
“Err 03” Inaccurate pipetting volume
Press the
button
Press the
RESET
RESET
button
RESET
Droplets left inside
the tip
Leakage or volume
too small
Step motor failure “Err 04”
Photo-couple failure
Press the
button
Unsuitable tip Use quality, low
retention tips
Non-uniform wetting of the
plastic tip
Rinse the tip once
prior to pipetting
31
Page 36

Failure to aspirate
Power on failure
Function Mode
setup failure
Tip incorrectly attached Attach firmly
Unsuitable tip Use high-quality
tips
Low battery Charge the
battery
The lower manifold is not
correctly attached
Foreign material blocking
the hole at bottom of the
cone
Detach and
reassemble
Use MIX mode
and distilled
water to wash. Air
dry
Piston movement is blocked Lubricate piston
Bad battery contact Reinsert the
battery
Rusted battery contact Replace with new
battery
Dead battery Charge the
battery
Tip Ejector can’t bounce
back
Adjust Tip
Ejector position
32
Page 37

Appendix A: Technical Specifications
Automatic Pipetting (AUTO), Multiple
Operation Mode
Program memory
Aspirating/Dispensing Speed
Auto-calibration
Piston Motor
Power Saving Feature
Power Adaptor
Audible Alerts
Autoclavable
Operating Temperature
Operating Humidity
Battery
Battery Charger Kit
Carrousel Stand
Certification
Note:
Dispensing (MD), Mixing(MIX)
Sequential Aspirating/Dispensing (SE),
System Setup (SYS)
9 programs
5 speeds
Yes
High precision stepping motor
Yes, after 10 minutes
100/120/220/240 V AC-DC 3.6 V
Yes
Yes, lower manifold only
5 ~ 50
RH: 0 ~ 85%
900 mAh/3.6 V or ab o ve, Li -I on
Optional
Optional
Complies with CE, Class A
(EN60101-1-2, EN50082-1, EN 5501 1)
Complies with ISO-8655/ DIN 12650
o
C
1. U.S. patents pending
2. Specifications are subject to change without prior notice
Appendix B : Tip Ejector Height Adjustment
Use a flat-head screw driver or other tool to turn the tip ejector height
adjustment screw as shown in Figure 15. By turning the screw in a
counter-clockwise direction, the tip ejector can be adjusted down. This
height adjustment feature enables efficient ejecting of different
manufacturer’s tips.
33
Page 38

Flat-head screw
Figure 15 Tip ejector height adjustment
Appendix C: Warranty
LABNET Excel electronic pipettors are covered by a warranty for one year
against defects in materials and workmanship. This period begins from the
date of purchase, and within this period all defective parts will be replaced
at no charge by LABNET International. The warranty does not cover
defects caused by excessive wear and tear or damage due to shipping,
accident, abuse, misuse, problems with electrical power, or usage not in
accordance with product instructions, or if other than original spare parts
supplied by the manufacturer have been used. Each LABNET Excel
electronic pipettor is tested and documented by the manufacturer before
shipping. LABNET ’s Quality Control System guarantees that the
performance of the LABNET Excel electronic pipettor you have purchased
is within its specifications.
34
Page 39

Note
35
Page 40

Note
36
Page 41

Page 42

LABNET International Inc., 31 Mayfield Ave Edison, NJ 08820, USA
US Toll Free: 888 522 6381 / +1 732-417-0700
E-mail: labnet@labnetlink.com
Web Site: www.labnetlinkcom
 Loading...