

Küppersbusch EKWE, EKWH Instructions For Use Manual
BEDIENUNGSANWEISUNG
mit Montageanweisungen
Instructions for use and installation instructions
Instructions d’utilisation et avis de montage
Gebruiksaanwijzing en montagehandleiding
EKWE / EKWH
072543 L61

EKWE / EKWH 25
For your information...
Please read this manual carefully before using your appliance. It contains
important safety advice; it explains how to use and look after your appliance
so that it will provide you with many years of reliable service.
Should a fault arise, please first consult chapter “What to do if trouble occurs”.
You can often fix minor problems yourself, without having to call in an
engineer.
Please keep this manual in a safe place and pass it on to new owners for
their information and safety.
Conditions of guarantee
The conditions of guarantee applicable for this product are subject to those
published by the representative in the relevant country. Details regarding same
may be obtained from the dealer from whom the appliance was purchased.
For claims under guarantee the sales receipt must be produced.
Disposing of the packaging and your old appliance
Please dispose of the packaging that came with your appliance in an
environmentally friendly way.
If you bought your appliance in Germany, the dealer who sold it to you will
take the packaging back for recycling. Recycling in this way saves on
resources and cuts down on waste. Your old appliance still contains useful
raw materials. Take your old appliance to a recycling collection point. Please
make your old appliances unserviceable before disposing of it, to prevent it
from misuse.

26 EKWE / EKWH
Contents
An overview of your honeycomb hob ................................................. 27
Safety instructions ............................................................................... 28
Safety instructions for installation,
connection and function of the appliance 28
Safety instructions on using the cooking zones 28
Before using the appliance for the first time .....................................29
Which are the best pots and pans? 29
Using the cooking zones ..................................................................... 30
Switching the honeycomb hob on 30
The cooking levels 30
Automatic boost function 31
Residual heat indicators 32
Dual-circuit cooking zones 32
The pan-on detection 33
The emergency switch 34
Minute minder and switch-off function 34
Childproof lock (sensor lock) 35
Time limit function (holiday function) 35
Other functions 36
Cleaning and Care ............................................................................... 36
What to do if trouble occurs ............................................................... 37
An overview of the honeycomb dimensions ....................................... 38
Cooking unit EKWH 320.14 / 320.18 / 320.18 Z 38
Control unit EKWE 320.W / S 38
Installing the honeycombs / honeycomb cooking units ..................... 39
Instructions for installing the honeycombs 39
Measuring and marking out the worktop cut-outs 40
Marking out the cut-out 41
Cut-out in worktops made of wood or plastic 41
Cut-out in stone worktops 42
Electrical connection of the honeycombs 44
Programming the control honeycomb in accordance
with the cooking zone layout 46
EKWE / EKWH 27
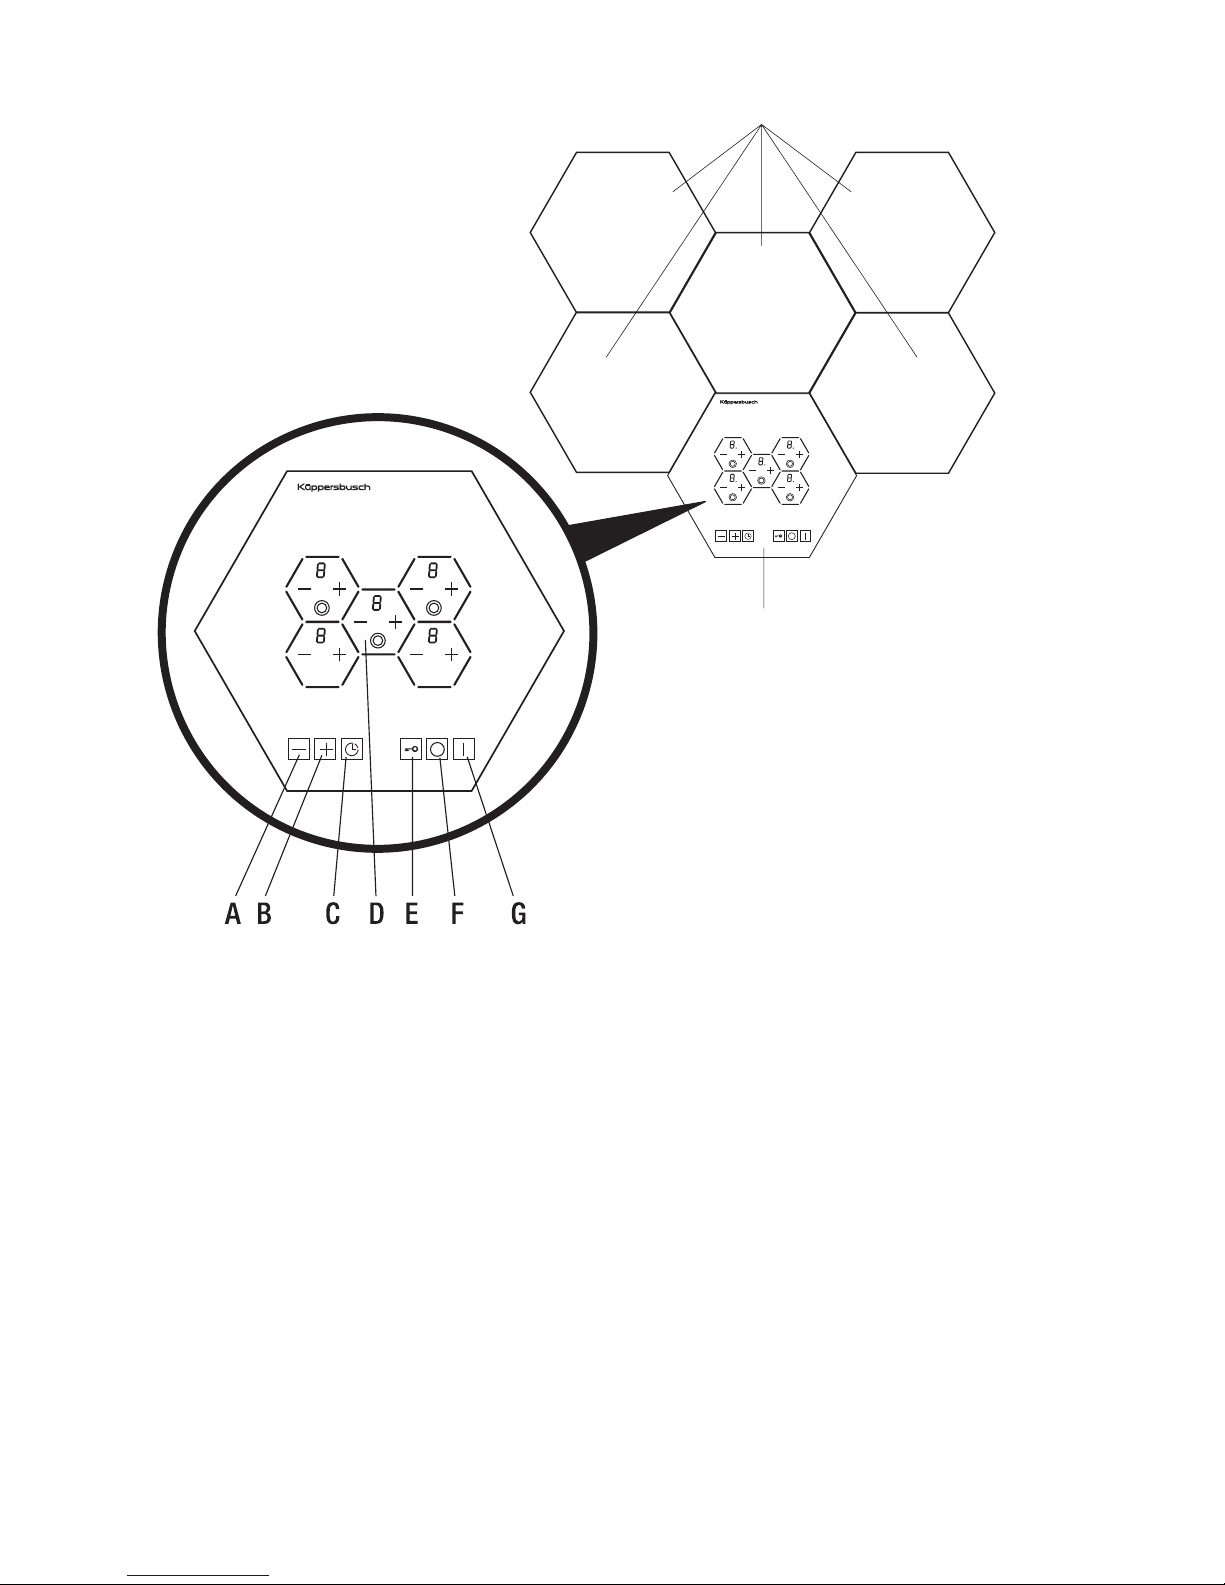
An overview of your honeycomb hob
The honeycomb hob is equipped with an easy-to-operate sensor control
system which is operated via the control honeycomb.
The layout of the cooking zones is shown in the control honeycomb. The
control honeycomb itself is not indicated.
The cooking zones can be activated by the touch of a fingertip on the control
honeycomb.
The control honeycomb consists of the following touch controls and sensors:
A and B Touch controls for the minute minder with plus and minus sensors
C Minute minder with a control function
D Touch controls for the cooking zones with plus and minus sensors
and, if required, additional sensors for dual-circuit cooking zones
E Key sensor for the childproof lock
FOff sensor
G Stand-by sensor
Cooking zones
Control honeycomb

28 EKWE / EKWH
Safety instructions
Safety instructions for installation, connection and function of the appliance
• Attention: The control honeycomb must not be subjected to severe
mechanical shocks!
• Fitting a mains socket, repairing and servicing the appliance are jobs that
should be left to a qualified electrician according to valid safety
regulations. For your own safety, do not allow anyone other than a
qualified service technician to install, service or repair this appliance.
• During operation the surface of the cooking zones becomes hot. Thus
Caution: Always make sure that children are kept well away!
Safety instructions on using the cooking zones
• Overheated fats and oils may spontaneously ignite. Food involving the use
of fats and oils, e.g. chips, may only be cooked under supervision. Never
extinguish ignited fats and oils with water! Put the lid on, turn off the
cooking zone and remove the pan.
• Should a glass ceramic cooking zone crack, fracture or break, switch off
the honeycomb combination immediately and disconnect the mains fuse.
Call customer service.
• If a cooking zone cannot be switched off due to a defect in the sensor
control, disconnect the mains fuse immediately and call customer service.
• Take care when working with attachments! Electric cables must not come
into contact with hot cooking zones.
• Do not use the honeycomb hob to deposit items on.
• Do not place combustible or ignitable objects on the cooking zones which
might be dangerous if the appliance is switched on unintentionally.
• The appliance is designed solely for the preparation of food in the home.
• Do not switch the cooking zones on if not using them for cooking. Never
use the honeycomb hob to heat a room! This would result in improper
operating conditions.
• Do not put kitchen foil or plastic onto the cooking zones. Keep everything
which could melt, such as plastics, foil and in particular sugar and sugary
foods away from hot cooking zones. Remove sugar immediately from the
cooking zone when it is still hot with a scraper to avoid damage
• Avoid repeated burning of food residues and boiling over.
• Calcium deposits will damage the honeycomb hob.
• If there are any pets in the apartment which could come near the hob,
activate the child-proof lock.
• In the case of stainless steel worktops: do not place any hot cooking pots
and pans onto the stainless steel worktop since high temperatures could
discolour it and make it turn blue. This discolouration will be permanent.
EKWE / EKWH 29
Before using the appliance for the first time
• Remove packaging and non-essential components. Before preparing the
first meals clean the glass ceramic hob by means of a moist cloth and a
bit washing-up liquid.
• The hob is resistant against thermal shocks (coldness and heat) and also
very robust.
• Always ensure that no hard objects are dropped onto the cooking surface.
Pointed objects falling onto your hob might break it.
• Please observe the cleaning and servicing instructions. Be especially
careful to keep the sensor keys clean since soiling could be mistaken for
finger contact by the appliance. Never put anything (pans, tea towels etc.)
onto the sensor keys! If food boils over onto the sensor keys, we advise
you to activate the emergency switch.
• When switching on the cooking zones a short buzzing noise may be heard
from the heating. This is design-specific and has no influence on quality
and operation.
• Hot cooking pots and pans should not cover the sensor keys. In this case
the oven automatically shuts off.
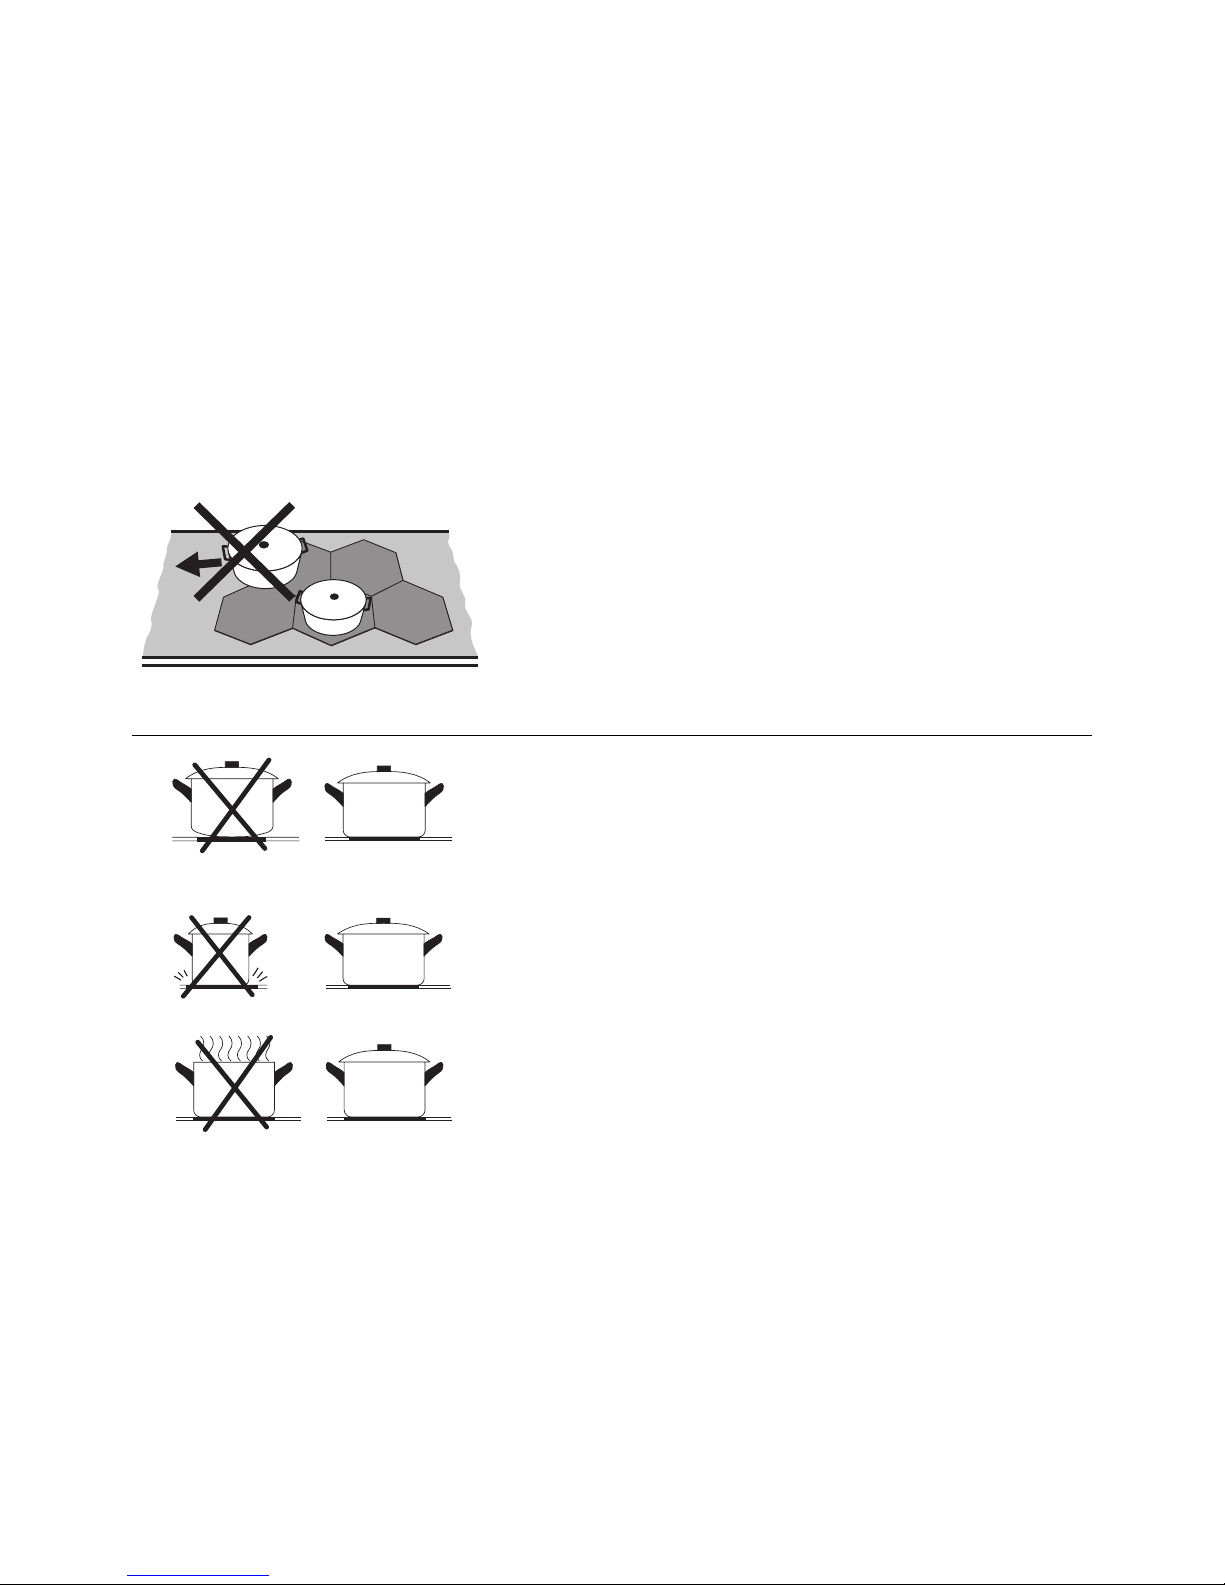
• Hot cooking pots and pans can only be placed onto stone worktops. Hot
cooking pots and pans must never be pulled onto or pulled over worktops
with a plastic surface, or over plastic worktops or stainless steel worktops.
Which are the best pots and pans?
Use pots and pans with flat, smooth bottoms.
The cooking time with pans and pots with curved bottoms is longer and
consumes more energy. Pans with rough bottoms scratch the glass ceramic
cooking surface when they are moved. When using cookware made from
fireproof glass or porcelain please follow the instructions of the manufacturer.
Choose a pot or pan whose diameter fits the cooking zone.
You save energy and cooking time and avoid the overheating of the cooking
zone.
If possible always place a lid on the pan.
You save a lot of energy by cooking in a closed pan. Food only boils over
when the temperature is too high. For the cooking zones, you can precisely
set the temperature required. With a little practice, you will readily make the
correct choice of cooking settings so that nothing boils over even when a lid
is in place.
Saucepan bases must be clean and dry to avoid scratches on the surface of
the honeycombs.
Do not use saucepans made of cast iron or saucepans with electrographic
bases. Pans with rough bottoms scratch the glass ceramic cooking surface
when they are moved.
Do not use plastic containers or aluminium bowls.
30 EKWE / EKWH
Using the cooking zones
Please note the safety instructions!
Subsequent to initial connection and after a power failure “'%0” will appear
briefly in the LED displays. Rotating, circling symbols will then be indicated.
This means that various sensors have been checked automatically and that
the touch sensitivity has also been newly set.
Touch the “off” sensor in order to confirm that there were no objects on the
cooking zones or on the sensors. These symbols will be switched off
immediately if there are no objects on the sensors. Otherwise remove any
objects and disconnect the cooking zone briefly from the mains (fuse) once
again.
Important!
There may not be any objects on the sensors or on the cooking zones while
the sensor sensitivity is automatically being set.
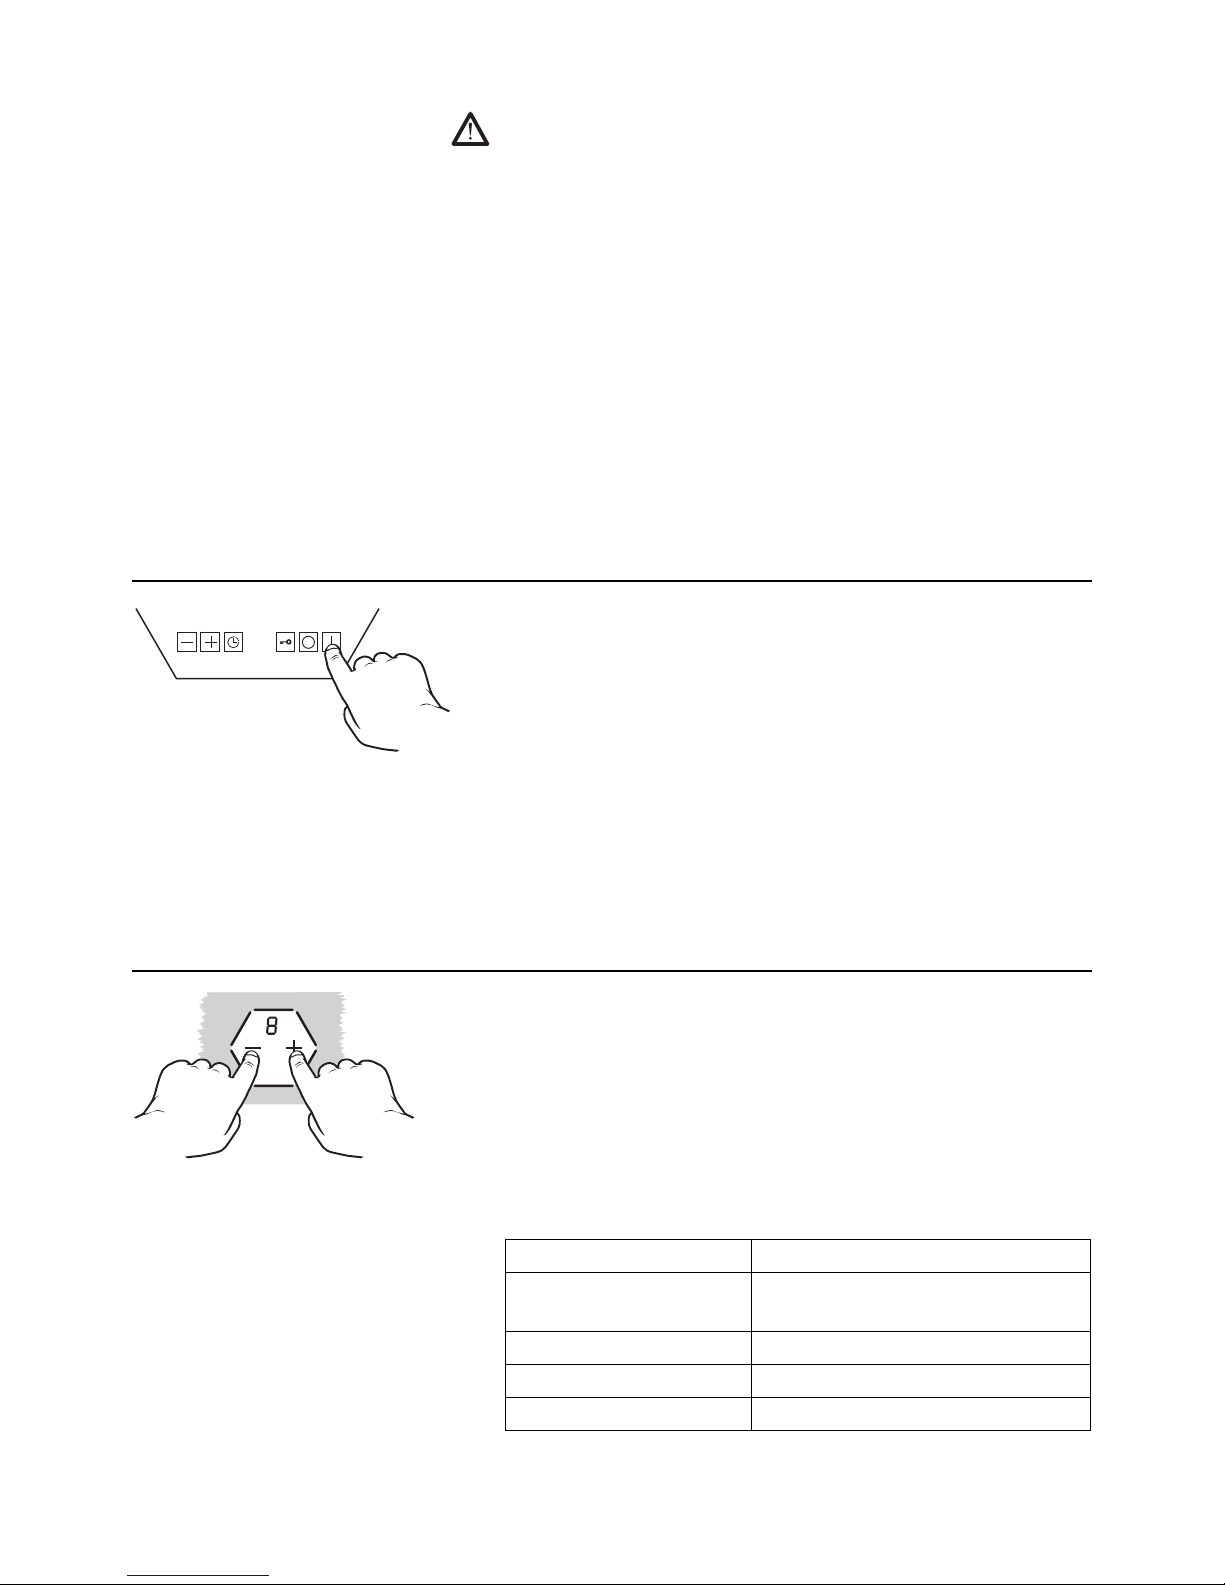
Switching the honeycomb hob on
– Touch the stand-by sensor key for about 2 seconds. The touch controls
of the cooking zones will light up and the appliance will be ready for
operation (stand-by mode).
– Each cooking zone can now be operated individually.
Cooking zones on which a pan has been placed will indicate a small “u”.
The stand-by mode automatically switches itself off
– if no cooking zone is activated within 20 seconds (after 10 seconds an
acoustic buzzer will indicate that the appliance will switch off after another
10 seconds) or
– if it remains unused for one minute after operation.
The cooking levels
There exist 9 cooking levels.
The cooking setting required can be activated by means of the plus or the
minus sensor. It is shown in the display.
F
In order to be able to set a cooking level, a pan suitable for the pan-on
detection must have been placed on the cooking zone or the pan-on
detection must be deactivated.
F
The “0” setting remains visible for approx. 2 seconds after switch-off.
Cooking level Suitable for
1-3 heating up, keeping warm
swelling, defrosting
4-5 steaming, soaking, cooking
6-8 frying, deep-fat frying
9 heating large quantities
or
EKWE / EKWH 31
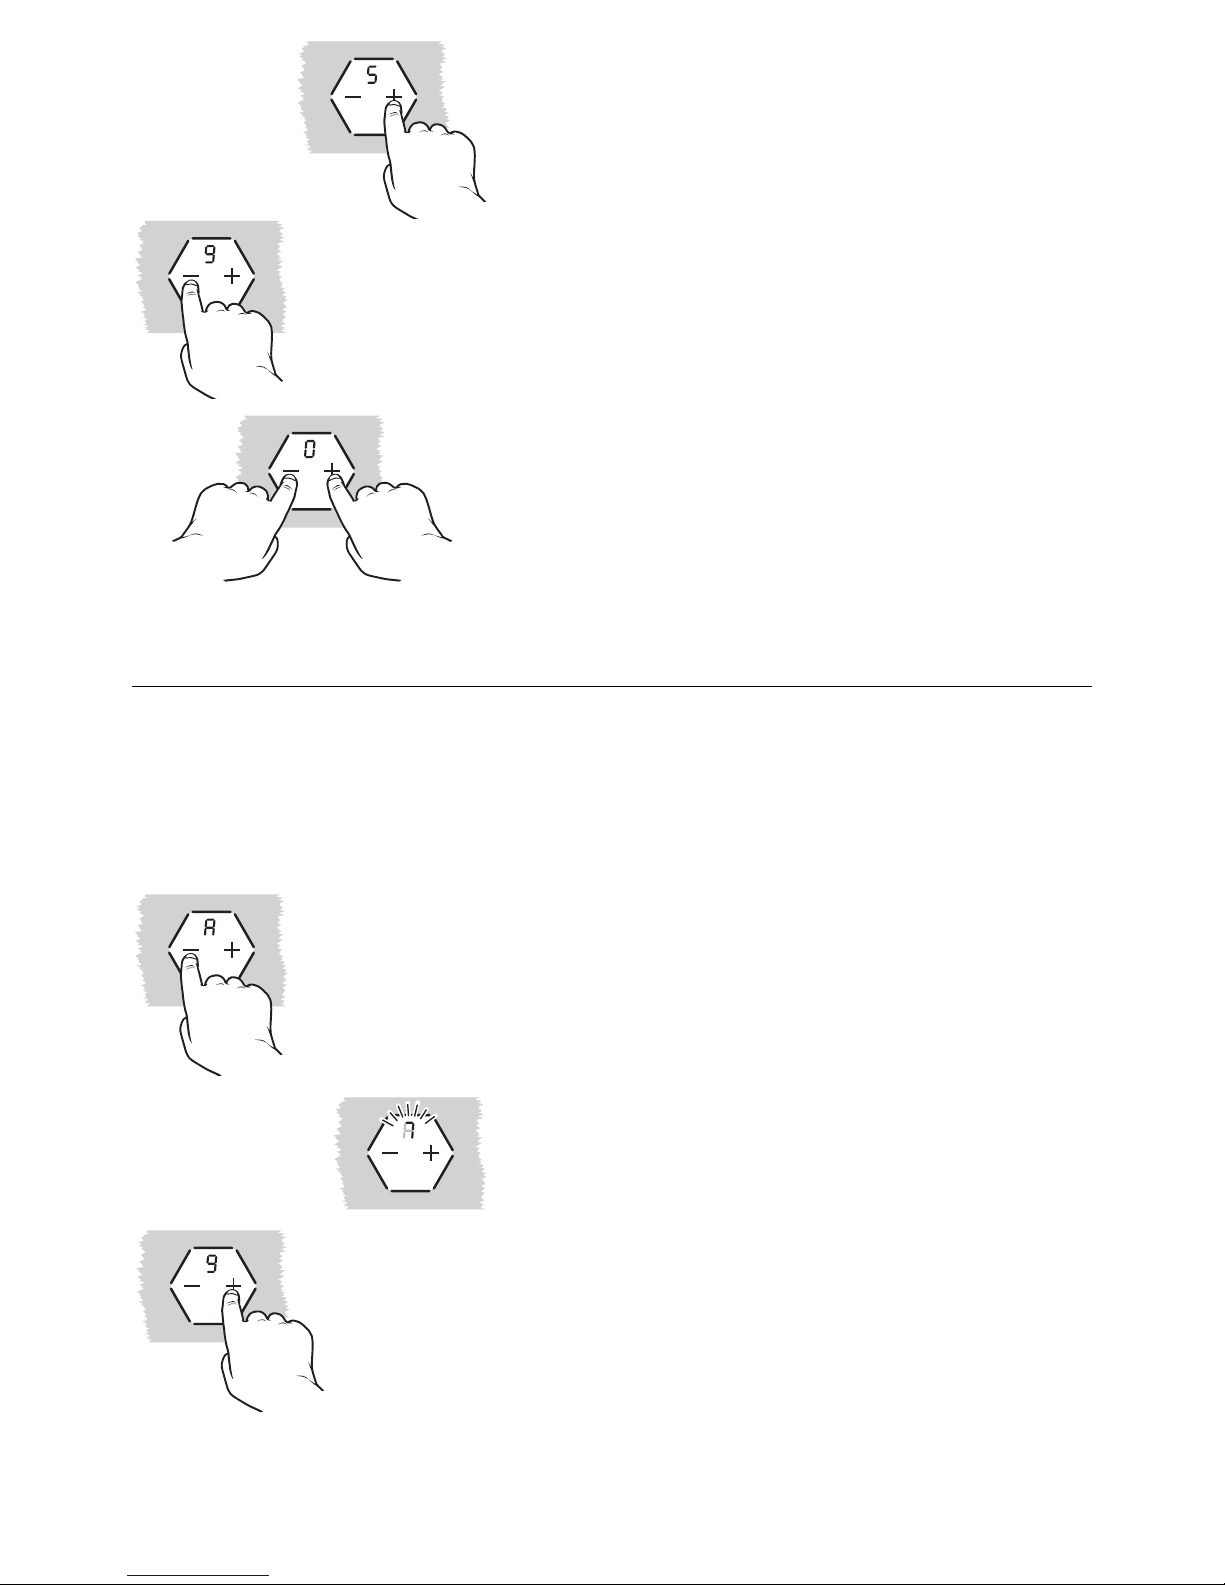
If you touch the plus key, the cooking zone starts at setting 5, without an
automatic boost.
If you touch the minus key, the cooking zone starts at setting 9.
In this case the automatic boost function is automatically activated too.
Switching off the cooking zone:
press the plus sensor and the minus sensor simultaneously.
Automatic boost function
All cooking zones have an automatic boost function. The booster cooking
phase is activated at full power. The booster cooking time depends on the
subsequent cooking level which has been selected after the activation. The
cooking zone automatically changes to the selected subsequent cooking level
as soon as the set booster cooking time has elapsed.
F
If the pan-on detection function is activated and the pan is removed from
the cooking zone, the automatic boost function will be cut off. When a
pan is replaced on the cooking zone the automatic boost function
resumes operation again.
Selecting the required setting by means of the minus sensor will automatically
activate the automatic boost function.
During automatic operation an “A” will flash in the display in alternation with
the cooking level set.
If the automatic boost function is to be activated when the required setting is
selected by means of the plus sensor, the plus sensor must be touched again
once power level 9 has been reached.
and
2X
 Loading...