

Page 1

TABLE OF CONTENTS
CHAPTER 1. GETTING STARTED
INSTALLING THE BATTERY ...............................................................................................................................8
REMOVING THE BATTERY ...............................................................................................................................
CHARGING THE BATTERY ..............................................................................................................................
POWER CONNECTION ........................................................................................................................................................10
BLOCKING ANTENNA WHILE MAKING A CALL .............................................................................................11
CORRECT/INCORRECT FINGER POSITION ..........................................................................................................................11
ACTIVATING YOUR VIRGIN MOBILE ACCOUNT .............................................................................................12
FINDING YOUR PHONE’S SERIAL NUMBER ...................................................................................................
PROGRAMMING YOUR PHONE .....................................................................................................................
GETTING TO KNOW YOUR PHONE ................................................................................................................
TURNING THE PHONE ON ..................................................................................................................................................19
TURNING THE PHONE OFF .................................................................................................................................................
MY PHONE NUMBER .........................................................................................................................................................20
TTY .....................................................................................................................................................................................
PHONE INFO ......................................................................................................................................................................21
NAVIGATING THROUGH MENUS ...................................................................................................................23
CHAPTER 2. MY ACCOUNT
MY ACCOUNT ...............................................................................................................................................28
TOP-UP WITH A TOP-UP CARD ...........................................................................................................................................28
TOP-UP WITH A DEBIT CARD, CREDIT CARD, OR PAYPAL ACCOUNT ..................................................................................
CHAPTER 3. MAKING AND RECEIVING CALLS
MAKING AND RECEIVING CALLS ..................................................................................................................32
MAKING A CALL ................................................................................................................................................................32
ANSWERING CALLS ............................................................................................................................................................
SPEAKERPHONE ................................................................................................................................................................. 33
HARD/ 2 SECOND PAUSE FEATURE ....................................................................................................................................
CALLER ID FUNCTION ........................................................................................................................................................33
CALL WAITING FUNCTION .................................................................................................................................................
ADJUSTING VOLUME ..........................................................................................................................................................
SPEED DIALING ..................................................................................................................................................................34
RECENT CALLS LIST-RECENT CALLS ...................................................................................................................................
RECENT CALLS LIST-INCOMING CALLS ..............................................................................................................................
9
10
13
14
15
19
20
29
32
33
34
34
35
36
1
Page 2

TABLE OF CONTENTS
RECENT CALLS LIST-OUTGOING CALLS ..............................................................................................................................37
RECENT CALLS LIST-MISSED CALLS ...................................................................................................................................
CALL TIMER ........................................................................................................................................................................
911 IN LOCK MODE ...........................................................................................................................................................39
911 USING ANY AVAILABLE SYSTEM .................................................................................................................................
DURING A CALL ............................................................................................................................................40
MUTE .................................................................................................................................................................................40
CALL HISTORY ....................................................................................................................................................................
FIND NAME ........................................................................................................................................................................ 40
MESSAGING .......................................................................................................................................................................
BLUETOOTH .......................................................................................................................................................................
CHAPTER 4. ENTERING LETTERS, NUMBERS, SYMBOLS
ENTERING LETTERS, NUMBERS, SYMBOLS ....................................................................................................44
ALPHABET INPUT MODE .................................................................................................................................................... 44
T9 INPUT MODE .................................................................................................................................................................
NUMBER MODE .................................................................................................................................................................46
SYMBOL MODE .................................................................................................................................................................. 46
SMILEYS .............................................................................................................................................................................
EMOTICON .........................................................................................................................................................................
AUTO TEXT .........................................................................................................................................................................
CHAPTER 5. STORING CONTACTS
STORING CONTACTS .....................................................................................................................................50
ADD NEW ...........................................................................................................................................................................51
FIND NAME ........................................................................................................................................................................ 52
GROUP SETTINGS ..............................................................................................................................................................53
SPEED DIAL ........................................................................................................................................................................55
CHAPTER 6. MESSAGING
MESSAGING ..................................................................................................................................................58
SEND A TEXT MESSAGE .....................................................................................................................................................58
SEND A PICTURE MESSAGE ...............................................................................................................................................
SEND AN E-MAIL MESSAGE ...............................................................................................................................................
SEND AN IM .......................................................................................................................................................................
INBOX ................................................................................................................................................................................
38
38
39
40
40
41
45
46
46
47
59
60
60
61
2
Page 3

TABLE OF CONTENTS
VIRGIN ALERTS ................................................................................................................................................................... 61
SENT ..................................................................................................................................................................................62
SAVED ................................................................................................................................................................................
VOICEMAIL .........................................................................................................................................................................
ERASE MSGS ...................................................................................................................................................................... 63
MSG SETTINGS ..................................................................................................................................................................64
CHAPTER 7. MY STUFF
MY STUFF .....................................................................................................................................................70
MY RINGTONES .................................................................................................................................................................70
MY GRAPHICS ....................................................................................................................................................................70
MY GAMES ........................................................................................................................................................................71
MY OTHER STUFF ...............................................................................................................................................................72
MY SOUNDS ......................................................................................................................................................................72
CHAPTER 8. VIRGINXL
VIRGINXL ......................................................................................................................................................74
CHAPTER 9. PICTURES
PICTURES ......................................................................................................................................................76
TAKE A PICTURE ................................................................................................................................................................. 76
SEND A PICTURE MESSAGE ...............................................................................................................................................
MY PICTURES ..................................................................................................................................................................... 77
CAMERA SETTINGS ............................................................................................................................................................ 78
HELP ..................................................................................................................................................................................79
CHAPTER 10. CUSTOMIZING YOUR PHONE
CUSTOMIZING YOUR PHONE ........................................................................................................................82
SOUND ............................................................................................................................................................................... 82
DISPLAY .............................................................................................................................................................................
MESSAGING .......................................................................................................................................................................
BLUETOOTH .....................................................................................................................................................................
SECURITY .........................................................................................................................................................................103
LOCATION ........................................................................................................................................................................
CALL SETTINGS ................................................................................................................................................................109
OTHERS ............................................................................................................................................................................
62
63
77
93
97
100
108
110
3
Page 4

TABLE OF CONTENTS
CHAPTER 11. USING TOOLS
USING TOOLS ..............................................................................................................................................116
VOICE ...............................................................................................................................................................................116
TIP CALCULATOR ..............................................................................................................................................................
CALCULATOR ...................................................................................................................................................................
ALARM CLOCK .................................................................................................................................................................
SCHEDULER .....................................................................................................................................................................119
MEMO PAD ......................................................................................................................................................................
STOPWATCH ....................................................................................................................................................................
WORLD CLOCK .................................................................................................................................................................
MEMORY MANAGER .......................................................................................................................................................
CHAPTER 12. WARRANTY
WARRANTY .................................................................................................................................................124
MANUFACTURER’S WARRANTY .......................................................................................................................................124
CHAPTER 13. SAFETY
SAFETY ........................................................................................................................................................128
SAFETY INFORMATION FOR WIRELESS HANDHELD PHONES ........................................................................................... 128
SAFETY INFORMATION FOR FCC RF EXPOSURE ..............................................................................................................
SAR INFORMATION ..........................................................................................................................................................
FDA CONSUMER UPDATE ................................................................................................................................................
EMERGENCY CALLS ....................................................................................................................................................... 138
COMPLIANCE WITH OTHER FCC REGULATIONS ...............................................................................................................
GENERAL SAFETY ............................................................................................................................................................140
ANTENNA .........................................................................................................................................................................
BATTERY ..........................................................................................................................................................................
ADAPTER/CHARGER .........................................................................................................................................................
RECYCLE YOUR CELL PHONE! ..........................................................................................................................................
FCC HEARING-AID COMPATIBILITY (HAC) REGULATIONS FOR WIRELESS DEVICES .........................................................
FCC COMPLIANCE INFORMATION ...................................................................................................................................
117
118
118
120
120
121
121
130
131
132
139
140
141
142
143
144
146
4
Page 5
NAVIGATING THROUGH CHAPTER
CHAPTER INFORMATION
1. GETTING STARTED This chapter provides important information about using your phone including:
•
Installing the Battery
•
Charging the Battery
•
Activating Your Virgin Mobile Account
•
Finding your Serial Number
•
Programming Your Phone
•
Getting to Know Your Phone
•
Navigating through Menus
•
Caring for the Battery
2. MY ACCOUNT
3. MAKING AND
RECEIVING CALLS
4. ENTERING LETTERS,
NUMBERS, SYMBOLS
5. STORING CONTACTS Numerous functions including saving phone numbers to the internal
6. MESSAGING
7. MY STUFF
8. VIRGINXL
9. PICTURES
10. CUSTOMIZING YOUR
PHONE
11. USING TOOLS This section shows you how to use features that can help you keep up with your
Manage your Virgin Mobile account directly from your phone.
Phone's basic functions including menus, volume levels, and call features.
•
Making and Receiving Calls
•
During a Call
This chapter provides entering letters, numbers, symbols.
phonebook.
Checking voice mail messages, as well as sending and receiving message.
Access ringtones, games, graphics and sounds.
Download games, ringtones, graphics and applications.
Take a picture and send picture message.
Customizes your cellular telephone and optimizes performance through a
variety of settings.
contacts, schedules and appointments.
5
Page 6
NAVIGATING THROUGH CHAPTER
12. WARRANTY This chapter contains the terms and conditions of services and the warranty for
13. SAFETY Read this important safety information before using your phone.
your cellular telephone.
6
Page 7
CHAPTER 1 GETTING STARTED
CHAPTER 1
GETTING STARTED
This chapter provides important information about
using your phone including:
Installing the Battery
Remove the Battery
Charging the Battery
Activating Your Virgin Mobile Account
Finding your Serial Number
Programming Your Phone
Getting to Know Your Phone
Navigating through Menus
Caring for the Battery
7
Page 8
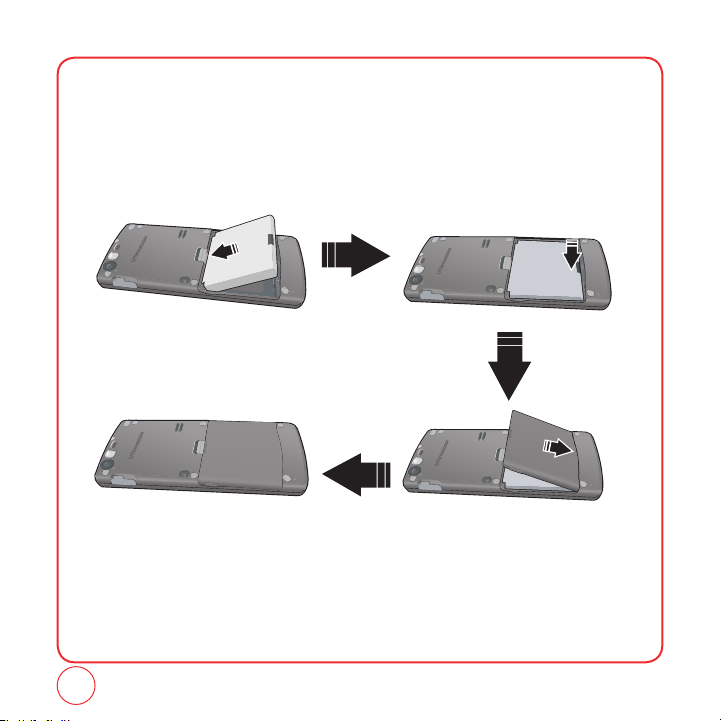
INSTALLING THE BATTERY
1.
Place the battery (label side up) on the back of the phone so the metal contacts match up on
the battery and in the battery cavity.
2.
Push the battery down into the battery cavity until it locks into place.
3.
Place the battery cover over the battery and snap it into place.
8
Page 9

REMOVING THE BATTERY
1.
Make sure your phone is turned off.
2.
Hold the phone face down.
3.
Push up on the latch on the back of the phone and pull the back cover off.
4.
If necessary, remove the battery by pulling up on the bottom edge of the battery.
Battery
900 mAh Lithium Ion
Talk Time Standby Time
Up to 270 min Up to 230 hours
9
Page 10
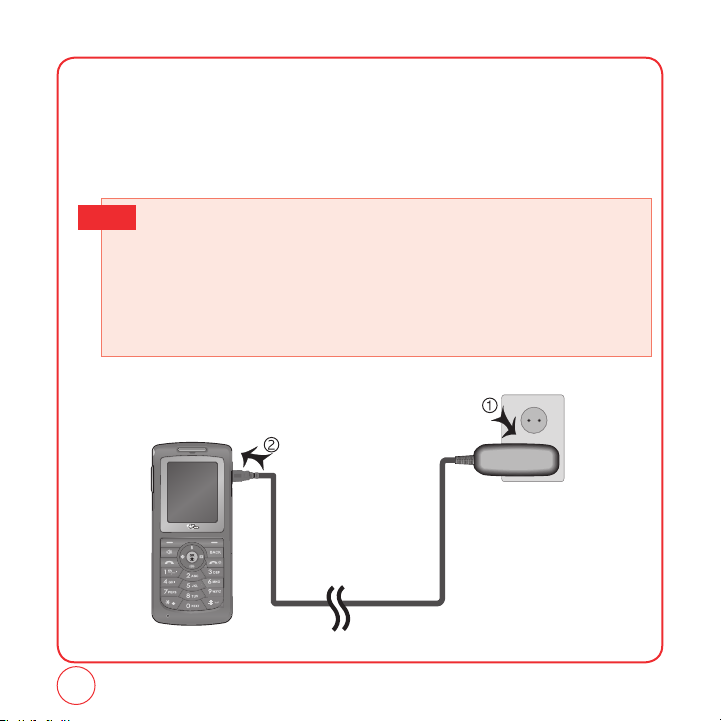
CHARGING THE BATTERY
POWER CONNECTION
1.
Plug the AC Charger into a standard outlet.
2.
Plug the other end of the AC Charger into your phone. Make sure the battery is securely in
place.
• When you charge the battery with the phone power off, you will see a charging status screen.
Tip
You cannot operate the phone until it is powered on.
• The battery is not charged at the time of purchase.
• Fully charge the battery before use.
• It is more efficient to charge the battery with the handset powered off.
• The battery must be connected to the phone in order to charge it.
• Battery operating time gradually decreases over time.
• If the battery fails to perform normally, you may need to replace the battery.
10
Page 11
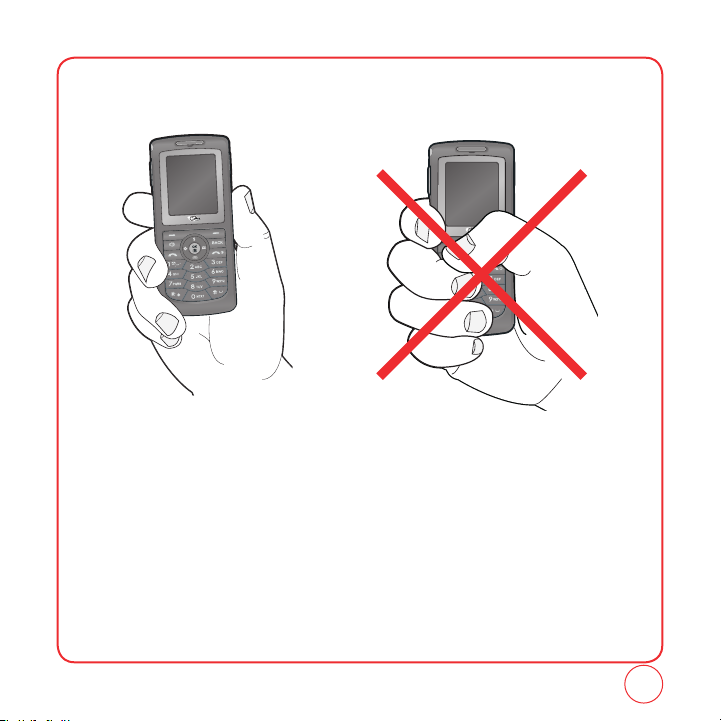
BLOCKING ANTENNA WHILE MAKING A CALL
CORRECT/INCORRECT FINGER POSITION
CORRECT FINGER POSITION
INCORRECT FINGER POSITION
11
Page 12

ACTIVATING YOUR VIRGIN MOBILE ACCOUNT
Before you can start talking, messaging, or downloading, you need to activate service with Virgin
Mobile. You need your phone’s serial number to activate your Virgin Mobile account. (Please see
next page on how to find your serial #) Activate your account online by going to
www.virginmobileusa.com and clicking on Activate. Or call Virgin Mobile at 1-888-322-1122.
12
Page 13

FINDING YOUR PHONE’S SERIAL NUMBER
1.
Press [Menu], then press "Settings". Press "Handset info".
2.
Press "My mobile number".
3.
The serial number is under the letters MEID. It has 18 digits.
13
Page 14

PROGRAMMING YOUR PHONE
Once your account is active, you’ll receive your Virgin Mobile phone number. When you are ready,
follow these steps to program it into your phone:
1.
Turn on your phone and wait for it to power up.
2.
Dial ##VIRGIN# (that’s #-#-8-4-7-4-4-6-#)
3.
You are now in the Programming menu. Scroll down to “Activate Phone” and hit “OK".
4.
Your screen will say, “Do you want to activate your phone now ?” Select “Yes”.
5.
Your phone will connect to the network, and then the screen will say "Hi. Press Start to
continue the activation process". Scroll down to "Start" and hit "OK".
6.
Your phone will say "We're getting your phone number for you," then your phone will display
your new Virgin Mobile phone number. Write it down.
7.
Scroll down to "Finish" and hit "OK" to complete the activation process. Your phone will turn
off and back on by itself.
• That’s it – It might take a couple of hours to get you set up on our network, but we’ll send a text
14
message to your phone to let you know you can start talking. Also, it may take up to 4
hours for VirginXL, voicemail, and Top-Up features to come online. But we bet you’ll find
us worth the wait. Enjoy!
Page 15

GETTING TO KNOW YOUR PHONE
Your Super Slice phone weighs 2.5 ounces. The dimensions are 4.4” X 1.9” X .4”.
Earpiece
Color Display
Right Option Button
Left Option Button
SEND Key
Microphone
Camera
Back Key
Navigation and OK Key
END/POWER Key
Charging port
Volume Keys
Earjack
15
Page 16
GETTING TO KNOW YOUR PHONE
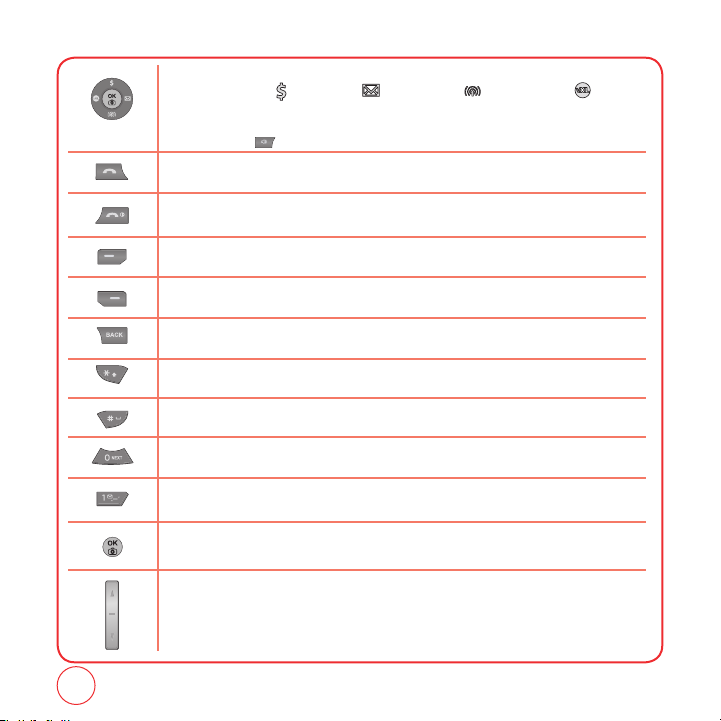
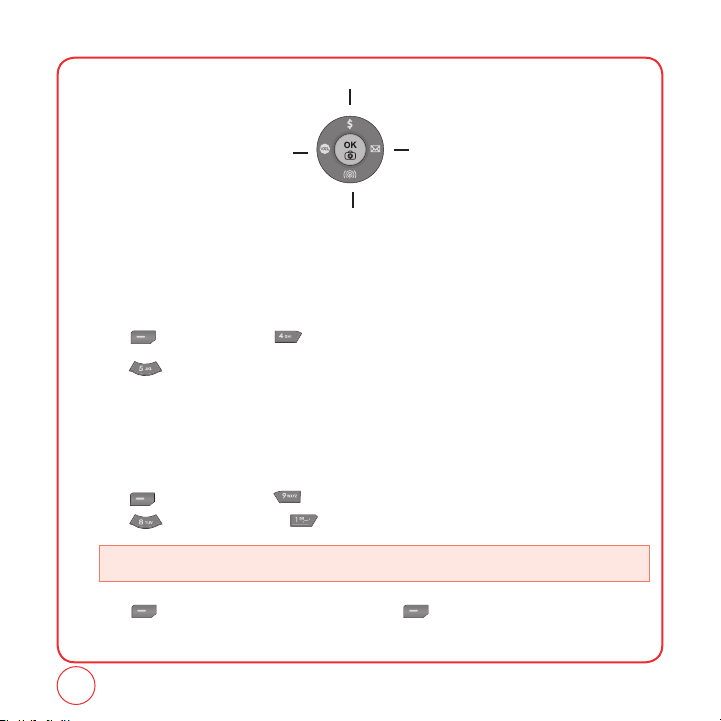
NAVIGATION KEY
In Idle Mode :
Within a Menu :
On a Call :
Send Key
Press to make or receive a call or in idle mode, press to access the Recent Calls list.
End Key
Press to terminate a call or to return to idle mode. Press and hold to turn the phone on/off.
Left Option Button
Press to access the menu or function displayed at the bottom left of the screen.
Right Option Button
Press to access the menu or function displayed at the bottom right of the screen.
BACK Key
Press to clear a digit or press and hold to clear all digits from the display. Press to return to the previous page.
Shift Key
Enters the asterisk [
Space Key
In text entry mode, press to accept the word and add a space.
0 Key
In T9 Mode, press to see other word choices.
1 Key
Press and hold to access voicemail.
OK Key
Press to access the Menu.
Side Volume Key
Allows you to adjust the ringtone volume in standby mode or adjust the voice volume during a call.
The volume key can also be used to scroll up or down to navigate through the different menu options.
Press to ignore an incoming call and mute the ringtone.
Press
for My Account,
Within a menu, use to scroll through menu options, or to select a function displayed on the
screen.
Press
to activate speakerphone mode.
] character for calling features. Press and hold to enter Keyguard mode.
*
for Send Text Msg,
for Recent Calls and
for Virgin XL.
16
Page 17
GETTING TO KNOW YOUR PHONE
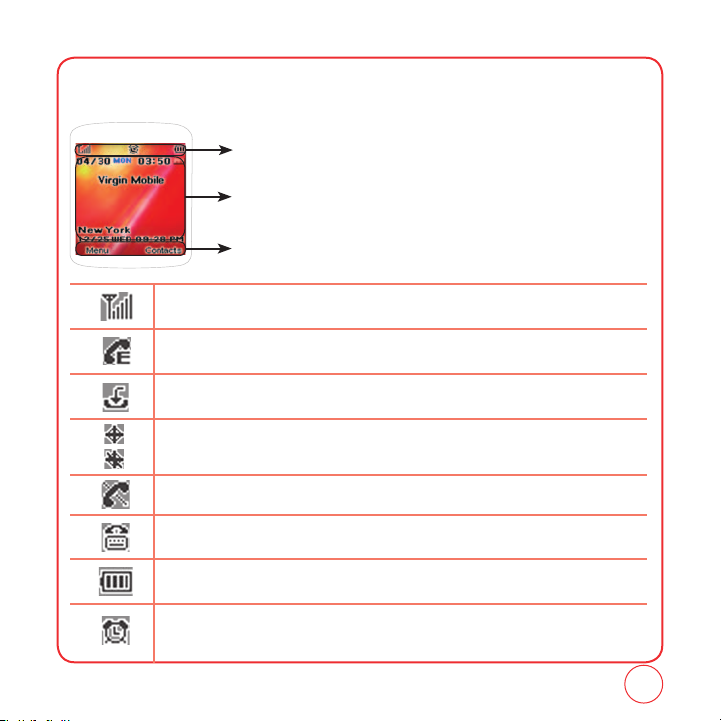
The idle mode display appears when you are not on a call or using the menu. You must be in the
idle mode display to dial a phone number.
Display Indicators
Display various icons.
Text & Graphic area
Option Button Indicators
Shows the functions currently assigned to each Option Button and displays some icons.
Signal Strength
Current signal strength: the more lines, the stronger the signal.
Emergency Call
Blinks when an emergency call is in progress.
Download
Downloading is in progress.
GPS Icon
Indicates the Location Service of your phone is disabled/enabled.
No Service
Indicates the phone cannot receive a signal from the system.
TTY
Indicates your phone is in TTY mode.
Battery
Battery charging level — the more bars, the fuller the charge.
Alarm
Appears when either a calendar or an alarm is set.
17
Page 18
GETTING TO KNOW YOUR PHONE
Off
Indicates the ringtone volume is set to off.
Vibrate+Bell Mode
Phone will vibrate and ring to notify you of an incoming call.
Vibrate Only
Phone will vibrate to notify you of an incoming call.
Silence All
All sounds, including ringtone volume, are set to off.
Voicemail
Indicates you have voicemail messages.
New Text Messages
Indicates you have text messages.
New Voice Messages
Indicates you have both text and voicemail messages.
Lock
Phone is locked.
Charging
Your battery is charging.
18
Page 19
GETTING TO KNOW YOUR PHONE
TURNING THE PHONE ON
1.
Press and hold until the phone powers on.
• If “Password” appears on the display enter your 4-digit password to unlock your phone.
Tip
• The default password is the last 4 digits of your phone number.
TURNING THE PHONE OFF
1.
Press and hold until the phone powers off.
• Immediately change or recharge the battery when “LOW BATTERY!! PHONE IS TURNING OFF!”
Tip
appears on the display. Memory may possibly be damaged if the phone turns off due to the
battery completely draining.
• Turn the phone off before removing or replacing the battery. If the phone is on, unsaved data
may be lost.
Each function can be accessed by scrolling with or by pressing the number that corresponds
with the menu item.
1.
To access the menu in the idle mode, press [Menu].
2.
Press / / / to scroll through the 8 menu items.
3.
To return to the previous page, press .
To exit the current menu and return to the idle mode, press .
4.
Press to enter a function when its main page is displayed or press its assigned number to
have direct access to the function.
19
Page 20
GETTING TO KNOW YOUR PHONE
My Account
VirginXL
Recent Calls
Send Text Msg
MY PHONE NUMBER
Displays your phone number.
1.
Press [Menu], then press "Contacts".
2.
Press "My phone number". Your phone number will be displayed.
TTY
Your phone is able to operate with a TTY(Teletypewriter) device. This feature is system dependent
and may not be available in all areas.
1.
Press [Menu], then press "Settings".
Press “Others”, then press "TTY".
• Enabling TTY may impair headset use and non- TTY accessory performance.
2.
Press [Next]. Select “On” or “Off.”, then press [Select] to save the setting.
20
Page 21

GETTING TO KNOW YOUR PHONE
PHONE INFO
Displays your phone’s information:
MY MOBILE NUMBER
Displays your phone number and MEID(Serial Number).
1.
Press [Menu], then press "Settings".
Press “Handset info”, then press “My mobile number”.
2.
Your phone number and MEID(Serial Number) is displayed.
VERSION
Displays your phone's software versions.
1.
Press [Menu], then press "Settings".
Press “Handset info”, then press "Version".
2.
Your phone's software version are displayed.
ICON GLOSSARY
Displays some of the indicator icons of your phone.
1.
Press [Menu], then press "Settings".
Press “Handset info”, then press "Icon glossary".
2.
Your phone's indicator icons are displayed.
21
Page 22
GETTING TO KNOW YOUR PHONE
ADVANCED
Displays your phone's SID, Channel, Technology and Frequency information.
1.
Press [Menu], then press "Settings".
Press “Handset info”, then press "Advanced".
2.
Your phone's SID, Channel, Technology and Frequency information is displayed.
22
Page 23

NAVIGATING THROUGH MENUS
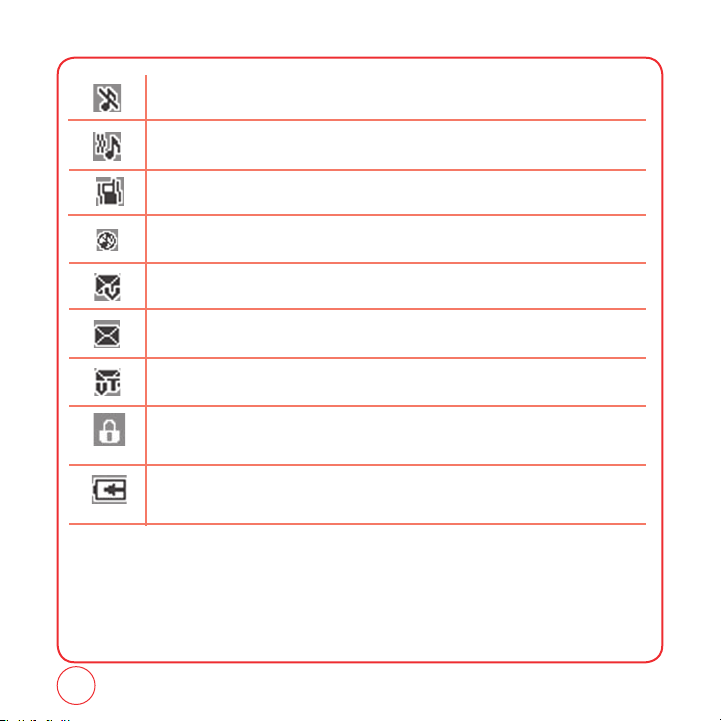
MY STUFF
1. My ringtones
2. My graphics
3. My games
4. My other stuff
5. My sounds
MY ACCOUNT
PICTURES
1. Take a picture
2. Send pic msg
3. My pictures
4. Settings
4.1. Resolution
4.2. Quality
4.3. Shutter sound
5. Help
5.1. Resolution
5.2. Quality
5.3. Picture message
CONTACTS
1. Find name
2. Add new
3. Group settings
4. Speed dial
5. My Phone number
VirginXL
MESSAGING
1. Send Text msg
2. Send Pic msg
3. Send email msg
4. Send im
5. Inbox
6. Virgin alerts
7. Voicemail
8. Saved
9. Sent
10. Erase msgs
10.1. inbox
10.2. sent
10.3. saved
11. Msg settings
11.1. Sound
11.1.1. Text message
11.1.2. Picture message
11.1.3. Voicemail
11.2. Reminder
11.3. Auto text
11.4. Text entry
11.5. Group
11.6. Signature
11.7. Save to sent folder
11.8. Auto erase
11.9. Notification
TOOLS
1. Voice
1.1. Voice memo
1.2. Voice command
2. Tip Calculator
3. Calculator
4. Alarm clock
23
Page 24

NAVIGATING THROUGH MENUS
5. Scheduler
6. Memo pad
7. Stopwatch
8. World clock
9. Memory manager
RECENT CALLS
1. Recent calls
2. Incoming calls
3. Outgoing calls
4. Missed calls
5. Call timer
SETTINGS
1. Sound
1.1. Ringer type
1.1.1. With caller id
1.1.2. No caller id
1.2. Volume
1.2.1. Ringer
1.2.2. Receiver
1.2.3. Speakerphone
1.2.4. Headset
1.2.5. Key tone
1.2.6. Applications
1.2.7. Others
1.2.7.1. Messaging
1.2.7.2. Voicemail
1.2.7.3. Alarms & scheduler
1.2.7.4 Power on/off
1.3. Alerts
1.3.1. Minute minder
1.3.2. Connect tone
1.3.3. Service tone
1.3.4. Fade tone
1.4. Tone length
2.Display
2.1. Graphics
2.1.1. Wallpaper
2.1.1.1. My graphics
2.1.1.2. My pictures
2.1.2. Clock and calendar
2.1.3. Screensaver
2.2. Incoming calls
2.2.1. My graphics
2.2.2. My pictures
2.3. Menu style
2.4. Greeting
2.5. Backlight
2.5.1. Display
2.5.2. Keypad
3. Messaging
3.1. Sound
3.1.1. Text messaging
3.1.2. Picture messaging
3.1.3. Voicemail
3.2. Reminder
3.3. Auto text
3.4. Text entry
3.5. Group
3.6. Signature
3.7. Save to sent folder
3.8. Auto erase
3.9. Notification
4. Bluetooth
24
Page 25

NAVIGATING THROUGH MENUS
4.1. My device
4.2. Settings
4.3. Support service
4.4. Information
5. Security
5.1. Handset lock
5.2. Key lock
5.3. Special number
5.4. Change lock code
5.5. Erase data
5.6. Reset browser
5.7. Default settings
5.8. Reset handset
6. Location
7. Call settings
7.1. Answer mode
7.2. Auto answer
8. Others
8.1. TTY
8.2. Abbrev. dial
8.3. Contacts match
8.4. Typing mode
8.4.1. Auto-capital
8.4.2. Auto-space
8.4.3. My words
8.4.4. T9 settings
8.4.5. Help
8.5. Voice Commands
8.5.1. Voice recognition results
8.5.2. Voice Calibration
8.5.3. Prompts
8.5.4. Number format
9. Handset info
9.1. My mobile number
9.2. Version
9.3. Icon glossary
9.4. Advanced
25
Page 26

MEMO
26
Page 27

CHAPTER 2
MY ACCOUNT
CHAPTER 2 MY ACCOUNT
27
Page 28
MY ACCOUNT
When you balance is low, you can Top-Up your account from your phone:
TOP-UP WITH A TOP-UP CARD
1.
Press [Menu] to select “Menu”.
2.
From the idle screen, press the Up navigation key or from the main menu, scroll to My Account
and press .
3.
Scroll down and select the “Top-Up” link and press .
• You can tell it’s selected because it’s highlighted.
4.
Top-Up Card is highlighted so press .
5.
Enter your account PIN (vKey) and press .
6.
Scroll down to select “Login” and press .
7.
Enter your Top-Up card’s PIN number and press .
8.
Scroll down to select “Top-Up Now” and press .
9.
At the confirmation screen, select “Yes” by pressing .
10.
At the “Approved” screen scroll to OK and press the .
11.
Press to exit.
28
Page 29
MY ACCOUNT
TOP-UP WITH A DEBIT CARD, CREDIT CARD, OR PAYPAL
ACCOUNT
Before you can Top-Up from your phone with a debit card, credit card, or Paypal account, you need
to register the card or Paypal account at
1.
Press [Menu] to select “Menu”.
2.
From the idle screen, press the Up navigation key or from the main menu, scroll to My Account
and press .
3.
Scroll down and select the “Top-Up” link and press .
• You can tell it’s selected because it’s highlighted.
4.
Scroll down and select “Credit Card” and press .
5.
Enter your account PIN (vKey) and press .
6.
Scroll down to select “Login” and press .
7.
Enter the amount for Top-Up and press .
8.
Scroll down to select “Top-Up Now” and press .
9.
Your handset will validate the amount you want to Top-Up. Scroll down to select “Yes” and
press .
10.
That’s it. Your phone will announce that “You’re Topped-Up.” Press .
11.
Press to exit.
www.virginmobileusa.com.
29
Page 30

MEMO
30
Page 31

CHAPTER 3 MAKING AND RECEIVING CALLS
CHAPTER 3
MAKING AND
RECEIVING CALLS
MAKING AND RECEIVING CALLS
DURING A CALL
31
Page 32

MAKING AND RECEIVING CALLS
MAKING A CALL
1.
Enter a phone number.
To modify the phone number you have entered :
Tip
• To erase one digit at a time, press
• To erase the entire number, press and hold
2.
Press .
.
.
• If “CALL FAILED” appears on the display or the line is busy, press
Tip
• If you activate the
of times you have selected.
• If “Enter lock code” appears on the display enter your 4-digit password to unlock your phone.
3.
To end a call, press .
"
AUTO RETRY" function, the phone will automatically retry for the number
or
.
ANSWERING CALLS
1.
When your phone rings or vibrates, press to answer the incoming call. (Depending on
your phone’s settings, you may also answer incoming calls by pressing any number key.)
• To ignore incoming calls, press [Ignore].
2.
To end a call, press .
32
Page 33

MAKING AND RECEIVING CALLS
SPEAKERPHONE
The speakerphone feature lets you hear audio through the speaker and talk without holding the
phone.
1.
To activate the speakerphone while on a call, press .
2.
The phone returns to normal (Speakerphone Off) after ending a call or when the phone is
turned off and back on.
HARD/ 2 SECOND PAUSE FEATURE
Pauses are used for automated systems (i.e., voicemail, calling cards). Insert a pause after a phone
number then enter another group of numbers. The second set of numbers is dialed automatically
after the pause. This feature is useful for dialing into systems that require a code.
1.
To insert a Hard Pause/2-second Pause, enter a phone number then press [Options].
Select either a P Hard pause ("P" appears) or a T 2-second pause ("T" appears).
2.
Press to dial or press [options] and select “Save” to save phone number.
CALLER ID FUNCTION
Identifies caller by displaying their phone number. If the caller’s name and number are already
stored in your phone book, caller’s name with the number will appear.
33
Page 34

MAKING AND RECEIVING CALLS
CALL WAITING FUNCTION
Notifies you of an incoming call when you are already on a call by playing a beep tone and
displaying the caller’s phone number.
1.
To answer another call while on the phone, press .
This places the first call on hold. To switch back to the first caller, press again.
• Call waiting is a system dependent feature. Please contact your service provider for details.
Tip
ADJUSTING VOLUME
To adjust the ringtone volume:
1.
In idle mode, press up or down. Choose from Silence All, Vibrate All, Ringer off, or Level
1~5. You can also choose to have the phone vibrate as well when the phone rings.
Press to check the box on/off for Vibrate.
2.
Press [Save] to save the setting.
SPEED DIALING
Ideal for frequently dialed numbers, this feature allows entries in your contact list to be dialed via
the keypad with only one or two key presses.
ONE DIGIT SPEED DIALING
2-9 : Press and hold the corresponding memory number for more than 1 second.
34
Page 35

MAKING AND RECEIVING CALLS
TWO DIGIT SPEED DIALING
10-99 : Press and release the first digit, then press and hold the second digit for more than 1 second.
• Location 1 is reserved for voicemail. Locations 2-99 are unassigned. To assign a speed dial
Tip
location, please see page 53.
RECENT CALLS LIST-RECENT CALLS
Displays information about the 75 most recent incoming, outgoing or missed calls.
1.
To access the “Recent Calls List,” press the or press [Menu], then “Recent Calls”.
Select “Recent Calls”.
2.
To view call details, press .
• Call details include date, time, and phone number.
Tip
3.
Press [Options] to access “Send txt msg”, “Save”, “Prepend”, “Erase”, or “Erase all”.
Or, press [Send msg] to send a text message.
• After 75 incoming, outgoing or missed calls, the oldest call will automatically be erased from
Tip
the history.
• Send txt msg: Send a text message to the contact.
• Save: Save the phone number in your phonebook.
• Prepend: Adds numbers to the beginning of the phone number.
• Erase: To erase the call entry.
• Erase All: To erase all entire all calls list.
35
Page 36

MAKING AND RECEIVING CALLS
RECENT CALLS LIST-INCOMING CALLS
Displays information about the last 25 entries in the Incoming Call list. Place a call to a selected
number by pressing .
1.
To access the “Recent Calls List,” press the or press [Menu], then “Recent Calls”.
Select “Incoming Calls”
2.
To view incoming call details, press .
3.
Press [Options] to access 'Save”, “Prepend”, “Erase”, or “Erase all”. Select
[Send msg] to send a text msg or picture msg.
• Save: Save the phone number in your phonebook.
• Prepend: Adds numbers to the beginning of the phone number.
• Erase: To erase an incoming call entry.
• Erase all: To erase all
.
entire Incoming Calls.
36
Page 37

MAKING AND RECEIVING CALLS
RECENT CALLS LIST-OUTGOING CALLS
Displays information about the last 25 entries in the Outgoing Calls list. Place a call to a selected
number by pressing .
1.
To access the “Recent Calls List,” press the or press [Menu], then “Recent Calls”.
Select “Outgoing Calls”
2.
To view outgoing call details, press .
• Call details include date, time and phone number.
Tip
3.
Press [Options] to access 'Save”, “Prepend”, “Erase”, or “Erase all”. Select
[Send msg] to send a text msg or picture msg.
• Save: Save the phone number in your phonebook.
• Prepend: Adds numbers to the beginning of the phone number.
• Erase: To erase the Outgoing Call entry.
• Erase all: To erase all
.
the entire Outgoing Call list.
37
Page 38

MAKING AND RECEIVING CALLS
RECENT CALLS LIST-MISSED CALLS
Displays information about the last 25 entries in the Missed Cal list. Place a call to a selected
number by pressing .
1.
To access the “Recent Calls List,” press the or press [Menu], then “Recent Calls”.
Select “Missed Calls”
2.
To view missed call details, press .
3.
Press [Options] to access 'Save”, “Prepend”, “Erase”, or “Erase all”. Select
[Send msg] to send a text msg or picture msg.
• Save: Save the phone number in your phonebook.
• Prepend: Adds numbers to the beginning of the phone number.
• Erase: To erase a Missed Call entry.
• Erase all: To erase all
.
the entire Missed Calls list.
CALL TIMER
Check the talk time and manages your calls within the limit you set. The four call timers include:
Last call, All calls, Incoming calls, and Outgoing calls.
1.
To access the “Recent Calls List,” press the or press [Menu], then “Recent Calls”.
Select “Call Timer”
2.
Press / to view the different timers.
Press [Reset All] to Reset all call timers.
3.
To return to the previous page, press .
.
38
Page 39

MAKING AND RECEIVING CALLS
911 FEATURE
The 911 feature puts the phone in the Emergency Call Mode when you dial the preprogrammed
emergency number, 911. It also operates in the Lock Mode and out of the service area.
911 IN LOCK MODE
The 911 call service is available even in the Lock Mode.
1.
Enter "911", then press .
2.
The call connects.
3.
When the call ends, the phone returns to Lock Mode.
• The 911 call is not recorded in the Recent Call list.
Tip
911 USING ANY AVAILABLE SYSTEM
1.
Enter "911", then press .
2.
The call connects.
3.
The phone maintains the Emergency Mode and the phone can receive an incoming call from
any available system. However, it can’t make a call.
39
Page 40

DURING A CALL
MUTE
The caller cannot hear you or any sounds from your side but you can still hear him/her.
1.
Press [Mute].
• To deactivate, press [Unmute].
• The phone will automatically unmute in Emergency Call or Callback mode.
CALL HISTORY
Displays call information:
1.
Press [Options], then press .
FIND NAME
To select the phone number in your internal Contact List:
1.
Press [Options], then press .
MESSAGING
To send a text message during a call:
1.
Press [Options], then press .
40
Page 41

DURING A CALL
BLUETOOTH
Connect to a Bluetooth-enabled device, such as a wireless headset (sold separately):
1.
Press [Options], then press .
41
Page 42

MEMO
42
Page 43

CHAPTER 4 ENTERING LETTERS, NUMBERS, SYMBOLS
CHAPTER 4
ENTERING
LETTERS,
NUMBERS,
SYMBOLS
43
Page 44

ENTERING LETTERS, NUMBERS, SYMBOLS
You can enter letters, numbers, and symbols using several entry modes: Alphabet, Number, T9,
Symbol, Auto Text, and Emoticon. Not all options are available for every text entry screen.
An indicator for the current entry mode will appear in the middle of the bottom row on the display
when you are entering letters and numbers. To select an entry mode, press the [Options], then
choose from the list on screen.
ALPHABET INPUT MODE
Use the number keys to enter letters, numbers and symbols. Select Alphabet mode by pressing
[Options], then select Alphabet. The Alphabet mode icon [ABC] will appear in the middle of the
bottom of your screen.
1.
Find the key that corresponds to the letter you want to enter. Press it as many times as needed
for the letter to appear on the screen.
2.
To enter a space, press . The cursor will automatically move to the next column.
3.
To delete one digit, press . To delete all letters, press and hold .
Select Alphabet mode by pressing [Options], then select "Alphabet".
Tip
When you select this mode, the Alphabet icon [Abc] appears as a visual confirmation.
- Find the key that corresponds to the letter you want to enter.
- Press it as many times as needed for the letter to appear on the screen.
- To enter the name "John" in Alphabet mode:
Press [
Press [
Press [
Press [
] J
, ,
,
,
] h
] n
] o
44
Page 45

ENTERING LETTERS, NUMBERS, SYMBOLS
T9 INPUT MODE
T9 mode uses a built-in dictionary to select a word based on the letters you've entered. A word can
be entered more quickly by pressing each key once per character. Instead of typing out the entire
word, scroll through the list of words provided and select the one you want.
1.
To select T9 mode, press [Options], then select T9 Words from the list.
The T9 icon [T9w] will appear in the middle of the bottom of your screen.
2.
For each letter of the word you want, press the corresponding number key once. For example,
to enter the word "any", press -> -> .
3.
If the word doesn't match what you want, press to look at other word matches.
4.
When you see the word you want, press to accept the word and enter a space.
To enter a compound word:
Tip
• Enter the first part of the word then press to accept it without adding a space after it.
• Enter the last part of the word then press to accept the word.
Tip
To enter "Sweetcakes" in T9 mode:
- Press [Options] to select T9 Word mode.
- Press , , , , and you will see the word "Sweet".
- Press to keep Sweet selected and to complete the compound word entry.
- Press , , , , and you will see "baker". Press until you see
"cakes".
45
Page 46

ENTERING LETTERS, NUMBERS, SYMBOLS
NUMBER MODE
Number mode allows you to enter numbers.
1.
To select Number mode, press [Options] then select Number from the list.
2.
To enter a number, press the corresponding number key.
SYMBOL MODE
Symbol mode allows you to enter emoticon faces. (i.e smiley face, sad face)
1.
To select Symbols mode, press [Options] then select Symbols from the list.
2.
Select the symbol you want to enter by pressing / / / . Then press .
SMILEYS
Smileys mode allows you to enter expressions using symbols already put together.(i.e. :), :( ).
1.
To select a smiley, press [Options] then select Smileys.
2.
Select the smiley from the list by pressing / / / . Then press .
EMOTICON
Emoticon mode allows you to enter Smileys.
1.
To select an emoticon, press [Options] then select Emoticon.
2.
Select the emoticon from the list by pressing / / / . Then press .
46
Page 47

ENTERING LETTERS, NUMBERS, SYMBOLS
AUTO TEXT
Preset Msg. allows you to use preloaded messages.
1.
To select an Preset message, press [Options] then select Preset Msg.
2.
Highlight a message from the list and press [Select].
47
Page 48

MEMO
48
Page 49

CHAPTER 5 STORING CONTACTS
CHAPTER 5
STORING
CONTACTS
49
Page 50

STORING CONTACTS
1.
Enter phone number, press [Save].
2.
Highlight "New Entry" or "Existing Entry". Press to select.
If "Existing Entry" is selected, your contact list is displayed. Choose the entry to add the
number to, then press [Next]. You will then see the phone number listed above the
number type list. Select the type then press .
• You can have up to 5 numbers of the same type for one contact entry.
3.
If "New Entry" is selected, the list of phone number types will be shown appear.
Press / to choose the type of number you are adding. Press to select. Enter a
name. To change the input mode, press [Options]. Press to enter information in other
fields for the contact. Fields include “Name”, “Mobile 1”, “Mobile 2”, “E-mail”, "IM", “URL”,
“Group”, “Ringtone”, "Vibration", "Msg Alert", “Photo”,
• Group: To set a group for the contact, highlight the Group Name.(Unassigned, Personal, Family,
Business)
• Ringtone: To set a ringtone for the contact, highlight a Ringtone.
• Vibration: To set a vibration for the contact, highlight the Vibration.(Use Phone Vib, Vibration 1~6)
• Msg Alert: To set a msg alert for the contact, highlight the Msg Alert.
• Photo: To add a Photo for a contact, highlight the Photo field and press . The Photo screen will
appear. Highlight a photo and press [Select].
• Secret: To set the contact to Secret, highlight Secret.(Lock, Unlock)
• Memo: To add a memo for a contact, highlight the memo field and press . The Memo screen will
appear. Enter your Memo and press [Done].
"Secret", “Memo”.
4.
To store the entry in your contact list, press [Save].
50
Page 51

ADD NEW
Adds a new entry to your phone's contact list.
1.
Press [Menu], then press "Contacts".
2.
Press "Add new".
3.
Fill in the fields as they are selected.
Press / to highlight a field, then press to select it.
STORING CONTACTS
• Phone book fields: Name/Mobile/Email/IM/URL/Group/Ringtone/Vibration/Msg Alert/Photo/Secret/
4.
To save the entry, press [Save]. To return to the previous page, press .
Memo
51
Page 52

STORING CONTACTS
FIND NAME
Retrieves an entry by name and calls the primary number by simply pressing .
1.
Press [Menu], then press "Contacts".
2.
Press "Find Name".
3.
The list of names in your contacts is displayed alphabetically.
4.
Enter a name or scroll through the list. If more than one contact is listed, highlight the contact
you want.
5.
To select the contact, highlight it and press . The contact information is displayed.
6.
To edit the contact information, press [Edit]. The Edit Contact screen will appear with the
selected contact information shown. See page 48 for Storing a Phone Number.
7.
To save the entry, press [Save]. To return to the previous page, press .
8.
Highlight a field in the contact and press [Options] for various functions for the fields.
9.
To call the selected number, press .
52
Page 53

STORING CONTACTS
GROUP SETTINGS
Organize your contact list into groups for better management, like "Family", "Business", etc.
ADD GROUP
1.
Press [Menu], then press "Contacts".
2.
Press "Group Settings".
3.
Press [Add].
4.
Input a new group name.
5.
Press [Save] to save the setting.
CHANGE GROUP NAME
1.
Press [Menu], then press "Contacts".
2.
Press "Group Settings".
3.
Scroll to Group 1, Group 2, Group 3 or Group 4 through the list. Press [Options], then
select “Rename” from the list.
4.
Input a new group name.
5.
Press [Save] to save the setting.
53
Page 54

STORING CONTACTS
RINGER
1.
Press [Menu], then press "Contacts".
2.
Press "Group Settings".
3.
Select an existing group name.
4.
Press [Options], then select “Ringtone” from the list.
5.
Select ringtone and press [Select].
ERASE GROUP
1.
Press [Menu], then press "Contacts".
2.
Press "Group Setting".
3.
Select Group 1, Group 2, Group 3 or Group 4 a group.
4.
Press [Options], then select “Erase” from the list.
5.
“Erase?” will be displayed. Select “Yes” and press to erase the group.
54
Page 55

STORING CONTACTS
SPEED DIAL
In idle mode, calls can be placed to numbers stored in speed dial by pressing & holding the location
number on the key pad. For a 2-digit location number, press the first number, then press and hold
the second number.
1.
Press [Menu], then press "Contacts".
2.
Press "Speed dial".
3.
To assign a phone number to a location, select the location then press [Assign].
• "Empty" appears if the location is available.
Tip
4.
Highlight a name from your contact list. If the contact has more than 1 number saved, press
/ until the correct number for the speed dial location is shown.
5.
Press [Done] to save the number to the speed dial location. You will see the contact name
next to the speed dial location number in the speed dial list.
55
Page 56

MEMO
56
Page 57

CHAPTER 6 MESSAGING
CHAPTER 6
MESSAGING
Charges apply for the use of these features.
See www.virginmobileusa.com for pricing.
57
Page 58

MESSAGING
SEND A TEXT MESSAGE
To send a new text message:
1.
Press [Menu], then press "Messaging". Press "Send text msg".
2.
Under "Send to", input the phone number or e-mail then press [Next].
Press [Options] to choose from:
• Contacts: Look up a phone number from your contact list.
• Recent List: Look up a number from your recent message list.
Look up a phone number from your group list.
• Group:
3.
Under "Enter Msg", input your message, press [Options] to edit.
how to enter text, please see page 42.
4.
To send the message, press [Send].
For instructions on
58
Page 59

SEND A PICTURE MESSAGE
To send a new picture message:
1.
Press [Menu], then press "Messaging". Press "Send Pic msg".
2.
Select a picture in My pictures.
3.
Under "Send to", input the phone number or e-mail then press [Next].
4.
Under "Subject", press , input the subject then press [OK].
5.
Under "Message", press , input the subject your message then press [OK].
Press to choose from:
• Insert/Delete Picture: To insert/delete a picture in a picture message.
• Insert/Delete Sound: To insert/delete a sound in a picture message.
6.
To send the message, press [Send].
MESSAGING
59
Page 60
MESSAGING
SEND AN E-MAIL MESSAGE
To send a new e-mail message:
1.
Press [Menu], then press "Messaging". Press "Send email msg".
2.
Select an email provider.
If you have not downloaded an email client, you will see the message onscreen “The IM/Email Client
must be installed before feature can be used.” Press “Install Now” to choose and download the
desired client.
3.
Use your keypad to enter the required sign-in information for the selected provider, such as
user name, email address, and password, and select Sign In.
4.
Follow the on screen instructions to read, reply to, compose, send, and manage emails in your
account.
SEND AN IM
To send a new instant message:
1.
Press [Menu], then press "Messaging". Press "Send IM".
2.
Select an IM provider.
If you have not downloaded an IM client, you will see the message onscreen “The IM/Email Client must
be installed before feature can be used.” Press “Install Now” to choose and download the desired
client.
3.
Use your keypad to enter the required sign-in information for the selected provider, such as
user name and password, and select Sign In. (Your IM screen for the selected provider will be
displayed appear.)
60
Page 61
INBOX
Messages you’ve received will be stored in the Inbox.
1.
Press [Menu], then press "Messaging". Press "Inbox".
2.
Select a message, then press . The message is displayed.
3.
Press [Option], then select one of the following options:
• Call: Place a call to the number the message was sent to.
• Forward: Send the message to another person.
• Save: Saves the message in the Saved folder.
• Save contact: Save the phone number in Contacts.
• Erase: Delete the message.
• Cancel: Cancel the message.
VIRGIN ALERTS
Review the Virgin Alerts you’ve received.
1.
Press [Menu], then press "Messaging". Press "Virgin Alerts".
2.
To select "GoTo", press .
MESSAGING
61
Page 62

MESSAGING
SENT
The Sent folder manages sent messages.
1.
Press [Menu], then press "Messaging". Press "Sent".
2.
Select a message, then press . The message is displayed.
3.
Press [Option], then select one of the following options:
• Forward: Send the message to another person.
• Call: Place a call to the number the message was sent to.
• Lock/Unlock: Lock/Unlock the message.
• Compose New: Compose new message.
• Erase: Delete the message.
• Erase All: Delete the all Sent messages.
SAVED
Messages you’ve saved will be stored in the Saved folder.
1.
Press [Menu], then press "Messaging". Press "Saved".
2.
Select a message, press [Erase] then select “Yes.” Press to delete the messages from
the saved folder.
3.
Select a message, then press . The message is displayed.
4.
Press [Options], then select one of the following options:
• Call: Place a call to the number the message was sent to.
• Forward: Send the message to another person.
• Save contact: Save the phone number in the contacts.
• Erase: Delete the message.
62
Page 63

VOICEMAIL
1.
Press [Menu], then press "Messaging". Press "Voicemail".
• Call Voicemail: Place a call to the number the voicemail was sent to.
• Last Voicemail Detail: View last voicemail information.
• Clear Voicemail icon: Delete the voicemail icon.
ERASE MSGS
This feature allows you to erase text and picture messages.
1.
Press [Menu], then press "Messaging". Press "Erase msgs".
2.
Select:
1. Inbox
2. Sent
3. Saved
3.
Select “Yes” and then press to delete the messages from the selected folder.
MESSAGING
63
Page 64

MESSAGING
MSG SETTINGS
This feature enables you to manage your messaging settings.
SOUND
1.
Press [Menu], then press "Messaging". Select “Msg settings” from the list.
2.
Press "Sound".
3.
Select "Text messaging", "Picture messaging" or "Voicemail".
4.
Select "My ringtones" or "Vibration".
• My ringtones:
• Vibration:
5.
Press [Select] to save the setting.
Highlight a ringtone from the list
Highlight a vibration from the list
. (Vibration 1~6)
.
REMINDER
1.
Press [Menu], then press "Messaging". Select “Msg settings” from the list.
2.
Press "Reminder".
3.
Select "On" or "Off".
64
Page 65

MESSAGING
AUTO TEXT
To edit the Auto text message you have saved:
1.
Press [Menu], then press "Messaging". Select “Msg settings” from the list.
2.
Press "Auto text".
3.
Highlight a message from the list. To add a new Quick Text message, press "Add new".
To edit the Quick Text message you have selected, press . Press to delete any
characters you don't want then enter your text. Press [Save] to save the text and return
to the Auto Text list.
4.
From the Auto Text list, press [Options] to select one of the following:
• Send text msg
• Send pic msg
• Erase
• Erase all
TEXT ENTRY
Sets an Entry Mode as a default:
1.
Press [Menu], then press "Messaging". Select “Msg settings” from the list.
2.
Press "Text entry".
3.
Highlight "T9 Word" or "Alphabet" then press [Select] to save the setting.
65
Page 66

MESSAGING
GROUP
To create and edit the Group:
1.
Press [Menu], then press "Messaging". Select “Msg settings" from the list.
2.
Press "Group".
SIGNATURE
Create a signature that can be automatically inserted at the end of a text message.
1.
Press [Menu], then press "Messaging". Select “Msg settings" from the list.
2.
Press "Signature".
3.
Highlight “On” or “Off” then press [Select] to save the setting.
SAVE TO SENT FOLDER
Select if you want to automatically save a message after sending it.
1.
Press [Menu], then press "Messaging". Select “Msg settings" from the list.
2.
Press "Save to sent folder".
3.
Highlight “Auto”, "Off" or “User confirmation” then press [Select] to save the setting.
•
If you don't want to automatically save a message after sending it, select "Off".
For instructions on how to create a group, please see page 51.
66
Page 67

MESSAGING
AUTO ERASE
Automatically erases inbox messages when new messages arrives.
1.
Press [Menu], then press "Messaging". Select “Msg settings" from the list.
2.
Press "Auto erase".
3.
Highlight “Yes” or “No” then press [Select] to save the setting. Automatically erases
oldest inbox messages when new messages arrive.
NOTIFICATION
Sets a notification:
1.
Press [Menu], then press "Messaging". Select “Msg settings" from the list.
2.
Press "Notification".
3.
Highlight “Icon & Message” or “Icon Only” then press [Select] to save the setting.
67
Page 68

MEMO
68
Page 69

CHAPTER 7
MY STUFF
CHAPTER 7 MY STUFF
69
Page 70

MY STUFF
Anything you download from Web - games, ringtones, graphics and applications - will be stored in
the My Stuff folder. You can access these files from My Stuff.
MY RINGTONES
You can download the latest ringtones right to your phone. Charges apply.
Visit
www.virginmobileusa.com for details.
1.
Press [Menu], then press "My stuff".
2.
Press "My ringtones".
3.
Your list of ringtones is shown. Select “1. Get more ringtones” to download any additional
ringtones to your phone. Web will launch and you will be taken to the download menu.
4.
Download your ringtones. From the information page select "Buy".
5.
A confirmation page will notify you that the ringtone has been purchased.
To download the ringtone, select “Download”.
MY GRAPHICS
You can download new graphics to your phone. Charges apply.
Visit
www.virginmobileusa.com for details.
1.
Press [Menu], then press "My stuff".
2.
Press "My graphics".
3.
Your graphics list will be shown. Select "1. Get more graphics" to download additional
wallpapers & screensavers to your phone. Web will launch and you will be taken to the
download menu.
70
Page 71

MY STUFF
4.
Download your graphic. From the information page select "Buy".
5.
A confirmation page will notify you that the graphic has been purchased.
To download the graphic, select “Download”.
MY GAMES
You can download the latest games and play them right on your phone. Charges apply.
Visit
www.virginmobileusa.com for details.
1.
Press [Menu], then press "My stuff".
2.
Press "My games".
3.
Your games list will be shown. Select “1. Get more games” to download additional games to
your phone. Web will launch and you will be taken to the download menu.
4.
Download your game. From the information page select "Buy".
5.
A confirmation page will notify you that the game has been purchased.
To download the game, select "Download".
71
Page 72

MY STUFF
MY OTHER STUFF
You can download other stuff - such as applications, etc. to your phone. Charges apply.
Visit
www.virginmobileusa.com for details.
1.
Press [Menu], then press "My stuff".
2.
Press "My other stuff".
3.
Select “1. Get more other stuff” to download additional screensaver to your phone. Web will
launch and you will be taken to the download menu.
4.
Download your other stuff. From the information page select "Buy".
5.
A confirmation page will notify you that the application has been purchased.
To download the application, select "Download".
MY SOUNDS
You can download new sounds to your phone.
1.
Press [Menu], then press "My stuff".
2.
Press "My sounds".
3.
Your list of sounds will be shown.
72
Page 73

CHAPTER 8
VIRGINXL
CHAPTER 8 VIRGINXL
73
Page 74

VIRGINXL
VirginXL is a fun collection of features which you can access directly from your phone - download
ringtones, games, graphics, and more. Charges apply. Visit
1.
To access VirginXL, press .
2.
To scroll down the page or through the menus, press / .
3.
To return to the previous page, press .
4.
To exit VirginXL, press .
• When you select VirginXL, a session is initiated.
Tip
• You cannot receive incoming calls when a VirginXL session is in progress.
All incoming calls will be automatically forwarded to voicemail.
www.virginmobileusa.com for details.
74
Page 75

CHAPTER 9
PICTURES
CHAPTER 9 PICTURES
75
Page 76

PICTURES
TAKE A PICTURE
Taking pictures with your phone ’s built-in camera is as simple as choosing a subject,pointing the
lens,and pressing a button.
1.
Press [Menu], then press "Pictures". Press "Take a picture".
• Camera can also be launched by holding the [OK] from the idle Screen.
2.
Using the phone ’s Main LCD as a viewfinder, aim the camera lens at your subject.
Press [Options] to choose from:
• Self Timer: To select self timer 0ff, 5sec or 10 sec.
• Fun Frame:
• Image Effect: To adjust the image effect from Normal, Gray, Negative, Sepia, Emboss, Sketch.
• Mirror:
• Resolution: To adjust the photo size from 640x480, 320x240, 160x120 or Wallpaper.
• Quality: To adjust the photo quality from Economy, Normal or Fine.
• Shutter Sound: Select a sound to use for shutter.
3.
Press until the shutter sounds. Press [My Pics] to send a picture message.
To return to camera mode without saving the picture,press .
Press [Options] to choose from:
• Assign: To display the picture for picture caller ID,screensaver, incoming calls, wallpapers.
• Upload to My Pix: To upload the picture you just took to the picture messaging Web site.
• Take a Picture
• Edit title: To edit the selected picture’s title.
• Erase:
• Erase Multi-pics:
Highlight a fun frame from the list
Select a mirror type to use for take picture from Vertical or Horizontal.
To delete the picture you just took.
To multi delete the pictures.
.
76
Page 77

PICTURES
• Erase All: To delete the all pictures you just took.
• Picture Info: View picture information. (File Name, Time/Data, Resolution, Picture Size, Qual
Assigned, Uploads.)
SEND A PICTURE MESSAGE
To send a picture message:
1.
Press [Menu], then press "Pictures". Press "Send pic msg".
2.
Highlight a picture from the list
3.
Under "Send to", input the phone number or e-mail then press [Next].
4.
Under "Subject", press , input the subject then press [OK].
5.
Under "Message", press , input the subject then press [OK].
6.
Under "Picture", press , select picture in My pictures then press [Select].
7.
Under "Audio", press , select Voice memo then press [Select].
8.
To send the message, press [Send].
then press [Select].
MY PICTURES
1.
Press [Menu], then press "Pictures". Press "My Pictures".
2.
In Review Mode, you can view all the pictures you have taken and stored.
3.
Select photo image with the Navigation Key then press to view picture.
ity,
77
Page 78

PICTURES
CAMERA SETTINGS
RESOLUTION
To adjust the size using resolution settings:
1.
Press [Menu], then press "Pictures". Press "Settings".
2.
Press "Resolution".
3.
Select “640x480”, “320x240”, “160x120” or “Wallpaper” then press [Select] to save
setting.
QUALITY
To select the quality of the picture:
1.
Press [Menu], then press "Pictures". Press "Settings".
2.
Press "Quality".
3.
Select “Economy”, “Normal” or “Fine” then press [Select] to save setting.
SHUTTER SOUND
To select shutter sound:
1.
Press [Menu], then press "Pictures". Press "Settings".
2.
Press "Shutter sound".
3.
Select “Default”, “Shutter 1” or “Shutter 2” then press [Select] to save setting.
78
Page 79

HELP
View Resolution, Quality, Picture message informations.
RESOLUTION
1.
Press [Menu], then press "Pictures". Press "Help".
2.
Press "Resolution".
3.
To return to the previous page, press .
QUALITY
1.
Press [Menu], then press "Pictures". Press "Help".
2.
Press "Quality".
3.
To return to the previous page, press .
PICTURE MESSAGE
1.
Press [Menu], then press "Pictures". Press "Help".
2.
Press "Picture message".
3.
To return to the previous page, press .
PICTURES
79
Page 80

MEMO
80
Page 81

CHAPTER 10 CUSTOMIZING YOUR PHONE
CHAPTER 10
CUSTOMIZING
YOUR PHONE
81
Page 82

CUSTOMIZING YOUR PHONE
Customizes your phone and optimizes performance through a variety of settings.
SOUND
RINGER TYPE
To select a ringer type for:
Voice Calls
1.
Press [Menu], then press "Settings".
Press "Sound", then press “Ringer type".
2.
Press "Voice calls".
3.
Select "With Caller ID" or "No Caller ID" then press .
• With Caller ID: Any call from a number whose phone number is not restricted or blocked.
• No Caller ID: From restricted or blocked numbers.
4.
Select your desired ringers from the list by pressing / . To hear a ringtone that is
highlighted, press [Play].
5.
To save the selected ringtone, press [Select] to save the setting.
82
Page 83

CUSTOMIZING YOUR PHONE
VOLUME
Control the volume for Ringtone, Speakerphone, Headset, and Advanced settings.
Ringer
To set ringer volume and incoming call alert options:
1.
Press [Menu], then press "Settings".
Press "Sound", then press “Volume".
2.
Press "Ringer".
3.
Press / to adjust the volume level. Press to select Vibrate when High as the volume
level.
The available volume settings are:
• Silence All: All sounds are off.
• Vibrate All: Phone will vibrate to alert you of incoming call or message.
• Ringtone mode: 1~5.
• You can also adjust the ringtone volume with the side keys.
Tip
4.
Press [Save] to save the setting.
83
Page 84

CUSTOMIZING YOUR PHONE
Receiver
To adjust the receiver volume:
1.
Press [Menu], then press "Settings".
Press "Sound", then press “Volume".
2.
Press "Receiver".
3.
Adjust the Receiver volume by pressing / . Press [Save] to save the setting.
The volume settings available are:
• Ringtone mode: 1~5.
Speakerphone
To adjust the speakerphone volume:
1.
Press [Menu], then press "Settings".
Press "Sound", then press “Volume".
2.
Press "Speakerphone".
3.
Adjust the Speakerphone volume by pressing / . Press [Save] to save the setting.
The volume settings available are:
• Ringtone mode: 1~5.
84
Page 85

CUSTOMIZING YOUR PHONE
Headset
To adjust the headset volume:
1.
Press [Menu], then press "Settings".
Press "Sound", then press “Volume".
2.
Press "Headset".
3.
Adjust the Headset volume by pressing / . Press [Save] to save the setting.
The volume settings available are:
• Ringtone mode: 1~5.
Key Tone
To adjust the Key Tone volume:
1.
Press [Menu], then press "Settings".
Press "Sound", then press “Volume".
2.
Press "Key tone".
3.
Adjust the Key Beep volume by pressing / . Press [Save] to save the setting.
The volume settings available are:
• Ringtone mode: 1~5.
85
Page 86
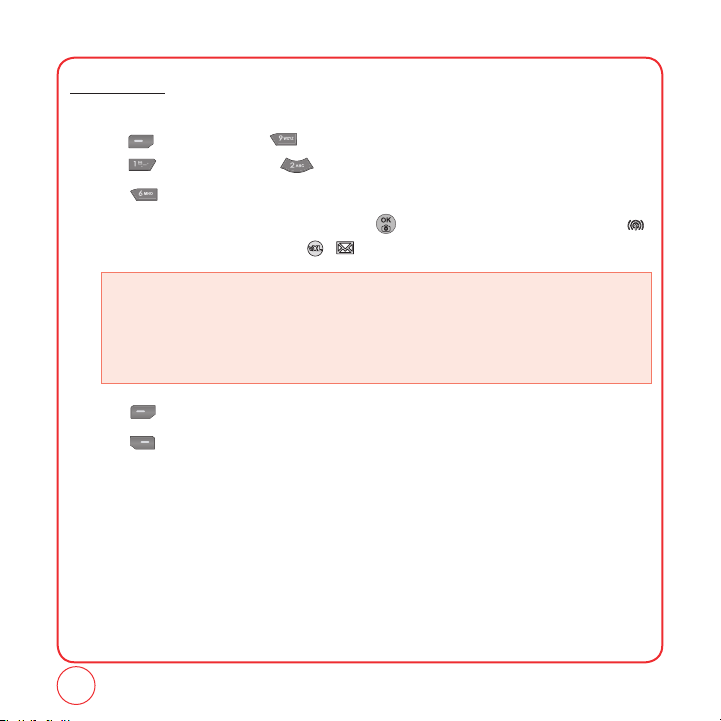
CUSTOMIZING YOUR PHONE
Applications
To adjust the Applications volume:
1.
Press [Menu], then press "Settings".
Press "Sound", then press “Volume".
2.
Press "Applications".
3.
Highlight "Use ringer" or "Separate" and press to select. If Separate is selected, press
to highlight the volume level. Press / to adjust the volume level.
This setting controls the volume of the applications.
• Use ringtone vol.: Plays the application at the same volume as the voice ringtone and allows the
• Use separate vol.: Plays the application at the selected volume level. Alerts will always play at this
4.
Press [Save] to save the setting.
5.
Press [Help] for additional information
side volume keys to change the application volume at the same time as the voice
ringtone.
level unless the ringtone volume is set to “Silence all” or “Vibrate”.
86
Page 87
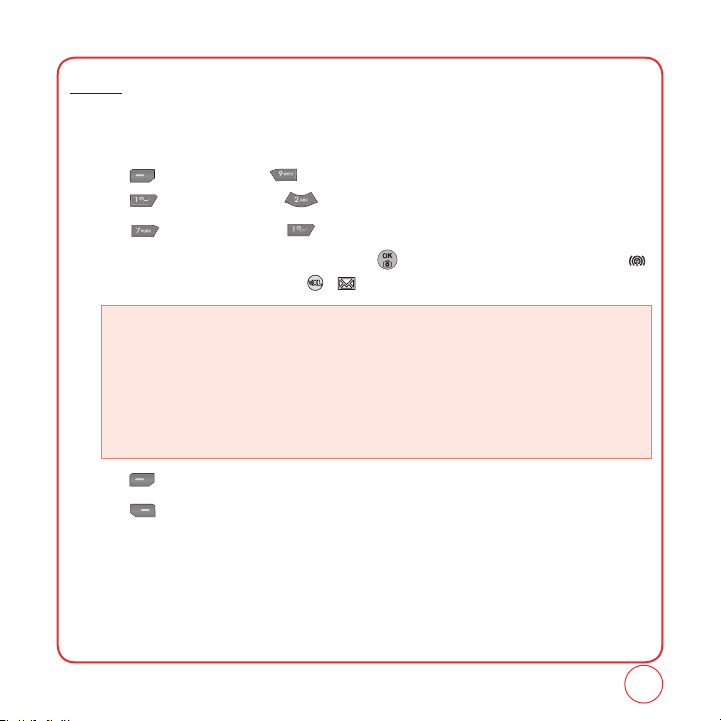
CUSTOMIZING YOUR PHONE
Others
Messaging
To adjust the message alert volume:
1.
Press [Menu], then press "Settings".
Press "Sound", then press “Volume".
2.
Press “Others”, then press “Messaging”.
3.
Highlight "Use ringer" or "Separate" and press to select. If Separate is selected, press
to highlight the volume level. Press / to adjust the volume level.
This setting controls the volume of new text message alerts.
• Use ringer vol.: Plays the text message alerts at the same volume as the voice ringtone and allows
• Separate vol.: Plays the text message alerts at the selected volume level. Alerts will always play at
• Always vibrate: Select to this causes the application to add vibration to any sound. Only works with
4.
Press [Save] to save the setting.
5.
Press [Help] for additional information.
the side volume keys to change the text message alert volume at the same time as
the voice ringtone.
this level unless the ringtone volume is set to “Silence all” or “Vibrate”.
when “Separate” is selected.
87
Page 88

CUSTOMIZING YOUR PHONE
Voicemail
To adjust the voicemail alert volume:
1.
Press [Menu], then press "Settings".
Press "Sound", then press “Volume".
2.
Press “Others”, then press “Voicemail”.
3.
Highlight "Use ringer" or "Separate" and press to select. If Separate is selected, press
to highlight the volume level. Press / to adjust the volume level.
This setting controls the volume of new voicemail alerts.
• Use ringtone vol.: Plays the voicemail alerts at the same volume as the voice ringtone and allows
• Use separate vol.: Plays the voicemail alerts at the selected volume level. Alerts will always play at
• Always vibrate: Selecting this causes the application Select to add vibration to any sound. Only
4.
Press [Save] to save the setting.
5.
Press [Help] for additional information.
the side volume keys to change the voicemail alert volume at the same time as
the voice ringtone.
this level unless the ringtone volume is set to “Silence all” or “Vibrate”.
works with when “Separate” is selected.
88
Page 89

CUSTOMIZING YOUR PHONE
Alarm & Scheduler
To adjust the Alarm & Scheduler volume:
1.
Press [Menu], then press "Settings".
Press "Sound", then press “Volume".
2.
Press “Others”, then press “Alarm & Scheduler”.
3.
Highlight "Use ringer" or "Separate" and press to select. If Separate is selected, press
to highlight the volume level. Press / to adjust the volume level.
This setting controls the volume of the alarm & scheduler.
• Use ringtone vol.: Plays the Alarm & Scheduler at the same volume as the voice ringtone and allows
• Use separate vol.: Plays the Alarm & Scheduler at the selected volume level. Alerts will always play
• Always vibrate: Selecting this causes the application to add vibration to any sound.
4.
Press [Save] to save the setting.
5.
Press [Help] for additional information.
the side volume keys to change the alarm volume at the same time as the voice
ringtone.
at this level unless the ringtone volume is set to “Silence all” or “Vibrate”.
Only works with when “Separate” is selected.
89
Page 90

CUSTOMIZING YOUR PHONE
Power On/Off
To adjust the Power On/Off volume:
1.
Press [Menu], then press "Settings".
Press "Sound", then press “Volume".
2.
Press “Others”, then press “Power On/Off”.
3.
Highlight "Use ringer" or "Separate" and press to select. If Separate is selected, press
to highlight the volume level. Press / to adjust the volume level.
This setting controls the volume of the sound when turning the phone on and off.
• Use ringtone vol.: Plays the power on/off alert at the same volume as the voice ringtone and allows
• Use separate vol.: Plays the power on/off alert at the selected volume level. Alerts will always play
• Always vibrate: Selecting this causes the application Select to add vibration to any sound.
4.
Press [Save] to save the setting.
5.
Press [Help] for additional information.
the side volume keys to change the power on/off alert volume at the same time
as the voice ringtone.
at this level unless the ringtone volume is set to “Silence all” or “Vibrate”.
Only works with when “Separate” is selected.
90
Page 91

CUSTOMIZING YOUR PHONE
ALERTS
This feature allows you to set additional phone alerts.
Minute Minder
This alert notifies you with a beep tone every minute you are on a call.
1.
Press [Menu], then press "Settings".
Press "Sound", then press "Alerts".
2.
Press "Minute Minder".
3.
Highlight “On” or “Off” then press [Select] to save the setting.
Connect Tone
This alert notifies you with a beep tone the a call has been successfully placed.
1.
Press [Menu], then press "Settings".
Press "Sound", then press "Alerts".
2.
Press "Connect tone".
3.
Highlight “On” or “Off” then press [Select] to save the setting.
Service Tone
This alert notifies you with a beep tone that service is available for your phone.
1.
Press [Menu], then press "Settings".
Press "Sound", then press "Alerts".
2.
Press "Service tone".
3.
Highlight “On” or “Off” then press [Select] to save the setting.
91
Page 92

CUSTOMIZING YOUR PHONE
Fade Tone
This alert notifies you with a beep tone when the signal for your service is low.
1.
Press [Menu], then press "Settings".
Press "Sound", then press "Alerts".
2.
Press "Fade tone".
3.
Highlight “On” or “Off” then press [Select] to save the setting.
TONE LENGTH
To adjust key pad tone length:
1.
Press [Menu], then press "Settings".
Press "Sound", then press "Tone length".
3.
Highlight “Normal” or “Long” then press [Save] to save the setting.
92
Page 93

CUSTOMIZING YOUR PHONE
DISPLAY
This set of features allows you to customize your display.
GRAPHICS
Select an image for your idle display.
Graphics
1.
Press [Menu], then press "Settings".
Press "Display", then press "Graphics".
2.
Press "Graphics".
3.
Select "My graphics" or "My pictures".
4.
Press / to scroll through the images.
5.
Press [View], then press [Select] to save the setting.
Clock and calendar
1.
Press [Menu], then press "Settings".
Press "Display", then press "Graphics".
2.
Press "Clock and calendar".
Clock types:
• Digital Clock: Shows displays date and time in written format.
• Calendar: Shows displays the current month's calendar.
• Dual clock: Shows Digital displays at top of display and selected city with its Digital date and time at
• Analog Clock: Shows displays time in a standard clock format.
bottom of display. Press [City] to select a city.
93
Page 94

CUSTOMIZING YOUR PHONE
3.
Press [Save] to save the setting.
Screensaver
1.
Press [Menu], then press "Settings".
Press "Display", then press "Graphics".
2.
Press "Screensaver".
• Time: Select 5, 10, 15, 20 secs or Screensaver off.
• My Graphics:
• My Pictures:
3.
Press [Select] to save the setting.
INCOMING CALLS
To select an image for Incoming Calls:
1.
Press [Menu], then press "Settings".
Press "Display", then press "Incoming calls".
2.
Select My graphics or My pictures, then press / to scroll through the images.
3.
Press [Select] to save the setting.
MENU STYLE
Select how the phone menu will display.
1.
Press [Menu], then press "Settings".
Press "Display", then press "
2.
Highlight “Grid style” or “List style” then press [Select] to save the setting.
Press / to scroll through the images in My graphics.
Press / to scroll through the images in My pictures.
Menu style".
94
Page 95

CUSTOMIZING YOUR PHONE
GREETING
The greeting is your personal label for your phone. It appears on the main screen along the bottom
of the display.
1.
Press [Menu], then press "Settings".
Press "Display", then press "
2.
Select "On" or "Off".
3.
If you select "On", the current greeting text is displayed. Press to delete the greeting,
then enter your new greeting. Press [Options] to change the input mode.
4.
Press [Save] to save the greeting.
BACKLIGHT
Turn on the backlight on the display and keypad for easy viewing in dark places.
Display
Backlight the display:
1.
Press [Menu], then press "Settings".
Press "Display", then press
2.
Press "Main display".
3.
Highlight one of the following options by pressing / .
• 5 seconds, 10 seconds, 20 seconds, Always On, Always Dim.
4.
Press [Select] to save the setting.
Greeting".
"Backlight".
95
Page 96

CUSTOMIZING YOUR PHONE
Keypad
Backlight the Keypad:
1.
Press [Menu], then press "Settings".
Press "Display", then press
2.
Press "Keypad".
3.
Highlight one of the following options by pressing / .
• 5 seconds, 10 seconds, 20 seconds, Always Off.
4.
Press [Select] to save the setting.
"Backlight".
96
Page 97

CUSTOMIZING YOUR PHONE
MESSAGING
This feature enables you to manage your message settings.
SOUND
1.
Press [Menu], then press "Settings". Press "Messaging".
2.
Press "Sound".
3.
Select "Text messaging", "Picture messaging" or "Voicemail".
• My ringtones: Select a ringtone.
• Vibration:
4.
Press [Select] to save the setting.
Select Vibration 1~6.
REMINDER
When Reminder is on, your phone periodically alerts the user until all the received messages are
checked by the user.
1.
Press [Menu], then press "Settings". Press "Messaging".
2.
Press "Reminder".
3.
Highlight "On" or “Off”, then press [Select] to save the setting.
97
Page 98

CUSTOMIZING YOUR PHONE
AUTO TEXT
To edit the Auto Text message you have saved:
1.
Press [Menu], then press "Settings". Press "Messaging".
2.
Press "Auto Text".
3.
Highlight a message from the list. To add a new Quick Text message, press [Add New].
4.
To edit the Quick Text message you have selected, press . Press to delete any
characters you don't want then enter your text. Press [Save] to save the text and return to
the Auto Text list.
TEXT ENTRY
Sets an Entry Mode as a default:
1.
Press [Menu], then press "Settings". Press "Messaging".
2.
Press "Text entry".
3.
Highlight "T9 Word" or "Alphabet" then press [Select] to save the setting.
GROUP
To edit the Group:
1.
Press [Menu], then press "Settings". Press "Messaging".
2.
Press "Group".
3.
To add a new Group, press [Add].
4.
Press [Save] to save the new group
98
Page 99

CUSTOMIZING YOUR PHONE
SIGNATURE
Create a signature that can be automatically inserted at the end of a text message.
1.
Press [Menu], then press "Settings". Press "Messaging".
2.
Press "Signature".
3.
Highlight "On" or "Off" then press [Select] to save the setting.
SAVE TO SENT FOLDER
Select if you want to automatically save a message after sending it.
1.
Press [Menu], then press "Settings". Press "Messaging".
2.
Press "Save to Sent folder".
3.
Highlight "Auto", "Off" or "User confirmation" then press [Select] to save the setting.
AUTO ERASE
Automatically erases messages when new messages arrive.
1.
Press [Menu], then press "Settings". Press "Messaging".
2.
Press "Auto Erase".
3.
Highlight "Yes" or "No" then press [Select] to save the setting.
NOTIFICATION
Sets an Notification:
1.
Press [Menu], then press "Settings". Press "Messaging".
2.
Press "Notification".
3.
Highlight “Icon & Message” or “Icon Only” then press [Select] to save the setting.
99
Page 100

CUSTOMIZING YOUR PHONE
BLUETOOTH
Bluetooth allows you to connect your phone to compatible, Bluetooth-enabled devices, such as a
wireless headset (sold separately). Since devices with Bluetooth connectivity communicate using
radio waves, your phone and the other device do not need to be in direct line-of-sight. The two
devices only need to be within 10 meters (30 feet) of each other. However, the connection may
sometimes suffer interference from obstructions such as walls or other electronic devices.
The Super Slice is compatible with devices that support the Bluetooth
(HFP) Profiles. Your phone is based on the Bluetooth
work with all devices enabled with Bluetooth® wireless technology.
®
specification, but it is not guaranteed to
®
Headset (HSP), Hands-Free
PAIRING YOUR PHONE
You can manage your Bluetooth connections through the My Device menu.
1.
Press [Menu], then press "Settings". Press "Bluetooth".
2.
Press "My device".
Press [Options] to choose from:
• Add New:
• Assign Short Name:
• Device Info: Displays information about a Bluetooth device.
• Erase: To erase a selected Bluetooth device.
• Erase All: To erase all Bluetooth devices.
3.
Your phone will display the names of Bluetooth devices it has previously discovered. If none
have been detected, “No matches found” will be displayed.
4.
For a new device, press [Options], then “Add new”.
100
Searches for Bluetooth devices in possible range.
To assign short a name to a device.
 Loading...