How it Works
Log In / Sign Up
Buy Points
How it Works
FAQ
Contact Us
Questions and Suggestions
Users
Kyocera
Loading...
T
TK-410
TK-4105
TK-435
TK-475
TK-5220C
TK-5220K
TK-5220M
TK-5220Y
TK-5230C
TK-5230K
TK-5230M
TK-5230Y
TK-590C
TK-590K
TK-6305
TK-685
TK-8305C
TK-8305Y
TK-895C
TK-895Y
TNT!
2
TNT S2400
TNT VMS200
Tomo
TOMO S2410
2
Topaz
3
Topaz KX7
Torcque XT
Torino
3
TORINO S2300
2
Torque
3
Torque G01
Torque G02
2
TORQUE G03
2
Torque G04
Torque Sprint
TORQUE X01
2
Torque XT
Torque XT Sprint
TU 108P
TWAIN
TXRTR10012
U
UF-1
2
UF 100P
UG-31
URBANO L01
Urbano L02
2
Urbano Progresso
2
Urbano V01
Urbano V02
2
Urbano V03
V
Verizon
Verizon Brigadier
Verizon Hydro Elite
2
Verve
3
VI-200
VI-230L
2
VI-310L
vi3760
Vi7360
Virgin Event
Virgin Mobile Hydro Vibe
Virgin Rise
VLSG-01
VM1450
VMKX5C
VMS130
VMSE47KY
VR-1
W
W61K
W63K
W65K
WIA
Wild Card
6
Wireless Portable Speaker
Wireless Stereo Headset
WP31C
WX320K
2
WX331K
WX331KC
WX334K
WX340K
X
Xcursion KX160
2
Xcursion KX160A
2
Xcursion KX160B
2
XI3648
X-tc
3
X-tc M2000
3
Y
YAKF 1
yashica
Yashica T4 Super
Yashica T4 Super D
YKCA04
YKDA25
YKEA60
YKFA21
YKFA24
YKHA81
YTMF
Z
Zio
Loading...
Loading...
Nothing found
Urbano V03
User Guide
3 pgs
16.73 Mb
0
Table of contents
Loading...
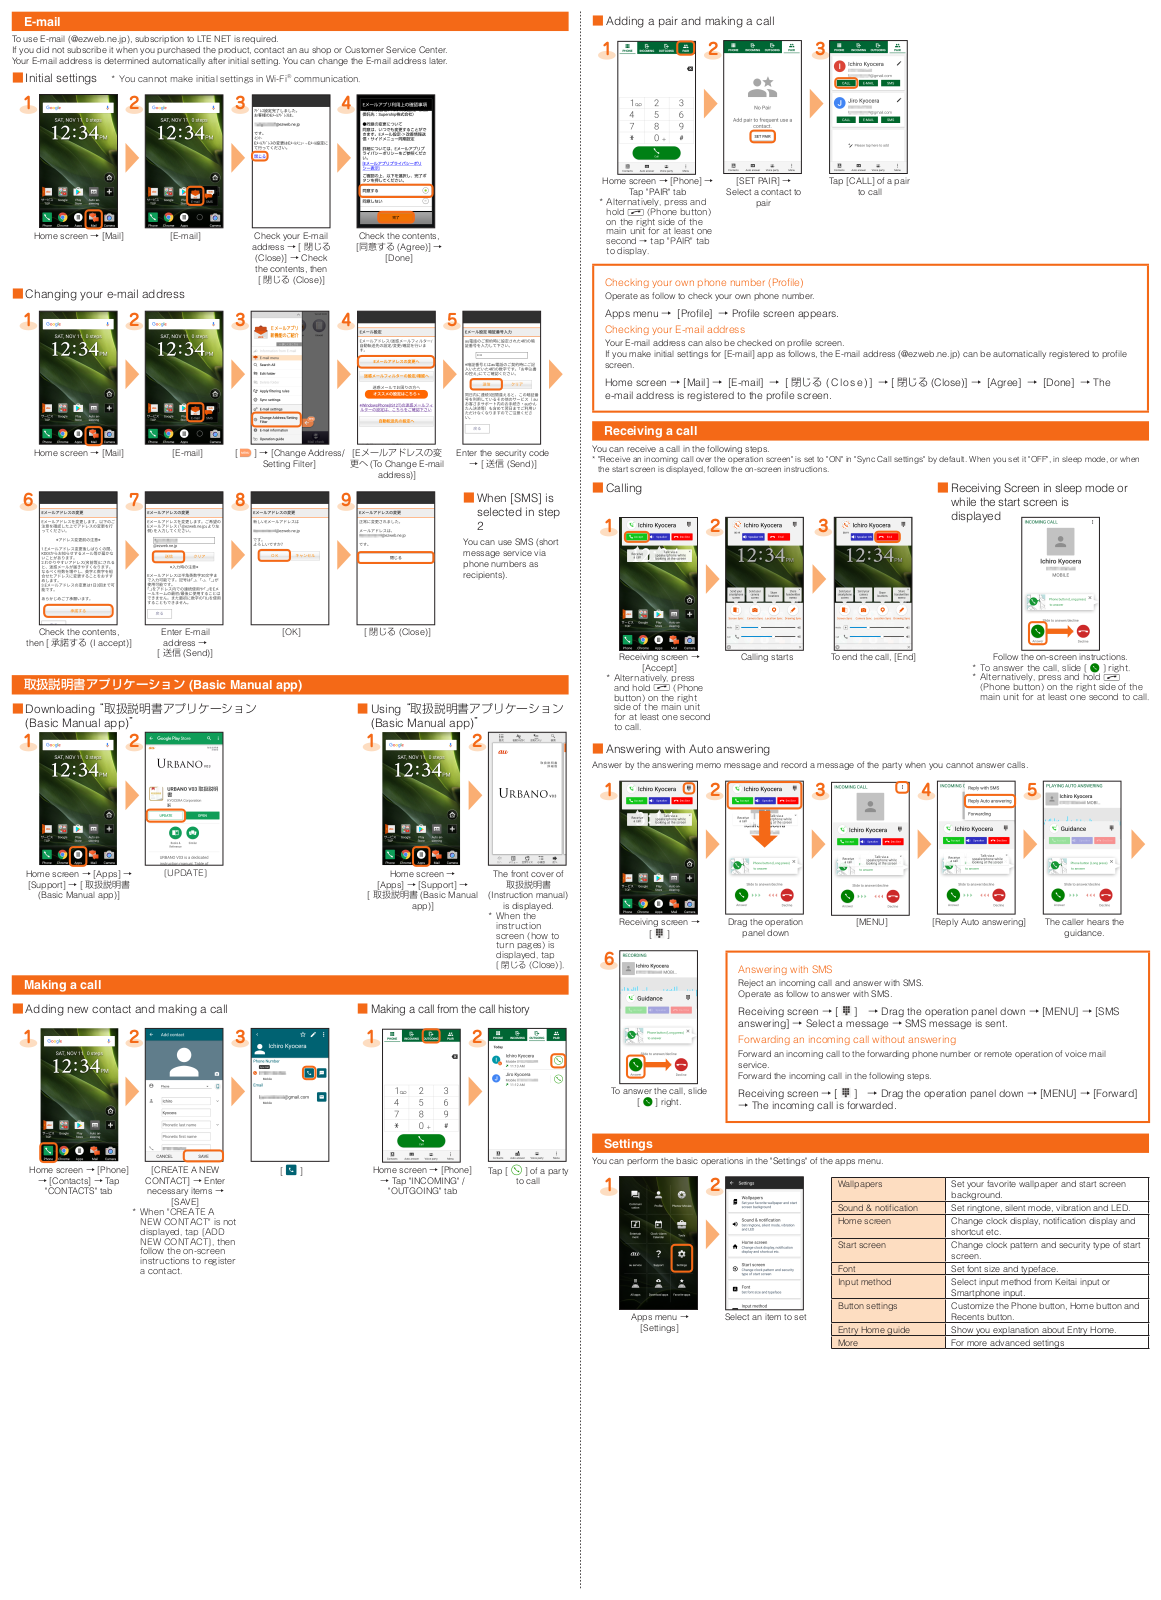
Kyocera Urbano V03 User Guide
...
Kyocera User Guide
Download
Specifications and Main Features
Frequently Asked Questions
User Manual
Download
Page 1
Page 2
Page 3
Loading...
+
hidden pages
Unhide
You need points to download manuals.
1 point = 1 manual.
You can buy points or you can get point for every manual you upload.
Buy points
Upload your manuals
 Loading...