

Page 1

Contents V1.0
ONE Introduction
1.1 Applications
1.2 Features
1.3 System Requirements
1.4 Accessories
1.5 Specifications
TWO Installation
THREE Using UD160
3.1 Display Modes
3.2 Extend Mode
3.3 Mirror Mode
3.4 Rotate Mode
3.5 Adjusting Resolution, Color Depth
3.6 Effects on Vista Aero Interface
3.7 Standby and Hibernate, Shut Down and Restart
3.8 Using Multi Adapters
3.9 Disconnecting the Adapter
3.10 Uninstall the Adapter and Driver
..............................................................02
......................................................02
........................................................03
.........................................03
..................................................03
.................................................03
........................................................................04
..........................................................06
..........................................................06
..........................................................06
........................................................07
........................................................08
..................................09
..................................................09
...........................................10
........................................10
.............................08
.............09
FOUR Troubleshooting
..........................................................11
FIVE User Guide for MAC
....................................................12
Page 2
2
ONE
Instruction
Introduction
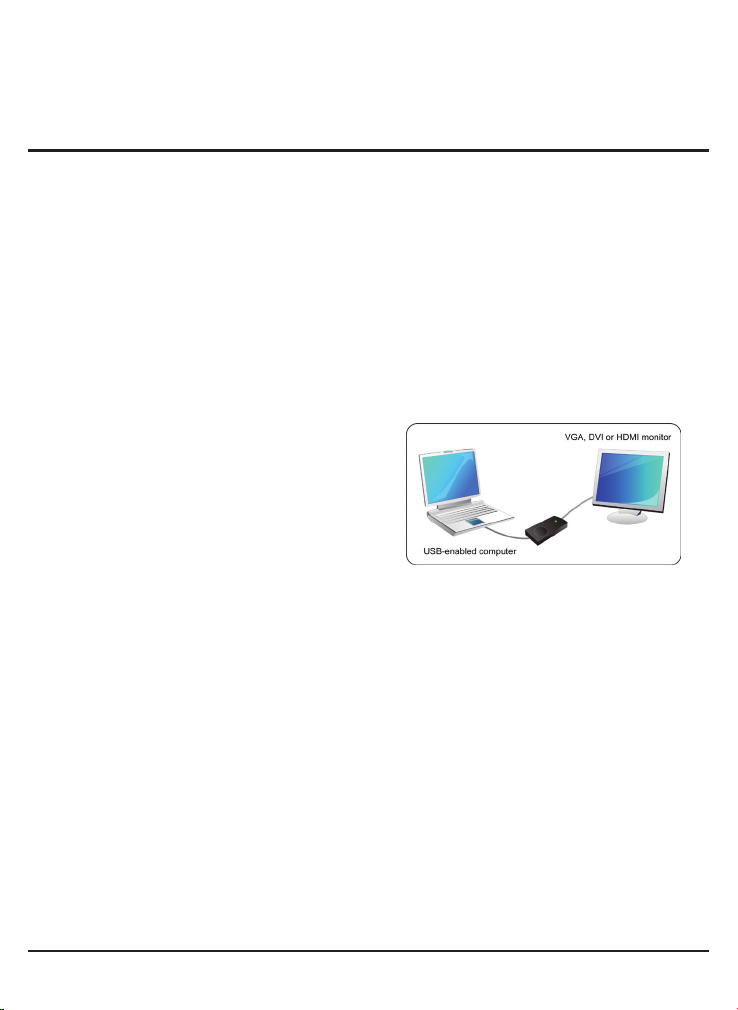
This UD160 enables you to connect one more monitor, LCD or projector to a computer
with a USB 2.0 port. For desktop users adding an extra monitor via USB connection is
easier than ever without having to open the computer chassis to install an internal video
card. Once the installation is done, the USB-attached monitor soon wakes up. No function
key hassle to swap a second monitor.
With this handy adapter, you can enjoy many benets brought by an add-on monitor. The
most obvious one is that you get more desktop area to have more applications visible at
one time. For example, you may work on one monitor while watching video on the other.
No more stacking windows within the connes of a single display. Or you may span an
application, e.g. spreadsheets, across two displays. What’s more, the adapter is not
pluggable. If you are not using the extra monitor, just unplug the adapter at any time; no
reboot needed.
System performance is an important issue
wh en usi ng mul tip le mon it ors . Ano th er
benefit of this adapter is that it uses little
co mp ut er res ou rc e, e ns ur ing users ge t
quality display without comprising computer
performance.
1.1 Applications
Ofce workstation
• View your large spreadsheets across two screens with Display continuity
• Multi-task more effectively without overlapping windows
• Edit on one screen while surf the Internet information on the other
On the road
• Do multiple screen presentations without bringing another computer
• Easily provide multiple screen exhibitions in a trade show
Graphics workstation
• Use second display for palettes/tools
• Get a panoramic view of large documents
Editing workstation
• Type documents on one screen while viewing reference material on the other
• Compare two documents simultaneously across two screens
Financial analysis
• Have one monitor per data stream
• View charts and live data at the same time
Entertainment
• View videos/TV on one screen and reviews on the other
• Get additional perspectives when playing games
© 2009 KWorld
Page 3
1.2 Features
• Easy Setup From USB to VGA/DVI-I/HDMI
• Maximum 32-Bit True Color Display
• High Quality Resolution up to 1680x1050 / 1600x1200
• Create TV Wall with Maximum of 6 KWorld USBtoDVI
• 4 Preset Functions: Primary, Extend, Mirror, Rotate
1.3 System Requirements
• Pentium-IV 1.6 GHz or above
• 512MB RAM or above
• One free USB2.0 port
• Graphics Card (Must support Microsoft DirectX 9.0c)
• 32MB or above Free HD Space
• CD-ROM Drive (For software installation)
• Windows2000 SP4 / XP SP2 32-bit / Vista 32-bit / MAC
• To display HD Movie on the adapter-attached monitor, in addition to the requirements
above, the recommanded requirements as:Dual core CPU at 2.0 GHz processor clock
and 1G or above RAM.
1.4 Accessories
• UD160
• User Manual
• Installation CD
• USB cable
• DVI-I to VGA connector
• DVI-I to HDMI connector
3
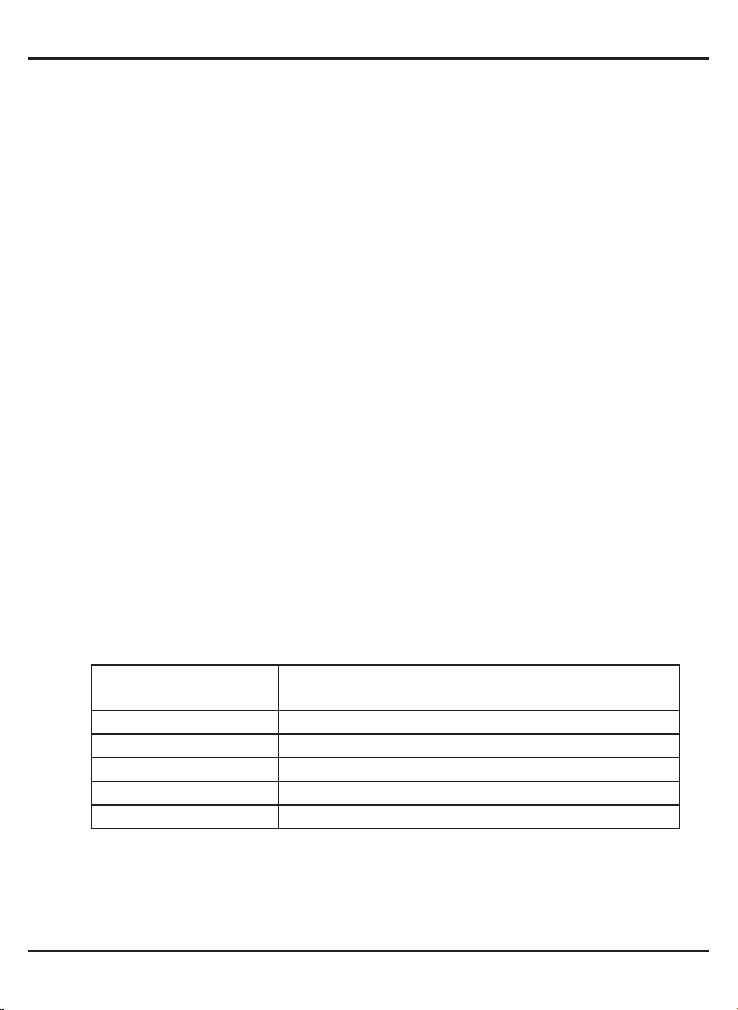
1.5 Specications
Resolutions Depends on your monitor. Maximum resolution is
1680x1050 / 1600x1200
Input USB 2.0 *1 (B Type)
Output DVI-I output
Voltage 5V DC from USB Port
Power Consumption Less than 2w
Current 400ma
M100
Page 4
4
TWO
Installation
Installation
Follow the procedures below to install the driver and then connect the adapter:
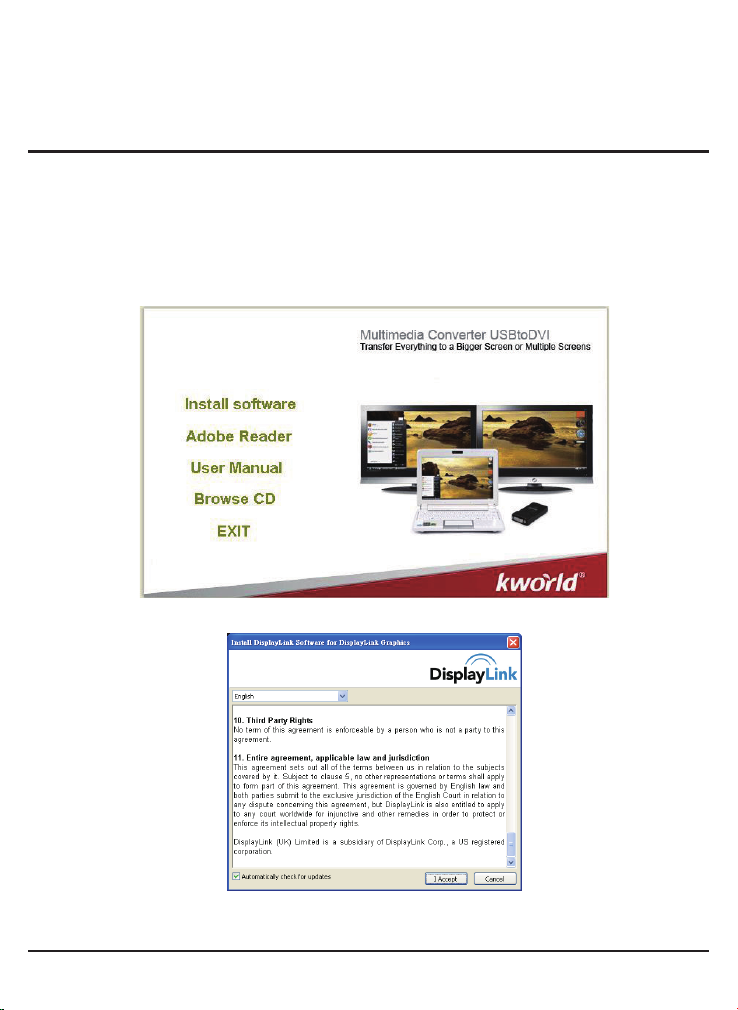
1.Insert the provided driver CD into your CD-ROM drive. The setup program will run
automatically. Please click on “Install software” to install. If not, locate and double-click the
Setup for win2k_xp_vista.exe le on the CD.
© 2009 KWorld
Page 5
2.Please select the language of user license and click on “I Accept” to install driver and
software automatically.
Notice for Window Vista users:
Windows Vista users will encounter a User Account Control dialog box when attempting to
install a program. Enter an administrator password or click Allow to start the installation.
When prompted with Windows Security dialog box, select Install this driver software
anyway.
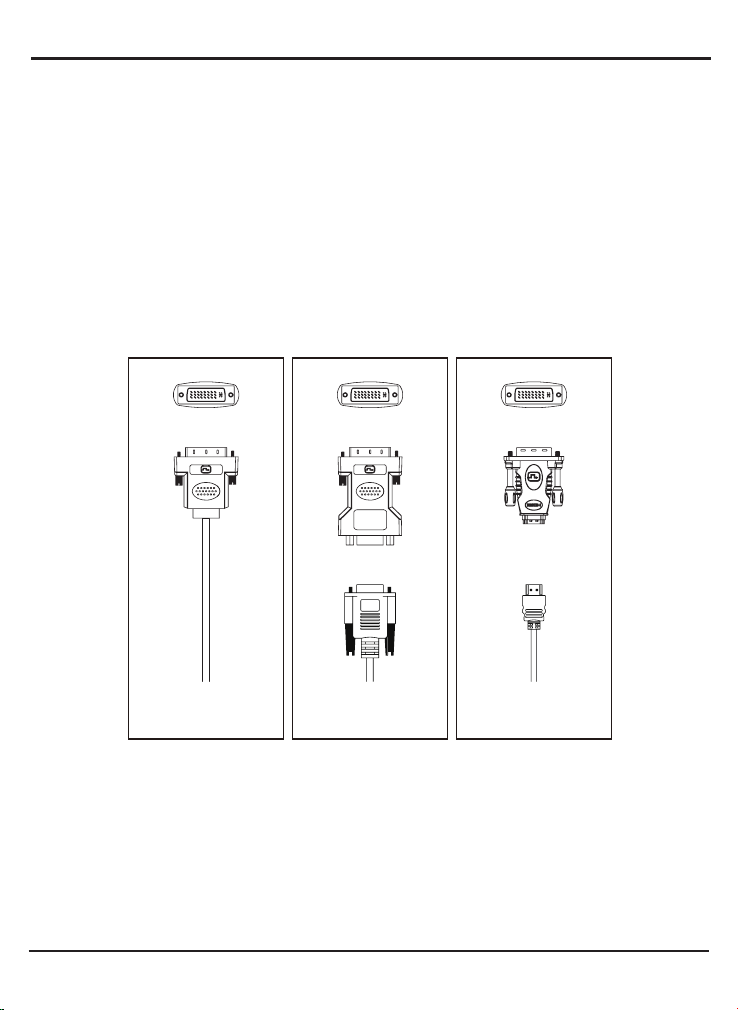
The equipped DVI-I (DVI-Integrated) connector transmits both the digital and analog
signals. This means it supports either of these three connection types:
It can be connected to a DVI-D (digital) monitor using a DVI cable (not provided). It can be
connected to an analog VGA monitor using the provided DVI-I to VGA adapter and a VGA
cable (not provided). Or, it can be connected to an HDMI monitor using the provided DVI-I
to HDMI adapter (not provided) and a HDMI cable (not provided).
5
DVI Cable
Connect to DVI monitor
DVI to VGA adapter
VGA Cable
Connect to VGA monitor
DVI to HDMI adapter
HDMI Cable
Connect to HDMI monitor
3.After you connect the adapter, Windows will automatically complete the installation.
4.Once the installation is done, an extended screen will appear on the add-on monitor.
For Windows Vista, i f the add-on monitor is blank, please reboot your system again.
If required, you can connect and disconnect the add-on monitor any time without
disconnecting the adapter from the USB port on your computer.
To change the display mode, see next chapter for instructions.
• During the installation, it’s normal that the screen icks black a couple of times.
• Sometimes it takes time for the add-on monitor to show the video.
M100
Page 6

6
THREE
Using UD160
3-1. Display Modes
There are se veral ways you can utilize th e
monitor attached on the adapter. The addon monitor can be configured to use eith er
“Mirror mode”, “Extend mode”, “Rotate mode”
or be the primary display as described in this
section. Please find DisplayLink tray icon is
loaded in the right-bottom of task bar. Right
click on it and wil l pop-up a window. It can
change settings for UD160.
3-2. Extend Mode(Default)
In “Extend mode”, your display will be spread over the add-on monitor(s). This mode
allows you to perform multiple tasks more effectively without overlapping windows.
Extend mode is the default setting. To set up the UD160 to use or restore extend mode,
follow these steps:
1.Position the mouse anywher e on yo ur com put er des ktop, rig ht-click and se lect
Personalize => Display Settings on Vista, or select Properties => Settings on XP.
2.In the Display drop-down menu, select the option with the string “DisplayLink Graphics ”.
3.Check the Extend the desktop onto this monitor box on Vista or Extend my Windows
Desktop onto this monitor box on XP.
4.Drag the icons in the window at the top of the screen to match the physical arrangement
of your primary monitor and add-on monitor.
© 2009 KWorld
Page 7

The add-on monitor connected to the adapter may be identified as either “2” or “3”,
depending on your computer, although there may not be a total of 3 screens connected.
5.Click “OK” to close the settings screen.
Once the setting is done, to use your extended desktop, simply drag and drop your
open windows over to your second monitor. However, note that some applications may
not support display on the extended desktop.
Cursor disappeared?
If you’re in extended mode but the add-on monitor is not connected, the desktop still
pans to the add-on monitor and it’s possible that your cursor has moved to the extended
desktop so that you cannot nd it on the primary display. To solve the problem in such
a case, connect the add-on monitor to the adapter or keep moving your mouse to try or
unplug the adapter rst to restore the cursor.
Video and DVD Playback in Extended Mode
On Windows Vista with extended mode, it’s suggested that you run video or DVD
playback programs on your primary monitor instead of the add-on monitor to ensure the
playback performance.
3-3. Mirror Mode
This mode is referred to as “Mirror mode” . In this mode, your original screen (the primary
display) will be mirrored to the add-on monitor.
7
In mirror mode, the UD160 will automatically select the settings (screen resolution, color
quality and refresh rate) for the add-on monitor. But you can manually adjust the settings
as required. However, the settings of the add-on monitor are limited by that of the primary
monitor. For example, even though your add-on monitor supports a resolution of up to
1920x1080.
M100
Page 8

8
3-4. Rotate Mode
In this so-called “Rotate mode”, your display
will be spread over the add-on monitor(s ).
This mode allow s you to ro tate Wind ows
Desktop.
3-5. Adjusting Resolution, Color Depth
There are three components that make up the screen mode:
Resolution: In common usage, this refers to the number of pixels displayed on screen
horizontally and vertically.
Color Depth: This denes the number of different colors that can be shown on the screen
at the same time.
About the resolutions and refresh rates available to users
The resolutions and refresh rates available to the user through Windows are a comprise
of the support from the following elements:
• The USB display adapter
• The primary monitor and the add-on monitor
• The primary video card on your computer and installed driver
© 2009 KWorld
Page 9

3-6. Effects on Vista Aero Interface
On Windows Vista, after you install the UD160, the original Vista Aero Interface (if
enabled) will be disabled. You will be warned that the color scheme has been changed
when finishing the adapter installation. But if you unplug or uninstall the adapter, the
system will automatically resume the Aero Glass look.
3-7. Standby and Hibernate, Shut Down and Restart
When the UD160 is connected to a computer and an external monitor, if the computer
goes into standby or hibernate mode, the external monitor display goes blank.
When the computer returns to an active state, the external monitor display keeps the
same settings it had before the computer went into standby or hibernate mode. However,
if the add-on monitor was set for extended mode, windows that were previously on the
external monitor will not move back to that secondary monitor. Also, if the add-on monitor
is in extended mode and the computer requires a log-in after standby or hibernate mode,
the log-in screen appears on the primary computer monitor, not the external monitor.
If the computer is shut down, restarted and logged in, again the add-on monitor returns to
the same mode as it was before shutdown.
3-8. Using Multi Adapters
Up to 6 adapters can be simultaneously attached to one computer.
To use two adapters:
1. Connect the rst adapter to your computer and install the driver.
2. Then connect the second adapte r to your comp uter. T he system wil l automatically
complete the installation. While two adapters are connected to a computer, in most cases
both adapters support extended and mirror modes. The only exception is on Windows
Vista XDDM mode as described below.
Note: Connect more adapters to computer, you need more computer performance.
Limitation for dual adapters on
Windows Vista in XDDM mode:
In t h i s mo d e on e ex te n d ed
s c re e n a n d on e m i rr o re d
screen is supp or ted. Only the
first connected adapter can be
congured to use extended mode;
the second adapter is forced to
use mirror mode. When you bring
out the Windows display settings
di alo g bo x, you wil l fin d th at
only one ...DisplayLink Graphics
Adapter (representing your first
attached Adapter) is congurable.
9
M100
Page 10

10
What is Vista XDDM mode?
XDDM refers to Windows XP Driver Mode. It is a video card driver mode used in some
legacy computers that running the new generation Vista OS. It provides an interface
similar to Windows XP user interface on Vista and one of its characteristics is that it
doesn't support Windows Aero Interface.
3-9. Disconnecting the Adapter
If the adapter is unplugged from the comput er, the add-on monitor goes blank. All
windows and icons move to the primary screen.
On reconnection of the adapter, the adapter returns to the same mode as it was before
disconnection. However, windows and icons that were previously on screen will not be
moved back.
3-10. Uninstall the Adapter and Driver
If for any reason you want to uninstall the video adapter and its driver, please take these
steps:
1. Open the Control Panel and double-click Programs and Features on Vista or Add or
Remove Programs on XP/2000.
2. Select DisplayLink Core Software / DisplayLink Graphics and click Uninstall or
Remove.
3. Click Yes to conrm the removal.
4. Click Yes to restart your computer and then unplug the adapter now.
© 2009 KWorld
Page 11

FOUR
Troubleshooting
Q1: The display on the add-on monitor is blank?
A1: If the monitor power LED is green (in most cases), wait a moment for the
monitor to show the video as sometimes it takes time for the add-on monitor to
show the video. You can also reboot your system to try again. Also make sure
the computer is not in standby or hibernation mode, which will lead the add-on
monitor to be blank.
If the monitor power LED is red (in most cases), check if the connection is
properly made. If problem still exists, uninstall the driver, unplug the adapter and
reinstall the driver to try again.
Q2: The add-on monitor is ickering?
A2: This is usually caused by a low refresh rate. To solve this problem:
• In mirror mode, increase the refresh rate of the main monitor. This will in turn
increase the refresh rate of the add-on monitor.
• In extended mode, increase the refresh rate of the add-on monitor.
Q3: When I play MPEG fil e by Windows Media Player on the extende d
monitor, how come the display becomes abnormal when I switch to full
screen mode?
A3:If your system is Windows XP SP1, we suggest you upgrade it to SP2 to solve
this problem.
Q4: When playing the video in full screen mode, the motion is not smooth?
A4:Try the following tips to improve the smoothness of the movie playback:
Reduce the resolution of the display to 800x600.Use the adapter in extend
mode.Terminate any other CPU intensive applications running on the computer.
If you still have issues playing media content on the adapter, try the following steps:
• As some media players require DirectX hardware support to correctly operate, try a
different media player which requires less DirectX support.
• Drag the media player to the add-on screen and close the player. Restart the player
and it should open on the add-on monitor. Now try playing the media le again.
• The video playback may be unusual when the add-on monitor is mirroring the
primary display and there is another extended screen connected to the computer.
The extended screen must be disabled before the content will be correctly cloned to
the add-on monitor.
Q5: In extend mode, the add-on monitor appears to have a black border
around the desktop?
A5:This happens when the resolution used by the add-on monitor is larger than the
resolution used by the primary monitor. To solve this problem, congure the add-
on monitor to use the same resolution as the primary monitor.
11
M100
Page 12

12
FIVE
User Guide for MAC
Introduction
This guide applies to software version 1.0 and above of the MAC software.
What is the Mac Driver?
The Mac Driver is designed for Mac OS X 10.4 (Tiger) and 10.5 (Leopard) to enable
you to add an additional monitor to your Mac using DisplayLink technology. This
software allows you to run your UGA devices on any Intel based desktop or laptop
Mac, allowing you to connect up to 4 additional monitors via USB.
Please note: Power PC-based Macintosh computers, such as late-model iMacs,
PowerBooks and PowerMacs, are not currently supported.
What else do I need to use this driver?
As well as an Intel based Mac running the latest versions of Mac OS X 10.4 or 10.5,
you will need a UGA device. One UGA device is required for each of the additional
displays you wish to connect to your Mac.
Setup Guide Installing/Uninstalling the MAC Driver
To run the MAC installer, double-click the MAC DriverInstaller image: this will mount
the MAC DriverInstaller.
Select “Software Installer” to begin installing
the MAC Driver on your Mac. This will run a
standard Mac installer and will require a restart
once completed.
Select “User Guide” to view the User Guide.
Select “Software Uninstaller” to uninstall the
MAC Driver from your Mac. This will require a
restart once complete.
Connecting displays to your Mac
Once you have installed the MAC Driver, simply plug in your UD160 via USB and connect
each display to a device. You can now connect up to 4 additional displays. Example
setups include:
Example 1
Adding two displays to a MacBook Pro. MacBook Pro connects to two monitors via
USB cables using UD160. Monitors connect to graphics adapters via standard VGA/
DVI cables.
© 2009 KWorld
Page 13

Example 2
Adding three displays to a MacBook Air. MacBook Air connects to a standard powered
USB hub. Three monitors are connected to the USB hub via UD160. Monitors connect
to graphics adapters via standard VGA/DVI cables.
Managing Multiple Displays
When attaching a display that the software
has not seen before, the display will default to
being extended to the right of the main display.
To congure the settings for each of your USB
attached displays, select “Displays” from the
“System Preference” menu. This will open a
“Display Preference” window on each of your
attached displays allowing you to configure
each display as required.
Managing Multiple Displays
Display Preference:
Display Resolutions
Rotating a Display
Position of Displays
Display Positions
Display to Mirror mode
Display to Extend
Using both extended and mirrored displays
Changing the main display
13
Conguring Displays from the Menu Bar
If you have checked the “Show displays in the menu bar” in Display Preferences then you
can congure displays by clicking the display icon in the menu bar. This will show a menu
similar to the following:
This menu allows you to perform the following actions:
Detect all displays connected to the Mac. Turn on/off. Mirroring.
Set the resolution of both the primary display and the additional
display(s), by selecting one of the recently used resolutions.
Configure how many ‘recent resolutions’ should be shown in
this menu.
Open “Display Preferences”
M100
Page 14

14
WARNING
This User’s Manual is for specic product, and all its contents are processed with due care but
are not ensured fully correct. We assume no responsibility for any loss arising from use of this
manual. The right to interpret all contents of this User’s Guide belongs to the company. The
manual is subject to change without notice. This User’s Manual is not authorized to any party
and no reproduction or copy, in part or whole, of the manual in any way is permitted.
KWorld Website: www.kworld-global.com
© 2009 KWorld
 Loading...