

Page 1
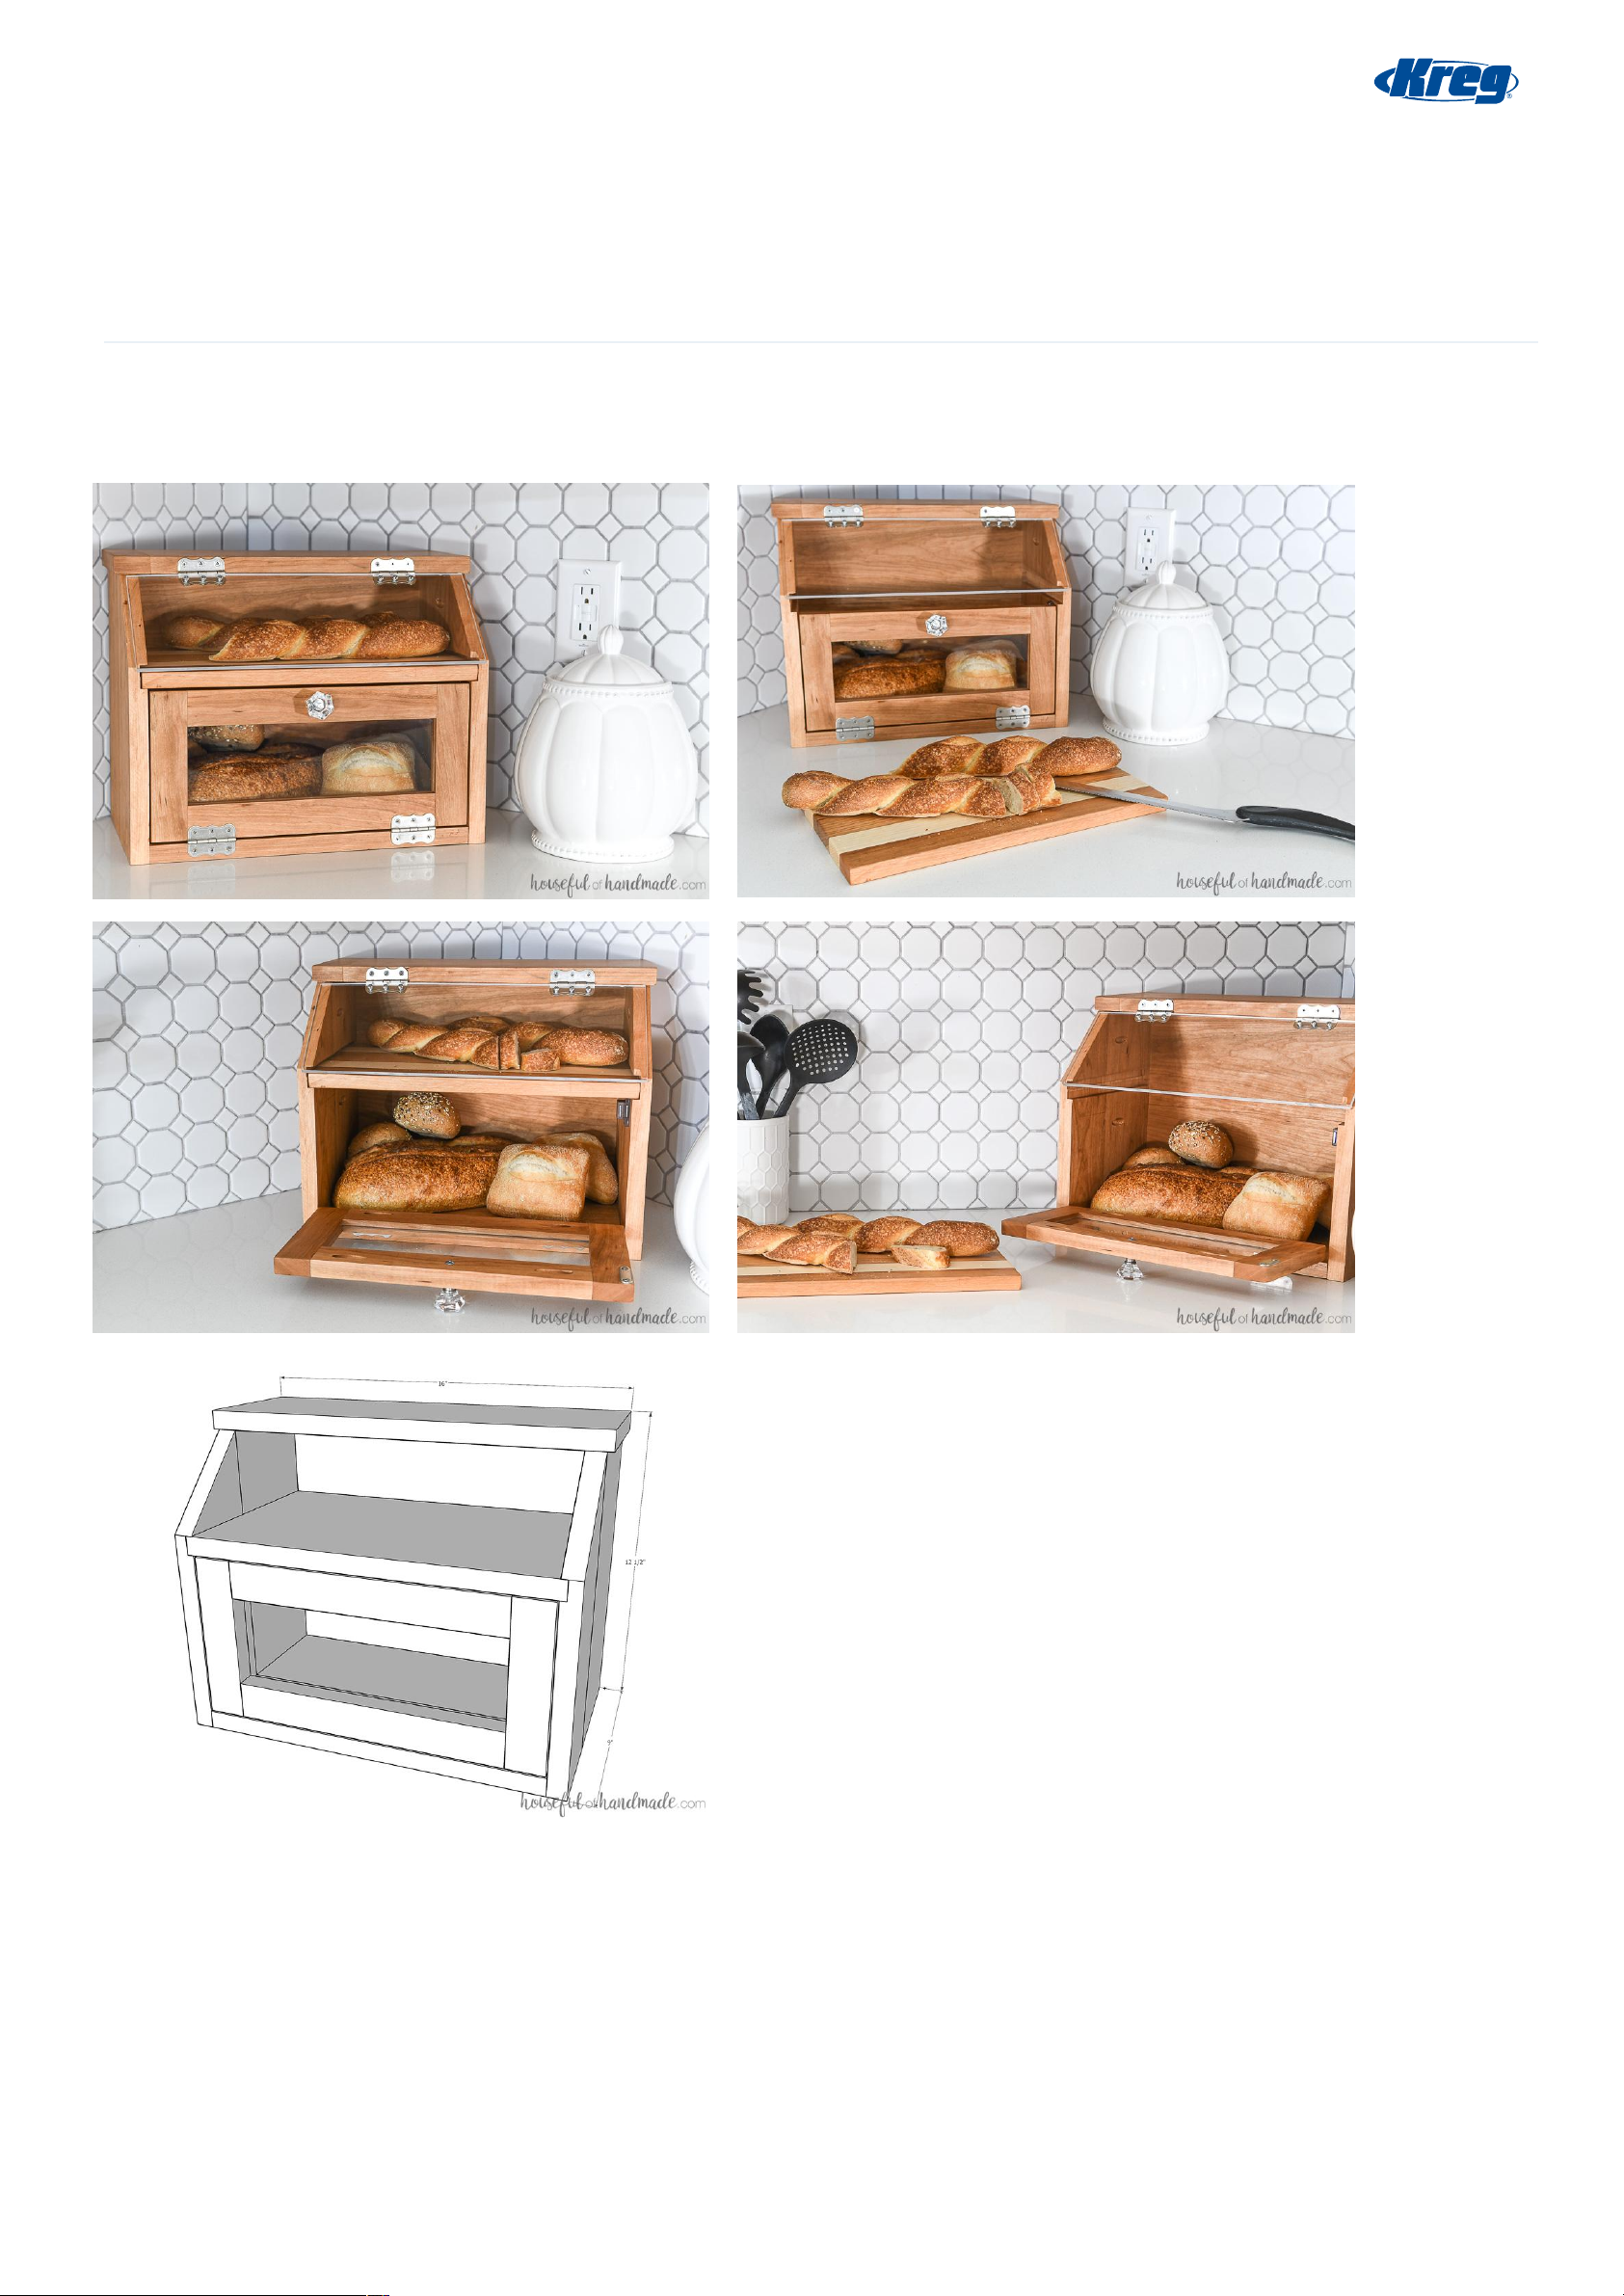
Two Story Bread Box
Difficulty
Easy
This beautiful bread box is the perfect place to store your favorite loaves. The shelf is a built-in cutting board. And the
plexiglass doors mean you can instantly see what you have in stock.
Page 1 of 15
Page 2

Tools
Kreg Tools
Rip-Cut™
Wood Project Clamp - 6"
Kreg® Pocket-Hole Jig 720
Cabinet Hardware Jig
Other Tools
Circular Saw (corded)
Miter Saw
Square
Tape Measure
Thickness Planer
Drill (corded)
Impact Driver
Nail Gun
Router
Sander
Shop Vacuum
Materials
Wood Products
Board , 1x4 , 48"1
Board , 1x6 , 96"1
Board , 1x2 , 96"1
Board , 1x3 , 24"1
Hardware & Supplies
1 1/4" Pocket Hole Screws25
Wood Glue1
15" X 10" 0.22 Thick Plexiglass1
Decorative Hinges4
1/2" Screws With Bolts6
Knob1
Magnetic Latch1
Cutting Board Oil1
Page 2 of 15
Page 3

Cut List & Parts
Side Back , 3/4" X 5 1/2" X 11 3/4"2
Side Front , 3/4" X 3 1/2" X 11 3/4"2
Back , 3/4" X 5 1/2" X 14"2
Bottom Back , 3/4" X 5 1/2" X 14"1
Bottom Front , 3/4" X 3 1/2" X 14"1
Top , 3/4" X 5 1/2" X 16"1
Door Stiles , 3/4" X 1 1/2" X 6 5/8"2
Door Rails , 3/4" X 1 1/2" X 10 7/8"2
Cutting Board Center , 3/4" X 2 1/2" X 14 1/2"1
Cutting Board Sides , 3/4" X 1 1/2" X 14 1/2"4
Page 3 of 15
Page 4
Directions
Build sides
1
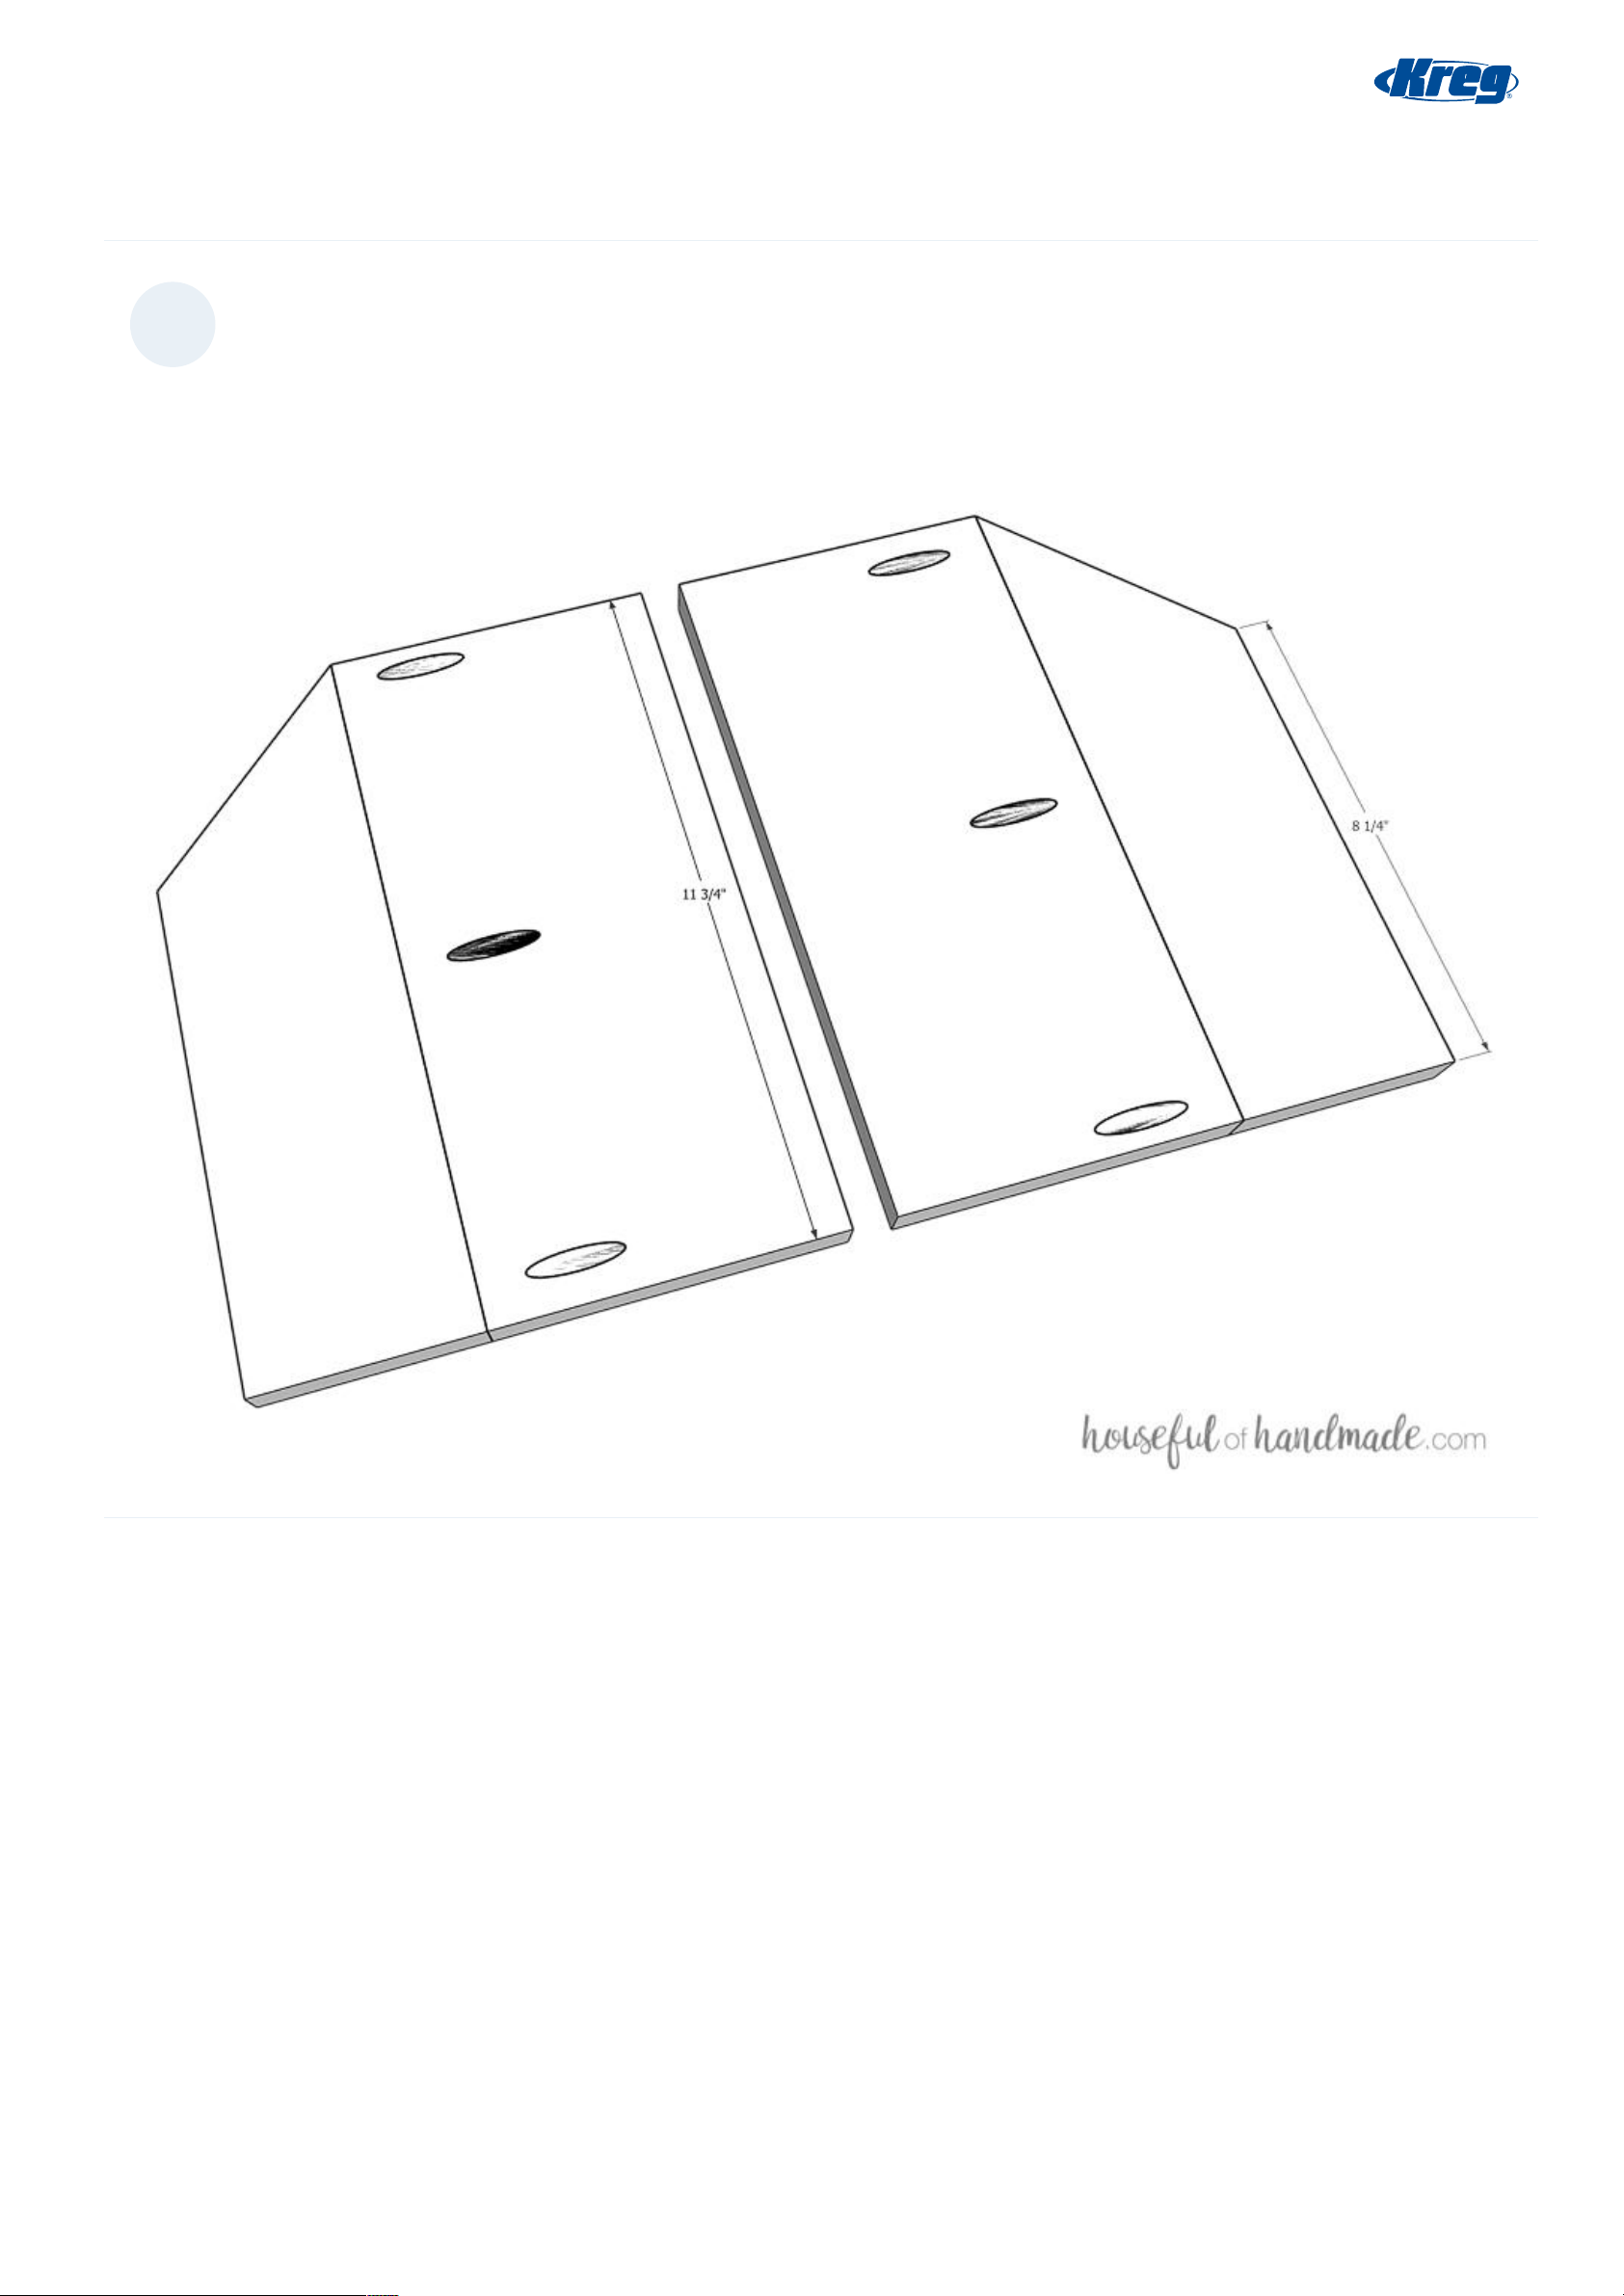
Cut the front and back side boards. Drill pocket holes along the edge of the back side board. Cut the top of the front side
board so it is a 45 degree angle. Using wood glue and pocket hole screws, attach the two boards together to create the
sides. Make sure the pocket holes are on the inside and mirrored on the two sides.
Page 4 of 15
Page 5
2
Router sides
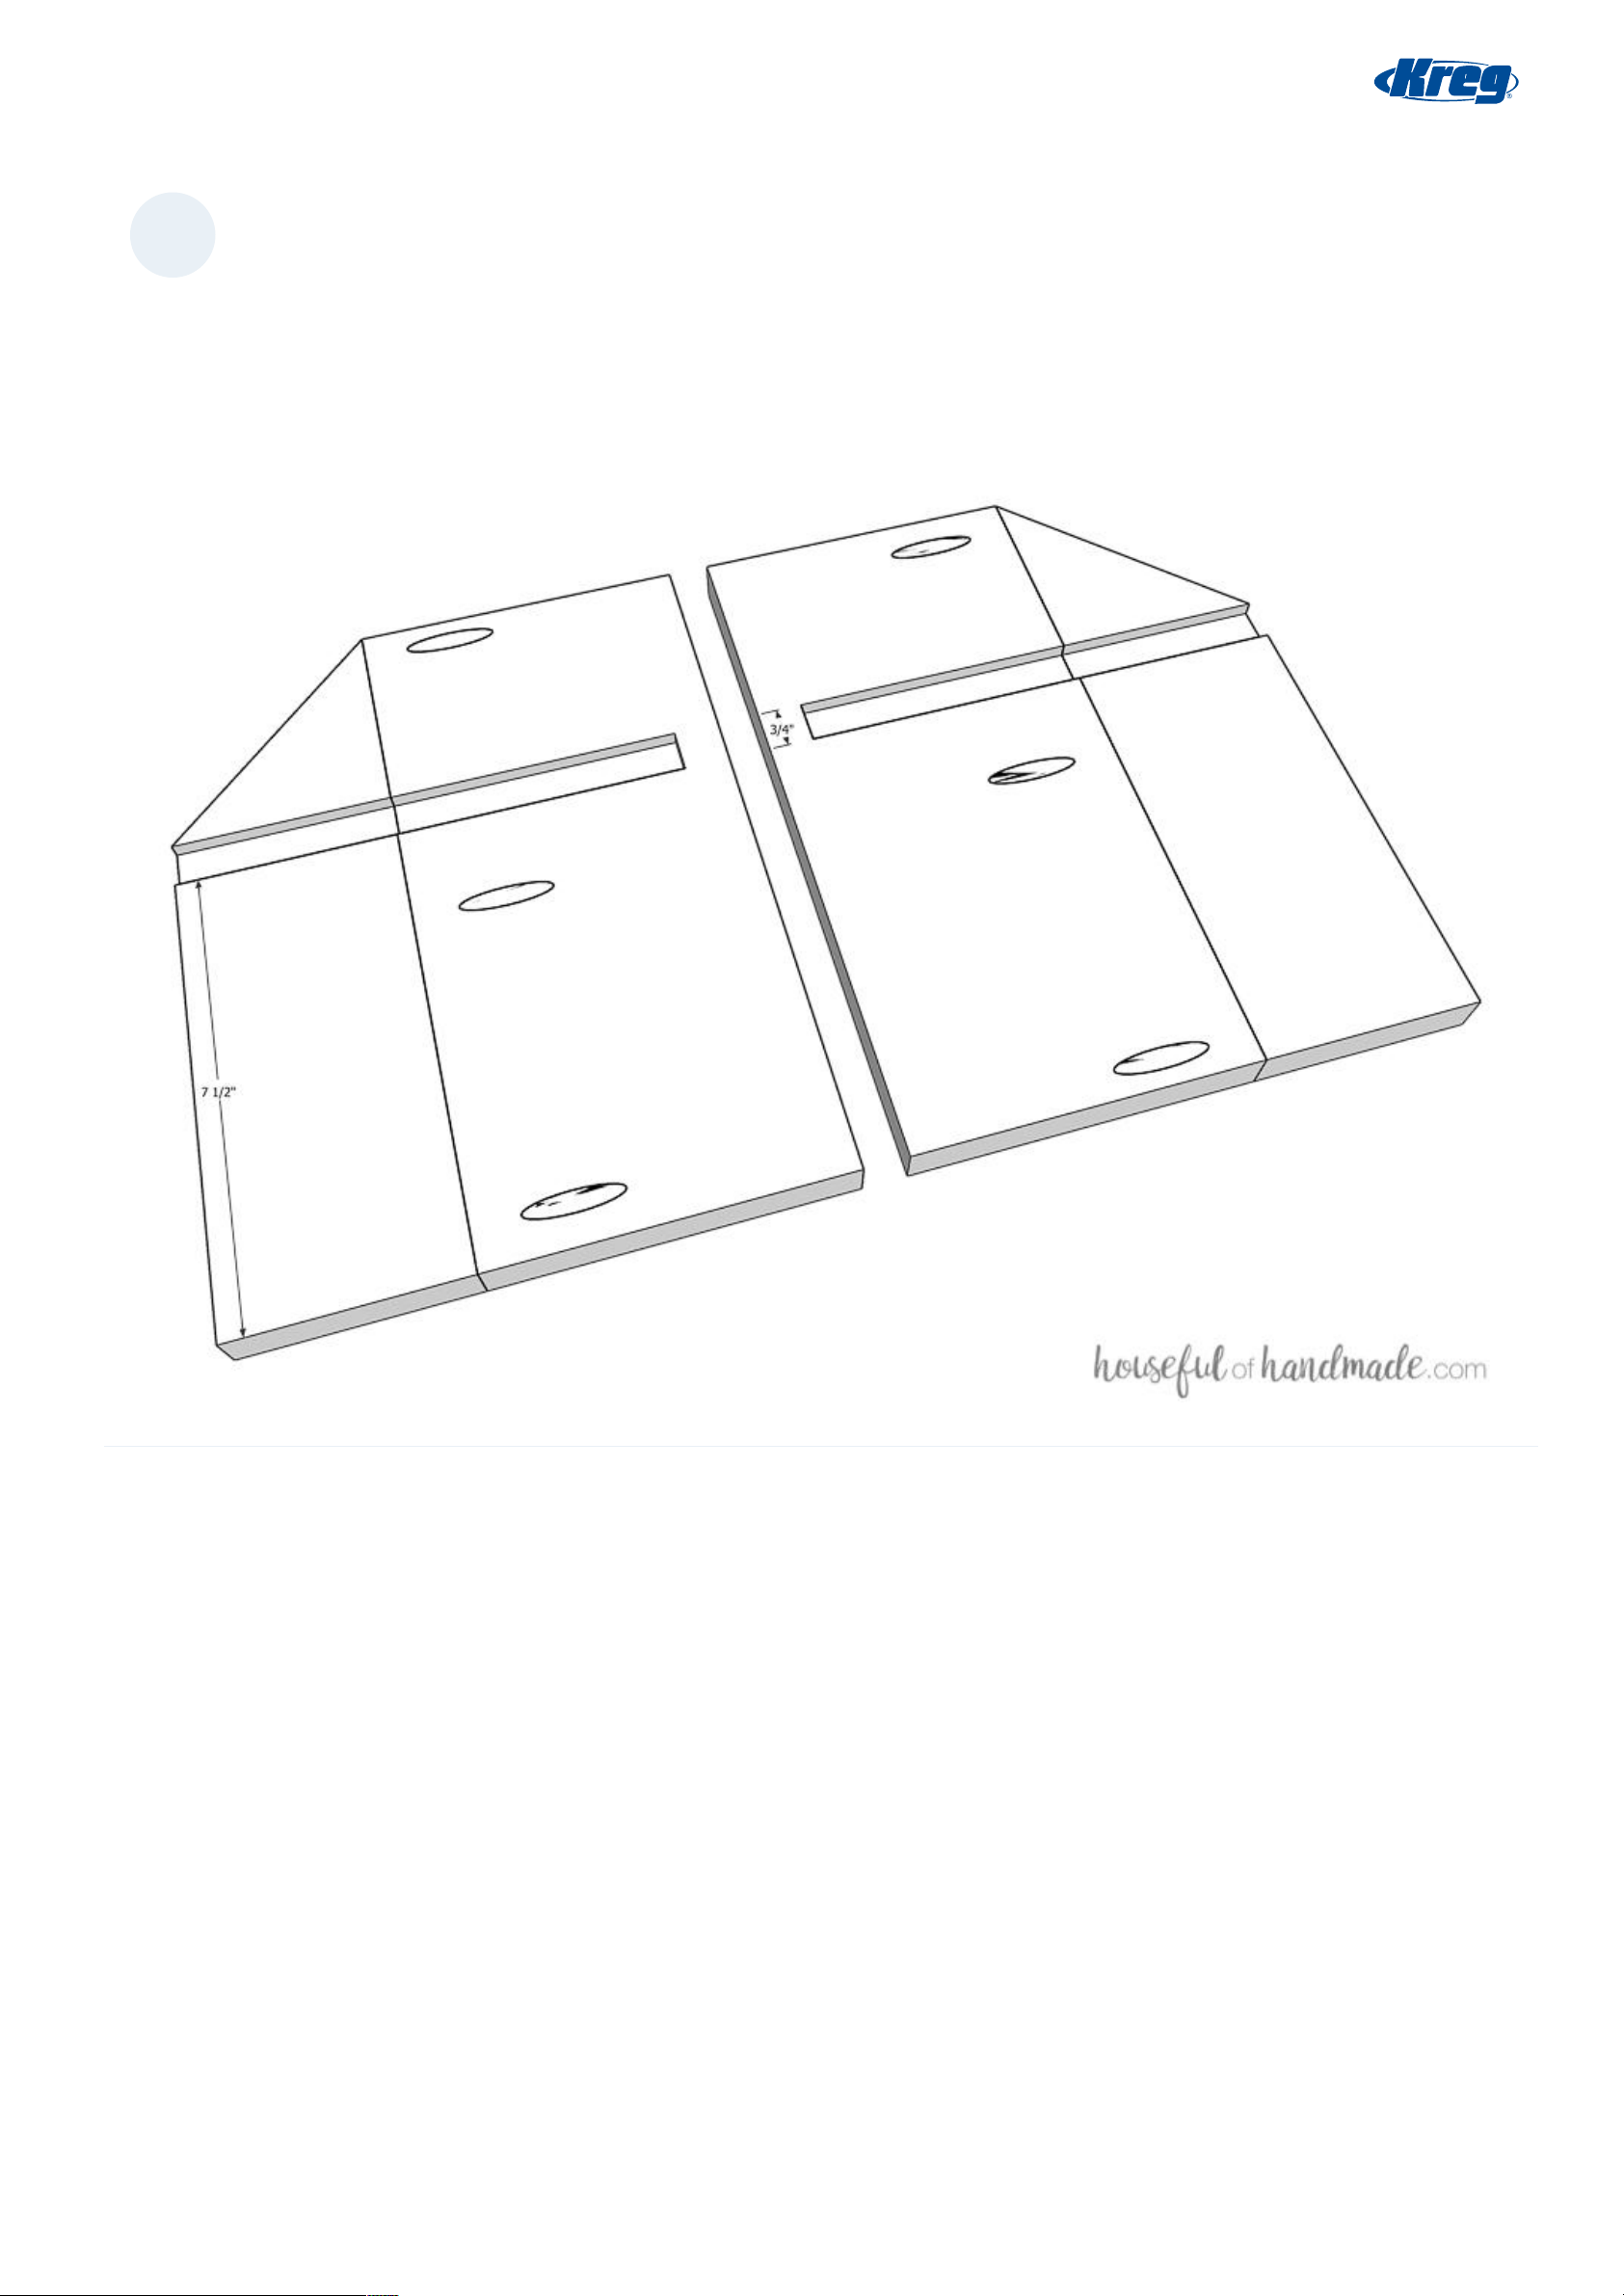
Router a groove on the inside of the assembled side pieces. Make the groove 1/4" deep and 3/4" thick. The top of the groove
should start at the end of the angle on the front board. Stop the groove 3/4" away from the back. I forgot this until I
assembled the box, but was able to fix it by cutting a scrap 3/4" x 3/4" x 1/4" and glowing it into the groove to fill it. Also, be
careful of tear-out on the edge of the sides when you router. The angled edge is fragile if you router towards it, so I
recommend starting on the front side and routing towards the back.
Page 5 of 15
Page 6
3
Assemble bottom and back
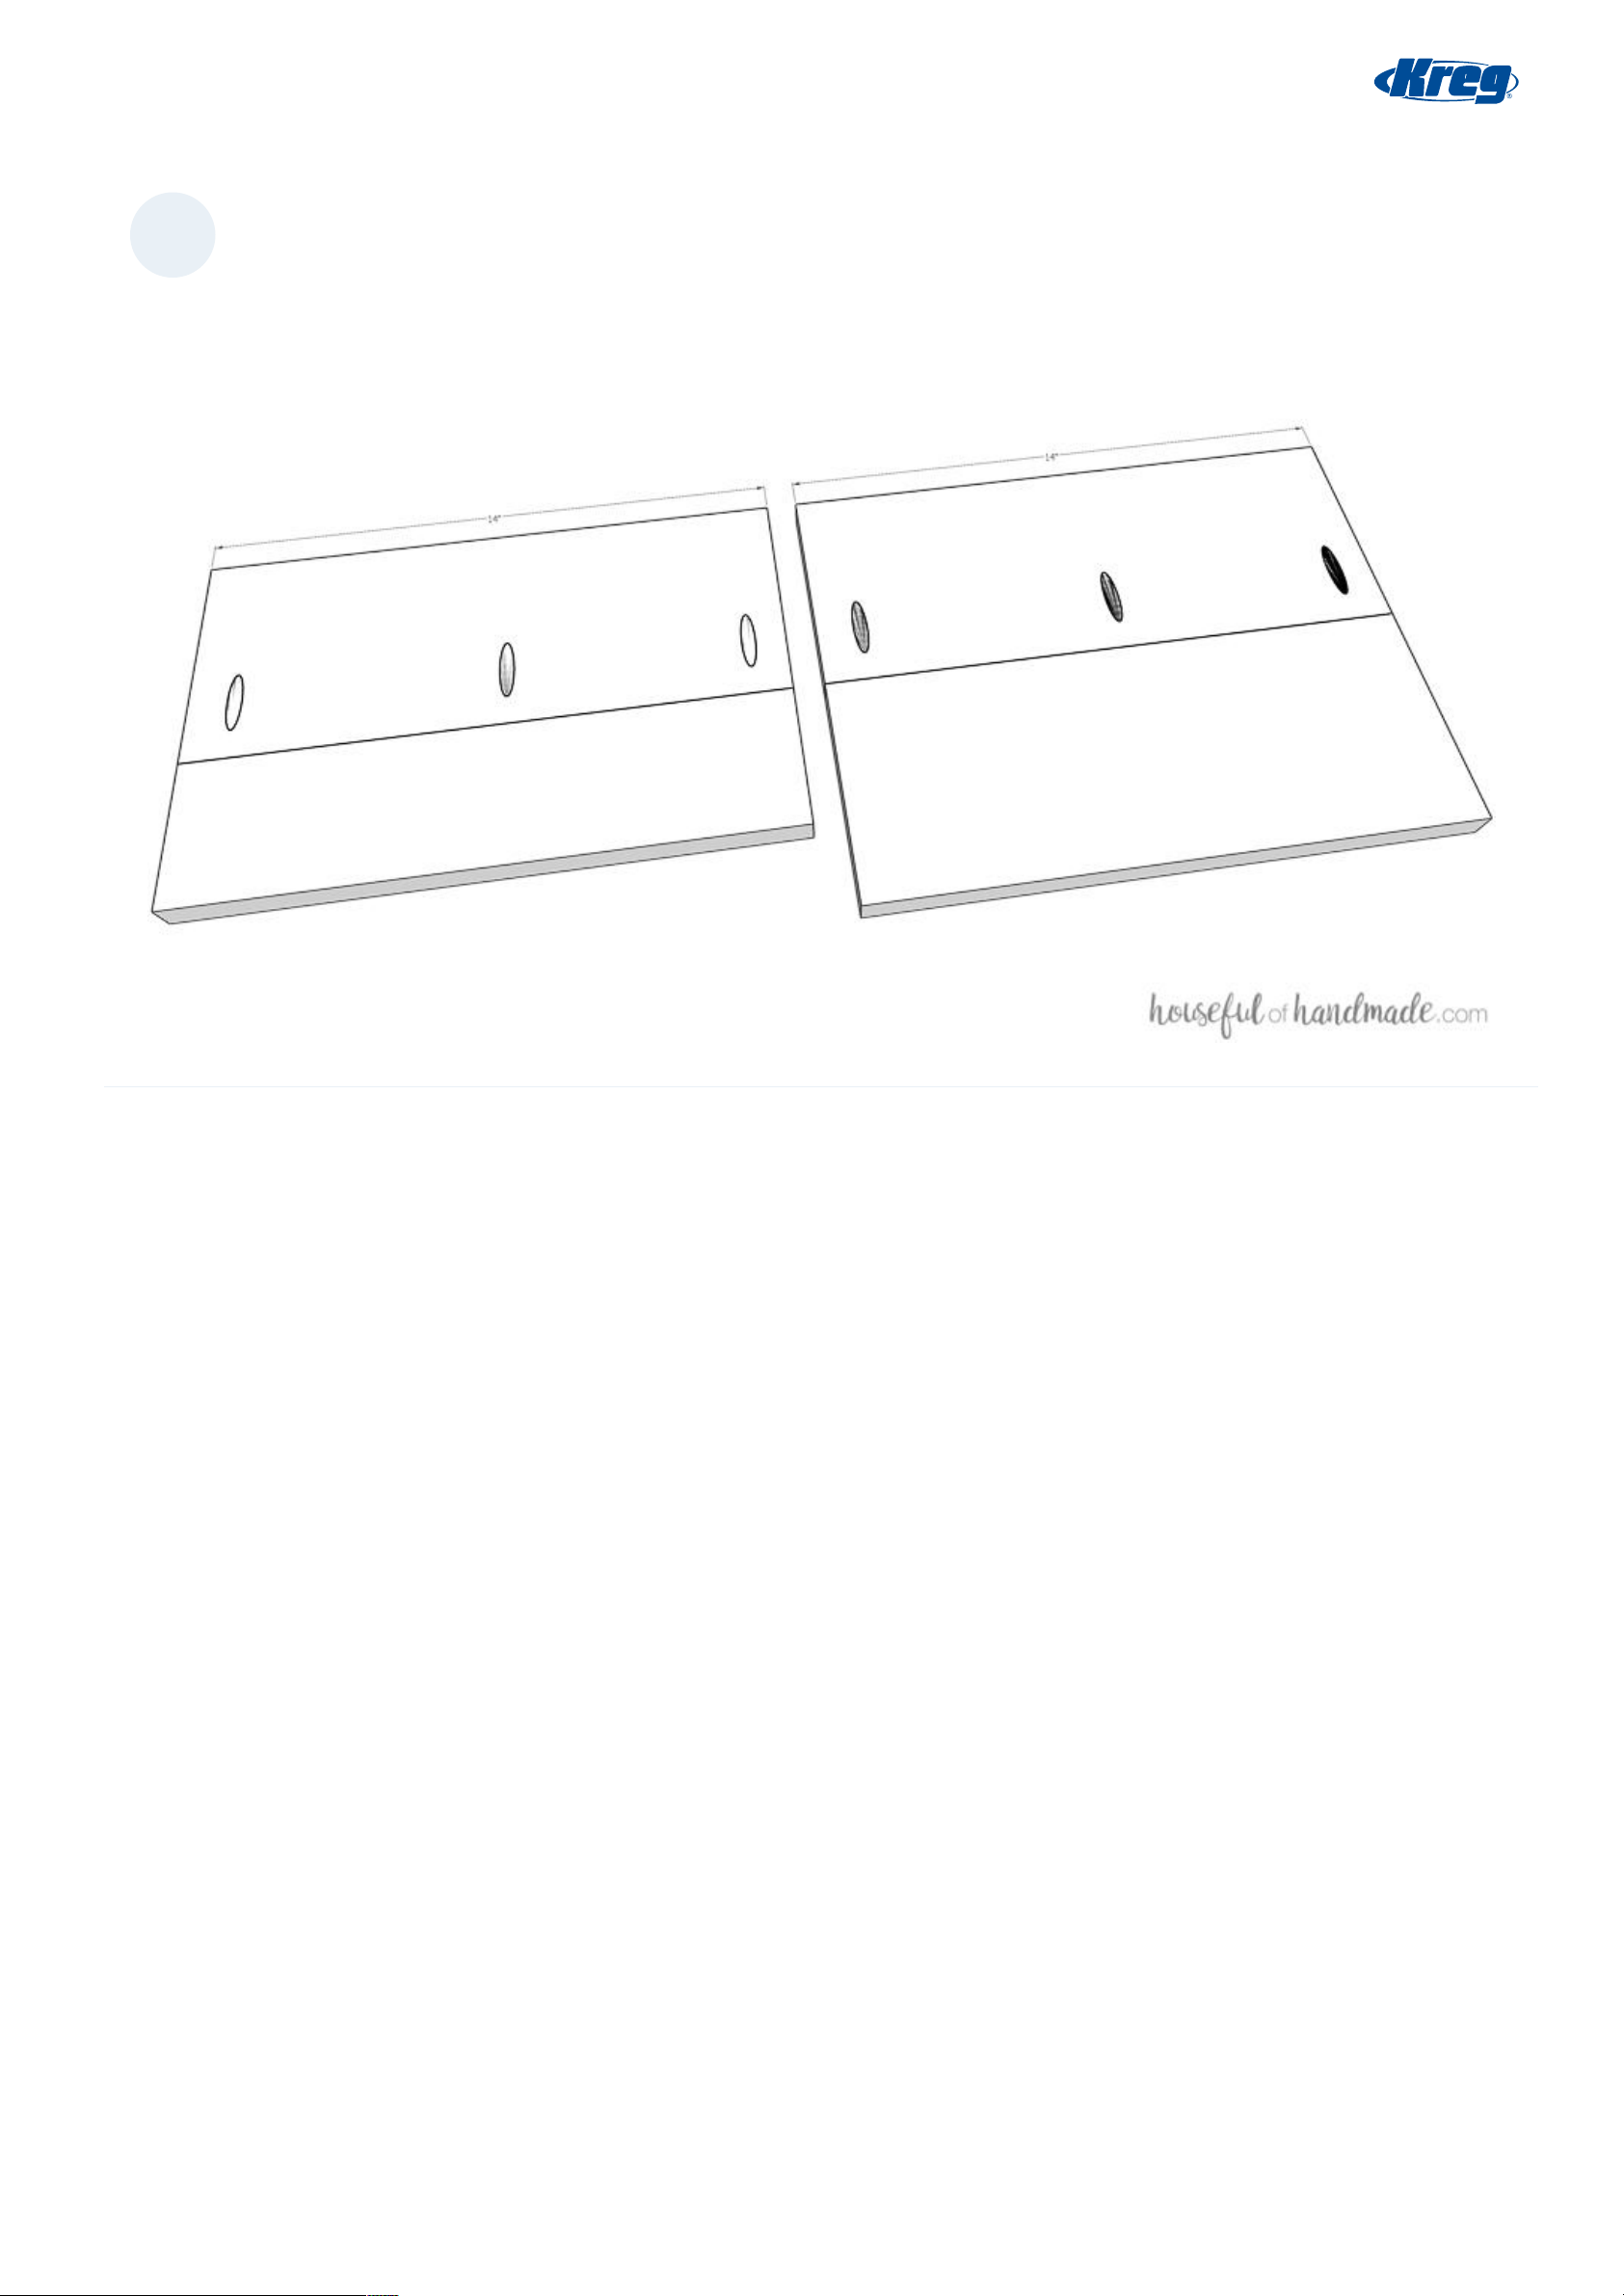
Cut the bottom and back boards. Drill pocket holes set for 3/4" material to the edge of the bottom back board and one back
board. Using wood glue and 1 1/4" pocket hole screws, attach the boards together.
Page 6 of 15
Page 7
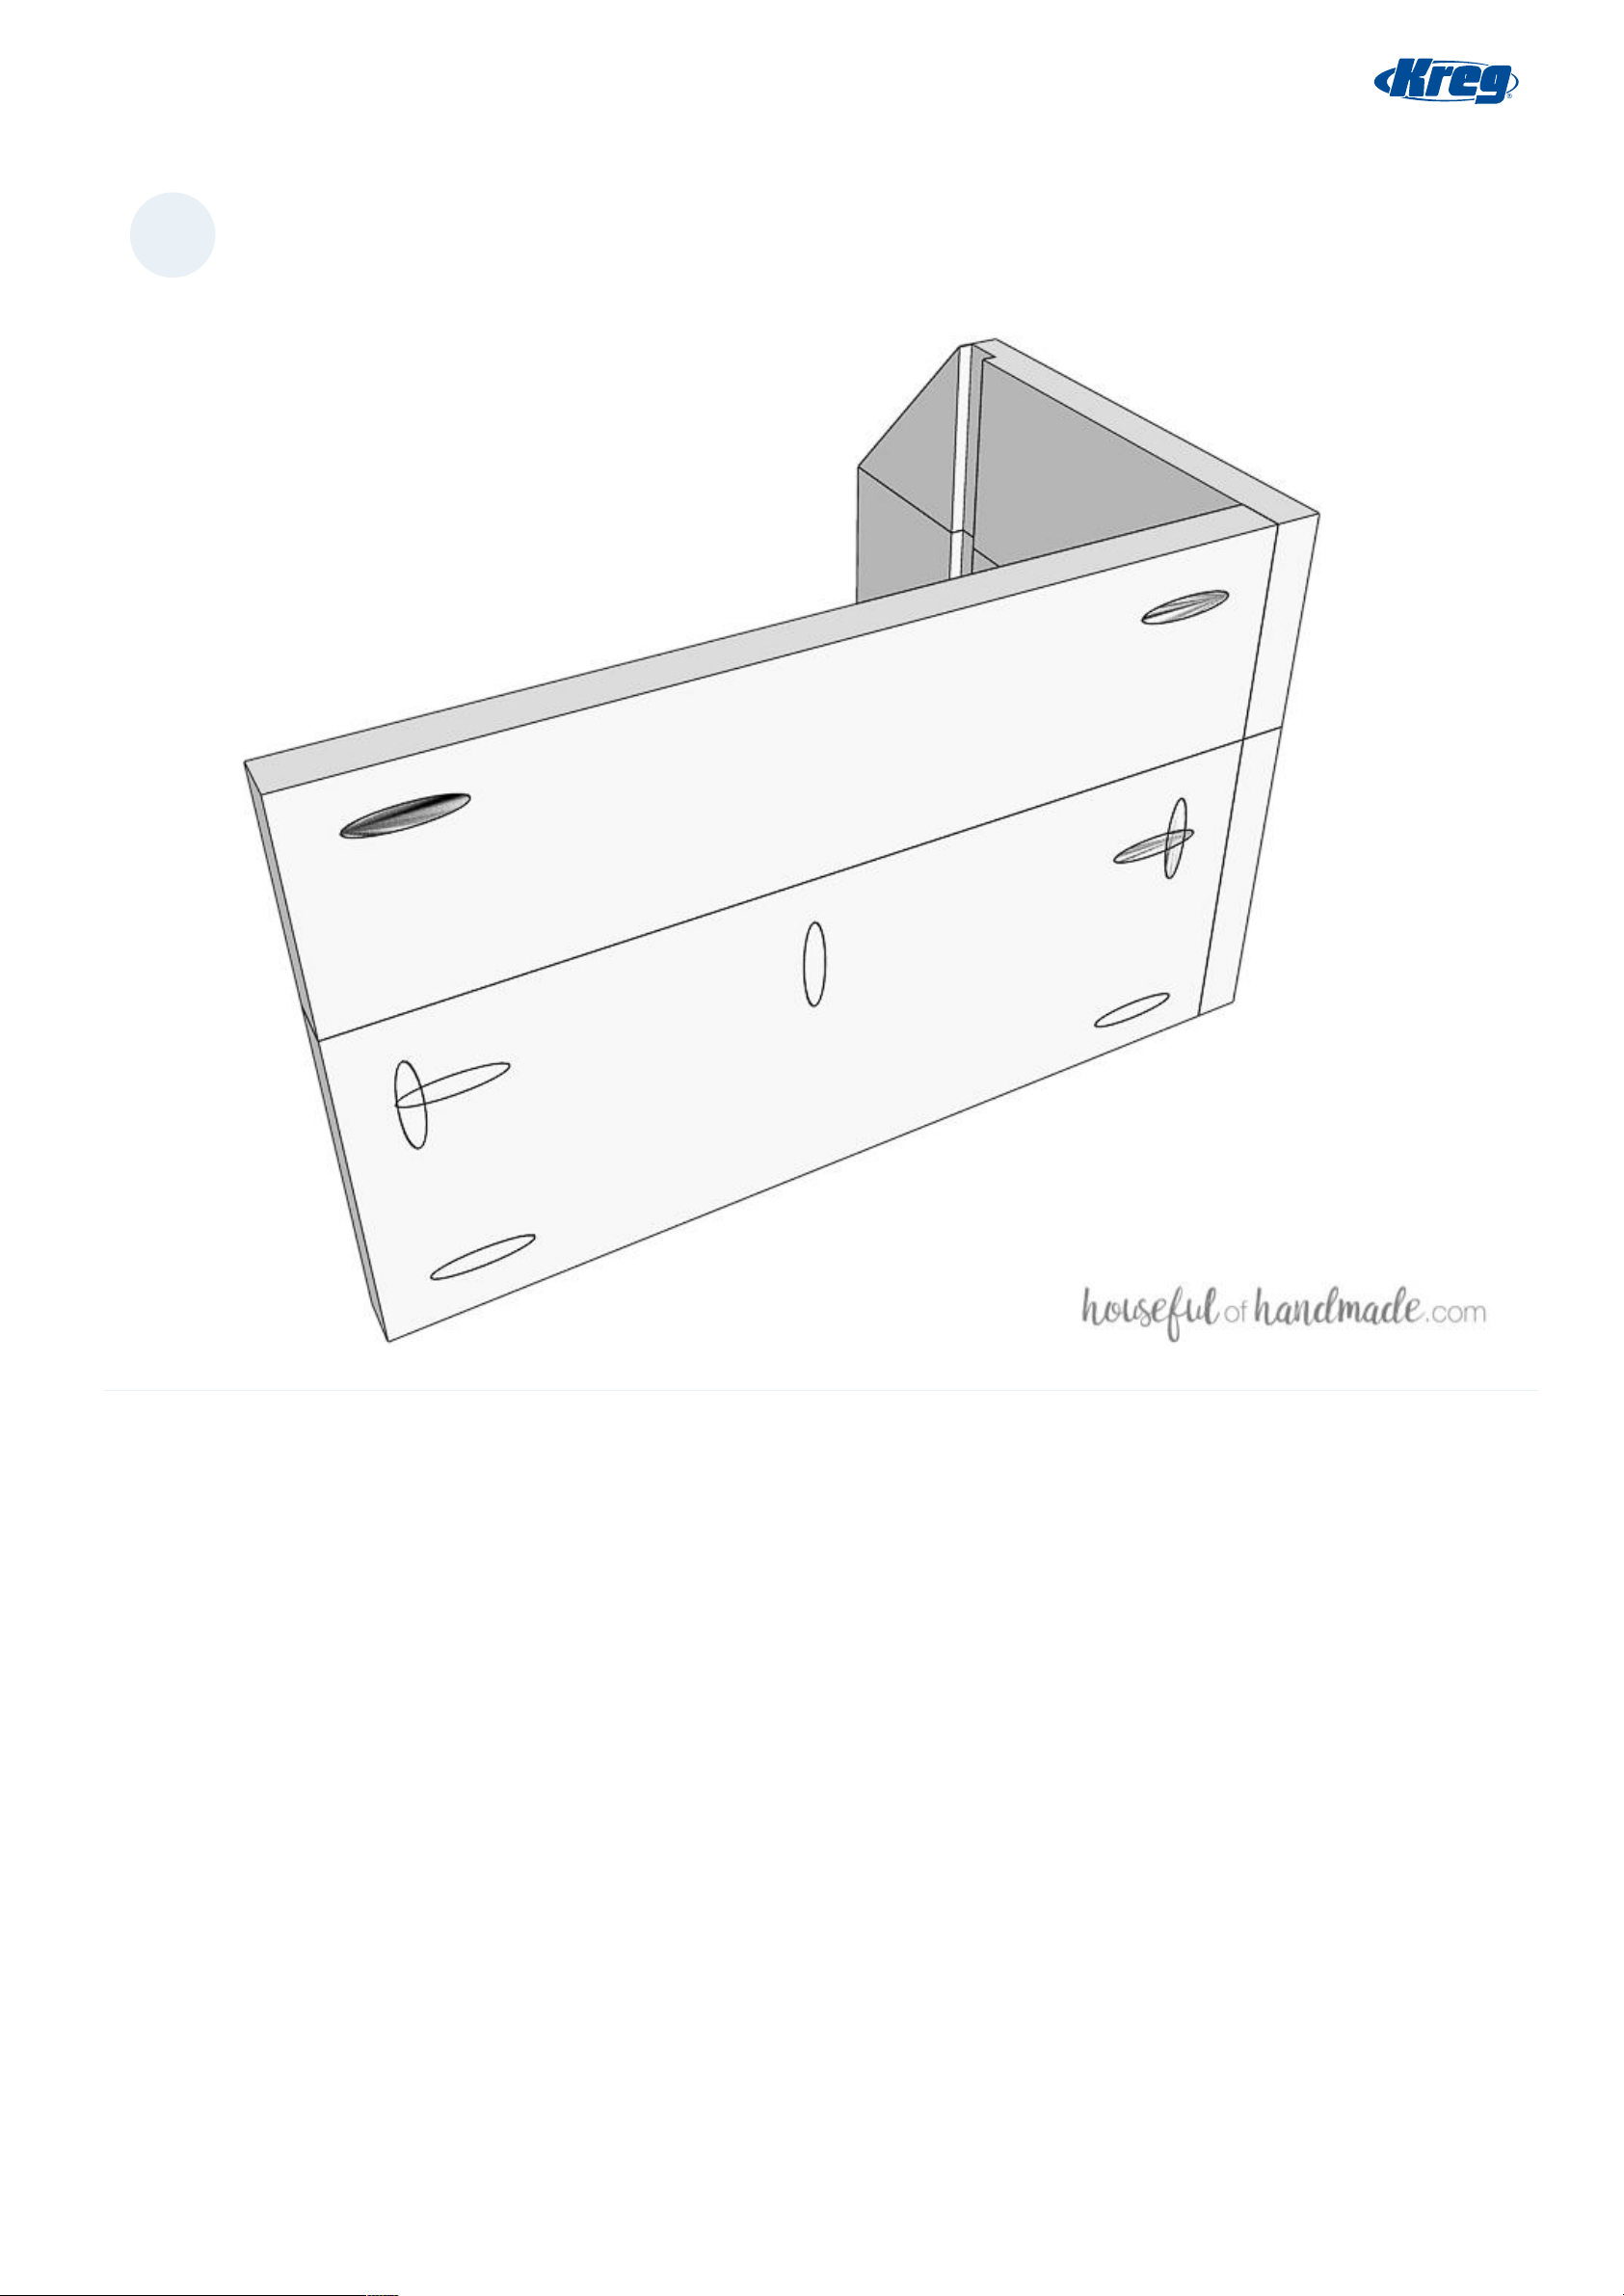
4
Attach the bottom to side
Drill pocket holes in either side of the assembled bottom piece. Attach one of the sides pieces to the bottom with wood glue
and pocket hole screws.
Page 7 of 15
Page 8
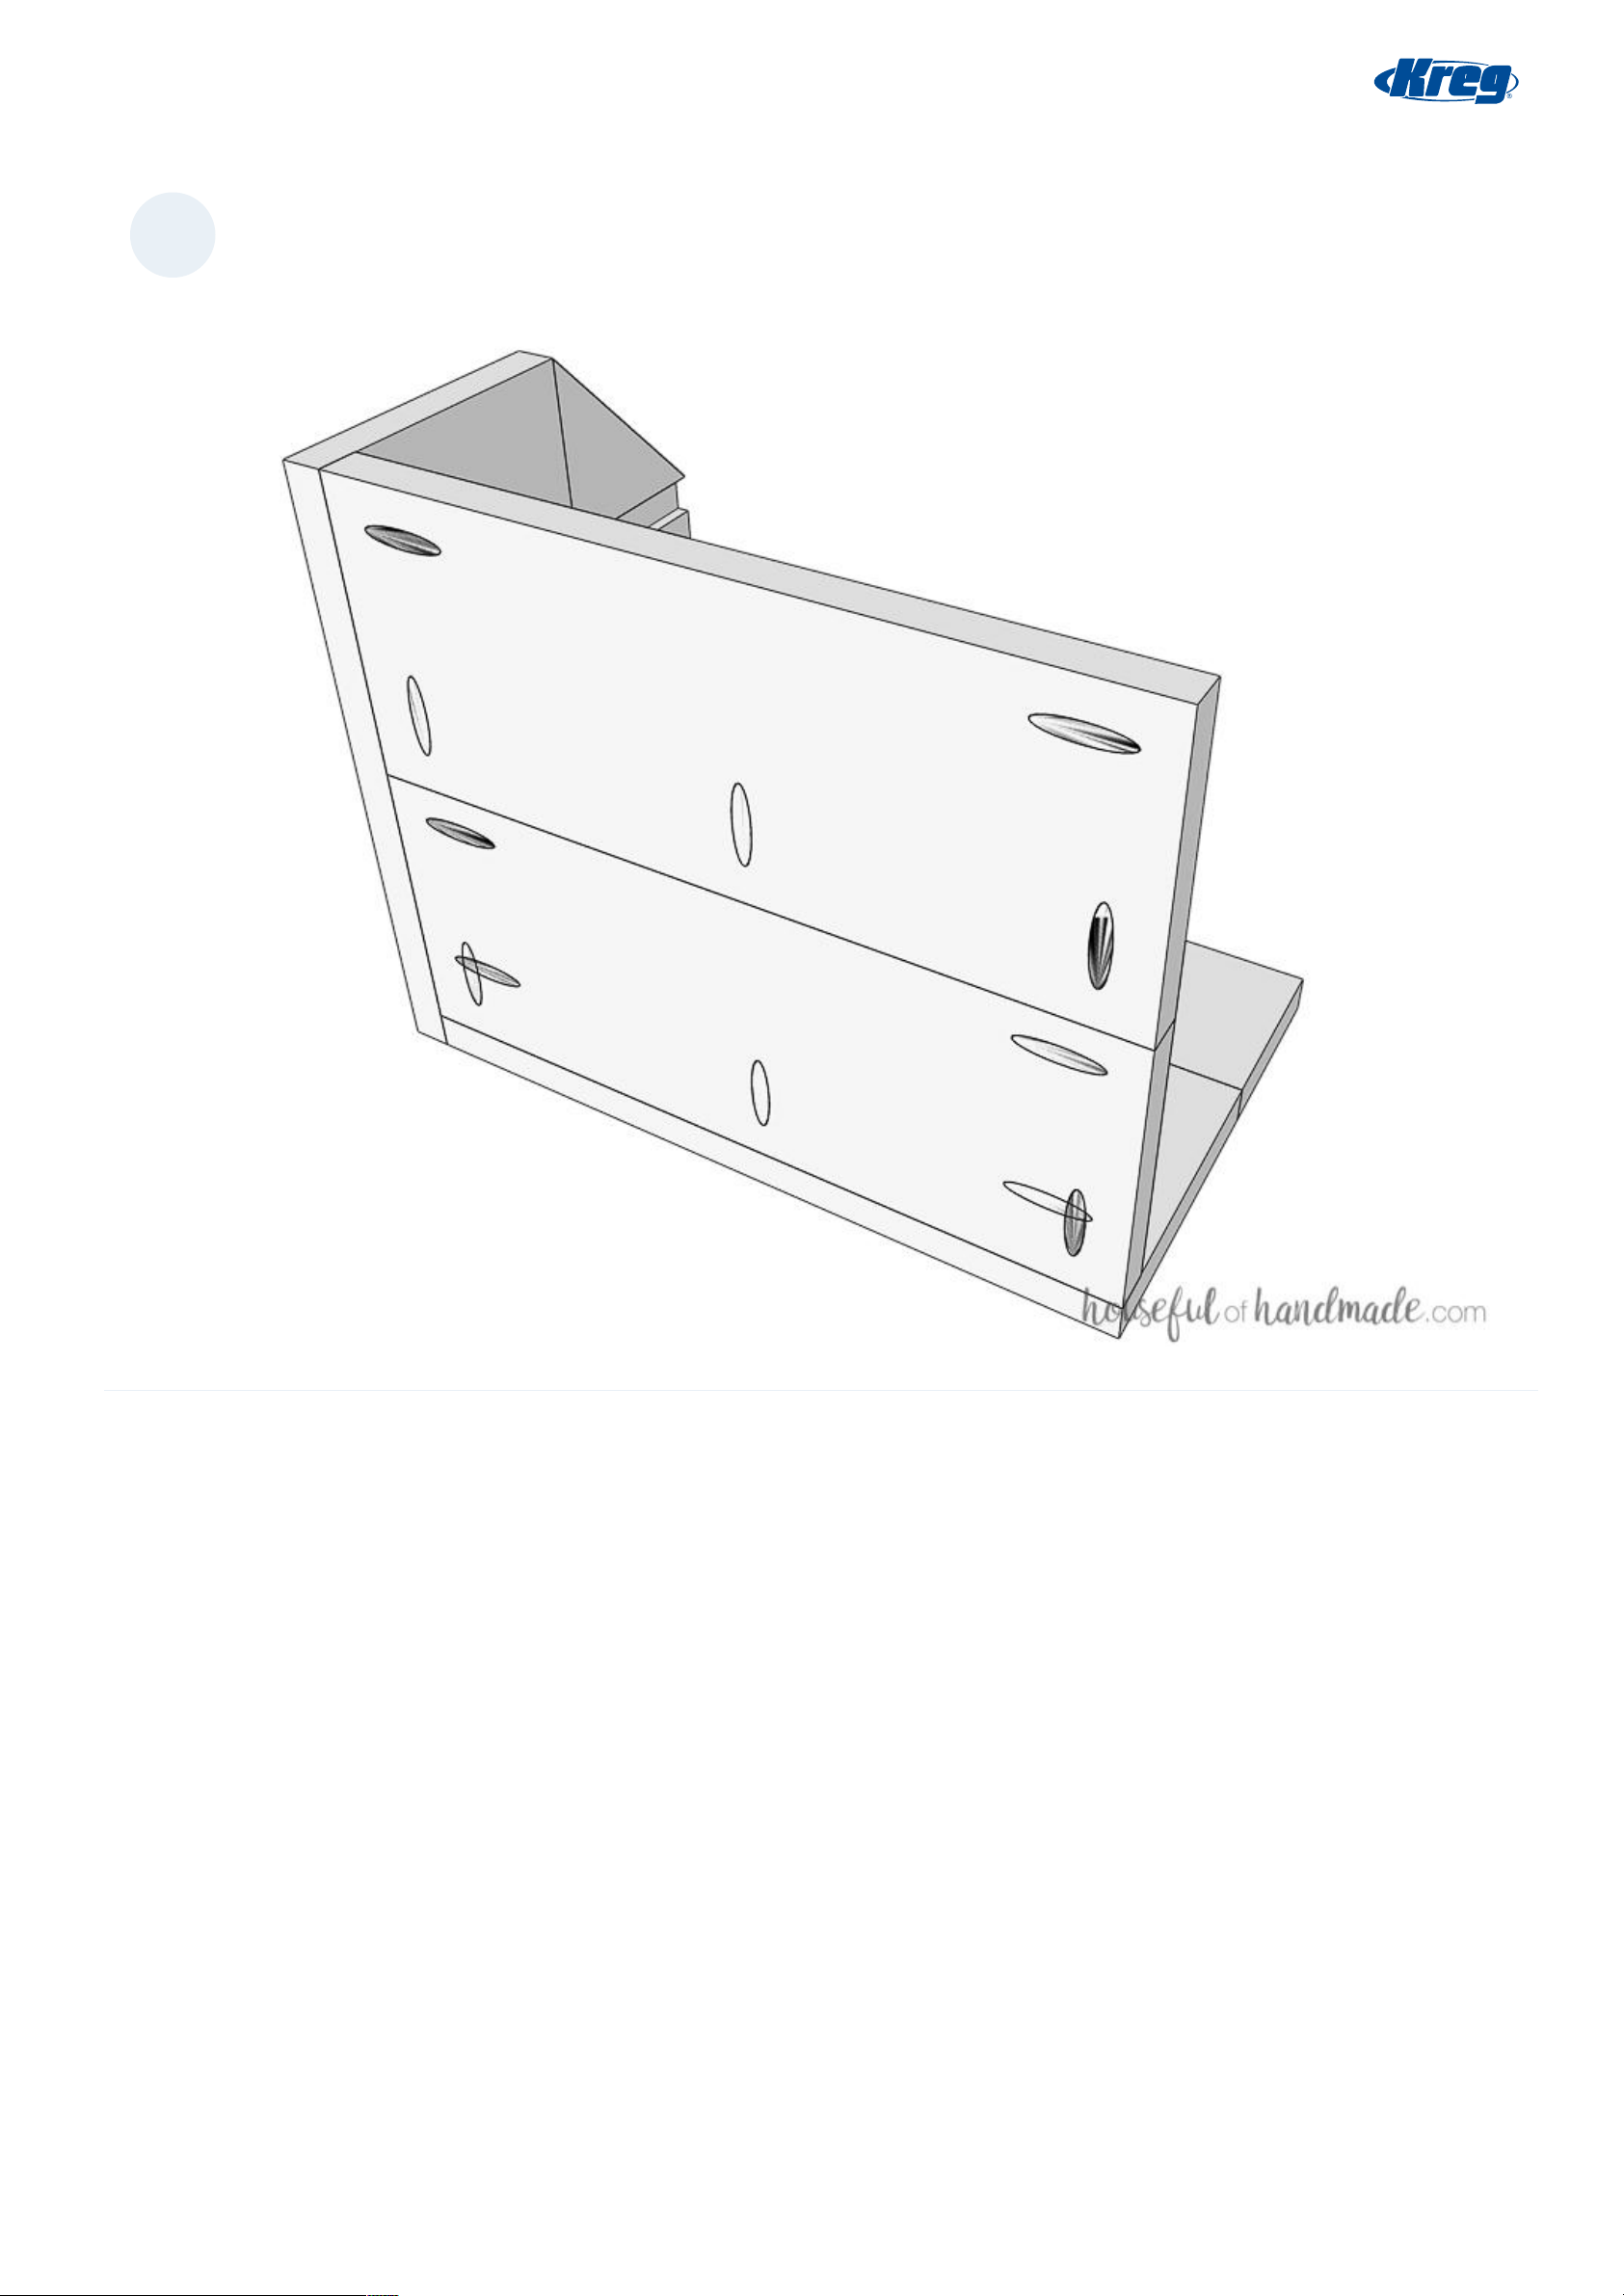
5
Attach back
Drill pocket holes in the bottom and either side of the assembled back piece. Attach it to the bottom and side piece with
wood glue and pocket hole screws. Then attach the other side piece.
Page 8 of 15
Page 9
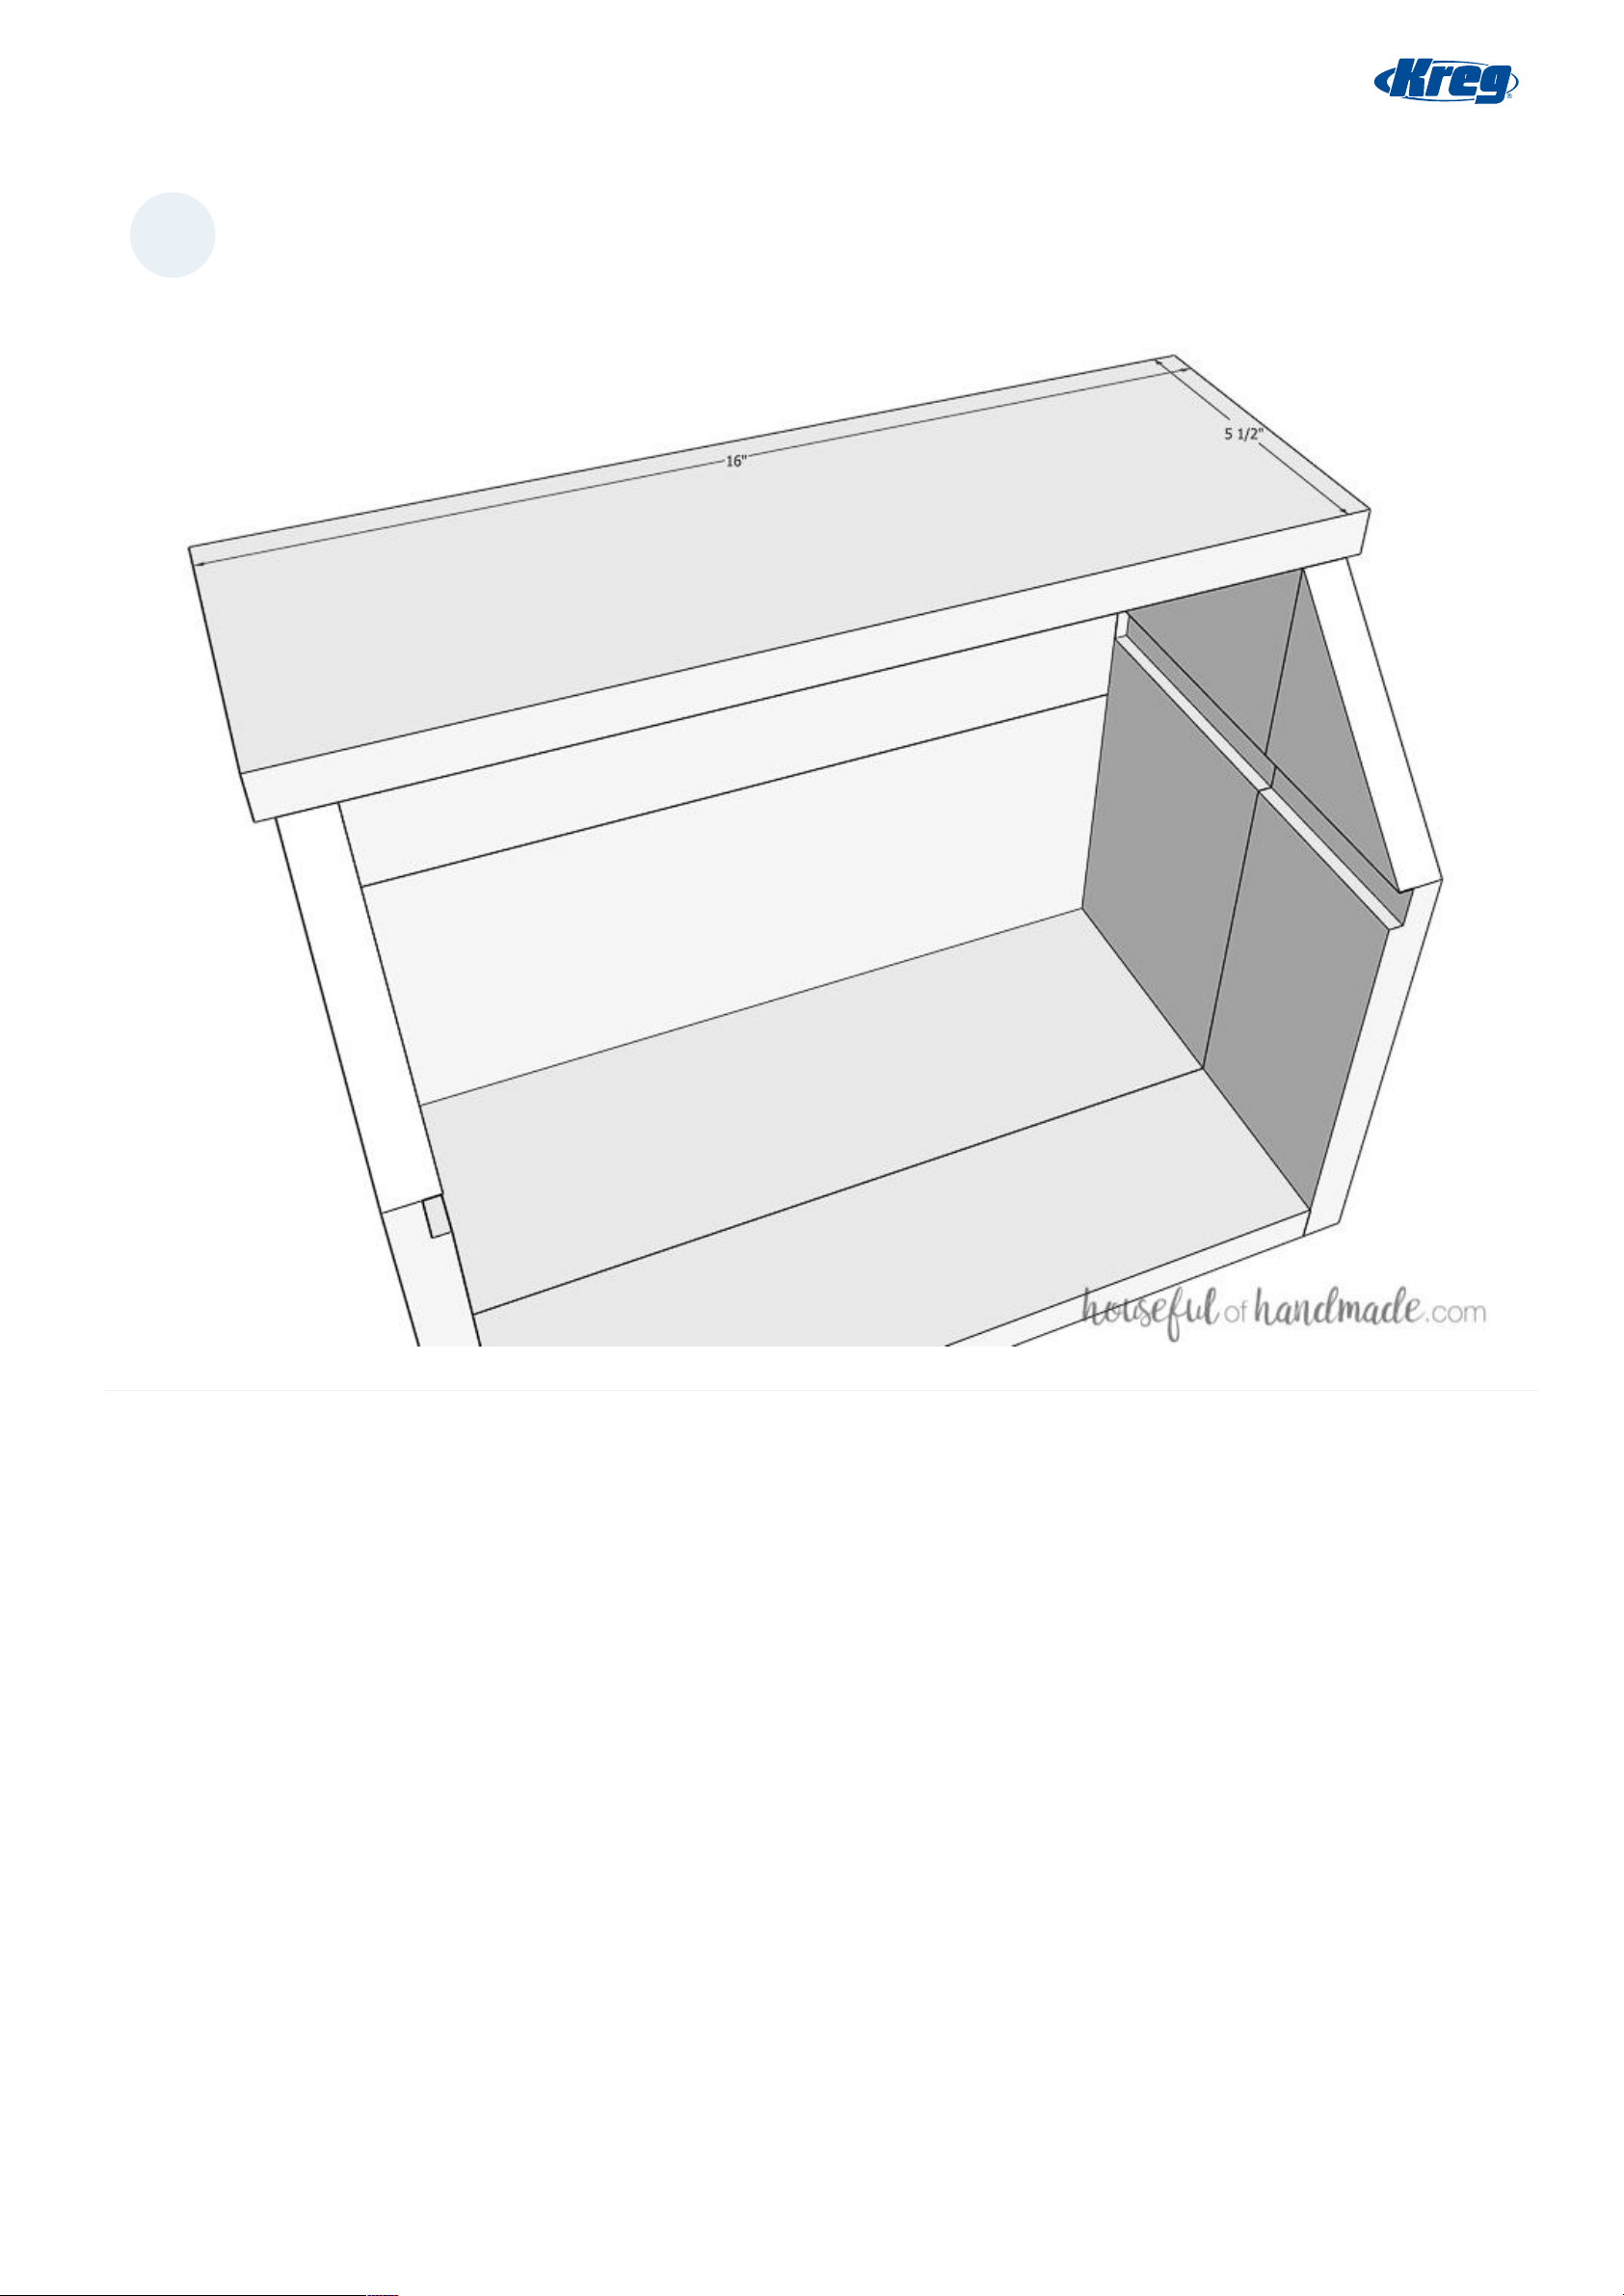
6
Attach the top
Add wood glue to the top of the bread box and position the top piece on it so that it hangs over each edge 1/4" and is flush
to the back. Secure with a few finishing nails.
Page 9 of 15
Page 10
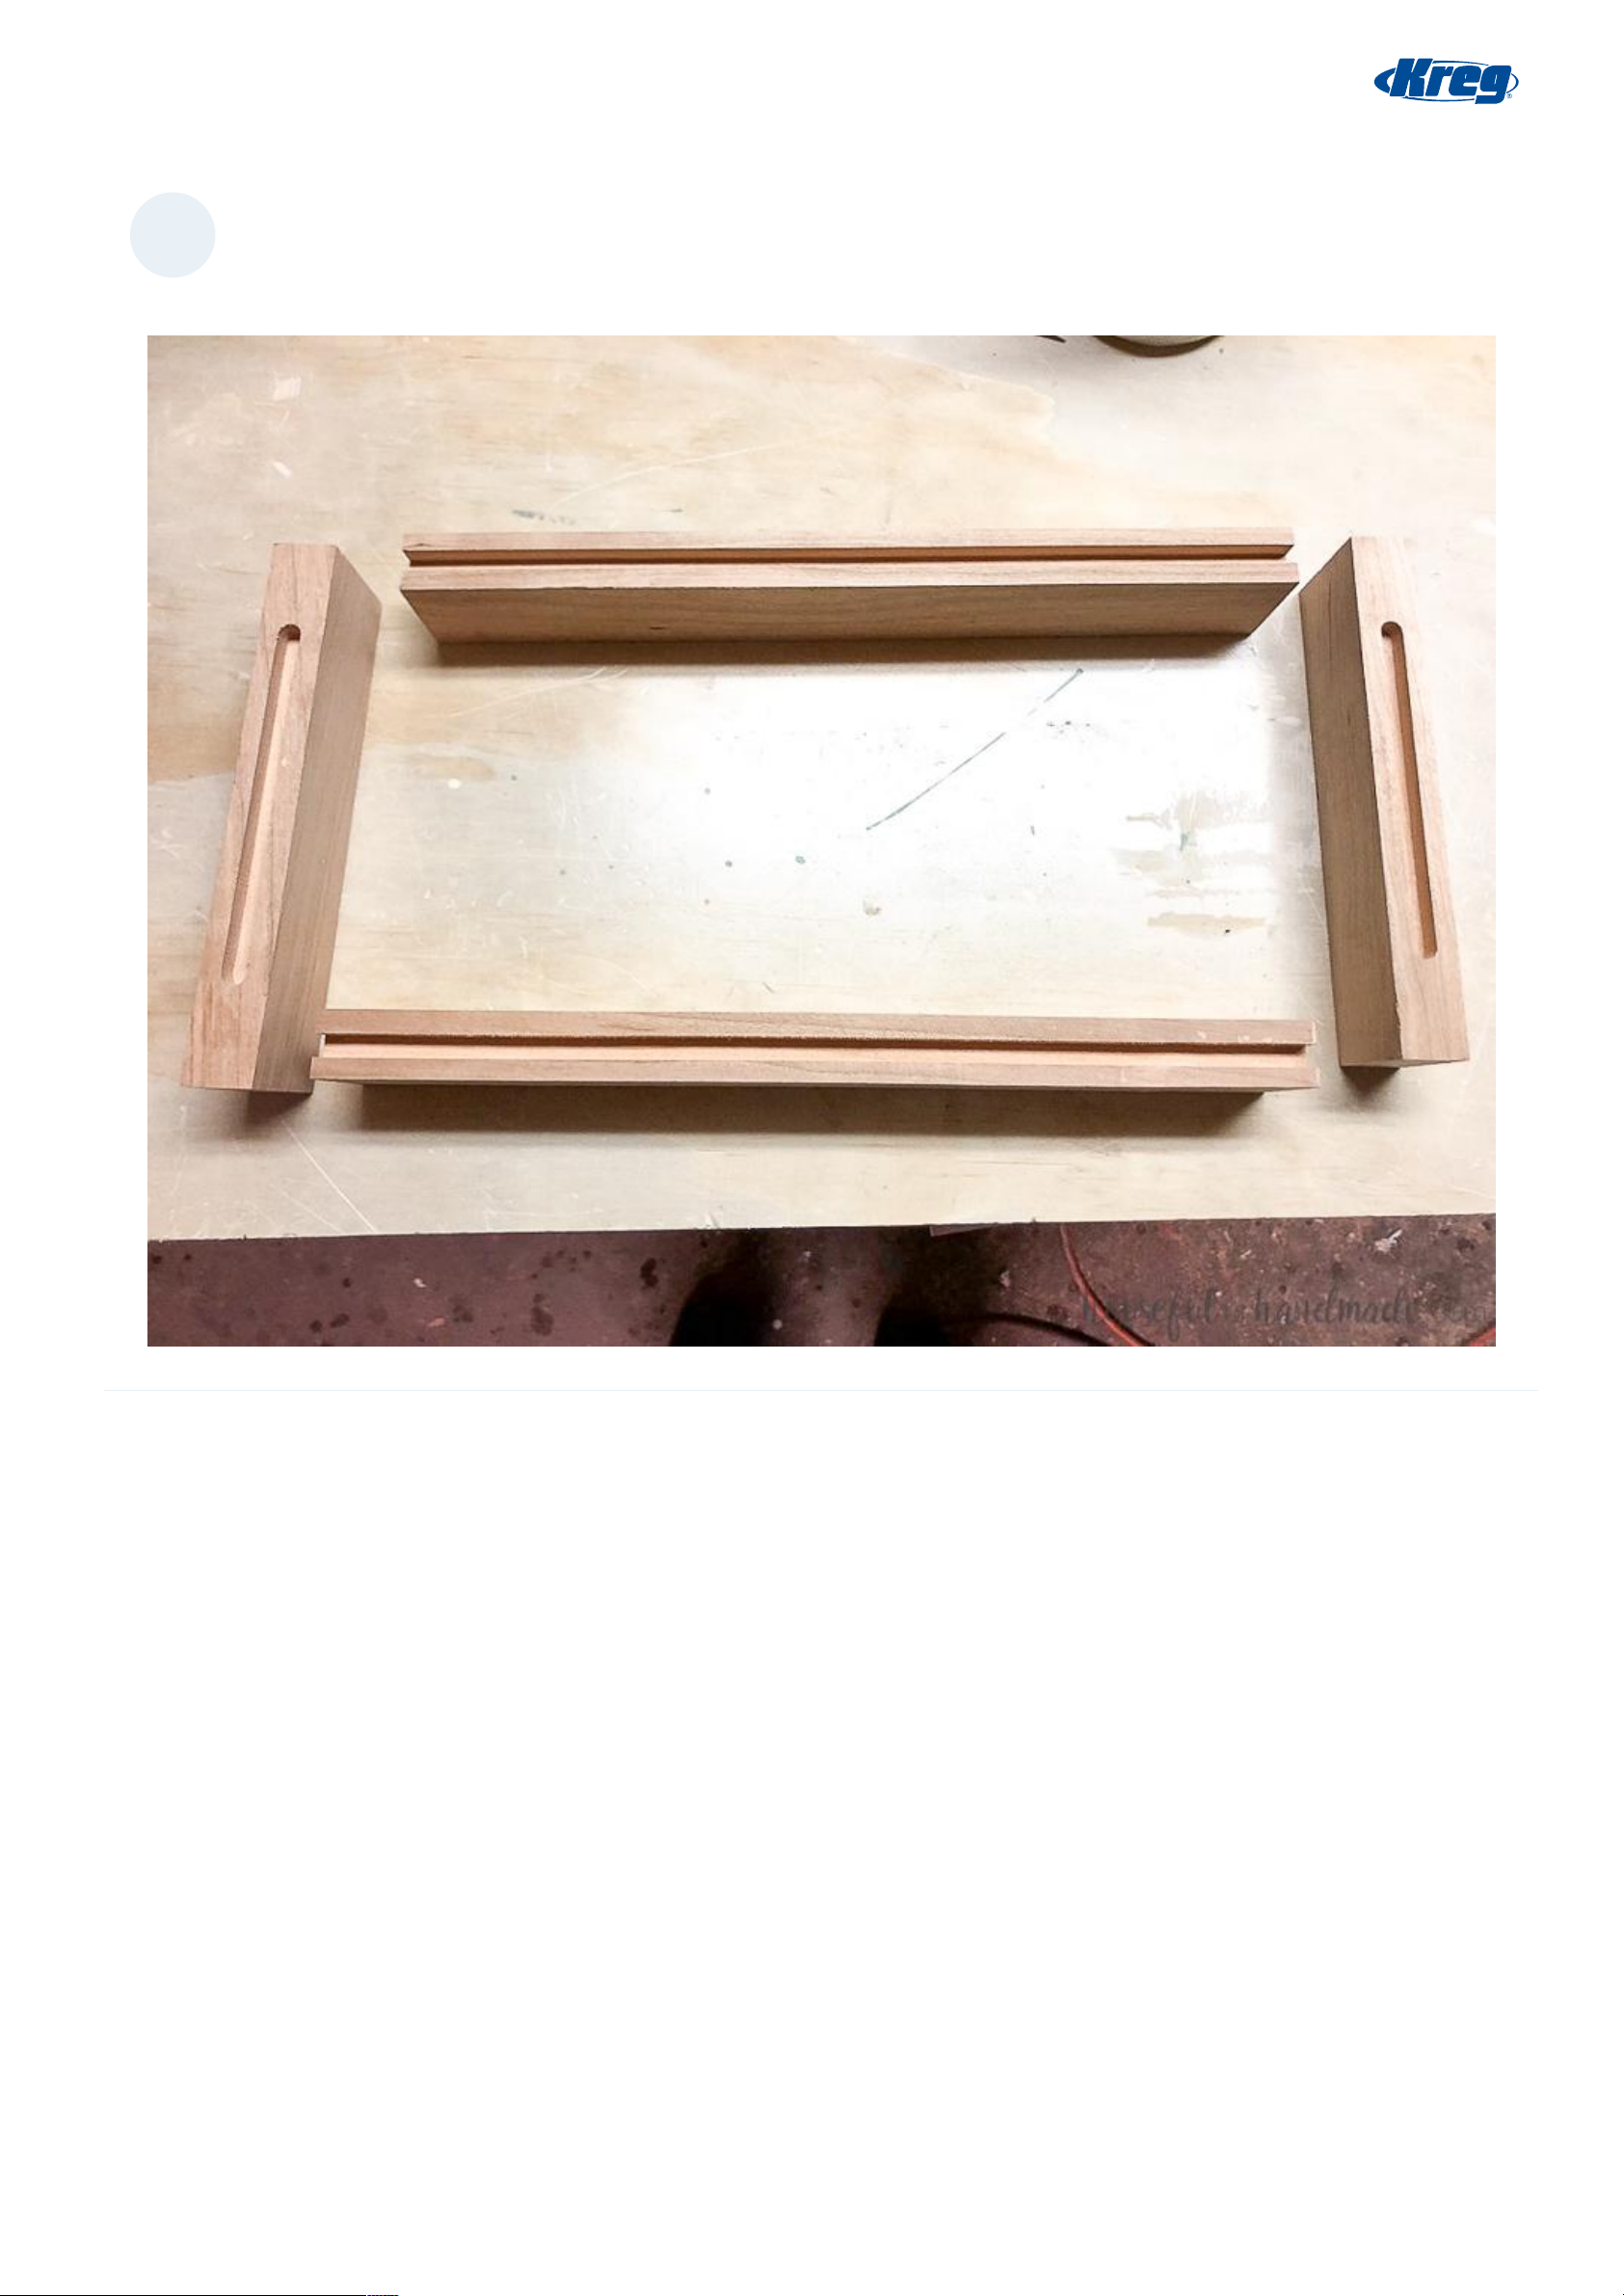
7
Build the door
Cut the door pieces. Router 1/4" x 1/4" grooves into the inside of the rails. For the stiles, start and stop the groove 1 1/4" from
the edge.
Page 10 of 15
Page 11
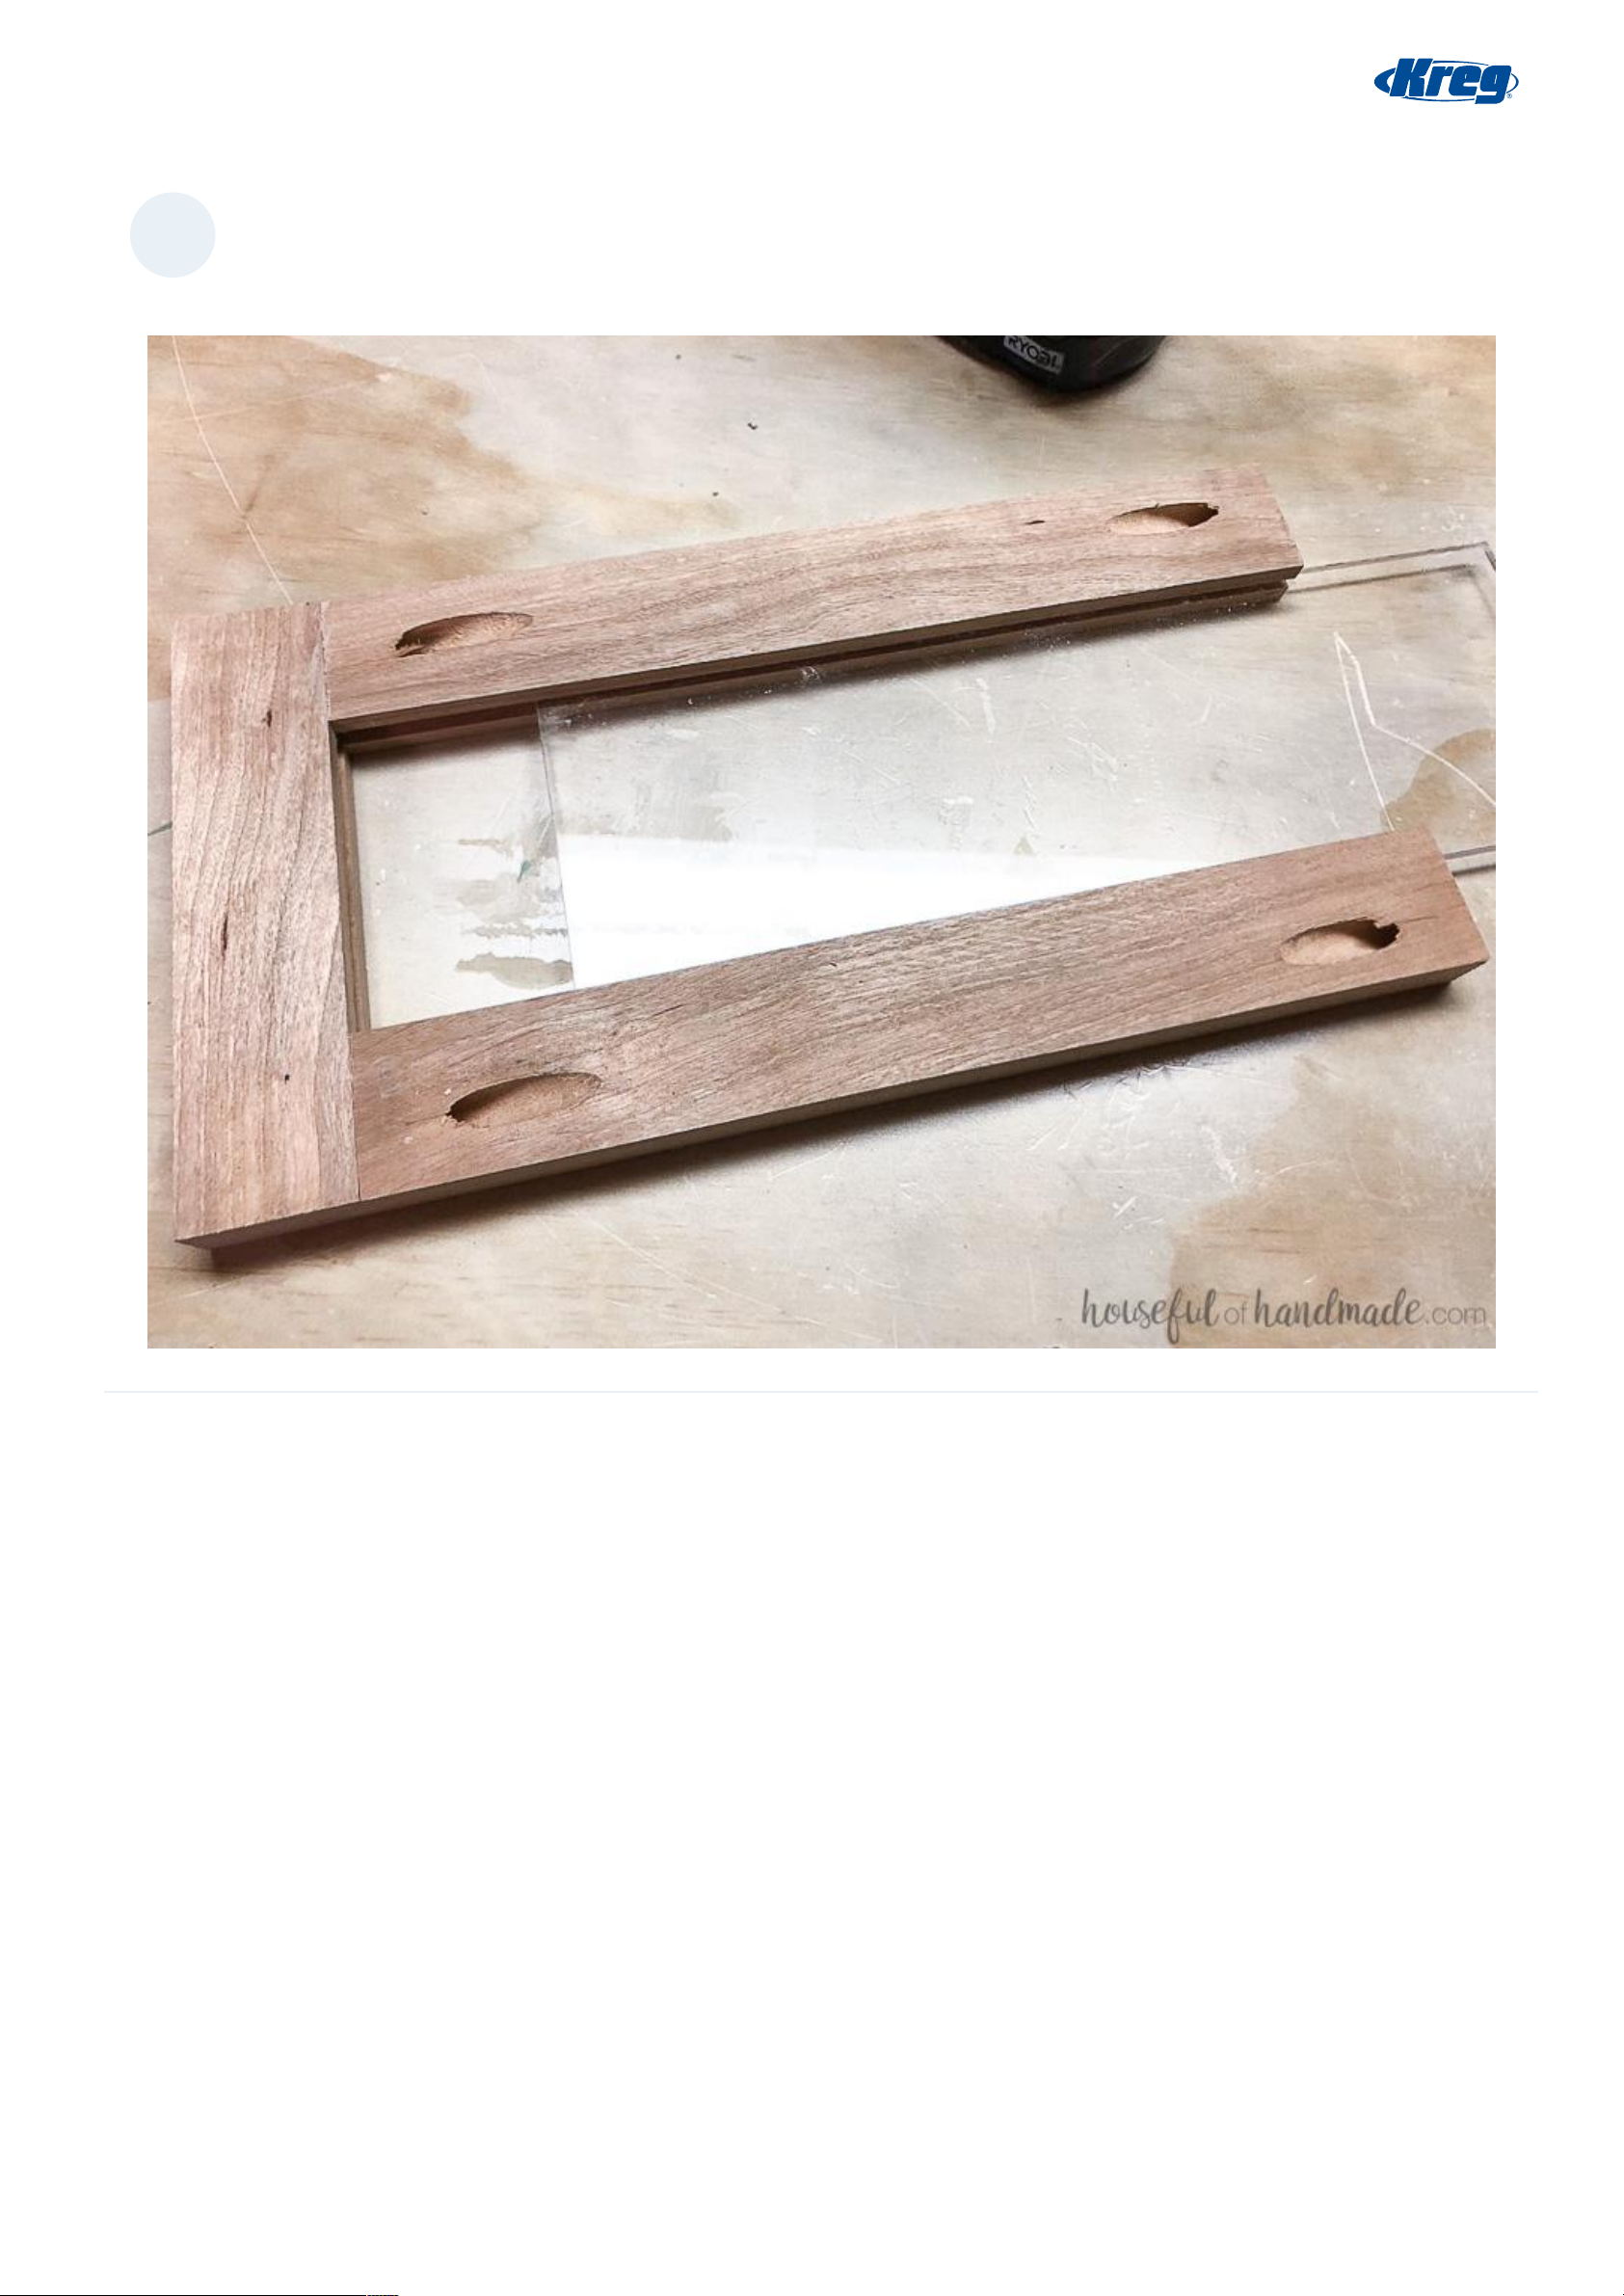
8
Assemble the door
Drill pocket holes in either end of the door rail boards. Using wood glue and pocket hole screws, attach the rails to the top
and bottom of one stile board. Slide the plexiglass into the groove. Then attach the other stile.
Page 11 of 15
Page 12
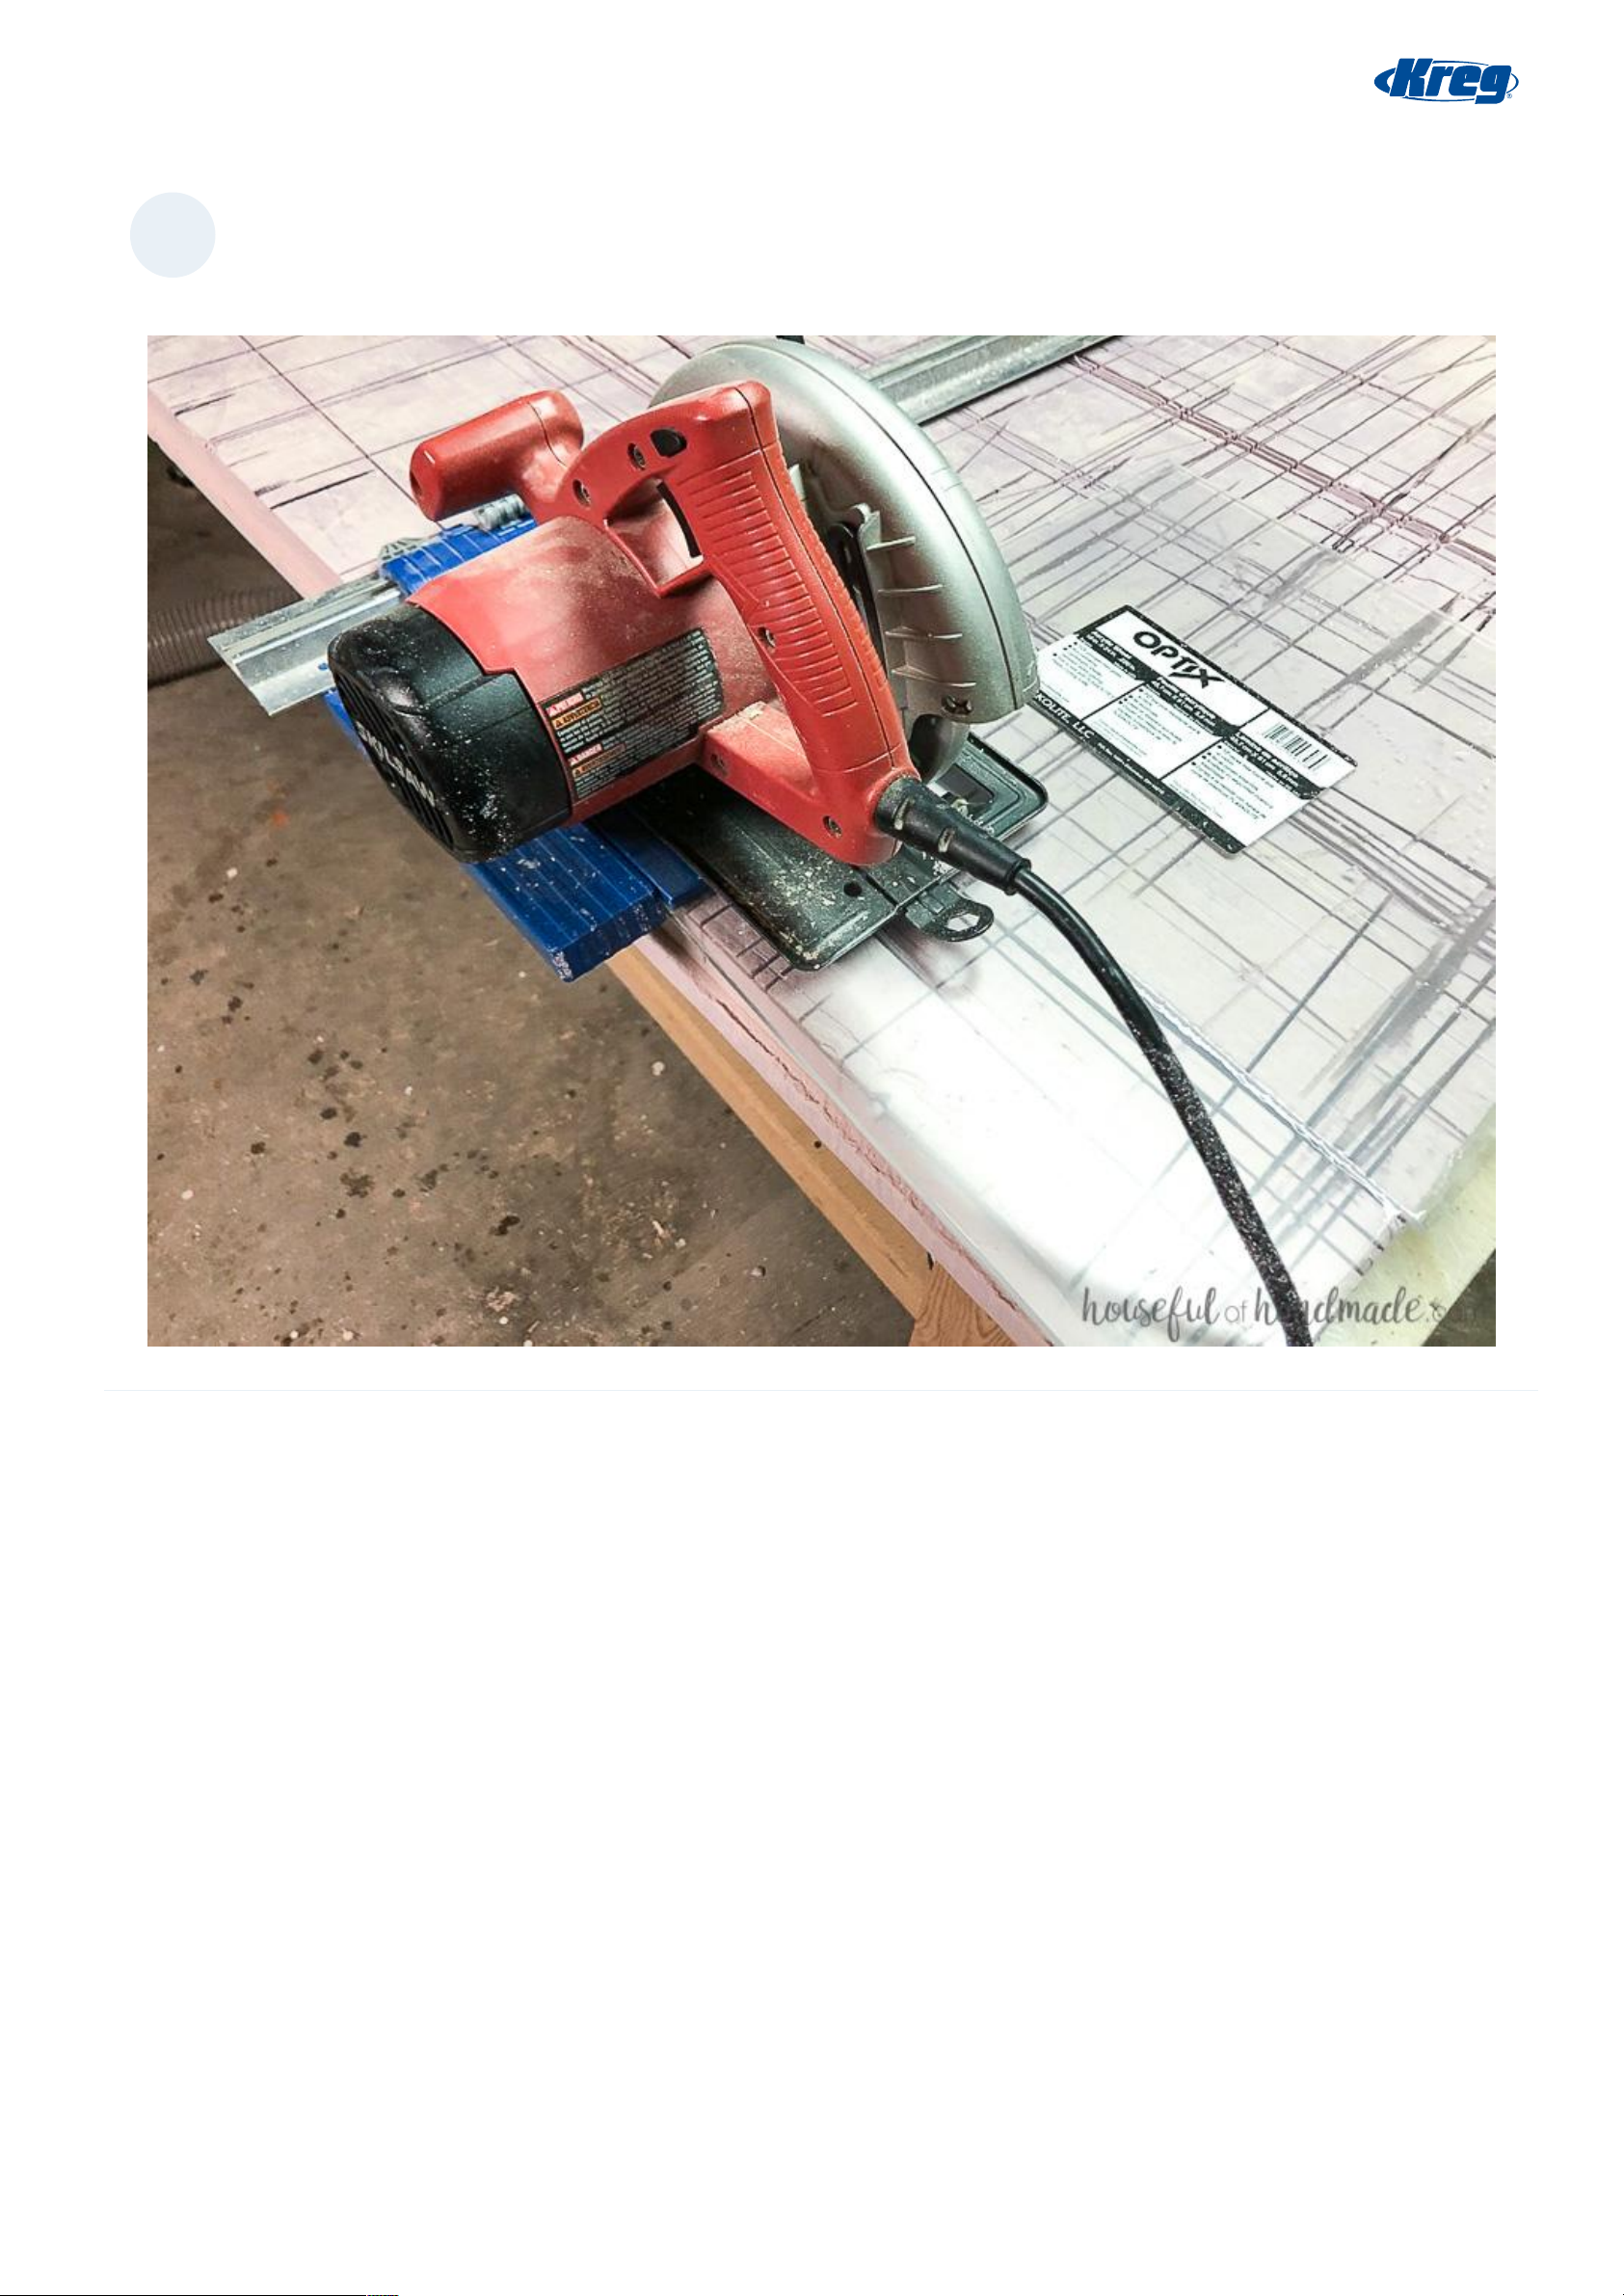
9
Cut the plexiglass
Using a circular saw with the edge guide, cut the plexiglass. Cut 1 piece for the door 11 3/8" x 4 1/8" and cut 1 piece for the top
flap 15" x 5".
Page 12 of 15
Page 13
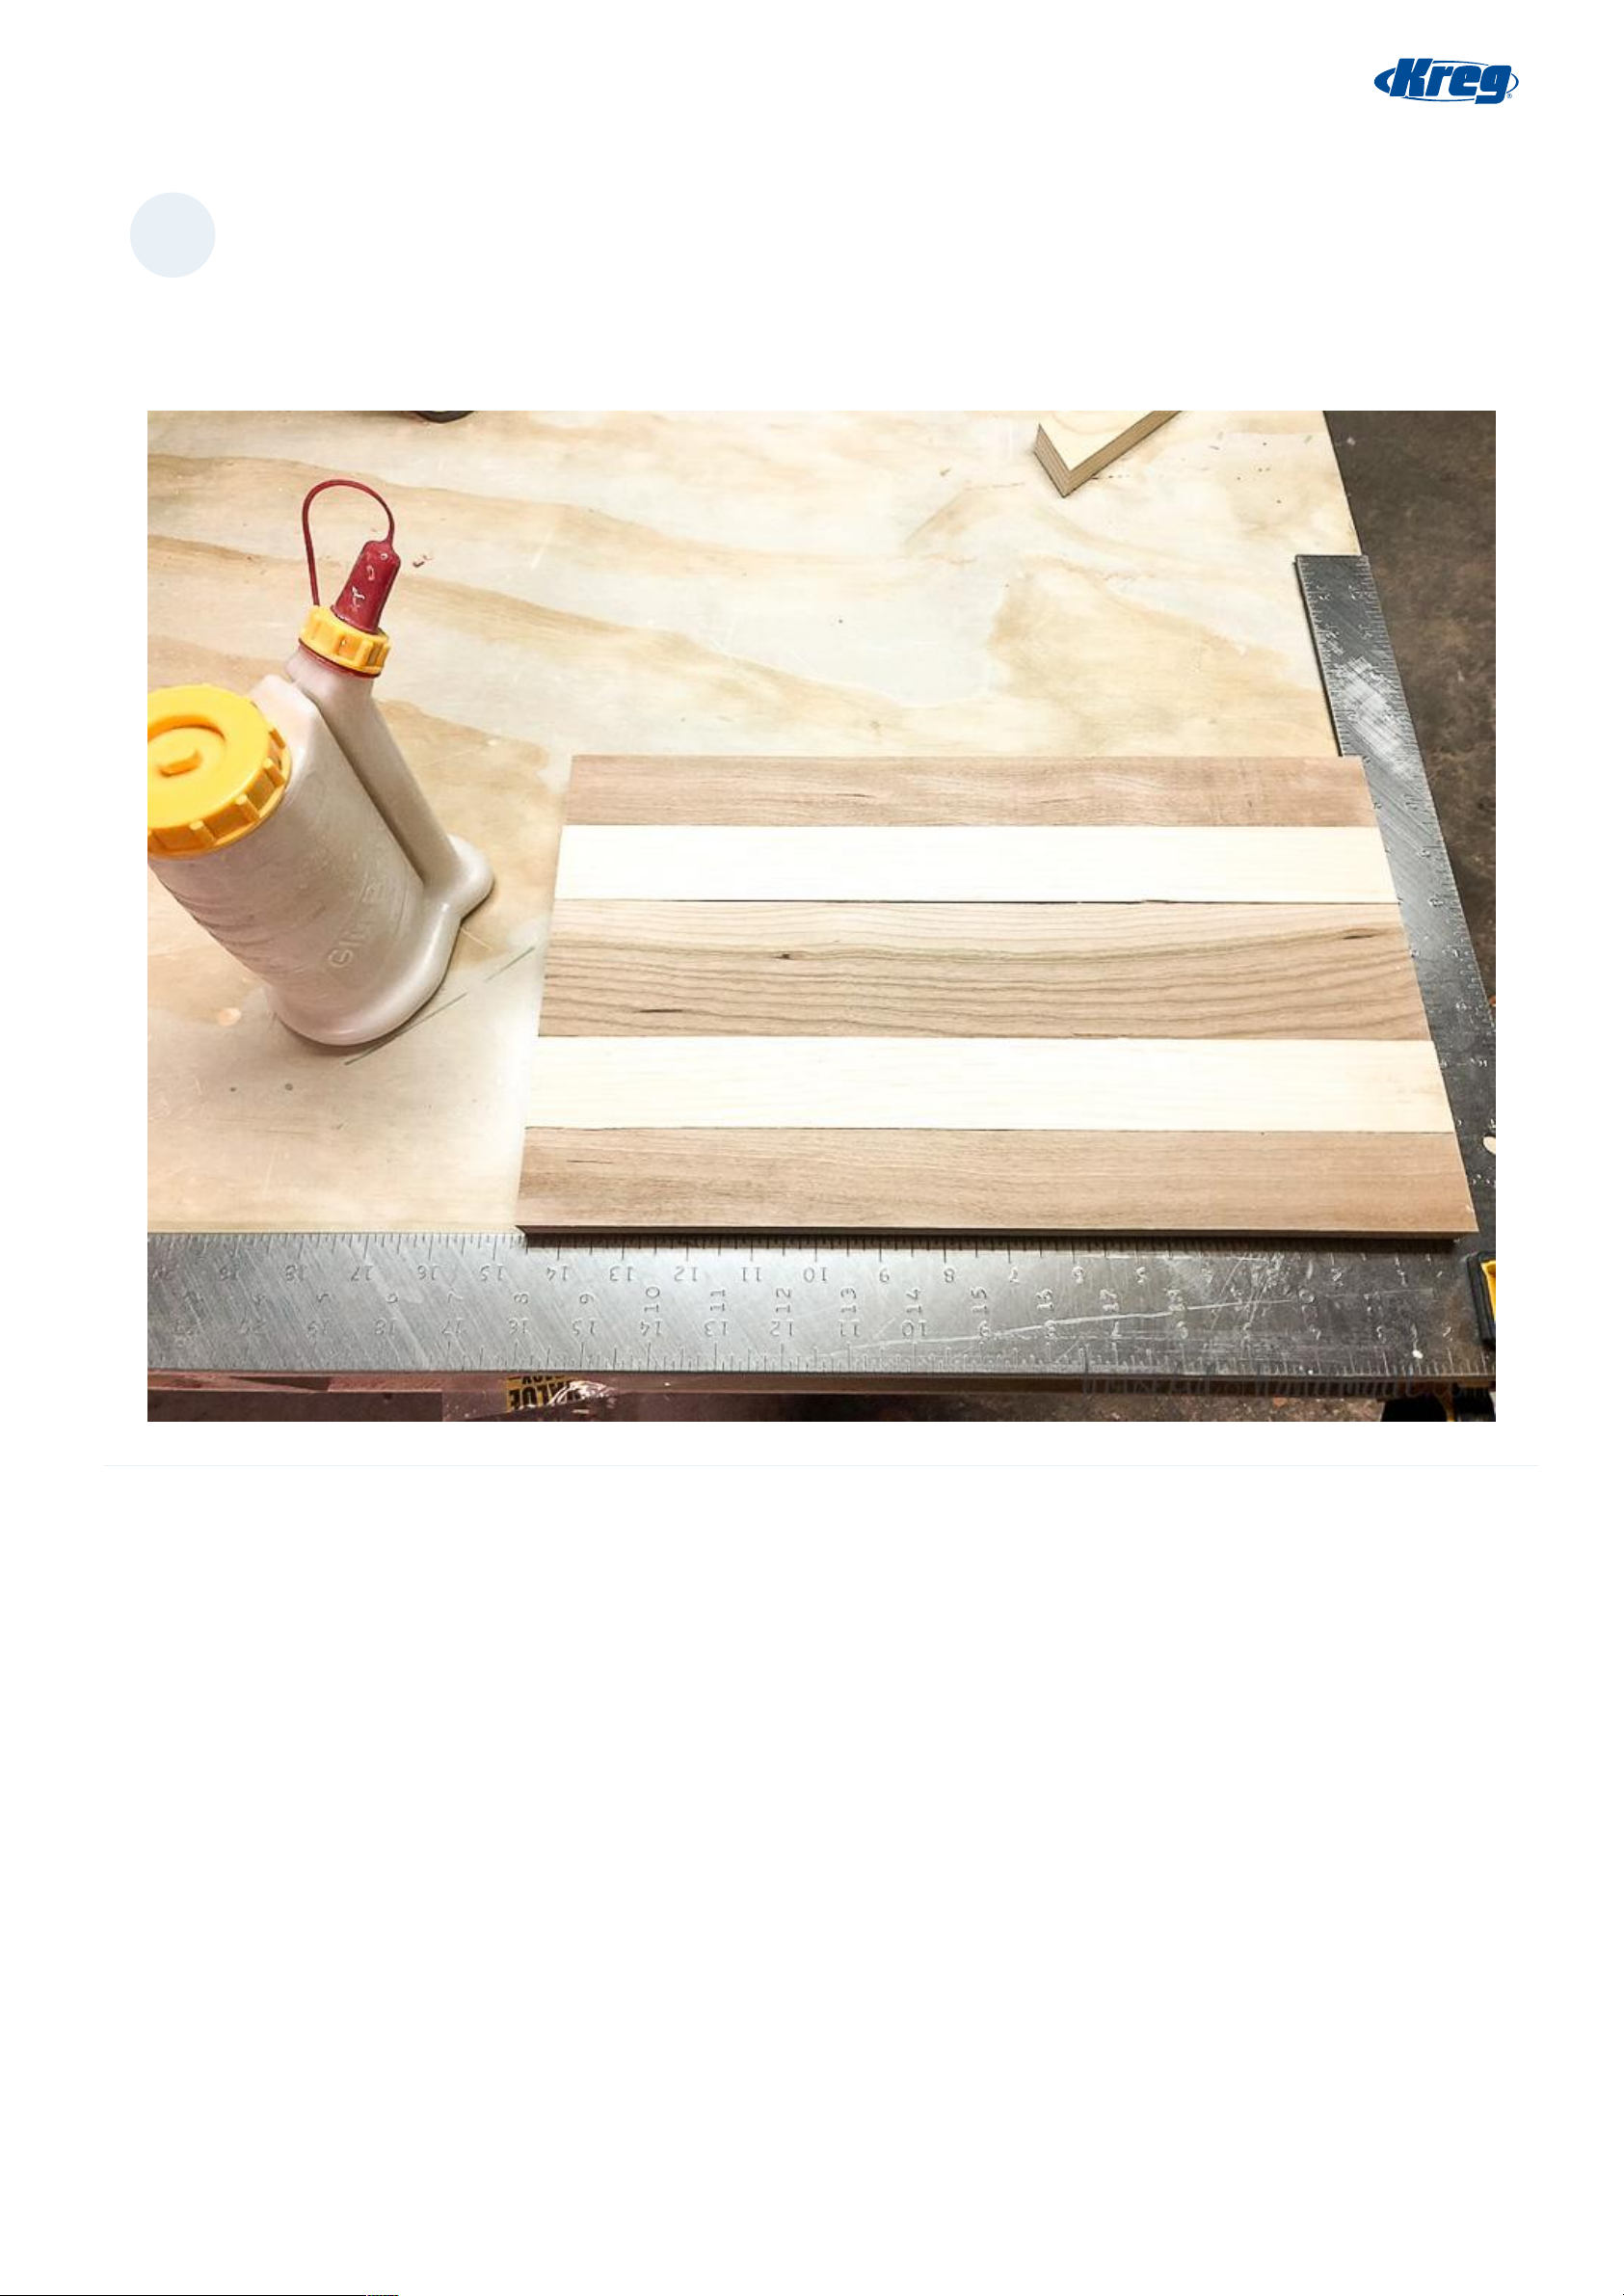
10
Build the cutting board shelf
Cut the boards for the cutting board. To give it stripes, use 2 1x2 boards of a different species. Add glue to the sides of the
boards and line them up. Clamp tightly and allow to dry. Run the cutting board through a planner to smooth the top and
bottom. As assembled, the cutting board will be 8 1/2" deep. Trim the cutting board to 8 1/4" with a table saw or circular saw
with edge guide.
Page 13 of 15
Page 14
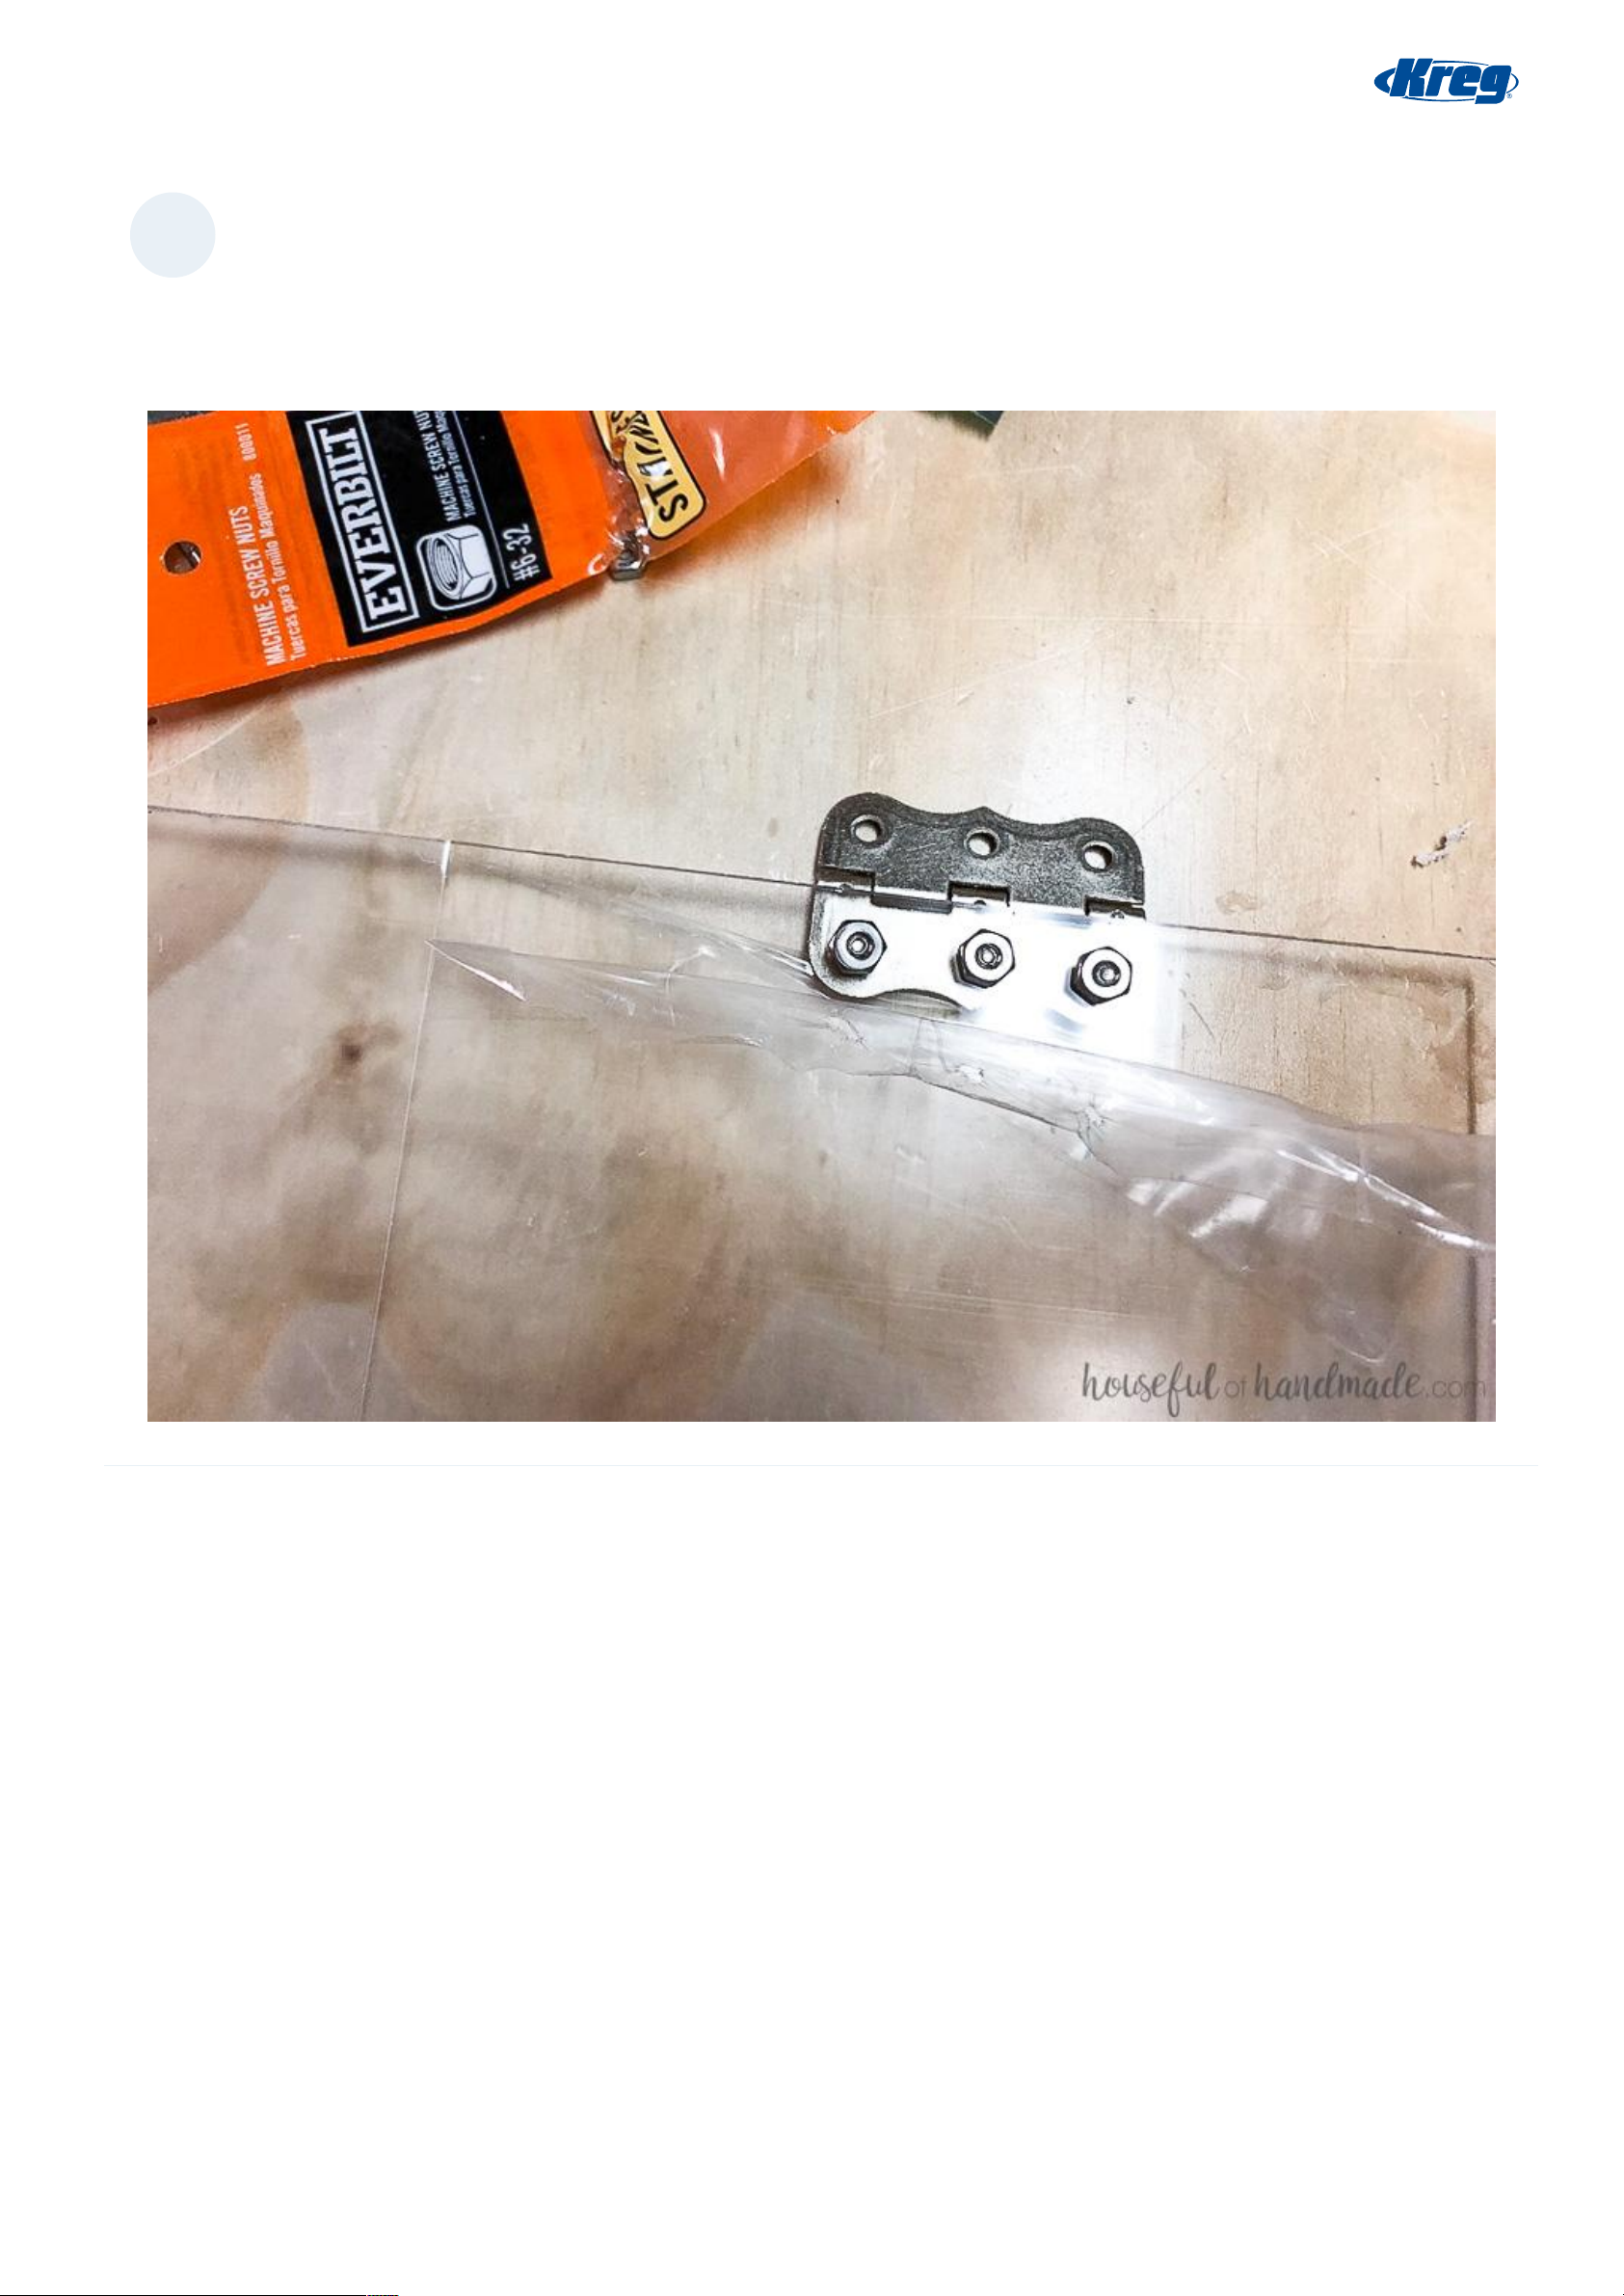
11
Attach top plexiglass flap
To attach the hinges to the plexiglass cover for the top of the bread box, mark where the holes need to be. Then drill them
with a through. Using the 1/2" screws and press through the holes, then line up the hinge behind the plexiglass and secure
with the bolts. The hinges need to be on the backside of the plexiglass to make it lay properly. Then line the flap up on the
bread box and attach the hinges to the top.
Page 14 of 15
Page 15
12
Attach the door
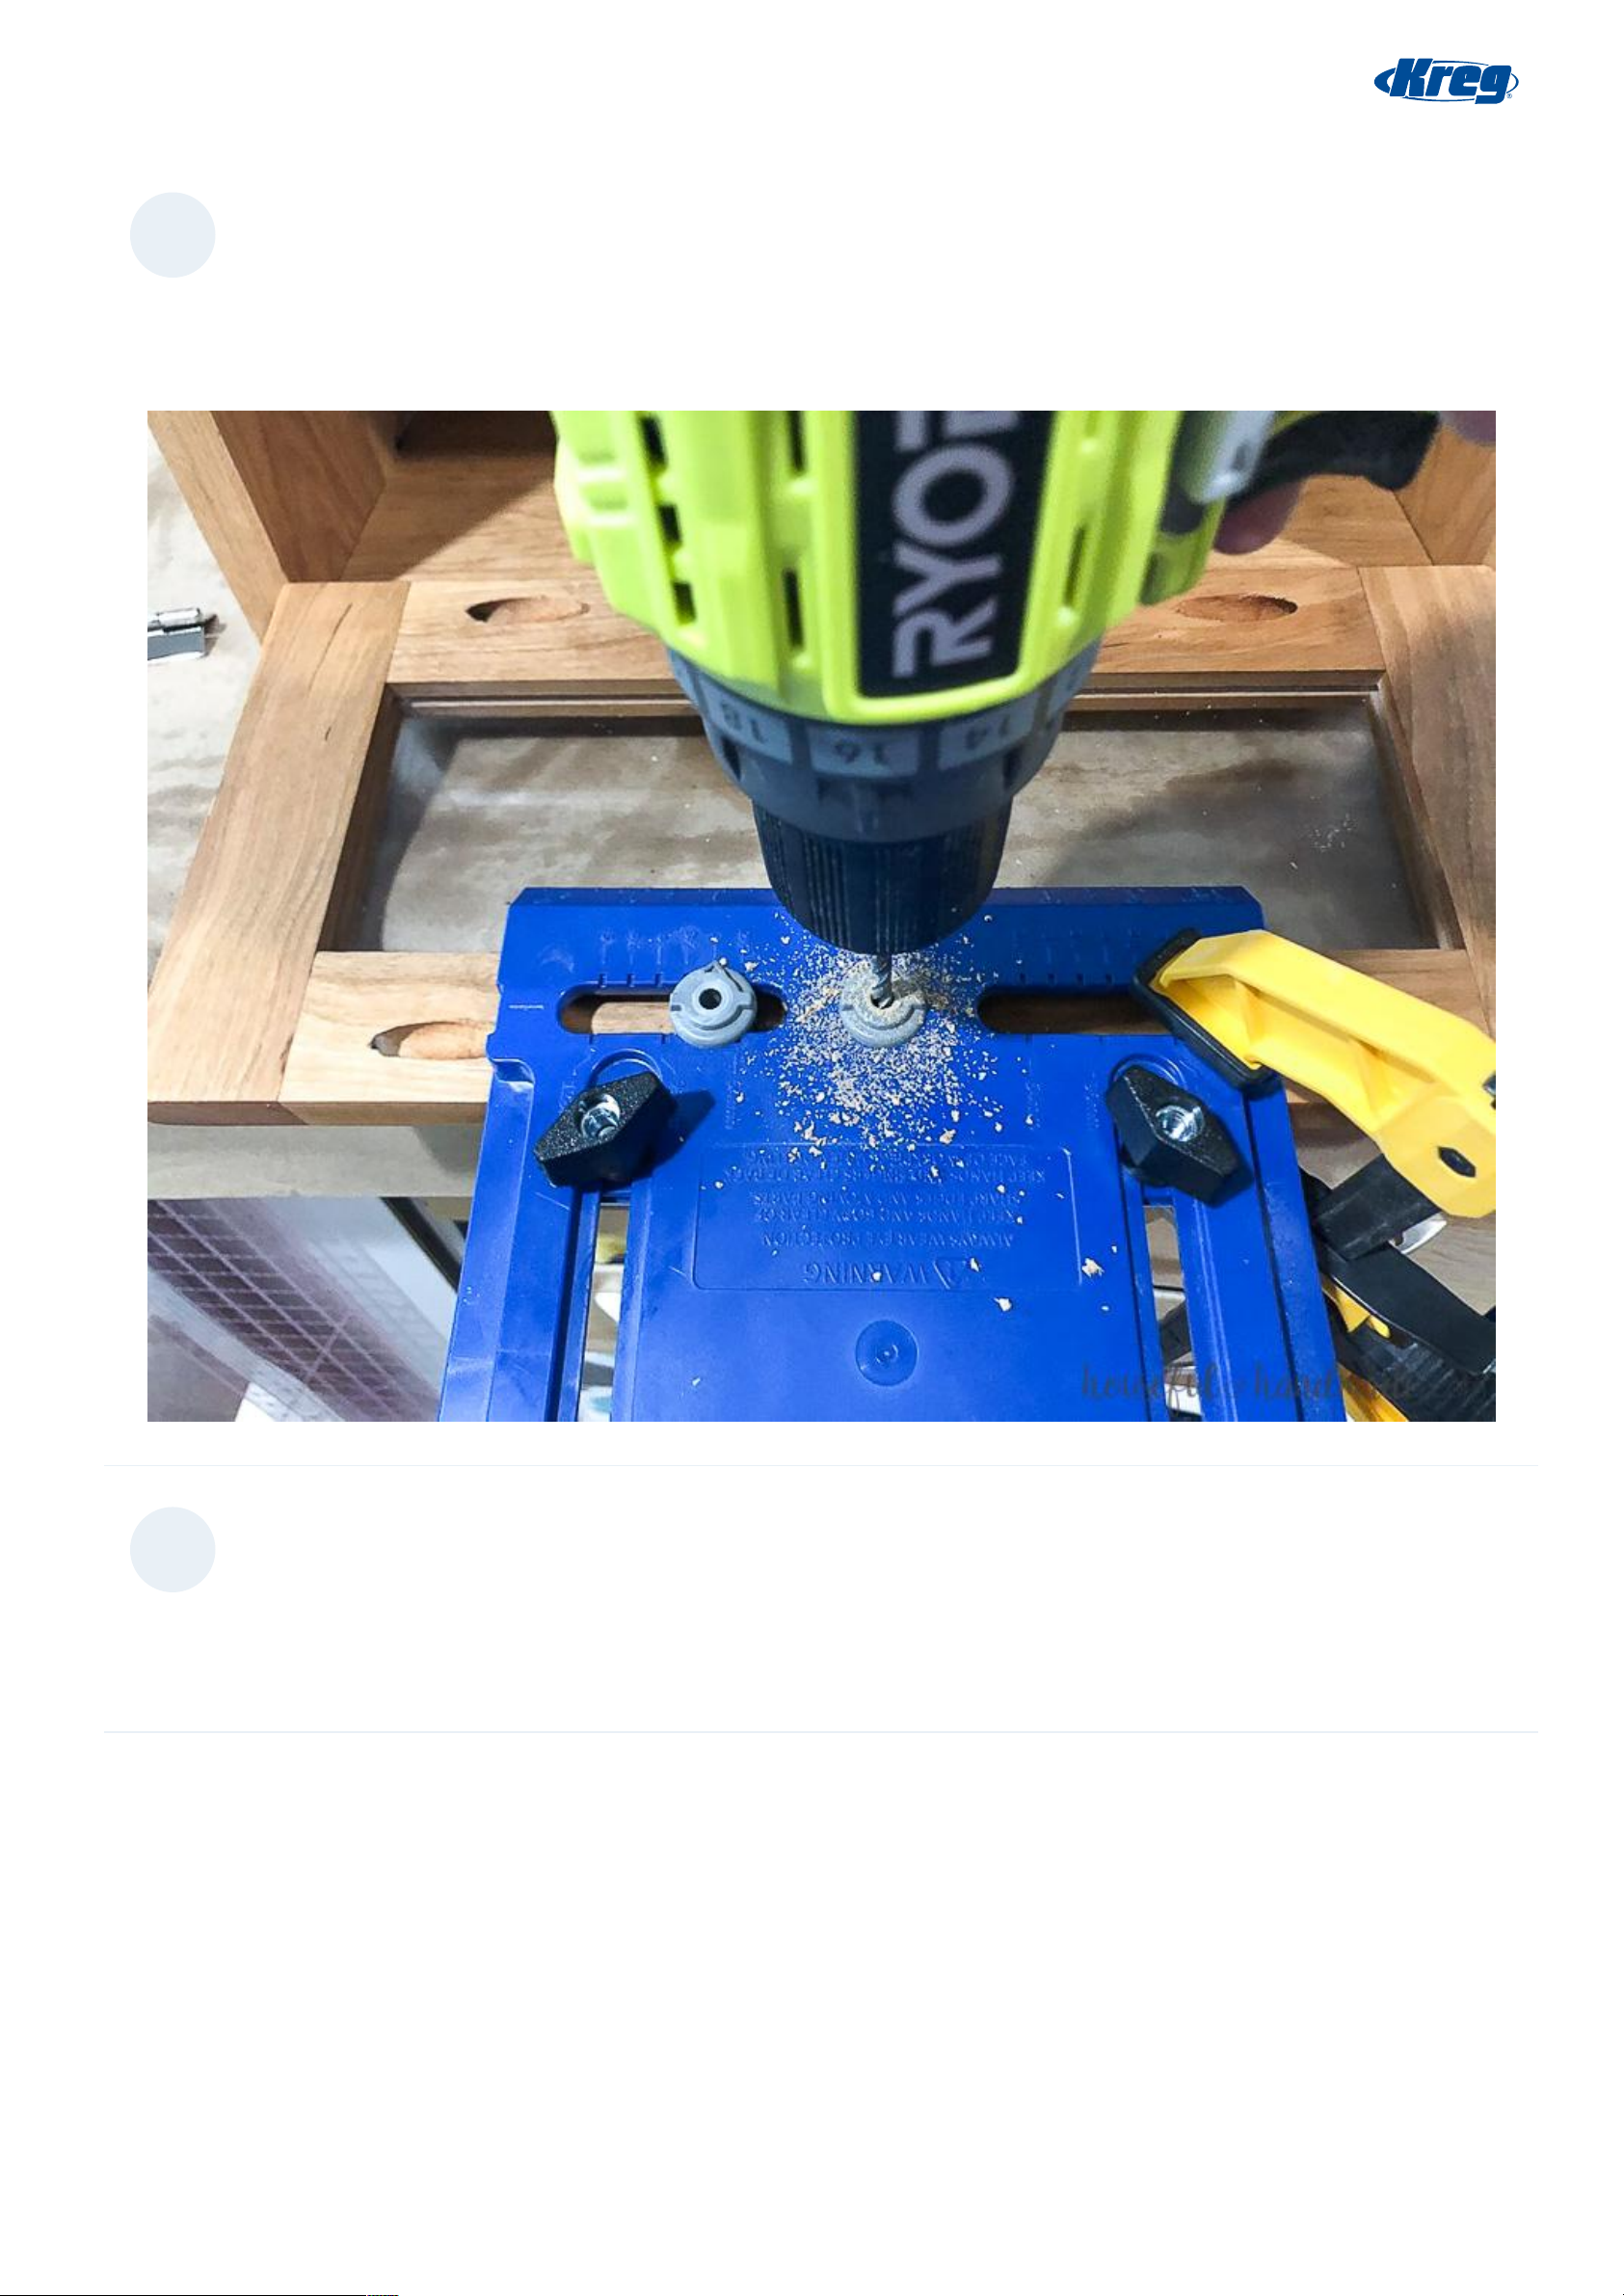
To attach the door, line up the hinges on the front of the door and secure. Then attach to the bottom of the bread box so
there is a 1/8" space between the door and bread box bottom. Place the magnetic hinge on the side of the box below the
cutting board shelf 3/4" in from the front of the box. Attach the magnet to the back of the door. Using the cabinet hardware
jig, drill a hole in the center of the door and attach a knob.
13
Finish the bread box
Finish the bread box as desired. I chose to make it out of hardwood so I could just seal it with cutting board oil. For the
cutting board shelf, you definitely want to finish it with cutting board oil. Slide the cutting board into the groove and fill your
new bread box with your favorite breads.
Page 15 of 15
 Loading...