

Kreg Adaptive Cutting System Owner's Manual

ADAPTIVE
SYSTEM
10/2018 NK9382
V1
Owner’s
Manual
Guide d’utilisation / Manual del propietario
PARALLEL GUIDES ARE COVERED IN THIS MANUAL
Parallel Guides
(ACS415)

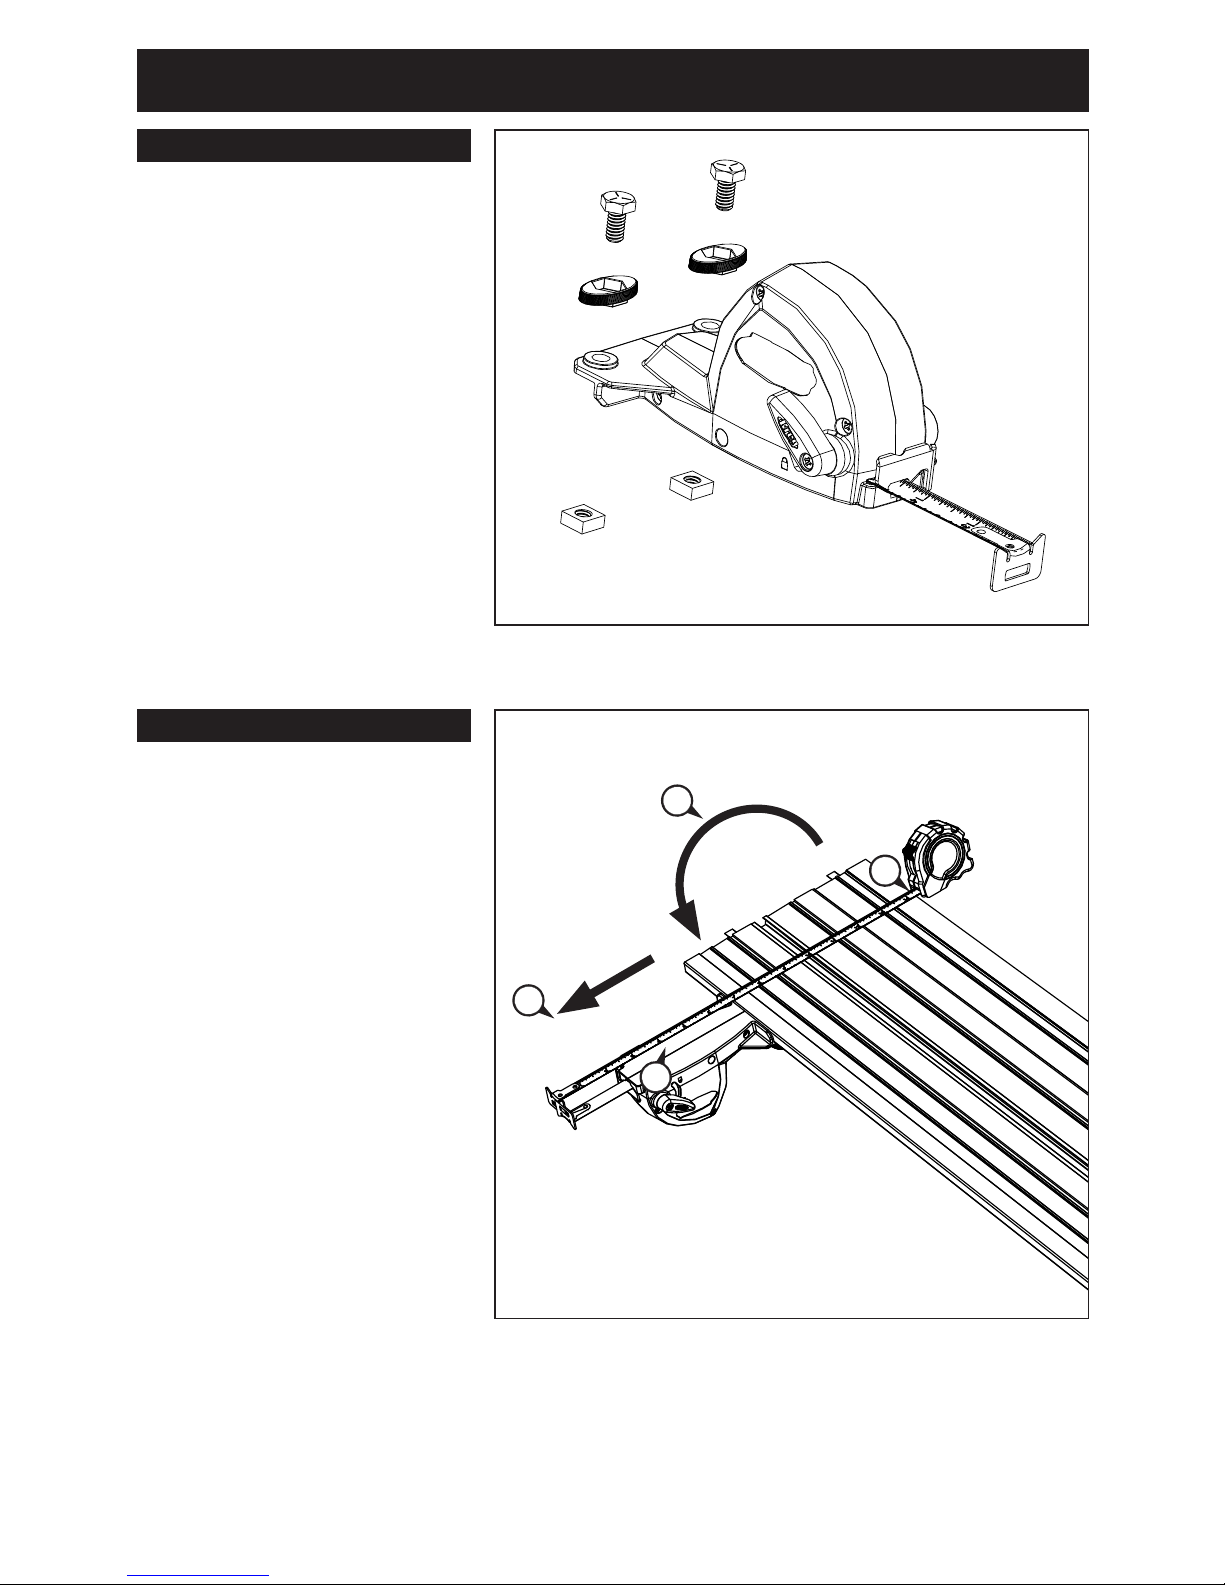
# NAME
A
Bolt, handle, square nut
B
Guide body
C
Tape rule
D
Indicator
E
Indicator screw
F
Rule lock
F
PARALLEL GUIDE COMPONENTS
ATTENTION:
!
This product is intended for use with the Kreg Adaptive Cutting System Plunge Saw + Guide
Track (Item # ACS2000). Parallel Guides position a workpiece for cuts from 12" to 96" wide.
WARNING:
!
This product can expose you to chemicals including Acrylonitrile and other chemicals, which
are known to the State of California to cause cancer and reproductive harm. For more information
go to www.P65Warnings.ca.gov.
C
D
E
B
A
ASSEMBLE & CALIBRATE
(1) Install two bolts,
handles, and square
nuts in each guide
body. Tighten the
assemblies to draw
the bolt heads into the
handles. Loosen the
assemblies ½ turn so
the nuts will slide into
the guide-track T-slot.
(1) Turn the guide track
upside down. Slide
the square nuts into
the guide track T-slot.
Tighten the knobs.
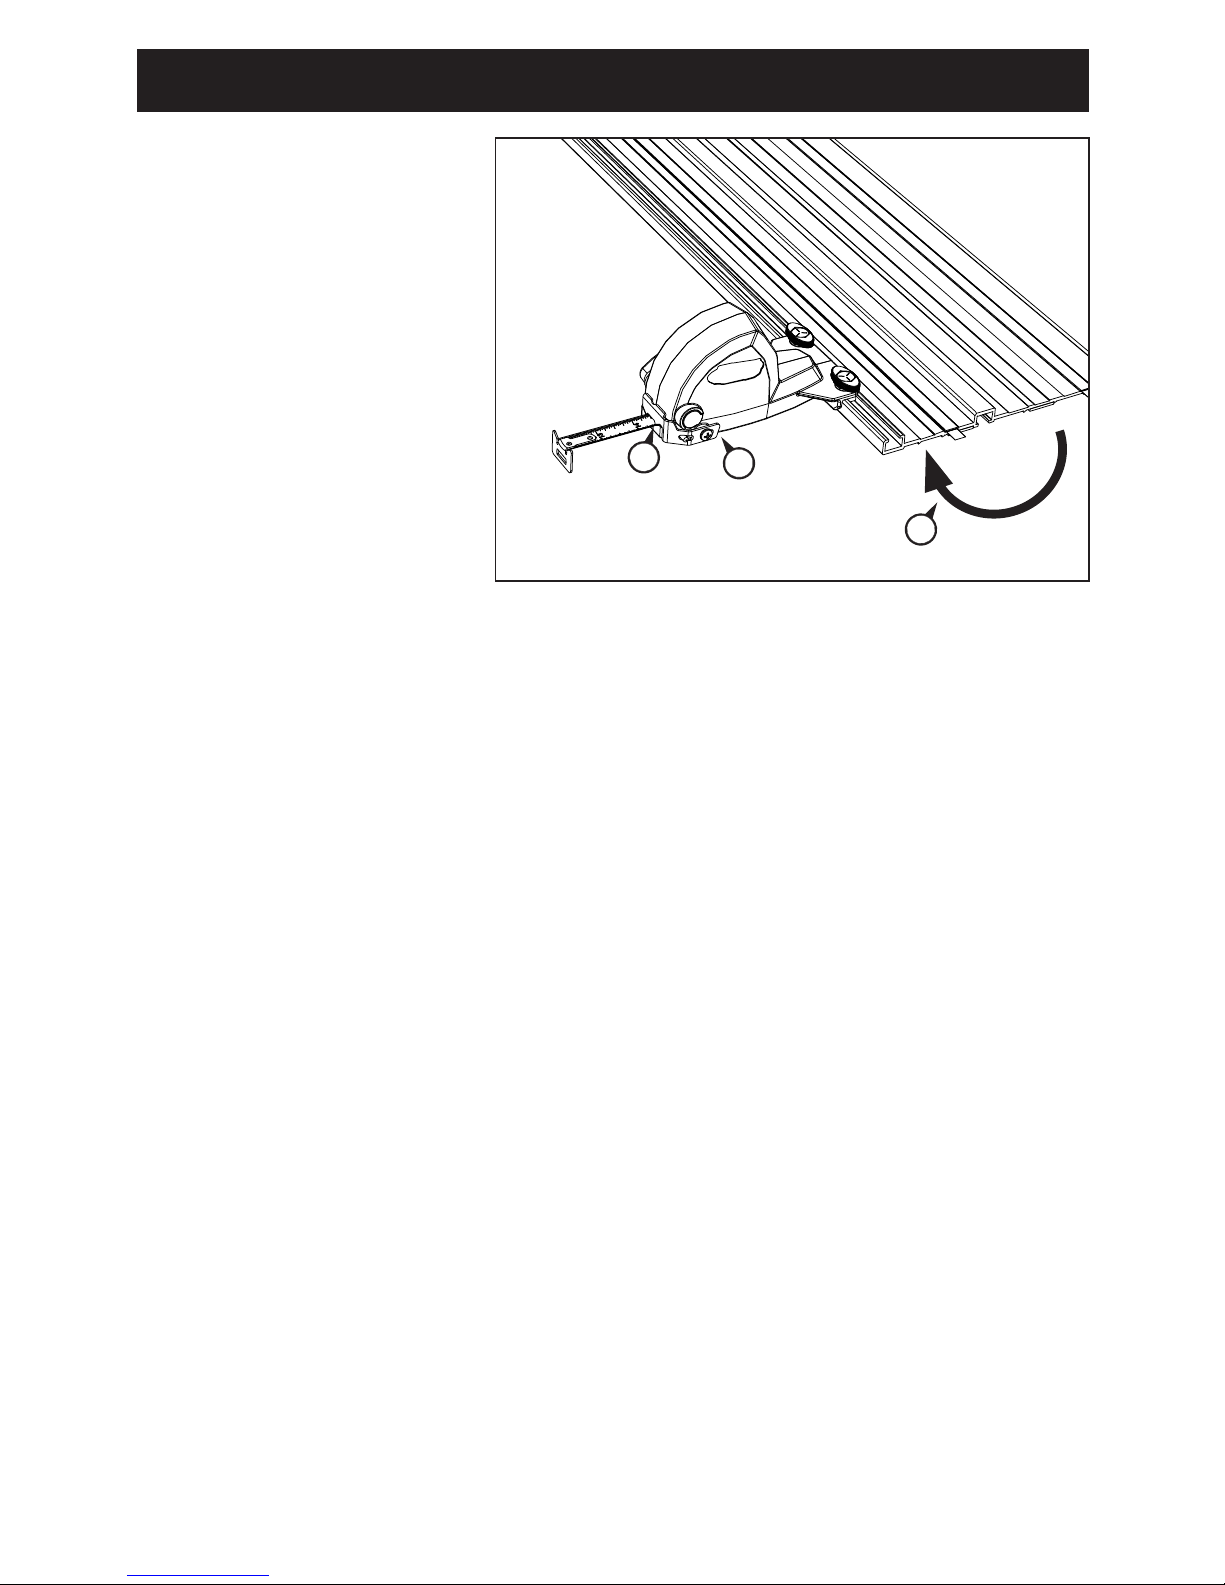
(2) Using a good-quality
tape rule, push the
end of the tape
against the hook on
the end of the Parallel
Guide tape rule.
(3) Extend both tapes
and align the 14" mark
on your tape rule with
the trimmed edge of
the guide track
anti-chip strip.
(4) Lock the Parallel
Guide tape rule. (The
rule-lock lever covers
the lock symbol on the
guide body.)
Assemble
Calibrate
3
4
2
1
(5) Turn the track right
side up. Loosen the
indicator screw.
(6) Align the outside face
of the indicator with
the 14" mark on the
Parallel Guide tape.
(7) Tighten the indicator
screw. Retract the tape.
Repeat these steps to
calibrate the second
Parallel Guide.
6
5
7
ASSEMBLE & CALIBRATE
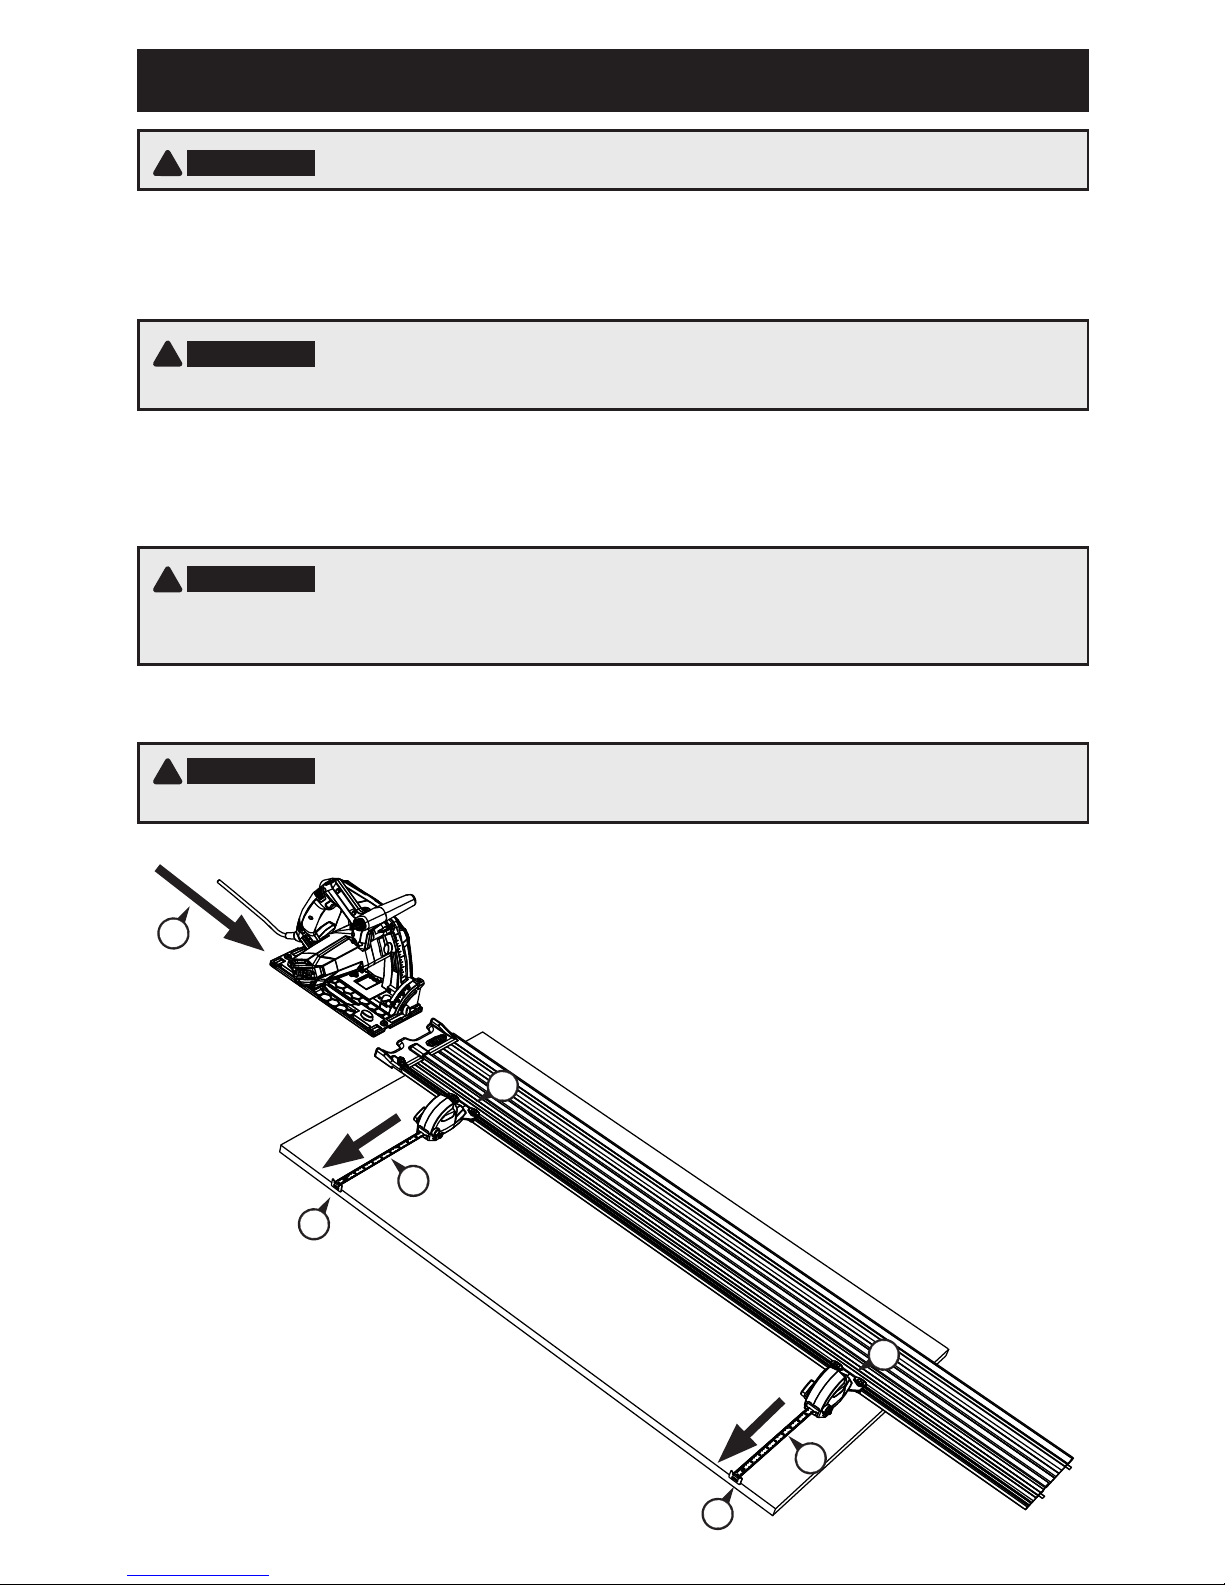
USING THE GUIDES
(1) Position one Parallel Guide a minimum of 6" from the cord-manager
end of the guide track to allow lead-in room for the saw. Position the
second Parallel Guide 2" from the far end of the workpiece.
(4) Place the Saw on the Track and make the cut.
(2) Extend both tape rules to the same dimension and lock them in place.
(3) Position the guide track on the workpiece and hook the Parallel Guide
tapes on the edge of the workpiece.
ATTENTION:
!
For all cuts, position the workpiece under the guide track with the waste to the outside.
ATTENTION:
!
With the cord-manager end of the workpiece 6" from the end of the track, both Plunge Saw
tracking controls engage the guide track and the saw blade plunges into the workpiece to start the cut.
ATTENTION:
!
The Parallel Guide tape rules are self-supporting to 96". For cuts over 48”, place the guide
track with attached Parallel Guides on the workpiece in approximate position. Extend the tapes to the desired
dimension, lock them, and then reposition the guide track to engage the Parallel Guide tape hooks.
ATTENTION:
!
After removing the Parallel Guides from the guide track, retract the tape and tighten all knobs
to prevent loss of parts.
4
3
2
2
3
1
1
 Loading...