

Page 1

INSTALLATION MANUAL
Granite Kitchen Sinks
www.kraususa.com
www.kraususa.com I phone: 1.646.461.9199 I fax: 1.516.621.8900 I toll free: 1.800.755.0703
Page 2
Thank You
We want to take this opportunity to thank you for purchasing a Kraus
product, a carefully-crafted, functional addition to your kitchen.
Thoughtfully designed and polished, our products are a testament to
endless creativity and timeless quality. Every nished piece endures rigorous
testing and inspection to ensure it stands the test of time, giving you years of
perfect use. Let us help you make your kitchen the heart of your home
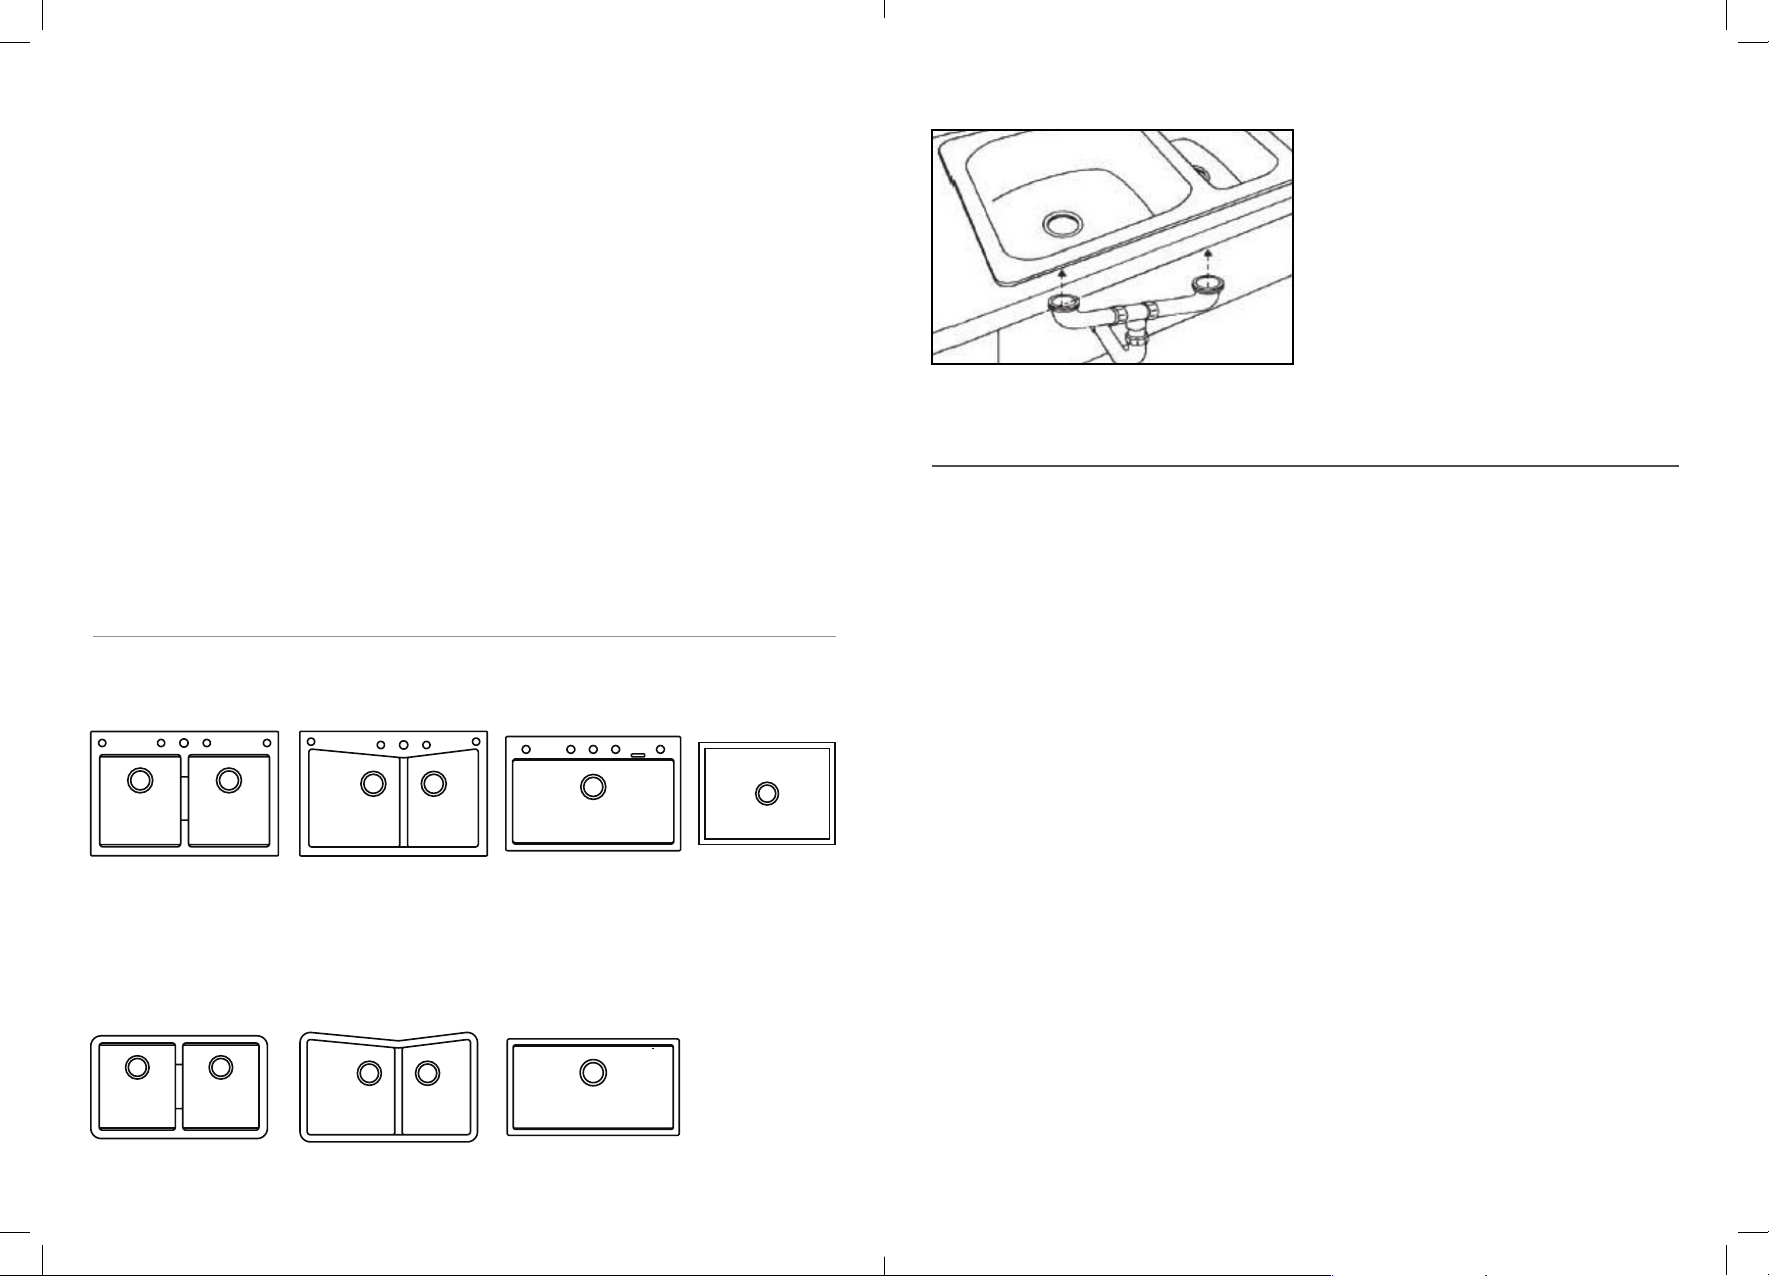
Step 7
As you begin your Kraus journey, please register your product at:
www.kraususa.com/product-registration
Dual Mount Models
can be installed either as a TOP MOUNT or as an UNDERMOUNT
KGD-433B
KGD-430B
KGD-412B KGD-410B
Undermount Models
can be installed as an UNDERMOUNT
Connect all faucet supply lines, disposal (if available), and drain trap fittings per
manufacturer’s instructions.
CHECK FOR LEAKS:
• Supply tubes to faucet
• Supply riser tubes to shut o valves or lower connections
• Fill sink with water and check for leak around drain and carefully tighten as needed
GRANITE SINK CARE & CLEANING INSTRUCTIONS
Everyday Cleaning:
• Wash your sink using warm water, a soft cloth or non-abrasive woven nylon pad, and
a nonabrasive liquid cleaner or detergent. This can be done as often as the sink is used.
Metallic Abrasions or Heavy Stains:
• Wipe the sink using a soft cloth or non –abrasive woven nylon pad and a liquid
scouring product. Apply the liquid scouring product sparingly and rub lightly. Repeat
as necessary until sink is clean.
Hard Water, Calcium and Lime Deposits:
• Wipe with a non-abrasive woven nylon pad and white vinegar. Rinse after 20 minutes.
Do Not Use:
• Abrasive cleansers, abrasive scrub pads, or alkali cleaners such as ammonia.
KGU-434B
KGU-431B KGU-413B
HELP LINE
If you need additonal assistance at any time during the installation, please call us at:
1.800.775.0703 or email us at: info@kraususa.com
Our customer service hours are Monday - Friday, 9am - 6pm EST.
Be sure to visit our website at: www.kraususa.com
Page 3

Step 1
Step 3
Cutout Are
a
Masking Tape
Position the template on the countertop in the location you wish to install the sink. Check
to make sure that the sink bowl(s) will not interfere with the cabinets below. Attach the
template to the countertop with masking tape and trace the cutout line with a pencil.
Remove template from countertop before proceeding.
Or (Without Template)
Invert sink and position onto the counter-top. Check to make sure that the sink bowl(s)
will not interfere with the cabinets below. Trace a pencil line around the outside edge of
the sink and remove the sink from the countertop. Measure in ⁄” (10mm) from the initial
sink outline and draw a second line inside the rst, this is the cut out line.
Using a saber saw, cut inside of cutout Line. Place sink in cut out hole and check for
proper t.
Step 4
Step 2
Drill a starter hole inside of cutout line using a drill bit sized to allow the saber saw blade
to be inserted for cutting. NOTE: The starter hole must be fully inside of the cut out line.
Identify xture hole locations for faucet, spray or soap dispensers . Drill a starter hole
from reverse side of the countertop. Working from the top side of the countertop drill the
appropriate number of holes using a 1¼” (32 mm) using a hole saw position on the starter
hole, through the countertop. To cool the hole saw and sink surface, a light application
of water, periodically, is necessary. Attach faucet, drain, and accessories according to
manufacturer’s instructions.
Page 4

Step 5
Caulk
TOOLS REQUIRED:
• Tape Measure
• Retractable Utility Knife (x-acto type)
• Masking Tape
• Caulk
• Rubber Mallet
• Drill
• Safety Glasses
• Phillips Head Screwdriver
• 1¼” Hole Saw
• Saber Saw (if counter top cutout is required)
IMPORTANT INSTALLER NOTE: READ ALL INSTRUCTIONS CAREFULLY
BEFORE STARTING
If you purchased the Dual Mount Granite sink there are two “Master Templates” packaged
with the sink that you are installing. Before proceeding any further YOU MUST identify
the template pattern that is required in order to install the sink either as a TOP MOUNT
installed on the top of the counter or as an UNDERMOUNT installed to the underside of
the counter.
Apply a bead of caulk (not included) to the underside of the sink flange. For final
fit, make sure each sink clip is pulled back as illustrated. Position the sink into the
countertop opening.
Step 6
Secure the sink by pivoting the sink clips into the position illustrated and tighten screws
in the front, then tighten Rear and side screws.
a.) TOP MOUNT INSTALLATION:
Select the template pattern from the Master Top Mount template that corresponds to
the model number of the sink that you are installing, the model numbers as shown in the
line break of the template in the bottom center position of the Master template. Using a
Retractable Utility Knife, cut carefully along the line of the template that corresponds to
your sink model until you have created the cut out area on the Master template, keep the
cut out area to follow instructions.
b.) UNDER MOUNT INSTALLATION:
Select the template pattern that from the Master Under Mount template that corresponds
to the model number of the sink that you are installing, the model number is shown in
the line break of the template in the bottom center position of the Master template. Using
a Retractable Utility Knife, cut carefully along the line of the template that corresponds to
your sink model until you have created the cut out area on the Master template, keep the
cut out area to follow instructions.
 Loading...