How it Works
Log In / Sign Up
Buy Points
How it Works
FAQ
Contact Us
Questions and Suggestions
Users
Korg
Loading...
#
01R-W
2
01/W
3
01WFD
2
01-Wpro
3
01-W pro X
3
01W WFD
03r-w
2
05R-W
2
104ds Hyper Distortion
105od Classic Overdrive
120
1212IO
3
168RC
2
2E
2E ii
301dl Dynamic Echo
411fx Super Multi FX
700s
3
73key
707
2
770
3
800
800-DV
405012500
A
A1
A2
A3
2
A4
3
A5
4
AD120VT
AD15
AD30
AmkII
AMPWORKS
AMPWORKSB
2
AMPWORKS BASS
AMPWORKSG
Arp Odyssey
2
AudioGate
Audiogate 4.5
AW1
AW-2
AW-3G
AW-3M Dolcetto
AW-3U
AW-3V
AW-LT100B
AW-LT100G
AW-LT100M
AW-LT100T
AW-LT100V
AW-OTB
AW-OTB-POLY
AW-OTG
AW-OTG-POLY
AX1000G
3
AX100G
3
AX10A
3
AX10B
2
AX10G
3
AX1500G
3
AX1B
AX1G
Ax3000b
2
AX3000B 1
AX3000g
7
AX300G
2
AX30B
AX30G
2
AX3A
3
AX3B
3
AX3G
4
AX5B
2
AX5G
3
B
B1
B1SP
B2BK
B2SP
BA-40
Beat Boy
2
BEATLAB BTL-1
Beatlab Mini
BGPGVNL
BTL-1
2
BX-3
2
C
C-150
C-303
C-320
2
C-3200
C-340
2
C-350
Loading...
Loading...
Nothing found
AW-3G
Owner's Manual
7 pgs
846.7 Kb
0
Table of contents
Loading...
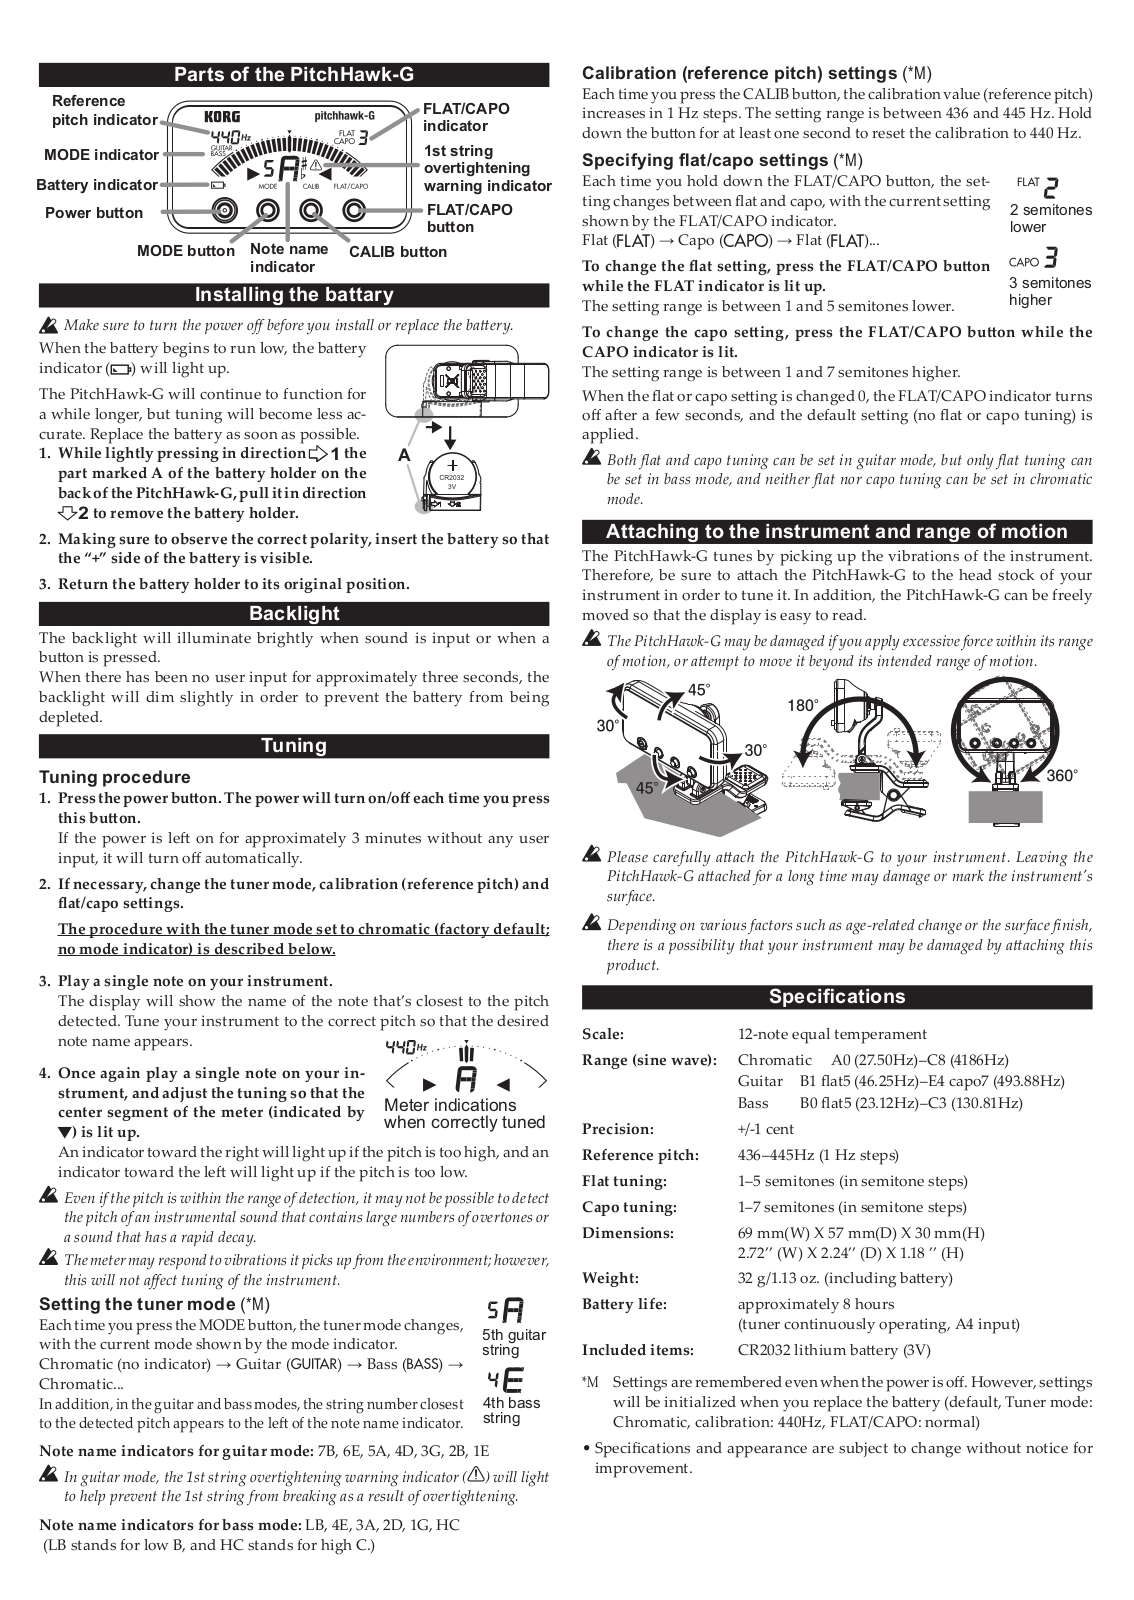
Korg AW-3G, PitchHawk-G Owner's Manual
...
Korg Owner's Manual
Download
Specifications and Main Features
Frequently Asked Questions
User Manual
Download
Loading...
+
4
hidden pages
Unhide
You need points to download manuals.
1 point = 1 manual.
You can buy points or you can get point for every manual you upload.
Buy points
Upload your manuals
 Loading...