

Page 1
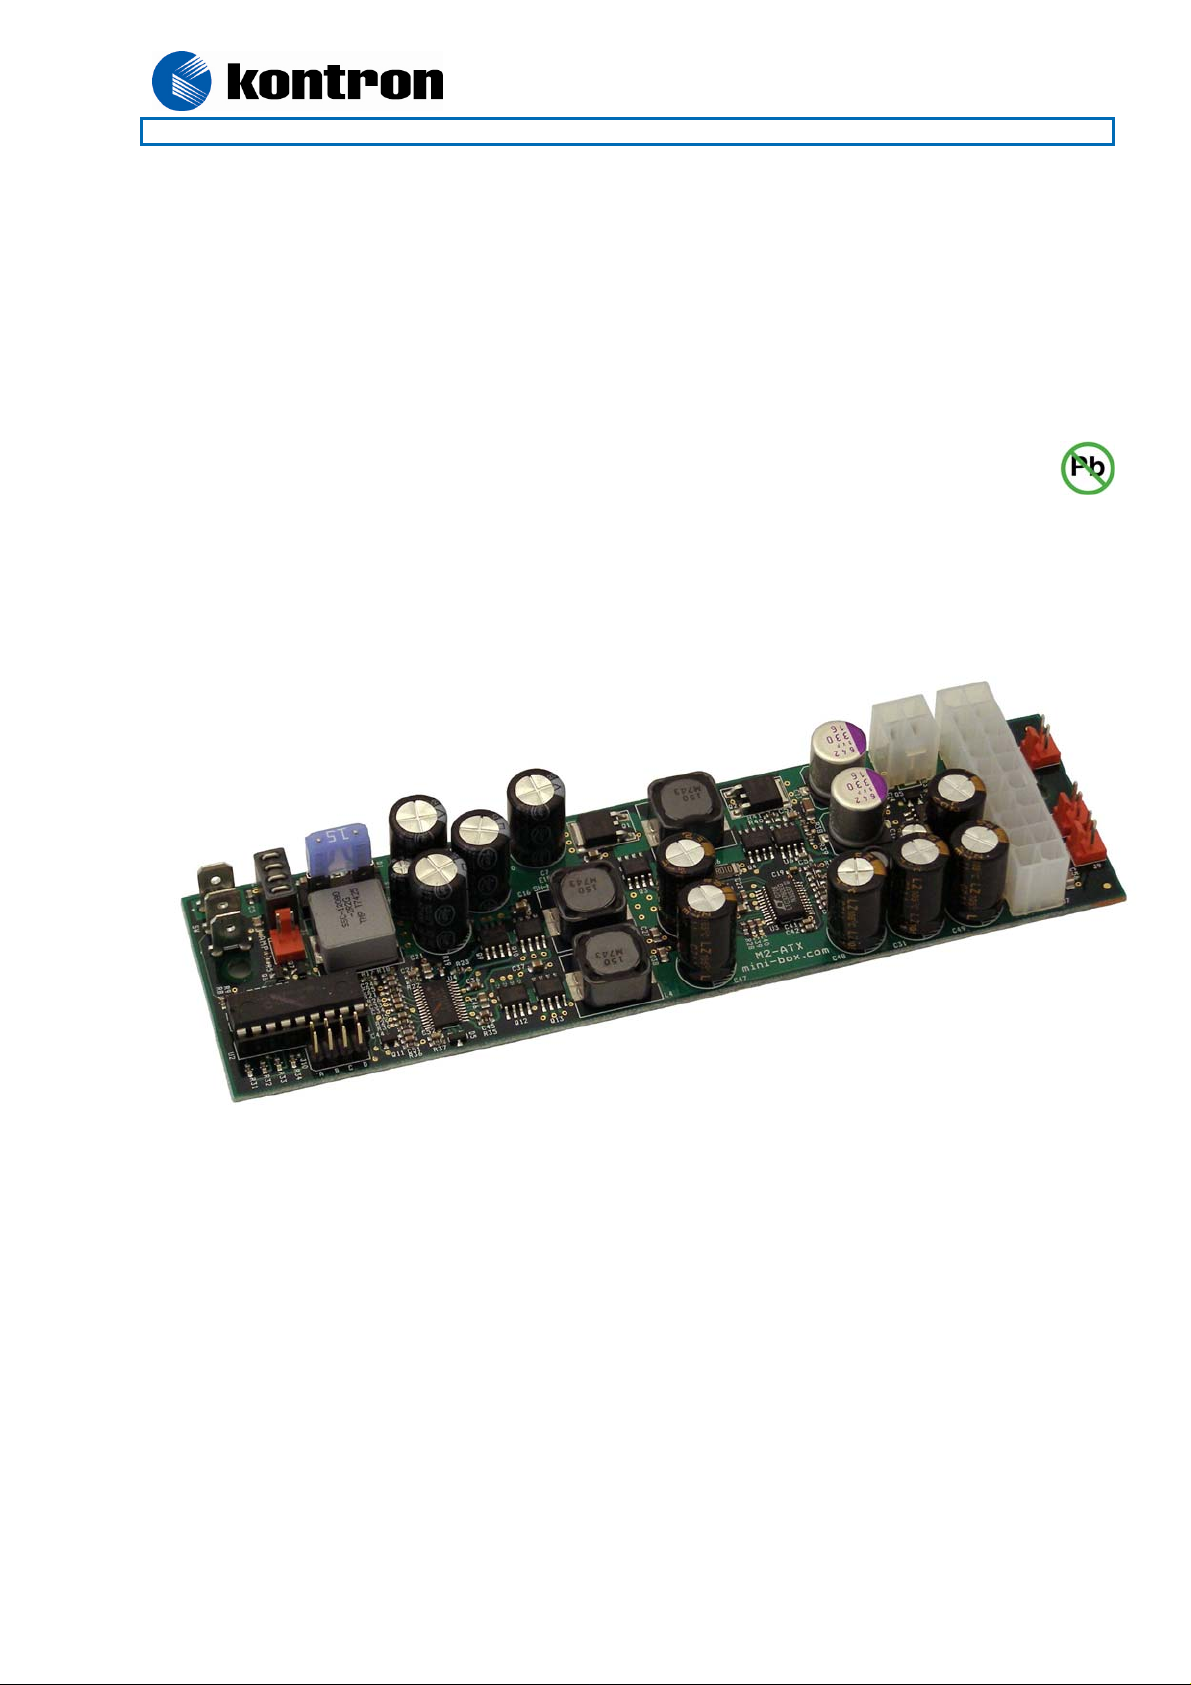
820155 DC-DC Supply 10-32Vin 90W
KTD-00740-C Public User Manual Date: 2008-04-24 Page 1 of 9
User Manual
for the
820155 DC-DC Power Supply 90W 10-32Vin
Page 2
820155 DC-DC Supply 10-32Vin 90W
KTD-00740-C Public User Manual Date: 2008-04-24 Page 2 of 9
Introduction
The 820155 DC-DC Power Supply is a fully compliant ATX power supply designed to power a wide variety of
motherboards like the KT690mITX, 786LCD/mITX, 886LCD-M and 986LCD-M families of boards. It has
included cable kit inclusive ATX+12V cable, as required by the KT690 and 986LCD-M families.
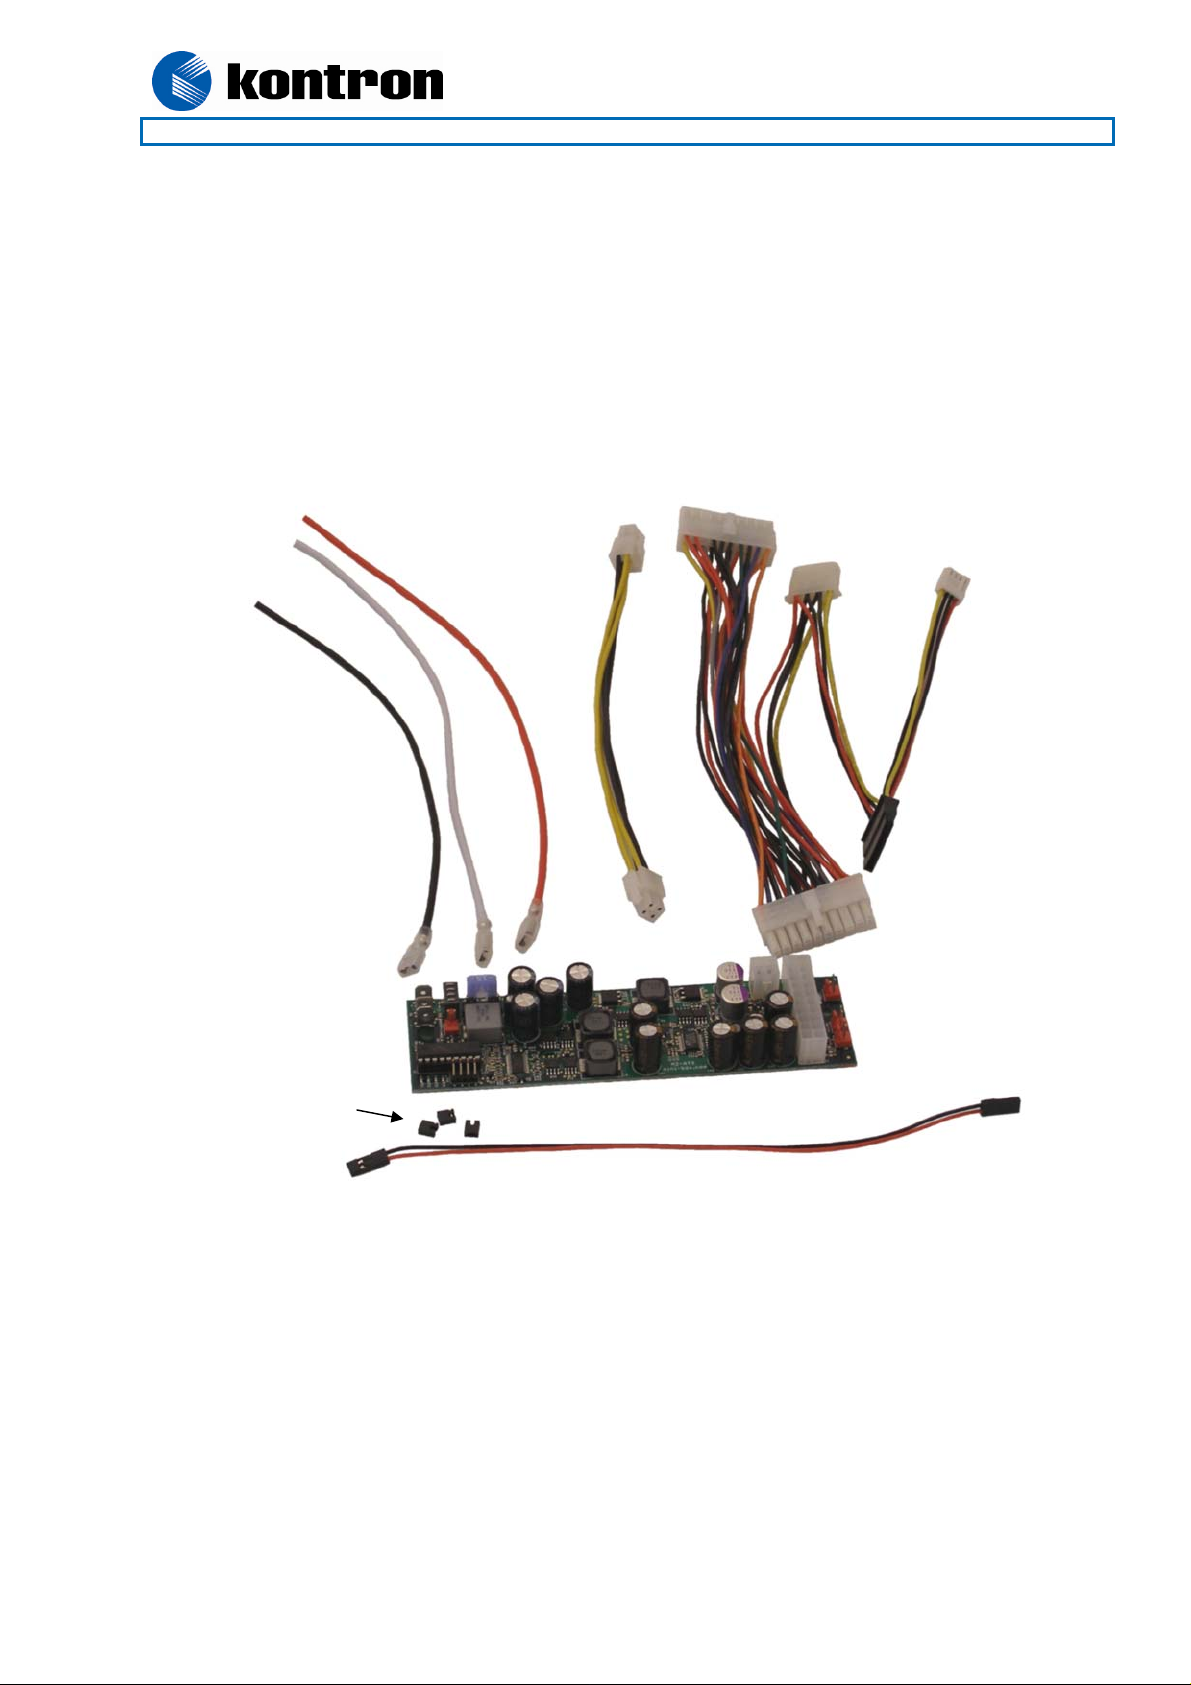
The 820155 comes with complete cable harness consisting of:
Note 1: Used for battery driven application. Not needed for standard ATX PSU mode.
+V Cable
+
SW Cable
-
Jumpers
- ATX cable (220 mm) with 1x HDD power plugs, 1x SATA power plug and 1x FDD power plug.
- ATX+12V Power cable (200 mm).
- Power input wires, 3 pieces (red, black and white) (300mm) open-ended.
- 2 wire cable for implementing PSU controlled motherboard Power On Button (210 mm). (Note 1)
- Set of Jumpers (3 pieces) to select between various power sequencing schemes. (Note 1)
Page 3
820155 DC-DC Supply 10-32Vin 90W
KTD-00740-C Public User Manual Date: 2008-04-24 Page 3 of 9
The power supply can be operated in two types of modes: “Standard ATX Supply Mode” and “Battery Driven
Application Mode”. The input power voltage shall be 10 – 32V except for Battery Driven Application Mode
where the minimum power input voltage is 11.2V (down to 8V is allowed for maximum 1 minute). The power
input is protected against over-voltage transients, short circuits (>15A) and in Battery Driven Application Mode
the battery is protected against Deep Discharging.
Note 1: Peak Load (< 30 sec.) These values can be used as maximum load if active cooled.
In order to estimate if the DC-DC Power Supply is suitable for a specific project the following table can be
used.
The allowed load (without forced air) can be compared to the maximum load of the actual board. Maximum
load from LCD, HDD, PCI, AGP cards must be taken into consideration to make sure none of the outputs is
overloaded. The “green” numbers are the available power for these loads.
Voltage Output Max load
(fan less)
Peak Load
Note 1.
5V 5,5A 6A
5VSB 1,45A 2A
3.3V 3,9A 6A
-12V 0,11A 0.15A
12V 3,3A 6A
Loads in Ampere
KT690mITX 786LCD/mITX 886LCD-M 986LCD-M Voltage Output
Turion
1.6G
Sempron
1.00G
733/133 400/100 1600/400 800/400 Duo
2G
Celeron
5V 3,2 2,3 2,4 3,1 1,7 3,8 1 4,5 4,7 0,8 3 2,4 2,5 3,0 2,1 3,4
5VSB 0,3 1,2 0,3 1,2 0,3 1,2 0,3 1,2 1,2 0,3 1,2 0,3 0,7 0,7 0,2 1,2
3.3V 1,3 2,6 1,3 2,6 3,2 0,7 2,5 1,4 2,6 1,3 2,6 1,3 1,3 2,6 1,6 2,3
-12V - 0,1 - 0,1 - 0,1 - 0,1 - 0,1 - 0,1 0,05 0,05 - 0,1
12V 2,4 0,9 0,8 2,5 0,4 2,9 0,3 3,0 0,6 2,7 0,6 2,7 2,7 0,6 0,6 2,7
Unused available power on some of the power lines can to some extend be used on other power lines.
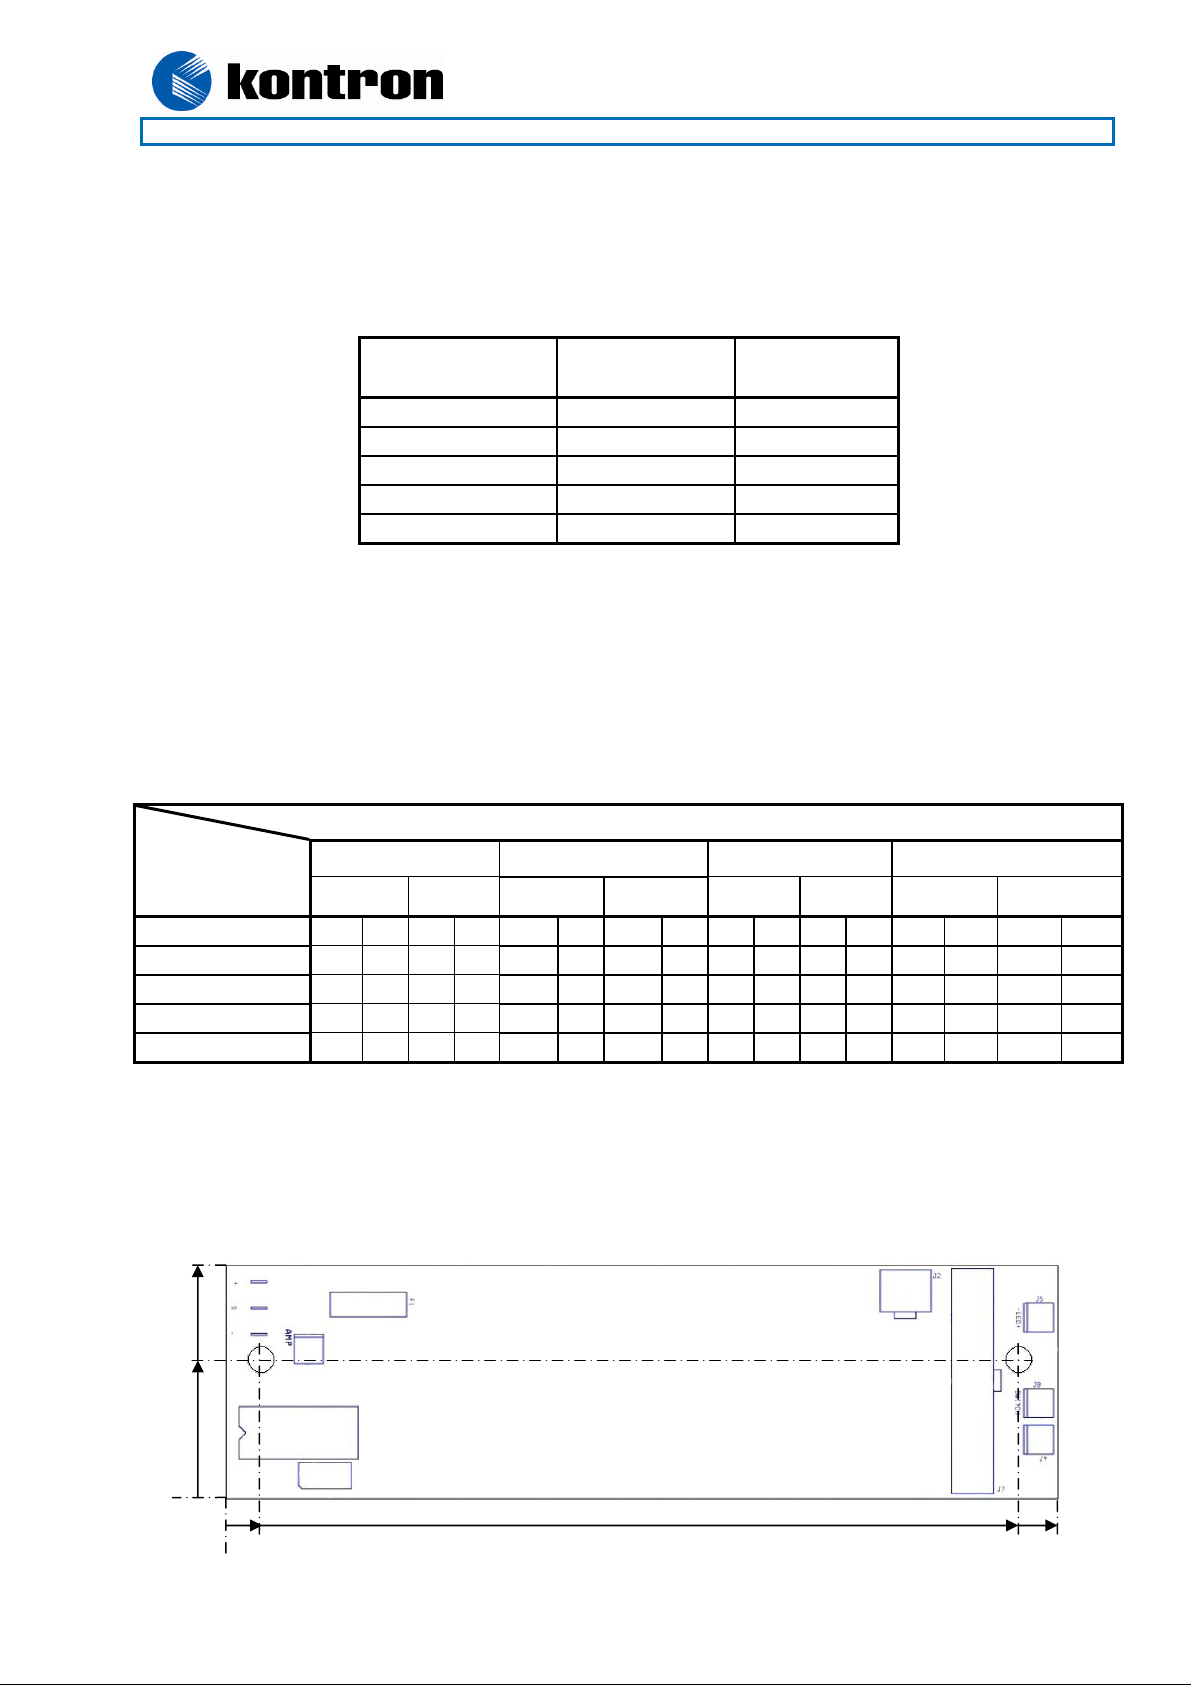
Mechanical Drawing
45.0
27.0
1.06G
Measures in mm.
160.0153.07.0
Page 4

820155 DC-DC Supply 10-32Vin 90W
KTD-00740-C Public User Manual Date: 2008-04-24 Page 4 of 9
Functional diagram
+V
(J1)
-V
(J4)
Protection circuit
(Filter, Fuse,
TVS, Under
voltage, reverse
voltage)
SW
(J3)
Amp
(J6)
Connector position
J1 = +V
J2 = ATX+12V
J3 = SW
J4 = -V
J5 = LED
J6 = AMP
J7 = ATX Connector
J8 = Switch
J9 = Switch
J10 = Jumpers
Switch Logic
Microcontroller
and I/O interface
Jumpers
(J10)
10 – 32V DC/DC
converters
Switch
(J8)
ATX+12V
Conn.
(J2)
ATX
Power
Conn.
(J7)
LED
(J5)
Switch
(J9)
Page 5

820155 DC-DC Supply 10-32Vin 90W
KTD-00740-C Public User Manual Date: 2008-04-24 Page 5 of 9
Functional/Connector description
+V (J1) is for 10 – 25V power input (Vin) with reference to –V (J4).
-V (J4) is Ground reference to +V (J1).
SW (J3) Switch On/Off signal input to be used in Battery Driven Application Mode.
This input shall be left unconnected when the PSU is used in Standard ATX Supply Mode (no Jumpers
installed in J10). As long as Vin is available the +5VSB will be present and it is up to the motherboard to turn
on and off motherboard.
This input shall be used in Battery Driven Application Mode (1 – 3 jumpers installed in J10). The SW input is
used to tell the PSU to automatically turn on the motherboard and later to turn off again after a selectable
delay (seconds, minutes or hours range) by automatically start motherboard shutdown procedure. When the
motherboard is shutdown it is possible that also the +5VSB will turn off after a certain delay
SW State Action description
OFF 0 Nothing happens. (Waits for SW to be turned to the ON-position).
ON 1a Waits for 2 seconds.
OFF 2a
* = On/Off controlled by motherboard
Input Voltage On
1b Turn on the 5Vsb rail and wait 1 second.
1c
1d Wait for the SW to turn OFF
2b
2c
3
State 0.
Off mode
Generate a Power On Button pulse on J8 and J9. Then the Motherboard shall turn on the
supply by activating the PSON # signal (ATX signal). If J8 or J9 are not used for Power On
Button, then Motherboard waits for Power On Button activated or it turns on automatically
if selected in BIOS to do so.
Waits for 5 sec., 30 sec, 30 min. or 3 hours (OFFDELAY) depending on the selected
Battery Driven Application Mode (selected by Jumpers in J10).
If SW is turns ON before the delay elapse then go to state 1d
Generate a Power On Button pulse on J8 and J9, so that the Motherboard will initiate the
Shutdown Procedure.
Please notice that if J8 or J9 is not connected to Power Button input on Motherboard then
Motherboard Shutdown Procedure will not be initiated.
Waits for 45 sec., 2 hours or “Forever” (5VSB Off Delay) depending on the selected
Battery Driven Application Mode (selected by Jumpers in J10).
When “Forever” is selected then the input voltage is monitored and if it gets below 11V for
more than one minute, the “Forever” delay will terminated until the input voltage gets
higher than 11V.
Please notice that if the Motherboard is rebooted by manual Power On Button, then all
power lines will be turned off, as selected by the 5VSB Off Delay, without the Shutdown
procedure has been carried out.
If SW is turns On before the delay elapse then go to state 1a
If Input Voltage is removed then go to state 0.
Total Off mode. Mother board can not be turn on by Push Button. When SW goes ON
then go to state 1a
SW On
Motherboard
On *
State 1.
On mode
(unlimited)
SW Off
SW On
Motherboard
On *
State 2.
Off mode
(limited)
5VSB Off
SW On
Motherboard
Off
State 3.
Total Off
mode
Page 6

820155 DC-DC Supply 10-32Vin 90W
KTD-00740-C Public User Manual Date: 2008-04-24 Page 6 of 9
Jumpers (J10)
By use of up to 3 Jumpers it is possible to select between 8 microcontroller driven timing modes. The default
mode is no Jumpers installed in the J10 connector, position A, B, C and D. This mode is the standard ATX
Supply mode.
In default mode the PSU behave as a traditional PC PSU with no ignition control (shutdown controller
bypassed) and it can be used in non-vehicle computer applications. The other modes are for battery driven
applications having different Off delay and +5VSB Off delay timings according to the following table.
Mode A B C D Off Delay 5VSB Off Delay Notes
0
1
2
3
4
5
6
7
(*) This mode can drain the battery even though the PSU will automatically shut down when battery voltage is
below 11.2V for more than 1 minute.
Switch (J8 and J9)
J8 and J9 are parallel connectors used to simulate a “Power On Button” signal.
These outputs can be left unconnected when the PSU is used in standard ATX Supply Mode (no Jumpers
installed in J10). In stead the Motherboard Power On Button is implemented by separate push button contact
in combination with BIOS settings for the Power Button input. In this configuration it is possible also to keep
the Motherboard in Shutdown mode after power interruption.
If one of these outputs is connected to the Motherboard “Power On Button” input (Front Panel connector)
when the PSU is used in standard ATX Supply Mode (no Jumpers installed in J10), then the PSU will
automatically turn on the Motherboard after power interruption. This is one way of implement an “Always On”
function.
The output can be used in Battery Driven Application Mode (1 – 3 jumpers installed in J10) in order to start up
motherboard automatically when power is connected to the PSU and SW turns to on for the first time. One of
these outputs shall be connected to the Motherboard “Power On Button” input (Front Panel connector). The
output will also be used to initiate shutdown procedure to save battery capacity. It is possible to add manual
operated push button to one of connectors (J8 or J9).
Note: In case “Always On” function shall not allow Shut Down then a special circuit can be design to fit the
Frontpanel connector of the Motherboard. Application note is available on request.
: : : :
: : :
: :
:
: :
: :
: :
:
:
:
:
0 sec Forever Standard ATX supply (Default)
5 sec 45 sec Battery Driven Application Mode
5 sec 2 hours Battery Driven Application Mode
5 sec Forever (*) Battery Driven Application Mode
30 sec 2 hours Battery Driven Application Mode
30 sec Forever (*) Battery Driven Application Mode
30 min Forever (*) Battery Driven Application Mode
3 hours Forever (*) Battery Driven Application Mode
Signal Pin Signal
Position A 1 2 Gnd
Position B 3 4 Gnd
Position C 5 6 Gnd
Position D 7 8 Gnd
Pin Signal
1 Switch pin1
2 Switch pin2
Page 7

820155 DC-DC Supply 10-32Vin 90W
KTD-00740-C Public User Manual Date: 2008-04-24 Page 7 of 9
AMP (J6)
The AMP connector can be used to remotely mute Audio Amplifiers etc. the first 4 seconds after PSU is
turned on. In general the AMP is not required to mute the motherboard audio system when the motherboard is
booting. In stead the BIOS can silence the speaker system.
The RMT signal is unconnected the first 4 seconds after PSU turns on and then i t is connected to Vin.
ATX Connector (J7) ATX Power connector 20 pin (Molex P/N 39-01-2200).
Control signal description:
Signal Description
Pin Signal
1 Gnd
2 RMT
Signal PIN Signal
+12V 10 20 5V
SB5V 9 19 5V
P_OK 8 18 nc
GND 7 17 GND
5V 6 16 GND
GND 5 15 GND
5V 4 14 PSON#
GND 3 13 GND
3V3 2 12 -12V
3V3 1 11 3V3
P_OK Active high output signal indicating that the +12V, +5V and 3V3 are within operating limits.
PS_ON# Active low input signal to turn on the power supply outputs.
ATX+12V Power Connector (J2)
Signal PIN Signal
GND 1 3 +12V
GND 2 4 +12V
Note 1: Use of the 4-pin ATX+12V Power Connector is required for operation of the KT690mITX and 986LCDM boards.
LED (J5) Connect a standard LED, no resistor required, to implement a “Power ON LED”. This option can be
used instead of using a +3.3VSB power output on Motherboard Front Panel connector. When the PSU is used
in Battery Driven Application Mode and when in State 2c, then the LED is flashing every 2 seconds.
Pin Signal
1 LED 2 LED +
Page 8

820155 DC-DC Supply 10-32Vin 90W
KTD-00740-C Public User Manual Date: 2008-04-24 Page 8 of 9
Installation guide
Standard ATX Supply mode:
1. Make sure no Jumpers are installed in J10.
2. Connect the PSU ATX Connector to the Motherboard ATX connector via the ATX Cable. The cable kit
can be mounted two ways, make sure it’s done as requested.
Please notice that for the KT690mITX and 986LCD-M families:
Four pins of the ATX Power Connector are not used, but the connector system is keyed so
the DC-DC Power Supply can not be mounted in a wrong position. The ATX connector lock
has no effect.
The ATX+12V cable shall be connected.
3. Connect –V (J4) to a DC power source reference ground (black wire etc.) and connect +V (J1) to the
DC 10 – 32V power source (red wire etc.).
4. Connect “Power” LED to J5 if required (not included in the 820155).
5. Connect HDD, CD-ROM, ADD or ADD2 card if required. If more power connectors are needed then
standard HDD/floppy “Y” splitter cable can be used.
6. Turn on the Mother Board by using the Power On Button pin (pin 16) in the Front Panel Connector
(alternatively short circuit pin 16 and pin 18 for half a second).
Battery Driven Application mode:
7. Mount Jumpers on J10 in according to requested delays.
8. Connect the PSU ATX Connector to the Motherboard ATX connector via the ATX Cable. The cable kit
can be mounted two ways, make sure it’s done as requested.
Please notice that for the KT690mITX and 986LCD-M families:
Four pins of the ATX Power Connector are not used, but the connector system is keyed so
the DC-DC Power Supply can not be mounted in a wrong position. The ATX connector lock
has no effect.
The ATX+12V cable shall be connected.
9. Connect –V (J4) to a DC power source reference ground (black wire etc.) and connect +V (J1) to the
DC 10 – 32V power source (red wire etc.).
10. Connect the SW (J3) input to a “Turn On Switch” (via white wire etc.) so that SW is connected to Vin
when system shall be able to turn on and is unconnected when system shall turn to off (after some
delay) and then stay off.
11. Optional Connect J8 to the Motherboard “Power On Button” input (Front Panel connector) and
optional connect J9 to a manual operated Push Button Contact.
12. Optional, connect “Power” LED to J5 (no LED kit is included in the 820155).
13. Connect HDD, CD-ROM, ADD or ADD2 card if required. If more power connectors are needed then
standard HDD/floppy “Y” splitter cable can be used.
14. Turn on the Mother Board by using the Power On Button pin (pin 16) in the Front Panel Connector
(alternatively short circuit pin 16 and pin 18 for half a second).
Page 9

820155 DC-DC Supply 10-32Vin 90W
KTD-00740-C Public User Manual Date: 2008-04-24 Page 9 of 9
Specifications
Input Requirements
Battery Driven Application Mode: 12V battery, 11.2 -24V (down to 8V for a few seconds is accepted).
Standard ATX Supply Mode: 10 – 25V regulated, max=15A.
The power input is protected against over-voltage transients, short circuits (>15A) and in Battery Driven
Application Mode the battery is protected against Deep Discharging.
Fuse: Littlefuse – MINIfuse 15A (Blue)
Recommended for UL approval is adding external Fuse on input voltage.
Voltage outputs
Output
voltage
5V 5,5 6 +/- 1.5%
5VSB 1,45 2 +/- 1.5%
3.3V 3,9 6 +/- 1.5%
-12V 0,11 0.15 +/- 5%
12V 3,3 6 +/- 2%
Peak loads less than 5 sec. up to 30% more effect.
Output Power: 130W (forced air) and 90W (Fan less) maximum.
Peak Load power: 170W < 5 sec.
Efficiency: >94% at 10 – 16V in and 50% load.
Lifetime: MTBF=100K hours at 50 ºC.
Size: (L, W, H) = (160, 45, 35) mm
Operating environment: Temperature: -20 to 85 ºC. Relative Humidity 10 to 90% (non-condensing).
Shipping and storage: Temperature -40 to +90 ºC. Relative humidity 5 to 95% (non-condensing).
RoHS compliant.
PCB UL mark: E154554
Max Load / [A]
(Fan less)
Max Load / [A]
(Forced air)
Regulation
 Loading...