

Page 1
User’s Guide
Page 2

Introduction
Thank you for purchasing this machine.
This manual provides the information required to use this machine for scanning.
Be sure to read this manual before performing any operations.
For precautions concerning the use and safety of the machine, refer to the
User’s Guide provided with the machine.
Store the CD-ROM and User’s Guides provided with the machine in a safe
place.
Trademarks and copyright
- KONICA MINOLTA, the KONICA MINOLTA logo, and The essentials of
imaging are registered trademarks of KONICA MINOLTA HOLDINGS,
INC.
- PageScope and bizhub are registered trademarks or trademarks of
KONICA MINOLTA BUSINESS TECHNOLOGIES INC.
- Netscape is a registered trademark of Netscape Communications Corporation in the United States and other countries.
- Novell and Novell NetWare are registered trademarks of Novell, Inc. in the
United States and other countries.
- Microsoft, Windows, and Windows NT are either registered trademarks
or trademarks of Microsoft Corporation in the United States and/or other
countries.
- Adobe, the Adobe logo, Acrobat and PostScript are either registered
trademarks or trademarks of Adobe Systems Incorporated in the United
States and/or other countries.
- Ethernet is a registered trademark of Xerox Corporation.
- PCL is a registered trademark of Hewlett-Packard Company Limited.
- All other product and brand names are trademarks or registered trade-
marks of their respective companies or organizations.
TWAIN Driver x-1
Page 3

Copyright
© 2007 Konica Minolta Business Technologies, Inc. All Rights Reserved.
Note
- This User’s Guide may not be reproduced in part or in full without permission.
- Konica Minolta Business Technologies, Inc. will not be held liable for any
incidents caused by using this User’s Guide.
- Information included in this User’s Guide is subject to change without notice.
- Views of the actual equipment may be slightly different from the illustrations used in this User’s Guide.
TWAIN Driver x-2
Page 4

Software End User License Agreement
PLEASE READ CAREFULLY THE LICENSE AGREEMENT BELOW BEFORE
OPENING THE PACKAGE OF THIS SOFTWARE (“SOFTWARE”), DOWNLOADING, INSTALLING OR USING THE SOFTWARE. OPENING THE PACKAGE, OR DOWNLOADING, INSTALLING OR USING THE SOFTWARE
SHALL BE DEEMED YOUR LAWFUL ACCEPTANCE OF THE TERMS AND
CONDITIONS BELOW. IF YOU DO NOT AGREE TO THEM, DO NOT DOWNLOAD, INSTALL, USE THE SOFTWARE, NOR OPEN THE PACKAGE.
1. COPYRIGHT AND INTELLECTUAL PROPERTY RIGHTS
This is a license agreement and not an agreement for sale. Konica Minolta
Business Technologies, Inc. (“Konica Minolta”) owns, or has been licensed
from other owners (“Konica Minolta Licensor”), copyrights and other intellectual property rights of the Software, and any and all rights and title to the
Software and any copy made from it are retained by Konica Minolta or Konica Minolta Licensor. In no event, this Agreement shall be deemed to assign
any copyright and/or any intellectual property rights of the Software from
Konica Minolta or Konica Minolta Licensor to you. The Software is protected
by copyright laws and international treaty provisions.
2. LICENSE
Konica Minolta hereby grant to you a non-exclusive and limited license, and
you may:
(i) install and use the Software only on your computer(s) connected with
Konica Minolta product for which this Software is designed;
(ii) allow users of the computers described above to use the Software, provided that you assure that all such users comply with the terms of this Agreement;
(iii) use the Software only for your own customary business or personal purpose;
(iv) make one copy of the Software only for backup purpose in the support
of the normal and intended use of the Software.
(v) transfer the Software to other party by transferring a copy of this Agreement and all documentation along with the Software, provided that (a) you
must, at the same time, either transfer to such other party or destroy all your
other copies of the Software, (b) such transfer of possession terminates your
license from Konica Minolta, and (c) you must assure that such other party
has agreed to accept the terms and conditions of this Agreement. If such
other party does not accept such terms and conditions then you shall not
transfer any copy of the Software.
3. RESTRICTIONS
(1) You shall not without the written consent of Konica Minolta:
TWAIN Driver x-3
Page 5

(i) use, copy, modify, merge or transfer copies of the Software except as provided herein;
(ii) reverse engineer, reverse assemble, reverse compile or any other way analyze the Software; or
(iii) sublicense, rent, lease or distribute the Software or any copy thereof.
(iv) remove, use, or alter any trademark, logo, copyright or other proprietary
notices, legends, symbols or labels in the Software.
(2) You agree that you will not export the Software in any form in violation of
any applicable laws and regulations regarding export control of any country.
4. DISCLAIMER OF WARRANTIES
(1) If the Software is furnished on CD-ROM(s) or other tangible object that is
used for storage of digital data (hereinafter collectively “Storage Medium”),
Konica Minolta warrants the Storage Medium to be free from the defects in
material and workmanship under normal use, for a period of ninety (90) days
from the date of delivery to you. WITH THE EXCEPTION OF THE FOREGOING EXPRESS WARRANTIES APPLICABLE TO STORAGE MEDIUM ONLY,
THE SOFTWARE IS PROVIDED TO YOU “AS IS” WITHOUT ANY WARRANTIES WHATSOEVER. KONICA MINOLTA, ITS AFFILIATE COMPANIES AND
KONICA MINOLTA LICENSOR DISCLAIM ALL WARRANTIES WITH REGARD TO THE SOFTWARE, EXPRESS OR IMPLIED, INCLUDING, WITHOUT
LIMITATION, IMPLIED WARRANTIES OF MERCHANTABILITY, FITNESS
FOR A PARTICULAR PURPOSE AND NON-INFRINGEMENT OF THIRD
PARTY RIGHTS.
(2) IN NO EVENT WILL KONICA MINOLTA, ITS AFFILIATE COMPANIES NOR
KONICA MINOLTA LICENSOR BE LIABLE FOR ANY LOST PROFITS, LOST
DATA, OR ANY OTHER INDIRECT, SPECIAL, PUNITIVE, INCIDENTAL OR
CONSEQUENTIAL DAMAGES THAT RESULT FROM USE OR INABILITY TO
USE THE SOFTWARE INCLUDING WITHOUT LIMITATION, DAMAGES FOR
LOSS OF GOODWILL, COMPUTER FAILURE OR MALFUNCTION OR ANY
AND ALL OTHER COMMERCIAL OR OTHER DAMAGES OR LOSSES, EVEN
IF KONICA MINOLTA, ITS AFFILIATE COMPANIES OR KONICA MINOLTA
LICENSOR HAS BEEN ADVISED OF THE POSSIBILITY OF SUCH DAMAGES OR FOR ANY CLAIM BY YOU BASED ON A THIRD PARTY CLAIM.
(3) The disclaimer of warranty hereunder does not affect your statutory rights.
In case of the disclaimer is not allowed by applicable law, the disclaimer shall
only apply to you to the maximum extent permitted by the law.
5. TERMINATION
You may terminate this license at any time by destroying the Software and
all your copies of it. This Agreement shall also terminate if you fail to comply
with any terms hereof. Upon such termination, you must immediately destroy
all copies of the Software in your possession.
TWAIN Driver x-4
Page 6

6. GOVERNING LAW
This Agreement shall be governed by the laws of Japan.
7. SEVERABILITY
In the event that any part or parts of this agreement shall be held illegal or
null and void by any court or administrative body of competent jurisdiction,
such determination shall not effect the remaining parts of this agreement and
they shall remain in full force and effect as if such part or parts determined
illegal or void had not been included.
8. NOTICE TO US GOVERNMENT END USERS
The Software is a “commercial item,” as that term is defined at 48 C.F.R.
2.101 (October 1995), consisting of “commercial computer software” and
“commercial computer software documentation,” as such terms are used in
48 C.F.R. 12.212 (September 1995). Consistent with 48 C.F.R. 12.212 and
48 C.F.R. 227.7202-1 through 227.7202-4 (June 1995), all U.S. Government
End Users shall acquire the Software with only those rights set forth herein.
YOU ACKNOWLEDGE THAT YOU HAVE READ THIS AGREEMENT, UNDERSTAND IT, AND AGREE TO BE BOUND BY ITS TERMS AND CONDITIONS. NEITHER PARTY SHALL BE BOUND BY ANY OTHER STATEMENTS
OR REPRESENTATIONS THAT ARE INCONSISTENT WITH THE TERMS
AND CONDITIONS OF THIS AGREEMENT. NO AMENDMENT TO THIS
AGREEMENT IS EFFECTIVE UNLESS WRITTEN AND SIGNED BY PROPERLY AUTHORIZED REPRESENTATIVES OF EACH PARTY. BY OPENING THE
PACKAGE, DOWNLOADING, INSTALLING OR USING THE SOFTWARE
YOU AGREE TO ACCEPT THE TERMS OF THIS AGREEMENT.
TWAIN Driver x-5
Page 7

Contents
Introduction
Copyright ........................................................................................x-2
Software End User License Agreement ..........................................x-3
Contents ............................................................................................. x-6
Explanation of manual conventions ................................................x-8
1 Setting up for scanning
2 Installing the TWAIN driver
2.1 Making connections and installing the driver ................................2-1
Connecting to a computer .............................................................. 2-1
Procedures for making connections and installing the driver ........2-2
2.2 General operation for driver installation ......................................... 2-4
Installation using Plug and Play ...................................................... 2-4
Installation using the TWAIN Driver Installer ..................................2-4
2.3 Installing the TWAIN driver by using Plug and Play ....................... 2-5
Connecting to the computer’s USB port ........................................ 2-5
Installing using Plug and Play on Windows XP/Server 2003 .......... 2-6
Installing using Plug and Play on Windows Vista ........................... 2-7
Installing using Plug and Play on Windows 2000 ........................... 2-9
Installing using Plug and Play on Windows Me ............................ 2-10
2.4 Installing the TWAIN driver by using the installer ........................2-12
Connecting to a computer through a network .............................2-12
2.5 Reinstalling the TWAIN driver by using the installer .................... 2-15
2.6 Uninstalling the TWAIN driver ........................................................ 2-17
Deleting the TWAIN driver by using Control Panel .......................2-17
Deleting the TWAIN driver by using the installer .......................... 2-18
3 Scanning a document
3.1 Using the automatic document feeder ...........................................3-1
3.2 Using the original glass ....................................................................3-3
TWAIN Driver x-6
Page 8

4 Driver settings
4.1 TWAIN scanner driver ....................................................................... 4-1
Document Size ............................................................................... 4-2
Scan Mode .....................................................................................4-3
Resolution .......................................................................................4-3
Scan Type .......................................................................................4-4
Duplex Scanning ............................................................................4-4
Brightness .......................................................................................4-5
I/O Type ..........................................................................................4-5
Help ................................................................................................ 4-6
About .............................................................................................. 4-6
Scan ................................................................................................ 4-6
Cancel ............................................................................................. 4-6
5 Error messages
5.1 Paper misfeeds .................................................................................. 5-1
Clearing a misfeed in the automatic document feeder ..................5-2
Transmission error .......................................................................... 5-5
Scanning .........................................................................................5-5
Scanning error ................................................................................ 5-6
Automatic document feed no paper ............................................... 5-6
Other machine errors ...................................................................... 5-7
TWAIN Driver x-7
Page 9
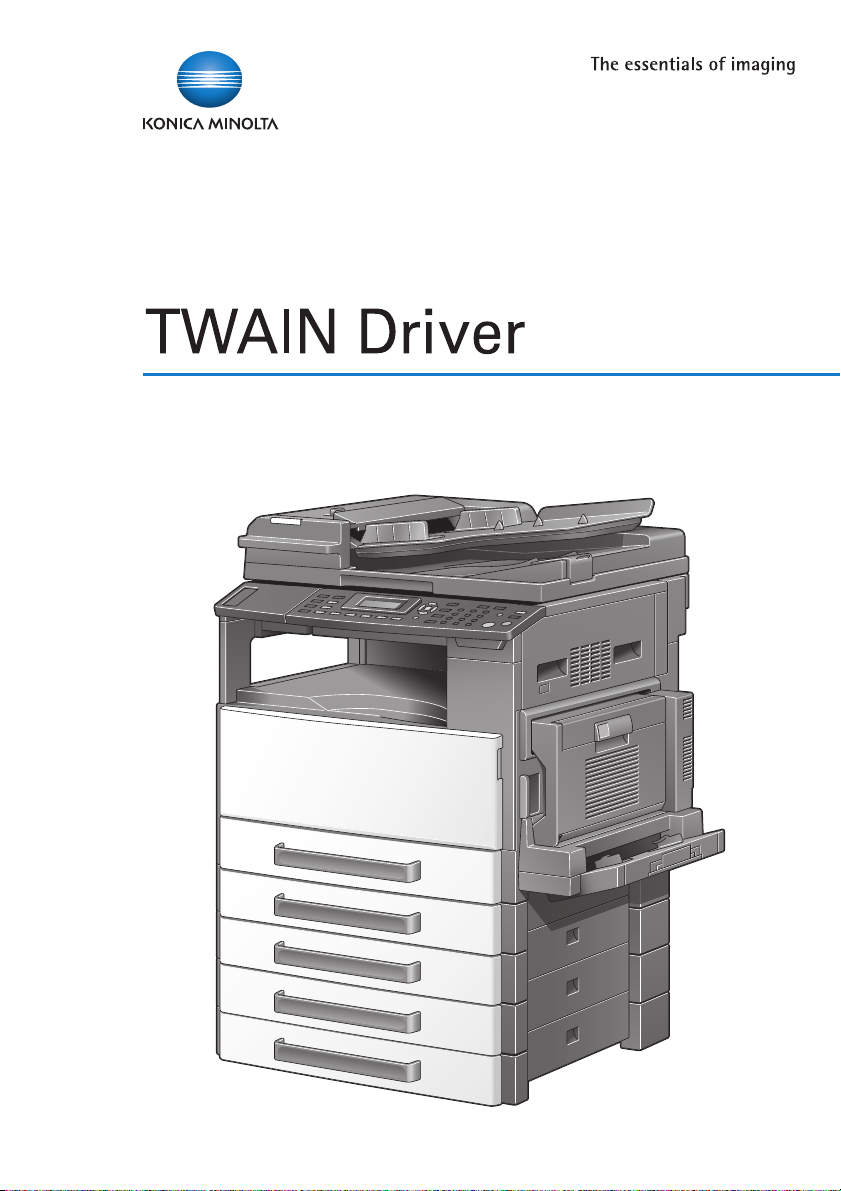
Explanation of manual conventions
TWAIN Driver x-8
Page 10

Setting up for scanning
1 Setting up for scanning
If the enclosed TWAIN driver is installed on the computer, this machine can
be used to scan a document and send it to the computer.
For scanning, an environment that includes the following software and hardware is required.
Item
Compatible operating
systems
Computer applications TWAIN-compatible image-processing software (such as, Ado-
Connection port Compliant with USB V. 2.0 (Windows 98 SE is not supported.)
Windows Vista/Windows XP/Windows Server 2003/Windows
2000/Windows Me/Windows 98 SE
Windows Vista x64 Edition/Windows Server 2003 x64 Edition/
Windows XP Professional x64 Edition
be Photoshop or Acrobat Professional)
10Base-T/100Base-TX (when the optional network interface
card NC-503 or image controller IC-206 is installed)
2
Reminder
The TWAIN driver is not compatible with Windows 95/98/ NT 4.0.
1
TWAIN Driver 1-1
Page 11

Setting up for scanning
1
TWAIN Driver 1-2
Page 12
Installing the TWAIN driver
2 Installing the TWAIN driver
This chapter provides descriptions on connecting the machine to a computer
and installing the TWAIN driver.
2.1 Making connections and installing the driver
Connecting to a computer
This machine can be connected to a computer using any of the following
connection methods.
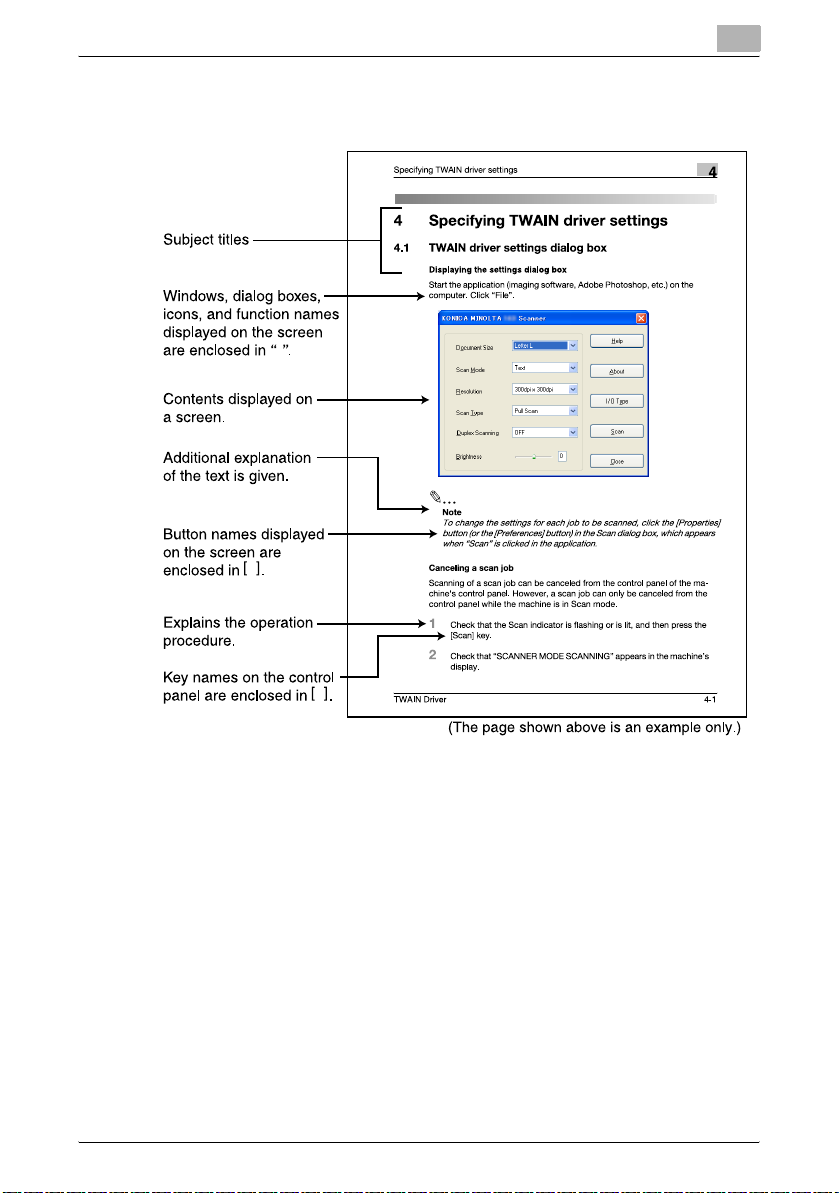
Connecting to a USB port
In the following procedure, the machine is connected directly to the computer by using a USB cable.
2
When the machine is connected to the USB port, installation of the TWAIN
driver begins. For the procedure on connecting this machine with USB, refer
to “Installing the TWAIN driver by using Plug and Play” on page 2-5.
2
Reminder
This machine cannot be connected to a computer running Windows 98
SE using a USB interface.
TWAIN Driver 2-1
Page 13
Installing the TWAIN driver
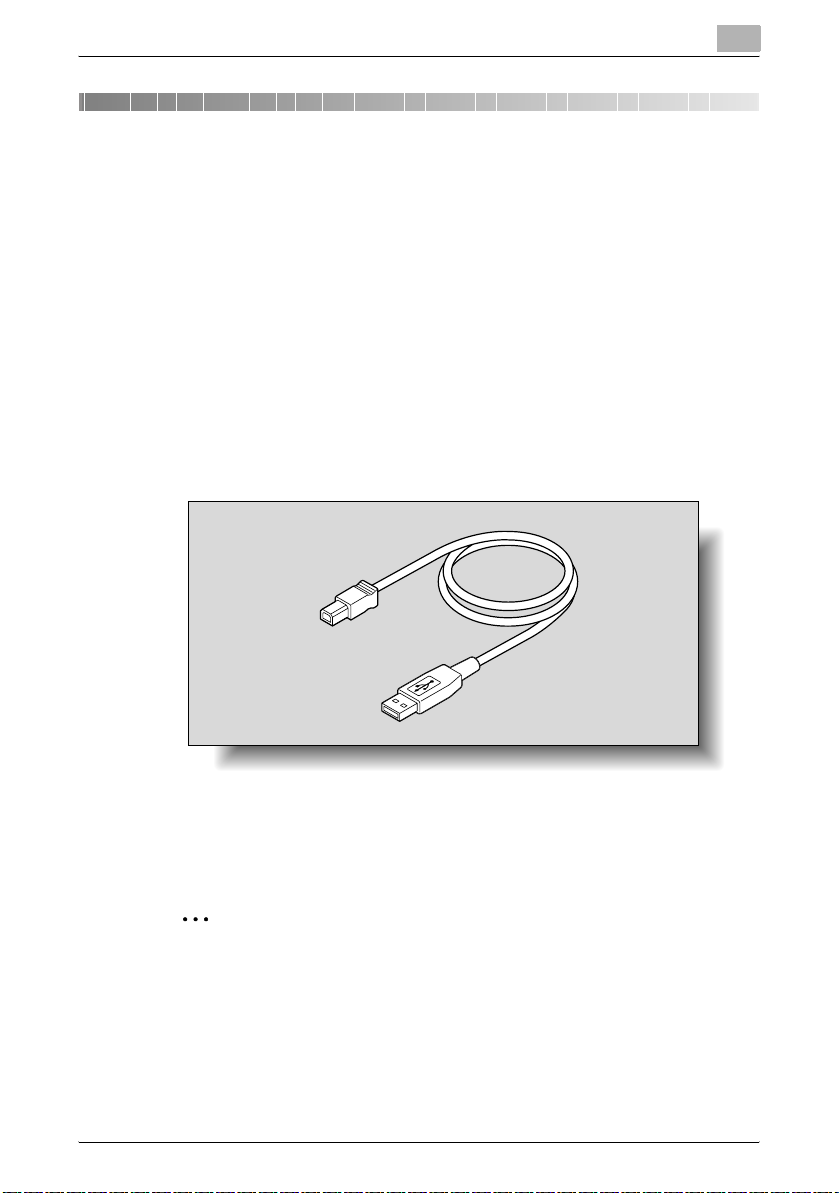
Connecting to the network
In order to perform TWAIN scanning on a network, the optional network interface card NC-503 or image controller IC-206 must be installed. For details
on connecting this machine to the network, refer to “Installing the TWAIN
driver by using the installer” on page 2-12. For details on the network interface card NC-503 and image controller IC-206, refer to the corresponding
User’s Guide.
Procedures for making connections and installing the driver
The TWAIN driver can be installed by using Plug and Play or by using the installer.
The installation procedure differs depending on the method used to make
the connection. Use the installation method that corresponds with the connection method.
2
2
Reminder
If the machine is to be connected to a USB port, install the driver by using
Plug and Play. If the machine is to be connected to a network, install the
driver by using the installer.
Connection
method
USB port connection
TWAIN Driver 2-2
Supported operating systems
Windows XP, Windows
Server 2003, Windows Vista,
Windows 2000 and Windows Me
TWAIN driver installation method
Install using Plug and Play.
For details, refer to “Installing the TWAIN
driver by using Plug and Play” on
page 2-5.
Page 14

Installing the TWAIN driver
2
Connection
method
Network connection
Supported operating systems
Windows XP, Windows
Server 2003, Windows Vista,
Windows 2000, Windows
Me and Windows 98 SE
TWAIN driver installation method
Install using the installer.
For details, refer to “Installing the TWAIN
driver by using the installer” on
page 2-12.
2
Note
When installing using Plug and Play, the printer driver is also installed after the TWAIN driver. For details on the printer driver, refer to the User’s
Guide for the GDI printer driver or the image controller IC-206.
This machine cannot be connected to a computer running Windows 98
SE using a USB interface.
TWAIN Driver 2-3
Page 15
Installing the TWAIN driver
2.2 General operation for driver installation
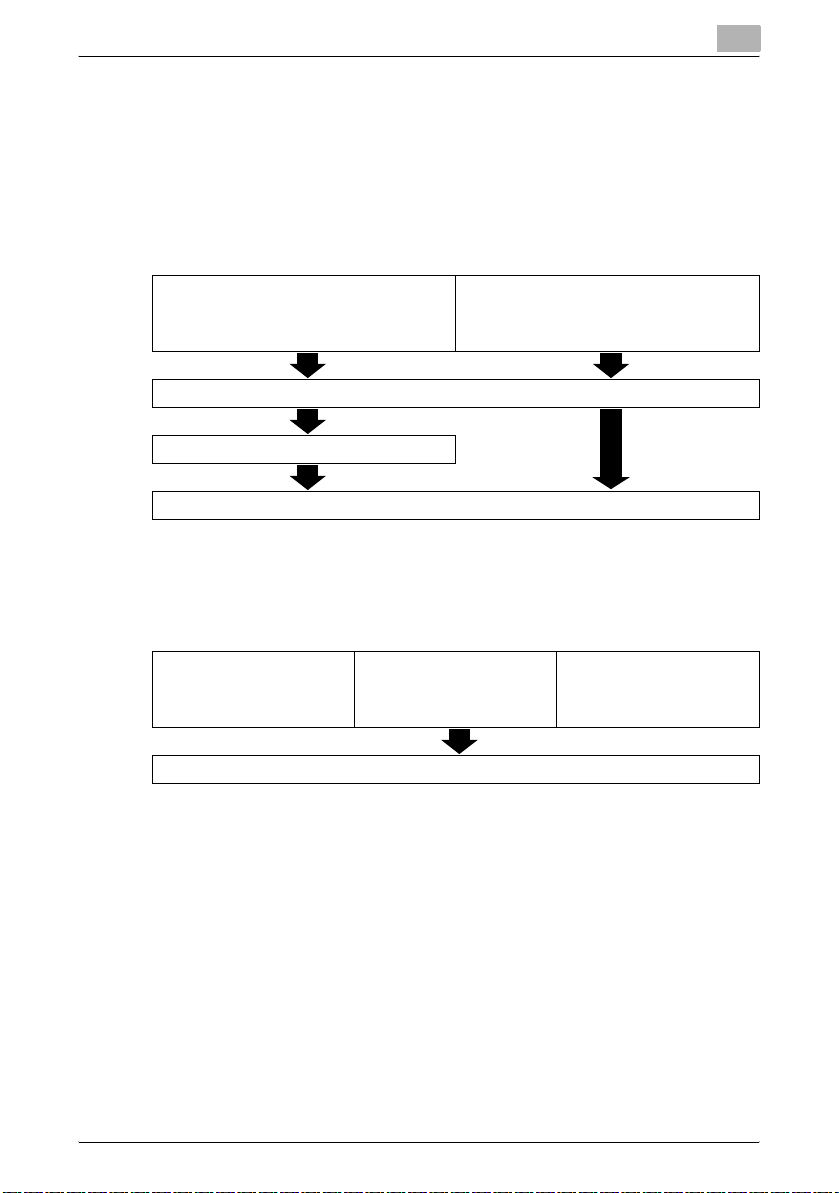
The driver is installed according to the following general operation.
Installation using Plug and Play
When installing the driver by using Plug and Play, the installation procedure
differs depending on the operating system.
With Windows XP,
With Windows Me
Install the TWAIN driver.
Install the USB printing support driver.
Install the printer driver.
Installation using the TWAIN Driver Installer
When installing the driver by using the TWAIN Driver Installer, the installation
procedure is the same for all operating systems.
Windows Server 2003,
Windows Vista,
and Windows 2000
2
With Windows XP,
With Windows 98 SE With Windows Me
Install the TWAIN driver.
Windows Server 2003,
Windows Vista,
and Windows 2000
TWAIN Driver 2-4
Page 16

Installing the TWAIN driver
2.3 Installing the TWAIN driver by using Plug and Play
Connecting to the computer’s USB port
When this machine is connected to a computer with a USB cable, Plug and
Play detects the device, and then installation of the necessary drivers begins.
1 Start Windows, and then insert the CD-ROM into the computer’s CD-
ROM/DVD drive.
2 Turn on this machine.
3 After this machine starts up and is ready for copying, connect it to the
computer with the USB cable.
2
This machine is detected, and the Found New Hardware Wizard (Add New
Hardware Wizard on Windows Me) appears.
The remainder of the procedure differs depending on the operating system.
Follow the instructions in the dialog boxes that appear for the operating system being used.
- For Windows XP and Windows Server 2003: “Installing using Plug and
Play on Windows XP/Server 2003” on page 2-6
- For Windows Vista: “Installing using Plug and Play on Windows Vista” on
page 2-7
- For Windows 2000: “Installing using Plug and Play on Windows 2000” on
page 2-9
- For Windows Me: “Installing using Plug and Play on Windows Me” on
page 2-10
TWAIN Driver 2-5
Page 17

Installing the TWAIN driver
2
Note
With Windows XP, Server 2003, Vista and 2000, log on as a user with Administrator privileges to install the driver.
Installing using Plug and Play on Windows XP/Server 2003
2
Note
If the driver is installed using Plug and Play, first the TWAIN driver is installed, and then installation of the printer driver begins. The procedure
described in this manual is for the installation of the TWAIN driver, then
the printer driver. For details on the printer driver, refer to the User’s
Guide for the GDI printer driver or the image controller IC-206.
2
Note
When using Windows XP (Service Pack 2), the following dialog box may
appear, requesting confirmation to connect to Windows Update. At this
time, select “No, not this time”, and then click the [Next] button.
Follow the instructions that appear in the Found New Hardware Wizard to
complete the installation.
2
1 Select “Install from a list or specific location (Advanced)”, and then
click the [Next] button.
2 Select “Include this location in the search” as the location to be
searched for the driver, and then specify the following folder on the CDROM as the location where the driver is saved.
– Folder to be specified:
\Driver\WIN2K_XP\English
– With 64-bit operating systems, select “\Driver\WinVista64\English”.
– The folder can be selected after clicking the [Browse] button.
3 Click the [Next] button.
– When the Windows logo testing warning message appears, click
the [Continue Anyway] button.
TWAIN Driver 2-6
Page 18

Installing the TWAIN driver
4 When the Completed Found New Hardware Wizard dialog box ap-
pears, click the [Finish] button.
This completes the installation of the TWAIN driver.
The Found New Hardware Wizard appears again, and the installation
of the printer driver begins.
5 Repeat steps 1 through 4 to install the printer driver.
Installing using Plug and Play on Windows Vista
2
Note
If the driver is installed using Plug and Play, first the TWAIN driver is installed, and then installation of the printer driver begins. The procedure
described in this manual is for the installation of the TWAIN driver, then
the printer driver. For details on the printer driver, refer to the User’s
Guide for the GDI printer driver or for image controller IC-206.
Follow the instructions of the Found New Hardware wizard, and then click
complete the installation.
1 In the Found New Hardware wizard, select “Locate and install driver
software (recommended)”.
– If the User Account Control dialog box appears, click the [Continue]
button.
– If a message appears, requesting confirmation to search online,
click the [Don’t search online] button.
2
TWAIN Driver 2-7
Page 19

Installing the TWAIN driver
2 In the dialog box for checking the disk, click the [I don’t have the disk.
Show me other options.] button.
3 Insert the printer driver CD into the CD-ROM/DVD drive of the compu-
ter.
4 Click the [Browse my computer for driver software (advanced)] button.
5 Select “Include subfolders”, and then specify the following folder on
the CD-ROM as the location where the driver is saved.
– Folder to be specified: \Driver\WinVista\English
– With 64-bit operating systems, select “\Driver\WinVista64\English”.
– The folder can be selected after clicking the [Browse] button.
2
6 Click the [Next] button.
– In the Windows Security dialog box, select “Install this driver soft-
ware anyway”.
7 After the installation is finished, click the [Close] button.
This completes the installation of the TWAIN driver.
The Found New Hardware wizard appears again, and the installation of
the printer driver begins.
8 Repeat steps 2 through 7 to install the printer driver.
TWAIN Driver 2-8
Page 20

Installing the TWAIN driver
Installing using Plug and Play on Windows 2000
2
Note
If the driver is installed using Plug and Play, first the TWAIN driver is installed, and then installation of the printer driver begins. The procedure
described in this manual is for the installation of the TWAIN driver, then
the printer driver. For details on the printer driver, refer to the User’s
Guide for the GDI printer driver or the image controller IC-206.
Follow the instructions that appear in the Found New Hardware Wizard to
complete the installation.
1 Check the contents of the Found New Hardware Wizard, and then click
the [Next] button.
2 Select “Search for a suitable driver for my device [recommended]”, and
then click the [Next] button.
3 Select “Specify a location”, and then click the [Next] button.
4 Specify the following folder on the CD-ROM as the location where the
driver is saved.
– Folder to be specified:
\Driver\WIN2K_XP\English
– The folder can be selected after clicking the [Browse] button.
2
5 Click the [Next] button.
– When the Microsoft digital signature warning message appears,
click the [Continue Anyway] button.
6 When the Completed Found New Hardware Wizard dialog box ap-
pears, click the [Finish] button.
This completes the installation of the TWAIN driver.
The Found New Hardware Wizard dialog box appears again, and the
installation of the printer driver begins.
7 Repeat steps 1 through 6 to install the printer driver.
TWAIN Driver 2-9
Page 21

Installing the TWAIN driver
Installing using Plug and Play on Windows Me
2
Note
If the driver is installed using Plug and Play, first the TWAIN driver is installed, then the USB printing support driver is installed, and then installation of the printer driver begins. The procedure described in this manual
is for the installation of the TWAIN driver, the USB printing support driver,
then the printer driver. For details on the printer driver, refer to the User’s
Guide for the GDI printer driver or the image controller IC-206.
Follow the instructions that appear in the Add New Hardware Wizard to complete the installation.
1 Select “Specify the location of the driver (Advanced)”, and then click
the [Next] button.
2 Select “Specify a location”, and then specify the following folder on the
CD-ROM as the location where the driver is saved.
– Folder to be specified:
\Driver\Win98_ME\English
– The folder can be selected after clicking the [Browse] button.
2
3 Click the [Next] button.
4 Check the location of the driver, and then click the [Next] button.
A dialog box appears, indicating that the installation is finished.
5 Click the [Finish] button.
This completes the installation of the TWAIN driver.
The Add New Hardware Wizard appears again, and the installation of
the USB printing support driver begins.
6 Repeat steps 1 through 5 to install the USB printing support driver.
After the installation of the USB printing support driver is finished, the
Add New Hardware Wizard appears again and the installation of the
printer driver begins.
7 Repeat steps 1 through 4 to install the printer driver.
8 When a dialog box appears, allowing the printer name to be specified,
click the [Finish] button.
– To change the printer name, type in the new name.
TWAIN Driver 2-10
Page 22

Installing the TWAIN driver
– When you are asked whether to set this machine as the default, se-
lect “Yes”.
A dialog box appears, indicating that the installation is finished.
9 Click the [Finish] button.
This completes the installation of the printer driver.
2
TWAIN Driver 2-11
Page 23

Installing the TWAIN driver
2.4 Installing the TWAIN driver by using the installer
If the machine is to be used through a network connection, install the TWAIN
driver by using the installer.
2
Reminder
The optional network interface card NC-503 or image controller IC-206
must be installed in order to establish a network connection.
For details on the network interface card, refer to the User’s Guide for the
network interface card NC-503 or the image controller IC-206.
Connecting to a computer through a network
1 Use the network cable to connect this machine to the computer.
2
2 Insert the CD-ROM containing the TWAIN driver installer into the com-
puter’s CD-ROM / DVD drive.
3 Open My Computer, and then double-click the icon of the appropriate
CD-ROM drive.
4 Double-click the TWAIN Driver Installer icon on the CD-ROM.
– If the User Account Control dialog box appears in Windows Vista,
click the [Continue] button.
TWAIN Driver 2-12
Page 24

Installing the TWAIN driver
5 From the drop-down list, select “English”, and then click the [OK] but-
ton.
The installer starts up.
6 From the drop-down list, select the appropriate TWAIN driver, and then
click the [OK] button.
7 Click the [OK] button.
2
TWAIN Driver 2-13
Page 25

Installing the TWAIN driver
8 Type in the IP address of the connected machine, and then click the
[OK] button.
– Clicking the [Search] button automatically displays the IP address
of the connected machine.
– Select the IP address of the machine, and then click the [OK] but-
ton.
– When the logo testing message appears, click the [Continue Any-
way] button since there will be no effect on this machine.
A dialog box appears, indicating that the installation is finished.
2
9 Click the [Finish] button.
10 Restart the computer.
TWAIN Driver 2-14
Page 26

Installing the TWAIN driver
2.5 Reinstalling the TWAIN driver by using the installer
The following procedure describes how to reinstall the TWAIN driver by using
the installer.
1 Insert the CD-ROM containing the TWAIN installer into the CD-ROM/
DVD drive of the computer.
2 Open My Computer, and then double-click the icon of the appropriate
CD-ROM drive.
3 Double-click the TWAIN Driver Installer icon on the CD-ROM.
– If the User Account Control dialog box appears in Windows Vista,
click the [Continue] button.
4 From the drop-down list, select “English”, and then click the [OK] but-
ton.
2
The installer starts up.
5 From the drop-down list, select the appropriate TWAIN driver, and then
click the [OK] button.
TWAIN Driver 2-15
Page 27

Installing the TWAIN driver
6 Click the “Upgrade Driver”, and then click the [Finish] button.
A dialog box appears, indicating that the reinstallation is finished.
7 Click the [Finish] button.
2
8 Restart the computer.
TWAIN Driver 2-16
Page 28

Installing the TWAIN driver
2.6 Uninstalling the TWAIN driver
The TWAIN driver can be uninstalled by deleting the driver with System Properties from Control Panel or by using the installer.
2
Note
If the machine is to be used through a network, use the installer to uninstall the TWAIN driver.
Deleting the TWAIN driver by using Control Panel
1 In the System Properties dialog box, click the Hardware tab, and then
click the [Device Manager] button.
– For Windows XP/Server 2003, click the [Start] button, click “Per-
formance and Maintenance” in Control panel, and then click “Sys-
tem”.
– For Windows Vista, click the [Start] button, click “Control Panel”,
then “System and Maintenance”, then “System”, and then open
Device Manager. If the User Account Control dialog box appears,
click the [Continue] button.
– For Windows 2000, click the [Start] button, click “Settings”, then
“Control Panel”, and then double-click “System”.
– For Windows Me, click the [Start] button, click “Control Panel”,
double-click “System”, and then click the Device Manager tab.
2
2 Under “Imaging device”, double-click the device to be deleted.
3 Click the “Driver” tab, and then click the [Delete] button.
The Confirm deleting of the device message appears.
4 Click the [OK] button.
– In Windows Vista, a message appears, requesting confirmation to
uninstall the device.
The appropriate device is removed from the imaging devices.
5 Restart the computer.
TWAIN Driver 2-17
Page 29

Installing the TWAIN driver
Deleting the TWAIN driver by using the installer
Use the installer to delete the TWAIN driver.
1 Start Windows, and then insert the CD-ROM containing the TWAIN
driver installer into the computer’s CD-ROM/DVD drive.
2 Double-click the installer icon.
3 From the drop-down list, select “English”, and then click the [OK] but-
ton.
4 Select the device to be deleted, and then click the [OK] button.
2
TWAIN Driver 2-18
Page 30

Installing the TWAIN driver
5 Click the “Remove Driver”, and then click the [Finish] button.
Once the driver is deleted, the following dialog box appears.
6 Click the [Finish] button.
2
7 Restart the computer.
TWAIN Driver 2-19
Page 31

Installing the TWAIN driver
2
TWAIN Driver 2-20
Page 32

Scanning a document
3 Scanning a document
The document can be scanned using either the automatic document feeder
or the original glass.
3.1 Using the automatic document feeder
Use the automatic document feeder to continuously scan multiple documents.
2
Note
Automatic document feeder DF-502 and reverse automatic document
feeder DF-605 are available options.
1 Start the application (imaging software, Adobe Photoshop, etc.) on the
computer.
– As an example, the procedure using Adobe Acrobat 6.0 Profession-
al is described below.
2 Click “File”.
3
3 Point to “Create PDF”, and then click “From Scanner”.
4 Select the device from the dialog box, specify the desired settings, and
then click the [Scan] button.
TWAIN Driver 3-1
Page 33

Scanning a document
5 Specify the necessary settings.
– Refer to “Driver settings” on page 4-1.
– The “Duplex Scanning” is appears only if optional reverse automat-
ic document feeder DF-605 is installed.
6 Load the document face up in the document feed tray of the automatic
document feeder.
3
7 Click the [Scan] button.
– If “Pull Scan” was selected from the “Scan Type” drop-down list in
the driver settings dialog box, scanning begins.
– If “Push Scan” was selected from the “Scan Type” drop-down list
in the driver settings dialog box, a message appears on the compu-
ter screen and in the control panel display, indicating that scanning
begins when the [Start] key on the machine is pressed. Press the
[Start] key and then, scanning begins.
TWAIN Driver 3-2
Page 34

Scanning a document
3.2 Using the original glass
Use the original glass when scanning a book.
1 Start the application (imaging software, Adobe Photoshop, etc.) on the
computer.
– As an example, the procedure using Adobe Acrobat 6.0 Profession-
al is described below.
2 Click “File”.
3 Point to “Create PDF”, and then click “From Scanner”.
4 Select the device from the dialog box, specify the desired settings, and
then click the [Scan] button.
5 Specify the necessary settings.
– Refer to“Driver settings” on page 4-1.
– The “Duplex Scanning” is appears only if optional reverse automat-
ic document feeder DF-605 is installed.
3
TWAIN Driver 3-3
Page 35

Scanning a document
6 Place the document page face down on the original glass.
– Align the document with the document scales at the top and at the
left side of the original glass.
7 Click the [Scan] button.
– If “Pull Scan” was selected from the “Scan Type” drop-down list in
the driver settings dialog box, scanning begins.
– If “Push Scan” was selected from the “Scan Type” drop-down list
in the driver settings dialog box, a message appears on the compu-
ter screen and in the control panel display, indicating that scanning
begins when the [Start] key on the machine is pressed. Press the
[Start] key and then, scanning begins.
3
TWAIN Driver 3-4
Page 36

Driver settings
4 Driver settings
4.1 TWAIN scanner driver
4
1
2
3
4
5
6
No. Item Settings
1 Document Size A3L, B4L, A4L, B5L, A5L, FLS 8 1/4 * 13 in, FLS 8 1/2 * 13 in, FLS
2 Scan Mode Text (default), Photo
3 Resolution 150 dpi × 150 dpi, 300 dpi × 300 dpi, 600 dpi × 600 dpi
4 Scan Type Push Scan, Pull Scan (default)
5Duplex Scan-
ning
220 * 330 mm, FLS 8 1/8 * 13 1/4 in, FLS 8 * 13 in, A4C, B5C, A5C,
Ledger L, 11 x 14 L, Legal L, Letter L, Invoice L, Letter C, Invoice
C, 8KL, 16KL, 16KC
Refer to “Document Size” on page 4-2.
Refer to “Scan Mode” on page 4-3.
Refer to “Resolution” on page 4-3.
Refer to “Scan Type” on page 4-4.
OFF (default setting), ON
For details, refer to “Duplex Scanning” on page 4-4.
7
8
9
10
11
2
Note
The “Duplex Scanning” is appears only if optional reverse automatic document feeder DF-605 is installed.
6 Brightness -4 to 4 (The default setting is “0”.)
7 [Help] button Click this button to display the Help.
8 [About] button Click this button to display the software version information.
Refer to “Brightness” on page 4-5.
TWAIN Driver 4-1
Page 37

Driver settings
No. Item Settings
9 [I/O Type] but-
10 [Scan] button Click this button to scan the image.
11 [Cancel] button Click this button to stop scanning.
Document Size
From the drop-down list, select a document size to specify the size of the
document to be scanned.
ton
Click this button to check and change the USB and network connection settings.
Refer to “I/O Type” on page 4-5.
4
2
Note
If the scanned image is larger than the specified document size selected
in the Document Size drop-down list, any part of the scanned image larger than the specified size is erased.
If the scanned image is smaller than the size selected in the Document
Size drop-down list, the image is scanned at the specified size.
TWAIN Driver 4-2
Page 38

Driver settings
Scan Mode
Two settings are available in the “Scan Mode” drop-down list.
- Text: Select this setting for normal documents.
- Photo: Select this setting for photos.
Resolution
Three settings are available in the “Resolution” drop-down list. Select the
setting appropriate for the desired use.
- 150dpi×150dpi: This resolution is appropriate for standard text sizes.
- 300dpi×300dpi: This higher resolution is appropriate for small text sizes.
- 600dpi×600dpi: This high resolution is appropriate for images of land-
4
A highly efficient scanning operation is performed.
This resolution is selected as the default setting.
scapes and people.
TWAIN Driver 4-3
Page 39

Driver settings
Scan Type
From the “Scan Type” drop-down list, select either “Push Scan” or “Pull
Scan”.
- Pull Scan: With this scanning method, clicking the [Scan] button in the
- Push Scan: With this scanning method, pressing the [Start] key on the
Duplex Scanning
Select “OFF” or “ON” from the drop-down list.
4
driver starts scanning.
machine’s control panel starts scanning.
2
Note
The “Duplex Scanning” is appears only if optional reverse automatic document feeder DF-605 is installed.
TWAIN Driver 4-4
Page 40

Driver settings
Brightness
The brightness of colors can be adjusted. The default setting is “0”.
The brightness can be set between -4 (darker) and 4 (brighter).
I/O Type
The I/O Type dialog box appears. A USB connection or a network connection
can be selected.
- If a network connection is selected, the IP address can be specified or
1 Select “Network”.
2 Type in the new IP address or the IP address to be changed.
4
changed as described in the following procedure.
– Click the [Search] button to display the IP addresses of devices
connected to the network. Select the appropriate IP address, and
then click the [OK] button.
3 After the IP address is set, and then click the [OK] button.
TWAIN Driver 4-5
Page 41

Driver settings
Help
Click this button to display the Help screen.
About
Click this button to display the software version information.
Scan
Click this button to scan the document.
Cancel
Click this button to stop scanning.
4
TWAIN Driver 4-6
Page 42

Error messages
5 Error messages
5.1 Paper misfeeds
Control panel message:
Computer display message:
5
Cause Remedy
A paper misfeed occurred in the automatic
document feeder or reverse automatic document feeder.
All misfed paper was not removed from the
automatic document feeder or reverse automatic document feeder.
Open the misfeed-clearing cover and the
automatic document feeder, and then remove the misfed paper. For details on performing the operation, refer to “Clearing a
misfeed in the automatic document feeder”
on page 5-2.
When the misfed paper is removed, the
memory size (percent) returns to its original
value.
TWAIN Driver 5-1
Page 43
Error messages
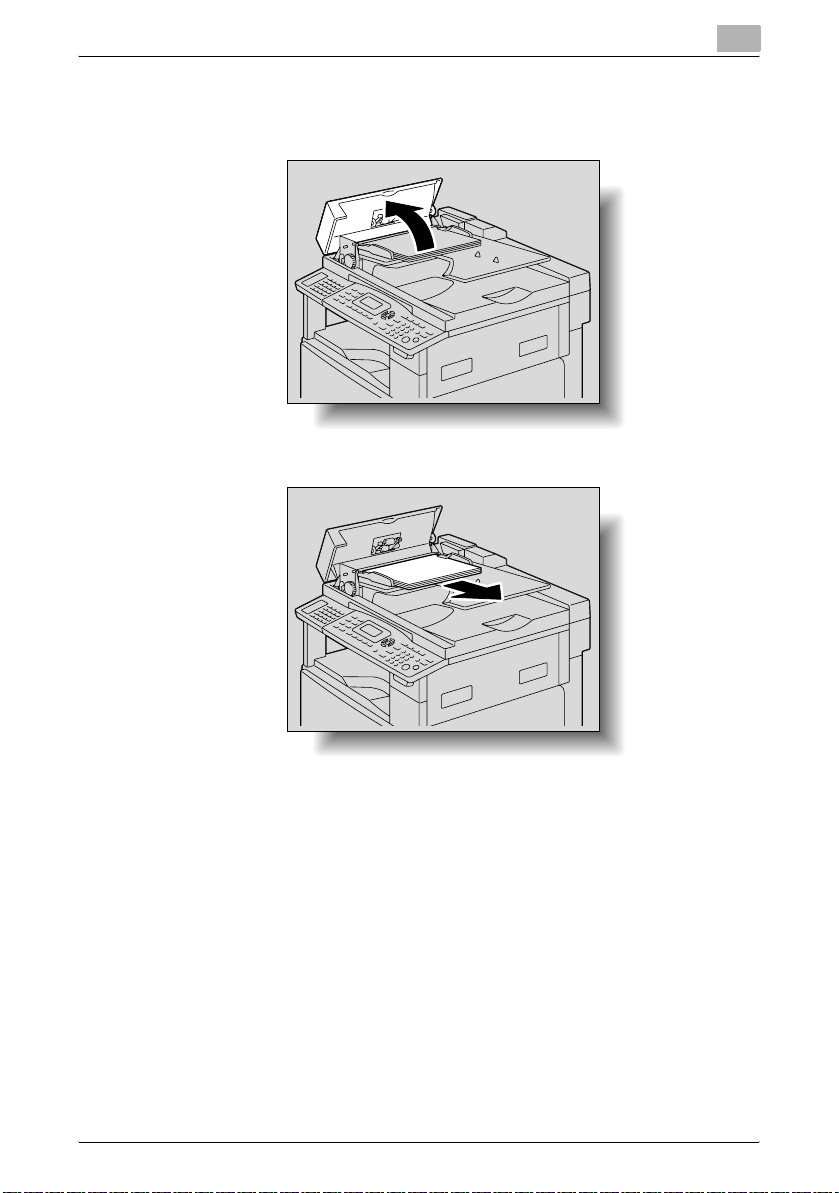
Clearing a misfeed in the automatic document feeder
1 Open the misfeed-clearing cover.
2 Remove all document pages from the document feed tray.
5
TWAIN Driver 5-2
Page 44

Error messages
3 Lift open the automatic document feeder.
4 While turning the knob on the automatic document feeder in the direc-
5
tion of the arrow, slowly pull out the document.
TWAIN Driver 5-3
Page 45

Error messages
5 Close the automatic document feeder and the misfeed-clearing cover.
6 Load the documents removed in step 2 back into the tray.
5
2
Reminder
If the message “RETURN ORIGINAL to ORIG. GLASS and PRESS START
KEY” appears on the display, return the document pages that caused the
misfeed to their original positions.
TWAIN Driver 5-4
Page 46

Error messages
Transmission error
Computer display message:
Cause Remedy
The machine has not started up. • Turn off the machine, and then check
A system crash may have occurred on the
computer or the machine during transmission.
The USB cable or network cable was not correctly connected during transmission.
2
Note
The network cable can be used only when the optional network interface
card NC-503 or image controller IC-206 is installed.
that the USB cable and network cable
are correctly connected.
• After checking the USB cable and network cable, turn on the machine again.
• If the error is still not corrected, contact
your technical representative.
5
Scanning
Computer display message:
Cause Remedy
If a TWAIN scan job is sent at the same time
as a copy job, the machine may stop while
scanning.
Wait until the copy or scan operation is finished.
TWAIN Driver 5-5
Page 47

Error messages
Scanning error
Computer display message:
Cause Remedy
An error occurred while the machine was
reading data during scanning.
2
Note
The network cable can be used only when the optional network interface
card NC-503 or image controller IC-206 is installed.
• Turn off the machine, and then check
that the USB cable and network cable
are correctly connected.
• After checking the USB cable and network cable, turn on the machine again.
• If the error is still not corrected, contact
your technical representative.
5
Automatic document feed no paper
Computer display message:
Cause Remedy
There is no paper in the automatic document
feeder (reverse automatic document feeder)
when duplex scanning is selected.
Add paper to the automatic document
feeder (reverse automatic document feeder).
TWAIN Driver 5-6
Page 48

Error messages
Other machine errors
Computer display message:
Cause Remedy
The automatic document feeder or the misfeed-clearing cover is open while a document
is being scanned from the automatic document feeder.
There may be problem with the transmission
of commands between the TWAIN driver and
the machine.
2
Note
The network cable can be used only when the optional network interface
card NC-503 or image controller IC-206 is installed.
Refer to the User’s Guide.
When the misfed paper is removed, the
memory size (percent) returns to its original
value.
Check the USB cable and network cable
connected to the machine.
5
TWAIN Driver 5-7
Page 49

Error messages
5
TWAIN Driver 5-8
Page 50

2007
http://konicaminolta.com
Copyright
2007.12A08E-9591-22
 Loading...