

Konica Minolta REMOTE CONSOLE, PAGEPRO 9100, MAGICOLOR 2210, MAGICOLOR 2200, MAGICOLOR 3300DN User Manual
...Page 1

Remote Console
User’s Guide
1800264-001E
Page 2

Trademarks
The MINOLTA-QMS logo, imPRESS, PS Executive Series, and Crown/MINOLTA-QMS,
Inc.; Hewlett-Packard, HP-GL, and HP PCL/Hewlett-Packard, Inc.; PostScript is a
trademark of Adobe Systems Incorporated for a page description language and may be
registered in certain jurisdictions; DECnet, VAX, LN03, and VMS/Digital Equipment
Corporation; FrameMaker/Adobe Systems Corporation; UNIX/UNIX Systems
Laboratories, Inc.
Proprietary Statement
The digitally encoded software in Remote Console is Copyrighted 2000 by MINOLTAQMS, Inc. All Rights Reserved. This software may not be reproduced, modified,
displayed, transferred, or copied in any form or in any manner or on any media, in
whole or in part, without the express written permission of MINOLTA-QMS, Inc.
Copyright Notice
This manual is Copyrighted 2000 by MINOLTA-QMS, Inc., One Magnum Pass, Mobile,
AL 36618. All Rights Reserved. This manual may not be copied in whole or in part, nor
transferred to any other media or language, without the express written permission of
MINOLTA-QMS, Inc.
Manual Notice
MINOLTA-QMS, Inc. reserves the right to make changes to this manual and to the
equipment described herein without notice. Considerable effort has been made to
ensure that this manual is free of inaccuracies and omissions. However, MINOLTA-
QMS, Inc. makes no warranty of any kind including, but not limited to, any implied
warranties of merchantability and fitness for a particular purpose with regard to
this manual. MINOLTA-QMS, Inc. assumes no responsibility for, or liability for, errors
contained in this manual or for incidental, special, or consequential damages arising
out of the furnishing of this manual, or the use of this manual in operating the
equipment, or in connection with the performance of the equipment when so operated.
Manual Colophon
This manual was created in FrameMaker, using Times New Roman, Courier, Arial,
Symbol and Wingdings typefaces. The manual was printed in camera-ready form on a
MINOLTA-QMS printer.
Page 3

Contents
1 Remote Console User’s Guide
About Crown Consoles .................................................................. 1
About This Manual .......................................................................... 1
Typographic Conventions 1
Starting a Remote Console Session ............................................. 2
Starting a Telnet Session 3
If You Cannot Start a Telnet Session 4
Starting a DECnet Session 5
Message Display and Console Modes .......................................... 7
Local and Remote Consoles 7
Message Display Mode 7
Console Mode 8
Using Remote Console ................................................................. 10
Page 4

Remote Console Commands ........................................................10
User/Offline Mode Commands 11
Blocked Mode Commands 11
Admin Mode Commands 12
Print Job Status Information 13
System Information Commands 14
Listing Current Remote Console Sessions 18
Displaying the Active Jobs 19
Job Ordering Commands 20
Disk Operation Commands 25
System Setting Commands 30
System Console Mode Switching Commands 35
Session Termination Commands 37
Index
!
Remote Console User’s Guideii
Page 5

About Crown Consoles
A console is a terminal through which a user communicates with the printer. The console
feature on Crown printers allows users o r s ystem administrators to ac cess information, set
up printer configuration, or change printer configuration from a remote console.
For Crown printers supporti ng the re mote con sole featur e, the re mote con sole is a terminal
connected via TCP/IP Telnet. The console is a line-oriented display of 24 lines of 80
characters that provides printer status information, such as printer state, fonts installed,
and job status.
About This Manual
This manual provides information on the features and capabilities of the remote console.
The features and capabilities available through remote console vary depending on your
system setup and your printer options. This manual describes how to start a remote
console session and explains the remote console modes and commands.
"#
A
magicolor
reflect the system you’re using and the available options on the printer you select. For
example, the emulation option lists only those emulations available on the selected
printer. (See “Accessing the Printer Emulation” on page 17 for details.)
6100 Print System is used in the examples for this manual. Your screens
Typographic Conventions
The following conventions are used throughout this manual:
Mixed-Case Courier
Mixed-Case
Italic
Courier
Text you type, and messages and
information displayed on the console.
Variable text you type in the examples; replace the italicized word(s)
with information specific to your
printer or computer.
1
Page 6

Mixed-Case
Bold Italic Courier
Text you type in the examples.
lowercase bold
lowercase italic
↵↵↵↵
Command
Purpose
Mode
"#
Note
Example
Remote console commands in the
text.
Variable information in text and
command variables.
Press the Enter (or Return) key.
Command syntax.
The task that the command or
parameter is designed to accomplish.
Console mode required to execute
the command.
Tips, extra information, or important information that deserves
emphasis or reiteration.
Depiction of how the command
looks when typed on the console
and the resultant output.
Starting a Remote Console Session
Depending on your system and your network interface, yo u have one of th ree ways to st art
a remote console session.
$
If you have a CrownNe t interfac e card, s ee the ap propriat e chapter of the
Crown Book
,
which is included on a disk in your CrownNet shipment.
$
If you are not using CrownNet and are in a UNIX environment, use the Telnet protocol described in this manual.
$
If you are not using CrownNet a nd are worki ng with a DECnet setu p, use the PS Executive Series Utilities for VMS as de scribed in t his manual.
2
Page 7

"#
Whether you use a VMS host through PS Executive for VMS or a
TCP/IP host with Telnet commands, r emote console works the same once you are in th e
session.
Starting a Telnet Session
With No Password Set
"#
Passwords can be set or changed only through the printer’s control panel. See your
printer user’s guide for more information on passwords.
To start a remote console session when no operator password is set, do the following:
Use the telnet command to connect to the printer. At the system prompt, type
telnet printername↵
replacing
assigned by the system administrator in the HOSTS file.) Once the console session is
opened, you can view the settings of the printer.
When opening a console session, messages like
the screen to show p rogr es s. When the connection is compl et e, a pr ompt with your printer
name and the current printer status appears. The messages you may see when opening a
console session vary according to your system protocol.
For example, if you are using a magicolor 6100 Print System, the screen looks similar to
the following:
With a Password Set
"#
Passwords can be set or changed only through the printer’s control panel. See your
printer user’s guide for more information on passwords.
printername
QMS CrownNet Rev 5.40FE
QMS magicolor 6100;Release 2.0.1;Processor IDT64474_5; Crown,0;
QMS Console Manager
magicolor 6100
magicolor 6100
magicolor 6100
with the name of the printer you are using. (This name is
−>
−>
−>
Idle
Trying
..
. and
Connected
...
appear on
3
Page 8

If the operator password is enabled, you are prompted to enter it before y ou can use
remote console. The password is case-sensitive and can have up to 16 characters. If you
enter an invalid password, the connection to remote console closes automatically.
This example shows how a session is closed automatically when the wrong password is
used:
[b@venus, 40] telnet 6100↵
Trying 161.33.128.183 ...
Connected to 6100.
Escape character is ’^]’.
QMS Console Manager
magicolor 6100
Enter Password :A0012↵
*** Invalid password ***
Connection closed by foreign host.
−>
This is an example of how a session begins with a correct password:
[b@venus, 41] telnet 6100↵
Trying 161.33.128.183 ...
Connected to 6100.
Escape character is ’^]’.
QMS Console Manager
magicolor 6100
Enter Password :A100↵
magicolor 6100
magicolor 6100
−>
−>
−>
Idle
You have now entered a remote console session. Now see “Remote Console Commands”
on page 10 for information on using remote console.
If You Cannot Start a Telnet Session
There are two situations where an attempt to start a Telnet session may fail:
1
The maximum number of remote con sol e sessions that can be open at the same time
has been reached.
The system allows a maximum number of remote console sessions to be open at the
same time. If this number is reached, the system rejects further requests for new con-
4
Page 9

sole sessions. For most systems, the maximum number is nine, including local consoles where applicable.
Wait until one of the nine sessions is available and try again.
2
The system is busy.
If a positive acknowledgment to a request for opening a remote console session is not
received by the daughterboard within a given time limit (which depends on the daughterboard and communication protocol being used), the daughterboard cancels the
request. This may occur when the system is very busy.
Try again when the system is not busy.
Starting a DECnet Session
To use remote console on a DECnet setup, do the following:
1
Have your system administrator install the PS Executive for VMS on your system.
2
Use the VMS utilities to connect to th e printer.
With your system running, go to the VMS prompt. Then, type the following:
RUN SYS$SYSTEM:QMS$PSEXEC↵
The first screen in PS Executive prompts you for the nodename of the printer.
$RUN SYS$SYSTEM:PSEXEC
What is the printer nodename
−>
3
Enter the nodename for the printer whose settings you want to view.
This name was assigned to the printer by the system administrator during client software installation. If you do not know the nodename, ask your administrator or use the
method appropriate to your environment.
$ In a Phase IV environment, type:
$ MC NCP SHOW KNOWN NODES↵
This command lists your accessible nodes.
$ In a Phase V environment, if you used the local name space configuration when
setting up the printer originally, check the text file sys$sysroot:[sysexe]decnet_loc_node_definitions.txt.
5
Page 10

$ In a Phase V environment, if you used the distributed name space configuration
when setting up the printer originally, check with your system administrator for the
nodename.
You can view the settings of only one printer at a time. If you have other printers connected to the client, you must exit from PS Executive before viewing others.
Once you enter the nodename, the following PS Executive Main menu appears:
MAIN MENU
Start Remote Console Session
Show Printer Counters
Show Printer Location
Exit PS Executive
Use arrow keys and <RETURN> to select
"#
If you accidentally enter an invalid nodename or one that is valid but not for a printer
(such as another VAX node), various messages or prompts appear depending on what
was entered. Until you enter a correct nodename, you cannot open PS Executive to use
remote console.
4
Select Star t Remote Console Session at the top of the screen.
A Remote Console Session screen similar to the following appears.
REMOTE CONSOLE SESSION
QMS Console Manager
magicolor 6100
magicolor 6100−>
−>
Idle
When the connection to the printer is complete, a prompt with your printer name and
the current printer status, such as Idle or Spooling, appears. In this example, a
magicolor
display in the printer’s message window.
6100 Print System is used. The status message,
Idle
, is the same as the
You are now ready to use remote console (see “Using Remote Console” on page 10).
"#
If the operator pas sword for your printer is enabled, you are prompted to enter i t bef ore
you can use remote console. If you enter an invalid password, the connection to remote
console closes automatically. Passwords can only be set or changed through the
printer’s control panel. See your printer user’s guide for more information on
passwords.
6
Page 11

Message Display and Console Modes
The console can operate in several modes and can either have status displayed or not
displayed to the screen. The following sections describe these modes.
Local and Remote Consoles
The console is a simple, line-oriented display of 24 lines of 80 characters. To list the
available console commands, type? on the console keyboard.
Message Display Mode
The message display mode can be set to ei ther si lent or normal. The defau lt for di splay ing
status on a remote console is normal. When the message display mode is enabled and set
to normal, conditions that require user intervention appear on a local or remote console.
The TCP/IP Accounting/Reverse Channel messages (if available) are seen in normal
mode, but not in silent mode.
For example, status messages may indicate that paper is low, output bins are full, or a
paper jam has occur red. Stat us messag es are d isplayed each ti me the us er pres ses the Enter
key to ensure that they do not scroll off the screen. When the problem is cleared, the
following message displays:
Printer Ready
The printer reports any changes of the printer's status to a console. These changes include
the following:
1
Changes of printer status:
$
Starting a new job.
$
Paper jam, low toner, low paper.
$
System is idle or offline.
2
Error messages generated when printing a document.
You can choose to allow or disallow these messages to be displayed on the console by
setting the message display mode to silent or normal with the commands
normal
:
silent
and
7
Page 12

$ silent
Set the console to silent mode. No message is displayed. In silent mode, pressing
Enter causes any outstanding message (like paper jam or low toner) to be echoed
to the screen.
$ normal
Set the console to normal mode to display all messages.
"#
The initial message display mode of a console session is different from product to
product.
With message display on, if a remote console session is active while a job is active on the
printer, the console screen displays
magicolor 6100−>
magicolor 6100−>Idle
magicolor 6100
magicolor 6100
part numbers......]
magicolor 6100
−>NO ERROR
−>Starting job 00078[Owner:collinst, Name:
−>Input Idle Printing
Console Mode
System users and the s ystem administrator use the con sole for different purposes. System
users use the console to check print job status, cancel print jobs, or check certain printer
configuration settings. (See “User/Offline Mode Commands” on page 11 for a list of
commands available to users.) The system administrator uses the console more
extensively for printer configuration and file system management. (See “Admin Mode
Commands” on page 12 for a list of the commands available to the administrator.
The console can operate in one of the following modes. The console prompt indicates
what mode the console is operati ng in.
User mode
$
This is the initial mode when a console session is opened. It is indicated with the user
prompt:
−>
Offline mode
$
magicolor 6100
8
Page 13

Use the
toner. It is indicated with the offline prompt:
offline
command to put the printer offline for service, like adding paper or
offline
"#
The console’s offline mode does not allow you to access the configuration menus. The
−>
console’s admin mode, like the printer control panel’s offline mo de, allows system
administrators to access the configuration menus to change the printer configuration.
Admin mode
$
Administrators can use the
admin mode to configure the printer. Only one console session can be in admin mode
at a time. This mode is indicated with the admin prompt:
admin
−>
If the administrator password is enabled, you are prompted to enter it before you can
access admin mode. Usually this password is set by the system administrator through
the printer control panel using a security card or a security disk, depending on your
system. If you enter an invalid password, an
***Invalid password ***
message displays, and then the remote console prompt displays.
If the printer is idle when you enter the admin mode, the printer is automatically taken
offline and the prompt changes to
offline
−>
admin
command to take the printer off line and enter the
Blocked mode
$
A console is in blocked mode when the administrator or another user is in admin
mode or offline mode, or when the printer is put in offline mode from the printer control
panel. It is indicated with the following:
System Offline
offline
−>
The current mode of the console determines the type of command you can execute. For a
list of commands all owed in admin, user, offline, and blocked modes, type
shorthand version,
. See “Remote Console Commands” on page 10 for more
↵
?
help
or the
↵
information.
9
Page 14
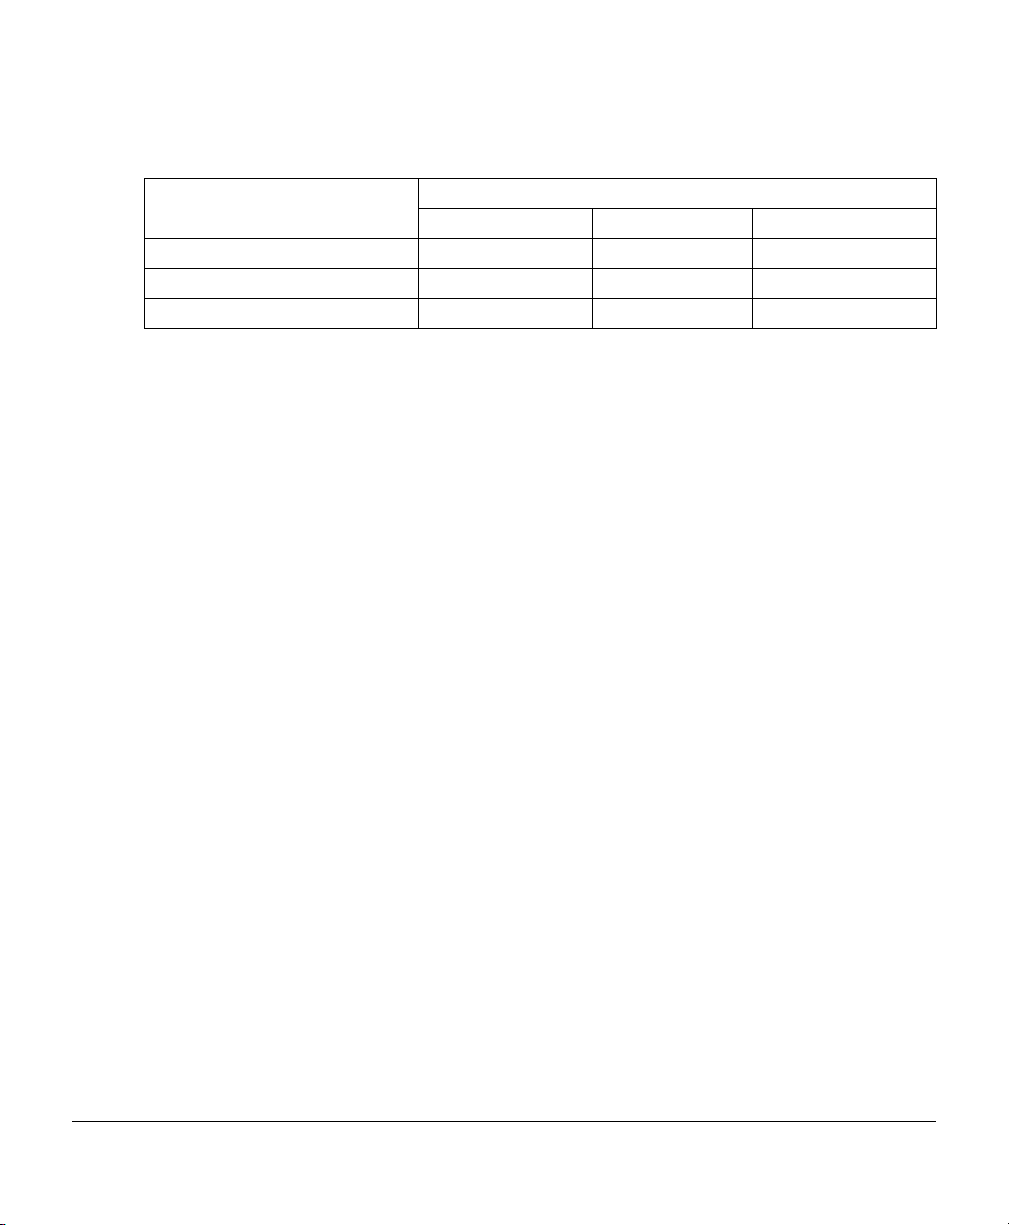
Commands for Switching Among Console Modes
Switch from Mode Switch to Mode
User Offline Admin
User N/A offline admin
Offline online N/A admin
Admin exit N/A N/A
"#
A console in blocked mode returns to user mode when the system is on line. See “User/
Offline Mode Commands” on page 11 for more specific information on each of these
commands.
Using Remote Console
Whether you use a VMS host through the PS Executive for VMS or a TCP/IP host with
Telnet commands, Remote Console works the same once you are in the session.
Depending upon how the system administrator sets up access privileges, password
security, and disk drives, some or all of the commands in the “Remote Console
Commands” section may be available for you to use.
"#
Options with an n parameter allow you to specify a job number. For example, if you
enter cancel without the parameter, all jobs in the queue are canceled. To cancel just
one job, replace the n with the job numbe r.
Also, the following commands are available in the admin mode only if the printer you
are using has a disk drive: cd, copy, cp, del, rem, format, ls, dir, pwd, rename, and mv.
Remote Console Commands
The following sections de scr ibe the Remote Console commands. Some commands have a
shorthand version. For exa mple , ? is shorthand for the
in the following section, shorthand commands are shown in parentheses: (?). The console
10
help
command. In the descriptio ns
Page 15

displays 24 lines of 80 characters. The commands displayed depend on your remote
console mode of operation.
User/Offline Mode Commands
In the default user mode and the offline mode, only a subset of the console commands is
available. Commands accessible from user and offline modes are shown in the following
table:
User/Offline Mode Commands
admin
cancel
fonts
help (?)
jobs
languages
next
normal
offline
online
order
printsetup
priority
quit
silent
time
who
n Cancel job in progress (or specific job n).
n Display job queue (or details of specific jobn).
n Print job number n next.
j1 j2 Print job number j1 before job number j2.
j p Change job j’s printing priority to priority number p.
Enter console administrative mode, if you have administrative privileges.
List available fonts.
Display help menu.
Display the emulation selection menu.
Enable error/status reporting.
Take printer off line. (Not available in offline mode.)
Put printer on line. (Not available in user mode.)
Print status page(s).
Quit the console session.
Disable error/status reporting.
Display the current date and time.
Display a list of who is logged into the console server.
Blocked Mode Commands
In the blocked mode, only a subset of the user commands is available. Commands
accessible from blocked mode are shown in the following table:
Blocked Mode Commands
cancel
n Cancel job in progress (or specific job n).
11
Page 16

fonts
help (?)
jobs
n Display job queue. With n, display details on job
languages
next
n Print job number n next.
normal
order
j1 j2 Print job number j1 before job number j2.
printsetup
priority
quit
silent
time
who
j p Change job j’s printing priority to priority number p.
List available fonts.
Display help menu.
n.
Display the emulation selection menu.
Enable error/status reporting.
Print status page(s).
Quit the console session.
Disable error/status reporting.
Display the current date and time.
Display a list of who is logged into the console server.
Admin Mode Commands
If you have administrator privileges, you can enter admin mode. The commands
accessible from admin mode are shown in the following table:
Administrator Commands
admin
cancel
cd
config
copy (cp)
del (rm)
exit
fonts
format
help (?)
jobs
languages
ls, dir
n Cancel job in progress (or specific job n).
n Display job queue (or details of specific job
Enter console administrator mode, if you have administrative privileges.
Change directory.
Configure printer.
Copy file.
Delete file.
Exit console administrator mode.
List available fonts.
Format hard disk.
Display the help menu.
n).
Display the emulation selection menu.
List files.
12
Page 17

next
n Print job number n next.
normal
order
j1 j2 Print job number j1 before job number j2.
printsetup
priority
pwd
quit
reboot
rename (mv)
reset
resetaccount
settime
silent
time
who
j p Change job j’s printing priority to priority number p.
Enable error/status reporting.
Print status page(s).
Print working directory.
Quit the console session.
Reboot the printer.
Rename file.
Reset the printer configuration to the factory default settings.
Reset the accounting information.
Set the date and time.
Disable error/status reporting.
Display the current date and time.
Display a list of who is logged into the console server.
Print Job Status Information
When using the remote console commands, information displayed on the console may
contain any of the following terms.
Cancelled
Interface
Interpreting
Job
Owner
Page
Printed
Printing
Prio
Sheet
The job has been cancelled.
The interface through which the job is received.
The job is compiling.
The job’s identification number.
The owner of the job.
The number of logical pages (page images) printed (how many sides, such
as in duplex printing).
The job is done; all pages are printed.
The job is printing.
The job’s printing priority. Jobs with bigger priority numbers print first. Jobs
with the same priority print in order of arrival.
The number of physical pages (sheets of paper) printed.
13
Page 18

Spooled
Spooling
Status
Terminating
Title
The printer has received all data for the job.
The printer is receiving data for the job.
The current status of the job.
The job is about to finish.
The title of the file.
System Information Commands
The system commands allo w you to perf orm system ta sks, such as access help, acce ss font
information, print a status page, display the time, display the available emulations, check
the console sessions, and display active print jobs.
Accessing Help
Command
Purpose
Mode
Notes
Example
jobs n
fonts
cancel n
printsetup
offline
online
admin
help (?)
time
languages
help (?)
Display the commands accessible in a given console mode. To access a specific mode’s help, you must first be in that mode, and then enter the
mand at the magicolor 6100 −> prompt.
user, admin, offline
If you have administrator privileges, you can enter the admin mode and display
help that lists the following commands, plus others which pertain only to the
admin mode.
See “Console Mode” on page 8, for information on how to access the admin
mode.
magicolor 6100−>help↵
- Display job queue. With n, display details on job n
- List available fonts
- Cancel job in progress (or specific)
- Print status page(s)
- Take printer off line
- Bring printer on line
- Enter console administrative mode
- Help menu
- Display the current date and time
- Display the emulation selection menu
help
com-
14
Page 19

who
quit
normal
silent
priority j p
order j1 j2
next n
- Who is logged in on the console server
- Quit console session
- Enable error/status reporting
- Disable error/status reporting
- Change j's printing priority to p
- Print j1 before j2
- Print job n next
Accessing Font Information
Command
Purpose
Mode
Notes
Example
fonts (f)
Display a menu that allows you to view the fonts available from an emulation
currently installed in the printer.
user, admin, offline
If optional emulations and fonts are installed, they appear also. The value listed
in [ ] is the default value and can be entered by pressing the Enter key ↵. If you
enter the number that corresponds to the desired emulation, the list of available
fonts for that emulation appears with the available font sizes.
magicolor 6100−>fonts↵
List fonts for:
1. postscript
2. pdf
3.pclxl
4.pc15e
5. hpgl
0. Exit menu
Chose one [0]: 4↵
##FONTS##
54
Font: Courier; Standard; Selection Index 0
Font: Courier Italic; Standard; Selection Index 1
Font: Courier Bold; Standard; Selection Index 2
Font: Courier Bold Italic; Standard; Selection Index 3
Font: Albertus Medium; Standard; Selection Index 4
15
Page 20

Font: Albertus Extra Bold; Standard; Selection Index 5
Font: Antique Olive; Standard; Selection Index 6
Font: Antique Olive Italic; Standard; Selection Index 7
Font: Antique Olive Bold; Standard; Selection Index 8
Font: Arial; Standard; S election Index 9
Font: Arial Italic; Standard; Selection Index 1 0
Font: Arial B old; Standa rd; Selection Index 11
Font: Arial B old Italic; Standard; Selection Index 12
Font: Clarendon Condensed Bold; Standard; Selection Index 13
Font: Coronet; Standard; Selection Index 14
Font: Garamond Antiqua; Standard; Selection Index 15
Font: Garamond Kursiv; Standard; Selection Index 16
Font: Garamond Halbfett; Standard; Selection Index 17
Press Enter to continue
Printing Status Page
16
Command
Purpose
Mode
Notes
Example
printsetup (s)
Print a status page to the printer. Status page information varies depending on
the printer.
user, offline, admin
The status page lists printer information. See your printer user’s guide for more
information on the status page.
magicolor 6100−>
Status page(s) queued to print
magicolor 6100−>Idle
magicolor 6100−>Input Idle Printing
Displaying the Time
Command
Purpose
Mode
time (t)
Display the current time on the printer system clock.
user, offline, admin
printsetup
↵
Page 21

Notes
Example
On most Crown printers, if the time and date are incorrect, they can be changed
through the admin mode
Time” on page 30.
Available only on systems with real-time clocks.
magicolor 6100−>time↵
Thur Jan 20, 1994 15:03:12
Accessing the Printer Emulation
settime
command. See “Setting the System Clock
Command
Purpose
Mode
Notes
Example
languages (l)
Display a menu that allows you to view the current setup for a selected emulation.
user, offline, admin
The value in brackets [ ] is the current value for the selection. This is a display
only command. You cannot change the language setting using this command.
Not all the options shown in this example are available on all printers. Only the
options for your printer will appear on the remote console display.
magicolor 6100−>languages↵
Emulations
1. ESP Default
2. Postscript
3. PCL 5e
4.HP-GL
5. LinePrinter
0. Exit menu
Choose one [0]: 2↵
Postscript
1.Color Rendering
2. Halftone Type
0. Exit menu
Choose one [0]: 1↵
Color Rendering :
1.Business
2. Colormetric
3.Photographic
Current selection is [3]
Press Enter to continue↵
17
Page 22

Listing Current Remote Console Sessions
Command
Purpose
Mode
Example
who (w)
List all the current remote console sessions and their modes.
user, offline, admin
magicolor 6100−>who↵
**** Session open status ****
Session 0 -- user mode
18
Page 23

Displaying the Active Jobs
Command
Purpose
Mode
Notes
Example
magicolor 6100
magicolor 6100−>
Job Status Prio Owner Title Interface Sheet Page
014 Interpreting 0001 Ethernet 1 0000 0000
015 Spooled 0001 stdin(ditroff) Ethernet 1 0000 0000
016 Spooled 0001 Ethernet 1 0000 0000
017 Spooled 0001 Ethernet 1 0000 0000
018 Spooled 0001 Ethernet 1 0000 0000
019 Spooled 0001 Ethernet 1 0000 0000
020 Spooling 0001 Ethernet 1 0000 0000
-------------------------------------------------------------------------
009 Printed 0001 Ethernet 1 0010 0010
010 Printed 0001 Ethernet 1 0001 0001
011 Printed 0001 stdin(ditroff
012 Printed 0001 Ethernet 1 0001 0001
013 Printed 0001 stdin(ditroff) Ethernet 1 0023 0023
End of job query
−>
−>
−>−>
jobs
jobs
(j)
n
Display a list of active print jobs and the last 5 terminated jobs (when applicable). Active jobs and printed jobs are separated by a dashed line. With n, display details on job n.
user, offline, admin
This command allows the system administrator to monitor the activity of the
printer. For example, you can tell how many files are left to print.
If there are active jobs, the display may look like this:
↵↵↵↵
) Ethernet 1 0001 0001
If there is no active job, the display may look like this:
19
Page 24

Job Status Prio Owner Title Interface Sheet Page
00075 Printed 0001 Fast-Ethe-NI 0000 0000
00076 Printed 0001 collinst 100bprice rec.xls Fast-Ethe-NI 0001 0001
00077 Printed 0001 collinst 100bprice rec.xls Fast-Ethe-NI 0019 0019
00078 Printed 0001 collinst part numbers...6100 Fast-Ethe-NI 0005 0005
00079 Printed 0001 collinst part numbers...6100 Fast-Ethe-NI 0005 0005
End of job query
magicolor 6100->No active job
Job Status
Entering the jobs command with a specific number shows the status of the job.
This option is valid for active jobs only, not for terminated jobs.
magicolor 6100−>j 19↵
magicolor 6100−>
Description for job [19]
Job Number: 19
Status: Spooled
Priority: 1
Owner:
Title:
Interface: Ethernet 1
Sheet: 0
Page: 0
End of job query
Job Ordering Commands
Job ordering commands are used to set the order and priority of jobs and to cancel jobs.
Changing Job Priority
Command
Purpose
Mode
priority (jp)
Set the printing priority of a job to advance/delay the printing of a given job by
priority order.
user, offline, admin
n
1 n2
20
Page 25

Notes The valid range of priority values are 1 to 100. A negative priority value causes
an
***Incorrect entry *** error message to display. A priority greater
than 100 is reset to 100. A priority value of 0 is reset to 1.
Example See below
Initial printing order:
magicolor 6100−>
Job Status Prio Owner Title Interface Sheet Page
027 Terminating 0001 Ethernet 1 0001 0001
028 Interpreting 0001 stdin(ditroff) Ethernet 1 0000 0000
029 Spooled 0001 Ethernet 1 0000 0000
030 Spooled 0001 Ethernet 1 0000 0000
031 Spooled 0001 Ethernet 1 0000 0000
032 Spooled 0001 Ethernet 1 0000 0000
033 Spooled 0001 Ethernet 1 0000 0000
034 Spooled 0001 Ethernet 1 0000 0000
035 Spooled 0001 Ethernet 1 0000 0000
036 Spooled 0001 Ethernet 1 0000 0000
037 Spooled 0001 stdin(ditroff) Ethernet 1 0000 0000
038 Spooled 0001 Ethernet 1 0000 0000
039 Spooled 0001 stdin(ditroff) Ethernet 1 0000 0000
-------------------------------------------------------------------------
022 Printed 0001 Ethernet 1 0010 0010
023 Printed 0001 Ethernet 1 0001 0001
024 Printed 0001 stdin(ditroff) Ethernet 1 0001 0001
025 Printed 0001 Ethernet 1 0001 0001
026 Printed 0001 stdin(ditroff) Ethernet 1 0023 0023
End of job query
−>j↵↵↵↵
−>−>
Changing printing priority of job 33 to 10:
magicolor 6100−>
magicolor 6100−>
−>priority 33 10↵↵↵↵
−>−>
−>j↵↵↵↵
−>−>
21
Page 26

Job Status Prio Owner Title Interface Sheet Page
033 Spooled 0010 Ethernet 1 0000 0000
028 Terminating 0001 stdin(ditroff) Ethernet 1 0000 0000
029 Interpreting 0001 Ethernet 1 0000 0000
030 Spooled 0001 Ethernet 1 0000 0000
031 Spooled 0001 Ethernet 1 0000 0000
032 Spooled 0001 Ethernet 1 0000 0000
034 Spooled 0001 Ethernet 1 0000 0000
035 Spooled 0001 Ethernet 1 0000 0000
036 Spooled 0001 Ethernet 1 0000 0000
037 Spooled 0001 stdin(ditroff) Ethernet 1 0000 0000
038 Spooled 0001 Ethernet 1 0000 0000
039 Spooled 0001 stdin(ditroff) Ethernet 1 0000 0000
------------------------------------------------------------------------
023 Printed 0001 Ethernet 1 0001 0001
024 Printed 0001 stdin(ditroff) Ethernet 1 0001 0001
025 Printed 0001 Ethernet 1 0001 0001
026 Printed 0001 stdin(ditroff) Ethernet 1 0023 0023
027 Printed 0001 Ethernet 1 0001 0001
End of job query
22
Changing Job Order
Command
Purpose
Mode
Example
magicolor 6100
Job Status Prio Owner Title Interface Sheet Page
order (j)
Set a given job to print before another job.
user, offline, admin
Set job 39 to print before job 31:
magicolor 6100−>order 39 31↵
New printing order:
−>
−>j↵↵↵↵
−>−>
n
1 n2
Page 27

033 Terminating 0010 Ethernet 1 0000 0000
030 Terminating 0001 Ethernet 1 0000 0000
039 Spooled 0001 stdin(ditroff) Ethernet 1 0000 0000
031 Terminating 0001 Ethernet 1 0000 0000
032 Spooled 0001 Ethernet 1 0000 0000
034 Spooled 0001 Ethernet 1 0000 0000
035 Spooled 0001 Ethernet 1 0000 0000
036 Spooled 0001 Ethernet 1 0000 0000
037 Spooled 0001 stdin(ditroff) Ethernet 1 0000 0000
038 Spooled 0001 Ethernet 1 0000 0000
-------------------------------------------------------------------------
025 Printed 0001 Ethernet 1 0001 0001
026 Printed 0001 stdin(ditroff) Ethernet 1 0023 0023
027 Printed 0001 Ethernet 1 0001 0001
028 Printed 0001 stdin(ditroff) Ethernet 1 0000 0000
029 Printed 0001 Ethernet 1 0000 0000
End of job query
Printing a Job Next
Command
Purpose
Mode
Example
Job Status Prio Owner Title Interface Sheet Page
037 Spooled 0001 stdin (ditroff) Ethernet 1 0000 0000
039 Printing 0001 stdin (ditroff) Ethernet 1 0012 0012
next (nt)
Set a given job to be printed next.
user, offline, admin
Setting job 37 to be printed next:
magicolor 6100−>next 37↵
New printing order:
magicolor 6100−>j↵
magicolor 6100−>
n
23
Page 28

032 Terminating 0001 Ethernet 1 0010 0010
034 Spooled 0001 Ethernet 1 0000 0000
035 Spooled 0001 Ethernet 1 0000 0000
036 Spooled 0001 Ethernet 1 0000 0000
038 Spooled 0001 Ethernet 1 0000 0000
-------------------------------------------------------------------------
028 Printed 0001 stdin (ditroff) Ethernet 1 0023 0023
029 Printed 0001 Ethernet 1 0001 0001
033 Printed 0010 Ethernet 1 0001 0001
030 Printed 0001 Ethernet 1 0001 0001
031 Printed 0001 Ethernet 1 0002 0002
End of job query
Cancelling a Job
Attention
If you use the cancel command without specifying a job ID, it will cause all active
processing jobs to be canceled.
24
Command
Purpose
Mode
Notes
Example
cancel n (c)
Cancel printing the current job(s) or a specific job.
user, offline, admin
When the cancel command is entered with a job ID, the specified job is
canceled. For example, the command cancel 7, cancels job 7. When
the cancel command is entered with no job ID specified, all jobs with the
printing, interpreting, or terminating status are canceled. You can use the
jobs command to find the job ID or status of any job in the system.
To cancel the current job:
magicolor 6100−>cancel↵
magicolor 6100−>cancelling Job
To cancel job number 41:
magicolor 6100−>cancel 41↵
magicolor 6100−>cancelling Job
Page 29

Disk Operation Commands
The commands in this section are available only when a disk drive is attached to your
printer. The Disk Operations commands may use the following root directory on the
printer to manipul ate fi les: DSK#:/USR/xxxxxxxx (where # represents a disk ID number in
the 1 to 7 range and xxxxxxxx represents a user-created subdirectory.) See the cd, copy
(cp), rename (mv), and del (rm) commands for specific directory information.
Path Name Legend
.
..
current directory
parent directory
File and Directory Name Rules
File and directory names are composed of a root name of up to 8 characters and an
$
extension name of up to 3 characters.
The name is not case-sensitive; file name ABC.doc is the same as abc.doc.
$
Wild ca rd char acters * and ? in file names are no t support ed with the exceptio n of the
$
following:
cp source_directory/* destination_directory
rm directory/*
Commands like
dir *.txt
cp bin/* usr
and
are invalid.
Changing the Current Device
Command
Purpose
Mode
Notes
cd DSK#:/usr
Change to a new hard disk
admin
This command has no effect if the corresponding device is not available. This
command works in the DSK#: (# represents a disk in the range of 1 to 7),
25
Page 30

Example
Change directory:
admin−>cd DSK6↵
admin−>Idle
Show the current path of the device:
admin−>pwd↵
DSK6/
admin−>
Displaying the Current Working Directory
Command
Purpose
Mode
Notes
Example
pwd
Display the current working directory.
admin
This command appears only if a disk drive is available on the printer you are
using.
admin−>pwd↵
DSK6:USR
Displaying Directory Contents
Command
Purpose
Mode
Notes
Example
dir (ls)
Display the contents of the current directory or a given directory.
admin
This command appears only if a disk drive is available on the printer you are
using.
Current directory:
admin−>ls↵
BIN.<DIR>01-19-199415:42:01
SYSTEM.DL 381740001-19-199415:50:01
TMP.<DIR>01-19-199415:53:01
SPOOL.<DIR>01-19-199415:53:01
FONTS.<DIR>01-19-199415:55:01
ROM.DL405448801-20-199414:30:01
26
Page 31

Specific directory:
admin−>ls dsk6:/usr↵
..<DIR>01-19-199415:42:01
...<DIR>01-19-199415:42:01
ACC.DIC688401-21-199413:27:01
ACC.STA15001-21-199412:46:01
ACC1.JOB688401-21-199413:27:01
ACC.PAP15001-21-199412:46:01
Changing the Working Directory
Command
Purpose
Mode
Notes
Example Change directory:
cd
Change to a new working directory.
admin
This command appears only if a disk drive is available on the printer you are
using. This command works in the DSK#:/USR/
sents a disk in the range of 1 to 7 and
directory.)
admin−>cd usr↵
admin−>Idle
List
contents of directory DSK6:/usr:
admin−>ls↵
..<DIR>01-19-199415:42:01
...<DIR>01-19-199415:42:01
ACC.DIC688401-21-199413:27:01
ACC.STA15001-21-199412:46:01
ACC1.JOB688401-21-199413:27:01
ACC.PAP15001-21-199412:46:01
Change to Parent Directory
admin−>cd ..↵
Change to Root Directory
admin−>cd↵
xxxxxxxx
xxxxxxxx
represents a user created sub-
directory. (# repre-
Copying a File
Command
Purpose
copy (cp)
Copy the contents of a file to a new file.
27
Page 32

Mode admin
Notes You may use the following shortcut to copy all files from one directory to
another:
cp source_directory/* destination_directory↵
This command appears only if a disk drive is available on the printer you are
using. This command works in the DSK#:/USR/
resents a disk in the range of 1 to 7 and
subdirectory).
Example Initial content of directories usr and bin:
admin−>dir usr↵
..<DIR>01-19-199415:42:01
...<DIR>01-19-199415:42:01
ACC.DIC688401-21-199413:27:01
ACC.STA15001-21-199412:46:01
ACC1.JOB688401-21-199413:27:01
ACC.PAP15001-21-199412:46:01
admin−>dir bin↵
..<DIR>01-19-199415:42:01
...<DIR>01-19-199415:42:01
FE.<DIR>01-19-199415:42:01
EMULATE.<DIR>01-19-199415:42:01
DIAGS.<DIR>01-19-199415:43:01
NVR.<DIR>01-19-199415:43:01
xxxxxxxx
xxxxxxxx
directory (where # rep-
represents a user created
28
Copy file DSK6:/usr/acc.pap to DSK6:/bin/acc.bak:
admin−>copy usr/acc.dic bin/acc.bak↵
Copying data...
New content of directory bin:
admin−>dir bin↵
..<DIR>01-19-199415:42:01
...<DIR>01-19-199415:42:01
FE.<DIR>01-19-199415:42:01
EMULATE.<DIR>01-19-199415:42:01
DIAGS.<DIR>01-19-199415:43:01
NVR.<DIR>01-19-199415:43:01
ACC.BAK688401-21-199414:13:01
Page 33

Renaming a File
Command
Purpose
Mode
Notes
Example
rename (mv)
Change the current name of a file to a new name. If the new name specifies a
different directory, the file is moved to that directory.
admin
The new directory must already exist. If it does not exist you will receive a file
name is invalid error message, in which case you need to create the
directory using FTP.
The command works on files only. Directories cannot be renamed with this command.
You may use the following shortcut to copy all files from one directory to
another:
cp source_directory/* destination _directory
The file to be renamed must be in one of the following directory: DSK#:/USR/
xxxxxxxx
resents a user created subdirectory.) This command displays only if a disk drive
is available on the printer you are using.
Rename file acc.bak to acc.old in the same directory:
admin−>mv acc.bak acc.old↵
Rename file acc.bak to acc.old and move it to the parent directory:
admin−>mv acc.bak ../acc.old↵
directory. (# represents a disk in the range of 1 to 7 and
xxxxxxxx
rep-
Deleting a File
Command
Purpose
Mode
Notes
Example
Move the file acc.bak to subdirectory backup without changing its name:
admin−>mv acc.bak backup/acc.bak↵
del (rm)
Delete a file.
admin
This command works in the DSK#:/USR/
disk in the range of 1 to 7 and
This command displays only if a disk drive is available on the printer you are
using.
admin−>del acc.bak↵
xxxxxxxx
xxxxxxxx
represents a user created subdirectory.)
directory. (# represents a
29
Page 34

Formatting a Hard Disk
Command
Purpose
Mode
Notes
Example
format
Format a hard disk.
admin
This command displays only if a disk drive is available on the printer you are
using. The value in brackets [ ] is the current value for the selection.
Format hard disk 6:
admin−>format DSK6↵
Format disk:DSK6
Continue (N=no, Y=Yes) [N]:y↵
admin−>Idle
System Setting Commands
Setting the System Clock Time
Command
Purpose
Mode
Notes
settime
Set the date and time of the system clock.
admin
This command displays only if a disk drive is available on the printer you are
using. The value in brackets [ ] is the current value for the selection.
The command is available only on systems with real-time clocks.
30
Page 35

Example
admin−>settime↵
Date of Month (1 - 31)
Enter value [20]:21↵
Month (1 - 12)
Enter value [1]:2↵
Year (1990 - 2089)
Enter value [1994]:1994↵
Weekday (1=Mon, 2=Tue, ..., 7=Sun)
Enter value [4]:1↵
Hour (0 - 23)
Enter value [15]:↵
Minute (0 - 59)
Enter value [48]:↵
Second (0 - 59)
Enter value [58]:↵
admin−>Idle
admin−>
admin−>Idle
Enter the time command to verify the new time:
admin−>time↵
Thur Feb 21, 1994 15:48:12
admin−>Idle
Setting the Console to Normal Message Display Mode
Command
Purpose
Mode
Example
normal (n)
Set the console to normal message display mode to display any message the
system reports to the console. See “Message Display and Console Modes” on
page 7.
user, offline, admin
magicolor 6100−>normal↵
Setting the Console to Silent Message Display Mode
Command
Purpose
Mode
silent (s)
Set the console to silent message display mode to ignore any message the system reports to the console. See “Message Display and Console Modes” on
page 7.
user, offline, admin
31
Page 36

Example
magicolor 6100−>silent↵
Removing All Accounting Records
Command
Purpose
Mode
Notes
Example
resetaccount (ra)
Remove all accounting records from the system.
admin
This command is not available on all MINOLTA-QMS printers.
The value in brackets [ ] is the current value for the selection.
admin−>resetaccount↵
Reset accounting information (y/n) [n]:y↵
admin−>Idle
admin−>
*** Resetting accounting...
*** Creating accounting job file(s), please wait ...
*** Created file
*** Creating paper accounting file, please wait ...
*** Created file
Resetting to Factory Default Settings
Command
Purpose
Mode
Notes
Example
reset
Reboot the system and reset the system configuration to factory default settings. All console sessions are terminated and the terminals are frozen until the
system is back on line.
admin
Any job in the system is lost after the reboot, and the current system configuration settings are replaced with factory default settings or the saved custom
default settings. The value in brackets [ ] is the current value for the selection.
admin−>reset↵
Reset printer configuration (y/n) [n]: y↵
Printer configuration reset
admin−>Idle
admin−>
Connection closed by foreign host.
[b@boris, 36]
32
Accessing the Printer Configuration Menu
Command
config (menu)
Page 37

Purpose Access the printer configuration menu to review and change settings.
Mode admin
Notes The value in brackets [ ] is the current value for the selection. If you want to
change that value, enter the desired value after the colon (:). The higher-level
menu defaults are 0’s. This allows you to exit from the menu in the same order
as you entered it.
Passwords can only be set or changed through the printer’s control panel.
The config command accesses the printer configuration menu, which may vary
depending on your printer (not all options are available on all MINOLTA-QMS
printers). It accesses the same printer configuration menu that is available
through the control panel for your specific printer. When you are in the printer
configuration menu, you can press the Return key to return to the user mode or
you can press the Return key to advance one menu level with the following
exception: when the data type for a field is a character string. In this case, anything you enter is accepted as data for that field.
See your printer user’s guide and Crown Book for more information on passwords and the configuration menu options that are available on your printer.
33
Page 38

Example Use config to enter the configuration menu:
admin−>config↵
Configure the operator control menu options:
Printer Configuration
1. Operator Control
2. Administration
0. Exit menu
Choose one [0]: 1↵
Press the Enter key or type 1, and the operator control options appear:
Operator Control
1. Copies
2. Duplex
3. Tumble Duplex
4. Collation
5. Orientation
6. Inputbin
7. Outputbin
8. Chain Inputbins
9. Offset Stacking
10. Stapling
11. Accounting
0. Exit menu
Choose one [0]:
If an operator control menu password is enabled, you are prompted to enter it:
Printer Configuration
1. Operator Control
2. Administration
0. Exit menu
Choose one [0]: 1
Enter Password:
Enter value [ ]:
34
Page 39

Configure the administration menu options:
Printer Configuration
1. Operator Control
2. Administration
0. Exit menu
Choose one [0]: 2↵
Press the Enter key or type 2, and the Administration menu options appear:
Administration
1. Communications
2. Emulations
3. Special Pages
4. Startup Options
5. Memory
6. Engine Setup
7. Miscellaneous
8. Disk Operations
0. Exit menu
Choose one (0):
If administration password protection is enabled, you are prompted to enter the
administration password:
Printer Configuration
1. Operator Control
2. Administration
0. Exit menu
Choose one [0]: 2↵
Enter Password:
Enter value [ ]:
System Console Mode Switching Commands
Putting the System Off Line (from User Mode)
Command
Purpose
Mode
Notes
offline (o)
Switch the console from user mode to offline mode and take the system off line.
The system enters blocked mode.
user
Entering the
online
command returns you to user mode.
35
Page 40

Example
Waiting for idle…Enter "online" to return to operator mode online
magicolor 6100−>
magicolor 6100−>offline↵
offline−>Idle
If the system is busy, the following message appears:
Putting the System On Line (from Offline Mode)
Command
Purpose
Mode
Example
online
Switch the console from offline mode to user mode and put the system on line.
offline
offline−>online↵
magicolor 6100−>idle
Putting the System Off Line, Going to Admin Mode
Command
Purpose
Mode
Notes
Example
admin
Switch the console from user/offline mode to admin mode and take the system
off line.
admin
Passwords can only be set or changed through the printer’s control panel. See
your printer user’s guide for more information on passwords.
From user mode to admin mode:
magicolor 6100−>admin↵
admin−>Idle
From offline mode to admin mode:
offline−>admin
admin−>idle
If the system is busy, the following message appears:
Waiting for idle...Enter "online" to return to operator mode
magicolor 6100−>
36
Use online to return to user mode:
magicolor 6100−>online↵
magicolor 6100−>
Page 41

If administration password protection is enabled, a password entry prompt
appears. Entering a wrong password puts the console in offline mode. You can
try again with the admin command or return to user mode with the online command:
magicolor 6100−>admin↵
Enter Password:00aaa↵
*** Invalid password ***
offline−>Idle
offline−>online
Entering the password again:
magicolor 6100−>Idle
magicolor 6100−>admin↵
Enter Password:00AAA↵
admin−>Idle
admin−>
Put the System On Line in Admin Mode
Command
Purpose
Mode
Notes
Example
exit (x)
Switch the console from admin mode to user mode and put the system on line.
admin
When you exit from the admin mode, the offline prompt changes to the general
remote console user/offline prompt, as shown in the example below.
admin−>exit↵
magicolor 6100−>idle
Session Termination Commands
Session Termination commands allow you to terminate the console session or reboot the
whole system.
Terminating the Console Session
Command
Purpose
Mode
quit (q)
Terminate the current console session.
user, offline, admin
37
Page 42

Notes
Example
When you quit a remote console session, a message displays that tells you the
connection is closed and who closed it. In this example, b@venus closed the
session. If you do not quit the session, it is automatically closed when the system is turned off.
For VMS users, when you quit the session, it may take several seconds for the
remote link to disconnect.
magicolor 6100−>quit↵
Connection closed by foreign host.
[b@venus, 42]
Rebooting the System
Command
Purpose
Mode
Notes
Example
reboot
Reboot the system and terminate all console sessions. This is similar to the
reset
command, except that it does not reset the system configuration to factory
default.
admin
The value in brackets [ ] is the current value for the selection. Any job in the system is lost after the reboot.
admin−>reboot↵
Reset printer configuration (y/n) [n]: y↵
Printer configuration reset
admin−>Idle
admin−>
Forced Console Termination
A system may have a daughterboard that supports a remote console connection timeout
option. This option sets a console idle time limit. If no activity is detected for a session
within the time limit, the session is terminated.
Certain printer configuration menu options, like memory configuration, require a system
reboot to take ef fect . Changin g these op tions c ause s the sys tem to re boot and t erminat e all
sessions w hen the user leaves the configuration menu.
!
38
Page 43

Index
A
Access privileges
Accessing font information
Accessing help
Accessing the printer configuration menu
Accessing the printer emulation
Admin mode
4, 6
15
14
17
12
B
Blocked mode
11
C
cancel command
Cancelling a job
Case-sensitive
cd command
Changing
job order 22
24
24
4
27
32
job priority 20
Changing the working directory
Command
cd 27
dir 26
Commands
admin 36
cancel 24
config 32
copy 27
del 29
exit 37
fonts 15
format 30
help 14
jobs 19
languages 17
next 23
normal 31
normal (n) 31
27
Page 44

offline 35
online 36
order 22
printsetup 16
priority 20
pwd 26
quit 37
reboot 38
rename 29
reset 32
resetaccount 32
settime 30
silent 31
time 16
who 18
config (menu) command
Console modes
Conventions
Typographic 1
Copy (cp) command
Copying a file
7
27
32
27
D
DECnet
Default settings
Del (rm) command
Deleting a File
dir (ls) command
Directory
2
Start a session 5
start session 5
resetting to 32
29
29
26
display contents 26
display current 26
E
Exit command
37
F
font command
Forced console termination
15
38
Format command
Formatting a Floppy Disk
Formatting a Hard Disk
30
30
G
Going to admin mode
36
H
Help command
14
J
Job order
22
L
languages command
17
M
Main menu
PS Executive 6
Message display
Mode 7
Modes
Admin 12
Blocked 11
User/Offline 11
7
N
next (nt) command
Nodename
Getting the 5
Invalid 6
normal (n) command
5
23
31
O
Offline (o) command
Online command
Operator password
Order (jo) command
35
36
4, 6
22
30
I-2 Remote Console User’s Guide—Index
Page 45

P
Password
Invalid 4, 6
Operator 4, 6
Print job status information
Printer nodename
Printer status
Printing a job next
Printing status page
Printsetup
printsetup command
Prompt
VMS 5
PS Executive
Main menu 6
Nodename 5
Remote Console 6
Put the system on line in admin mode
Putting the system off line
Putting the system on line
pwd command
4, 6
13
5
6
23
16
16
16
2, 3
35
36
26
Q
Quit command
37
37
Reset command
Resetaccount (ra) command
Resetting to factory default settings
32
32
S
Session
Start 3, 5
Setting the Console to Normal
System information commands
Font 15
Help 14
Languages 17
Time 16
Who 18
31
14, 16
T
TCP/IP
3
Telnet
2, 3
start session 3
Telnet session
Fail 3, 4
Terminating the console session
time command
Typographic conventions
16
1
37
32
R
Reboot command
Rebooting the system
Remote console
Commands 10
Forced termination 38
Listing current session 18
PS Executive 6
Start session 2
Using 10
Remote Console commands
Admin mode 12
Blocked Mode 11
User/Offline Mode 11
rename (mv) command
Renaming a File
38
38
29
29
10
U
UNIX
2
User/Offline mode
V
VMS
2, 3, 5
VMS prompt
5
W
who command
!
18
11
I-3Remote Console User’s Guide—Index
Page 46

 Loading...