

Page 1

1 Introduction
1.1 System requirements..................................................................1 - 1
Brand names.................................................................................1 - 1
2 Connections
2.1 Connection cables ......................................................................2 - 1
2.2 Connections ................................................................................2 - 3
Connecting the fax machine to the PC .........................................2 - 3
Connection to a LAN network using a PC ............... ............. ........2 - 4
Connection the fax machine directly to a LAN network.................2 - 5
3 Installing the software
3.1 Installation with Windows 95 ................. .. ............. ................ ....3 - 1
3.2 Installation with Windows 98 ................. .. ............. ................ ....3 - 5
3.3 Installation with Windows NT 4.0 ... .. .. ............. .. .. ............. ........3 - 9
3.4 Installation w it h Wi ndows 2000 ............. .. ....................... ........3 - 13
4 Setting up the printer
4.1 Changing the settings using the software................................4 - 1
Launching the pri nter driver .................... ............ ............ .. ...........4 - 1
4.2 Changing settings directly at the printer..................................4 - 3
Symbols ........................................................................................4 - 3
Overview symbols.........................................................................4 - 4
Fonts .............................................................................................4 - 5
Overview fonts ..............................................................................4 - 6
Line number .................................................................................4 - 7
Test page........................... ............ ...................... ............ ............ .4 - 7
5 Troubleshooting
6Appendix
6.1 Specifications..............................................................................6 - 1
Non printing area...........................................................................6 - 1
PCL5e IVZ-1
Page 2

IVZ-2 PCL5e
Page 3
Introduction
1 Introduction
1.1 Syste m requirements
Microsoft Windows ® 95
Microsoft Windows ® 98
Microsoft Windows ® NT4.0
Microsoft Windows ® 2000
WARNING
Radio interference due to non- shielded cables
Interface cables that are not shielded, may cause radio interference and
damage to other devices .
➜ Only use shielded cables.
Brand names
Microsoft® is a registered trade mark of the Microsoft Corporation.
Windows® is a registered trade mark of the Microsoft Corporation.
1
PCL5e 1-1
Page 4

1
Introduction
1-2 PCL5e
Page 5
Connections
2 Connections
2.1 Connection cables
✎
Preparation
Turn the PC and the Minoltafax 2800/3800 off, befor e you connect the
cables. When s w it ching the machines back on, make sur e to turn the
Minoltafax on before you turn the PC on.
✎
Auto detection
If the automatic detection for components is on, Windows will
automatically st art s etti ng up the n ew pr inter. I nterr upt th is pro cedure
before you begin with the installation.
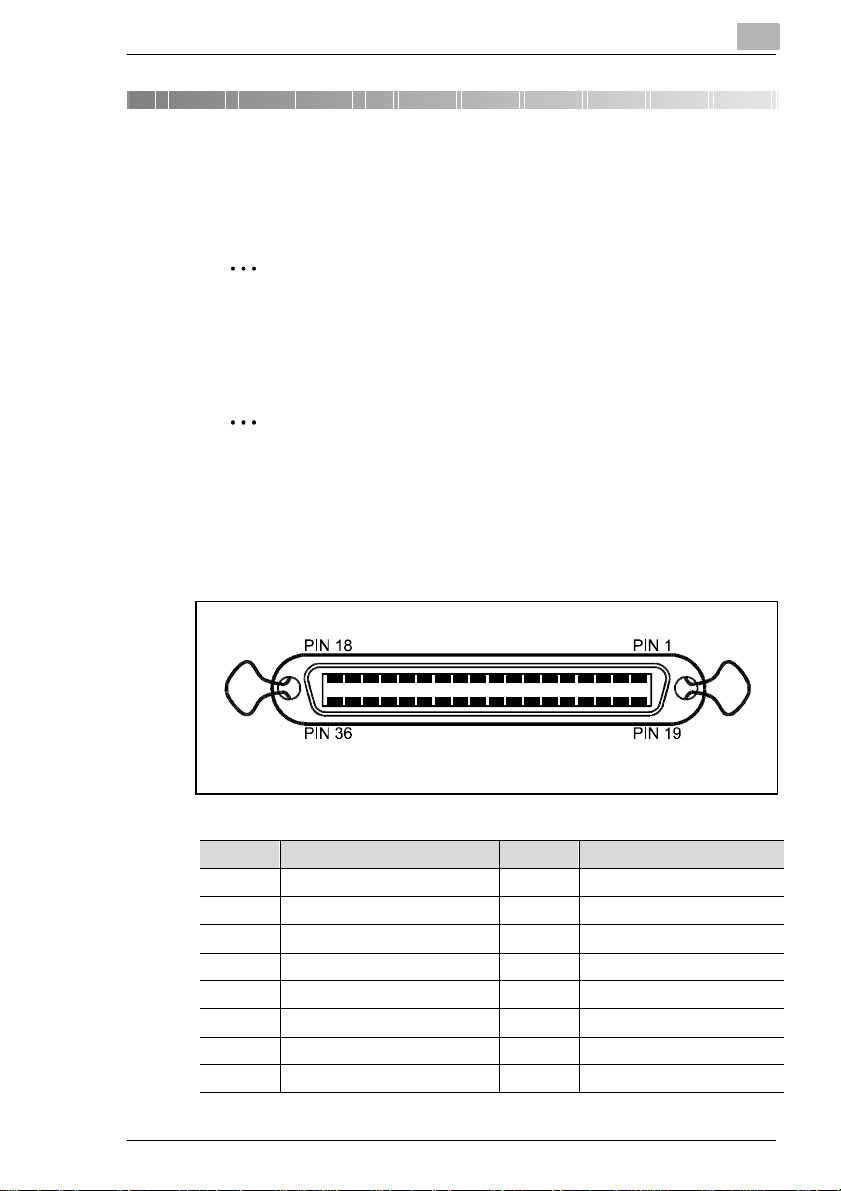
Use a parallel IEEE1284 type B interface cable to connect the pri nter to
the PC, the cable must have the following pin connections:
2
Pin no. Pin no.
1- Store 19GND
2 Data 1 (LSB) 20 GND
3 Data 2 21 GND
4 Data 3 22 GND
5 Data 4 23 GND
6 Data 5 24 GND
7 Data 6 25 GND
8 Data 7 26 GND
PCL5e 2-1
Page 6
2
Connections
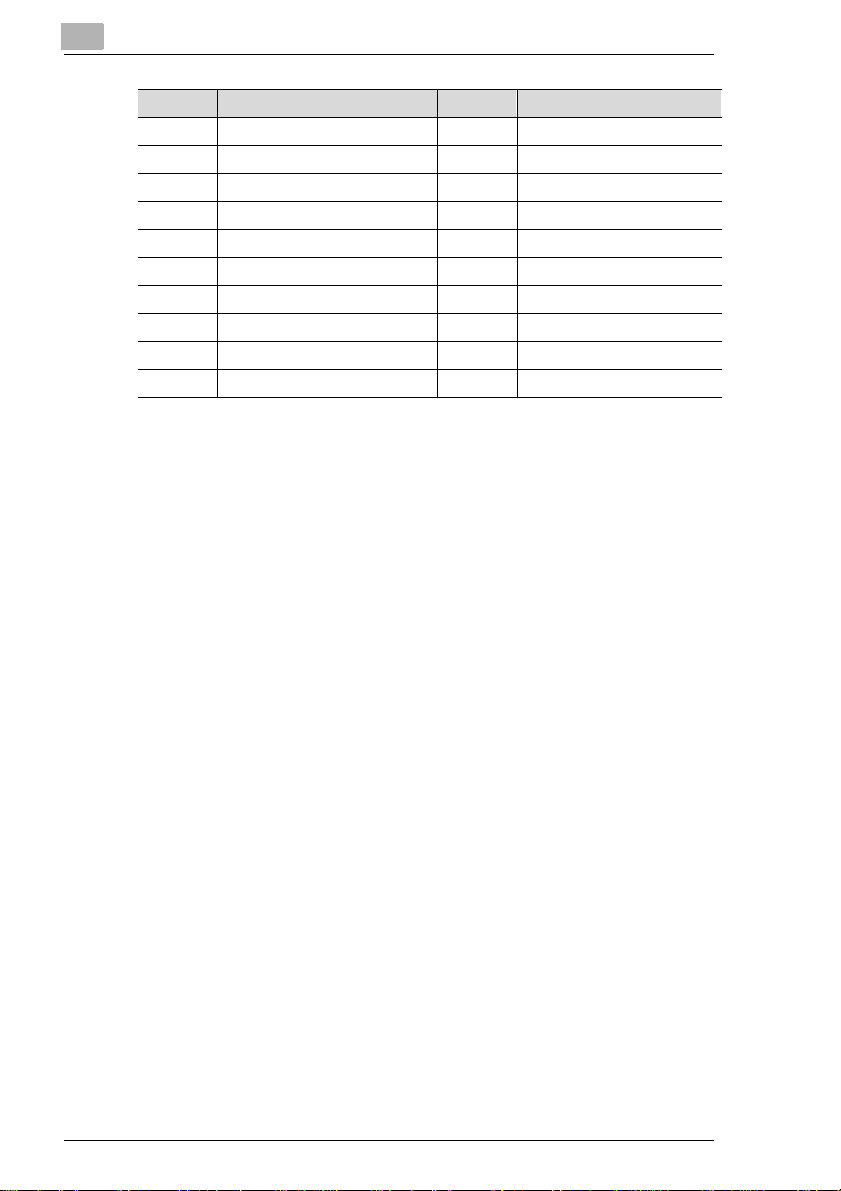
Pin no. Pin no.
9 Data 8 (MSB) 27 GND
10 -Ack 28 GND
11 Busy 29 GND
12 PError 30 GND
13 Select 31 -Init
14 -AutoFd 32 -Fault
15 N.C. 33 N.C.
16 GND 34 N.C.
17 Chassis 35 N.C.
18 VCC 36 -Select
2-2 PCL5e
Page 7
Connections
2.2 Connections
You may use the fax machine with a PC or in a network.
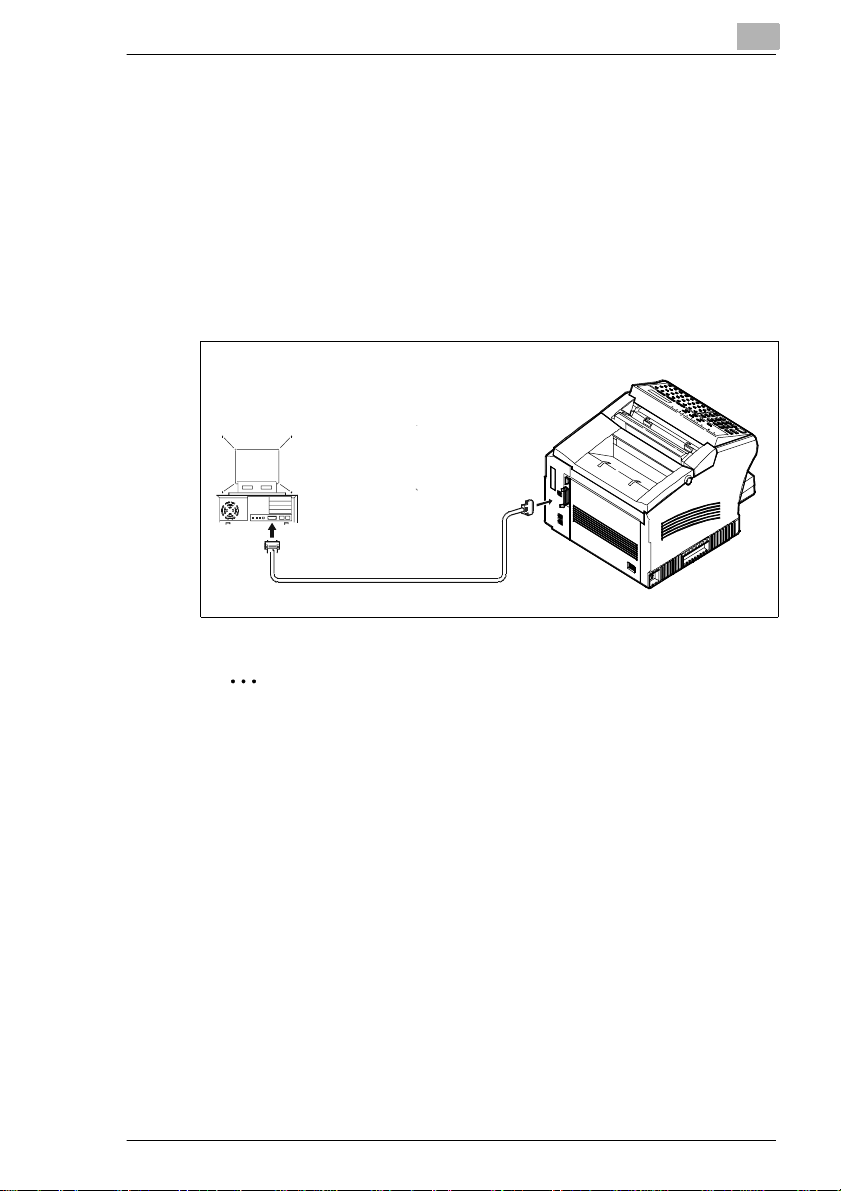
Connecting the fax machine to the PC
Place the ferri te core (Kitagawa SFC8) on the cable and close the
1
core. Place the ferrite core directly behi nd the jack to the fax
machine.
Connect fax machine and PC according to the scheme below.
2
2
✎
Note
The interface cable should not exceed 2 meters in length. Also the
cable must be shielded.
PCL5e 2-3
Page 8
2
Connections
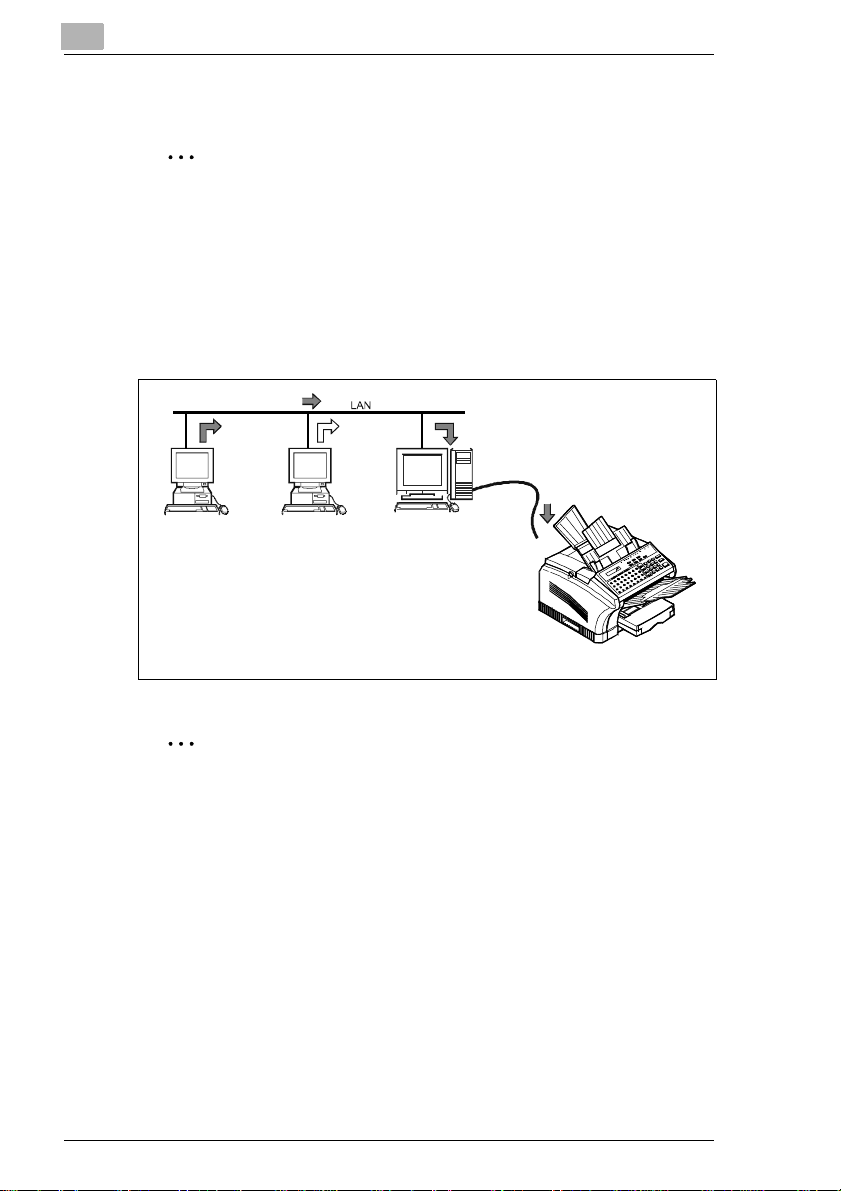
Connection to a LAN network using a PC
✎
LAN conncetion
The Minoltafax can be fit ted with one LAN board only (e-mail or
network printer car d). If the machine is fitted with a print er board,
connect it directly to the LAN network. If the machine is fitted with an
e-mail board, connect it to the LAN network using a PC.
➜ Connect fax machine and PC according to the scheme below. In
this case the PC will serve as a print server and connect the fax
machine to the network. Use the parallel inte rface for connection.
✎
Note
The interface cable should not exceed 2 meters in length. Also the
cable must be shielded.
2-4 PCL5e
Page 9
Connections
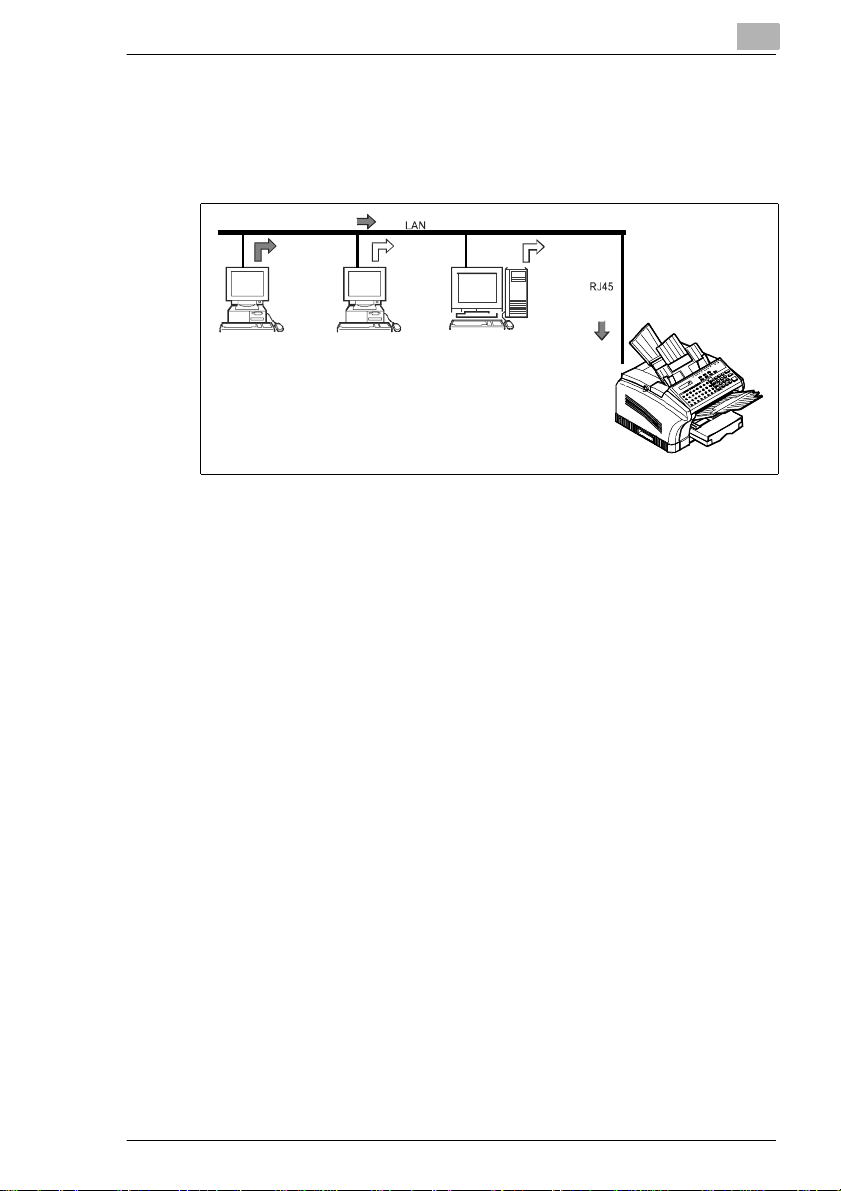
Connection the fax machine directly to a LAN network
➜ Use CAT 5 cables to connect the fax machine directly to the LAN
2
network. For t his connection the fax machine m ust be fitted with a
network borad. In this case the board will serve as a print server.
PCL5e 2-5
Page 10

2
Connections
2-6 PCL5e
Page 11
Installing the software
3 Installing the software
3.1 Installation with Windows 95
✎
Preparation
Turn the PC and the Minoltafax 2800/3800 off, befor e you connect the
cables. When s w it ching the machines back on, make sur e to turn the
Minoltafax on before you turn the PC on.
✎
Auto detection
If the automatic detection for components is on, Windows will
automatically st art s etti ng up the n ew pr inter. I nterr upt th is pro cedure
before you begin with the
installation.
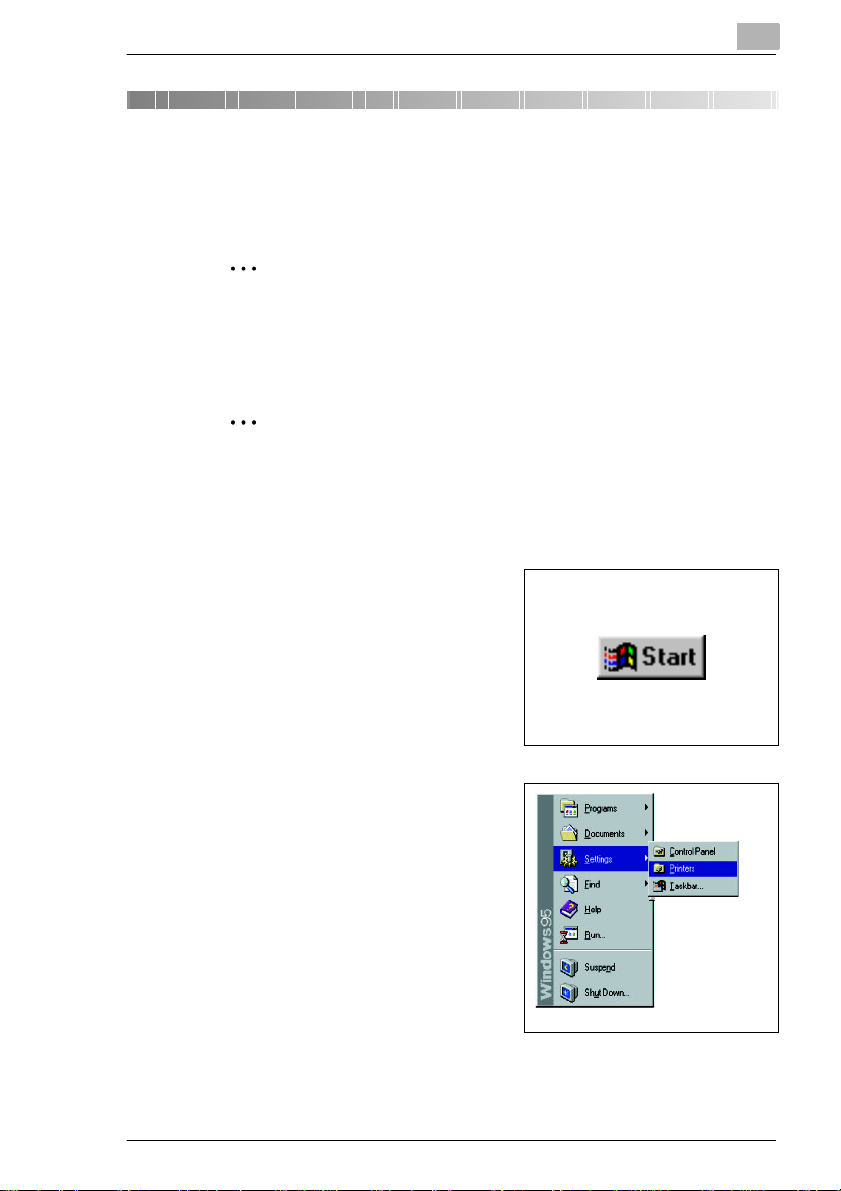
Click on Start.
1
3
Click on Settings and Printers.
2
The window Printers opens.
PCL5e 3-1
Page 12

3
Click on Add Printer.
3
The Add Printer Wizard opens.
Click on Next.
4
Click on Local pr inter and on
5
Next .
Do you want to instal l a pr inter i n
?
a net w ork?
➜ In this case , click on Network
printer. To install the network
printer please contact your
system administrator.
Installing the software
Place the installation CD in your
6
CD drive and click on Have disk .
3-2 PCL5e
Page 13

Installing the software
Enter the following pat h: D:(CD-
7
ROM driver)\
Driver\Win9x\GB\PCL5e.
Click on OK.
8
Click on Next, to confirm the
9
selected pri nter.
Select the requir ed port for the
10
printer. F or most a pplications t his
will be LPT1.
(The name of the
printer port depends
on the configuration of the
computer.)
3
Click on Next.
Enter a name with which you
11
want the printer to appear in the
applications.
Click on Next
PCL5e 3-3
Page 14

3
Installing the software
To finish t he installation you can
12
print a test page. This helps you
to verif y the correct instal lation. If
you do not want to print a test
page, mark No.
Click on Next.
Now the files are c opied from the
CD to your computer and the
icon for the new pr inter i s added.
If you chose to pr int a test page,
check if t he correct name for the
printer is pri nted on the page.
Microsoft Windows asks, if the test page was pr inted correctly.
13
Answer the question according to the print out . Fol low the
instruct ions on the screen.
3-4 PCL5e
Page 15

Installing the software
3.2 Installation with Windows 98
✎
Preparation
Turn the PC and the Minoltafax 2800/3800 off, befor e you connect the
cables. When s w it ching the machines back on, make sur e to turn the
Minoltafax on before you turn the PC on.
✎
Auto detection
If the automatic detection for components is on, Windows will
automatically st art s etti ng up the n ew pr inter. I nterr upt th is pro cedure
before you begin with the installation.
Click on Start.
1
3
Click on Settings and Printers.
2
The window Printers opens.
PCL5e 3-5
Page 16

3
Click on Add Printer.
3
The Add Printer Wizard opens.
Click on Next.
4
Click on Local pr inter and on
5
Next.
Do you want to instal l a pr inter i n
?
a net w ork?
➜ In this case , click on Network
printer. To install the network
printer please contact your
system administrator.
Installing the software
Place the installation CD in your
6
CD drive and click on Have disk .
3-6 PCL5e
Page 17

Installing the software
Enter the following pat h: D:(CD-
7
ROM driver)\
Driver\Win9x\GB\PCL5e.
Click on OK.
8
Click on Next, to confirm the
9
selected pri nter.
Select the requir ed port for the
10
printer. F or most a pplications t his
will be LPT1. (The name of the
printer port depends on the
configuration of the computer.)
3
Click on Next.
Enter a name with which you
11
want the printer to appear in the
applications.
Click on Next.
PCL5e 3-7
Page 18

3
Installing the software
To finish t he installation you can
12
print a test page. This helps you
to verif y the correct instal lation. If
you do not want to print a test
page, mark No .
Click on Next.
Place the installation CD second editio n in your CD-drive and click
13
OK.
Now the files are c opied from the
CD to your computer and the
icon for the new pr inter i s added.
If you chose to pr int a test page,
check if t he correct name for the
printer is pri nted on the page.
Microsoft Windows asks, if the
14
test page was prin ted correctly.
Answer the question according to the print out . Fol low the
instruct ions on the screen, if nece ssary.
3-8 PCL5e
Page 19

Installing the software
3.3 Installation with Windows NT 4.0
✎
Preparation
Turn the PC and the Minoltafax 2800/3800 off, befor e you connect the
cables. When s w it ching the machines back on, make sur e to turn the
Minoltafax on before you turn the PC on.
Click on Start.
1
Click on Settings and Printers.
2
The window Printers opens.
3
Click on Add Printer.
3
The Add Printer Wizard opens.
PCL5e 3-9
Page 20

3
Click on Next.
4
Do you want to instal l a pr inter i n
?
a net w ork?
➜ In this case , click on Network
printer server. To install the
network printer ple ase contact
your system administrator.
Select the requ ir ed port for the
5
printer. For most applications this
will be LPT1. (The name of the
printer port depends on the
configuration of the computer.)
Click on Next.
Place the installation CD in your
6
CD drive and click on Have disk .
Installing the software
Enter the following path: D:(CD-
7
ROM driver)\
Driver\Winnt40\GB\PCL5e.
Click on OK.
8
3-10 PCL5e
Page 21

Installing the software
Click on Next, to confirm the
9
selected pri nter.
Enter a name with which you
10
want the printer to appear in the
applications.
Click on Next.
If other users on th e netwo rk are
11
to use the printer as well, click
Shared.
3
If only you ar e t o use t he print er,
click on Not shared.
Click on Next.
To finish t he installation you can
12
print a test page. This helps you
to verif y the correct instal lation. If
you do not want to print a test
page, mark No .
Click on Finish.
PCL5e 3-11
Page 22

3
Installing the software
Now the files are c opied from the
CD to your computer and the
icon for the new pr inter i s added.
If you chose to pr int a test page,
check if t he correct name for the
printer is pri nted on the page.
Microsoft Windows asks, if the
13
test page was prin ted correctly. Answer the que sti on according to
the print out. Fol low the instructions on t he screen, if necessary.
3-12 PCL5e
Page 23

Installing the software
3.4 Installation with Windows 2000
✎
Preparation
Turn the PC and the Minoltafax 2800/3800 off, befor e you connect the
cables. When s w it ching the machines back on, make sur e to turn the
Minoltafax on before you turn the PC on.
✎
Auto detection
If the automatic detection for components is on, Windows will
automatically st art s etti ng up the n ew pr inter. I nterr upt th is pro cedure
before you begin with the installation.
Click on Start.
1
3
Click on Settings and Printers.
2
The window Printers opens.
Click on Add Printer.
3
The Add Printer Wizard opens.
PCL5e 3-13
Page 24

3
Click on Next.
4
Click on Next.
5
Do you want to instal l a pr inter i n
?
a net w ork?
➜ In this case , click on Network
printer. To install the network
printer please contact your
system administrator.
Select the requ ir ed port for the
6
printer. For most applications this
will be LPT1.
(The name of the
printer port depends
on the configuration of the
computer.)
Installing the software
Click on Next.
Place the installation CD in your
7
CD drive and click on Have disk.
3-14 PCL5e
Page 25

Installing the software
Enter the following pat h: D:(CD-
8
ROM driver)\
Driver\Winn2000\GB\PCL5e
Click on OK.
9
Click on Next, to confirm the
10
selected pri nter.
Enter a name with which you
11
want the printer to appear in the
applications or use the
suggested name. Select if the
Minoltafax is to be the standard
printer.
3
Click on Next.
If other users on th e netwo rk are
12
to use this printer, mark Share
as: and enter a name with which
you want the printer to appear in
the network.
If only you are to use the printer,
mark Do not share this printer.
Click on Next.
PCL5e 3-15
Page 26

3
Choose whether you want a test
13
page to be printed. The test page
helps you to veri fy the correct
installation. If you do not want to
print a test page, mark No.
Click on Next.
To finish t he installation you can
14
check the data. Click on Back if
you want to change the ent ri es.
Click on Finish, if all data is
correct.
Click on Yes to continue the
15
installation process.
Installing the software
Now the files are c opied from the
CD to your computer and the
icon for the new pr inter i s added.
If you chose to pr int a test page,
check if t he correct name for the
printer is pri nted on the page.
3-16 PCL5e
Page 27

Setting up the printer
4 Setting up the printer
Use the printer dri ver t o chang e the set tings of the pr inter . These se tti ngs
are, for example resolution, paper size or number of copi es. You can
change the sett ings dir ectly in t he print er drive r or in the print menu of your
application.
✎
Note
For some software settings it is important that they match the
hardware sett ings of the printer. Check the settings if error messages
are displayed in the pri nters display.
4.1 Changing the settings using the software
Most of the set ting s can be made f rom your appli catio n ( text edit or). If you
change the settin gs in t he application, the changes will override the
settings made in the printer driver in most cases . Here only the settings
made in the printer dri ver are descr ibed. For infor mation about the special
functions of your application, please r efer to the application manual.
4
Launching the printer driver
Click on Start.
1
PCL5e 4-1
Page 28

4
Setting up the printer
Click on Settings and Printers.
2
The window Printers open s.
Use the right
3
mouse button to click on the
desired pr inter . I n t h e cont ex t
menu, click D evice settings.
The dialog window for the printer
settings opens.
Click on t he tab deviceto made chan ges in the settings . Click on t he
other tabs, if you want to change the entries, you made during the
installation.
✎
Software settings
Use the method described above to adjust the printer dr iver to the
Hardware of the Minoltafax. Your application may of fer more options.
In most cases the settings made in the application, override the
settings made in the printer driver.
4-2 PCL5e
Page 29

Setting up the printer
4.2 Changing settings directly at the printer
Some settings can be made directly at the printer.
Symbols
Use this function to set the f ont for printing in DOS-mode.
Press [SE T ] a nd 7 ti m e s [V/P IN
1
CODE].
Press [3] on the numeric key
2
pad.
Select the desired symbol set
3
using the arrow keys and press
[YES].
Press [ST O P ] to te rm i n at e
4
the entry.
SET P R I N TER ?
YES / or 1-5
3 SYMBOL SE T
SYMBOL SET=IBM-US
OK=YE S
JAN. 09 13:00 100%
-SET DOC. FAC E DOWN-
4
s
t
s
t
PCL5e 4-3
Page 30

4
Setting up the printer
Overview symbols
Code Fonts Code Fonts
ISO60 ISO60 Danish/Nowegian PC-8Tk PC-Turkish
DeskTop DeskTop PC-1004 PC-1004 Code Page 1004
ISOL1 ISO 8859/1 Latin1 PC-775 PC-775 Code Page 775
ISOL2 ISO 8859/2 Latin2 Roman-8 Roman-8
ISOL5 ISO 8859/9 Latin5 ISO17 ISO17: Spanish
ISOL6 ISO 8859/6 Latin6 ISO11 ISO11: Swedish
ISOL69 ISO 69:French Symbol Symbol
ISOL21 ISO21:German PS Text PS Text
ISOL15 ISO15:Italian ISO4 ISO4: United Kingdom
Legal Legal ISO6 ISO6: ASCI
Math-8 Math-8 VN Intl Ventura International
MC Text MC Text VN Math Ventura Math
PS Math PS Math VN US Ventura US
MS Publ Microsoft Publishing WINL1 Windows 3.1 Latin1
PC-8 PC-( Code Page 437 WINL2 Windows 3.1 Latin2
PC-8DN PC-8 Danish/Norwegian WIN3.0 Windows 3,0 Latin1
PC-852 PC-852 Latin 2 WIN5 Windows 3.1 Latin5
Pi font Pi font Winding Wingdings
PC-850 PC-850 Multlingual
4-4 PCL5e
Page 31

Setting up the printer
Fonts
A number is assigned to the printer’s inter nal fonts. If the PC does not
assign a font, choos e one from the pre-selected fonts.
Selecting a font
Press [SE T ] a nd 7 ti m e s [V/P IN
1
CODE].
Press [4] on the numeric key
2
pad.
Use the n umeric keypa d to select
3
the required font and press
[YES].
Press [ST O P ] to te rm i n at e
4
the entry.
SET P R I N TER ?
YES / or 1-5
4 FONT NUMBER
FONT NUMBER= 1
OK=YES (DEL=NO)
JAN. 09 13:00 100%
-SET DOC. FAC E DOWN-
4
s
t
PCL5e 4-5
Page 32

4
Setting up the printer
Overview fonts
The following fonts are available:
No. Printer Font Code Fonts
1 Courier 24 Garamond Semibold
2 CG Times 25 Garamond Italic
3 CG Times Bold 26 Garamond Italic Semibold
4 CG Times Italic 27 Marigold
5 CG Times Italic Bold 28 Alberturs Medium
6 CG Omega 29 Albertus Extra Bold
7 CG Omega Bold 30 Arial
8 CG Omega Italic 31 Arial Bold
9 CG Omega Bold Italic 32 Arial Italic
10 Coronet 33 Arial Bold Italic
11 Clarendon Condensed 34 Times New
12 Univers Medium 35 Times New Bold
13 Univers Bold 36 Times New Italic
14 Univers Medium Italic 37 Times New Bold Italic
15 Univers Bold Italic 38 Symbol
16 Univers Medium Condensed 39 Windings
17 Univers Bold Condensed 40 Courier Bold
18 Univers Medium Condensed
19 Univers Bold Condensed
20 Antique Olive 43 Letter Gothic
21 Antique Olive Bold 44 Letter Gothic Bold
22 Antique Olive Italic 45 Letter Gothic Italic
23 Garamond Antiqua
Italic
Italic
41 Courier Italic
42 Courier Bold Italic
4-6 PCL5e
Page 33

Setting up the printer
Line number
Use this functi on t o set t he num ber of lines the pr inter print s on one page.
Per page you can print between 5 and 127 lines. However, it is likely t hat
your computer will over ride this function.
Setting the line number
Press [SE T ] a nd 7 ti m e s [V/P IN
1
CODE].
Press [2] on the numeric key
2
pad.
Use the nume ric k eypad to enter
3
the required quantity and press
[YES].
Press [ST O P ] to te rm i n at e
4
the entry.
SET P R I N TER ?
YES / or 1-5
5 LINE NUMB ER
LINE NUMBER= 64
OK=YES (DEL=NO)
JAN. 09 13:00 100%
-SET DOC. FAC E DOWN-
4
s
t
Test page
Use this function to pr int a test page with the internal fonts of the printer.
Print a test page
Press [SE T ] a nd 7 ti m e s [V/P IN
1
CODE].
Press [5] on the numeric key
2
pad.
Your fax machine pri nts the test page list.
PCL5e 4-7
SET P R I N TER ?
YES / or 1-5
*PRINT FO NT *
s
t
Page 34

4
Setting up the printer
4-8 PCL5e
Page 35

Troubleshooting
5 Troubleshooting
Message Description Solution
*Caution*
No paper
*Caution*
No toner
*Caution*
Printer open
*Caution*
Paper jam
*Caution*
Scanner open
*Caution*
Toner low
The paper cassette has run out
of paper.
The toner cartridge has run out
of toner.
The top cover is not closed
properly.
Print paper jam Follow the instructions given in
The control panel is not closed
properly.
The toner cartridge has run out
of toner.
5
Insert the paper.
Replace the toner cartridge..
Close the cover firmly.
the fax manual.
Close the
operation panel.
Replace the toner cartridge..
PCL5e 5-1
Page 36

5
Troubleshooting
5-2 PCL5e
Page 37

Appendix
6 Appendix
6.1 Specifications
PCL5e
Resolution 600 dpi
Speed 8 Pages/minute
Commands PCL5e
Interface IEEE-1284 (type B)
Paper Tray Automatic selection
Printer driver Micro soft Windows ® 95, Microsoft Windows ® 98, Microsoft
Non printing area
The greyed areas can not be printed on.
Cassette 1
Cassette 2
Single sheet feeder
Windows ® NT4.0, Microsoft Windows ® 2000
6
P P
P P
P P
PP
PCL5e 6-1
Page 38

6
Appendix
6-2 PCL5e
 Loading...