

Page 1

User Manual
Minolta MicroPress System Software Release 6
www.minoltaeurope.com
The essentials of imaging
Page 2

Page 3

User Manual
PrintStation Manager
www.minoltaeurope.com
The essentials of imaging
Page 4

Page 5

Copyright © 1995–2001 T/R Systems, Inc.
All Rights Reserved
Reproduction, adaptation, or translation without prior written permission is prohibited, except as allowed
under the copyright laws.
The information contained in this document is subject to change without notice. T/R Systems makes no
warranty of any kind with regard to this material, including, but not limited to, the implied warranties of
merchantability and fitness for a particular purpose. T/R Systems shall not be liable for errors contained
herein or for incidental or consequential damage in connection with the furnishing, performance, or use
of this material.
T/R Systems, MicroPress, M@estro, e-Ticket, MicroImager and other T/R Systems' product names are
registered trademarks or trademarks of T/R Systems, Inc. in the United States and other countries.
Portions of this product were created using LEADTOOLS © 1991-2001, LEAD Technologies, Inc. ALL
RIGHTS RESERVED.
Portions hereof include TextBridge® OCR Copyright © Xerox Corporation. ALL RIGHTS RESERVED.
LZW data compression technology licensed under U.S. Patent No. 4,558,302
Some ICC Profiles created using software under License from Monaco Systems, Inc.
Portions Copyright © 2001 URW++. All Rights Reserved
Imaging Technology provided under License by AccuSoft Corporation. ImageGear© 1996-2001 by
AccuSoft Corporation. All Rights Reserved.
All other company and product names are registered trademarks or trademarks of their respective owners in the United States and other countries.
The following marks are used in this manual:
Indicates precautions that must be observed to prevent possible personal injury or damage
to equipment or malfunctioning of software.
Indicates notes and memos containing additional or detailed information.
Indicates useful tips.
Page 6

Page 7

Table of Contents
What is PrintStation Manager™? . . . . . . . . . . . . . . . . . . . . . . . . . . . . . . 1
Features . . . . . . . . . . . . . . . . . . . . . . . . . . . . . . . . . . . . . . . . . . . . . . . . . . . . . . . . . . . 1
PrintStation and Virtual Engine Naming Convention. . . . . . . . . . . . . . . . . . . . . . . . . . 2
The PrintStation Manager Main Screen Display . . . . . . . . . . . . . . . . . . 2
Job List Window . . . . . . . . . . . . . . . . . . . . . . . . . . . . . . . . . . . . . . . . . . . . . . . . . . . . . 3
Job List Fields . . . . . . . . . . . . . . . . . . . . . . . . . . . . . . . . . . . . . . . . . . . . . . . . . . . . . . . . . . . . 3
Job Icons . . . . . . . . . . . . . . . . . . . . . . . . . . . . . . . . . . . . . . . . . . . . . . . . . . . . . . . . . . . . . . . 3
Display Jobs . . . . . . . . . . . . . . . . . . . . . . . . . . . . . . . . . . . . . . . . . . . . . . . . . . . . . . . . 4
PrintStation Button . . . . . . . . . . . . . . . . . . . . . . . . . . . . . . . . . . . . . . . . . . . . . . . . . . . 4
Virtual Engine Status Bar . . . . . . . . . . . . . . . . . . . . . . . . . . . . . . . . . . . . . . . . . . . . . . 5
Menus . . . . . . . . . . . . . . . . . . . . . . . . . . . . . . . . . . . . . . . . . . . . . . . . . . . . 5
File . . . . . . . . . . . . . . . . . . . . . . . . . . . . . . . . . . . . . . . . . . . . . . . . . . . . . . . . . . . . . . . 5
UnArchive Job File(s)… . . . . . . . . . . . . . . . . . . . . . . . . . . . . . . . . . . . . . . . . . . . . . . . . . . . . . 5
Exit . . . . . . . . . . . . . . . . . . . . . . . . . . . . . . . . . . . . . . . . . . . . . . . . . . . . . . . . . . . . . . . . . . . . . 5
Virtual Engine . . . . . . . . . . . . . . . . . . . . . . . . . . . . . . . . . . . . . . . . . . . . . . . . . . . . . . . 6
Pause or Resume a Virtual Engine . . . . . . . . . . . . . . . . . . . . . . . . . . . . . . . . . . . . . . . . . . . . 6
Resuming a Paused Virtual Engine . . . . . . . . . . . . . . . . . . . . . . . . . . . . . . . . . . . . . . . . . . . . 6
Resynch Jobs . . . . . . . . . . . . . . . . . . . . . . . . . . . . . . . . . . . . . . . . . . . . . . . . . . . . . . . . . . . . 6
Forms… . . . . . . . . . . . . . . . . . . . . . . . . . . . . . . . . . . . . . . . . . . . . . . . . . . . . . . . . . . . . . . . . . 6
Multi Page Forms . . . . . . . . . . . . . . . . . . . . . . . . . . . . . . . . . . . . . . . . . . . . . . . . . . . . . . . . 6
Letterhead. . . . . . . . . . . . . . . . . . . . . . . . . . . . . . . . . . . . . . . . . . . . . . . . . . . . . . . . . . . . . . 7
Engine Defaults… . . . . . . . . . . . . . . . . . . . . . . . . . . . . . . . . . . . . . . . . . . . . . . . . . . . . . . . . . 7
Virtual Engine Defaults . . . . . . . . . . . . . . . . . . . . . . . . . . . . . . . . . . . . . . . . . . . . . . . . . . . . 8
Media Saving Features . . . . . . . . . . . . . . . . . . . . . . . . . . . . . . . . . . . . . . . . . . . . . . . . . . 9
Job Defaults . . . . . . . . . . . . . . . . . . . . . . . . . . . . . . . . . . . . . . . . . . . . . . . . . . . . . . . . . . . . 9
Finishing Defaults . . . . . . . . . . . . . . . . . . . . . . . . . . . . . . . . . . . . . . . . . . . . . . . . . . . . . . . 10
Finishing Configuration. . . . . . . . . . . . . . . . . . . . . . . . . . . . . . . . . . . . . . . . . . . . . . . . . . 10
TRueColor.... . . . . . . . . . . . . . . . . . . . . . . . . . . . . . . . . . . . . . . . . . . . . . . . . . . . . . . . . . . . . 10
B&W Engine Balance. . . . . . . . . . . . . . . . . . . . . . . . . . . . . . . . . . . . . . . . . . . . . . . . . . . . . . 11
Job . . . . . . . . . . . . . . . . . . . . . . . . . . . . . . . . . . . . . . . . . . . . . . . . . . . . . . . . . . . . . . 11
Info... . . . . . . . . . . . . . . . . . . . . . . . . . . . . . . . . . . . . . . . . . . . . . . . . . . . . . . . . . . . . . . . . . . 11
Job Settings . . . . . . . . . . . . . . . . . . . . . . . . . . . . . . . . . . . . . . . . . . . . . . . . . . . . . . . . . . . 12
Finishing Options . . . . . . . . . . . . . . . . . . . . . . . . . . . . . . . . . . . . . . . . . . . . . . . . . . . . . . . 12
062 Finishing Rules . . . . . . . . . . . . . . . . . . . . . . . . . . . . . . . . . . . . . . . . . . . . . . . . . . . . 13
Output Options . . . . . . . . . . . . . . . . . . . . . . . . . . . . . . . . . . . . . . . . . . . . . . . . . . . . . . . . . 14
Page Range Settings . . . . . . . . . . . . . . . . . . . . . . . . . . . . . . . . . . . . . . . . . . . . . . . . . . . . 16
Margin Offsets. . . . . . . . . . . . . . . . . . . . . . . . . . . . . . . . . . . . . . . . . . . . . . . . . . . . . . . . . . 16
Brightness/Contrast. . . . . . . . . . . . . . . . . . . . . . . . . . . . . . . . . . . . . . . . . . . . . . . . . . . . . . 17
Color Adjust. . . . . . . . . . . . . . . . . . . . . . . . . . . . . . . . . . . . . . . . . . . . . . . . . . . . . . . . . . . . 18
ColorCurves . . . . . . . . . . . . . . . . . . . . . . . . . . . . . . . . . . . . . . . . . . . . . . . . . . . . . . . . . . 18
Default ColorCurves and Definitions . . . . . . . . . . . . . . . . . . . . . . . . . . . . . . . . . . . . . . . . . 19
Job Parsing . . . . . . . . . . . . . . . . . . . . . . . . . . . . . . . . . . . . . . . . . . . . . . . . . . . . . . . . . . . . 19
Chapters . . . . . . . . . . . . . . . . . . . . . . . . . . . . . . . . . . . . . . . . . . . . . . . . . . . . . . . . . . . . . . 19
Page Settings . . . . . . . . . . . . . . . . . . . . . . . . . . . . . . . . . . . . . . . . . . . . . . . . . . . . . . . . . . 20
Annotations . . . . . . . . . . . . . . . . . . . . . . . . . . . . . . . . . . . . . . . . . . . . . . . . . . . . . . . . . . . . 21
Finishing Setup, Settings and Summary . . . . . . . . . . . . . . . . . . . . . . . . . . . . . . . . . . . . . . 21
Preview…. . . . . . . . . . . . . . . . . . . . . . . . . . . . . . . . . . . . . . . . . . . . . . . . . . . . . . . . . . . . . . . 21
Edit . . . . . . . . . . . . . . . . . . . . . . . . . . . . . . . . . . . . . . . . . . . . . . . . . . . . . . . . . . . . . . . . . . . . 21
iii
Page 8

Lock/Unlock... . . . . . . . . . . . . . . . . . . . . . . . . . . . . . . . . . . . . . . . . . . . . . . . . . . . . . . . . . . . 21
Hold/Suspend . . . . . . . . . . . . . . . . . . . . . . . . . . . . . . . . . . . . . . . . . . . . . . . . . . . . . . . . . . . 22
Print . . . . . . . . . . . . . . . . . . . . . . . . . . . . . . . . . . . . . . . . . . . . . . . . . . . . . . . . . . . . . . . . . . . 22
Move... . . . . . . . . . . . . . . . . . . . . . . . . . . . . . . . . . . . . . . . . . . . . . . . . . . . . . . . . . . . . . . . . . 22
Delete . . . . . . . . . . . . . . . . . . . . . . . . . . . . . . . . . . . . . . . . . . . . . . . . . . . . . . . . . . . . . . . . . 22
Abort . . . . . . . . . . . . . . . . . . . . . . . . . . . . . . . . . . . . . . . . . . . . . . . . . . . . . . . . . . . . . . . . . . 23
Merge… . . . . . . . . . . . . . . . . . . . . . . . . . . . . . . . . . . . . . . . . . . . . . . . . . . . . . . . . . . . . . . . . 23
Archive... . . . . . . . . . . . . . . . . . . . . . . . . . . . . . . . . . . . . . . . . . . . . . . . . . . . . . . . . . . . . . . . 24
Apply Form…. . . . . . . . . . . . . . . . . . . . . . . . . . . . . . . . . . . . . . . . . . . . . . . . . . . . . . . . . . . . 24
Mail Merge… . . . . . . . . . . . . . . . . . . . . . . . . . . . . . . . . . . . . . . . . . . . . . . . . . . . . . . . . . . . . 25
Center Pages… . . . . . . . . . . . . . . . . . . . . . . . . . . . . . . . . . . . . . . . . . . . . . . . . . . . . . . . . . . 27
Image Editing... . . . . . . . . . . . . . . . . . . . . . . . . . . . . . . . . . . . . . . . . . . . . . . . . . . . . . . . . . . 27
OCR... . . . . . . . . . . . . . . . . . . . . . . . . . . . . . . . . . . . . . . . . . . . . . . . . . . . . . . . . . . . . . . . . . 28
Imposition . . . . . . . . . . . . . . . . . . . . . . . . . . . . . . . . . . . . . . . . . . . . . . . . . . . . . . . . . . . . . . 29
Insert/Delete Pages… . . . . . . . . . . . . . . . . . . . . . . . . . . . . . . . . . . . . . . . . . . . . . . . . . . . . . 30
Numbering… . . . . . . . . . . . . . . . . . . . . . . . . . . . . . . . . . . . . . . . . . . . . . . . . . . . . . . . . . . . . 31
Re-order Pages… . . . . . . . . . . . . . . . . . . . . . . . . . . . . . . . . . . . . . . . . . . . . . . . . . . . . . . . . 32
Scale & Rotate… . . . . . . . . . . . . . . . . . . . . . . . . . . . . . . . . . . . . . . . . . . . . . . . . . . . . . . . . . 33
Rotate Pages . . . . . . . . . . . . . . . . . . . . . . . . . . . . . . . . . . . . . . . . . . . . . . . . . . . . . . . . . . . . 33
Send To . . . . . . . . . . . . . . . . . . . . . . . . . . . . . . . . . . . . . . . . . . . . . . . . . . . . . . . . . . . . . . . . 33
Settings . . . . . . . . . . . . . . . . . . . . . . . . . . . . . . . . . . . . . . . . . . . . . . . . . . . . . . . . . . . . . . . . 34
Tumble . . . . . . . . . . . . . . . . . . . . . . . . . . . . . . . . . . . . . . . . . . . . . . . . . . . . . . . . . . . . . . . . . 34
Job Ticket . . . . . . . . . . . . . . . . . . . . . . . . . . . . . . . . . . . . . . . . . . . . . . . . . . . . . . . . . . . . . . 35
Assign Job Ticket . . . . . . . . . . . . . . . . . . . . . . . . . . . . . . . . . . . . . . . . . . . . . . . . . . . . . . . 35
Edit/View Job Ticket . . . . . . . . . . . . . . . . . . . . . . . . . . . . . . . . . . . . . . . . . . . . . . . . . . . . . 36
Delete Job Ticket . . . . . . . . . . . . . . . . . . . . . . . . . . . . . . . . . . . . . . . . . . . . . . . . . . . . . . . 36
Print Job Ticket . . . . . . . . . . . . . . . . . . . . . . . . . . . . . . . . . . . . . . . . . . . . . . . . . . . . . . . . . 36
View . . . . . . . . . . . . . . . . . . . . . . . . . . . . . . . . . . . . . . . . . . . . . . . . . . . . . . . . . . . . . . 36
Toolbar. . . . . . . . . . . . . . . . . . . . . . . . . . . . . . . . . . . . . . . . . . . . . . . . . . . . . . . . . . . . . . . . . 36
Status Bar . . . . . . . . . . . . . . . . . . . . . . . . . . . . . . . . . . . . . . . . . . . . . . . . . . . . . . . . . . . . . . 37
System Events . . . . . . . . . . . . . . . . . . . . . . . . . . . . . . . . . . . . . . . . . . . . . . . . . . . . . . . . . . . 37
System Errors . . . . . . . . . . . . . . . . . . . . . . . . . . . . . . . . . . . . . . . . . . . . . . . . . . . . . . . . . . 37
Accounting . . . . . . . . . . . . . . . . . . . . . . . . . . . . . . . . . . . . . . . . . . . . . . . . . . . . . . . . . . . . . . 37
Scripting. . . . . . . . . . . . . . . . . . . . . . . . . . . . . . . . . . . . . . . . . . . . . . . . . . . . . . . . . . . 38
Script Toolbar . . . . . . . . . . . . . . . . . . . . . . . . . . . . . . . . . . . . . . . . . . . . . . . . . . . . . . . . . . . 39
Tools . . . . . . . . . . . . . . . . . . . . . . . . . . . . . . . . . . . . . . . . . . . . . . . . . . . . . . . . . . . . . 40
Notifications… . . . . . . . . . . . . . . . . . . . . . . . . . . . . . . . . . . . . . . . . . . . . . . . . . . . . . . . . . . . 40
Find… . . . . . . . . . . . . . . . . . . . . . . . . . . . . . . . . . . . . . . . . . . . . . . . . . . . . . . . . . . . . . . . . . 40
AutoScript . . . . . . . . . . . . . . . . . . . . . . . . . . . . . . . . . . . . . . . . . . . . . . . . . . . . . . . . . . . . . . 40
Options . . . . . . . . . . . . . . . . . . . . . . . . . . . . . . . . . . . . . . . . . . . . . . . . . . . . . . . . . . . . . . . . 41
General . . . . . . . . . . . . . . . . . . . . . . . . . . . . . . . . . . . . . . . . . . . . . . . . . . . . . . . . . . . . . . . 41
Archive . . . . . . . . . . . . . . . . . . . . . . . . . . . . . . . . . . . . . . . . . . . . . . . . . . . . . . . . . . . . . . . 42
Preview . . . . . . . . . . . . . . . . . . . . . . . . . . . . . . . . . . . . . . . . . . . . . . . . . . . . . . . . . . . . . . . 42
TRueEdit . . . . . . . . . . . . . . . . . . . . . . . . . . . . . . . . . . . . . . . . . . . . . . . . . . . . . . . . . . . . . . 43
Enable Remote Services . . . . . . . . . . . . . . . . . . . . . . . . . . . . . . . . . . . . . . . . . . . . . . . . . . . 43
BAT Object Registration . . . . . . . . . . . . . . . . . . . . . . . . . . . . . . . . . . . . . . . . . . . . . . . . . . . 43
Window . . . . . . . . . . . . . . . . . . . . . . . . . . . . . . . . . . . . . . . . . . . . . . . . . . . . . . . . . . . 44
Help . . . . . . . . . . . . . . . . . . . . . . . . . . . . . . . . . . . . . . . . . . . . . . . . . . . . . . . . . . . . . . 44
Engine Status Dialogs . . . . . . . . . . . . . . . . . . . . . . . . . . . . . . . . . . . . . . 44
Summary . . . . . . . . . . . . . . . . . . . . . . . . . . . . . . . . . . . . . . . . . . . . . . . . . . . . . . . . . . 45
System. . . . . . . . . . . . . . . . . . . . . . . . . . . . . . . . . . . . . . . . . . . . . . . . . . . . . . . . . . . . 48
iv
Page 9

PrintStation 024-Specific Error Messages . . . . . . . . . . . . . . . . . . . . . . . . . . . . . . . . . . . . . . 49
Jam Resolution . . . . . . . . . . . . . . . . . . . . . . . . . . . . . . . . . . . . . . . . . . . . . . . . . . . . . 50
Maintenance . . . . . . . . . . . . . . . . . . . . . . . . . . . . . . . . . . . . . . . . . . . . . . . . . . . . . . . 50
Service . . . . . . . . . . . . . . . . . . . . . . . . . . . . . . . . . . . . . . . . . . . . . . . . . . . . . . . . . . . 50
Unit Errors. . . . . . . . . . . . . . . . . . . . . . . . . . . . . . . . . . . . . . . . . . . . . . . . . . . . . . . . . 51
Miscellaneous . . . . . . . . . . . . . . . . . . . . . . . . . . . . . . . . . . . . . . . . . . . . . . . . . . . . . . 52
Feed Tray . . . . . . . . . . . . . . . . . . . . . . . . . . . . . . . . . . . . . . . . . . . . . . . . . . . . . . . . . 52
Device . . . . . . . . . . . . . . . . . . . . . . . . . . . . . . . . . . . . . . . . . . . . . . . . . . . . . . . . . . . . 53
Settings . . . . . . . . . . . . . . . . . . . . . . . . . . . . . . . . . . . . . . . . . . . . . . . . . . . . . . . . . . . 53
Non-Standard Paper Settings . . . . . . . . . . . . . . . . . . . . . . . . . . . . . . . . . . . . . . . . . . 54
Browser. . . . . . . . . . . . . . . . . . . . . . . . . . . . . . . . . . . . . . . . . . . . . . . . . . . . . . . . . . . 54
Covers. . . . . . . . . . . . . . . . . . . . . . . . . . . . . . . . . . . . . . . . . . . . . . . . . . . . . . . . . . . . 55
Tab Setup . . . . . . . . . . . . . . . . . . . . . . . . . . . . . . . . . . . . . . . . . . . . . . . . . . . . . . . . . 55
Engine Density . . . . . . . . . . . . . . . . . . . . . . . . . . . . . . . . . . . . . . . . . . . . . . . . . . . . . 55
Engine Exposure Adjust . . . . . . . . . . . . . . . . . . . . . . . . . . . . . . . . . . . . . . . . . . . . . . 56
Engine Margin Offsets. . . . . . . . . . . . . . . . . . . . . . . . . . . . . . . . . . . . . . . . . . . . . . . . 56
Color Insertion Tray. . . . . . . . . . . . . . . . . . . . . . . . . . . . . . . . . . . . . . . . . . . . . . . . . . 56
Support . . . . . . . . . . . . . . . . . . . . . . . . . . . . . . . . . . . . . . . . . . . . . . . . . . . . . . . . . . . 56
OPC Connected Devices . . . . . . . . . . . . . . . . . . . . . . . . . . . . . . . . . . . . . . . . . . . . . 56
OPC Summary . . . . . . . . . . . . . . . . . . . . . . . . . . . . . . . . . . . . . . . . . . . . . . . . . . . . . . . . . . . 57
Custom PJL Support . . . . . . . . . . . . . . . . . . . . . . . . . . . . . . . . . . . . . . . . . . . . . . . . . . . . . . 57
e-PSM . . . . . . . . . . . . . . . . . . . . . . . . . . . . . . . . . . . . . . . . . . . . . . . . . . . . 58
PSM Functionality Available in e-PSM . . . . . . . . . . . . . . . . . . . . . . . . . . . . . . . . . . . 58
PSM Functionality Not Available in e-PSM . . . . . . . . . . . . . . . . . . . . . . . . . . . . . . . . 60
Glossary. . . . . . . . . . . . . . . . . . . . . . . . . . . . . . . . . . . . . . . . . . . . . . . . . . 60
v
Page 10

vi
Page 11
What is PrintStation Manager™?
”
PrintStation Manager (PSM) is an application that groups multiple PrintStations™/PrintLinks™ so they appear and function as a single high-speed printer. This Virtual Engine (VE)
system lets you customize printer configurations based on printing requirements. Using multiple Virtual Engines allows printing multiple jobs simultaneously. PSM’s Electronic Collator
and job parser (job manager) evenly distributes jobs between PrintStations grouped in the
Virtual Engine. PrintStations can have several VE configurations, so the MicroPress® ships
with default VE configurations.
Features
PSM has many built-in features (e.g., drag-and-drop to move files between Virtual Engines,
one-click duplexing).
Optional features* include:
• Imposition – See “Imposition” on
page 29
• Document Merge – See “Merge…” on
page 23
• Forms – See “Apply Form…” on
page 24
• Image Manipulation (not available on
PrintStation 312) – See “Brightness/
Contrast” on page 17 See “Color
Adjust” on page 18
• TRueColor™ (Print Test Calibrate in
prior versions) – See “TRueColor...” on
page 10
• Scripting – See “Scripting” on page 38
• Job Ticketing – See “Job Ticket” on
page 35
• Page Numbering – See “Numbering…
on page 31
• Annotations – See “Annotations” on
page 21
• Image Editing – See “Image Editing...”
on page 27
•OCR – See “OCR...” on page 28
• PDF Archive – See “Archive...” on
page 24
• e-PSM™ – See “e-PSM” on page 58
• Job Parsing – See “Job Parsing” on
page 19
• TRueEdit™ – See “Edit” on page 21
Note: You must purchase each optional feature and get a new license number from your Micro-
Press dealer. If you haven’t purchased an option, you will see a yellow key and “grayed out” or
unavailable controls. Some features may not be available for all PrintStations.
To enter licensing information, select Help
button (or run the PSM Configuration™ software).
ÎAbout... from the menu, then click the Licensing
1
Page 12
PrintStation and Virtual Engine Naming Convention
PrintStation/Virtual Engine names are a letter and a number. The letter indicates the PrintStation type; the number is an increment of 1-12, reflecting the quantity of the PrintStation type.
• A – PrintStation 312
• B – PrintStation 024
•C – PrintLink Cii
• D – PrintStation LaserJet 5Si
• E – PrintStation DesignJet CP
• F – PrintStation 040
• G – PrintLink 062
• H – PrintStation LaserJet 8000
• J – PrintStation DesignJet 1000
• K – PrintStation 070
• M – PrintStation 065
• N – PrintStation 085r
• O – PrintStation 036k
Example: A MicroPress with four 024s would have PrintStations named B1, B2, B3, and B4.
A virtual engine using B1 and B2 would be named B12.
• P – PrintStation 2525t
• Q – PrintStation 070r
• R – PrintStation 080t
• S – PrintStation 0110i
• T – PrintStation 075m
• U – PrintStation 832m
• V – PrintStation 2020m
• W – PrintStation 624m
•Z – OPC
• AB – PrintStation 060c
• AC – PrintStation 085c
• AD – PrintStation 5050c
The PrintStation Manager Main Screen Display
The main screen allows access to:
• The Virtual Engines within the PrintStation Manager
• Print jobs and job attributes
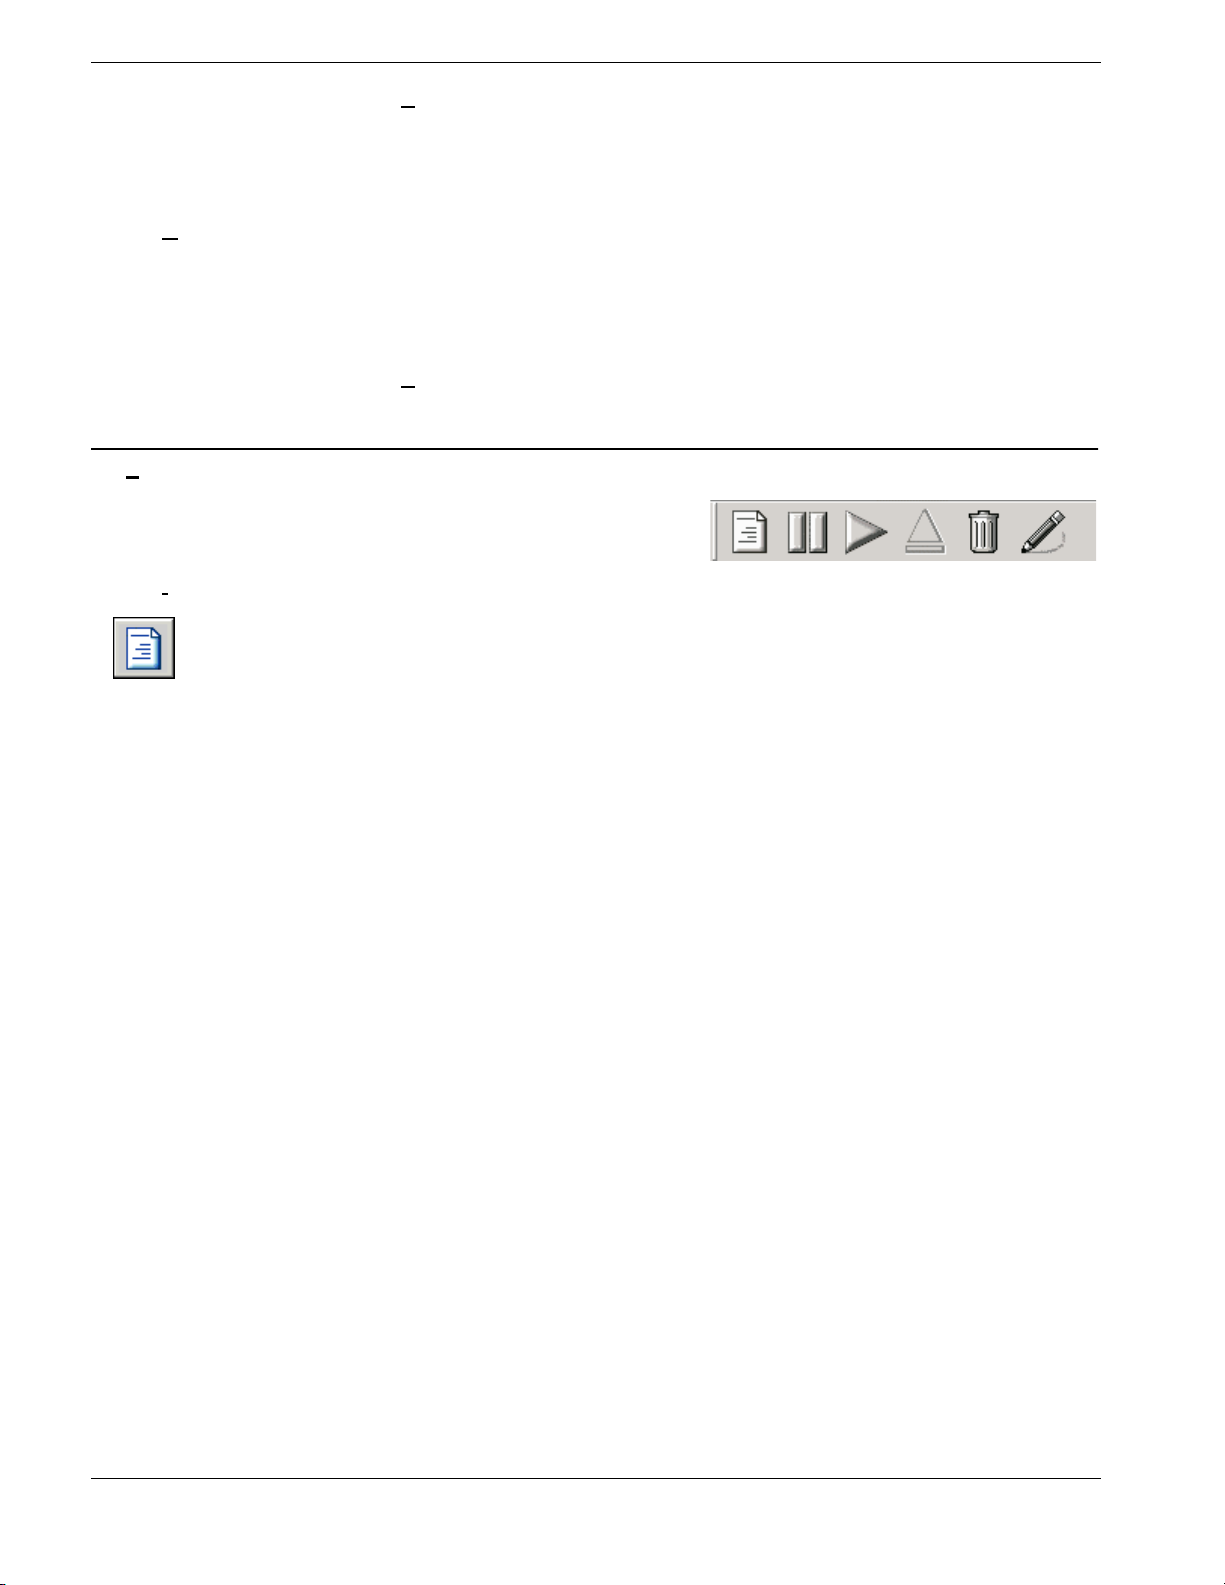
• The Toolbar for PrintStation and job
control
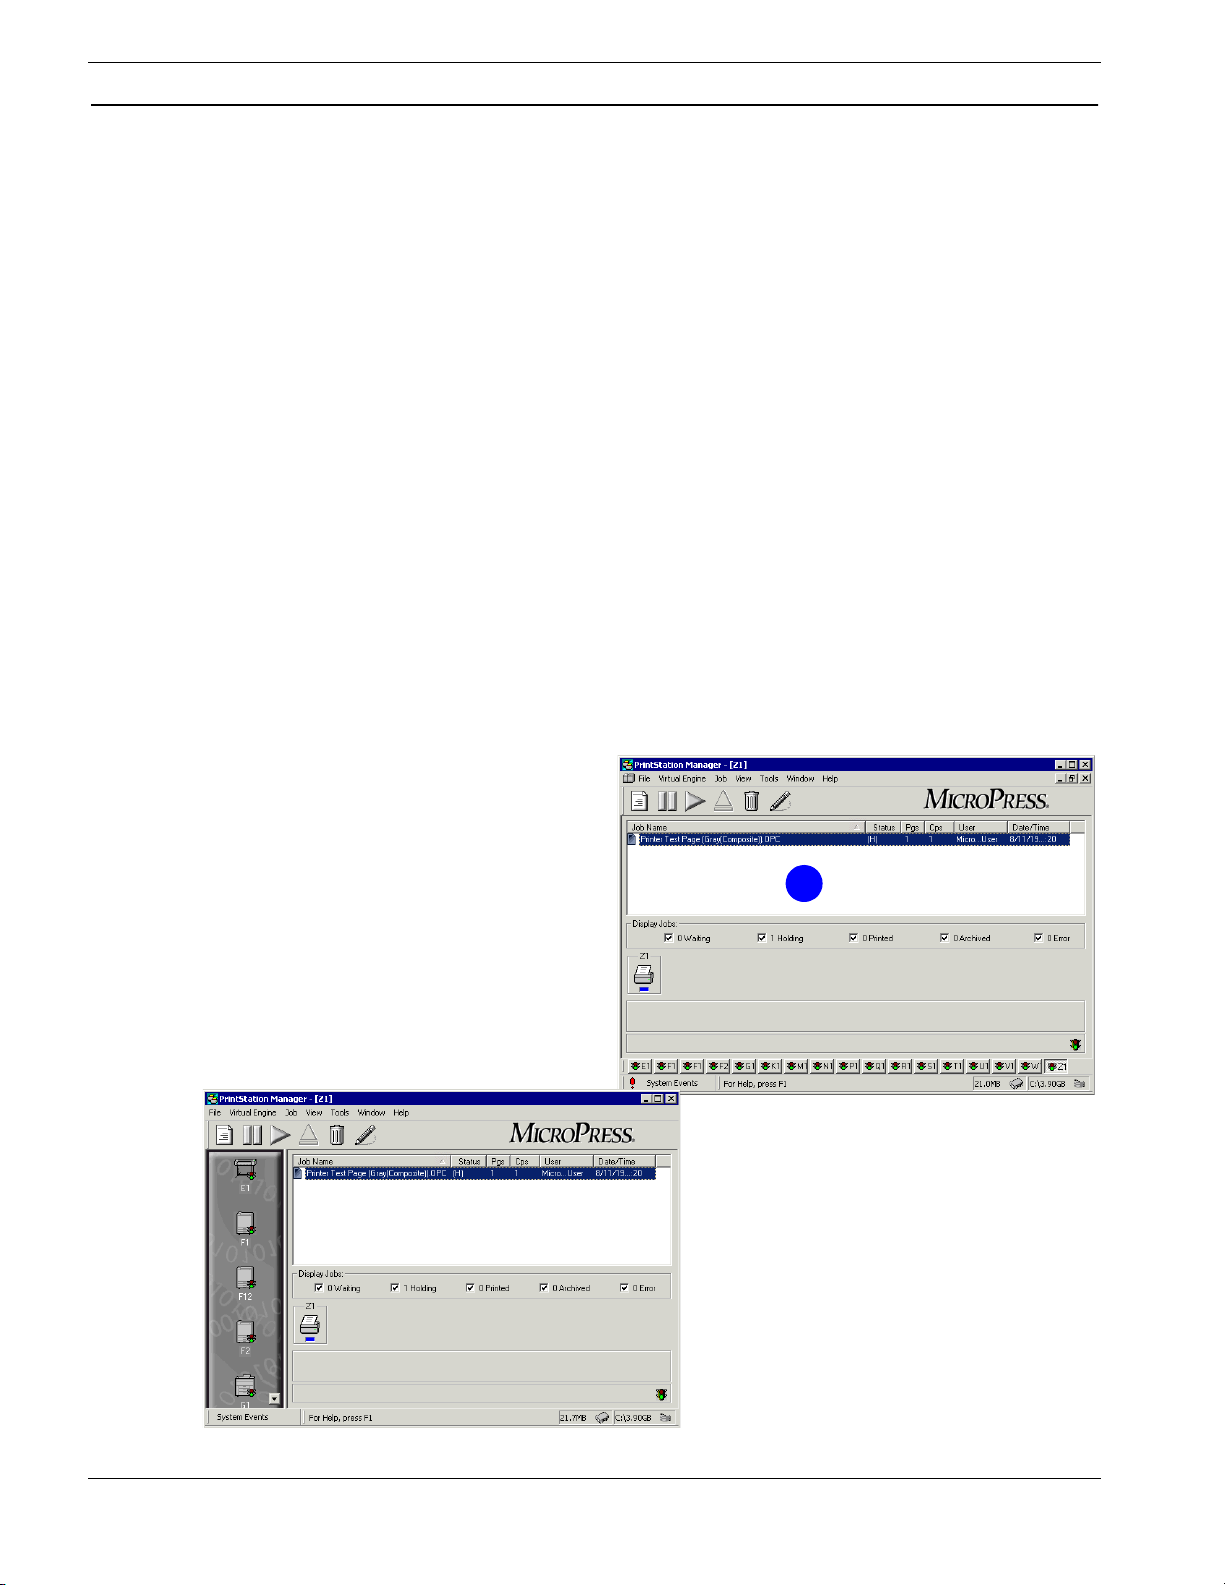
The graphic (right) shows the default
view.
Use the Options dialog to enable an
alternate view (below). See “Options” on
page 41.
1
2
Page 13
Job List Window
When details view is active, the Job List window ([1] on above graphic) gives detailed job
information. To enable this view, select Virtual EngineÎView Job Details from the menu.
Note: An * in front of the number of pages in the job means the job is set to print some sequence of pages other
than the first page to the last (e.g., odd pages only).
You can also set the Job List Window to display job names only. Select Virtual EngineÎ
View Job Name from the menu.
Job List Fields
The following table describes the columns in the Job List window. A small arrow head in a
column header indicates the list is sorted by that field. The direction of the arrow indicates
ascending or descending order.
Field/Control Description
Job Name The name of the job to print and job icon.
Job Status The current state of the job.
Pages The number of pages contained in the job. A “?” will display as a job is loading into the
PrintStation Manager.
Copies The number of times the job will be printed.
User The user or the name of the user’s workstation.
Date/Time When the PrintStation Manager received the job.
The checked selection in the ViewÎSort By menu indicates the current field that jobs are
sorted by. Sort by a particular field by clicking on the column header. Clicking again will
reverse the sort order. Jobs are initially sorted in ascending order.
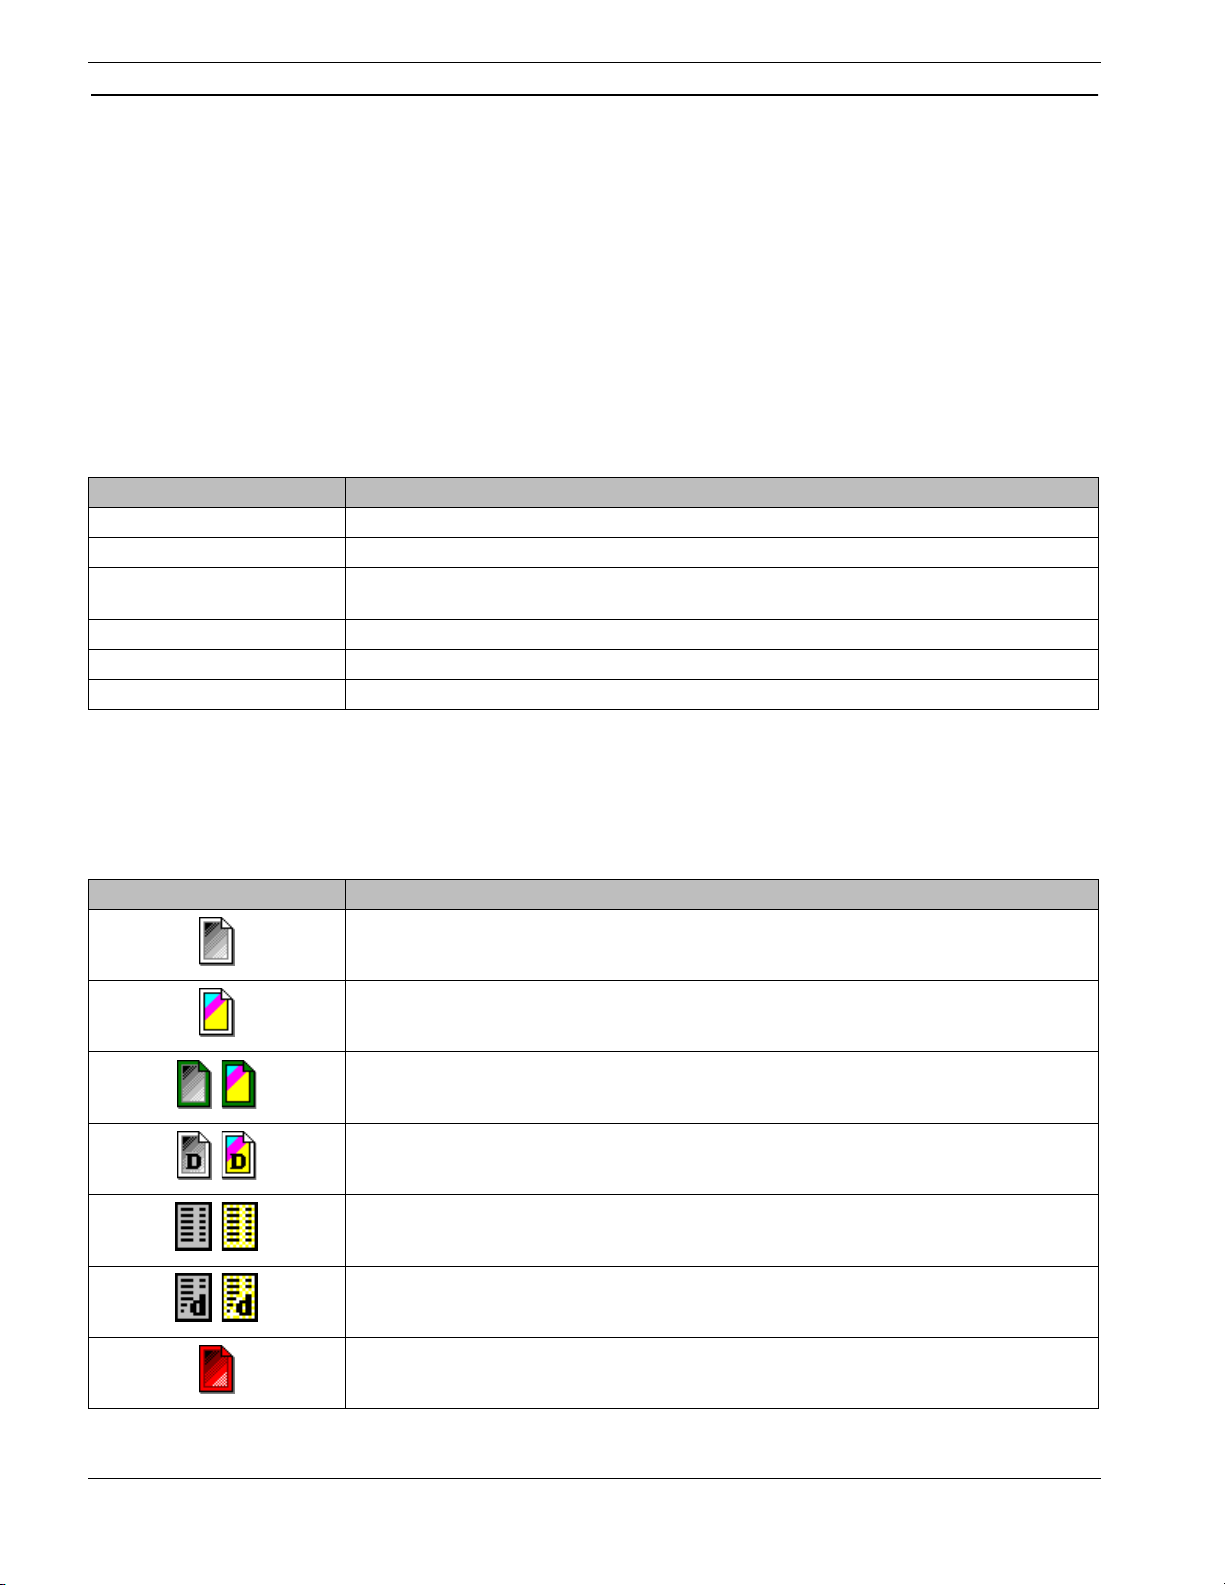
Job Icons
This table describes the job icons.
Job Icon Description
B&W standard – Displays for standard B&W jobs in the Waiting, Holding, Suspended, or
Printed state.
Color standard – Displays for standard color jobsin the Waiting, Holding Suspended, or
Printed state.
Printing (B&W, Color) – When a job is printing the icon is highlighted in green.
Duplex (B&W, Color) – A duplexed job.
Form (B&W, Color) – Indicates a job was Merged with a Form.
Combination (B&W, Color) – Indicates job is both Duplex and a Form.
Error – Indicates job has errored.
3
Page 14
Job Icon Description
Tab – Indicates job contains tab pages
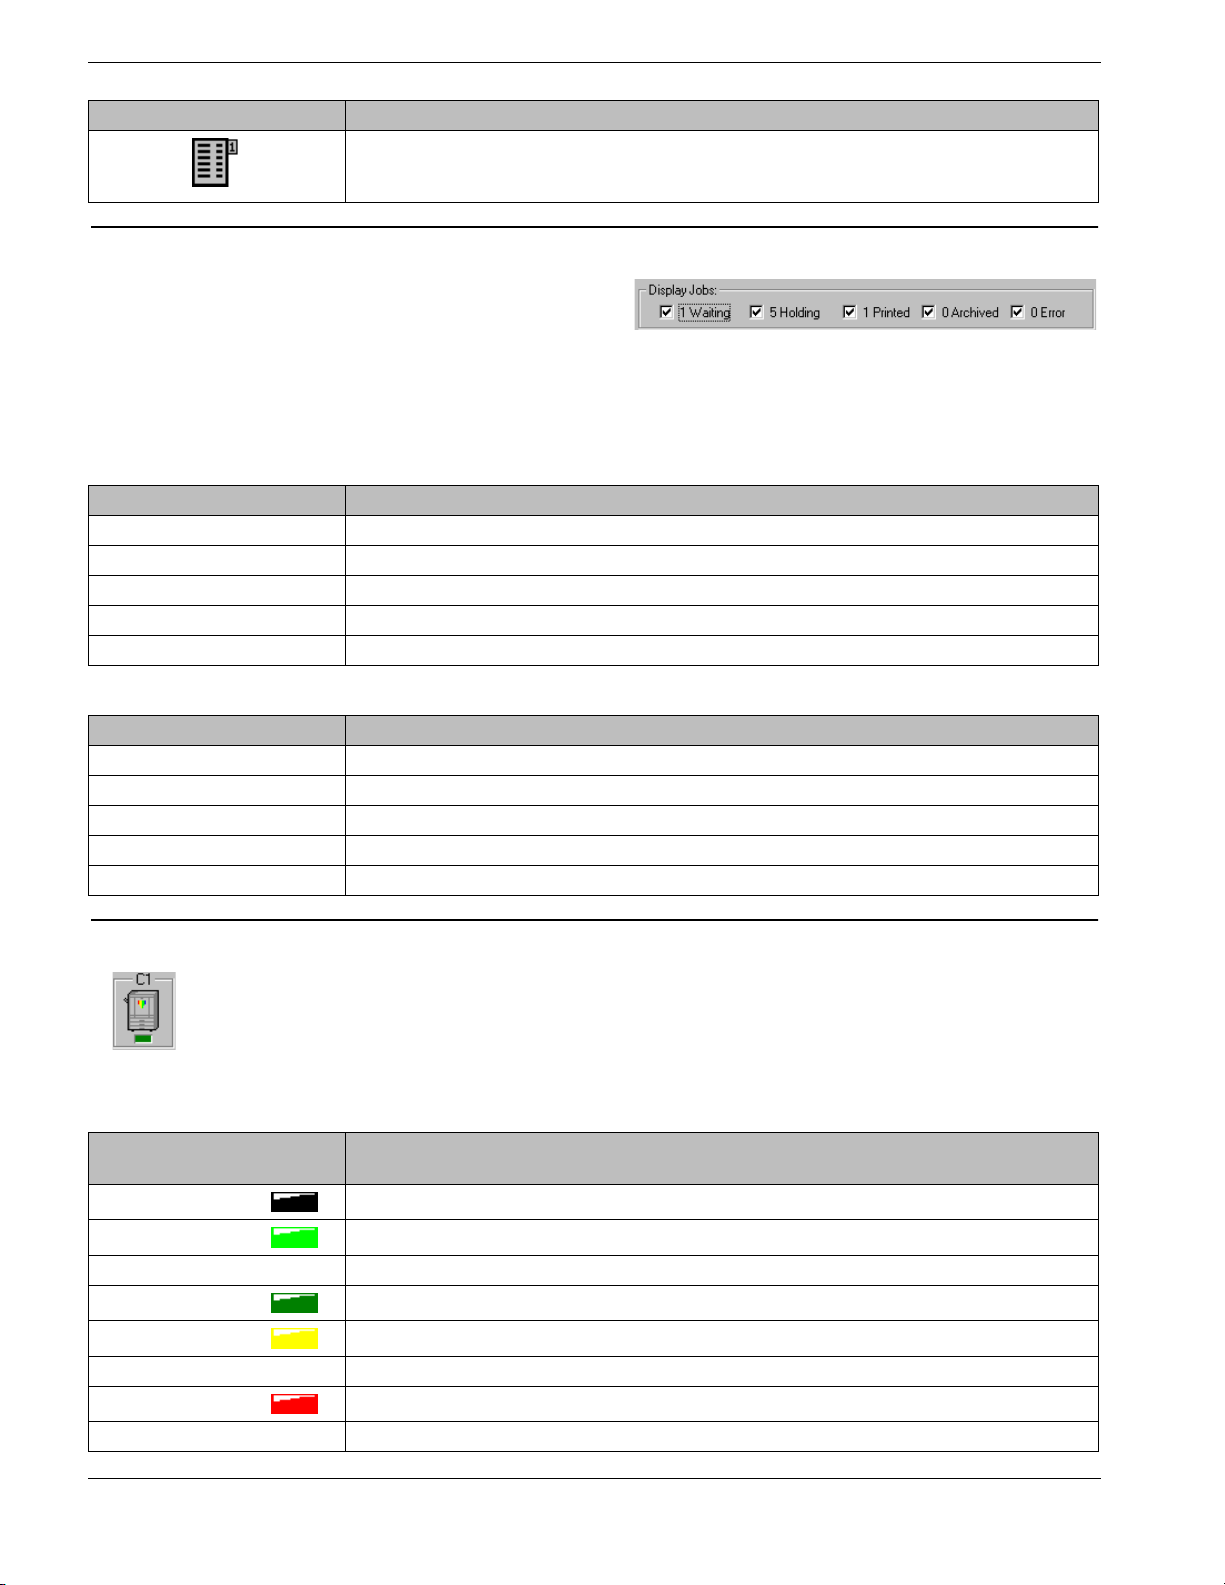
Display Jobs
When you select a job type, all jobs of that
type will display in the Job List Window.
Click the box beside each job type to
include it in the Job List. The number beside each job type is the number of jobs of that type.
Note: The number of each current job type will display regardless of whether the job type is selected.
This table describes various states in which jobs can display in the status column.
Field/Control Description
Waiting W: waiting to be printed.
Holding H: holding to print later.
Printed P: printed successfully.
Archived A: archived with Auto Archive.
Error E: printing error has occurred.
This table describes other job status indicators not listed in the Display Jobs check box area.
Status Indicates
>> Printing
P! Job stack moved to another PrintStation.
-B- Job is busy, usually during archiving.
S Currently printing. Clicking Hold/Suspend button stops printing.
°L Job locked with password.
PrintStation Button
PrintStation buttons located inside the Virtual Engine window alert you to common PrintStation conditions that can cause image defects or print job errors.
Clicking on a PrintStation button opens the PrintStation window and allows access to PrintStation Summary or PrintStation Systems information for a specific PrintStation.
PrintStation status is indicated by various colors. This table describes various PrintStation
button colors.
The PrintStation Icon
Light Displays
Black
Bright Green
Flashing Bright Green A job is printing without error, or toner is low.
Dark Green
Yel lo w
Flashing Yellow A Job is printing, but a caution is indicated.
Red
Flashing Red A printer is paused for “work and turn” pages for manual duplexing.
When
The PSM is starting up.
A printer is idle and ready.
No communication exists between the PSM and a PrintStation.
Paper out or conditions may be developing that will result in problems with image quality.
User intervention is needed before printing can continue.
4
Page 15
The PrintStation Icon
Light Displays
Disabled
Blue
Paper Out
Toner Low/Out
When
A PrintStation is disabled.
A device’s status cannot be determined. Currently, blue used only by OPC VE. See “OPC
Connected Devices” on page 56.
PrintStation has used last sheet of paper in selected paper source (some PrintStations
display which paper tray is empty).
• Paper Out with Yellow Light: Auto Tray Switch enabled and a paper tray is empty; however, printing may continue with use of another paper tray.
• Paper Out with Red Light: one or all paper trays are empty and printing stops.
Toner low. PrintStation button displays which toner cartridge is low.
Paper Jam
Paper jam. Always displays along with a red light. Click the engine button for information on
the paper jam location and jam resolution.
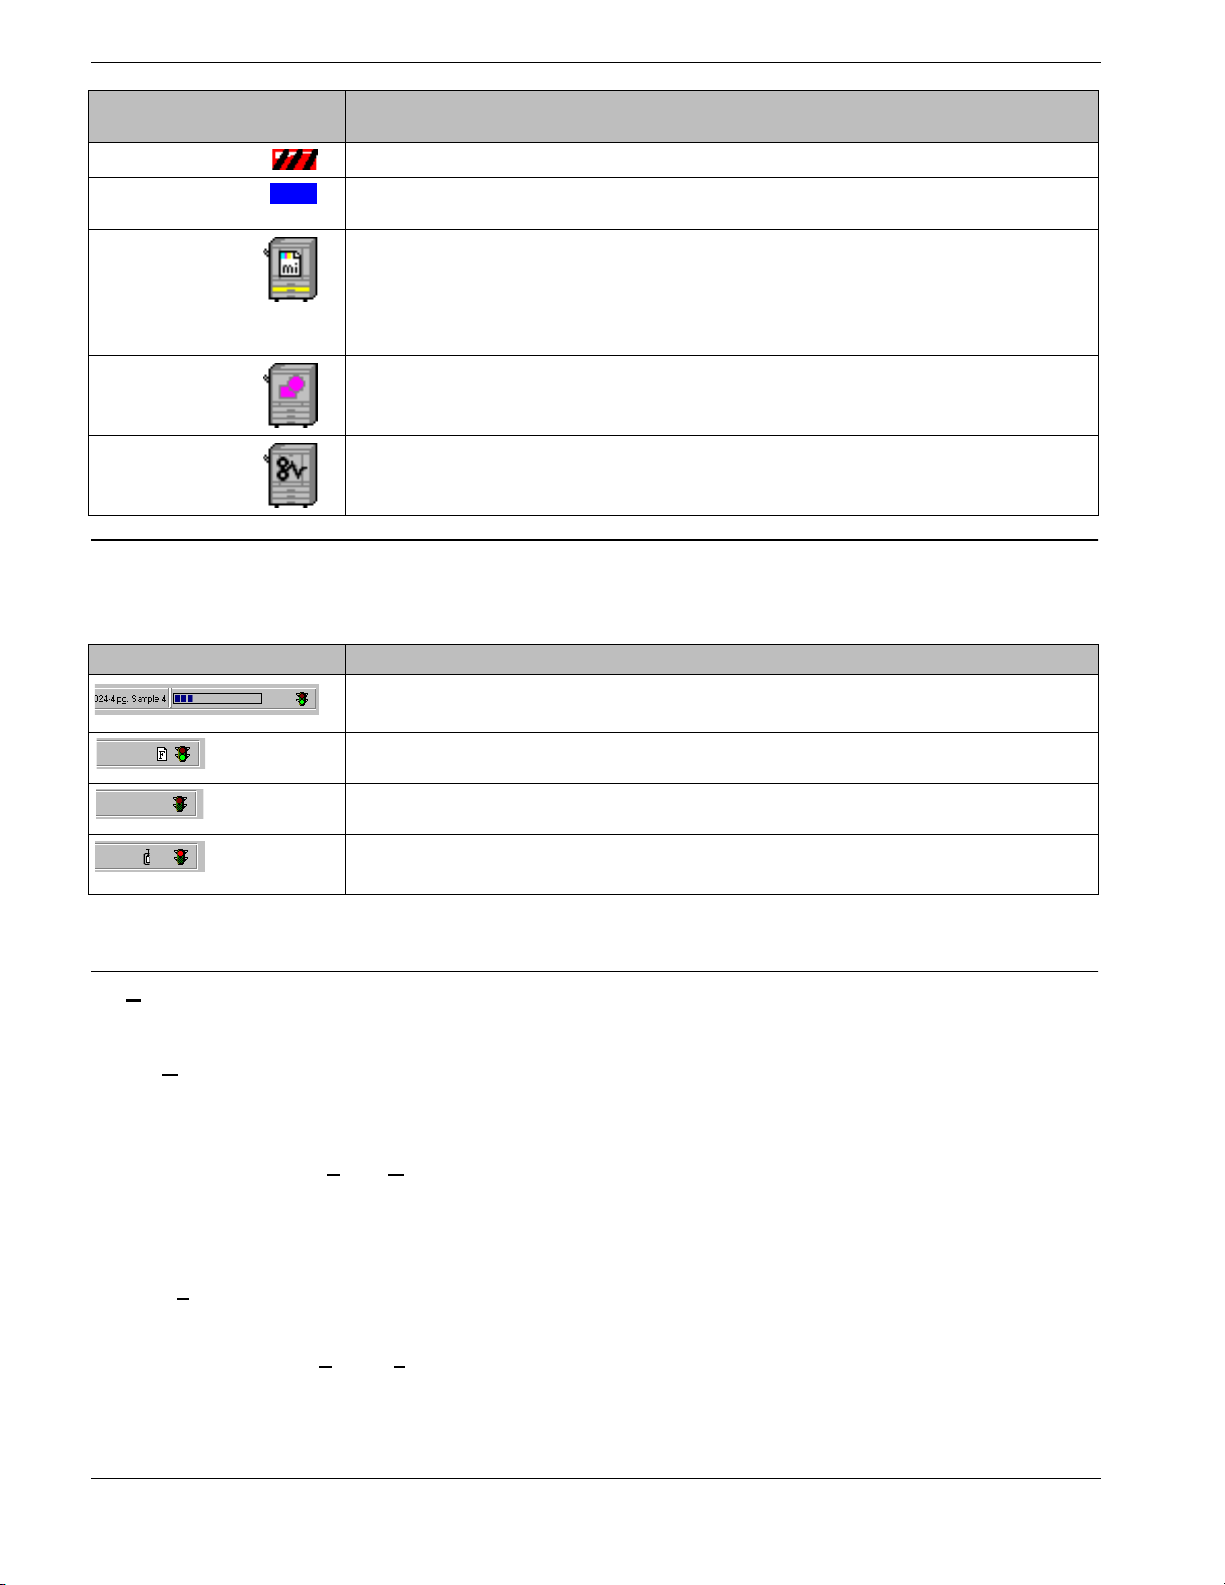
Virtual Engine Status Bar
The Virtual Engine Status Bar displays the name and status of the job printing and has also
has a Pause/Resume button. Icons indicate status:
Status Bar Indicates
Printing
Forms
Paused
Archiving/Unarchiving
Menus
File
Use the File menu selections to UnArchive jobs and Exit the PSM.
nArchive Job File(s)…
U
Use UnArchive Job File(s) to decompress archived files and return the file to PSM format.
1 Select the Virtual Engine to receive the archived file.
2 Select F
ileÎUnArchive Job File(s) from the menu.
3 Select the file to be unarchived. Click OK to decompress the file and place it in the
active Virtual Engine Job List.
Note: UnArchiving an older version PSM job will update to the current PSM version.
Exit
To exit PSM:
Select FileÎExit from the menu.
Note: PSM saves status of current jobs before closing.
Caution: Make sure all active jobs have completed processing before shutting down the PSM. If you shut down
the PSM while jobs are printing, a program error will result. To avoid having to reboot the server, select CTRL-
5
Page 16

ALT-DEL to launch the Task Manager. Open the Processes tab in the Task Manager, select psm.exe from the list
of active processes, then click End Process.
Virtual Engine
Virtual Engine menu options affect the selected Virtual Engine (VE). Which features are
active depends on the MicroPress configuration. The TRueColor feature is active only if the
VE contains a color capable PrintStation. The following sections describe the Virtual Engine
menu options.
P
ause or Resume a Virtual Engine
This option prevents or starts print activity on the active VE (but does not affect a currently
printing job). When the Pause/Resume light is green, the Virtual Printer is ready to print;
when it red, the Virtual Printer is paused and will not print. All jobs selected to print will display as a Wait (W) status in the Status column of the Job List window until the VE is resumed.
To pause a VE:
1 Select a VE.
2 Select Virtual E
continue to send jobs that will be held until the VE is resumed).
Resuming a Paused Virtual Engine
1 Select a paused Virtual Engine.
2 Select Virtual E
3 Virtual Engine activity resumes.
ngineÎPause from the menu to halt printing from the VE (users can
ngineÎResume from the menu.
ynch Jobs
Res
The Resynch Jobs feature lets you refresh and update the Job List window. This is especially
useful if a job file is copied into a PrintStation Manager spool directory. The updated job will
display after Resynch Jobs has refreshed the PrintStation Job List window.
1 Select a Virtual Engine.
2 Select Virtual E
ngineÎResynch from the menu.
3 The Job List window will refresh, and any jobs copied to the Virtual Engine’s Spool
Directory are added to the display.
F
orms…
Use the Forms option to print data from one job as an overlay onto another job. This provides
a more efficient way of printing multiple copies of a job that contains both common and
unique text or graphics. To print a form more efficiently, send it with fixed image information
(common text and graphics) to be processed through MicroSpool, the MicroPress RIP, and
then to the PSM only once. Next, configure the job as a form for that Virtual Engine to merge
the job with the form information. You can also set the forms print option from Macintosh or
PC workstations using the MicroPress drivers.
Multi Page Forms
A form can have one or more pages and be merged with unique text documents containing
any number of pages (e.g., 10 pages of unique text or variable data to be merged with a 5page form). Forms can be repeated so that each page of the unique text document will be
merged with the appropriate page of the form. Click the Repeat Form button to merge a 5-
page form with a 10-page document. The PSM merges pages 1-5 of the form with pages1-5
of the unique text document, and then the 5-page form is repeated with the next 5 pages
(pages 6-10) of the unique text document.
6
Page 17
Letterhead
The Forms option makes printing jobs with letterhead more efficient as it eliminates the need
to change or reload the paper tray with pre-printed letterhead. If the forms option is turned off
at the PSM, you can still set it from the workstation to override default options in PSM. However, if the current form in the PSM is “No Form”, the job set this way will fail because no form
has been added for use.
Warning: When using the Form feature in the PSM, the following Job Settings must match to achieve the desired
output:
• Bit Depth (Contone/BiLevel/Monochrome): Both the Form and the file to be overlaid must come
through the same Virtual Printer.
• Horizontal and Vertical Resolution Settings
If these Job Settings do not match, the job will print without the form, and an error message will be generated in
the system log.
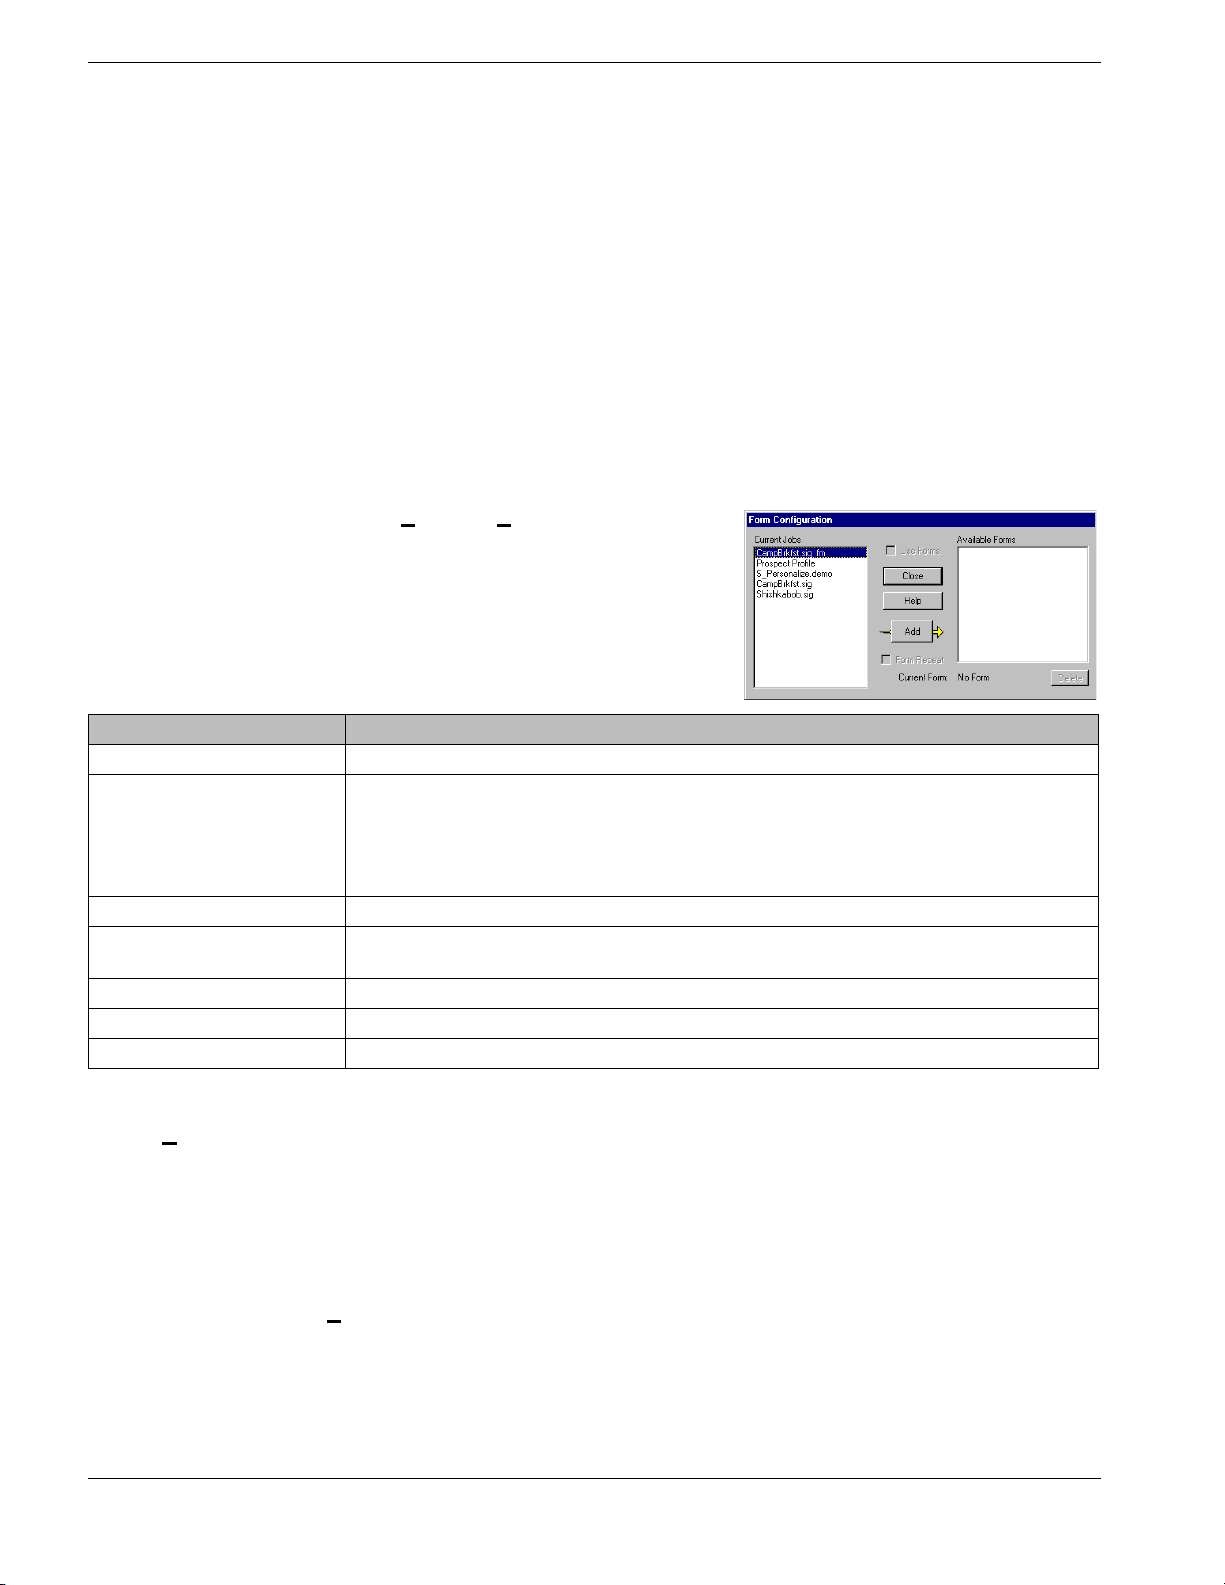
To use the Forms Setup option:
1 Select a Virtual Engine.
2 Select Virtual E
ngineÎForms to open the
Form Configuration dialog.
Note: To open the Form Setup dialog, pressing
[Ctrl]+[F].
Field Description
Current Jobs Displays all current jobs for the active Virtual Engine (VE).
Use Forms Prints the form as an overlay for every job sent to the VE. The current form is highlighted
under Available Forms and listed next to Current Form . If this box is not checked, the
selected form will not print unless the job itself has specified “Use Form.”
Note: Before the “Use Forms” option is available, a job must first be selected to be used as a
form from the Current Jobs field. “Add” it to the list of Available Forms.
Add Copies the job selected from the Current Jobs field to the Available Forms field.
Form Repeat Repeats a form so that each page of a specific document will be merged with the
appropriate page of the form.
Current Form Displays currently selected form.
Available Forms Selects a form for use as a printed overlay for every job sent to the VE.
Delete Removes selected form from the Available Forms list.
3 Click Close to apply the Form Setup.
ngine Defaults…
E
The Virtual Engine Default Settings dialog may contain several option categories (e.g., Virtual Engine Defaults and Job Defaults), depending on engine type. The next section
describes each default type.
To access the Engine Defaults dialog:
1 Right-click the Virtual Engine's task bar button on the PSM main dialog.
2 Select E
ngine Defaults.
7
Page 18

Virtual Engine Defaults
Virtual Engine Defaults control the behavior of all jobs printed from a VE and can be overridden by the workstation sending the job. The available defaults may vary by engine type.
Field/Control Description
Spool Directory The directory containing the PSM job files for the currently selected Virtual Engine. If
multiple Spool Directories are specified for the Virtual Engine, they may be selected
from the drop down lists.
To modify the Spool Directory:
Add Path
1 Click the Add Path button.
2 Navigate to the desired directory.
3 Click on the directory to select it.
4 Click OK to add the path.
Delete Path
1 From the drop down list, select the path to delete.
2 Click the Delete Path button.
Form Setup Forms option is used to print data from one job as an overlay onto another job.
Custom PJL
(Printer Job Language)
Hold Incoming Jobs Holds all incoming jobs until they are manually selected to print.
Keep Printed Jobs Saves jobs after printing.
Print Job Separators Prints a marked separator page at the end of each job.
Use Manual Tray for Separators Keeps paper for Separators in the Manual Tray. Select this option to use paper of a
Write Through Allows an incoming job to print as the RIP is processing it. Note: If Write Through is
Delete Color Pages When enabled, will delete color pages from jobs coming into the VE. Black and White
Print Color Pages Only For color engines – enable to print only the color pages in a job.
Print Color Inserts For Black and White engines – enable to put an insert sheet in place of a color page.
Step and Repeat Enables placing copies of a page across the width of the media as many times as
SafePrint Determines whether a page or job can be printed on the media remaining. See “Output
Print Quality Chooses the appropriate balance of print speed vs. quality. See Output Options.
Margin Offsets Changes the margin size and expands the print area of the page reducing the amount
(OPC VE) Permits advanced control of printer/finisher functionality. You must know
what commands the printer accepts; obtain this information from the manufacturer.
See “Custom PJL Support” on page 57.
different size and/or color for Job and/or Copy Separators. If you do not select this
option, the system checks the manual tray first. If no paper is loaded into the manual
tray, the currently selected input tray is used. Note: This does not apply to a duplex job
on a PrintStation 312 because it would use one of the pages from the job as a
separator; therefore, the separator will have to come from the manual tray.
selected and a job starts coming in, the PSM will use only one PrintStation of a Virtual
Engine to print until the entire job has been received. This guarantees correct collation.
For the LaserJet 8000, if Stapling is enabled, Write Through will be ignored.
pages will be retained.
possible. See “Media Saving Features” on page 9.
Options” on page 14.
of media waste. See “Page Range Settings” on page 16.
8
Page 19
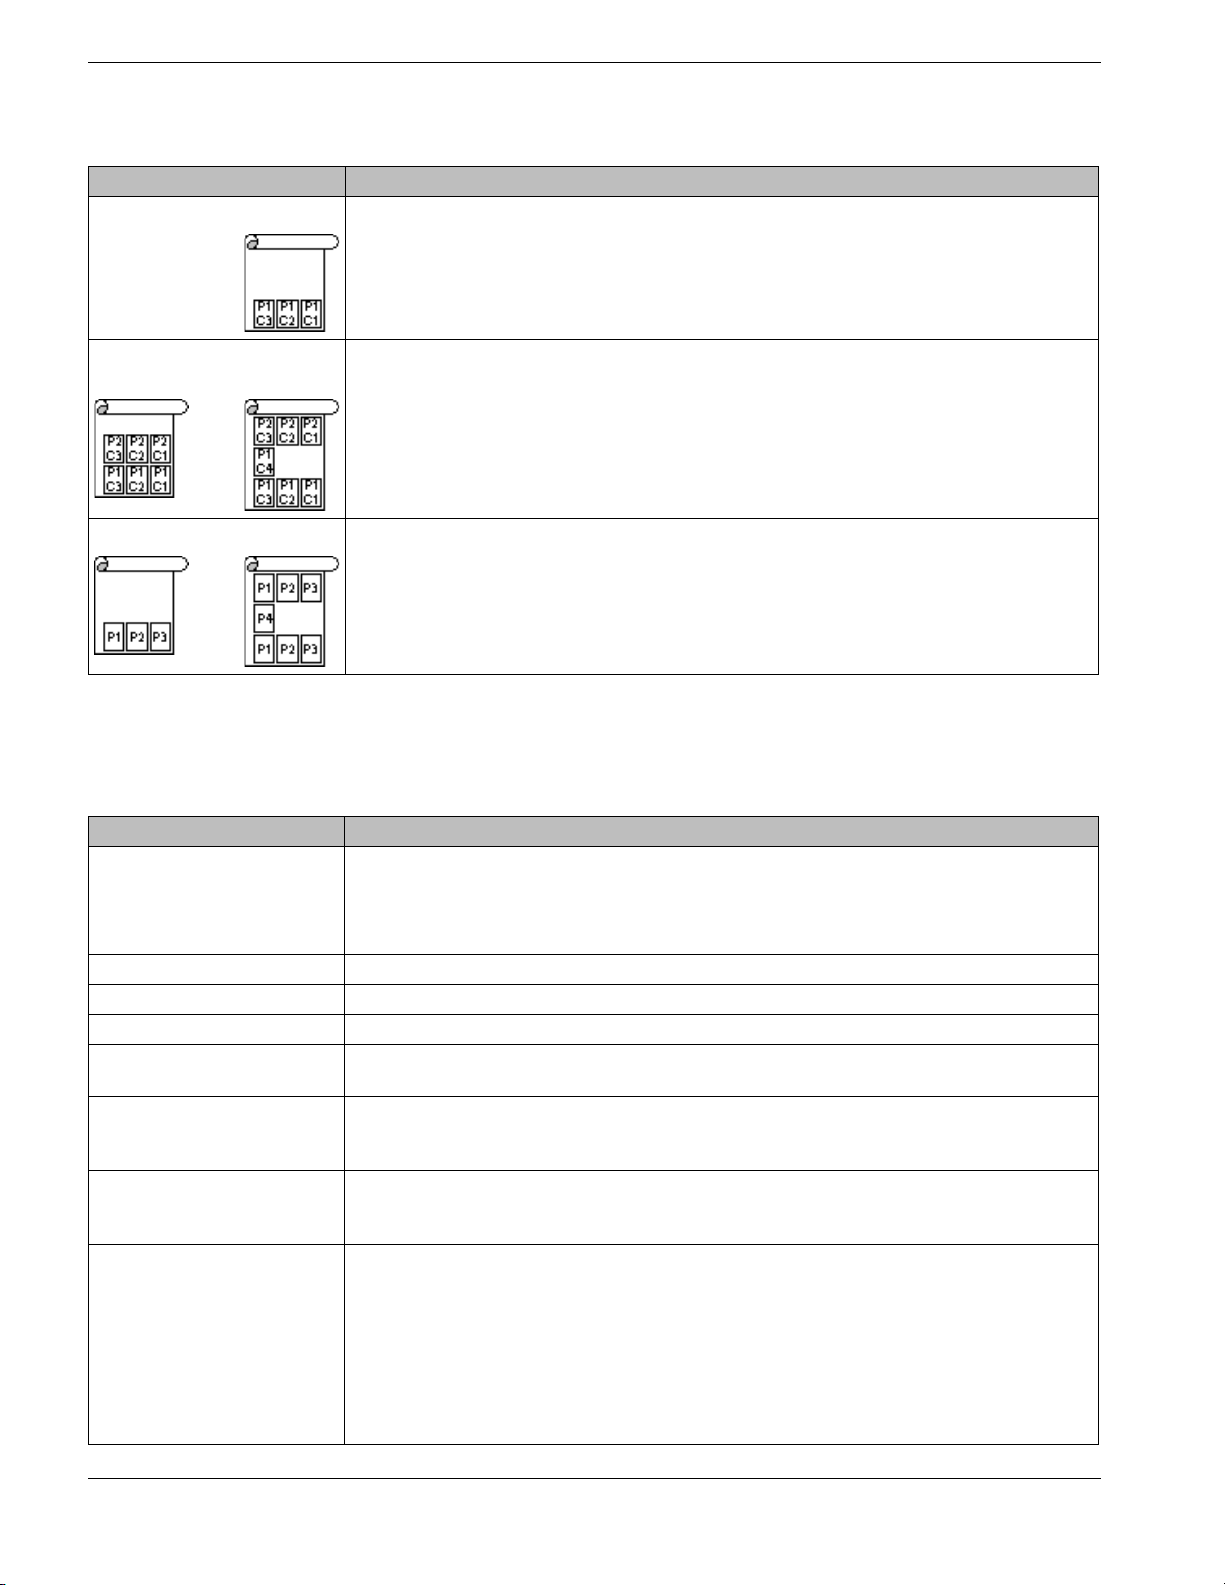
Media Saving Features
The following features apply to the DesignJets (P=Page; C=Copy).
Feature Description
Step and Repeat Use to print multiple copies of a job. Places copies of a page across the width of the media
as many times as possible.
Step and Repeat with
Gather Collate
FillWidth Use FillWidth to print multiple page jobs. As in the case with Step and Repeat with Gather
Using Step and Repeat with Gather Collate keeps the copies of pages together.
If all of the pages will not fit across the width as seen in the right-side graphic, a blank area
on the media may occur.
Collate, there may be an area of unused media if all of the pages will not fit across the
width.
Job Defaults
When sending jobs from a workstation, you can choose specific job settings to override the
Virtual Engine’s Job Defaults. The available defaults may vary by engine type.
Field/Control Description
Gloss Level Sets the job Gloss Level for the entire job. Available levels:
• Low: use for jobs containing text only (Matte/Satin finish)
• Standard: use for jobs containing both text and images
• High: use for jobs containing images only (Heavy sheen)
Feed Tray Selects paper tray from which paper will be fed.
Duplex Prints double-sided pages.
Print Copy Separators Prints a slip sheet after printing each copy of a job.
Quality Print Mode Improves registration and gives better image quality. Note: Quality Print Mode will
decrease PrintStation output speed.
Empty Tray Switch Enables a print job to automatically switch another paper feed tray when the selected tray
runs out of paper. Works only if the paper size is the same in both trays. The 062 will not
switch to the Manual tray when Empty Tray Switch is on.
Auto Select Allows a PrintStation to check all trays for the paper size specified in the job. In the case of
Letter, which is defaulted to APS from Tray 1 only, the PrintStation will not check all trays for
Letter unless Empty Tray Switch is enabled.
Gather Collate / Group Prints all page 1s, then all page 2s, for off-line electronic/manual collation.
f you have selected the collate option from a print dialog and also select the
Note: I
group option, the group option will have no effect. Here’s why: When you select
collate with mulitple copies from the print driver, the driver assumes that the print-
er has no storage capability and will send each page in the expected output order.
For example, two copies of a five-page job will be treated as a single 10-page job
(1,2,3,4,5,1,2,3,4,5). Thus, the group option will have have no effect since the job
amounts to one copy in the PSM.
9
Page 20
Field/Control Description
Parse on Copy Keeps multi-page documents together when sent to multiple engines. See “Output Options”
on page 14.
Reverse Order Causes the job to print and stack in the correct order. If the output device is a “face up”
printer jobs will stack in reverse order.
Split After n Pages Splits large jobs into smaller sections.
Interpret Image As Select the orientation of incoming jobs. This is not the paper feed direction but the actual
orientation of the job page contents. Orientation being either Landscape (top of the image is
along the long edge of the paper) or Portrait (top of the image is toward the short edge of
the paper)
Archive Jobs Older Than x Sets the PSM to automatically archive jobs in the (H) or (P) state that have not been printed
for the specified amount of time.
Jog Copies When the stacker is used with multiple copies, Jog Copies will offset each set of copies.
Stapling Set Stapling options.
Punching Toggles punching on or off.
Folding Sets Folding options.
Trim Cut page “creep” from a folded booklet.
Booklet Maker Folds or Folds and Staples job to create a booklet
Cover Inserter Add Cover – Insert a cover page pulled from the cover inserter. Some engines may insert a
cover page(s) to be pulled from the Cover Inserter while others may assign a Media Type
for the cover page(s).
Insert Color Pages Prints black-and-white pages and leaves color pages blank rather than printing them as
grayscales (i.e., if using black-and-white/color splitting).
Toner Saving Mode Uses the selected engine’s toner saving mode to reduce toner coverage.
Finishing Defaults
The following options set up the finishing parameters for the PrintStation 624m.
Field/Control Description
Base Configuration File XML (eXtensible Markup Language) file contains configuration data for the finisher. PSM
reads the file and populates the Finishing Configuration dialogs accordingly. See “Finishing
Configuration” on page 10.
Customize Finishing Displays the Finishing Configuration dialogs if the Base Configuration file has been loaded.
Finishing Configuration
Note: You can access the Finishing Configuration dialogs from the Engine Defaults or the Job Information dialog.
From the Engine Defaults dialog, the settings affect every job coming into the VE. From the Job Information dialog
(“Info...” on page 11), settings apply to individual jobs.
Dialog Description
Finishing Setup Checking items on this dialog populates the Finishing Settings dialog accordingly.
Finishing Settings Selections on the Finishing Setup dialog and the Base Configuration File determine the
settings on this dialog.
Finishing Summary Displays current configuration as set on the Finishing Setup and Settings dialogs.
Selections available in the Finishing Selected list determine the selections available in the
Option Selected list.
TRueColor...
10
TRueColor activates the optional
Gamma Calibration software and prints a Gamma Target.
For more information about calibration, see the TRueColor User Guide.
1 Select the Virtual Engine.
Page 21
2 Select Virtual EngineÎTRueColor from the menu.
Note: A Key Code is necessary to activate the optional functionality of TRueColor. Contact your MicroPress
dealer for more information.
B&W Engine Balance
B&W Engine Balance sends the MonoTune test target to the output devices connected to
the currently selected VE.
1 Select the Virtual Engine.
2 Select Virtual E
3 Follow the directions on the test target to make adjustments to the PrintStation.
Job
The Job Menu Bar gives immediate access to frequently used commands.
I
nfo...
The Job Information dialog consists of several tab pages displaying setup options for Job
Settings, Page Settings, job parsing, etc. The dialog’s title bar displays the job name and file
size. Selections may vary based on engine type. This section describes each page.
• Job Settings: displays information about the whole job. You can view or change many
global job settings.
ngineÎB&W Engine Balance from the menu.
Note: When bit depth or job resolution is identical in either the horizontal or vertical direction for any page in the
job, the exact resolution will be displayed. If it differs in either direction for all pages in the job, an asterisk displays
beside the resolution number. When both directions differ, two asterisks will display instead of a number in the title
bar. To view the individual resolution of each page, see the Page Settings tab.
• Output Options: displays various printing options. See “Output Options” on page 14.
• Finishing Options: finishing options vary depending on the output device. Options
may include Folding, Punching, Stapling, etc. See “Finishing Options” on page 12.
• Margin Offsets: options for adjusting margin offsets. See “Page Range Settings” on
page 16.
• Brightness/Contrast: options for adjusting Image brightness and contrast for the job.
See “Brightness/Contrast” on page 17.
• Color Adjust: controls for setting C, M, and Y levels, and for choosing a ColorCurve
Calibration Set. See “Color Adjust” on page 18 and “ColorCurves” on page 18.
• Parsing: displays a graphic depicting how the job is parsed and how to combine the
output of each PrintStation for a collation. See “Job Parsing” on page 19.
• Chapters: used for grouping pages into sections. See “Chapters” on page 19.
• Page Settings: displays information about individual pages in print jobs. See “Page
Settings” on page 20.
• Annotations: options for adding/viewing comments. See “Annotations” on page 21.
• Finishing Setup, Finishing Settings, Finishing Summary: configures functionality
for the finisher. See “Finishing Configuration” on page 10.
11
Page 22
• Page Range Settings: set and view settings, such as Media Types, Feed Trays, Paper
Sizes, and Subset Stapling for pages and groups of pages within a job. See “Page
Range Settings” on page 16.
To open the Info window:
1 Select a job from the Job List Window of the active VE.
2 Select J
Note: Click Reparse only if something changes on the Job Settings (e.g., number of copies, available print
engines).
obÎInfo from the menu.
Job Information dialogs may vary based on PrintStation/PrintLink type. Two types of messages may be displayed: Warnings (yellow!) and Errors (red!). Warning message jobs will
print, though perhaps with undesirable results. A job with an Error message will not print.
Attempting to do so will immediately puts the job in an error state.
Job Settings
Use the Job Settings tab to set up print options (i.e., number of copies, job name). The document paper size is also displayed but cannot be changed because it is set in the generating
application.
Note: Paper sizes B1–B6 referred to in this manual are JIS unless otherwise noted.
Field/Control Description
Copies Number of copies to print.
Print Range • All Pages - Prints every page in the job.
• Page Range - Prints specific pages in the job.
• Chapters - Prints the selected chapters.
• Odd + Even - Prints odd AND even pages for the specified range.
• Odd - Prints odd pages only.
• Even - Prints even pages only.
Reverse Order Causes job to print in the opposite order. For the 040, Reverse Order is not available if
Duplex (Output Options) is on.
Job Name Current job name (can modified directly).
User Name Network name of the workstation that sent the job. “NoName” displays if user name is not
indicated in the print job.
Paper Paper size for the job.
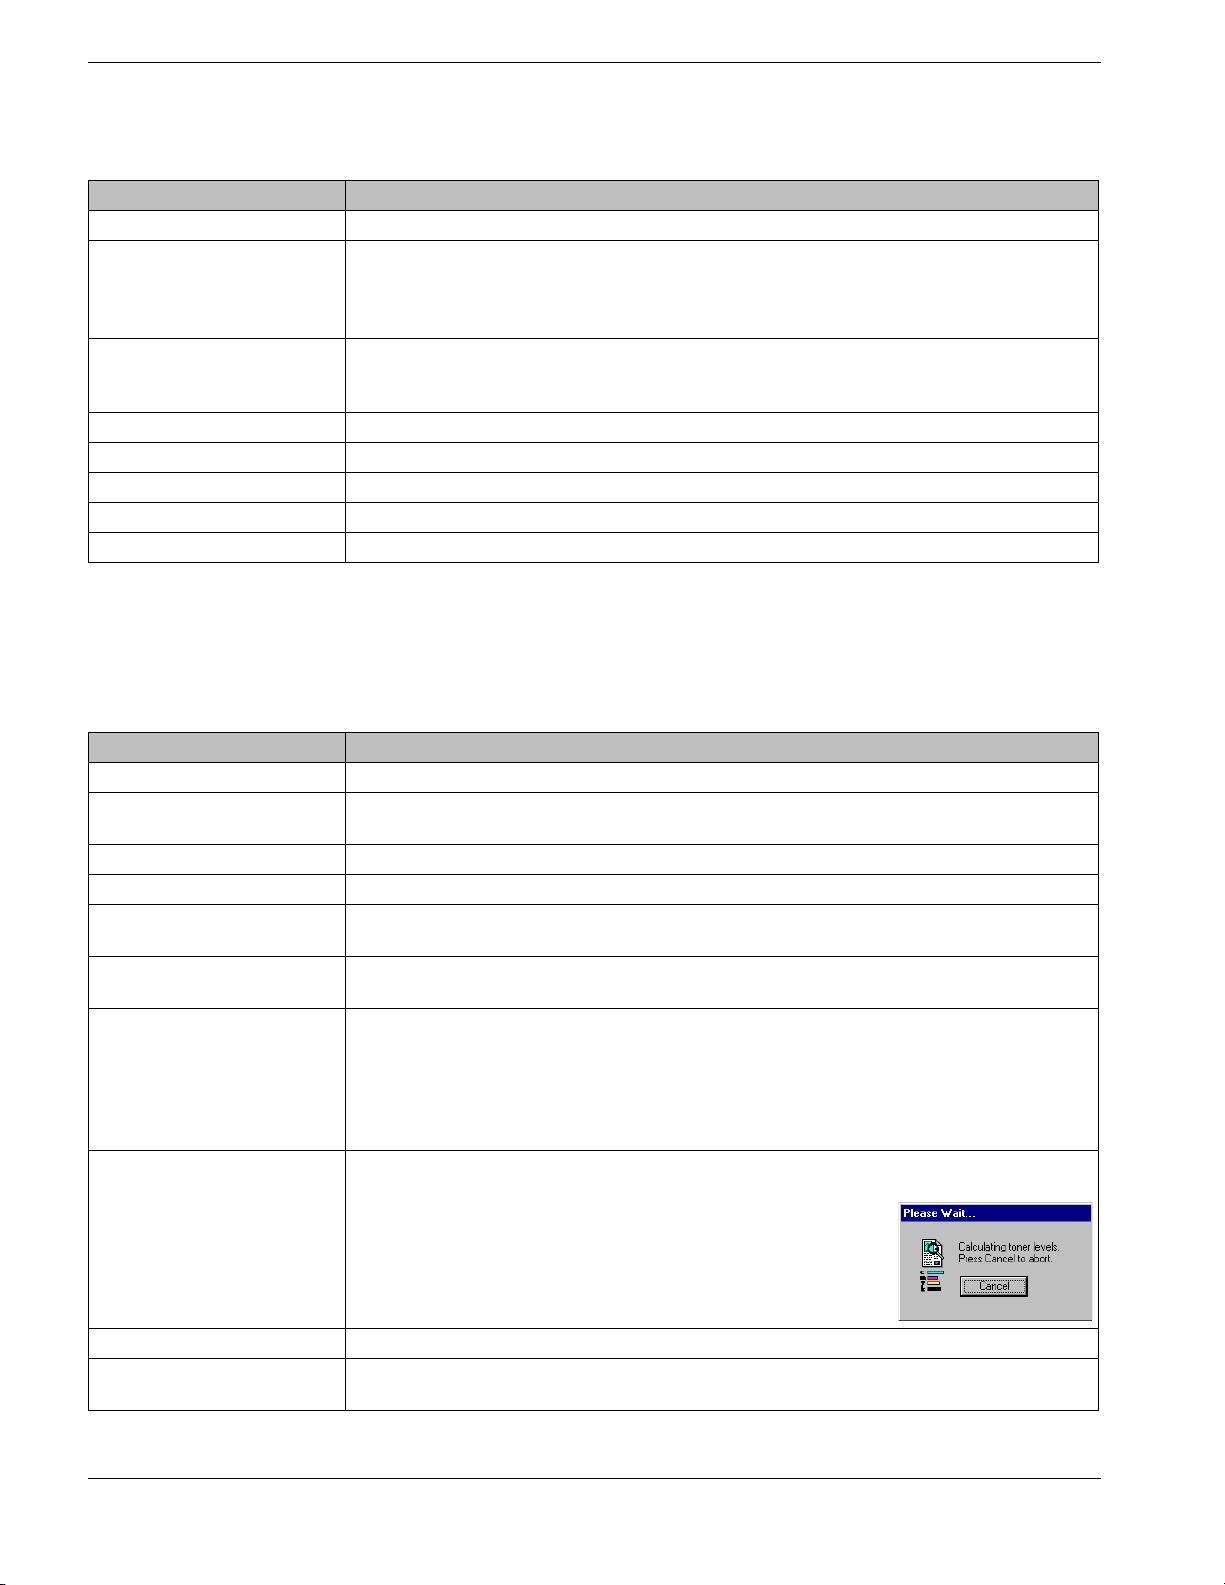
Calculate Toner Coverages Click Calculate in the Toner panel of the Job Settings or Page Settings tab to calculate the
toner coverage on all pages of selected job. Note: Selected paper size in the workstation
application may not match the paper size in the feed tray if Auto Select (Output Options,
Engine Defaults) is not on. If this happens, the job will print anyway.
Finishing Options
This dialog displays the available features if Finishing is available and will vary depending on
engine/finisher type. Some features may become unavailable when other features are
selected. This is to ensure proper operation of the engine/finisher.
12
Note: A job containing both long edge feed landscape and any orientation short edge feed may require that the
long edge feed be tumbled.
Page 23
Field/Control Description
Interpret Image As Select the orientation of incoming jobs. This is not the paper feed direction but the actual
orientation of the job page contents. Orientation being either Landscape (top of the image is
along the long edge of the paper) or Portrait (top of the image is toward the short edge of
the paper)
Stapling The possible stapling locations will be displayed. The page graphic on the dialog will
change to show how the job will be affected by the stapling location.
Note for 060c: To determine stapling position, look at the engine from the front. Portrait
Corner Stapling places the staple on the trailing edge corner closest to the back of the
engine (farthest away from you). Landscape Corner Stapling places the staple on the
trailing edge corner closest to the front of the engine (closest to you).
Punching The possible punching locations will be displayed. The page graphic on the dialog will
change to show how the job will be affected by the punching location.
Folding The possible folding locations will be displayed. The page graphic on the dialog will change
to show how the job will be affected by the folding method.
Jog Copies When the stacker is used with multiple copies, Jog Copies will offset each set of copies
Trim Cut page “creep” from a folded booklet.
Insert Covers Insert a cover page pulled from the cover inserter. Some engines may insert a cover
page(s) to be pulled from the Cover Inserter while others may assign a Media Type for the
cover page(s).
Booklet Maker Folds or Folds and Staples job to create a booklet. For some engines additional features
are available for producing booklets:
• Front – Produces an outside cover. Media may be selected from a specific location.
• Centerfold – Produces an insert for the inside center of the booklet. Media may be
selected from a specific location.
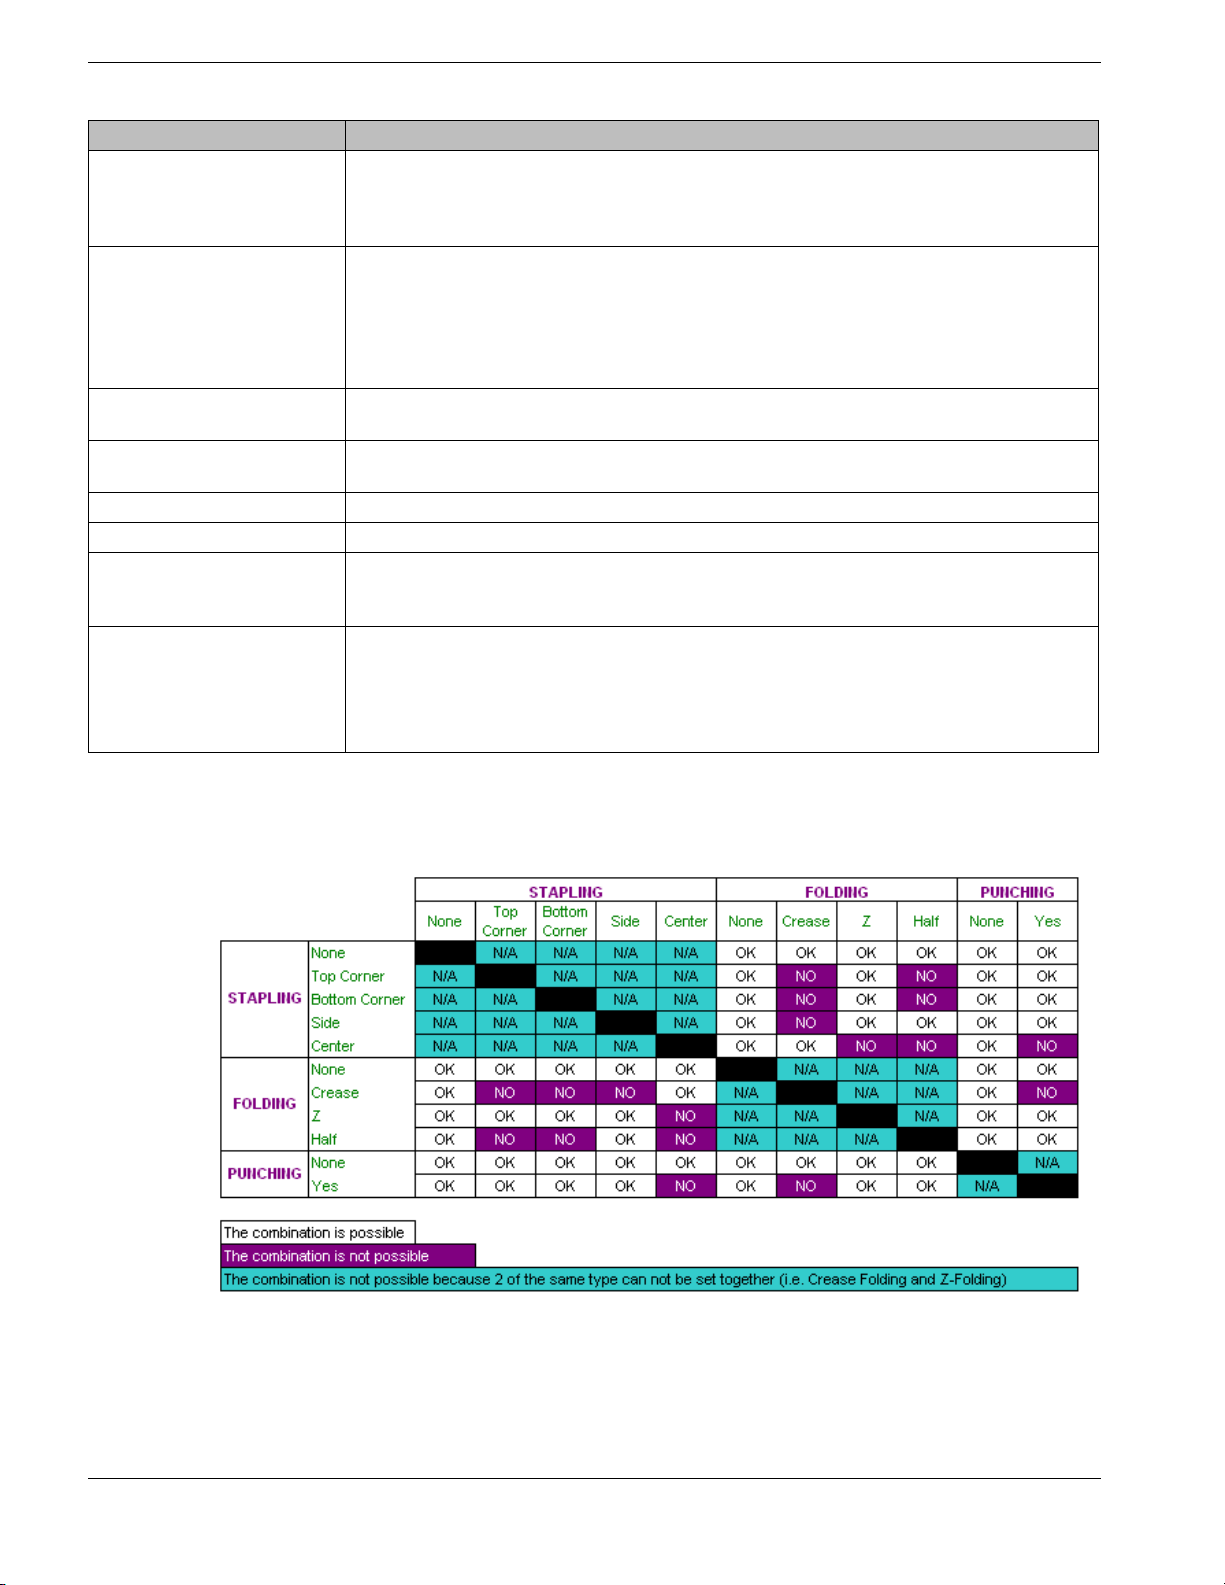
062 Finishing Rules
Some Finishing Options depend on other options (i.e., paper size, Copy Separators). This
table lists the combinations of options and availability for the 062 FN-3 Finisher.
13
Page 24
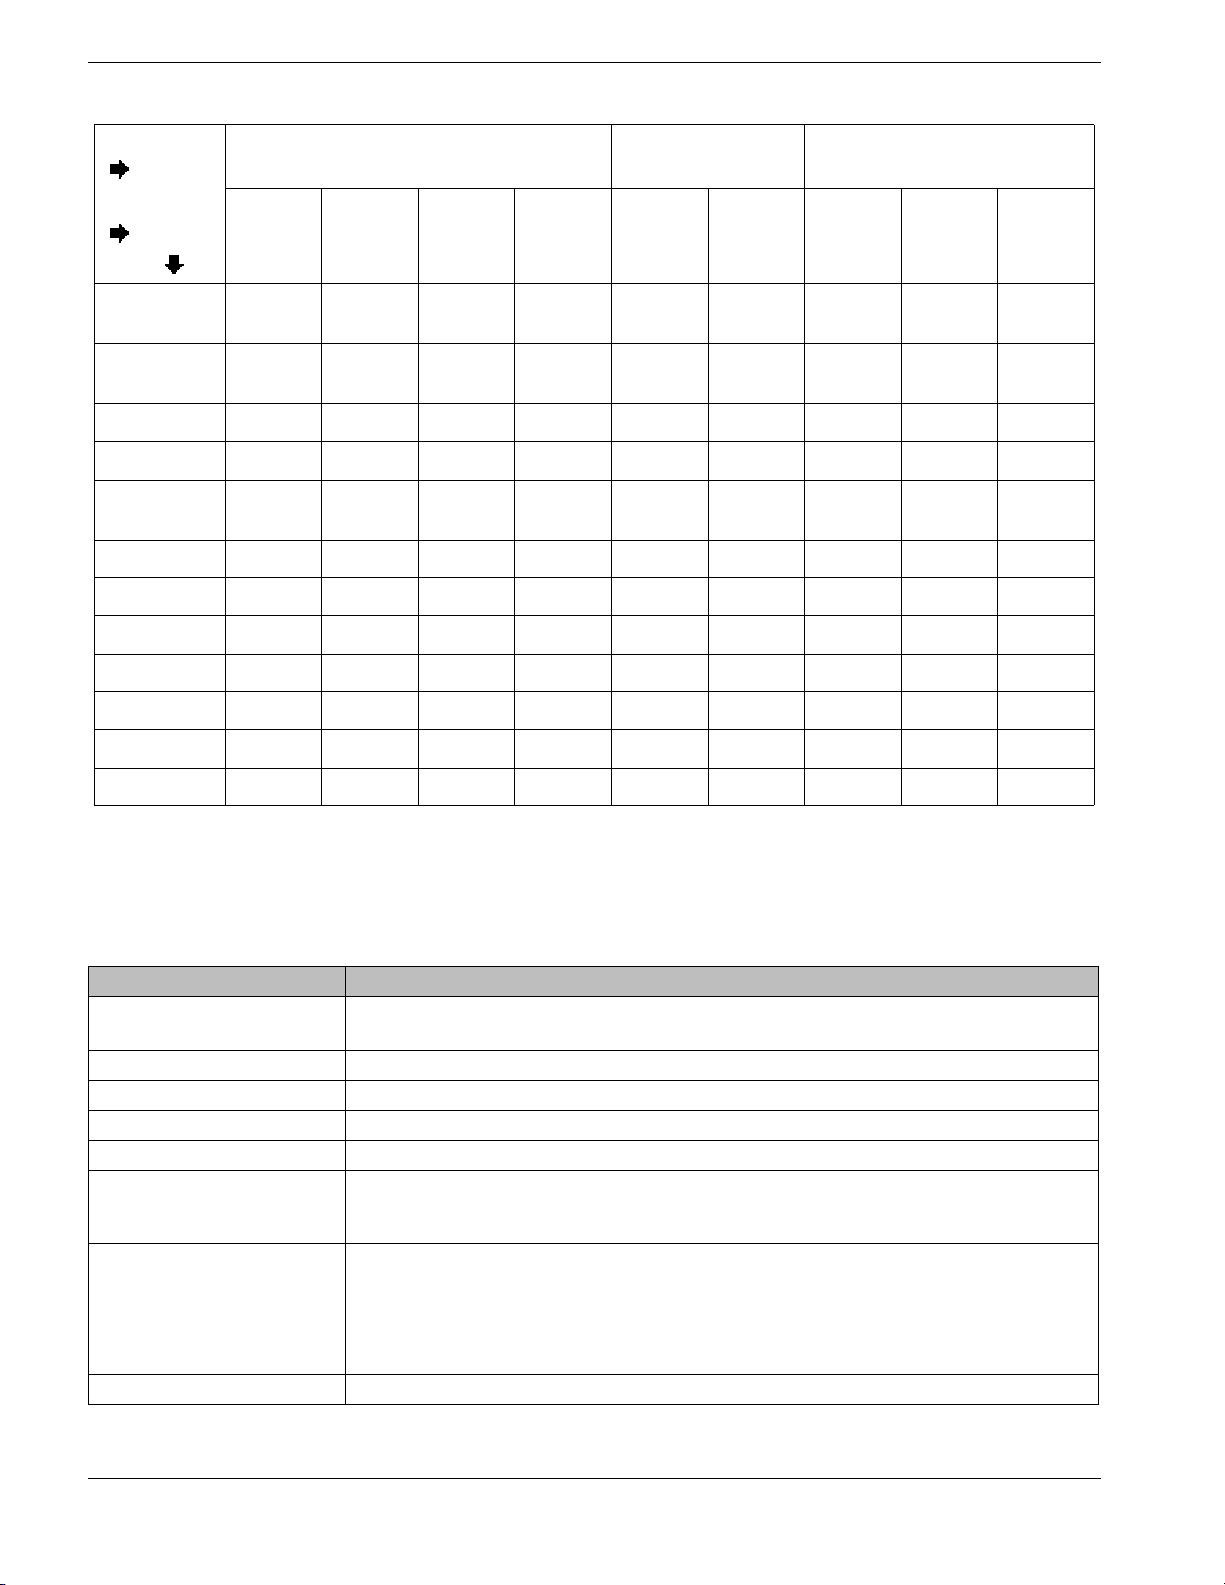
Options
Location
Paper
Staple Punch Fold
Corner LEF SEF Center LEF SEF Half Crease Z
Tabloid
SEF
Letter
SEF
Letter LEF •• •
Legal SEF •••*
Invoice
SEF
A3 SEF ••••
A4 SEF • •••*
A4 LEF •• •
A5 SEF
B4 SEF ••••
B5 SEF ••••
B5 LEF •• •
SEF=Short Edge Feed, LEF=Long Edge Feed, *=Unable to 3 hole punch on Short Edge
• •• ••••
• •••* •
Output Options
Output Options let you set and view job settings (i.e., paper source, duplexing, and copy separators). The table below describes the output options.
Field/Control Description
Feed Tray Select the paper source.
Pages Differ - will display when pages within a job are printed from different trays.
Destination Selects output tray for the printed job.
Reverse Order Causes the job to print and stack in the opposite order.
Media Type The type of media in the input tray (transparency, letterhead, bond, etc.)
Jog Copies Offsets each set of copies when the stacker is used with multiple copies.
Fast Print Enables the Cii to print at 6 pages per minute. Works only with Letter and A4 size paper
and may not be used with the manual feed tray, duplex jobs, or Pages Differ. Note: Some
engines connected to the PrintLink Cii will ignore Fast Print if Duplex is selected.
Manual Tray Increase
Transfer
Quality Print Mode Improves registration and image quality.
Modifies amount of toner applied for getting:
• uniform toner transfer on the second side of manual feed duplex jobs
• uniform toner transfer on single sided jobs of heavy stock
• increased toner density on single sided jobs with normal paper stock
Note: This option is available only for the Cii. The manual tray must be selected.
14
Page 25
Field/Control Description
Gloss Level Sets the job Gloss Level for the entire job.
•Low
• Standard
•High
Parse on Copy Keeps multi-page documents together when sent to multiple engines.
Print Inserts After selecting where to insert sheets within a job, Print Inserts can be used to toggle the
feature on or off. If the check box is active, the job has insert sheets that will print. If sheets
have been inserted but you don’t want to print them, uncheck this box ( insert sheets will
not print but you do not have to remove them from the job). If this check box is disabled,
there are no Insert Sheets in this job to print. Checking Insert Sheet After This Page on
ANY page will toggle on tthe job option Print Inserts.
Gather Collate / Group Prints all page 1s, then all page 2s, for off-line electronic/manual collation.
f you have selected the collate option from a print dialog and also select the
Note: I
group option, the group option will have no effect. Here’s why: When you select
collate with mulitple copies from the print driver, the driver assumes that the print-
er has no storage capability and will send each page in the expected output order.
For example, two copies of a five-page job will be treated as a single 10-page job
(1,2,3,4,5,1,2,3,4,5). Thus, the group option will have have no effect since the job
amounts to one copy in the PSM.
Duplex Prints double-sided pages.
For PrintStation 312: one side must be printed first, then turn the pages 180° and place
the pages back in the feed tray. Press “On Line” button on the front of the PrintStation to put
the engine back on line (Work and Turn). For the 040, Duplex is not available if Reverse
Order (Job Settings) is on.
Copy Separators Prints a slip sheet after each copy prints.
Empty Tray Switch Enables a print job to automatically switch to another paper feed tray when the selected
tray runs out of paper. Works only if the paper size is the same in both trays.
Auto Select
Special Handling Select this option to issue a special handling alert dialog to any user who attempts to print
Print Quality Chooses the appropriate print quality from the following choices:
SafePrint Determines whether a page or job can print on the media remaining in the DesignJet CP.
Staple Turns Stapling on or off. Stapling is not available on the HP 8000 for Legal size paper.
Sort Used with Gather Collate to group sets of copies.
Print Color Pages Only For color engines – enable to print only the color pages in a job.
Print Color Inserts For Black and White engines – enable to put an insert sheet in place of a color page.
Media Convert Job to Default Media Types – Selects a Media Type from the Media Catalog for
Tab Options • Print Tabs Only – Print only the tab pages within a job.
Allows the PrintStations to look in other paper trays when the selected paper tray contains the
wrong size paper. This item is a feed tray for the PrintLink 062.
the job. The alert dialog will prompt the user to perform any special handling the job
requires (e.g., must be printed on the corporate letterhead or on red 60# card stock or
watermarked “Confidential”; etc.) before processing.
• Best - the highest possible quality at the lowest speed (600X600 dpi)
• Normal - good combination of image quality and speed (300X300 dpi)
• Fast - job is printed at the highest speed with lower quality (300X300 dpi)
• SafePrint On Page - checks to see if the first page of the job can be printed
• SafePrint On Job - checks to see if the entire job can be printed
• No SafePrint - do not use SafePrint
Note: SafePrint will issue a warning if there is not enough media remaining to print the job or
page. The initial paper length must be set in order for SafePrint to function correctly.
each page in the job based on the paper size of each page.
• Print No Tabs – Print the job only with none of the tab pages.
15
Page 26
Field/Control Description
Print & Hold Job One copy of the job will print and then be put on Hold. Also known as Proofing.
Hold Jobs The job will be put in Hold status when it comes into the PSM and will not be printed.
Toner Saving Decreases toner coverage for producing a draft copy.
Character Mode Enable when printing jobs containing text to produce sharper characters.
Photo Mode Enable when printing jobs containing graphics to produce smoother gradients.
Page Range Settings
Set and view settings, such as Media Types, Feed Trays, Paper Sizes, and Subset Stapling
for pages and groups of pages within a job.
Field/Control Description
View Select • None – (default) None of the following views will be displayed. None will be selected each
time the Page Range Settings page is closed and re-opened.
• Media/Feed Tray View – Display and assign Media Types or Feed Trays to individual
pages or groups of pages within a job. If the Feed Tray is set to Auto Select on the Job
Settings tab, the Media Types drop down menu will be available. If set to a tray, the Media
Types drop down menu will not be available and instead the Feed Tray drop down menu
will be available.
• Paper Size View – Display Paper Sizes associated with individual pages or groups of
pages within a job.
• Subset Stapling View – Display and assign stapling to groups of pages within a job.
• Insert Color Page View – Display Insert Color Pages associated with individual pages or
groups of pages within a job.
Begin Page The first page of a Media/Feed Tray or Subset Stapling group.
End Page The last page of a Media/Feed Tray or Subset Stapling group.
Apply Commit changes to the job.
Subset Staple Enable/
Disable
Feed Tray Assign a Feed Tray to a page or group of pages within a job.
Media Type Assign a Media Type to a page or group of pages within a job.
List View Displays each page or group of pages within a job and the features associated with them.
Turn stapling on or off for a group of pages.
16
Margin Offsets
The settings on the Margin Offsets page affect the placement of data on each page for the
entire job.
Note: PrintLink 5050c – This engine will accept only positive margin offset values.
Note: PrintLink Cii – It is only possible to combine Fast Print and Margin Offsets if the offset
is the same for all pages of a job.
Page 27
Note: PrintLink 624m – Margin Offsets on this dialog are combined with the offsets on the
Engine Margin Offsets dialog, see “Engine Margin Offsets” on page 56.
Field/Control Description
Margin Offset Top and Left margin settings for Odd and Even pages.
Units – Pixels, Inches, or mm.
DesignJet:
Roll Media TE LE
•Smaller
•Normal
• Extended
Smaller only available for the DesignJet CP.
Sheet Media TE LE
•Smaller
•Normal
• Extended
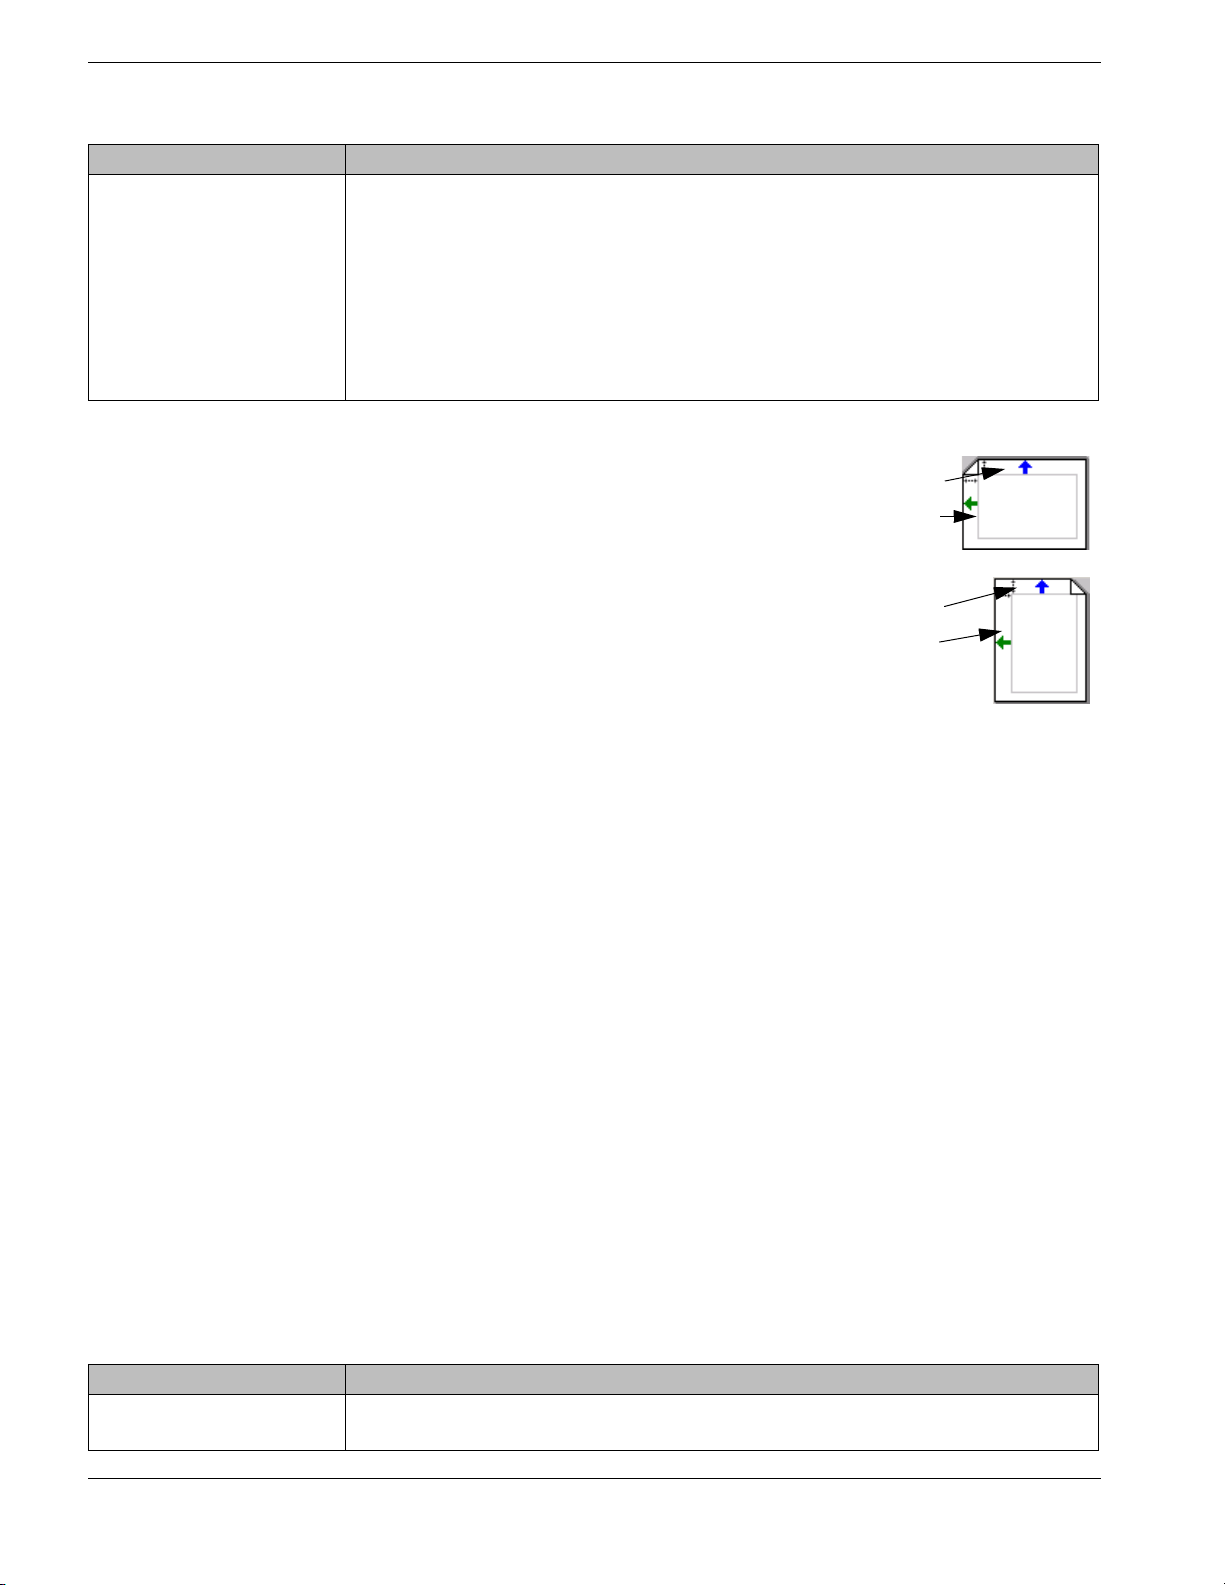
Example 1:
You need to print a job as portrait on an A4 page. The
paper in the drawer is LEF and the page was imaged
LEF
as LEF. On the Margin Offsets dialog the paper is displayed as portrait. The only valid margins will be -Top
and +Left. The top margin is actually the LEF right margin and the left margin is the LEF top margin.
SEF
To make the point more clear; if the paper size was
297mm x 210mm and 0.0mm was entered for the top
margin and 0.0mm for the left margin the actual margins would be:
TM = 0, BM = 210
LM = 0, RM = 297
Example 2:
The paper is 297x210. -25.4mm for the top margin and 12.7mm for the left margin was
entered, the actual margins would be:
TM = 12.7, BM = 222.7
-25.4 was entered which means 25.4 is added to the left margin. The actual margins (in pixels) would be:
LM = 25.4, RM = 322.1
If +25.4 for the top margin were entered, this would move the right +25.4, which is -25.4 for
the left, which is < 0. This is not permissible.
LEF=Long Edge Feed
• TM=Top Margin, BM=Bottom Margin, LM=Left Margin, RM=Right Margin
Top margin
Left margin
Top margin
Left margin
Brightness/Contrast
Brightness/Contrast sliders modify the lightness / darkness of an entire job or a selected
page or page range without having to re-RIP the job or start over from the application software.
Note: Image Adjust—The contrast slider adjusts contrast. For example, a contrast setting of .5 will reduce contrast by 50%. A setting of 1.5 will increase contrast by 50%. A contrast setting of 1 equates to NO CHANGE. The
brightness slider adjusts job brightness in 1% increments. For example, a brightness setting of +20 increases
brightness by 20%. –20 reduces brightness by 20%.
Note: 624m—The settings are not in percentage. See also “Engine Density” on page 55
Field/Control Description
Image Adjust • Brightness – Each increment is equivalent to a 1% change.
• Contrast – Each increment represents a 10% change.
17
Page 28
Field/Control Description
Black • Include – All color planes will be adjusted.
• Exclude – Only the Cyan, Magenta and Yellow planes will be adjusted.
• Only – Only the Black (K) plane will be adjusted.
Color Adjust
These sliders modify the color cast or hue of an entire job or a selected page or page range
without having to re-RIP the job or start over from the application software.
The table below describes the options.
Field/Control Description
Color Adjust Controls Adjusts amount of Cyan, Magenta, Yellow for the selected job.
ColorCurve Calibration Set Shows the currently selected ColorCurve Calibration Set. ColorCurve (.CLR) files may be
chosen from this list.
Edit Curve Graphically Display, Edit and Save ColorCurve Calibration Sets.
Image Adjust • Adjust the Sharpness, Brightness, and Contrast of the job.
•Black:
Include – All color planes will be adjusted.
Exclude – Only the Cyan, Magenta and Yellow planes will be adjusted.
Only – Only the Black (K) plane will be adjusted.
ColorCurves
ColorCurves complete the color adjustment flexibility of PostRipped files by allowing you to
create custom color reproduction curves and apply them to a job. Once created, a ColorCurve is available to all color jobs in the PSM and can be saved and loaded on other Micro-
Press installations.
Click Edit Curve button to open the ColorCurve dialog. If you selected a ColorCurve in the
ColorCurve Calibration Set box, the curve will be displayed for editing. Otherwise, select
FileÎOpen… to select a curve.
ColorCurve allows changes to be made to 4 curves (Cyan, Magenta, Yellow, Black). The bottom axis represents the original job color density (input) from 0 to 100%. The vertical axis
represents the printed job color density (output) from 0 to 100%. When a curve or a point on
a curve has higher output values than input values (the curve is above the 1:1 reference
line), the printed job will increase in density according to the percentage(s). When the curve
is below the 1:1 line, the printed job density will decrease. Change the curve shape by selecting and dragging a curve point with the mouse.
Note: ColorCurves provide additional color adjustment control. Color adjustment refers to the practice of altering
color according to customer preference. Use color calibration (Gammatic) and color matching (ICC Profile Processor) prior to printing to ensure the best possible rendering before adjustments are made
Field/Control Description
Color selection Chooses the color curve to display.
Input, Output, Ratio Displays the input percentage, output percentage, and the percent difference respectively
between the original and the printed job at any given point.
Undo Clears last change made to the curves.
Status bar Shows the curve being displayed/edited.
18
Page 29

Default ColorCurves and Definitions
ColorCurve Definition
Linear This selection does not directly change output, but rather serves as a starting point from
which the user can create a custom curve.
Light-10%
Light-15%
Light-25%
Light-35%
Dark+10%
Dark+15%
Dark+25%
Dark+35%
HighContrast-8%+8%
HighContrast-15%+15%
LowContrast+8%-8%
LowContrast+15%-15%
HighKey0+8%
HighKey0%+14%
HighKey-4%0%
HighKey-4%+8%
HighKey-4%+14%
LowKey+8%0%
From the curve’s 50% point, the dot is decreased (-) by the % shown. 0% and 100% are
unchanged.
From the curve’s 50% point, the dot is increased (+) by the % shown. 0% and 100% are
unchanged.
Dot is decreased (-) or increased (+) by the amounts shown at the 25% and 75% curve
locations respectively.
The 0%, 50% and 100% curve locations remain unchanged.
Job Parsing
This dialog shows how the pages of a job are distributed to the PrintStations within the Virtual
Engine. MicroPress uses the Electronic Collator to efficiently divide the print job into Job
Stacks (a set of instructions for pages designated for a specific PrintStation to print). Use this
dialog to interpret how the job was divided across the available PrintStations. The Part Info
field displays where the PrintStation will pause when printing duplex jobs and whether even
or odd pages will be printed, where separator sheets will be inserted, number of copies, and
errors. If Job Parsing has not been licensed, the option will not be available and only one
engine will be available. See “Output Options” on page 14.
1 Click on a Printer to display the parsing information for that PrintStation. The Part Info
field displays the job instructions.
2 Click OK. Note:
another PrintStation. See “System Errors” on page 37.
In the event of a printing error, the Job Stack could be automatically “moved” to
Chapters
This dialog is used to combine groups of contiguous pages within a job. Once the groups of
pages (Chapters) are added, you can apply options to them.
To s et up Chapters for a job:
1 Double-click on the job in the PSM Virtual Engine window.
2 Select the Chapters tab.
3 Click Add to create a Chapter.
4 Change the suggested Chapter Name if necessary. Subsequent chapter names will
be "Chapter" incremented by one.
5 Select the page range to include in the Chapter. One chapter may not contain a page
that is also in another chapter. Click OK.
6 Repeat Steps 3-5 as needed.
Notes: For more Chapters features, see “Page Settings” on page 20 and “Numbering…” on page 31.
19
Page 30
If you select multiple chapters then change a setting, the name of the feature to display in green. This is a temporary indicator showing that changes will be made only to this setting in all the selected chapters.
Field/Control Description
Print Marked Chapters Only Prints marked (consecutive) only.
Insert Sheet After Last Page Inserts a blank page after the last page in the selected chapter.
Note: The insert sheet is not applied to the chapter but is a separate page added after the
chapter. Thus, deleting a chapter with an insert page will not delete the insert sheet. The
insert sheet will remain unless you manually delete it.
Simplex Page Lock Prevents a page from having anything printed on its back and from being printed on the
back of another page. Applies the feature to all pages in the chapter. See “Page Settings”
on page 20.
Feed Tray Selects the paper tray from which the paper will be fed.
Destination Selects the output tray for the job.
Margin Offset Adjusts the Top and Left margins for each page .
Add Includes a page or group of contiguous pages as a chapter.
Delete Removes a chapter.
Page Settings
Use this dialog to view or apply print options to individual pages of the selected job.
Note: Double-click on a job, then click on the Page Settings tab to display the Page Settings.
Field/Control Description
Page Number Chooses the page number to apply print options to.
Insert Sheet After This Page Causes an additional blank page to be printed after the selected page. The blank page will
be pulled from the same location as Job and Copy Separators.
Feed Tray Selects the paper tray from which the paper will be fed.
Destination Selects the output tray for the printed job.
Gloss Set the job Gloss Level for the selected page (Low, Standard, High). Note: You can set the
Gloss Level (312 only) for all pages in a job on the Job Settings tab.
Simplex Page Lock Prevents a page from having anything printed on its back and from being printed on the
back of another page.
End Staple Set Allows groups of pages within a multi-page job to be stapled for output devices supporting
the feature.
Note: It is not recommended to set End Staple Set for a range of less than 2 physical pages;
End Staple Set will be ignored if Stapling is set to “None” on the Finishing tab; only one type of
stapling per job is allowed. Both “Top Corner” and “Side” cannot be used within the same job,
for example.
Toner Calculate Click Calculate in the Toner section of the Job Settings or Page Settings tab to calculate the
toner coverage on all pages of the selected job.
Note: The Calculate Toner option on the Job Settings dialog box
displays the toner coverage for individual pages within the job.
When a number (#%) displays, the toner coverage has been calculated. When “0%” displays, the toner coverage is less than 0.5%.
When “-%” displays, the toner coverage has not been calculated.
Margin Offset Adjusts the Top and Left margins for each page.
Lock Page Prevents global changes to the document’s margin settings from affecting the selected
page.
20
Page 31

Annotations
Use this dialog to enter comments about individual pages in a job. You can search for a word
or phrase in any annotation using the Find feature in the Tools menu. Use the Page Number
control to view each page of the job.
Finishing Setup, Settings and Summary
Please refer to the section “Finishing Configuration” on page 10 for information on these dia-
logs.
Preview…
Use this feature to preview a page of the job.
1 Select a job in the Job List window.
2 Select J
obÎPreview. The Preview dialog is accessible
from various dialogs within PSM.
Field/Control Description
Feed Direction Indicates the direction the paper will feed into the PrintStation.
Navigation buttons Goes to the beginning, end, previous or next page.
Page Displays the page currently being viewed. Enter a page number to go to that page.
Orientation Arrows
More Detail
B&W PrintStations
Use the controls to rotate the preview image to the desired orientation.
Clarifies the preview image.
Edit
Opens the TRueEdit application for manipulating PSM jobs and adding tabs. Refer to the
TRueEdit manual for more information.
/Unlock...
Lock
Use the Lock/Unlock feature to add password protection to PSM jobs.
Note: A password protected job is not accessible from any MicroPress application. If an attempt
is made to access a password protected job, a dialog will be displayed informing the user that
the job is locked.
Locking a job
1 Right-click on the job to lock, then select Lock
/Unlock...
2 Enter the password for the job in the Enter New Password box.
3 Enter the password again in the Confirm New Password box.
4 Click OK to apply the password, click OK again to close the notifi-
cation dialog. A small key will be appear to the left of the job
21
Page 32

name.
Unlocking a job
1 Right-click on the job to unlock, then select Lock
/Unlock...
2 Enter the password assigned to the job in the dialog box that is displayed.
3 Click OK to unlock the job.
H
old/Suspend
Use the Hold/Suspend option to set a selected job (not currently printing) to a Hold state. The
job will remain in a Hold state until you release it manually.
To place a job on Hold:
1 Select the VE that lists the job to be put on hold, then select the job from the Job List
Window.
2 Select JobÎÎÎÎHold/Suspend from the menu.
3 The status column displays H for the selected job, and the job is held for printing at a
later time.
To release the suspended job, select the job, then select Print.
P
rint
Use the Print Job option to take a selected job or jobs from the Job List Window from a Hold,
printed, or error state, and send it to the PrintStation.
To place a job in a printing state:
1 Select the VE that lists the job to print, then select the job from the Job List Window.
2 Select J
obÎPrint from the menu.
3 The status column of the Job List Window for the selected job displays >> if there is no
other job already printing. If another job is printing, the status column of the job the
user selected will display W; the job will print after all jobs ahead of it have printed.
M
ove...
Use the Move Job option to move a selected job from one VE to another. Moving a job will
change the printing parameters for the job.
not
To move a job to another Virtual Engine:
1 Select the VE that lists the job to move, then select the job from the Job List Window.
2 Select J
obÎMove from the menu.
3 Select a Virtual Engine.
4 Click OK. The selected job moves to the chosen VE destination.
Note: You cannot use this option to move a grayscale job from the 5050c to either the 060c or the 085c because
the resolutions differ (5050c jobs are ripped at 400 dpi, 8 bits per pixel, whereas 060c and 085c jobs are ripped at
600 dpi, 1 bit per pixel).
Note: Dragging a job into a LaserJet 5Si VE halts printing. When the file finishes copying, the job resumes printing.
Delete
To remove a job from the PSM:
1 Select the VE that lists the job to delete, then select the job from the Job List Window.
2 Select J
obÎDelete from the Job Menu.
3 The job will be removed from the PrintStation Manager Job List window.
22
Page 33

Abort
Use the Abort Job option to cancel a currently printing job.
To cancel a print job:
1 Select the VE that is currently printing the job to abort.
2 Select J
obÎAbort.
3 The job currently printing is canceled and displays an Error (E) status.
Warning: The printer may output one or two pages after the job is aborted due to PrintStation limitations. It is best
to wait until the PrintStation has stopped before proceeding.
Merge…
Use the Merge Job option to combine existing documents, in whole or in part, into a new job.
To merge jobs:
1 Select the VE that has the files listed to be merged.
2 Select J
obÎMerge from
the menu.
3 Select a job from the Cur-
rent Jobs list. You can
select multiple jobs.
4 Type the Page Range for
the selected job to be
added.
5 Click Add button. The
New Document Order list
displays the selected document.
Note: Double-click a job in the New Document Order window to display the Edit Page Range dialog.
6 Repeat steps 4—6 until all the documents to be merged are selected.
7 Select a job in the New Document Order list. You can arrange jobs in the New Docu-
ment Order list to place them in the order in which they will be printed.
8 Click Move Up, Move Down, or Remove.
9 Type the name of the merged document in the New Job Name field.
10 If the Merge As Chapters box is checked,
each job added will be treated as an individual
chapter. When you use this feature, another
dialog (see graphic) will open when you click
OK. You can edit the chapter names here. If a
chapter has an odd number of pages, a blank
page will be printed at the end, and the job will
be printed duplex if Insert blank page after
odd paged chapters for duplexing is
checked.
11 Click OK. The merged document displays in
the Job List Window in a Waiting state unless
the Hold Job box is checked.
23
Page 34

Archive...
Archiving allows you to compress a job to a single stream file that can be saved on CD,
transmitted over the Internet, or simply moved to another subdirectory. Files will be given a
.msm extension if archived using the MicroPress format or converted to the Adobe PDF for-
mat (default). When a job is archived using PDF, the filename includes .arc (jobname.024.arc.pdf).
To archive a job:
1 Select the VE that has the job listed to archive, then select the job.
2 Select J
obÎArchive from the menu.
3 The location for Archive File window opens.
4 Choose a location to store the archived file. Click OK. The dialog closes and the PSM’s
Status Bar displays: . The job status will also display “L,” indicating that the file is
locked until the compression is complete. When the compression is complete, the job
will be in Hold status.
Appl
y Form…
Use Apply Form to apply a form to a job that has
already been RIP’ed.
To apply a form:
1 Select a job in the Virtual Engine Job List
Window.
2 Right-click and select Apply Form.
3 Select the job containing the data to merge
with the Original Job from the Form Job
Name drop down list. All pages in the Form
Job will be applied to the Original Job. Check
the Custom Arrange box to manually add
pages from the Form job to the original job.
When using Custom Arrange, drag pages
from the Form Job and drop them over the pages of the Original Job. Only one page of
the Form Job can be applied to a single page of the Original Job. However, you can
apply a page of Form Job to more than one Original Job page.
4 In the New Job Name box, enter a name for the new job.
5 Select OK to merge the jobs.
6 The form will be applied to the job selected in the Job List Window unless Create New
Job is selected.
Field/Control Description
Form Jobs Form Job Name Job containing the information to be added to the Original Job.
Pages Number of pages in the Form Job.
Form Job Pages Number of pages in the Form Job.
Merged Job Original Job Name Job selected in the PSM VE window.
New Job Name Name of the new job created by merging the Form Job and Original jobs.
Original Job Pages Number of pages in the Original job.
Checkboxes Hold Sets the job in Hold status in the PSM after the two jobs are merged.
Create New Job Combines the jobs into a new job and preserve the Original Job unchanged.
Repeat Applies the Form Job to the Original Job as many times as possible.
Custom Arrange Manually adds pages from the Form Job.
24
Page 35

Field/Control Description
Remove Applied Page Removes a page from the Original Job.
Mail Merge…
Use the Mail Merge feature for adding variable data to a job.
1 Right-click on the job that will have the variable data merged with it. Select Mail Merge
from the menu.
When performing mail merge with a form with an odd number of pages, do this prior to the mail
merge:
1) go to job info on the FORM (or source job)
2) Select Page Settings
3) Scroll to (or type in) the last page of the job
4) Toggle Simplex page lock ON.
5) Close the info window and proceed with the merge as usual. Doing this will allow printing of the
document as simplex or duplex, with no need to add (or remove) blank pages on the end of each
unit of variable data.
2 The name of the job selected in Step 1 appears in the Original Job Name section of
the Mail Merge dialog.
3 Select the job containing the variable data that will be merged with the Original Job
from the Variable Data Job Name drop-down list. Check the Custom Arrange box to
manually add pages from the Variable Data job to the original job. When using Custom
Arrange, drag pages from the variable data job and drop them over the pages of the
original job. You can apply only one page of variable data to a single page of the Original Job. However, a page of variable data can be applied to more than one Original Job
page.
4 In the New Job Name box, enter a name for the new job.
5 Select OK to merge the jobs. Note: If a variable page has been applied to an original
page and needs to be removed, right-click on the original page and remove the variable data page.
Variable Data
Job
Merged
Document
Field/Control Description
Variable Data Job
Name
Pages per unit of
variable data
Variable Data Job
Pages
Original Job Name Job selected in the PSM VE window.
New Job Name Name of the new job created by merging the Variable Data and Mail
Pages Number of pages in the merged job.
Original Job Pages Pages in the Original job.
Hold Sets the job in Hold status in the PSM after the two jobs are merged.
Job containing the information to add to the Original Job.
Number of pages in the Variable Data job.
Pages in the Variable Data job.
Document jobs.
25
Page 36

Field/Control Description
Use Page References When you create a mail-merged document with this option, the resulting file is
smaller. The data for unchanged pages does not get copied into the new
document, it is linked, or referenced. This means that while the resulting file is
smaller, you cannot perform other operations (i.e., Page numbering, Apply
Forms, and Mail merge) to the file. If Page Referencing is turned off, the data
for unchanged pages is copied, resulting in a larger file. However, this file can
be mail-merged, numbered, etc.
Custom Arrange Manually adds pages from the Variable Data job.
Remove Applied Page Removes a page added to the Original Job.
26
Page 37

Center Pages…
Use this feature to center the image on all pages of a job.
To use Center Pages:
1 Right-click on the job and select Center Pages from
the menu.
2 Make any changes to the information displayed.
3 Click OK.
Note: When centering manually, remember that "top" is the lead edge of
the paper as it feeds through the PrintStation.
The Preview button displays a preview of the resulting job.
The example following shows the effect of centering a Letter
job to Legal. The hashed areas show what portion of the
original image will be cropped when centered to the selected
paper size.
Image Editing...
Image Editing is used to modify pages of a PSM job.
To use Image Editing:
1 Right-click on a job and
select Image Editing...
from the menu.
2 Click the “+” to display a list
of the pages within the job.
Note: Clicking the button by the job name
displays a menu containing commands
that can be applied to the job globally.
These modifications cannot be undone.
3 Double-click a page in the
job to display it in the preview window.
4 Apply the desired effects to the job or page. See Apply Changes in the table following
for methods to apply the changes.
Field/Control Description
Job list window Displays the pages in the job.
Preview window Displays the selected page in the job.
Edit Cut Removes the selection, placing it in the Windows clipboard.
Copy Places the selection in the Windows clipboard, leaving the original intact.
27
Page 38

Field/Control Description
Paste Places the contents of the Windows clipboard into the selected location.
Apply Changes Modifications made to the image in the preview window are displayed
instantly. To apply the changes to the job:
• Click Apply Changes
• Click Apply Region to All Pages
• Double-click on another page in the job and click OK on the dialog that dis-
plays.
•Click OK to close the Image Editing dialog
Apply Region to All
Pages
Tool None Turns off the currently selected tool to return the cursor to its normal state.
Zoom Enlarges the area under the cursor. Right-click to reduce.
Zoom Rectangle Use to zoom in on a specific area.
Pan Changes cursor to a hand and lets you move the image around in the preview
Selection Rectangle Draws a box around an area to be manipulated by the Image tools.
Select All Selects the entire image in the preview window.
Cancel Selection Turns off the selection marked with the Selection Rectangle tool.
Image Deskew Landscape/
Portrait
Despeckle Removes specks from the image.
Clear Deletes selected area or the entire image if an area is not selected
Invert Makes a negative image of the selection.
Rotate Right Rotates the image clockwise 90 degrees.
Rotate Left Rotates the image counter-clockwise 90 degrees.
Flip Reverses the image or selection vertically (top to bottom).
Reverse Reverses the image or selection horizontally (side to side).
Resize Duplicates or deletes pixels as necessary to achieve the desired width and
You can paste an item onto a page in the job from the Windows clipboard.
While the marquee is still visible around the pasted item, click Apply Region
to All Pages.
widow.
Straightens the image if it was, e.g., scanned at a slight angle. Choose either
Landscape or Portrait depending on the orientation of the job.
height. Check the Keep Aspect box to maintain the correct aspect ratio.
28
OCR...
This feature lets you read in and edit text
from PSM jobs.
1 Right-click on a job and select
OCR... from the menu.
2 Click the “+” to display a list of the
pages within the job.
3 Select where the OCR text should
go (File or Annotations).
4 Choose the appropriate Options.
5 Click Recognize.
6 Edit the OCR text or choose file format to save text as, depending on destination and
options selected.
Page 39

If Edit OCR text before save is checked, the text will be displayed and can be edited.
Field/Control Description
Job List window Displays jobs and their pages.
Send OCR Text To • Annotations – sends text on the pages in the job to annotations. View the text on the Job
Info Annotations page.
• File – save the text to more than 40 common file formats, including MS Word, MS Excel,
WordPerfect, Rich Text Format, and ASCII Text.
Options • Language – select the language used in the job
• Edit OCR text before save – selecting this option displays the text in the edit dialog prior to
sending it to Annotations or to a file (this feature is for individual pages not complete jobs).
Close Exits the OCR dialog
Recognize Reads the text into the OCR engine for export to either annotations or a file.
Help Loads the PrintStation Manager Help.
Preview Views the selected job page.
Impo
sition
This feature enables you to position multiple pages of a job onto a larger single sheet in the
correct orientation for binding. Four page ranges are supported: two A5 pages positioned on
a single A4 page or two 5.5x8.5 pages positioned on a single 8.5x11 and two A4 pages positioned on a single A3 page or two 8.5x11 pages positioned on a single 11x17 page. The
examples below, for a 4 page job, reflect the latter.
Example Description
Reader’s Spread – Pages 1 & 2 are on the front surface of the paper and pages 3 & 4 are
on the back surface.
Printer’s Spread – The 4 pages result in a piece of paper that can be folded to make a book.
Double Speed – When the job is finished, cut the pages in half and place the left stack on
top of the right stack to make a complete job.
Double Mint – When this job finishes, cut the sheets in half and each stack is a complete
job.
Multiple Signatures – This Imposition style is formatted the same as Printer's Spread. It
differs in the way it functions by allowing the pages to be broken into sections, called
signatures. This is done by entering the number of pages to include in each signature in the
Pages per Signature dialog. These signatures can then be bound together, side by side,
to form a book.
29
Page 40

Note: Imposition is not available for the PrintStation 312.
To use Imposition:
1 Select the job to make into a booklet. The page sizes for all pages within the job must
be exactly the same to impose. This is important to check if the job contains pages
from Scaled, scanned, or RIP’ed jobs. Using Center Pages on the job prior to Imposition corrects any problems with page sizes.
2 Select J
obÎImposition from the menu.
3 Select the type of Imposition to apply to the job.
4 A status bar appears until the task is complete.
5 A new job displays in the Virtual Engine Job List with the same job name. The type of
Imposition will display as the User Name.
Note: Certain Finishing Options do not produce desirable results when combined with some Imposition choices.
Insert/Delete Pages…
This feature is used to add or delete pages from a job. Additionally, the pages are inserted or
deleted from the target job instead of creating a new job.
Notes: When applying the following options, PSM creates a new job:
• Imposition
• Merge
• Scale & Rotate
• Tumble
• Center Pages
•Mail Merge
• Insert/Delete Pages, Re-Order Pages, and Numbering modify existing jobs.
You can select multiple pages by holding the Shift key and selecting adjacent pages or by hold-
ing the CTRL key to select random pages.
30
To Insert Pages in a job:
1 Select the VE containing the job
to manipulate.
2 Right-click on the job to modify
and select In
sert/Delete Pages
from the menu.
3 Select a job from the Insert
Pages From Job drop-down
list.
4 Choose the pages to be
inserted from the Page list win-
dow or Select All if all the
pages are to be added.
5 In the right pane, select the page where the new pages should be inserted.
6 Choose to insert Before or After the page selected in the previous step.
7 Click Insert button to add the page(s) to the job.
–OR–
Click the Replace button to replace the selected page.
Page 41

8 Click Apply to make the changes and update the display. Click OK.
To delete pages from a job:
1 Right-click the job to delete pages from and select In
sert/Delete Pages from the
menu.
2 In the right pane of the Insert/Delete Pages dialog, select the page to delete.
3 Click the Delete Page button.
4 Click Apply to make the changes. Click OK.
To add blank pages to a job:
1 Select the VE containing the job to manipulate.
2 Right-click the job to add blank pages to, then select In
sert/Delete Pages from the
menu.
3 In the right pane of the Insert/Delete Pages dialog, select the page where the blank
page should be added.
4 Choose to insert Before or After the page selected in the previous step.
5 Click Insert button.
6 Click Apply to make the changes. Click OK.
Notes: Use the Undo Delete, Undo Insert, or Undo Replace buttons to undo changes made before clicking OK
or Apply. Select the page to undo and click the appropriate button. Select a page from either pane of the dialog
and click the Preview button to preview the page. See “Preview…” on page 21.
Numbering…
Use this feature to insert page numbers in a job.
1 Right-click on the job and select Numbering from the
menu.
2 Make any changes.
3 Click OK to apply the page numbers.
Note: The default setting of X=1, Y=1 puts the page number in the top left
corner of the page.
Field/Control Description
Starting Number Number to start page numbering. Warning: Entering a starting number greater than
1,000,000,000 may produce unexpected page numbering results.
X Position Move the page number horizontally on the page with this coordinate.
Y Position Move the page number vertically on the page with this coordinate.
Units Use either mm or inches to position the numbers on the page.
Font Currently selected font for numbering.
Number the First Page Starts the page numbering on the first page of the job.
31
Page 42

Field/Control Description
Landscape Job Formats job for landscape orientation (automatically checked if Imposition is applied to a
numbered job).
Create New Job Creates a new job with numbered pages (original job is unchanged).
Outside Edge Enabling this feature let you place page numbers correctly for duplex printing and binding.
Numbers can be positioned on the edge farthest away from the binding. For binding the left
edge of a document, e.g., the numbers should be on the left edge of even pages and the
right edge for odd pages. Pick the x and y position for the odd pages and the even page
numbering will be automatically mirrored.
Advanced/Basic Clicking Advanced adds additional functionality to the dialog.
• Place multiple numbers on each page:
• Number – The number to use, as determined by the Starting Number. N=the Starting Number, N+1=The Starting Number plus 1, etc.
• X Position – Move the page number horizontally on the page with this coordinate.
Y Position – Move the page number vertically on the page with this coordinate.
• Add – Add multiple numbers to a page and adjust the X and Y positions.
• Delete – Remove Page Number information from the selected job.
• Cut and Stack – Causes each number on a page to increment by 1 for each subsequent
page.
• Number Chapters – Adds, or prefixes, chapter numbers to page numbers (1-1, 1-2, 2-1,
etc.) for selected chapters. The first page of each chapter starts numbering at 1.
• Prefix – Edits the Prefix; prefix can be, e.g., a number (1 -, 2 -), a word (Appendix, Chapter), or a combination (Introduction 1 -, Preface 1.)
• Clear Prefixes – Removes prefixes from the page numbering.
• Default Prefixes – Sets prefixes back to 1 - (page number), 2 - (page number), etc.
Change Font Select font for the page number.
Re-order Pages…
Use this feature to rearrange printing order
of pages within PSM jobs.
1 Select a job in the Job List window.
2 Select JobÎReorder Pages from
the menu.
Field/Control Description
Pages Pages comprising currently selected job.
Auto Re-Order • Duplex Scan Order – Intended for use with MicroScan when a duplex document is
scanned as simplex.
• Reverse – Puts job’s pages in opposite order (4, 3, 2, 1).
• Reset – Restores page order to original configuration.
Preview Displays currently selected page.
32
Page 43

Scale & Rotate…
Use this feature to adjust the size of pages in a PSM job.
To Scale an image:
1 Select a job in the Job List window.
2 Open the J
Field/Control Description
Original Information about document’s current appearance.
Scale by Percentage amount to enlarge or reduce the image depending on paper size. Note: When
New Page Size Paper size scaled job will be printed on; ( image will not be centered if it is smaller than the
Rotation Changes orientation of the image on paper.
Center Centers image on page horizontally and vertically.
Low Priority Causes PSM to designate less of the system’s resources to manipulating the image.
obÎScale & Rotate from the menu.
• Paper – size of the paper
• Image – size of image on the paper.
the paper size after scaling is not an available paper type, turn Auto Select off, and select
the feed tray with the appropriate paper size (062 only).
paper size after scaling).
•Auto Rotate
• No Rotation.
• Rotate 90
• Rotate -90
Note: In accordance with PostScript convention, assume the direction of rotation is
counterclockwise. Thus, selecting Rotate 90 will rotate the image 90 degrees left
(counterclockwise) whereas selecting Rotate -90 will rotate the image 90 degrees right
(clockwise).
Note: (062 only) To rotate a Letter, A4, A5, or B5 job 90 degrees, select LetterR, A4R, A5R,
or B5R from the New Page Size menu.
3 Make the appropriate selections and click Scale.
4 The User Name in the Job List window will change to Scaled. Note: Scaling is not
available for QuadLevel jobs or jobs where pages differ.
Rotate Pages
Use this feature to change the orientation of an entire job.
1 Right-click on a job in a VE window.
2 Select Rotate Pages, then either 90 or 270 Degrees.
Send To
Send To provides a way to FTP (File Transfer Protocol) a PSM job to another location using
a network or Internet connection (requires access to an FTP Server). Consult your Network
Administrator for further information.
To FTP a file:
1 Right-click on a job in a VE window.
2 Select Send ToÎFTP.
33
Page 44

3 Enter accurate information for each field. All fields are required.
Field/Control Description
Server Name Name of the FTP server.
Username Login name for server.
Password Password to access server.
Remote Job Name Name of currently selected file. You can specify a different name. To place the file in a
specific folder on the FTP Server, give the folder name (case sensitive) and the filename:
\folder name\filename
Save Causes the Server Name and Username to be remembered (but password will not be
saved).
4 Click OK to begin the file transfer.
Settings
This menu item displays options available for the currently selected VE type.
1 Right-click on a job in a VE window.
2 Select Settings, then the necessary option, if available.
Note: Menu items not available for the selected VE will be grayed out. A checkmark beside an option indicates
that it is selected. If multiple jobs are selected, the check will be red if the option is not selected in all jobs. Clicking
on an option with a red check will cause PSM to attempt to apply the option to all of the selected jobs. If an option
can't be set for a job, a dialog displays indicating the job name and the reason the option cannot be set.Clicking
on an option with a black check will cause PSM to turn the option off in all of the jobs. A dialog box will be displayed if Print Inserts is selected and there are none.
The table lists cases when options are not applicable to jobs.
This option Is not available when
Duplex • job is only one page
• odd or even pages only
• job is printing from the manual tray on the Cii
Note: (062, 085c, 5050c) Selecting Duplex sets ouput to last binding method (e.g., short
edge or long edge).
Copy Separators • job is only one page
• only one copy of the job is being printed
Fast Print • job is not being printed on the Cii
• job is duplex
• paper size is not A4 or Letter
• job is printing from the manual tray
• job is being pulled from different trays
Manual Tray Increase
Transfer
T
umble
• job is not being printed on the Cii
• job is not printing from the manual tray
Tumble rotates selected pages 180 degrees. Choices are:
– Odd – Tumbles odd-numbered pages.
– Even – Tumbles even-numbered pages.
– All – Tumbles all pages.
– Pages – Tumbles selected pages.
1 Select a job in the Job List window.
2 Select J
obÎTumble from the menu
34
Page 45

3 Select Odd, Even, All, or Pages.
If Pages is selected, the following dialog will be displayed with a
check box for each page in the job. Use either the check boxes to
select pages or the edit box to enter pages (or page range).
4 The User Name in the Job List window will change to Tumbled.
The table below gives examples of Tumble selected for Even
pages.
Page Size Desired Output Tumble Settings
A4 and Letter
Portrait
No Tumble
A4 and Letter
Portrait
Tumbled
A4 and Letter
Landscape
No Tumble
A4 and Letter
Landscape
Tumbled
Others
Portrait
No Tumble
Others
Portrait
Tumbled
Others
Landscape
No Tumble
Others
Landscape
Tumbled
Job Ticket
Job Ticketing consists of three MicroPress applications: e-Ticket, TicketDeveloper, and
TicketDirector. From PSM, a print job can be assigned to a job ticket. You can also view, edit,
print, or delete job tickets. Note: For detailed information on the use of e-Ticket, TicketDevel-
oper, and TicketDirector, please see the documentation for the individual applications.
Assign Job Ticket
1 Right-click on a job and select Job TicketÎAssign Job Ticket from the menu. You
can also select the job and type Alt + A to display the Assign Job Ticket dialog.
2 Select a Job Ticket from the list.
35
Page 46

3 Click Assign to assign the job ticket to the PSM job. Note: The Job Ticket name con-
sists of the tracking number of the ticket and an 8-digit time stamp. The filename extension PJT indicates a PSM job ticket.
The following table describes options on the Assign Job Ticket dialog.
Field/Control Description
Job Name The name of the currently selected job
Job Tickets Available job tickets
Assign Assign the selected ticket to the currently selected job
AutoSet Job Attributes Automatically assign job attributes contained in the ticket to the selected job. The default
setting is ON.
View Job Ticket Displays the job ticket in a preview only browser window (see the graphic in the section
“Edit/View Job Ticket” following
Delete Job Ticket Removes the selected ticket from the Job Ticket window
Edit/View Job Ticket
1 Right-click on a job and select Job TicketÎEdit/
View Job Ticket from the menu. A browser win-
dow will display the ticket.
Make any needed changes to the ticket. To clear all
fields, click Reset button.
2 Click Save button to exit the preview and save any
changes made or click the x in the upper-right corner of the window. If the x is clicked, a dialog will
be displayed to confirm saving changes. Click
Cancel to exit preview without saving any
changes.
View
Toolbar
Delete Job Ticket
1 Right-click on a job and select Job TicketÎDelete Job Ticket from the menu. PSM
asks you to confirm the deletion.
2 Click Yes to delete ticket.
Print Job Ticket
The PSM can print the job ticket attached to a job.
1 Right-click on a job and select Job TicketÎPrint Job Ticket from the menu to open
the Print dialog.
2 Choose the printer for printing ticket.
3 Select any printer options and click OK to print.
The View menu options let you adjust the PSM display to a custom view. You can hide the
Toolbar or Status Bar, sort the job list (See “Job List Window” on page 3), and gain access to
System Events and Accounting information.
The Toolbar buttons allow quick access to some of the PSM’s most commonly used functions.
1 Select View from the PSM’s main menu.
2 Check Toolbar to open the toolbar; uncheck to close the toolbar.
36
Page 47

Status Bar
The Status Bar displays such information as available memory, available hard disk space,
etc.
1 Select View from the PSM’s main menu.
2 Check Status Bar to open the status bar; uncheck to close the status bar.
System E
vents
The PSM tracks system events. Select ViewÎSystem Events from the menu to access
results of errors and other events.
Note: When an error occurs, a red exclamation point appears on the Task Bar. Click the exclamation point to open the System Events dialog. The exclamation point will remain until the System Events dialog is
opened and closed.
To display system event information:
1 Select V
A time/date stamp is written to the event log each
time PSM is started. Afterwards, each message is
given a time stamp. Refer to the following table to
interpret the buttons in the Log Viewer.
Field/Control Description
Clear Event Log Clears existing log to make tracking current problems easier.
Save As... Saves information in the Event Viewer Log as a text file (can be saved and faxed to
iewÎSystem Events.
Technical Suppor).
2 Click OK to close the Log Viewer.
System Errors
If an error occurs at a PrintStation during printing and the PrintStation problem is not resolved
in a set amount of time (see PSM Configuration for details on the error timeout period), the
PSM will move the Job Stack to the first available PrintStation. The alternative PrintStation
will also belong to the same Virtual Engine. An Error Separator Sheet will “frame” the moved
stack.
Note: If the Job Stack has moved and that PrintStation does not have the correct paper or is out of paper, the
PrintStation will make three attempts to print the Job Stack, printing two error separator sheets for each attempt.
Accounting
The PSM maintains accounting information by tracking all print jobs according to user, spool
time, print time, job size, toner coverage, and pages printed. Accounting results for all PSM
jobs are stored in a tab delimited text file that you can import into a database or spreadsheet
application.
The accounting file, ACCOUNTING.TXT, is saved as <date>.txt in the PSM directory at midnight.
Note: Select ToolsÎPSM Options to toggle Accounting off and on from the PSM Options dialog.
To display the Accounting information for all jobs in the PSM:
1 Select V
iewÎAccounting from the menu.
37
Page 48

2 The Accounting Log screen displays the activity for the day from the PSM.
3 Click OK when finished viewing the information.
—OR—
Click Save As... to save the information as a Tab/Delimited text document. The file will
be given a .act extension. The graphic below shows an example of the information
imported into a spreadsheet.
The table below shows the default information in the Accounting Log.
Field Description
Job Name If detected, the name of the job will be displayed. Otherwise, the name may be listed as
“Untitled Document”.
User Name If detected, the name of the user will be displayed. Otherwise, the name may be listed as
“NoName”.
Input Date Date job was accepted into the PSM.
Input Time Time job was accepted into the PSM.
Pages Printed Number of job’s pages printed.
Job Size Size, in bytes, of the job.
Virtual Engine Name Name of the VE from which the job was printed.
Print Date Date job was printed.
Print Time Time job was printed.
Toner Values Toner Coverage (in percent) for each color used in the job. As a job is processed by the
MicroPress RIP, the Toner Coverage for the job is calculated. Clicking the Toner Calculator
button on the Job Info dialog’s Job Settings tab will refresh the information. The Page
Settings tab will display the coverage for each individual page in the job. If the coverage
has not been calculated, “-” will be displayed. “0%” displays when toner coverage is less
than 0.5%. See “Page Settings” on page 20.
Scripting
38
If you submitted the job via e-Ticket, additional information will display in the accounting log
for that job. The data from the completed fields on the ticket will be displayed, such as the
Company Name, Address, etc. The information displayed is also dependent upon the fields
available in the ticket. An empty field will be shown as a colon “:”
In the PSM, you can script certain aspects of a job. For example, a script can loop through all
the jobs in a Virtual Engine and turn Duplex off, as shown below:
Dim job
For Each job in VE.Jobs
VE.JobDuplex(job) = False
Next
VE stands for Virtual Engine. Everything in PSM scripting is done through this VE object. VE
has several properties and methods available for use. Refer to the Scripting Properties and
Methods manual for more information.
Instructions are not included in this documentation for creating, modifying VBScripts, or
VBScript language constructs. Many books and resources address this subject. See, e.g.,
the online tutorial on the Microsoft website:
Page 49

http://msdn.microsoft.com/scripting/vbscript/default.htm
For more information on available scripts, contact your MicroPress dealer.
Scr
ipt Toolbar
Selecting ViewÎScript Toolbar from the menu opens a toolbar to the Virtual Engines. This makes it possible to apply and run Visual Basic scripts on jobs, view the contents of scripts, and modify scripts.
PSM includes a number of
scripts you can modify with the
built-in script editor for customized usage.
Field/Control Description
Available Scripts drop down list Scripts in the scripts folder, MicroPress\psm\scripts.
Run Script
Executes selected script in the current VE.
View Script
Edit Script
Opens a preview window to view script contents.
Opens script editor.
The scripts included with PSM and their function are described in the table following.
Script Name Function
AlternateTraysOnJob Makes a 10 page job into a 20 page job, e.g.; alternates trays on each page.
Alternate3TraysOnJob Makes a 10-page job into a 30-page job, e.g., and alternates between all
three trays on each page. These tray settings are set specifically for 024
machines. Tray numbers differ on other engines. To use with a different
engine, change tray numbers.
AlternateTraysOnJobNoDup Creates a new job that will print from two trays, the first page will print from
tray 1, the second from tray 2 and it continues to alternate until job is printed.
ChangeJobPrintInformation Displays all the information about a job (duplex, collation, etc.) and allows
you to change the information; also asks if you want to archive the job.
CreateNewJob Goes through selected jobs and asks for page ranges to merge from. The
script also prompts for a new job name.
MakeBooklet Runs imposition on selected job and creates a booklet from it; deletes the
original job and gives the new booklet job the original job name. Beware that
the original job will be deleted and cannot be restored.
MakeBookletFold Same as MakeBooklet but puts a crease in the printed job.
MakeBookletStaple Same as MakeBooklet but center staples the printed job.
MakeBookletFoldStaple Same as MakeBooklet but puts a crease and center staples the printed job.
MergeSelectedFiles Merges all selected jobs into one new job.
ScriptStub Script template.
SplitColorFromBW Goes through selected job (only one selected job allowed) and strips out
color pages from black and white pages.
39
Page 50

Click View Script button will display the script in a view-only dialog.
Click Edit Script button opens a script-editing dialog. Note: Existing scripts may be modified
to perform other tasks. Use Save to make the changes to the existing script, or Save As to
create a new script.
Tools
This menu sets the notification method the PSM uses when different events take place. The
Job Find and AutoScript features are also in the Tools menu.
Notifications…
To set the type of notification:
1 Open the ToolsÎNotifications…
2 Select the notification type.
3 Click OK.
Note: The sound will be the PC “beep” and is only available for notification of job errors.
Field/Control Description
Events Events to which the Sound and E-Mail notifications can be assigned. When the event
occurs the assigned Notification will be sent.
• Job Printed
•New Job
• Print Error
Sound • Single Notification – one beep
• Continuous – repeating beep
• None – no beep
E-Mail • Name – the name of the e-mail recipient
• Address – address of the e-mail recipient
• None – no e-mail notification will be sent
40
Find…
Find is a search utility to find any job in the PSM.
1 Select T
oolsÎFind from the PrintStation Manager main
menu.
2 Select search by Job Name, User Name, Annotations,
Job Ticket or Tracking Number. Enter a text string or
an “*” for a listing of all jobs.
3 Click F
ind.
4 Select the engine type to search in. The default, All
Engines, searches through any VE type.
5 Click OK. If a match is found, a Job List showing Job
Name, User, and Virtual Engine will display.
AutoScript
Use AutoScript to automatically apply scripts to jobs either as they come into the PSM or
after they are printed. A wizard helps configure the AutoScript options through a series of dialogs.
To assign a script to run automatically:
Page 51

1 In the ToolsÎ AutoScriptÎConfiguration
Wizard.
2 Select VE types to apply a script to.
3 Click Next.
4 Check the box to enable AutoScripting on the
selected engine and click Next.
5 Choose the event type to trigger the script to
run (i.e., either a new job entering the PSM or
a job that has finished printing). Click Next.
6 Choose the script to run. Click Next.
7 The final page displays the settings chosen from the preceding pages. Press Back to
modify the settings, if necessary.
8 Click Finish to accept the settings.
Note: Use the View Configuration menu item to display AutoScript settings applied to all engines. If Auto-
Script is enabled, a small icon appears on the VE’s status bar.
Options
Use the PSM Options dialog to set such preferences as toggling job accounting off and on,
job archiving file format and Preview settings. You must restart the PSM for some settings to
take effect. To access the Options dialog:
1 In the T
ools menu, select Options...
2 Select the General, Archive, Preview, or TRueEdit tab to view and change the various
settings.
General
Field/Control Description
Show each virtual engine in
its own window
Show each virtual engine in
the same window
Maintain Accounting info Enables the Accounting log. See “Accounting” on page 37.
Special Handling Delay
Time
Allows multiple VEs to be viewed simultaneously. You must restart PSM after changing this
setting. For examples of both methods of viewing PSM see “The PrintStation Manager Main
Screen Display” on page 2.
Each VE displays maximized so that only one VE can be viewed at a time. Prevents
Cascade, Tile, etc., of VEs.
Adjusts length of time the Special Handling notification dialog is displayed. While the dialog
is displayed, press OK to print the job or Cancel to place the job on Hold. If neither
selection is made, the job will be put in an Error state after interval specified.
41
Page 52

Field/Control Description
Delete options • Confirm All Deletes – PSM will display a dialog prompting for permission to delete any
selected files.
• Confirm Multiple Deletes – Permission prompt will display only if multiple files are selected
for deletion.
• Do Not Confirm Deletes – Selected files will be deleted with no prompt for permission.
• Use Recycle Bin When Available – Deleted files will be placed in the Recycle Bin (recovery possible).
Hold the Shift key down when clicking Delete to bypass the delete prompt and the Recycle Bin.
Archive
Field/Control Description
Archive • Format - Choose format to use when archiving PSM jobs.
PDF - Platform independent and viewable, but archiving time is much slower. A key code
is required to use the PDF archive format.
MSM - Archiving time is much faster.
• Priority - Amount CPU time allocated for the archiving process.
Normal - More CPU time used for archiving.
Low - More CPU time used for archiving.
Preview
42
Page 53

Field/Control Description
Preview Options Preview displays at default settings (100 dpi for B&W and 300 dpi for Color). A Preview file
is stored in the PSM file for faster redisplaying. If more detail is needed for previewing,
increase the X number (the Y automatically increases same amount). This will take longer
for the initial Preview and use more space in the PSM file. Enter a lower number if a lower
quality Preview will do. This will make the initial Preview faster and save disk space.
Image Quality • Normal – fastest display, though quality lower than other choices
• Favor Black – suggested setting for most instances. Algorithm attempts to keep more of
the black pixels than the Normal setting
• Resample – minimizes the reduced image quality normally associated with changes in
image width and height (re-sizing) by using a process called interpolation
TRueEdit
Field/Control Description
Open In • Thumbnail view – (factory default) Opens the job in TRueEdit with the job pages displayed
as thumbnails
• One Page view – Opens the job in TRueEdit with the job pages displayed individually
Working copy ... • Enables/disables making a copy of the job before TRueEditing from within PSM. This
allows you to make changes to a job without affecting the original copy of it.
Enable Remote Services
This lets PSM accept requests from e-PSM users. e-PSM allows customers to use their
Microsoft Internet Explorer browser (version 4.0 or greater) to manage print-ready documents. Customers can use a set of the MicroPress’ application-independent, post-RIP docu-
ment management features from any computer connected to the Internet. These features
include merging multiple documents created in diverse native applications into one seamless
document, imposing a document into user friendly layouts, viewing job or specific print device
status, inserting copy separators, and print job security. See “e-PSM” on page 58.
BAT Object Registration
e-Prove is a user-programmable feature of
MicroPress. Users with high-level programming skills can develop their own COM
object to customize how the MicroPress processes print jobs and documents accounting
information. Refer to the e-Prove manual for
more information.
43
Page 54

Window
The Window menu options let you arrange, refresh, and select VEs.
Help
PSM Help menu contains the following items:
Menu Selection Definition
Cascade Open VEs are overlapped with the title bar of each visible.
Tile Horizontally Arranges VEs so they occupy an equal amount of space without overlapping. The title
bar of each is visible.
Tile Vertically Arranges VEs so they occupy an equal amount of space. The title bar of each is visible.
Arrange Icons Spaces minimized VE icons an equal distance apart.
Reset Size Useful when multiple VEs are open and not all Job List window information is
necessary. The Virtual Engine window will be reduced. The PrintStation Buttons and
Status Bar are hidden. Selecting Reset Size again restores window to its original view.
Refresh Refreshes and updates the Job List window. Refresh in the Window menu performs
the same function as Resynch Jobs located in the Virtual Engine menu. See
“Resynch Jobs” on page 6.
VE List Lists all configured VEs
• Index starts PSM Help.
• About... opens About dialog.
– MicroPress dongle number, sometimes necessary when contacting Technical Sup-
port, is here.
– The System Info button provides information about memory usage, versions of .DLL
files and their locations, etc., useful for Technical Support.
– The Configure Options dialog is used to enter License numbers obtained from your
MicroPress dealer to activate optional features or add new output devices. See
”Licensing” in the PrintStation Manager Configuration manual for more information.
Engine Status Dialogs
Click PrintStation button to identify PrintStation/PrintLink errors. The PrintStation Status dia-
log box provides detailed information about the PrintStation and troubleshooting information
to assist in the investigation of conditions that result in user intervention.
Most conditions are indicated by a PrintStation Status Light just under the engine icon. Serious conditions can be immediately identified when the PrintStation Status Light displays Red.
A yellow PrintStation Status Light indicates conditions may be occurring that will require operator intervention.
Precise information on the Status dialogs vary according to engine type. Some of the Status
dialog pages described in the following section will not be applicable for certain engine types.
The table below describes status page buttons.
Field/Control Description
Close Exits status dialog.
Update Updates if a change occurred. Click Update after you identify a problem and attempt to
correct it.
Enable/Disable • Disable – Makes the PrintStation unavailable for printing
• Enable – Makes the PrintStation available for printing
The PSM will retain the Disable or Enable setting even after the application is closed and
re-started.
Help Displays a description of the status dialog.
44
Page 55

Summary
The PrintStation Status Summary dialog displays the status of the PrintStation (e.g., errors
and other specific information). To display PrintStation Status Summary information:
On the active VE, click PrintStation button to view the Printer Status Summary information.
Note: For some engine types, various status indicators will display in gray when in a normal state. A sta-
tus will display in yellow or red when conditions require attention.
PrintLink 062:
If a paper input is opened, whether paper is added/removed or not, the status displaying paper quantity
will be lost. The status will be updated to the correct position the next time a job is printed and picks paper
from that input tray.
The table below describes conditions in the Printer Status Summary dialog box.
Field/Control Description
Paper Status Paper source, paper size, and sheets remaining. A green light indicating the current default
tray displays for some engines.
Manual Tray Sets paper size (and thickness, for some engines) in the manual tray.
PrintLink Cii:
Fuser speed is adjusted according to paper thickness to assure proper fusing of the toner.
•Normal = fastest
• Transparency = faster than Heavy
• Heavy = slowest
Notes:
PrintStation 024, PrintLink Cii:
If the Manual Tray is used as a source, this field must be correctly set to the exact size in
the Manual Feed Tray. If it does not match, the imaging could become “out-of-sync” with the
paper.
PrintStation LaserJet 5Si:
If the paper size is set for the Manual tray in the PSM, the paper size must also be set on
the PrintStation LaserJet 5Si by using the front panel.
DesignJet CP, DesignJet 1000:
DesignJet CP's or DesignJet 1000s within a Virtual Engine must have the same size paper
loaded.
Empty Tray Switch Skips This drop-down list allows you to select a tray that is not to be switched into when a job runs
out of paper.
Density Adjust Current density setting of the PrintStation. Use this setting to set density level ranging from
light to dark.
Error on Toner Low Selecting this option will cause the engine to stop printing when the toner is empty rather
than displaying a warning and continuing to print.
Selected Output Output Destination displayed here is selected from the Job Settings page.
Status Summary Detailed information about the printer.
Paper Status Displays paper size, Ready, or Low.
Pause Interrupts a printing job to use the Copy function of the PrintLink Cii.
Gamma Calibration Color capable PrintStations must be color calibrated in order to ensure consistent results
and balance color densities across multiple PrintStations. Gammatic, part of the TRueColor
option toolbox, is an automatic calibration system that measures 21 steps per color on all
PrintStations to ensure color consistency. For more information, see TRueColor User
Guide.
Toner State of the Cyan, Magenta, Yellow, and Black toner or ink cartridges. Color capable
PrintStations only.
Toner Cartridge eject
Handle
Pulling
The Toner Cartridge Ejection Handle is not fully engaged.
45
Page 56

Field/Control Description
Door Open Main door is open.
Jam Resolution Press button for jam information.
Update Updates information on all tabs.
Density Adjust Current density setting of the PrintStation.
Engine Type Displays model of the currently selected DesignJet.
Ink Type Type of ink currently installed, if known.
Take Up Reel Indicates if a take up reel is installed.
Firmware Rev. Revision level of the firmware in the DesignJet.
Ink Levels Ink levels in the cartridges (within a 20% error margin).
Paper Roll • Initial Paper Roll Length (feet) – When loading roll media, enter the length of the roll of
media here so usage can be tracked and SafePrint will function properly.
• Current Paper Roll Length (feet) – Used in conjunction with the initial length. The amount
of media remaining on the roll.
• Paper Width – Detected by the printer.
• Paper Type – Type of paper currently loaded (taken from the DesignJet CP front panel).
Sheet Feed (1000 only) • Paper Width (inches)
• Paper Length (inches)
• Paper Type
Separators From Select the correct paper source to pull separator paper from.
Duplex Adjust Aligns the images on both surfaces of a duplexed job so they are placed in the same
relative location on the page. The adjustment is from 1 to 15 (10 being the default) with
each increment moving the image approximately .5mm. The image on the back surface
remains stationary and the adjustment is done to the front surface image. A larger number
moves the image closer to the leading edge of the paper.
Sleep after x minutes Time period from the last printed page until the PrintStation goes to "sleep" (low power
mode). Printer will automatically wake when a new job arrives.
Media Handling
st
, 2nd and 3rd Drawer display the quantity and size of the paper in the tray
•1
• LCC (Large Capacity Cassette) displays the quantity and size of the paper in the cassette
or Not Present if the LCC is not available
• Finisher displays Present or Not present depending on availability of the Finisher. Punching displays No Punching, 2 hole or 3 hole.
• Manual Tray displays paper size in tray. Select Transparency or Thick paper from dropdown list.
Engine Settings • Separators from –sets correct paper source to pull separator paper from.
• Empty Tray Switch Skips – From the drop down-list, select the paper source to skip if one
paper tray runs out of paper during printing.
• Density – Current density setting of the PrintStation. Use this setting to select density
level.
• Error on Toner Low – Selecting this option causes engine to stop printing when the toner is
empty rather than displaying a warning and continuing to print.
• Finisher Mode – 4 modes:
– Mailbox
–Collator
– Job Separation
–Stacking
Total Page Count Total number of one-sided Letter and A4 pages printed.
IP Address Displays currently assigned IP Address (assigned in PrintStation Configuration).
Model Type of PrintStation connected to the MicroPress Server.
Capabilities Displays additional functionality for the connected device.
Status Indicates online status of the PrintStation.
46
Page 57

Field/Control Description
Media Handling • Upper, Lower, and Manual Tray display the quantity and size of the paper in the tray
• Feeder Deck displays the quantity and size of the paper in the cassette or None if the deck
is not available
• Envelope displays the status of the Envelope Feeder
PrintLink Flash Version Part number and revision level of the upgradeable MicroPress PrintLink software.
PrintLink ROM Level Part number and revision level of the MicroPress PrintLink boot code.
Kernel Driver Version Version of the firmware in the PrintStation.
Adapter Version Version of the firmware on the PrintAdapter board.
CPLD Version Version of the PrintAdapter CPLD chip code.
Address IP Address (network connected PrintStations) or PrintAdapter port number (PrintStations
connected directly).
Control Panel Display Information currently displayed on the printer display.
Display Information currently displayed on the printer display.
Digital Express Provides a link to the Digital Express web site from the 0110i. The web site provides an
outsourcing solution for large volume jobs or jobs requiring special finishing
Console Link Provides remote access to the 0110i. The information is the same as is displayed on the
0110i’s monitor.
The table below describes the Error Messages in the Status Summary box for the
PrintStation 312.
Error Code Error Message
E001 Fixer Warmup has failed.
E002 Fixer temperature is high.
E005 Fixer temperature is low.
E007 Main motor startup has failed.
E008 Problem with the rotation of the Main motor.
E010 Problem with the operation of the Drum motor.
E020 Developer Unit Rotation failure.
E021 Developer unit is pressing or depressing.
E110 Beam Detect failure.
E111 Beam Detect Laser failure.
E112 Problem with the Polygon Motor Startup.
E113 Problem with the rotation of the Polygon Motor.
E190 DC memory has failed.
E191 DC 5v 24v failure.
E192 Problem with the DC Chips.
E194 DC has a density error.
E700 DC has a communication error.
E800 Problem with the Controller Fan
E801 Problem with the Fixer fan.
E802 Problem with the electric fan.
E803 Problem with the Power Supply
47
Page 58

Error Code Error Message
C001 Fixing unit oil is empty.
C002 Fix Web is empty.
C003 Fixing Unit is not installed, or it is not properly installed.
C010 Drum is not installed, or it is not installed properly.
C020 Yellow Toner is out or the cartridge is not installed
C021 Magenta Toner is out or the cartridge is not installed.
C022 Cyan Toner is out or the cartridge is not installed.
C023 Black Toner is out or the cartridge is not installed.
C090 PAPER JAM in the Delivery Unit.
C091 Leading edge feed PAPER JAM.
C093 Transfer grip PAPER JAM.
C820 Waste toner container is full or missing.
C830 Error with the density sensor.
C840 Door is not closed.
C900 Optional Cassette Door is open.
System
To display Printer Status Systems information:
1 On the active Virtual Engine click PrintStation button.
2 Click the Systems tab.
The tables below describe options in the PrintStation Status Systems dialog.
Field/Control Description
Sleep after last page: “x” minutes
Engine Firmware Revision: Version of the firmware in the PrintStation.
Kernel Driver Version: Version of the drivers on the PrintStation.
Adapter Version Version of the firmware on the PrintAdapter board.
Total Pages printed: Total number of pages printed on this PrintStation. Cannot be reset.
Page Counter: Number of pages printed since the last time the “Reset” button was pushed.
PrintStation Adapter • Flash Version – Part number and revision level of the upgradeable MicroPress Print-
SNP ROM Version Print engine firmware version.
SCP ROM Version Print engine firmware version.
IP Software Version Print engine firmware version.
Engine Type Indicates the type of PrintLink Cii connected to the MicroPress Server.
Time period from the last printed page until the PrintStation goes to “sleep” (low power
mode). Printer will automatically wake up when a new job arrives.
Adapter software.
• ROM Level – Part number and revision level of the MicroPress PrintAdapter boot code.
48
Page 59

Field/Control Description
Maintenance Counters Counters are used to track the life of various components.
• Developer
•Drum Unit
•Fuser
• Tray 1 Rollers
• Tray 2 Rollers
• Tray 3 Rollers
• Deck Rollers
• Life Counter
• Charge Counter
• Total (Simplex Letter/A4 Equivalent) Page Count – the Charge Counter value multiplied by
100
PrintStation ROM Revision Version of the firmware in the PrintStation.
PrintStation ROM Level Version of the firmware in the PrintStation.
PrintStation Adapter Flash
Version
PrintStation Adapter ROM
Level
Part number and revision level of the upgradeable MicroPress PrintAdapter software.
Part number and revision level of the MicroPress PrintAdapter boot code.
An Advanced button may be displayed on this dialog depending on the type of device connected to the PrintLink. Click Advanced to display a dialog with the following information:
Field/Control Description
Engine Info • Revision – Firmware revision in the device connected to the PrintLink
• Finisher Revision – Version information for the finisher
• Sleep after x minutes – Time period from the last printed page until the PrintStation/PrintLink goes to “sleep” (low power mode). Printer automatically wakes when a new job
arrives.
Set Paper Tray Size Set for the type of paper in the input tray. Exception is the 2nd tray. This tray displays the
tray setting.
Error Reset Resets engine after error occurs
PrintStation 024-Specific Error Messages
Error Type Error
Fuser Related • Abnormally Low Temps - Error with the fuser unit causing fuser unit temperature to be too
low.
• Warm Up Abnormality - Error with fuser unit preventing fuser from reaching the ready
temperature.
• Abnormally High Temps - Fuser unit temperature too high.
Note: Thermal protection devices will prevent the fuser from reaching extreme temperatures.
Since these devices are similar to fuses, they will prevent the fuser from warming up again.
The fuser may now indicate: “Abnormally Low Temps” following the “Abnormally High
Temps ” error if the machine has been turned off.
Fan/Cooling Related
Malfunctions
Duplex Registration Guide
error
• Fan 1 - Fixing Unit/Scanner Unit Fan.
• Fan 2 - Power Supply Fan.
• Fan 3 - Electrical Unit Fan.
• Fan 4 - Fixing Unit Fan
• Main Motor - Abnormal main motor revolutions. See Main Motor below.
Registration guide in the duplex unit is not moving correctly.
49
Page 60

Error Type Error
Scanner Motor StartUp Malfunction - Laser scanner motor does not reach its specified speed at start up.
Rotation Failure - Laser scanner motor speed is abnormal.
Main Motor Startup Malfunction - Error with the main motor starting.
Rotation Failure -Main motor rotation is abnormal or has failed.
BD Malfunction Abnormality with the laser scanning.
BD Laser Malfunction Laser light emission has failed or is abnormal.
Paper Input Illegal
Operation
Paper Output Illegal Paper destination not available.
MPT Lifter Malfunction Lifter mechanism in the Manual Paper Tray is not lifting the paper or is lifting abnormally.
Selected paper feed tray is not installed or not properly installed.
Jam Resolution
When a jam occurs, PrintStation button displays a jam indicator.
When a jam occurs:
1 Click on PrintStation button. Information will display to assist in locating the jam.
024
2 After the jammed page is removed, click Update. Depending on engine type, you may
need to close additional dialogs.
Maintenance
Printer Status Maintenance dialog displays PrintStation errors correctable by performing
maintenance.
To display Printer Status Maintenance errors:
1 Click PrintStation button.
2 Click Maintenance tab.
The table below describes conditions in the Printer Status Maintenance dialog.
Field/Control Description
Miscellaneous Miscellaneous maintenance errors:
• Optional Cassette Door is open.
• Optional Cassette Feed Abnormality
• MP Paper Size Mismatch
• Test Print in Progress
Replacement Parts Errors Replacement Parts Errors:
• Waste Toner Box Full
•Drum Not Installed
• Fixing Oil Empty
Density Control Error Cyan, Magenta, Yellow, and Black toner cartridge density control errors, and Sensor Errors.
Testing/Adjusting Testing and Adjusting conditions:
• Checking Photosensitive Drum
• Image Density Control Performing
• Running Initialization Check
• Fuser Warming Up
Service
50
Printer Status Service dialog displays service errors that identify fixing unit, motor, and
Page 61

other miscellaneous service problems.
To display Printer Status Service errors:
1 Click PrintStation button.
2 Click Service tab.
The table below describes conditions in the Printer Service dialog.
Field/Control Description
Fixing Unit Errors Fixing Unit service errors:
• Fixing Unit Web Empty
• Fixing Unit Not Installed
• Fixing Unit Pump Failure)
Motor Failures Motor Failure service errors:
• Drum Motor
• Controller Fan
• Fixing Unit Fan
• Electric Fan
Main Motor Main Motor service errors:
• Startup Error
• Rotation Abnormality
Polygon Motor Polygon Motor service errors:
• Startup Error
• Rotation Abnormality
Miscellaneous Miscellaneous service errors:
• Printer ID Error
• Power Supply Failure
• BD Signal Incorrect
Unit Errors
Printer Status Unit Errors dialog displays unit errors that identify fixing unit, beam detector,
developer unit, and DC controller unit problems.
To display Printer Status Unit Errors:
1 Click PrintStation button.
2 Click Unit Errors tab.
The table below describes conditions in the Printer Status Unit Errors dialog.
Field/Control Description
Fixing Unit Fixing Unit errors:
• Temp Low
• Temp High
• Warm-up Failure
• Fixing Heater Cut Off
• Fixing Off Timing Circuit Error
BD Errors BD (Beam Detector) Errors:
• BD Failure
• Laser Failure
Developer Unit Errors Developer Unit errors:
• Rotation
• Pressing/de-pressing
51
Page 62

Field/Control Description
DC Controller Failures DC Controller Failures:
•Memory
• 5V, 24V
• Thermal/Humidity Sensor
• Density Sensor
• Communication
• IC Chips
Miscellaneous
Printer Status Miscellaneous dialog displays miscellaneous Printer Status information that
identifies gloss levels, number of pages printed, current Printer Status, density settings and a
printer sleep option.
To display Printer Status Unit Errors:
1 Click PrintStation button.
2 Click Miscellaneous tab.
The table below describes conditions in the Printer Status Miscellaneous dialog.
Field/Control Description
Gloss Level Current gloss level for this PrintStation.
Note: Access the Gloss Level option in the Job Settings, Page Settings, or Virtual Engine
Defaults dialog.
Sleep After Last Page Time period from the last printed page until the engine goes to “sleep” (low power mode).
Printer automatically wakes when a new job arrives.
Total Pages Printed Total number of pages printed on this PrintStation (cannot be reset).
Page Counter: Number of pages printed since the last time the “Reset” button was pushed.
Engine Firmware Revision Version of the firmware in the PrintStation
Kernel Driver Version Version of the drivers on the PrintStation.
Adapter Version Version of the firmware on the PrintAdapter board.
Current Status Following status information:
• Fuser and Main Motor Sleeping
• Ready Line
• Quality Print Mode
• Drum Past Life Expectancy
Current Density Settings Current Cyan, Magenta, Yellow, and Black toner density settings. The Current Density
Settings should display a value of zero (0). If not, you must manually reset them on the rear
panel of the PrintStation 312.
Gamma Calibration Click the Gamma Calibration button to load a different .gam file or to save the current file
with another name.
Feed Tray
52
Trays page displays information about the media inputs for the PrintStation.
To display Feed Tray Status information:
1 Click PrintStation button.
2 Click Trays tab.
Note: Place the mouse cursor over a Tray Level status bar to see an estimate of media remaining in the
Page 63

tray if this feature is supported for the engine.
Field/Control Description
Feed Tray Status Displays media levels, sizes and types for all input trays. Media Size for the MBT and
Media Type for all input trays can be set here.
Destination Tray Status Displays the status of the output, or Destination, trays.
Tray Settings • Separators from: – indicates which tray job or copy separators will be pulled from.
• Empty Tray Switch Skips: – From the drop-down list, select the paper source to skip if one
paper tray runs out of paper during printing.
Device
Device tab is used to make various settings for the PrintStation.
To display Device Status information:
1 Click PrintStation button.
2 Click Device tab.
Field/Control Description
Engine Settings • Error Timeout – Amount of time PrintStation waits before moving the job to another Print-
Station.
• Separators From – Sets correct paper source to pull separator paper from.
• MOP Limit – Multiple Original Prints (MOP) allows multiple copies of a job to be printed
through the PSM at the printer’s rated speed. Rather than sending the job from the PSM
multiple times to be decompressed and processed for each copy, the job is sent once. The
job is then decompressed and saved to disk by the engine. Once the specified number of
copies have been printed, the file saved to disk is deleted. The limit number determines
the point at which MOP is turned off. In other words, with the number set at 300, jobs from
1 to 300 pages will be processed as described above. Jobs from 301 pages and greater
will be sent by the PSM to the engine for each copy of the job.
• Sleep Timer – Time period from the last printed page until the PrintStation/PrintLink goes
to “sleep” (low power mode). Printer automatically wakes when a new job arrives.
• Error On Toner Low – Selecting this option causes engine to stop printing when the toner
is empty rather than displaying a warning and continuing to print.
Settings
Printer Settings dialog is used to view and change various settings for the PrintStation.
To display Printer Settings information:
1 Click PrintStation button.
2 Click Settings tab.
Field/Control Description
Error Timeout Amount of time PrintStation waits before moving the job to another PrintStation.
Error on Toner Low Selecting this option causes engine to stop printing when the toner is empty rather than
displaying a warning and continuing to print.
Separators from Sets correct paper source from which to pull separator paper.
Empty Tray Switch Skips From the drop-down list, select the paper source to skip if one paper tray runs out of paper
during printing.
Density Current density setting of the PrintStation.
Sleep Timer Time period from the last printed page until the PrintStation/PrintLink goes to “sleep” (low
power mode). Printer automatically wakes when a new job arrives.
Gamma Calibration Click the Gamma Calibration button to display a dialog that shows the current gamma file or
load another file.
53
Page 64

Non-Standard Paper Settings
This dialog is used to set the dimensions for non-standard paper sizes. Enter the lead and
side edge dimensions for paper in the trays displayed. The Image Adjustment button opens
the Non-Standard Paper Size Image Adjustment dialog. This dialog is used to correct the
paper feed so that the front and back surfaces of a duplexed, wide paper job are aligned in
the feed direction.
Browser
Some PrintStations have a web server embedded in their internal firmware. This enables
much information about the PrintStation to be displayed on the Browser tab page as a web
page.
54
Page 65

Covers
The Covers page displays the name and status for covers, or doors, on the PrintStation. Status will indicate if the cover, or door, is properly positioned in order to function correctly.
Tab S etu p
To display the Tab Setup dialog:
1. On the active VE click the PrintStation button.
2. Click the Tab S e tup tab.
The table below describes the Tab S etup dialog.
Field/Control Description
Tab Set • Banked – Each tab position is offset. Banks should always be full sets and start at
position 1.
• Not Banked – Each tab is in the same position
See the following graphic example of Banked and Not Banked tab sets.
Bank Size Number of tab positions in a set. Graphic following shows a Bank Size of 3.
Eject Tray When resetting the tabs, the specified tray is used to send the ejected tab page
Source Tray Information • Tab Position – Position of the tab on the tab page. If using a banked tab set, the only
option will be All. With tab sets that are not banked, each position in the set will be listed.
The result is placed in the lower window.
Note: for the 0110i, MP_TAB01 will be the media type for All in a Banked set. With a Not
Banked set, MP_TAB01, MP_TAB02, etc. would be listed with each corresponding to an
input tray. The MP_TAB0x (x = the number of an input tray) media names must be set up
through the 0110i Printer Monitor in the media catalog.
• Feed Tray – Tray from which Tabs will be pulled.
• Add – If using a Not Banked tab set, this box will list the tab positions based on the Bank
Size chosen. Make a selection from Position and Feed Tray, then click Add.
• Reset – Click to erase all selections.
• Remove – Click on the selection to be removed and then click the Remove button.
Engine Density
A slight color change in one PrintStation may be needed to lock in accurate balance for all
PrintStations. For this reason, modify the Engine Density and/or Engine Exposure Adjust to
fine-tune calibrations. From these dialogs, you can quickly change a PrintStations™ color
and apply it to all current and future jobs. Developer bias voltage is adjusted on the Engine
Banked Tabs Not Banked
55
Page 66

Density tab. Laser power voltage is adjusted on the Engine Exposure Adjust tab. See also
“Brightness/Contrast” on page 17.
Engine Exposure Adjust
See “Engine Density” on page 55.
Engine Margin Offsets
Use this dialog to set the default Margin Offsets at the engine level. Settings made here will
be added to any set on the job level Margin Offsets dialog, see “Page Range Settings” on
page 16. For example, if 1mm Top and Left are set on this dialog and on the job level Margin
Offsets dialog, the offset will be 2mm total. Settings may be adjusted for both the Feeder and
Cassette. The input source selected will be the one used for all jobs.
Color Insertion Tray
Pre-printed color pages may be placed in the assigned tray to be inserted into the correct
location within a job as it prints.
Field/Control Description
Tray Select the tray from which the pages will be pulled.
Media Select the media type on which the job should be printed.
Support
Support page displays contact information for technical support purposes.
OPC Connected Devices
An OPC VE (Open Printer Connection Virtual Engine) provides PSM connectivity to virtually
any PCL (Level 4 or higher) compatible printer. An OPC VE is fully supported by the Micro-
Press. The OPC VE will function similarly to any other VE but with the following limitations:
• No tray selection – will always auto-select trays
• No printer status will be available
• No error handling
• Monochrome printing only
• No finishing options
• Job Separators print to Letter paper only
Resolving problems for an output device connected to a MicroPress Server via an OPC VE
depends on the type of device. If the connected device is a PrintStation/PrintLink, refer to the
previous sections. If it is a non-MicroPress device, refer to documentation provided by the
device’s manufacturer or your network administrator.
Note: If ERROR 21 is reported, it means the data is too complex for the printer to process while printing
concurrently. Correct the problem by enabling Page Protection on the printer if it is available and the
printer is equipped with adequate memory.
For configuring a device to function with an OPC VE, see PrintStation Manager Configuration
Reference Manual.
56
Page 67

OPC Summary
Printer Status Summary dialog displays the status of the PrintStation (i.e.,
errors and other specific information).
To display Printer Status Summary information:
Click the PrintStation button.
The table below describes fields on the
OPC Engine Summary dialog.
Field/Control Description
Name Output device currently connected. You can select without going through PSM Config.
Status Indicates the online status of the PrintStation.
Type Output device type.
Where Output device queue.
Comment Information about the device.
Location Information about the physical location of the device. Comment and Location information is
manually entered using the Windows Printer Properties dialog (Start
Settings
Properties Displays settings for the currently selected output device.
View Jobs Displays the Windows print spooler dialog.
Refresh Updates information on the dialog.
Disable Disables the printer in PSM only. It will remain available to users connected to the printer
via other connections.
Connect Displays a dialog to browse for and connect to any available PCL printer on the network.
ÎÎÎÎPrinters, then open the selected printer’s Properties dialog).
ÎÎÎÎ
Custom PJL Support
Hewlett Packard developed PJL (Printer Job Language) to allow application programs to
have job-level control of print jobs sent to print devices supporting PJL. PJL commands are
not always standardized (and often proprietary), and PJL commands (or documentation) for
a manufacturer's print device are generally available only to developers.
OPC VE was developed to allow MicroPress users the ability to utilize their existing print
devices in the MicroPress environment. However, there is no two-way communication
between the print device and the MicroPress. Since the type of print device is unknown to the
MicroPress only the least common denominator is supported. Unfortunately, this does not
enable end-users to take advantage of any special features of the print device (e.g., finishing). The custom PJL support allows end-users to insert PJL commands into the command
string sent to the print device by the MicroPress, giving control over the print device not
directly supported by OPC VE.
The PJL command stream is a series of commands sent to the print device before any page
data is sent. These commands control what the print device will do at the job level.
To enter a new command:
1 Select an OPC VE.
2 Select Virtual EngineÎEngine Defaults... from the menu.
3 Click Custom PJL button.
57
Page 68

e-PSM
4 On the row displaying an “*”, click in the
PJL Variable column and enter the vari-
able (i.e., FINISH).
5 Click in the adjacent Value column and
enter the appropriate value (i.e., ON).
6 Click OK when finished.
Note: All physical engines in the virtual engine "cluster" will use these PJL commands. Confirm that all physical
engines support the PJL commands.
To edit or remove a value pair, first select it, then change the data or click Remove Item.
e-PSM is similar to the PSM in appearance
and functionality. The menus are dropdown lists rather than PSM’s standard
menus. e-PSM’s toolbar has fewer buttons,
and the virtual engine buttons are at the
bottom of the browser window. If enabled,
e-PSM will support 25 clients.
Some commands work identically, others
vary slightly or may not be available at all.
PSM Functionality Available in e-PSM
The table below lists the menu items available to e-PSM users.
Menu Command
File Exit
Virtual Engine • Pause/Resume – See “Pause or Resume a Virtual Engine” on page 6
• Resynch – See “Resynch Jobs” on page 6
• Engine Defaults – Virtual and Physical Engine Defaults are read only. The settings may be
viewed but not changed. See “Engine Defaults…” on page 7
• View Job Details – See “Job List Window” on page 3
• View Job Name Only – See “Job List Window” on page 3
58
Page 69

Menu Command
Job • Info – See “Info...” on page 11
- Output Options – See “Output Options” on page 14
- Finishing Options – See “Finishing Options” on page 12
- Margin Offsets – available only for the wide format engines – See “Page Range Settings”
on page 16
- Brightness/Contrast – See “Brightness/Contrast” on page 17
- Color Adjust – See “Color Adjust” on page 18
- Page Settings – See “Page Settings” on page 20
- Annotations – See “Annotations” on page 21
• Hold/Suspend – cannot suspend active jobs or resume suspended jobs – See “Hold/Sus-
pend” on page 22
•Print – See “Print” on page 22
• Merge – See “Merge…” on page 23
• Imposition – See “Imposition” on page 29
• Tumble – See “Tumble” on page 34
View System Events – See “System Events” on page 37
Window Refresh – See “Resynch Jobs” on page 6
Tools Options
• Show background image
• Enable splash screen at startup
Help About
The toolbar contains the following buttons:
Button Function
Job Info
Hold/Suspend
Print
Merge
Pause/Resume
Refresh
59
Page 70

PSM Functionality Not Available in e-PSM
The following commands and features are not available to users of e-PSM:
• Abort
• Archiving
• Chapters
• Delete
•Forms
•Move
• Numbering
•Preview
•Ticketing
• No right-click menus
• Jobs may only be modified by one user
at any time
Glossary
The following table identifies and defines terms as they apply to the PrintStation Manager.
Term Definition
Archive Compress and store a job in a file format that can be saved to back up media, or
transferred across the Internet.
Clear All Deletes all information displayed in the Program Execution Log window.
Print Job A job in the PrintStation Manager. The job is already processed (RIP’ed) and is now ready
to print.
PrintStation Physical print engine.
Source Paper tray that will supply the printer when printing.
Title Bar Displays the name of an application or application window.
Virtual Engine Collection of one or more PrintStations created in the PrintStation Manager Configuration
application.
Virtual Printer Set of characteristics created in the MicroPress RIP application that define the output
settings applied to incoming jobs.
Toolbar Button icons that provide immediate access to the more frequently used commands.
Page 71

User Manual
MicroSpool
www.minoltaeurope.com
The essentials of imaging
Page 72

Page 73

Copyright © 1995–2001 T/R Systems, Inc.
All Rights Reserved
Reproduction, adaptat ion, or translation without prior written permission is prohibited, except as allowed
under the copyright laws.
The information contained in th is document is subject to change without notice. T/R Systems makes no
warranty of any kind with regard to this material, including, but not limited to, the implied warranties of
merchantability and fitness for a particular purpose. T/R Systems shall not be liable for errors contained
herein or for incidental or consequential damage in connection with the furnishing, performance, or use
of this materia l.
T/R Systems, MicroPress, M@estro, e-Ticket, MicroI ma ger and other T/R Systems' product names are
registered trademarks or trademarks of T/R Systems, Inc. in the United States and other countries.
Portions of this product were created using LEADTOOLS ©1991-2001, LEAD Technologies, Inc. ALL
RIGHTS RESERVED.
Portions hereof include TextBridge® OCR Copyright ©Xerox Corporation. ALL RIGHTS RESERVED.
LZW data compression technology licensed under U.S. Patent No. 4,558,302
All other company and product names are registered trademarks or trademarks of their respective owners in the United S tates and other countries.
The following marks are used in this manual:
Indicates precautions that must be observed to prevent possible personal injury or damage
to equipment or malfunctioning of software.
Indicates notes and memos containing additional or detailed information.
Indicates useful tips.
Page 74

Page 75

Table of Contents
What is MicroSpool™?. . . . . . . . . . . . . . . . . . . . . . . . . . . . . . . . . . . . . . . 1
MicroSpool Features. . . . . . . . . . . . . . . . . . . . . . . . . . . . . . . . . . . . . . . . . . . . . . . . . . 1
Key Benefits . . . . . . . . . . . . . . . . . . . . . . . . . . . . . . . . . . . . . . . . . . . . . . . . . . . . . . . . . . . . 1
Understanding Queues and Devices . . . . . . . . . . . . . . . . . . . . . . . . . . . . . . . . . . . . . 1
Why Have More Than One Queue? . . . . . . . . . . . . . . . . . . . . . . . . . . . . . . . . . . . . . . . . . . . 2
MicroSpool Startup. . . . . . . . . . . . . . . . . . . . . . . . . . . . . . . . . . . . . . . . . . 2
Understanding the MicroSpool Main Screen Display . . . . . . . . . . . . . . . . . . . . . . . . . 2
Job List Window Fields . . . . . . . . . . . . . . . . . . . . . . . . . . . . . . . . . . . . . . . . . . . . . . . . . . . . 2
Display Jobs Window . . . . . . . . . . . . . . . . . . . . . . . . . . . . . . . . . . . . . . . . . . . . . . . . . . . . . 2
Toolbar . . . . . . . . . . . . . . . . . . . . . . . . . . . . . . . . . . . . . . . . . . . . . . . . . . . . . . . . . . . . . . . . 3
Status Bar . . . . . . . . . . . . . . . . . . . . . . . . . . . . . . . . . . . . . . . . . . . . . . . . . . . . . . . . . . . . . . 4
Working with Queues . . . . . . . . . . . . . . . . . . . . . . . . . . . . . . . . . . . . . . . . . . . . . . . . . 4
Displaying Information About an Input Queue . . . . . . . . . . . . . . . . . . . . . . . . . . . . . . . . . . 4
Understanding Queue Balancing . . . . . . . . . . . . . . . . . . . . . . . . . . . . . . . . . . . . . . . . . . . . 4
Pausing Jobs From a Queue . . . . . . . . . . . . . . . . . . . . . . . . . . . . . . . . . . . . . . . . . . . . . . . 4
Printer Status . . . . . . . . . . . . . . . . . . . . . . . . . . . . . . . . . . . . . . . . . . . . . . 5
Pausing a Printer. . . . . . . . . . . . . . . . . . . . . . . . . . . . . . . . . . . . . . . . . . . . . . . . . . . . . . . . . 5
Resuming a Printer . . . . . . . . . . . . . . . . . . . . . . . . . . . . . . . . . . . . . . . . . . . . . . . . . . . . . . . 5
Resetting and Restarting a Printer . . . . . . . . . . . . . . . . . . . . . . . . . . . . . . . . . . . . . . . 5
Downloading Files . . . . . . . . . . . . . . . . . . . . . . . . . . . . . . . . . . . . . . . . . . 6
Viewing Job Information . . . . . . . . . . . . . . . . . . . . . . . . . . . . . . . . . . . . . 6
Changing a Job’s Prior ity . . . . . . . . . . . . . . . . . . . . . . . . . . . . . . . . . . . . . . . . . . . . . . . . . . 6
Using Job Find . . . . . . . . . . . . . . . . . . . . . . . . . . . . . . . . . . . . . . . . . . . . . . . . . . . . . . 6
Placing a Job on Hold. . . . . . . . . . . . . . . . . . . . . . . . . . . . . . . . . . . . . . . . . . . . . . . . . 7
Sending a Job to the Printer . . . . . . . . . . . . . . . . . . . . . . . . . . . . . . . . . . . . . . . . . . . . 7
Removing Print Jobs . . . . . . . . . . . . . . . . . . . . . . . . . . . . . . . . . . . . . . . . 7
Removing All Jobs in the Job List Window. . . . . . . . . . . . . . . . . . . . . . . . . . . . . . . . . 7
Scheduling Print Jobs . . . . . . . . . . . . . . . . . . . . . . . . . . . . . . . . . . . . . . . 7
Moving Jobs to Anothe r Print Queue or Printer . . . . . . . . . . . . . . . . . . 7
To move a job to another print queue. . . . . . . . . . . . . . . . . . . . . . . . . . . . . . . . . . . . . . . . . 7
To drag and drop a job to another print queue . . . . . . . . . . . . . . . . . . . . . . . . . . . . . . . . . . 8
Dragging and Dropping Within a Virtual Printer . . . . . . . . . . . . . . . . . . . . . . . . . . . . . . . . . 8
Job Accounting and System Events. . . . . . . . . . . . . . . . . . . . . . . . . . . . 8
To display the Accounting information for all MicroSpool jobs:. . . . . . . . . . . . . . . . . . . . . . 8
Displaying System Event Information . . . . . . . . . . . . . . . . . . . . . . . . . . . . . . . . . . . . . . . . . 9
Exiting MicroSpool . . . . . . . . . . . . . . . . . . . . . . . . . . . . . . . . . . . . . . . . . . 9
MicroSpool Supports the Image Management Server™ and OPI . . . . 9
Understanding Macintosh Query Handling . . . . . . . . . . . . . . . . . . . . . 10
Downloading Fonts with MicroSpool . . . . . . . . . . . . . . . . . . . . . . . . . . 10
Help . . . . . . . . . . . . . . . . . . . . . . . . . . . . . . . . . . . . . . . . . . . . . . . . . . . . . 10
Troubleshooting . . . . . . . . . . . . . . . . . . . . . . . . . . . . . . . . . . . . . . . . . . . 11
General Diagnostics . . . . . . . . . . . . . . . . . . . . . . . . . . . . . . . . . . . . . . . . . . . . . . . . . 11
MicroSpool Diagnostics. . . . . . . . . . . . . . . . . . . . . . . . . . . . . . . . . . . . . . . . . . . . . . . 11
Glossary. . . . . . . . . . . . . . . . . . . . . . . . . . . . . . . . . . . . . . . . . . . . . . . . . . 12
iii
Page 76

Page 77

What is MicroSpool™?
An OPI Spooler that utilizes a central server (rather than individual workstations) to manage
printing and image management tasks. MicroSpool accepts print jobs quickly and spools to
disk for faster workstation release. With MicroSpool, you can print to the MicroPress® PrintStations™ and networked PostScript pri nters, and bui lt-in Appl eTalk queues appear to AppleTalk workstations in the same way as LaserWriters
workstation soft ware.
MicroSpool Features
—eliminating the need for special
• Workflow production streamlining
through efficient print job scheduling
and monitoring
• Job handling functions inclu de rearranging, assigning to diff erent output
devices, putting on hold, canceli ng,
scheduling, removing
• One-click job routing to send a job/s
from any application to an y MicroS pool
queue with the Macintosh Chooser or
Windows Print Manager
• Power routing functions let you send
multiple jobs to multip le RIP s (Se e
“Sending a Job to the Printer” on
page 7 for more details)
• Temporary storage area for queued
print jobs
Key Benefits
• Speed
• No Blocking
• OPI Server Functions
• Reprint Capability
• Resource gathering (e.g., font, proc
set) from supported printers at start up,
maintains the information for responding to queries from intelligent printer
drivers
• Powerful job accounting functions
track all print jobs according to user,
spool time, print time , job size, and
pages printed
• System event tracking
• Flexible output capabilities enable
printing to:
– a MicroPress Virtual Printer
– AppleTalk Network Printer
Directory on the MicroPress Server
hard drive or Microsoft Network
• Resource Sharing
• Drag and Drop
• Job Status Display
• Preflight Capabilities
Understanding Queues and Devices
MicroS pool queu es look lik e pr inter s on the net work but, unl ike standard printers, c an accept
an unlimited number of jobs from multiple workstations simultaneously. MicroSpool queues
drive the output devices they publish to. A queue receives all print jobs quickly, processes
them with pre-defined commands, and sends them to the output devi ce
You can configure queues to retain jobs after p rinting or when an error occurs, eliminati ng the
need to return to the wor kst at ion to re print a job. Wit h MicroSpool, you can store printer fonts
in a centralized location for sharing among configured output devices.
You can set up MicroSpool queues with assigned priorities to print jobs in order of importance. You can configure queues with Preamble or Postamble options that run specialized
PostScript commands, routines, or procedures to a job before or after printing.
1
Page 78

Why Have More Than One Queue?
With MicroSpool, you can create up to 64 queues to distribute among printers (we recommend 16 or fewer). For example: You might want to send jobs from both Macintosh and Windows workstations to the same printer. You can also set up queues for commonly-used RIP
settings. You can create two queues
MicroSpool St artup
When you launch MicroSpool, a
splash screen appears
wait: Initializing Printers A n d Inp ut
Queues”
registered on the network. The registration process takes 10-15 seconds, though the number of queues
defined affects this time period.
Understanding the MicroSpool Main Screen Display
The graphic at right shows the
MicroS pool ma in screen wit h it s v arious panels and fields (described in
detail below).
—until all queues have
—one for 1200 dpi, one for 2400 dpi output.
—“Please
n
o
Always launch MicroPress applications in this order:
• RIP
• PrintSt ati on Ma nag er
• MicroSpool
Job List Window Fields
n on above graphic. The MicroSpool main screen displ ays a job list window with all jobs
See
scheduled to output to a particul ar output device.
Field/Control Description
Job Name Name of job sent to the print queue
Status Current state of the job
User Netw ork nam e of the wo rkstati on that s ent the job ; “NoName” appears if no u ser name is
indicated
Size Size of the job bytes (a question mark means the job is still spooling)
Printer Queue Queue to which the workstation sent the job
Display Jobs Window
o on above graphic. Click check boxes beside job types to include in the Job List win-
See
dow. The number beside each job type gives the number of jobs of that type. The t able below
lists the dif ferent states in which the jobs display. Note: Letters in bold type are listed under
Status in the Job List Window.
2
Page 79

Field/Control Description
Waiting W
On Hold H
Balanced B
Error E
Processed/Printed P
Scheduled S
: job waiting to be printed
: job being held to print later
: job automatically moved to another queue to be printed
: an error has occured
: job successfully spooled to the RIP or printed
: job scheduled to print at specific day/time
The status column displays >> for jobs that are Printing or Active. You cannot change
options for the Printing or Active state in the Display Jobs check box area.
Toolbar
The Toolbar provides easy access to the most
frequently used commands. To hide or display the tool bar , select ViewÎTool Bar from
the main menu.
Field/Control Description
Job Info Displays general information about the selected job. See “Viewing Job Information” on
page 6
Hold Sets the selected job, that is not currently printing, in Hold state (until you manually
release it). See “Placing a Job on Hold” on page 7
Print Sends a job to the printer. See “Sending a Job to the Printer” on page 7
Schedule Schedules a job to print by date and time. See “Sch eduling Print Jobs” on page 7
Move Moves the selected job from o ne Vi rtual Prin ter to anot her. See “To move a job to an other
print queue” on page 7
Delete Removes a job from MicroSpool. See “Removing Print Jobs” on page 7
Pause/
Resume
Prevents or st arts a job printi ng to the a ctive pri nter . Th is option will not a ffect the current ly
printing job. When the Pause/Resume light is green, the Virtual Printer is ready to print.
When the Pause/Resume light is red, the Virtual Printer is paused and will not print. See
“Pausing a Printer” on page 5 and “Resuming a Printer” on page 5
3
Page 80

Status Bar
The Status Bar at the bottom of the MicroSpool main dialog displays various messages.
To hide or display the status bar , select ViewÎStatus Bar from the main menu.
Working with Queues
The Printer Window lists all queues configured for a particular output device. If more than
four queues are configured for a single printer, click the arrow buttons on the right-hand side
of the window to scroll.
Displaying Information About an Input Queue
To display information about any of the
input queues configured for a printer:
In the Queues Supplying This
Printer panel, click the queue for
which you want information.
Field/Control Description
Published Name Queue name that will appear in the Macintosh Chooser or Windows
Acknowledged Fonts Fonts MicroSpool acknowledges:
SpoolPath Where print jobs are stored until processed or deleted.
Preamble PostScript instructionsautomatically downloaded to a printer before a
Postamble PostScript instructions, routines, or procedures automatically
Pause Jobs From This Queue Pauses jobs for the queue
Print Manager
• if you select Use Server Fonts option in the Configuration setup
options, MicroSpool acknowle dge s all fonts stored on the server
• if you do not select Use Serve r Fonts, MicroSpool ackn ow le dge s only
the fonts currently resident in the RIP
print job
downloaded to a printer after a print job
Understanding Queue Balancing
MicroSpool uses queue balancing for queues configured with identical print ers and setup to
share print jobs. Example: Queue A and Queue B are configured with identical output
devices. Queue A is busy with several new jobs, but Queue B is idle. If queues A and B are
configured to balance all the acti ve jobs, Queue B will ac cept the next activ e job from Queue
A. The queue balancing relationship is one-way. You may set up Queue A to be bal anced by
Queue B; however , for queue B to balance queue A, you must set up Queue B to be balanced by Queue A.
Pausing Jobs From a Queue
1 Select a queue from the Queues Supplying This Pri nter panel of the MicroSpool
Main Screen to open the Queue Information dialog box.
2 Click the Pause Jobs From This Queue check box.
3 Click OK. Note: The bars on the queue button on the main screen
will turn red.
4
Page 81

Printer Status
The Printer S tatus Line in the lower portion of the main screen displays the
printer’s status. Status is updated every few seconds while jobs are printing.
icroPress printers may have a status of :
• Idle – printer available and not in use
• Working – prin te r c u rre n t ly pr in ting
Other PostScript printer statuses:
• Offline – printer unavailable
• Online – printer available
Pausing a Printer
Pausing a printer prevents jobs fr om being sent to it . Queues feeding the pr inter wil l continue
to accept jobs, which will be held until the printer is resumed. The printer, once Paused, will
complete any job already printing before responding to the Pause command.
1 Click a printer window. The active
window is highlighted.
2 Select P
rinterÎPause from the main
menu (or click the Pause button on
the main screen). The printer window
title bar displays Paused and the
printer will remain paused until you
resume printing.
Resuming a Printer
1 Click the printer window.
2 Select P
rinterÎResume from the main menu (or click the Resume butto n on the ma in
screen). The printer is activated, and all waiting jobs are processed.
Resetting and Restarting a Printer
Reset or restart a printer when you recei ve an unrecoverable error during printing. Both
actions remove data from the buffer so it becomes available to retry or process a new job.
Check with your system administrator about when to re set or restart a printer.
To reset or restart a printer:
1 Click the printer window.
2 Select P
start to restart the printer. The printer resets or restarts. Refer to the Troubleshooting
section on unrecoverable errors.
rinterÎReset from the main menu to reset the printer, or select PrinterÎRe-
Resetting a printer flushes the printer’s memory buffer. Reset may flush downloaded fonts and
PostScript commands from the printer’s memory. When you select Restart, the printer goes
through the start-up sequence. Restart may include testing the different systems within the
printer. Reset and Restart have no effect on the MicroSpool application.
Use the Restart option only when necessary. This option may require a lot of time to complete. If the printer is locked up from a communication error, cycle the printer OFF and
then ON again with the printer’s power switch.
5
Page 82

Downloading Files
To download PostScript files from a disk into a queue:
1 Select a printer window.
2 Select P
rinterÎDownload File from the main menu.
3 On the Choose PostScript File
dialog, select the drive, direc-
tory, and job to download.
4 Click OK. The file is down-
loaded to the specified printer.
Note: Downloading a file does not
allow you to specify which queue to
route the job through. It will always
send the file to the first queue in
the active Virtual Printer window.
Once the file is in MicroSpool, it
can be dragged and dropped into
the desired queue. The file can
also be dragged and dropped into the destination queue from the Explorer.
Viewing Job Information
To view job information about the currently selected job:
1 Select a job from the Job List Window.
2 Select J
The print job information gives general
information about the selected file.
Note: The following information is not always
available. The precise information is deter-
mined by the originating application.
3 Click Close.
obÎInfo... from the main menu.
Changing a Job’s Priority
Change a job’s priority to determine when the
job is to print in relation to the pri ority of other
waiting or scheduled jobs.
Using Job Find
Use Find to locate any job in MicroSpool by name or by user name.
6
1 Select a job from the Job L i s t W indow.
2 Select J
obÎInfo... from the main menu. The print job information box displ ays general
information about the selected file.
3 Click the down arrow in the Priority field and choose the priority for the job.
1 Select J
obÎFind from the main sc reen t o open the Find
Job dialog.
2 Select search by Job Name or User Name. Enter a text
string or an “*” to list all jobs.
3 Click F
ind.
Page 83

4 Click OK. If a match is found, a Job List dialog shows Job Name, User, and Virtual
Printer.
5 Click Find to activate the Virtual Printer with the job.
6 Click Close.
Placing a Job on Hold
1 Select a job from the job list window.
2 Select J
main screen). The job will stay on hold until you manually resume it.
obÎHold from the main menu (or click the Hold button on the Tool Bar on the
Sending a Job to the Printer
You can send any job to the printer, regardless of the job’s status (including Hold). You can
process multiple jobs simult aneously if mult iple RIPs are li censed, i nst al led, and runni ng. No
additional setup is required. MicroSpool detects all running RIPs and sends jobs to them as
the RIPs become available until all jobs complete.
1 Select a job from the Job List Window.
2 Select J
main screen) to send the job to the print queue.
obÎPrint from t he main menu (or click t he Print button on the Tool Bar on the
Removing Print Job s
Removing Print Jobs
Use Delete Job to remove jobs from MicroSpool. Deleting a job removes it from the disk.
1 Select a job from the Job List Window.
2 Select J
Bar on the main screen). The job is deleted from the printer queue and no longer dis-
plays in the Job List Window.
obÎDelete from the main menu (or click the Delete Jobs button on the Tool
Removing All Jobs in the Job List Window
Use Delete All to remove all jobs currently displayed in the Job List Window.
1 Select J
confirmation options.
2 Click OK to delete all jobs in the Job List Window.
obÎDelete All from the main menu. A warning dialog box displays delete
Scheduling Print Jobs
You can schedule jobs to print by date and time up to six days from the current date.
1 Select a job from the Job List Window.
2 Select J
menu (or click the Schedule Jobs button
on the Tool Bar on the main screen).
3 Select the day and time to be scheduled
for printing and click OK.
obÎSchedule from the main
Moving Jobs to Another Print Queue or Printer
To move a job to another print queue
1 Select a job from the Job List Window.
7
Page 84

2 Select JobÎMove from the main menu (or click the Move Job button on the Tool Bar
on the main screen).
3 On the Move dialog, select the queue to move
the job to.
4 Click OK.
To drag and drop a job to another print queue
1 Open the print queue you want to move t he job t o.
2 Open the print queue you want to move the job
from.
3 Click a job from the Job List Window.
4 Drag the job and drop it
into the desired print queue
under the heading “Queues
Supplying This Printer.”
The Printer Queue column
displays the new (current)
queue for the moved job.
Note: If you drag-and-drop a
job to a printer window
instead of a queue, the job will
move to the first (default)
queue.
Dragging and Dropping Within a Virtual Printer
To drag-and-drop a waiting job to
another place in a print queue:
1 Click a Waiting job in a
printer window.
2 Drag the job and drop it at the desired pl ace in the pr int qu eue among the other waiting
jobs. The printer window shows the Waiting job in the new position.
Note: You can only rearrange the order of a list of waiting jobs.
Job Accounting and System Events
MicroS pool tracks all print jobs according to user, spool time, print time, job size, and pages
printed. Accounting information for all MicroSpool jobs are stored in a tab-delimited text file
you can import into a database or spreadsheet application.
To display the Accounting information for all Mic roSpool jobs:
• Select V
menu to open the Accounting Log dialog
with spooler activity for the day.
Information in the Accounting Log dialog
includes:
• a description of the job
• the user who submitted the job
• the printer to which the job was sent
iewÎAccounting from the main
8
Page 85

• the number of pages
• the date and time the job was printed
• the date and time the job was sent
• total RIP time (in seconds)
Displaying System Event Information
MicroSpool tracks system events,
which you can use as a troubleshooting tool when errors occur.
1 Select V
2 Click Save As.... You can save
the log file to a specified directory.
OR
Click C
iewÎSystem Events.
lear Event Log.
Exiting MicroSpool
Select File from the menu bar, and then select Exit. (All print jobs will be saved.)
MicroSpool Supports the Image Management Server™ and OPI
The MicroPress Image Management Server
(IMS) software tool allows you to easil y manage large high-resolution image files and
automatically create small low-res olution
versions of them.
With MicroPress MicroSpool, you can
replace high-resolution images in a pagelayout program with lower-resolution versions to expedite the printing process and
localize image storage. Thi s feature is called
Open Prepress Interface (OPI) Image
Replacement or Automatic Picture Replacement. IMS provides the advantages of OPI
when using non-OPI aware applications.
IMS generates low-resolution placement
files from high-resolution image files. When
a print job containing a low-resoluti on placement file is sent to MicroSpool for output, the
low-resolution placement files are replaced
with their high-resolution counterparts.
MicroS pool, MicroSpool OPI, and/or IMS
support the following image file formats:
• Encapsulated Postscript (EPS)
• Desktop Color Separations (DCS)
• Tagged Image File Format (TIFF)
In order to utilize the MicroSpool OPI and
IMS picture replacement functions, you must
first set up Services for Macintosh on the
Windows NT Server. Services f or Maci ntos h
is a component of Windows NT Server.
When you set up Services for Macintosh, PC
users and Macintosh users can share files
and other resources, such as printing
devices, through the computer running Windows NT Server.
See the Windows NT Server Services for
Macintosh Guide for more info rmati on about
installing Services for Macintosh, the IMS
Reference Manual for Creating a Macintosh
Volume on the Windows NT Server and
Accessing the Windows NT Server from
your Macintosh.
For detailed information on IMS, OPI, and
supported file formats, see the IMS Refer-
ence Manual.
9
Page 86

Understanding Macintosh Query Handling
When printing, Macintosh workstati ons use
queries to generate the most efficient PostScript for the current print job description.
For example, when a font is used in a print
job, the Macintosh queri es the printer to see
if the font exists. Fonts not found on the
printer are downloaded with t he job from the
Macintosh workstation. Fonts found on the
printer are not sent from the Macintosh
workstation and job data transmission is
much faster.
A Macintosh workstation LaserWriter driver
typically uses PostScript to query the printer
for information. In turn, the Raster Image
Processor (RIP) interprets the PostScript
query.
When MicroSpool is in use, the PostScript
query does not pass through the spooler to
MicroSpool does not store information about disk locations because printers are not
associated with disk output destinations.
the printer. Instead, MicroSpool collects
resource information about each printer and
makes it available to AppleTalk workstation
queries. At startup, MicroSpool sends PostScript Printer Descripti on (PPD) and font list
queries to each PostScript de vice it cont rols,
including AppleTalk network printers and
MicroPress Virtual Engines.
PPD and fontlist query results are saved in
two separate files. The PPDRESP.CUR contains general information about the output
device including Resolution, LanguageLevel, FreeVM, etc. The FONTRESP.CUR contains a list of fonts that can
respond to fontlist queries. MicroSpool
updates this information periodically to
ensure current information is available to
AppleTalk clients.
Downloading Fonts with MicroSpool
You can configure MicroSpool to store printer fonts. Using MicroSpool to store fonts eliminates the need to download fonts with every print job, which saves printer Virtual Memo ry.
MicroSpool will check both the printer fonts and the server fonts (in that order) when it
receives a query from a workstation. Saved fonts are excluded from the job stream, and
MicroS pool automatically inserts the font before sending the job to an output destination.
To set up font storage, select the Use Server Fonts opti on when configuring or changing the
configuration of a queue in MicroSpool Configuration. Restart MicroSpool to enable font
downloading. MicroSpool supports Adobe Font Downloader 5.0.5.
MicroSpool enables you to store Type 1 fonts on the MicroPress Server hard drive. Use the Ad obe
Font Downloader 5.0.5 (only downloader currently supported because of its exacting use of PostScript comments) to download Type 1 fonts to any queue configured to "Use Server Fonts."
MicroSpool keeps track of the fonts on the server and will respond positively to any query for
these fonts. Also, i f a print jo b need s one of thes e font s, M icroSpool will automatically add the font
to the job while it is being sent to the printer (or the RIP in the case of MicroPress)
job contains proper PostScript comments.
Help
The Help menu contains the following items:
• Index
—starts the MicroSpool Help
—if the print
10
• About...
—displays the About dialog box.
– The System Info button provides information a bout memory usage, ver sio ns of .DLL
Page 87

files and their locations, and other information required when contacting Technical Support. This button is available in all MicroPress applications.
Troubleshooting
General Diagnostics
MicroS pool interacts with other network devices. So, when evaluating a potential problem,
first check network cables, routers, bridges, file servers, and printers. Micr oSpool’s performance can be impaired if other network components are malfunctioning. Answer the following questions before concluding that the job (or problem) is specific to MicroSpool:
1 Will the job print successfully to a printer? If you can bypass MicroSpool and
achieve output from a printer then rule out workstation or network problems.
2 Will the job print successfull y from another workstation? If not, rule out worksta-
tion problems.
3 Does printing a job to PostScript and downloading it to MicroSpool make it pos-
sible to spool successfully? If so, rule out probl ems with the job.
4 Does MicroSpool support the LaserW riter driver being used? MicroS poo l currently
supports the following LaserWriter drivers:
LaserWriter 7.2
LaserWriter 8.1.1
LaserWriter 8.2
LaserWriter 8.2.2
MicroSpool Diagnostics
Y ou can ident ify most MicroS pool prob lems through common troubleshooti ng methods. Refer
to table below for quick solutions to common problems.
When This Problem Exists Follow These Steps
Queues Are Not Visible On The
Network
MicroSpool Does Not Display
Jobs That Have Spooled
Successfully
1 Make sure MicroSpool is running.
2 If using a Macintosh, make sure the selected zone is correct.
3 Check the network connection, routers, cables, and hardware.
4 If you identify a network problem, refer to the NT Server Installation Guide
for information.
1 If using a Macintosh, background printing should be off.
2 Is the appropriate queue selected? Make sure the destination queue is visi-
ble to display jobs.
3 Be sure the jobs were sent directly to a printer.
4 Does MicroSpool display the job in an Error state? Make sure that Error jobs
are selected to display in the Job List Window.
5 Assure all job type check boxes are checked.
LaserWriter 8.3
LaserWriter 8.3.2
LaserWriter 8.3.3
LaserWriter 8.3.4
MicroSpool Displays The Job In
An Error (E) State
1 Double-click the job to identify the error.
2 Check the System Events to access error results.
3 If outputting to MicroPress RIP, check to see if Inputs have been started
(RIP-Start Inputs) and refer to the MicroPress RIP Reference Manual.
11
Page 88

When This Problem Exists Follow These Steps
The Job Does Not Display In A n
Active State
Images Are Missing From The
Printed Document
Waiting Jobs do not Print when
Stoplight is Green
Jobs are not retained (go to
Printed state) afte r succ es sful
printing
When downloading files, file
does not show up in file open
dialog.
When downloading files, files
do not show up in printer
window.
1 Make sure printer is not paused.
2 Make sure queue is not paused.
3 Is the target printer busy? The printer will not accept a new job if it is cur-
rently printing.
4 Check whether the RIP is busy. The MicroPress RIP processes only one job
at a time.
1 Many page layout programs have image options. Make sure the application
is instructed to include images or the correct OPI options are selected.
2 Be sureimages are placed in the correct directory.
1 Make sure printer window in question is in foreground.
2 Make sure queue in question is not paused.
3 MicroPress RIP can only accept one job at a time and it may already be pro-
cessing a job for a different Virtual Printer.
4 Connection to the RIP (another printer) may be active.
1 Assure that the queue in question is configured to Retain Jobs after printing.
2 Make sure Printed check box is checked.
Assure proper file type displays in List files of type: window.
1 With MicroSpool, you can only download PostScript files.
2 Assure correct printer is active window.
Cannot drag-and-drop jobs to
rearrange print order.
drag-and-dropping jobs to
another printer results in jobs
being listed in incorrect queue.
MicroSpool queues do not
show up in multiple zones.
Queue is not published and /or
not displayed as queue button
in printer window
When setting up a Print
Manager connection, the
message “Invalid Port” is
displayed.
You can rearrange only Waiting Jobs by drag-and-drop.
1 Dropping jobs on job list window results in jobs being assigned to default
printer. The default printer is the first queue button (left-most queue button.)
2 All visible queue buttons are also drop targets.
MicroSpool publishes queues in NT Server default zone. (You can set this
from Services For Macintosh configuration in the Network Control Panel.)
1 Make sure queue is not disabled from MicroSpool Configuration.
2 Make sure input queue is proper type: AppleTalk or Print Manager.
Make sure MicroSpool is running while setting up connection in Print Manager.
Glossary
Term Definition
Desktop Color Separations
(DCS)
Encapsulated PostScript (EPS) Common high-resolution gr aphics file format.
Image Management Server
(IMS)
Pre-separated EPS file with cyan (C), m agenta (M ), yello w (Y), and blac k (K) files an d
a fifth file for document placement. This fifth file is a low-resolution image that
reduces document’file size for faster processing.
Software tool that allows you to easily manage large high-resolution image files and
automatically cre ate sm al l low-res olu tio n vers io ns of them .
12
Page 89

Glossary
Term Definition
Macintosh-accessible volume Directory created on the computer running Windows NT Server available to
Macintosh clients. Macintosh-accessible volumes shared with PC’s make file
exchange possible for Macintosh and PC users. You can create Macintoshaccessible volumes from the MacFile menu in File Manager.
Open Prepress Interface (OPI) Ability to replace high-resolution images in a page layout program with lower-
resolution ones to expedite printing and localize image file storage. IMS offers the
advantages of OPI when using non-OPI aware applications.
Proc Set (or Prep File) Collection of PostScript commands used by some applications or printer drivers.
Queue List of documents sent by a user waiting to print. MicroSpool can handle up to 16
queues managing 8 printers.
Spooler Hardware or software that intercepts a print job on its way to the printer. A spooler
typically ac cep t s th e job as fast as the cl ient can send i t. It st ores the job and pri nt s i t
when the printer becomes available.
Tagged Image File Formats
(TIFF)
Virtual Engine One or more PrintStations created in the PrintStation Manager Configuration
Virtual Printer Set of characteristics created in the MicroPress RIP a pplic ation t hat defi ne the output
Files used for exchangi ng b itm ap i ma ges bet w een app lic ati ons . The se im age s ha ve
usually been scanned in color, line art (black & white), or gray scale.
application.
settings applied to incoming jobs.
13
Page 90

Page 91

User Manual
RIP
www.minoltaeurope.com
The essentials of imaging
Page 92

Page 93

Copyright © 1995–2001 T/R Systems, Inc.
All Rights Reserved
Reproduction, adaptation, or translation without prior written permission is prohibited, except as allowed
under the copyright laws.
The information contained in this document is subject to change without notice. T/R Systems makes no
warranty of any kind with regard to this material, including, but not limited to, the implied warranties of
merchantability and fitness for a particular purpose. T/R Systems shall not be liable for errors contained
herein or for incidental or consequential damage in connection with the furnishing, performance, or use
of this material.
T/R Systems, MicroPress, M@estro, e-Ticket, MicroImager and other T/R Systems' product names are
registered trademarks or trademarks of T/R Systems, Inc. in the United States and other countries.
Portions of this product were created using LEADTOOLS © 1991-2001, LEAD Technologies, Inc. ALL
RIGHTS RESERVED.
Portions hereof include TextBridge® OCR Copyright © Xerox Corporation. ALL RIGHTS RESERVED.
LZW data compression technology licensed under U.S. Patent No. 4,558,302
Some ICC Profiles created using software under License from Monaco Systems, Inc.
Portions Copyright © 2001 URW++. All Rights Reserved
Imaging Technology provided under License by AccuSoft Corporation. ImageGear© 1996-2001 by
AccuSoft Corporation. All Rights Reserved.
All other company and product names are registered trademarks or trademarks of their respective owners in the United States and other countries.
The following marks are used in this manual:
Indicates precautions that must be observed to prevent possible personal injury or damage
to equipment or malfunctioning of software.
Indicates notes and memos containing additional or detailed information.
Indicates useful tips.
Page 94

Page 95

Table of Contents
What is the MicroPress RIP? . . . . . . . . . . . . . . . . . . . . . . . . . . . . . . . . . . 1
What does the MicroPress RIP offer?. . . . . . . . . . . . . . . . . . . . . . . . . . . . . . . . . . . . . 1
What is the MicroPress? . . . . . . . . . . . . . . . . . . . . . . . . . . . . . . . . . . . . . . . . . . . . . . . 1
The MicroPress RIP Features. . . . . . . . . . . . . . . . . . . . . . . . . . . . . . . . . . . . . . . . . . . 3
The MicroPress RIP Options. . . . . . . . . . . . . . . . . . . . . . . . . . . . . . . . . . . . . . . . . . . . 4
Running MicroPress RIP . . . . . . . . . . . . . . . . . . . . . . . . . . . . . . . . . . . . . 5
Starting MicroPress RIP. . . . . . . . . . . . . . . . . . . . . . . . . . . . . . . . . . . . . . . . . . . . . . . . . . . . . 5
The Toolbar . . . . . . . . . . . . . . . . . . . . . . . . . . . . . . . . . . . . . . . . . . . . . . . . . . . . . . . . . . . . . . 5
Toolbar Status Area . . . . . . . . . . . . . . . . . . . . . . . . . . . . . . . . . . . . . . . . . . . . . . . . . . . . . . 5
Menus affected by optional features . . . . . . . . . . . . . . . . . . . . . . . . . . . . . . . . . . . . . . . . . . . 6
Configuring the MicroPress RIP. . . . . . . . . . . . . . . . . . . . . . . . . . . . . . . . . . . . . . . . . . . . . . . 6
Stopping the MicroPress RIP . . . . . . . . . . . . . . . . . . . . . . . . . . . . . . . . . . . . . . . . . . . . . . . . . 6
MP-RIP Menu . . . . . . . . . . . . . . . . . . . . . . . . . . . . . . . . . . . . . . . . . . . . . . . 6
Print File… . . . . . . . . . . . . . . . . . . . . . . . . . . . . . . . . . . . . . . . . . . . . . . . . . . . . . . . . . 7
Page Setup Manager . . . . . . . . . . . . . . . . . . . . . . . . . . . . . . . . . . . . . . . . . . . . . . . . . 7
Page Setup Manager Dialog . . . . . . . . . . . . . . . . . . . . . . . . . . . . . . . . . . . . . . . . . . . . . . . . . 7
Edit Page Setup Dialog . . . . . . . . . . . . . . . . . . . . . . . . . . . . . . . . . . . . . . . . . . . . . . . . . . . . . 8
Edit Page Setup Definitions . . . . . . . . . . . . . . . . . . . . . . . . . . . . . . . . . . . . . . . . . . . . . . . . 8
Configure RIP . . . . . . . . . . . . . . . . . . . . . . . . . . . . . . . . . . . . . . . . . . . . . . . . . . . . . . 20
Configure RIP Options… . . . . . . . . . . . . . . . . . . . . . . . . . . . . . . . . . . . . . . . . . . . . . . . . . . . 21
Configure RIP Extras… . . . . . . . . . . . . . . . . . . . . . . . . . . . . . . . . . . . . . . . . . . . . . . . . . . . . 23
Device Manager . . . . . . . . . . . . . . . . . . . . . . . . . . . . . . . . . . . . . . . . . . . . . . . . . . . . 23
Input Controller . . . . . . . . . . . . . . . . . . . . . . . . . . . . . . . . . . . . . . . . . . . . . . . . . . . . . 24
Input Controller Dialog . . . . . . . . . . . . . . . . . . . . . . . . . . . . . . . . . . . . . . . . . . . . . . . . . . . . . 24
Input Channel Edit Dialog . . . . . . . . . . . . . . . . . . . . . . . . . . . . . . . . . . . . . . . . . . . . . . . . . . 25
Input Controller Edit Dialog Definition . . . . . . . . . . . . . . . . . . . . . . . . . . . . . . . . . . . . . . . . 25
Start Inputs . . . . . . . . . . . . . . . . . . . . . . . . . . . . . . . . . . . . . . . . . . . . . . . . . . . . . . . . 29
Executive. . . . . . . . . . . . . . . . . . . . . . . . . . . . . . . . . . . . . . . . . . . . . . . . . . . . . . . . . . 29
Language . . . . . . . . . . . . . . . . . . . . . . . . . . . . . . . . . . . . . . . . . . . . . . . . . . . . . . . . . 29
About the MicroPress RIP. . . . . . . . . . . . . . . . . . . . . . . . . . . . . . . . . . . . . . . . . . . . . 29
Logo . . . . . . . . . . . . . . . . . . . . . . . . . . . . . . . . . . . . . . . . . . . . . . . . . . . . . . . . . . . . . 29
Memory Statistics . . . . . . . . . . . . . . . . . . . . . . . . . . . . . . . . . . . . . . . . . . . . . . . . . . . 29
Quit . . . . . . . . . . . . . . . . . . . . . . . . . . . . . . . . . . . . . . . . . . . . . . . . . . . . . . . . . . . . . . 30
Edit Menu . . . . . . . . . . . . . . . . . . . . . . . . . . . . . . . . . . . . . . . . . . . . . . . . . 30
Device Menu (Preview, TIFF, MicroPress devices) . . . . . . . . . . . . . . . 30
Device Menu Definitions . . . . . . . . . . . . . . . . . . . . . . . . . . . . . . . . . . . . . . . . . . . . . . . . . . 30
Color Menu . . . . . . . . . . . . . . . . . . . . . . . . . . . . . . . . . . . . . . . . . . . . . . . 30
Separations Manager… . . . . . . . . . . . . . . . . . . . . . . . . . . . . . . . . . . . . . . . . . . . . . . 30
New / Copy Style dialog . . . . . . . . . . . . . . . . . . . . . . . . . . . . . . . . . . . . . . . . . . . . . . . . . . . . 31
Edit Style dialog . . . . . . . . . . . . . . . . . . . . . . . . . . . . . . . . . . . . . . . . . . . . . . . . . . . . . . . . . . 32
Possible problems with output . . . . . . . . . . . . . . . . . . . . . . . . . . . . . . . . . . . . . . . . . . . . . . . 38
Color Setup Manager . . . . . . . . . . . . . . . . . . . . . . . . . . . . . . . . . . . . . . . . . . . . . . . . 39
Installation . . . . . . . . . . . . . . . . . . . . . . . . . . . . . . . . . . . . . . . . . . . . . . . . . . . . . . . . . . . . . . 39
Color Management Introduction. . . . . . . . . . . . . . . . . . . . . . . . . . . . . . . . . . . . . . . . . . . . . . 39
Emulation/Proofing . . . . . . . . . . . . . . . . . . . . . . . . . . . . . . . . . . . . . . . . . . . . . . . . . . . . . . 39
Color Setup Manager Dialog . . . . . . . . . . . . . . . . . . . . . . . . . . . . . . . . . . . . . . . . . . . . . . . . 39
iii
Page 96

Color Setup Dialog. . . . . . . . . . . . . . . . . . . . . . . . . . . . . . . . . . . . . . . . . . . . . . . . . . . . . . . . 40
Color Setups . . . . . . . . . . . . . . . . . . . . . . . . . . . . . . . . . . . . . . . . . . . . . . . . . . . . . . . . . . . 42
Loading the Color Setup into the RIP . . . . . . . . . . . . . . . . . . . . . . . . . . . . . . . . . . . . . . . . . 43
Install ICC Profile . . . . . . . . . . . . . . . . . . . . . . . . . . . . . . . . . . . . . . . . . . . . . . . . . . . . 43
Output . . . . . . . . . . . . . . . . . . . . . . . . . . . . . . . . . . . . . . . . . . . . . . . . . . . 44
Media Manager and Cassette Manager. . . . . . . . . . . . . . . . . . . . . . . . . . . . . . . . . . . 44
Trapping Manager . . . . . . . . . . . . . . . . . . . . . . . . . . . . . . . . . . . . . . . . . . . . . . . . . . . 44
Installation . . . . . . . . . . . . . . . . . . . . . . . . . . . . . . . . . . . . . . . . . . . . . . . . . . . . . . . . . . . . . . 44
Trapping Introduction. . . . . . . . . . . . . . . . . . . . . . . . . . . . . . . . . . . . . . . . . . . . . . . . . . . . . . 44
Misregistration and Visible Errors . . . . . . . . . . . . . . . . . . . . . . . . . . . . . . . . . . . . . . . . . . . 44
Creating Trapsets . . . . . . . . . . . . . . . . . . . . . . . . . . . . . . . . . . . . . . . . . . . . . . . . . . . . . . . . 45
Edit Trapping Parameters Dialog. . . . . . . . . . . . . . . . . . . . . . . . . . . . . . . . . . . . . . . . . . . . . 46
Special Colors . . . . . . . . . . . . . . . . . . . . . . . . . . . . . . . . . . . . . . . . . . . . . . . . . . . . . . . . . . . 48
Troubleshooting. . . . . . . . . . . . . . . . . . . . . . . . . . . . . . . . . . . . . . . . . . . . . . . . . . . . . . . . . . 48
Limitations . . . . . . . . . . . . . . . . . . . . . . . . . . . . . . . . . . . . . . . . . . . . . . . . . . . . . . . . . . . . . . 48
Calibration Manager. . . . . . . . . . . . . . . . . . . . . . . . . . . . . . . . . . . . . . . . . . . . . . . . . . 48
Calibration Sets . . . . . . . . . . . . . . . . . . . . . . . . . . . . . . . . . . . . . . . . . . . . . . . . . . . . . . . . . . 48
Tone Curves . . . . . . . . . . . . . . . . . . . . . . . . . . . . . . . . . . . . . . . . . . . . . . . . . . . . . . . . . . . . 49
Calibration (Dot Gain) Manager Dialog . . . . . . . . . . . . . . . . . . . . . . . . . . . . . . . . . . . . . . . . 50
Edit Uncalibrated Target Dialog . . . . . . . . . . . . . . . . . . . . . . . . . . . . . . . . . . . . . . . . . . . . . . 51
Table of Calibration Sets and Tone Curves. . . . . . . . . . . . . . . . . . . . . . . . . . . . . . . . . . . . . 52
Loading a Calibration Set . . . . . . . . . . . . . . . . . . . . . . . . . . . . . . . . . . . . . . . . . . . . . . . . . . 52
Using the "ToneCurveThumbnails" RIP feature. . . . . . . . . . . . . . . . . . . . . . . . . . . . . . . . . . 52
Print Calibration . . . . . . . . . . . . . . . . . . . . . . . . . . . . . . . . . . . . . . . . . . . . . . . . . . . . . 53
Print Calibration Dialog . . . . . . . . . . . . . . . . . . . . . . . . . . . . . . . . . . . . . . . . . . . . . . . . . . . . 53
DOT MC, DOTCMYK and DOT RGB Program Listings . . . . . . . . . . . . . . . . . . . . . . . . . . . 53
Media Monitor . . . . . . . . . . . . . . . . . . . . . . . . . . . . . . . . . . . . . . . . . . . . . . . . . . . . . . 54
Hold and Reprint . . . . . . . . . . . . . . . . . . . . . . . . . . . . . . . . . . . . . . . . . . . . . . . . . . . . 54
Fonts . . . . . . . . . . . . . . . . . . . . . . . . . . . . . . . . . . . . . . . . . . . . . . . . . . . . 55
Supplied Fonts. . . . . . . . . . . . . . . . . . . . . . . . . . . . . . . . . . . . . . . . . . . . . . . . . . . . . . . . . . . 55
Types of Fonts . . . . . . . . . . . . . . . . . . . . . . . . . . . . . . . . . . . . . . . . . . . . . . . . . . . . . . . . . . . 55
Pre-Loading Fonts . . . . . . . . . . . . . . . . . . . . . . . . . . . . . . . . . . . . . . . . . . . . . . . . . . . . . . . . 55
Substituting Fonts . . . . . . . . . . . . . . . . . . . . . . . . . . . . . . . . . . . . . . . . . . . . . . . . . . . . . . . . 55
Install Fonts . . . . . . . . . . . . . . . . . . . . . . . . . . . . . . . . . . . . . . . . . . . . . . . . . . . . . . . . 56
List Fonts . . . . . . . . . . . . . . . . . . . . . . . . . . . . . . . . . . . . . . . . . . . . . . . . . . . . . . . . . . 57
Proof Fonts . . . . . . . . . . . . . . . . . . . . . . . . . . . . . . . . . . . . . . . . . . . . . . . . . . . . . . . . 57
Delete Fonts. . . . . . . . . . . . . . . . . . . . . . . . . . . . . . . . . . . . . . . . . . . . . . . . . . . . . . . . 57
Print File . . . . . . . . . . . . . . . . . . . . . . . . . . . . . . . . . . . . . . . . . . . . . . . . . 57
Kill Current Job . . . . . . . . . . . . . . . . . . . . . . . . . . . . . . . . . . . . . . . . . . . . . . . . . . . . . 57
Stop Printing File . . . . . . . . . . . . . . . . . . . . . . . . . . . . . . . . . . . . . . . . . . . . . . . . . . . . 57
Abort Printing File . . . . . . . . . . . . . . . . . . . . . . . . . . . . . . . . . . . . . . . . . . . . . . . . . . . 57
. . . . . . . . . . . . . . . . . . . . . . . . . . . . . . . . . . . . . . . . . . . . . . . . . . . . . . . . . 57
Input Queue . . . . . . . . . . . . . . . . . . . . . . . . . . . . . . . . . . . . . . . . . . . . . . 58
Kill Current Job . . . . . . . . . . . . . . . . . . . . . . . . . . . . . . . . . . . . . . . . . . . . . . . . . . . . . 58
Stop Input Queue. . . . . . . . . . . . . . . . . . . . . . . . . . . . . . . . . . . . . . . . . . . . . . . . . . . . 58
Abort Input Queue . . . . . . . . . . . . . . . . . . . . . . . . . . . . . . . . . . . . . . . . . . . . . . . . . . . 58
Appendix A, Troubleshooting . . . . . . . . . . . . . . . . . . . . . . . . . . . . . . . . 59
Warning Messages . . . . . . . . . . . . . . . . . . . . . . . . . . . . . . . . . . . . . . . . . . . . . . . . . . 59
iv
Page 97

Problems starting the MicroPress RIP . . . . . . . . . . . . . . . . . . . . . . . . . . . . . . . . . . . . . . . . . 59
Problems Involving Memory or Disk Space . . . . . . . . . . . . . . . . . . . . . . . . . . . . . . . 59
Problems with Resources . . . . . . . . . . . . . . . . . . . . . . . . . . . . . . . . . . . . . . . . . . . . . . . . . . 59
Problems with Files . . . . . . . . . . . . . . . . . . . . . . . . . . . . . . . . . . . . . . . . . . . . . . . . . . . . . . . 59
Problems with Networks . . . . . . . . . . . . . . . . . . . . . . . . . . . . . . . . . . . . . . . . . . . . . . . . . . . 59
RIP Monitor Warnings. . . . . . . . . . . . . . . . . . . . . . . . . . . . . . . . . . . . . . . . . . . . . . . . 60
Problems Involving Disk Space . . . . . . . . . . . . . . . . . . . . . . . . . . . . . . . . . . . . . . . . . . . . . 60
Problems Involving Fonts . . . . . . . . . . . . . . . . . . . . . . . . . . . . . . . . . . . . . . . . . . . . . . . . . . 60
Problems involving Files . . . . . . . . . . . . . . . . . . . . . . . . . . . . . . . . . . . . . . . . . . . . . . . . . . . 60
Appendix B, Backup and Restore the MicroPress RIP . . . . . . . . . . . . 61
Backup the MicroPress RIP Configuration . . . . . . . . . . . . . . . . . . . . . . . . . . . . . . . . 61
Restore the MicroPress RIP Configuration . . . . . . . . . . . . . . . . . . . . . . . . . . . . . . . . 61
Backup RIP Fonts . . . . . . . . . . . . . . . . . . . . . . . . . . . . . . . . . . . . . . . . . . . . . . . . . . . 62
Restore RIP Fonts. . . . . . . . . . . . . . . . . . . . . . . . . . . . . . . . . . . . . . . . . . . . . . . . . . . 62
Appendix C, Resetting/Creating Virtual Printers . . . . . . . . . . . . . . . . . 62
Resetting All Virtual Printers . . . . . . . . . . . . . . . . . . . . . . . . . . . . . . . . . . . . . . . . . . . 62
Creating a Virtual Printer. . . . . . . . . . . . . . . . . . . . . . . . . . . . . . . . . . . . . . . . . . . . . . 63
Virtual Printer Configuration . . . . . . . . . . . . . . . . . . . . . . . . . . . . . . . . . . . . . . . . . . . 63
Enabling QuadLevel. . . . . . . . . . . . . . . . . . . . . . . . . . . . . . . . . . . . . . . . . . . . . . . . . . . . . . . 64
Creating Queues Manually . . . . . . . . . . . . . . . . . . . . . . . . . . . . . . . . . . . . . . . . . . . . . . . . . 64
Appendix D, Composite Fonts. . . . . . . . . . . . . . . . . . . . . . . . . . . . . . . . 64
Installing/Removing Composite Fonts. . . . . . . . . . . . . . . . . . . . . . . . . . . . . . . . . . . . . . . . 64
Using Composite Fonts Efficiently . . . . . . . . . . . . . . . . . . . . . . . . . . . . . . . . . . . . . . . . . . 64
Appendix E, Setting Print Options for Individual Pages in a Document 65
Appendix F, B/W and Color Splitting . . . . . . . . . . . . . . . . . . . . . . . . . . 65
Appendix G, Glossary . . . . . . . . . . . . . . . . . . . . . . . . . . . . . . . . . . . . . . 66
v
Page 98

vi
Page 99

What is the MicroPress RIP?
y
The MicroPress RIP (Raster Image Processor) is a PostScript® language compatible interpreter. MicroPress RIP rasterizes postscript and other file types for printing using three basic
functions (Input, Configuration, and Output), each with a corresponding software tool.
• Input
– Input Controller - provides various
input sources including AppleTalk,
MicroSpool pipe, and NT pipe
– Print file - downloads PostScript
files directly
• Configuration
– Configure RIP - used to set RIP
system settings and add RIP extras
such as ICC and TrapWorks
– Page Setup Manager - defines how
the RIP processes jobs including
A number of utilities exist for creating, configuring, backing up, and restoring RIP settings. See “Appendix B, Backup and Restore the MicroPress RIP” on page 61 and “Appen-
dix C, Resetting/Creating Virtual Printers” on page 62.
What does the MicroPress RIP offer?
• Increased speed and performance without purchasing a new hardware RIP
• Access to new features via cost-effective software upgrades
resolution, screening, page features, calibration, tone curves, and
printing effects (rotate, scaling, etc.)
– Calibration Manager - manages
calibration curves, Tone Curves
– Color Setup Manager - installs and
manages ICC profiles
– Cassette Manager - sets cassette
or wide-format roll size
• Output
– Device Manager - connects the
MicroPress RIP to output devices
• Much easier customer-specific customization than hardware RIPs
• PostScript® 3 functionality and many
additional features beyond Level 3 to
improve workflow and color functionalit
What is the MicroPress?
A short run, on-demand, digital printing system designed for production printing of black &
white and color documents. Its three software components—MicroSpool, MicroPress RIP,
PrintStation Manager—work with associated hardware to provide the network connectivity,
image rendering, and virtual printer capability to meet today’s digital document production
challenges. The following chart outlines the system and provides definitions its major components.
1
Page 100

Cii
Contone C12
BiLevel C12
Monochrome B12
Contone A12
BiLevel A12
QuadLevel A12
024
312
Manages Physical Engines by routing
jobs and job characteristics to Virtual Engines.
Virtual Engines can consist of a single
Physical Engine (for example, the Virtual Engine
C1), or a combination of multiple Physical
PrintStation Manager
Engines (for example, the Virtual Engine C12).
RIP.
MicroPress
MicroPress
MicroPress
RIP
Contone C12
Contone C12
RIP to MicroSpool.
Setups" to determine how jobs
are processed by
Raster Image Processor interprets
MicroPress
Page Setup Manager: Uses "Page
PostScript code and produces
compressed page images (raster).
Input Controller: Connects
RIP to PrintStation Manager.
Device Manager: Connects
C1
C2
C1: Virtual Engine using
a single Physcial Engine.
using multiple
Physical Engines.
C12: Virtual Engine
Receives job
information from the
Virtual Printer C12.
MANAGER
PAGE SETUP
Cii
B1
C2: Virtual Engine using
a single Physcial Engine.
B1: Virtual Engine using
a single Physcial Engine.
using multiple
Physical Engines.
B12: Virtual Engine
BiLevel C12
BiLevel C12
Monochrome B12
Monochrome B12
024
B2
B2: Virtual Engine using
a single Physcial Engine.
Receives job
information from the
Virtual Printer B12.
Device Manager
Contone A12
Contone A12
Input Controller
A1
A2
A1: Virtual Engine using
a single Physcial Engine.
using multiple
Physical Engines.
A12: Virtual Engine
Receives job
information from the
Virtual Printer A12.
BiLevel A12
BiLevel A12
312
A2: Virtual Engine using
a single Physcial Engine.
QuadLevel A12
QuadLevel A12
Created during Install.
PHYSICAL ENGINES
(or by using PrintStation Manager Configuration)
Created during Install.
VIRTUAL ENGINES
(or by using PrintStation Manager Configuration)
MicroPress
PAGE SETUPS
Created in
RIP's Page Setup Manager
Other
Mac 7.0 +
Manager queues to the network.
MicroSpool
* Publishes AppleTalk and Windows Print
* Accepts incoming job information
Contone C12, Monochrome B12, BiLevel A12,
etc. are all Virtual Printers within MicroSpool.
Each Virtual Printer can have multiple
* OPI aware
AppleTalk and/or Windows queues.
400x400 dpi
Continuous tone
printing
Contone C12
(Windows)
400x400 dpi
Halftone screen
printing
BiLevel C12
600x600 dpi
Halftone screen
printing
Monochrome B12
600x600 dpi
Contone A12
600x600 dpi
Halftone screen
BiLevel A12
Continuous tone
printing
printing
1200x1200 dpi
QuadLevel A12
screened printing
VIRTUAL PRINTERS
RIP's
MicroPress
_TRaddve (in Appendix))
Created during Install.
AutoGenerate, or
(or by using PrintStation Manager Configuration's
WIN NT WIN 98 WIN 95 UNIX
(AppleTalk)
RIP's
MicroPress
=
Contone C12
MS
server name
MS
MP Cii Contone C12
BiLevel C12
MS
Monochrome B12
MP Cii BiLevel C12
MS
Contone A12
MP 024 Monochrome B12
MS
BiLevel A12
MP 312 Contone A12
MP 312 BiLevel A12
MS
QuadLevel A12
MP 312 QuadLevel A12
MS
MicroPress
QUEUES
or
_TRaddve (in Appendix))
Created during Install.
Configuration's AutoGenerate,
(or by using PrintStation Manager
10 Base/100 Base T
Thin Coax/Thinnet
2
 Loading...