

Page 1
KONICA MINOLTA FAX2900/FAX3900
User’s Guide GDI Printer Controller
Page 2

Contents
Contents
1 Introduction
1.1 END USER LICENSE AGREEMENT.............................................1-1
1. SOFTWARE ..............................................................................1-1
2. LICENSE AGREEMENT............................................................1-1
3. LICENSE ...................................................................................1-1
4. RESTRICTIONS ........................................................................1-2
5. LIMITED WARRANTY ...............................................................1-2
6. LIMITATION OF REMEDIES.....................................................1-2
7. TERMINATION ..........................................................................1-3
8. GOVERNING LAW ....................................................................1-3
9. GOVERNMENT END USERS ...................................................1-3
1.2 Getting Ready................................................................................1-4
System Requirements ...................................................................1-4
2 Connecting to a Computer
2.1 USB Port Connection....................................................................2-1
2.2 Connecting the Network Cable ....................................................2-2
3 Installing the Printer Driver
3.1 Installing the Printer Driver Using Plug and Play ......................3-1
3.2 Installing the Printer Driver Using the Add Printer Wizard .......3-5
4 Configuring Printer Driver Settings
4.1 Displaying Printer Driver Properties for Configuring Global
Settings..........................................................................................4-1
4.2 Common Operations.....................................................................4-4
4.2.1 Common Button ..............................................................................4-4
OK..................................................................................................4-4
Cancel............................................................................................4-4
Apply..............................................................................................4-4
4.2.2 Orientation.......................................................................................4-4
4.2.3 Paper Source ..................................................................................4-4
4.2.4 Media Type .....................................................................................4-5
4.2.5 Paper Size.......................................................................................4-5
i
Page 3

Contents
4.2.6 Copy ............................................................................................... 4-5
4.2.7 Resolution....................................................................................... 4-5
ii
Page 4

Contents
5 Control Panel Operations
(PC Print Mode)
5.1 Printer Operations.........................................................................5-1
General Guide ...............................................................................5-2
[Printer] Indicator ...........................................................................5-3
Entering and Exiting the PC Print Mode ........................................5-3
5.2 Printing the Configuration Page..................................................5-7
6 Network Printing in a Windows Environment
(Available only with FAX3900)
6.1 Assigning an IP Address..............................................................6-2
Entering the IP Address From the Control Panel...........................6-2
Assigning an IP Address................................................................6-3
6.2 Selecting the Network Print Method............................................6-6
For Windows 98/ Windows Me ......................................................6-6
For Windows 2000.........................................................................6-7
For Windows XP ............................................................................6-8
For NetWare (NetWare Server/ Windows Client) ..........................6-9
Supported Environments ...............................................................6-9
6.3 Checking the Setup Procedures................................................6-10
6.4 Setting Up the Network Connections........................................6-12
6.4.1 Peer-to-Peer Printing ....................................................................6-12
Windows 98/ Windows Me...........................................................6-12
6.4.2 LPR Printing..................................................................................6-13
Windows 2000 .............................................................................6-13
6.4.3 Printing to Port 9100 .....................................................................6-15
Windows 2000/ Windows XP .......................................................6-15
6.4.4 IPP Printing ...................................................................................6-16
Windows 2000/ Windows XP .......................................................6-16
6.4.5 Connecting a Copier to the NetWare Server.................................6-17
7 Troubleshooting
7.1 Correcting Errors..........................................................................7-1
7.1.1 Checking Error Messages...............................................................7-1
7.1.2 Main Error Messages......................................................................7-2
7.1.3 Errors and Print Data ......................................................................7-4
“MACHINE TROUBLE” Error.........................................................7-4
Temporary Errors...........................................................................7-4
iii
Page 5

8 Specifications
Contents
iv
Page 6

Introduction
1 Introduction
1.1 END USER LICENSE AGREEMENT
PLEASE READ CAREFULLY THE LICENSE AGREEMENT BELOW
BEFORE INSTALLING THE SOFTWARE. INSTALLING THE
SOFTWARE INDICATES YOUR ACCEPTANCE OF THE TERMS AND
CONDITIONS BELOW. IF YOU DO NOT AGREE WITH THEM, YOU
SHOULD PROMPTLY RETURN THE SOFTWARE UNUSED.
1. SOFTWARE
“Software” means the computer program contained in the package,
together with all codes, techniques, software tools, format, design,
concepts, methods and ideas associated with the computer program and
all documentation related thereto.
2. LICENSE AGREEMENT
This is a license agreement for sale. KONICA MINOLTA BUSINESS
TECHNOLOGIES, INC. or its affiliate company (hereinafter collectively
“KONICA MINOLTA”) owns, or has been licensed from other owners
(“KONICA MINOLTA’s Licensor”), copyrights in the Software. Except as
in this Agreement, you are not granted any rights to patents, copyrights,
trade names, trademarks (whether registered or unregistered), or any
other rights, franchises or licenses in respect of the Software. Title to the
Software and any copy made from it is retained by KONICA MINOLTA or
KONICA MINOLTA’s Licensor.
1
3. LICENSE
KONICA MINOLTA, hereby grand to you, and you agree to accept a nonexclusive, non-transferable and limited license and you may:
(1) install and use the Software on a single computer.
(2) use the Software only for your own customary business or personal
purpose.
(3) make a copy of the Software for backup or installation purpose only in
support of the normal and intended use of the Software.
1-1
Page 7

1
Introduction
(4) transfer possession of copies of the Software to another party by
transferring a copy of this Agreement and all other documentation along
with at least one complete unaltered copy of the Software, provided that
(i) you, at the same time, either transfer to such other party or destroy all
your other copies of the Software, (ii) such transfer of possession
terminates your license with KONICA MINOLTA, and (iii) such other party
shall accept and be bound by these license terms with their initial use of
the Software.
4. RESTRICTIONS
(1) You shall not without the written consent of KONICA MINOLTA:
(i) use, copy, modify, merge or transfer copies of the Software except as
provided herein, (ii) reverse assemble or reverse compile the Software
except as permitted by law; or (iii) sublicense, rent, lease or distribute the
Software or any copy thereof.
(2) You shall not export or re-export the Software in any from under
violation of export restrictions by the government of your country.
5. LIMITED WARRANTY
KONICA MINOLTA warrants the media on which the software is recorded
to be free from defects in materials and workmanship under normal use.
Warranty details and limitations for the Hardware containing the Software
are described in the Statement of Limited Warranty which was supplied
with the hardware. With the exception of the foregoing express warranties
applicable to hardware and media only, the Software is not warranted and
is provided “AS IS”.
SUCH WARRANTIES ARE IN LIEU OF ALL OTHER WARRANTIES,
EXPRESS OR IMPLIED, INCLUDING, BUT NOT LIMITED TO, THE
IMPLIED WARRANTIES OF MERCHANTABILITY AND FITNESS FOR A
PARTICULAR PURPOSE.
1-2
6. LIMITATION OF REMEDIES
IN NO EVENT WILL KONICA MINOLTA BE LIABLE FOR ANY LOST
PROFITS, LOST DATA, OR ANY OTHER INCIDENTAL OR
CONSEQUENTIAL DAMAGES THAT RESULT FROM USE OR
INABLITY TO USE THE SOFTWARE, EVEN IF KONICA MINOLTA,
KONICA MINOLTA LICENSOR OR ITS AUTHORISED REMARKETERS
HAVE BEEN ADVISED OF THE POSSIBILITY OF SUCH DAMAGES OR
FOR ANY CLAIM BY YOU BASED ON A THIRD PARTY CLAIM.
Page 8

Introduction
7. TERMINATION
You may terminate your license at any time by destroying the Software
and all your copies of it or as otherwise described in these terms. KONICA
MINOLTA may terminate your license if you fail to comply with these
terms. Upon such termination, you agree to destroy all your copies of the
Software.
8. GOVERNING LAW
This Agreement shall be governed by the laws of the country where the
delivery is made to the original customer.
9. GOVERNMENT END USERS
If you are acquiring the Software on behalf of any unit or agency of the
United States Government, the following provisions apply. Use,
duplication or disclosure by the Government is subject to restrictions as
set forth in the Rights in Technical Data and Computer Software clause at
FAR 252.227-7013, subdivision (b)(3)(ii) or sub paragraph (c)(1)(ii), as
appropriate. Further use, duplication or disclosure is subject to restrictions
to restricted rights software as set forth in FAR 52.227-19(c)(2).
YOU ACKNOWLEDGE THAT YOU HAVE READ THIS AGREEMENT,
UNDERSTAND IT, AND AGREE TO BE BOUND BY ITS TERMS AND
CONDITIONS. NEITHER PARTY SHALL BE BOUND BY ANY
STATEMENT OR REPRESENTATION NOT CONTAINED IN THIS
AGREEMENT. NO CHANGE IN THIS AGREEMENT IS EFFECTIVE
UNLESS WRITTEN AND SIGNED BY PROPERLY AUTHORISED
REPRESENTATIVES OF EACH PARTY. BY INSTALLING THIS
SOFTWARE, YOU AGREE TO ACCEPT THE TERMS OF THIS
AGREEMENT.
1
1-3
Page 9

1
1.2 Getting Ready
System Requirements
The following operating environment is required in order to use the printer
driver.
G PIII, 600 MHz or faster
G Windows XP (SP1 or later), Windows 2000 (SP3 or later), Windows 98
G 128 MB RAM (Windows XP), 64 MB RAM (Windows 2000/98)
G USB port (Version 1.1)
G Network (only with FAX3900)
G CD-ROM drive
Introduction
1-4
Page 10
Connecting to a Computer
2 Connecting to a Computer
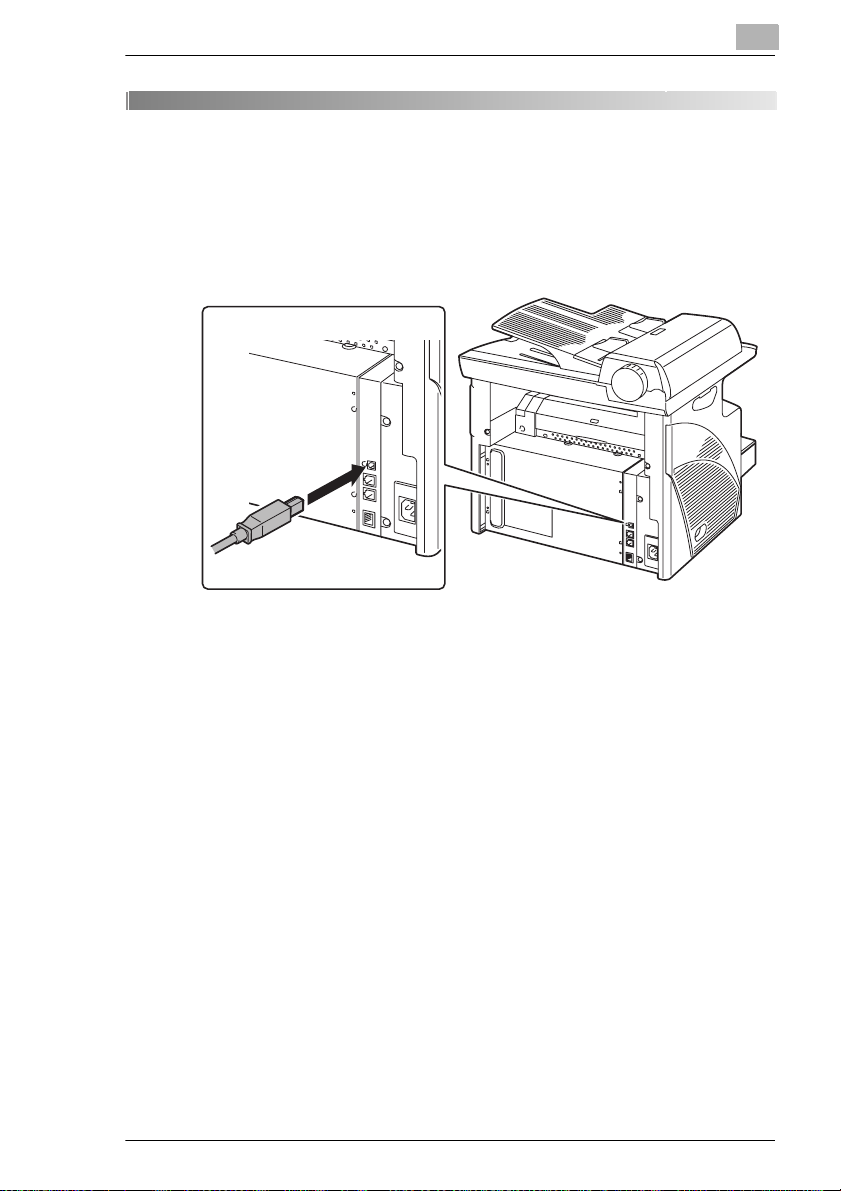
2.1 USB Port Connection
Use a Type B USB cable to connect the machine’s USB port to the USB
port on your computer.
2
2-1
Page 11
2
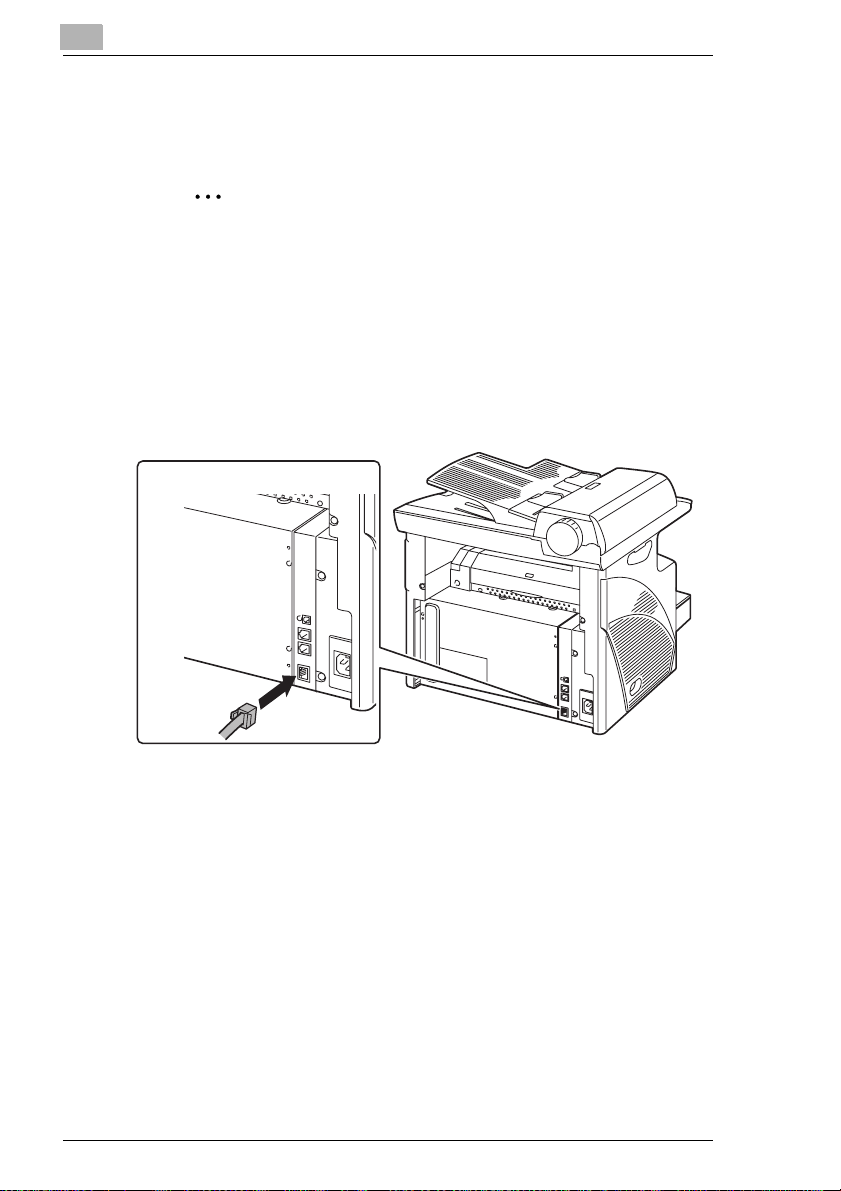
2.2 Connecting the Network Cable
Insert the connectors on the network cable into the network ports.
Note
This connection is available only with FAX3900.
Be sure to use a shielded Category 5 or 5E network cable. Use of
an unshielded cable may result in radio frequency interference.
1 Insert the connector on one end of the network cable into the network
port as shown in the illustration.
2 Insert the connector on the other end of the network cable into an
available port on the network hub.
Connecting to a Computer
2-2
About the LEDs
LED1 (LINK): This LED lights up when the network cable is
connected correctly. If this LED is not lit, check
the connection again, even if the copier appears
to be connected correctly. If this LED is not lit
when both ends are connected correctly, the
network cable may be damaged.
LED2 (ACT): This LED blinks when data is being transferred.
Page 12

Installing the Printer Driver
3 Installing the Printer Driver
This section describes the procedure for installing the printer driver. The
printer driver can be installed in two ways: by using Plug and Play or by
using the Add Printer Wizard.
3
If you want to use
this function to
install the printer
driver:
Plug and Play
(for USB connection)
Add Printer Wizard
(for parallel
connection)
Follow this procedure:
“Installing the Printer Driver Using Plug and Play”
on page 3-1
“Installing the Printer Driver Using the Add
Printer Wizard” on page 3-5
3.1 Installing the Printer Driver Using Plug and Play
Installation using Plug and Play is not possible on Windows 95 and
4.0. Refer to the procedure for using the Add Printer Wizard.
NT
For a parallel connection, quit the Add Printer Wizard that started up with
Plug and Play, and then install the printer driver by clicking the Add Printer
icon.
Installing the Printer Driver Using Plug and Play Under Windows XP
1 With Windows running, insert the CD-ROM into your computer’s CD-
ROM drive.
2 Turn on the machine.
3 When the machine is ready, connect it to the computer with the USB
cable.
The “Found New Hardware Wizard” dialog box appears.
4 Select Install from a list or specific location [Advanced], and then
click [Next].
5 Select Include this location in the search: under Search for the
best driver in these locations., and then click [Browse].
3-1
Page 13
3
Installing the Printer Driver
6 Browse to “Driver\(language)\WinXP” on the CD-ROM, and then click
[OK].
Tip
Select the language you prefer. For example, if you prefer English,
browse to:
Driver\English\WinXP
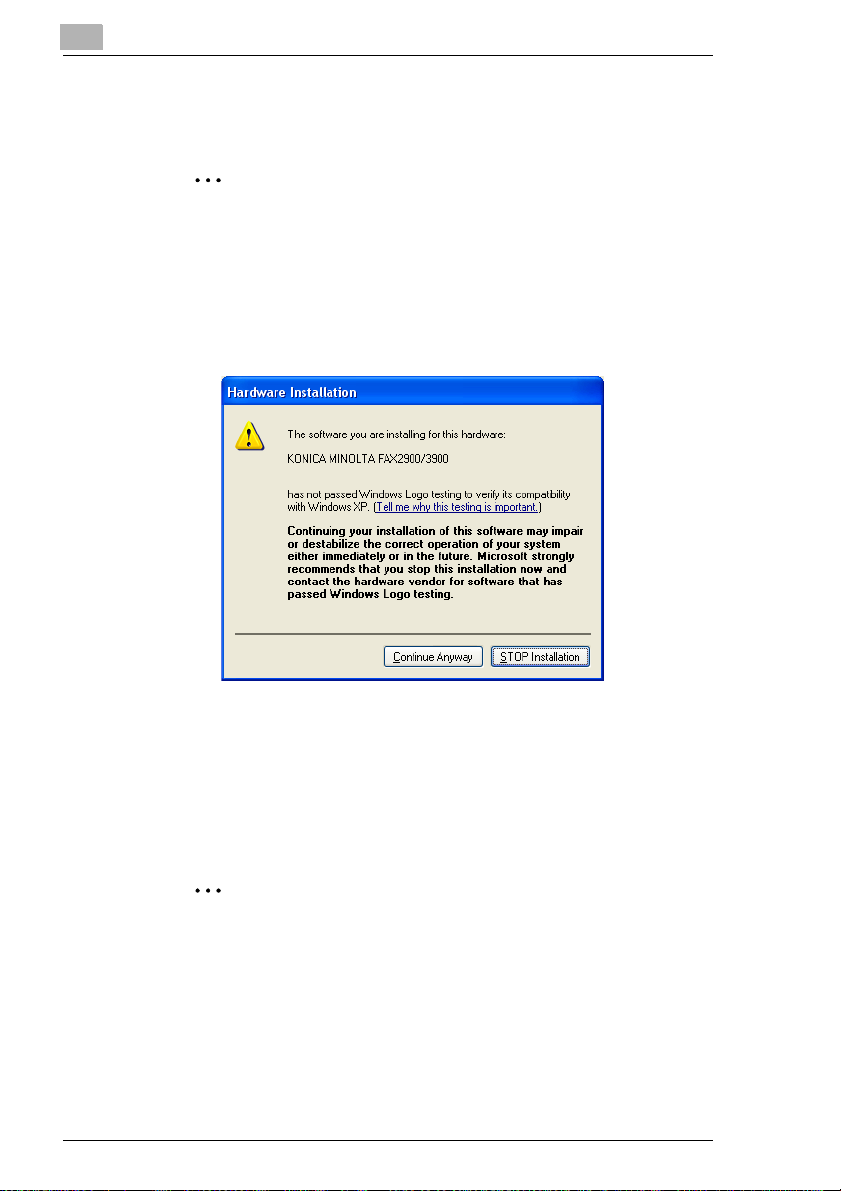
7 Click [Next].
H The following dialog appears, click [Continue Anyway].
3-2
8 The “Completing Found New Hardware Wizard” dialog box appears.
H Click [Finish].
9 The “Found New Hardware Wizard” dialog box appears again.
H Repeat steps 4 through 7.
Note
This completes the installation of the printer driver.
Page 14

Installing the Printer Driver
Installing the Printer Driver Using Plug and Play Under Windows 2000
1 With Windows running, insert the CD-ROM into your computer’s CD-
ROM drive.
2 Turn on the machine.
3 When the machine is ready, connect it to the computer with the USB
cable.
The “Found New Hardware Wizard” dialog box appears.
4 Select Search for a suitable driver for my device (recommended)
in the “Install Hardware Device Drivers” dialog box, and then click
[Next].
The “Locate Driver Files” dialog box appears.
5 Select Specify a location, and click [Next].
6 Click [Browse...] on the next dialog box, browse to
“Driver\(language)\Win2K” on the CD-ROM, and then click [OK].
3
Tip
Select the language you prefer. For example, if you prefer English,
browse to:
Driver\English\Win2K
7 Click [OK], and follow the instructions that appear on the screen until
the “Completing the Found New Hardware Wizard” dialog box
appears.
H Click [Finish].
8 The “Found New Hardware Wizard” dialog box appears again.
H Repeat steps 4 through 7.
Note
This completes the installation of the printer driver.
3-3
Page 15

3
Installing the Printer Driver
Installing the Printer Driver Using Plug and Play Under Windows Me/ 98
1 With Windows running, insert the CD-ROM into your computer’s CD-
ROM drive.
2 Turn on the machine.
3 When the machine is ready, connect it to the computer with the USB
cable.
The “Add New Hardware Wizard” dialog box appears.
4 Click [Next], and then select Search for the best driver for your
device (Recommended) on the next dialog box.
H Click [Next] again.
5 Select [Specify a location], and then click [Browse…].
6 Browse to “Driver\(language)\Win9X” on the CD-ROM, and then click
[OK].
Tip
Select the language you prefer. For example, if you prefer English,
browse to:
Driver\English\Win9X
3-4
7 Click [Next], and then follow the instructions that appear on the screen
until you can click [Finish].
8 The “Add New Hardware Wizard” dialog box appears again.
H Repeat steps 4 through 7.
Note
Repeat steps 4 through 7 until the installation is completely
finished. This completes the installation of the printer driver.
Page 16
Installing the Printer Driver
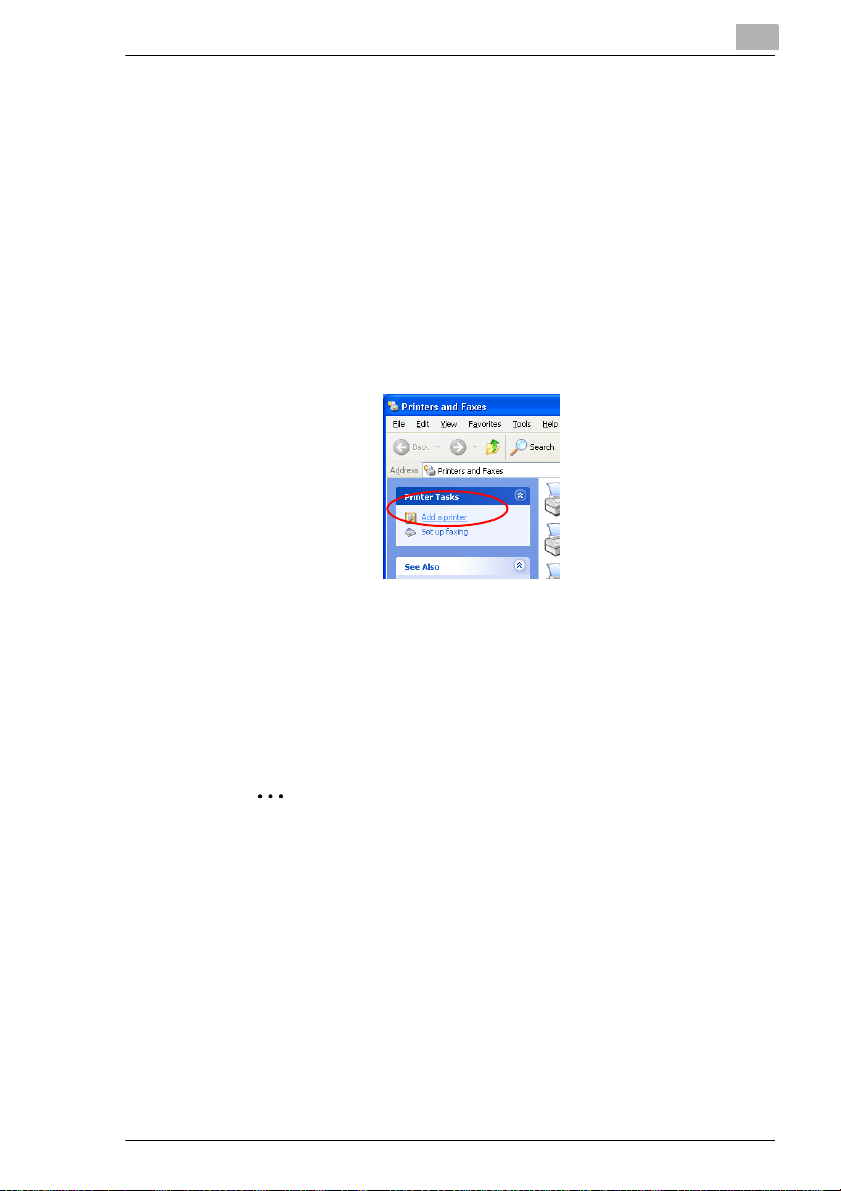
3.2 Installing the Printer Driver Using the Add Printer Wizard
Installing the Printer Driver Using the Add Printer Wizard Under Windows XP
1 With Windows running, insert the CD-ROM into the CD-ROM drive of
your computer.
2 Click the Windows [Start] button, and then click [Printers and Faxes].
3 Select [Add a printer] from the [Printer Tasks] menu.
3
The Add Printer Wizard starts.
4 Click the [Next] button.
5 Select “Local printer” (Do not check the “Automatically detect and
install my Plug and Play printer” box.), and then click [Next] button.
Note
H For details on specifying network settings, refer to Chap.6
“
Network Printing in a Windows Environment (Available only
with FAX3900). Since other network settings must first be
specified, temporarily install the printer driver under a local
connection.
H For the network printer settings, consult with the network
administrator.
6 Specify the port (LPT1, 2 ect) where the printer controller is connected,
and then click [Next] button.
7 Click the [Have Disk] button.
3-5
Page 17

3
Installing the Printer Driver
8 Click the [Browse] button.
9 Specify the printer driver directory on the CD-ROM for the
environment being used, and then click the [OK] button.
Note
When instructed to specify the driver, browse to
“Driver\English\WinXP” on the CD-ROM.
10 Click the [Next] button.
11 Follow the instructions that appear on your computer screen to
complete the installation.
12 After installation is complete, check that the icon for the installed
printer appears in the “Printers” window.
13 Eject the CD-ROM from your computer’s CD-ROM drive.
This completes the installation of the printer driver.
3-6
Page 18

Installing the Printer Driver
Installing the Printer Driver Using the Add Printer Wizard Under Windows 2000
1 With Windows running, insert the CD-ROM into the CD-ROM drive of
your computer.
2 Click the Windows [Start] button, point to [Settings], and then click
[Printers].
3 Double-click the “Add Printer” icon.
4 Click the [Next] button.
5 Select “Local printer”. (Do not check the “Automatically detect and
install my Plug and Play printer” box.), and then click [Next] button.
Note
H For details on specifying network settings, refer to Chap.6
Network Printing in a Windows Environment (Available only with
“
FAX3900). Since other network settings must first be specified,
temporarily install the printer driver under a local connection.
H For the network printer settings, consult with the network
administrator.
3
6 Specify the port (LPT1, 2, etc.) where the printer controller is
connected, and then click [Next] button.
7 Click the [Have Disk] button.
8 Click the [Browse] button.
9 Specify the printer driver directory on the CD-ROM for the
environment being used, and then click the [OK] button.
Note
When instructed to specify the driver, browse to
“Driver\English\Win2K” on the CD-ROM.
10 Click the [Next] button.
11 Follow the instructions that appear on your computer screen to
complete the installation.
3-7
Page 19

3
Installing the Printer Driver
12 After installation is completed, check that the icon for the installed
printer appears in the “Printers” window.
13 Eject the CD-ROM from your computer’s CD-ROM drive.
This completes the installation of the printer driver.
3-8
Page 20

Installing the Printer Driver
Installing the Printer Driver Using the Add Printer Wizard Under Windows Me/98
1 With Windows running, insert the CD-ROM into the CD-ROM drive of
your computer.
2 Click the Windows [Start] button, point to [Settings], and then click
[Printers].
3 Double-click the “Add Printer” icon.
4 Click the [Next] button.
5 Select “Local printer”, and then click [Next] button.
Note
H For details on specifying network settings, refer to Chap.6
“
Network Printing in a Windows Environment (Available only
with FAX3900). Since other network settings must first be
specified, temporarily install the printer driver under a local
connection.
H For the network printer settings, consult with the network
administrator.
3
6 Click the [Have Disk] button.
7 Click the [Browse] button.
8 Specify the printer driver directory on the CD-ROM for the
environment being used, and then click the [OK] button.
Note
When instructed to specify the driver, browse to
“Driver\English\Win9X” on the CD-ROM.
9 Click the [Next] button.
10 Click [Next] button.
11 Specify the port (LPT1, 2, etc.) where the printer controller is
connected, and then click [Next] button.
12 Follow the instructions that appear on your computer screen to
3-9
Page 21

3
Installing the Printer Driver
complete the installation.
13 After installation is completed, check that the icon for the installed
printer appears in the “Printers” window.
14 Eject the CD-ROM from your computer’s CD-ROM drive.
This completes the installation of the printer driver.
3-10
Page 22

Configuring Printer Driver Settings
4 Configuring Printer Driver Settings
The printer driver “Properties” dialog box appears when you display the
printer driver properties from the Windows “Printers” window. The settings
you make in the “Properties” dialog box are applied globally to all
applications.
Note
Screen images shown in this manual may differ slightly from the actual
ones and are subject to change without notice.
4.1 Displaying Printer Driver Properties for Configuring Global Settings
Displaying Settings Under Windows XP
1 Click the Windows [Start] button, and then click [Printers and Faxes].
2 In the “Printers and Faxes” window, select the “KONICA MINOLTA
FAX2900/3900” icon.
4
3 To display the printer driver settings, select [Printing Preferences...]
from the [File] menu.
The following printer setup dialog box appears.
4-1
Page 23

4
Configuring Printer Driver Settings
Displaying Settings Under Windows 2000
1 Click the Windows [Start] button, point to [Settings], and then click
[Printers].
2 Select the “KONICA MINOLTA FAX2900/3900” icon.
3 To display the printer driver settings, select [Printing Preferences...]
from the [File] menu.
The following printer setup dialog box appears.
4-2
Page 24

Configuring Printer Driver Settings
Displaying Settings Under Windows Me/98
1 Click the Windows [Start] button, point to [Settings], and then click
[Printers].
2 Select the “KONICA MINOLTA FAX2900/3900” icon.
3 To display the printer driver settings, select [Properties] from the [File]
menu.
The following printer setup dialog box appears.
4
4-3
Page 25

4
4.2 Common Operations
This section describes settings and buttons that are common to all tabs.
Tip
The tabs referred to this section differ according to the computer’s
operating system.
4.2.1 Common Button
OK
Click this button to exit the “Properties” dialog box and apply all settings
you changed.
Cancel
Click this button to exit the “Properties” dialog box without applying any
changes.
Apply
Click this button to apply all settings you changed without exiting the
“Properties” dialog box.
Configuring Printer Driver Settings
4.2.2 Orientation
Use this setting to specify whether your document should be printed in
portrait (vertical) or landscape (horizontal) format.
To specify the orientation:
H Windows XP/2000: Select the [Layout] tab, and then select “Portrait”
(vertical) or “Landscape” (horizontal) under orientation.
H Windows Me/98: Select the [Paper] tab, and then select “Portrait”
(vertical) or “Landscape” (horizontal) under orientation.
4.2.3 Paper Source
The Paper Source item sepcifies the tray from which paper is fed in the
machine. The following paper sources can be selected: Auto, Tray1,
Tray2 (optional), and Bypass Tray.
To specify the paper source:
H Windows XP/2000: Select the [Paper/Quality] tab, and then select the
desired tray from the “Paper Source” list.
H Windows Me/98: Select the [Paper] tab, and then select the desired
tray from the “Paper Source” list.
4-4
Page 26

Configuring Printer Driver Settings
4.2.4 Media Type
You can specify the type of media to be used for printing.
To specify the media type:
H Windows XP/2000: Select the [Paper/Quality] tab, and then select the
desired media type from the “Media” list.
H Windows Me/98: Select the [Paper] tab, select the “Media” as the
“Document” option, and then select the desired media type from the
“Media” list.
Note
The following media types can be selected: Plain paper, Thick paper,
OHP, and Envelope.
If “Auto” is selected under “Paper Source”, the tray containing the
paper of the specified size is automatically selected.
If “Tray1” or “Bypass” is selected under “Paper Source”, the paper type
(plain paper, thick paper, OHP, envelope) can be specified.
If the optional “Tray2” is selected, only the “Plain” paper type is
available.
4.2.5 Paper Size
You can specify the size of paper you want to use for printing.
To specify the output paper size:
H Windows XP/2000: Click [Advanced] on the [Layout] tab, and then
select a paper size from the “Paper Size” list.
H Windows Me/98: Select the [Paper] tab, and then select a paper size.
4
4.2.6 Copy
Use this setting to specify the number of copies to be printed.
To specify the number of copies:
H Windows XP/2000: Click [Advanced] on the [Layout] tab, and then
type or select a value in the Copy Count box.
H Windows Me/98: Select the [Paper] tab, and then type or select a
value in the “Copies” box.
4.2.7 Resolution
This function sets the print quality to suit the type of copy you are printing.
To specify the resolution:
H Windows XP/2000: Click [Advanced] on the [Layout] tab, and then
4-5
Page 27

4
Configuring Printer Driver Settings
select a resolution of either “600 x 600 dpi” or “300 x 300 dpi” from the
“Print Quality” list.
H Windows Me/98: Select the [Graphics] tab, and then select either “600
x 600 dpi” or “300 x 300 dpi” from the “Resolution” list.
Note
“600 x 600 dpi” provides better quality, but it also takes longer to print
at this setting than at “300 x 300 dpi”.
4-6
Page 28

Control Panel Operations (PC Print Mode)
5 Control Panel Operations
(PC Print Mode)
This section covers printer operations you can perform on the control
panel of the machine.
5.1 Printer Operations
If it is not being used in another mode, the machine will automatically
switch to the PC print mode when data is received from a computer. You
can also manually switch to the PC print mode from another mode by
pressing the [Printer] key.
See “Entering and Exiting the PC Print Mode” on page 5-3 for more
information.
5
5-1
Page 29

5
Control Panel Operations (PC Print Mode)
General Guide
21
Printer Status
Auto/Photo
3
Utility
Paper
Zoom
4
5
Sort
Error
Yes
ABC
JKL
TUV
DEF
MNO
WXYZ
123/ABC
@
GHI
No
C
PORS
Stop
Fax
Copy
Panel Reset
Start
6
7
Number Name Description
1 [Printer] key • Press while the machine is receiving print
data (indicated by the [Printer] indicator
blinking) to enter the PC print mode.
• Press while the machine is in the PC print
mode to exit the PC print mode.
2[Printer]
indicator
• Blinks while the machine is receiving print
data.
• Lights while there is PC print data in the
machine memory and while the machine is
performing a print operation.
• Goes off when there is no print data.
•See “[Printer] Indicator” on page 5-3.
3 Display • “[PC PRN]” or “PC:PRN” indicates print
data is in machine memory.
• “*PC PRINT*” indicates the PC print mode.
• The display also shows the paper source
and paper size for the print job.
4 [No] key • Press to reply “No” to the confirmation
message that appears when a print job is
canceled.
5 [Yes] key • Press to reply “Yes” to the confirmation
message that appears when a print job is
canceled.
6 [Stop] key • Press while the machine is in the PC print
mode to cancel the current print job. See
“Canceling a Print Job” on page 5-5.
7 [Start]
indicator
• Lights in orange when the machine is in the
PC print mode.
5-2
Page 30

Control Panel Operations (PC Print Mode)
[Printer] Indicator
The [Printer] indicator shows the current PC printing.
[Printer] Indicator Description
Blinking • The machine is receiving print data, even while
in another mode.
• A printer error has occurred (indicated by
“PRN Err” on the display).
On • When in another mode, indicates that the
machine memory contains PC print data.
• In the PC print mode, indicates that the
machine is printing PC print data. The indicator
remains lit (without blinking) even if data is
being received while printing is in progress.
Off • No print data in the machine memory.
Entering and Exiting the PC Print Mode
When it is not being used in another mode, the machine will automatically
switch to the PC print mode when data is received from a computer. You
can also manually switch to the PC print mode from another mode by
pressing the [Printer] key.
The following are the rules that govern switching to or from the PC print
mode.
G If the machine is in the copy mode when a print command is executed
on a connected computer, it will switch to PC print if no operation is
performed in the copy mode for 30 seconds. This machine will not
receive print data unless 30 seconds pass after it has completed its
last copy operation.
G If PC print data is received while a fax operation is being performed,
the machine will switch to the PC print mode and print the data after
the end of the fax mode job is reached.
G If a high-priority PC print job is received while a low-priority fax
operation is being performed, the machine will interrupt the fax
operation and enter the PC print mode to print the job. The fax
operation will resume after the PC print job is complete.
5
5-3
Page 31

5
Control Panel Operations (PC Print Mode)
G When there is print data in the
machine memory (indicated by “[PC
PRN]” or “PC:PRN” on the display
and a lit “Printer” indicator),
pressing the [Printer] key enters the
PC print mode. The machine will
beep, and the PC print mode will not
be entered if there is no print data in
the machine memory when the
[Printer] key is pressed.
G Pressing the [Fax] or [Copy] key exits the PC print mode.
G After printing is finished, the machine automatically switches to the
mode it was in before the print operation started.
5-4
Page 32

Control Panel Operations (PC Print Mode)
Canceling a Print Job
You can cancel a print job from the control panel of the machine. You can
cancel a print job from the control panel only while the machine is in PC
print mode.
1 Make sure that machine’s display
shows “*PC PRINT* PRINTING”.
2 Hold down the [Stop] key for five
seconds, until the “PC JOB
CANCEL?” confirmation message
appears on the display.
3 Press the [Yes] key to cancel the
print job or the [No] key to resume
printing.
Yes
5
No
C
Note
You can use steps 2 and 3 of the above procedure to cancel a print job
while any of the following errors is displayed: PAPER EMPTY,
INCORRECT PAPER SIZE, NO SUITABLE PAPER, PAPER SIZE
ERROR, LOAD PAPER, PAPER JAM, COVER OPEN, TONER
EMPTY, MEDIA TYPE ERROR.
A print job cannot be canceled while print data is being received by the
machine.
5-5
Page 33

5
Control Panel Operations (PC Print Mode)
Using the Bypass Tray
Use the procedure described below to print onto paper that is fed
automatically (up to 10 sheets at a time) from the bypass tray.
1 On your computer, display the printer driver, and then specify
“Bypass” as the Paper Source setting (
page 4-4).
2 Execute the print operation from your computer.
3 When the message “LOAD PAPER”
appears on the machine’s display,
load paper onto the bypass tray.
H This causes the print operation
to be performed using the paper
from the bypass tray.
5-6
4 Repeat step 3 as many times as necessary until printing of the
document is complete.
Note
Be sure to execute the print operation from the computer first, and then
place the paper onto the bypass tray. If there is already paper on the
bypass tray when you execute the print operation, remove the paper,
and then place it again onto the bypass tray.
The bypass tray can be loaded with a maximum of 1 envelope, 5 OHP
transparencies, or 10 sheets of plain paper or cards.
Page 34

Control Panel Operations (PC Print Mode)
5.2 Printing the Configuration Page
Detailed information on the settings can be printed so that they can be
easily checked.
1 Press the [Status] key on the control
panel of the copier.
2 Use the and keys to select “PRINTER REPORT?”.
3 Press the [Yes] key.
A list of the types of reports that can be printed appears.
4 Use the and keys to select “CONFIGURATION PAGE?”.
5 Press the [Yes] key.
The contents of the settings are printed.
5
5-7
Page 35

5
Control Panel Operations (PC Print Mode)
5-8
Page 36

Network Printing in a Windows Environment (Available only with FAX3900)
6 Network Printing in a Windows
6
Environment
This chapter provides detailed information on setting up and using a
copier as a network printer. However, not all information provided will be
required by all users.
(Available only with FAX3900)
Note
The Network Printing functions is available only with FAX3900.
Screen images shown in this manual may differ slightly from the actual
ones.
6-1
Page 37

Network Printing in a Windows Environment (Available only with FAX3900)
6
6.1 Assigning an IP Address
From the control panel of the copier, assign an IP address to the copier.
Note
Always assign an IP address only after consulting your network
administrator.
Entering the IP Address From the Control Panel
Use the 10-key pad on the control panel to enter the IP address.
Example: To enter “192.168.0.10”
6-2
Note
If a section of the number is less than three digits, press the key to
move the cursor to the beginning of the next section.
Page 38

Network Printing in a Windows Environment (Available only with FAX3900)
Assigning an IP Address
The IP address can be assigned using a function on the “NETWORK
SETTING” menu. Other functions on the “NETWORK SETTING” menu
can be used to specify the subnet mask and default gateway settings.
1 Press the [Utility] key.
The first Utility mode screen
appears.
2 Use the and keys to select
“NETWORK SETTING?”.
3 Press the [1] key from the 10-key
pad to select “IP ADDRESS”.
4 Use the and keys to select
“SPECIFY”, and then press the
[Yes] key.
6
Note
If “SPECIFY” is selected in this step, “AUTO” can also be selected.
If “AUTO” is selected, the IP address, subnet mask, and default
gateway setting are automatically assigned by the DHCP server on
the network. This means that they do not have to be assigned
manually, as is the case when “SPECIFY” is selected. However,
please note the following points when using “AUTO” to assign the
IP address.
6-3
Page 39

Network Printing in a Windows Environment (Available only with FAX3900)
6
Check with your network administrator to determine if there is a
DHCP server available on the network. (If there is, a special IP
address will be assigned by the AutoIP function. However, the
copier will not be able to communicate with other devices on the
network that have had ordinary IP addresses assigned to them. )
Always select “SPECIFY” when there is no DHCP server available.
When “AUTO” is selected to assign the IP address, the IP address
may sometimes be changed automatically. If the IP address and
other settings are changed, you may not be able to print to a
specified printer on the network due to a communication failure
caused by a change in the address. When “AUTO” is selected, we
recommend that you set the DHCP server to assign a fixed
address to the copier.
5 Use the 10-key pad and the
and keys to enter the IP
address.
Note
If an IP address is already entered, it can be overwritten by a new
one.
6-4
The IP address shown in the illustration is only an example. Always
check with your network administrator before entering an IP
address for the printer.
6 Press the [Yes] key to confirm the setting. “The NETWORK SETTING”
menu appears again.
H Proceed to enter the subnet mask setting.
7 While the “NETWORK SETTING”
menu is displayed, press the [2] key
in the 10-key pad to select
“SUBNET MASK”.
Page 40

Network Printing in a Windows Environment (Available only with FAX3900)
8 Use the 10-key pad and the
and keys to enter the subnet
mask address.
Note
The subnet mask address shown in the illustration is only an
example. Always check with your network administrator before
entering a subnet mask address.
9 Press the [Yes] key to confirm the setting. “The NETWORK SETTING”
menu appears again.
H Proceed to enter the default gateway setting.
10 While the “NETWORK SETTING”
menu is displayed, press the [3] key
on the 10-key pad to select
“GATEWAY”.
11 Use the 10-key pad and the
and keys to enter the default
gateway address.
6
Note
The default gateway address shown in the illustration is only an
example. Always check with your network administrator before
entering a default gateway address.
12 Press the [Yes] key to confirm the setting.
H The “NETWORK SETTING” menu appears again. Finally, the
specified IP address, network mask, and default gateway settings
are registered on the copier itself. In order to register these
settings, the copier must be restarted by turning it off, then on
again.
13 While the “NETWORK SETTING” menu is displayed, press the [No]
key or the [Panel Reset] key to select “PLEASE RE-START POWER
SUPPLY OFF/ON”.
Set the power switch on the copier to “2”, then “1” to restart the copier.
6-5
Page 41

Network Printing in a Windows Environment (Available only with FAX3900)
6
6.2 Selecting the Network Print Method
Once a network card has been installed, various methods for network
printing become available. This section describes how to select the
appropriate network print method for the type of operating system that you
are using.
For Windows 98/ Windows Me
■ Peer-to-Peer
■ Network Setup Utility
TCP/IP protocol
Windows 98
Windows Me
6-6
Peer-to-Peer Printing
G Using the Peer-to-Peer utility, you can connect a copier and computer
to the same network.
G The Peer-to-Peer utility is automatically installed when you install the
printer driver.
G The TCP/IP protocol is used.
Page 42

Network Printing in a Windows Environment (Available only with FAX3900)
For Windows 2000
■ LPR
■ IPP
■ PORT9100
TCP/IP protocol
Windows 2000
LPR Printing
G You can connect a copier and computer via the LPR print service.
G The LPR print service is available with a standard installation of the
operating system.
G The TCP/IP protocol is used.
IPP Printing
G You can connect a copier and computer via the IPP print service.
G The IPP print service is available with a standard installation of the
operating system.
G HTTP (Hyper Text Transfer Protocol), which is part of the TCP/IP
protocol, is used. Businesses and organizations may have a firewall
set up to prevent unauthorized access. However, it should normally be
possible to traverse an HTTP firewall. This allows you to print to
network printers beyond the firewall via an IPP connection.
Printing to Port 9100
G You can connect a copier and computer via the Port 9100 print
service.
G The Port 9100 print service is available with a standard installation of
the operating system.
G The TCP/IP protocol is used.
6
6-7
Page 43

Network Printing in a Windows Environment (Available only with FAX3900)
6
For Windows XP
■ IPP
■ PORT9100
TCP/IP protocol
Windows XP
IPP Printing
G You can connect a copier and computer via the IPP print service.
G The IPP print service is available with a standard installation of the
operating system.
G HTTP (Hyper Text Transfer Protocol), which is part of the TCP/IP
protocol, is used. Businesses and organizations may have a firewall
set up to prevent unauthorized access. However, it should normally be
possible to traverse an HTTP firewall. This allows you to print to
network printers beyond the firewall via an IPP connection.
Printing to Port 9100
G You can connect a copier and computer via the Port 9100 print
service.
G The Port 9100 print service is available with a standard installation of
the operating system.
G The TCP/IP protocol is used.
6-8
Page 44

Network Printing in a Windows Environment (Available only with FAX3900)
For NetWare (NetWare Server/ Windows Client)
When using NetWare, you can use a computer running Windows as a
NetWare client to print to a copier via a NetWare server.
NetWare server
TCP/IP protocol or
IPX/SPX protocol
NetWare client PC
(Windows computer)
Supported Environments
The controller supports the system environments described below.
6
NetWare Version Protocol Emulation Service Mode
NetWare 4.x IPX NDS/Bindery PServer/NPrinter
NetWare 5.x/6 IPX NDS/Bindery PServer/NPrinter
TCP/IP NDPS (lpr)
6-9
Page 45

Network Printing in a Windows Environment (Available only with FAX3900)
6
6.3 Checking the Setup Procedures
This section describes the required procedures for setting up network
printing for the selected network print method.
Peer-to-Peer Printing
1 Connect the network cable. (“Connecting the Network Cable” on
page 2-2)
2 Specify the IP address, subnet mask, and default gateway settings for
the copier. (
3 Print the configuration page and check the settings. (“Printing the
Configuration Page” on page 5-7)
4 Install the printer driver. The Peer-to-Peer utility is installed when you
install the printer driver.
H For details on installing the printer driver, refer to “Installing the
Printer Driver” on page 3-1.
5 Add a network port to the computer. (“Setting Up the Network
Connections” on page 6-12)
“Assigning an IP Address” on page 6-2)
6-10
LPR/PORT 9100 Printing
1 Connect the network cable. (“Connecting the Network Cable” on
page 2-2)
2 Specify the IP address, subnet mask, and default gateway settings for
the copier. (
“Assigning an IP Address” on page 6-2)
3 Print the configuration page and check the settings. (“Printing the
Configuration Page” on page 5-7)
4 Install the printer driver.
H For details on installing the printer driver, refer to “Installing the
Printer Driver” on page 3-1.
5 Add a network port to the computer. (“Setting Up the Network
Connections” on page 6-12)
Page 46

Network Printing in a Windows Environment (Available only with FAX3900)
IPP Printing
1 Connect the network cable. (“Connecting the Network Cable” on
page 2-2)
2 Specify the IP address, subnet mask, and default gateway settings for
the copier. (
“Assigning an IP Address” on page 6-2)
3 Print the configuration page and check the settings. (“Printing the
Configuration Page” on page 5-7)
4 Install the printer driver. Add a network port during the installation of
the printer driver.
H For details on installing the printer driver, refer to “Installing the
Printer Driver” on page 3-1.
NetWare Server/Client (except NDPS)
1 Connect the network cable. (“Connecting the Network Cable” on
page 2-2)
2 Specify the settings that enable the copier to connect to the NetWare
server. (
“Setting Up the Network Connections” on page 6-12)
6
3 Set up the NetWare client so that it can print via the NetWare server.
“Setting Up the Network Connections” on page 6-12)
(
NetWare Server/Client (NDPS)
1 Connect the network cable. (“Connecting the Network Cable” on
page 2-2)
2 Specify the IP address, subnet mask, and default gateway settings.
“Assigning an IP Address” on page 6-2)
(
3 Print the configuration page and check the settings. (“Printing the
Configuration Page” on page 5-7)
4 Specify the settings that enable the copier to connect to the NetWare
server. (
“Setting Up the Network Connections” on page 6-12)
5 Set up the NetWare client so that it can print via the NetWare server.
“Setting Up the Network Connections” on page 6-12)
(
6-11
Page 47

Network Printing in a Windows Environment (Available only with FAX3900)
6
6.4 Setting Up the Network Connections
6.4.1 Peer-to-Peer Printing
Windows 98/ Windows Me
Important
Before continuing to set up the network settings, check the following:
Check that the computer is set up to use the TCP/IP protocol.
Check that the copier is also set up to use the TCP/IP protocol.
Check that the printer driver has been installed on the computer.
(For details on installing the printer driver, refer to “Installing the Printer
Driver” on page 3-1.)
1 Click [Start], point to [Settings], and then click [Printers] to open the
“Printers” folder.
2 Right-click the icon for the installed printer driver.
6-12
3 Click [Properties] to open the Properties dialog box.
4 Click the “Details” tab, and then click [Add Port].
5 Select Other.
6 Select Peer2Peer from the list of port types.
7 Click [OK].
8 Enter the copier IP address.
9 Click [OK].
Page 48

Network Printing in a Windows Environment (Available only with FAX3900)
6.4.2 LPR Printing
Windows 2000
Important
Before continuing to set up the network settings, check the following:
Check that the computer is set up to use the TCP/IP protocol.
Check that the copier is also set up to use the TCP/IP protocol.
Check that the printer driver has been installed on the computer.
(For details on installing the printer driver, refer to “Installing the Printer
Driver” on page 3-1.)
1 Click [Start], point to [Settings], and then click [Printers] to open the
“Printers” folder.
2 Right-click the icon for the installed printer driver.
3 Click [Properties] to open the Properties dialog box.
6
4 Click the “Ports” tab, and then click [Add Port].
5 In the Printer Ports dialog box, select Standard TCP/IP Port, and then
click [New Port].
6 When the Add Standard TCP/IP Printer Port Wizard appears, click
[Next>].
7 Enter the IP address for the copier into the Printer Name or IP
Address box, and then click [Next>].
8 Select Custom, and then click [Settings].
9 Select LPR in the Protocol group box, enter the name of the print
queue in the Queue Name box (for example, “print”), and then click
[OK].
Note
Use half-pitch characters to enter the queue name.
10 Click [Next>].
6-13
Page 49

Network Printing in a Windows Environment (Available only with FAX3900)
6
11 Click [Finish].
6-14
Page 50

Network Printing in a Windows Environment (Available only with FAX3900)
6.4.3 Printing to Port 9100
Windows 2000/ Windows XP
Important
Before continuing to set up the network settings, check the following:
Check that the computer is set up to use the TCP/IP protocol.
Check that the copier is also set up to use the TCP/IP protocol.
Check that the printer driver has been installed on the computer.
(For details on installing the printer driver, refer to “Installing the Printer
Driver” on page 3-1.)
1 When using Windows 2000, click [Start], point to [Settings], and then
click [Printers] to open the “Printers” folder.
When using Windows XP, click [Start], point to [Control Panel], then
[Printers and Other Hardware] , and then click [See a list of installed
printers and fax printers.]
2 Right-click the icon for the installed printer driver.
6
3 Click [Properties] to open the Properties dialog box.
4 Click the “Ports” tab, and then click [Add Port].
5 In the Printer Ports dialog box, select Standard TCP/IP Port, and then
click [New Port].
6 When the Add Standard TCP/IP Printer Port Wizard appears, click
[Next>].
7 Enter the IP address for the copier into the Printer Name or IP
Address box, and then click [Next>].
8 Select Custom, and then click [Settings].
9 Select RAW as the protocol.
10 Enter “9100” for the Port Number setting, and then click [OK].
11 Click [Next>].
6-15
Page 51

Network Printing in a Windows Environment (Available only with FAX3900)
6
12 Click [Finish].
6.4.4 IPP Printing
Windows 2000/ Windows XP
Important
Before continuing to set up the network settings, check the following:
Check that the computer is set up to use the TCP/IP protocol.
Check that the copier is also set up to use the TCP/IP protocol.
Setting Up the IPP Print Connection
Set up the IPP Print connection. In order to set up IPP printing, you must
start by installing the printer driver. (For details on installing the printer
driver, refer to
1 When using Windows 2000, click [Start], point to [Settings], and then
click [Printers] to open the “Printers” folder.
When using Windows XP, click [Start], point to [Control Panel], then
[Printers and Other Hardware] , and then click [See a list of installed
printers and fax printers.]
“Installing the Printer Driver” on page 3-1.)
6-16
2 Start up the Add Printer Wizard, and then click [Next>].
3 Select Network Printer, and then click [Next>].
4 Select Connect to a printer on the internet or on your intranet.
5 Enter “http://copier IP address/ipp.cgi” in the URL box.
H Example: If the copier IP address is 192.168.0.10, enter:
http://192.168.0.10/ipp.cgi
6 Click [Next>]. When a confirmation message appears, click [OK].
7 Follow the instructions that appear on the screen to complete the
installation.
Page 52

Network Printing in a Windows Environment (Available only with FAX3900)
6.4.5 Connecting a Copier to the NetWare Server
Note
For information about configuring settings for printer user privileges,
printer alert options, and queue allocation, refer to the NetWare
documentation.
Setting Up the Windows Computer for the NetWare Client
1 Click [Start], point to [Settings], click [Printer], and then double-click
the “Add Printer” icon.
2 For the printer port, browse the network and specify the name of the
queue (or the name of the NDPS printer) that you created.
3 On the printer model list, select the printer driver on the CD-ROM.
4 Follow the instructions provided by the Wizard to complete the
procedure.
6
6-17
Page 53

Network Printing in a Windows Environment (Available only with FAX3900)
6
6-18
Page 54

Troubleshooting
7 Troubleshooting
If a problem occurs during PC printing, check the following.
7.1 Correcting Errors
This section describes the errors that can appear during PC printing and
what you need to do to correct the situation.
7.1.1 Checking Error Messages
“PRN Err” appears in the lower right
corner of the display when a PC print
error occurs while the machine is in
another mode besides the PC print
mode. If this happens, follow the
procedure below.
7
<Copy mode>
<Fax mode>
<Scanner mode>
1 Press the [Printer] key to enter the
PC print mode.
2 View the error message on the
display.
7-1
Page 55

7
7.1.2 Main Error Messages
The table below describes the main error messages that may appear
during PC print mode operations.
Error Message Cause Action
PAPER SIZE
ERROR
NO SUITABLE
PAPER
INCORRECT
PAPER SIZE
PAPER EMPTY There is no paper in the
MEDIA TYPE
ERROR
MEMORY FULL The memory is full with
The paper size
specified with the
printer driver differs
from the size of paper
that is loaded.
“Auto” is selected under
“Paper Source” in the
printer driver properties,
but none of the
machine’s trays contain
paper of the size
specified for printing.
Paper of the size
specified in the printer
driver is not loaded in
the specified paper tray.
specified tray, or the
specified tray is not
loaded in the machine.
Media of the type
specified in the printer
driver is not loaded in
the specified paper tray.
stored data.
Troubleshooting
Load paper of the
correct size into the
tray.
Tray1:
Change the paper size
in the Utility mode, and
then load the correct
paper into the tray.
Tray2:
Use a paper cassette
loaded with paper of the
corresponding size.
Bypass Tray:
Change the paper that
is loaded.
Load paper into the tray
or load Tray2 into the
paper feed cassette.
Change the media type
in the Utility mode, and
then load the correct
paper into the tray.
Press any key, and then
turn the machine off,
then on again.
7-2
Check the following chart if you have problems using the copier as a
network printer.
Check Item Possible Cause Solution
1 Has the print job
reached the copier?
Yes A copier error has
No The data has not
occurred. (No paper,
no toner, etc.)
arrived at the copier.
Check the copier and
resolve any errors.
See check item2.
Page 56

Troubleshooting
2 Does the computer
Check Item Possible Cause Solution
respond when a ping
test is sent to the
controller?
Yes The port number
No A copier malfunction
setting is wrong.
A computer
malfunction has
occured.
The driver has not
been installed
correctly.
has occured.
The network cable has
become disconnected,
or there is a problem
with the hub.
The IP address or
subnet mask setting is
wrong.
Correct the port number
setting.
Restart the computer.
Uninstall the driver
software, and then
reinstall it according to
the instructions.
Restart the copier.
Reconnect the cable,
and then restart or
replace the hub.
Correct the IP address
and subnet mask setting.
7
7-3
Page 57

7
7.1.3 Errors and Print Data
What happens to your print data when an error occurs depends on the
error type.
“MACHINE TROUBLE” Error
This error indicates a serious operational problem. The machine is unable
to receive any data while this error message is on the display.
Temporary Errors
The machine retains current print data in memory whenever any of the
easily correctable errors listed below occurs. As soon as the condition
causing the error is corrected, the machine automatically resumes
printing.
G PAPER JAM
G INCORRECT PAPER SIZE
G PAPER SIZE ERROR
G COVER OPEN
G NO SUITABLE PAPER
G PAPER EMPTY
G MEDIA TYPE ERROR
Troubleshooting
7-4
Note
You can cancel a print job stored in memory due to one of the above
errors. See
“Canceling a Print Job” on page 5-5 for more information.
Page 58

Specifications
8 Specifications
Specifications FAX2900 FAX3900
Print speed 16 pages/min. (A4L, 300 dpi)
RAM Shared with machine.
Interfaces USB Version 1.1 USB Version 1.1,
Protocol None TCP/IP, IPX/SPX
Printer language GDI
Fonts Windows
Supported
Operating systems
Web Browser Internet Explorer 4.0 or later
Windows XP (SP1 or later), Windows 2000 (SP3
or later), Windows Me, Windows 98
8
Ethernet 10/100BaseT/TX (RJ-45)
8-1
Page 59

8
Specifications
8-2
Page 60

1392-7702-02
http://konicaminolta.com
Copyright
2004
 Loading...