

Page 1

Fax Operations
C450
Page 2

Page 3

Table of contents
1Introduction
1.1 Special notice to user ....................................................................... 1-4
1.1.1 For Canada .................................................................................... 1-4
1.1.2 For U.S.A. ....................................................................................... 1-4
1.1.3 For New Zealand ............................................................................ 1-7
1.1.4 For Europe ..................................................................................... 1-7
1.2 Getting started (fax) .......................................................................... 1-8
1.3 Features of the fax .......................................................................... 1-10
1.4 Explanation of Manual Conventions ............................................. 1-21
1.5 Descriptions and symbols for documents and paper ................. 1-23
1.5.1 “Width” and “Length” ................................................................... 1-23
1.5.2 Paper orientation .......................................................................... 1-23
1.6 User’s guide .................................................................................... 1-24
2 Before use
2.1 Restriction matter ............................................................................. 2-3
2.2 Control panel ..................................................................................... 2-4
2.2.1 Control panel .................................................................................. 2-4
2.3 First-use settings .............................................................................. 2-7
2.3.1 Must-set items ............................................................................... 2-7
2.4 Useful functions ................................................................................ 2-8
2.4.1 Address book ................................................................................. 2-8
2.4.2 Program ....................................................................................... 2-12
2.5 Fax screen ....................................................................................... 2-15
2.6 User authentication and account track ........................................ 2-17
2.6.1 When the user authentication has been set ................................. 2-17
2.6.2 When the account track has been set ......................................... 2-17
2.7 Fax reception using the box .......................................................... 2-18
2.7.1 Type of boxes .............................................................................. 2-19
2.7.2 Operations of the PC-fax RX feature ........................................... 2-21
C450 x-i
Page 4

3 Transmission
3.1 Simple fax transmission ....................................................................3-3
3.2 Placing the original on the machine ................................................3-7
3.2.1 Using the ADF .................................................................................3-7
3.2.2 Placing originals on the platen glass ..............................................3-8
3.2.3 Sending multiple originals from the platen glass ............................3-9
3.2.4 Transmitting originals by using both the ADF
and the platen glass ......................................................................3-10
3.3 Setting transmission conditions ....................................................3-11
3.3.1 Original image type .......................................................................3-12
3.3.2 Density ..........................................................................................3-13
3.3.3 Simplex/Duplex .............................................................................3-14
3.3.4 Resolution .....................................................................................3-15
3.3.5 Confirming settings and communication results ..........................3-16
3.3.6 Registering the address book from the mode check screen ........3-19
3.4 Selecting one destination ...............................................................3-21
3.4.1 Selecting one destination .............................................................3-21
3.4.2 Selecting multiple destinations .....................................................3-28
3.4.3 To confirm/delete a destination ....................................................3-29
3.4.4 Manual redialing ............................................................................3-30
3.5 Scanning ...........................................................................................3-31
3.5.1 When original size cannot be detected .........................................3-31
3.5.2 When memory capacity is exceeded ............................................3-31
3.6 When unable to send .......................................................................3-32
3.7 Reserving transmission ..................................................................3-33
3.8 Manual transmission .......................................................................3-34
3.9 Canceling transmission ..................................................................3-35
3.9.1 Canceling communication in progress .........................................3-35
3.9.2 Canceling reserved jobs ...............................................................3-36
3.10 Confirm the job list ..........................................................................3-37
3.11 Confirming communication results ...............................................3-38
3.12 Memory transmissions and quick memory TX .............................3-41
3.12.1 Memory transmission ...................................................................3-41
3.12.2 Quick memory transmission .........................................................3-41
x-ii C450
Page 5

3.12.3 To perform a quick memory transmission ................................... 3-42
3.13 Number of originals ........................................................................ 3-44
3.14 Timer transmission ......................................................................... 3-47
3.15 International communication ......................................................... 3-50
3.16 Sender information ......................................................................... 3-53
3.16.1 Set to inside body text ................................................................. 3-53
3.16.2 Set to outside body text ............................................................... 3-53
3.16.3 When mixed original is selected .................................................. 3-54
4 Reception
4.1 Reception mode ................................................................................ 4-3
4.1.1 Auto reception (fax only mode) ...................................................... 4-3
4.1.2 Manual reception (telephone only mode) ....................................... 4-3
4.2 Auto reception (fax only mode) ....................................................... 4-4
4.3 Manual reception (telephone only mode) ....................................... 4-5
4.4 Unable to receive .............................................................................. 4-6
4.5 Memory substitute reception .......................................................... 4-7
4.6 Reception recording ......................................................................... 4-8
4.6.1 Recording after reducing at the minimum reduction rate .............. 4-8
4.6.2 Recording after reducing to fit in paper ......................................... 4-9
4.7 Reception information .................................................................... 4-17
5 Troubleshooting
5.1 Cannot send messages .................................................................... 5-3
5.2 Cannot receive messages ............................................................... 5-4
5.3 Error message displayed ................................................................. 5-6
5.4 Call for service .................................................................................. 5-7
6 Specifications
6.1 Specifications ................................................................................... 6-3
C450 x-iii
Page 6

7 Transmission applications
7.1 Opening the scan setting screen and comm. setting screen .......7-3
7.2 Application functions overview ........................................................7-5
7.3 Mixed original ....................................................................................7-8
7.4 Bind position ....................................................................................7-10
7.5 Frame erase transmission ..............................................................7-13
7.6 Background adjustment .................................................................7-16
7.7 Sharpness ........................................................................................7-19
7.8 Scan size ..........................................................................................7-22
7.9 File type ............................................................................................7-25
7.10 Password transmission ..................................................................7-27
7.11 Confidential communication ..........................................................7-30
7.11.1 Specifying confidential communication ........................................7-30
7.11.2 Printing the document received in a confidential user box ..........7-33
7.11.3 Deleting documents from a confidential user box ........................7-34
7.12 Relay transmission request ............................................................7-35
7.13 ECM OFF ..........................................................................................7-38
7.14 V.34 OFF ...........................................................................................7-41
8 Useful functions for reception
8.1 Memory reception .............................................................................8-3
8.1.1 Printing a document held in memory ..............................................8-3
8.1.2 Deleting a document held in memory .............................................8-5
8.2 Reception information ......................................................................8-6
8.2.1 Various reception information .........................................................8-6
9 Polling
9.1 Polled transmission ...........................................................................9-3
9.1.1 Polled transmission .........................................................................9-4
9.2 Polling reception ................................................................................9-6
9.3 Bulletin ................................................................................................9-9
9.3.1 Write a document to the bulletin board ........................................9-10
9.3.2 Receive by polling a document written to
x-iv C450
the bulletin board of a destination (fax) ........................................9-13
Page 7

10 Registering/Settings
10.1 Displaying the fax registration screen .......................................... 10-3
10.2 Registering the address book ....................................................... 10-5
10.3 Registering the group .................................................................. 10-19
10.4 Registering the program .............................................................. 10-25
10.5 Registering the subject and text of the e-mail .......................... 10-31
10.6 Setting the confidential boxes ..................................................... 10-48
10.7 Setting the bulletin board ............................................................ 10-50
10.8 Setting the memory RX user box ................................................ 10-51
11 Utility mode
11.1 Utility mode screen ......................................................................... 11-3
11.1.1 Entering user setting .................................................................... 11-3
11.1.2 Exiting from user setting .............................................................. 11-4
11.1.3 Entering administrator setting ...................................................... 11-5
11.1.4 Exiting from administrator setting ................................................ 11-6
11.2 Fax utility mode list ......................................................................... 11-7
11.2.1 Fax Basic Screen Default Setting ............................................... 11-7
11.2.2 Fax Active Screen ........................................................................ 11-7
11.2.3 Initial Setting ................................................................................ 11-7
11.2.4 Entering Power Save Mode (Fax) ................................................. 11-8
11.2.5 Print/Fax Output Settings ............................................................ 11-8
11.2.6 Non-Business Hour Output (Fax/Print) ....................................... 11-8
11.2.7 Header Information ...................................................................... 11-8
11.2.8 Header/Footer Position ................................................................ 11-9
11.2.9 Telephone Line Settings .............................................................. 11-9
11.2.10 TX/RX Setting ............................................................................. 11-10
11.2.11 Function Setting ......................................................................... 11-11
11.2.12 PBX CN Set ................................................................................ 11-12
11.2.13 Report Settings ......................................................................... 11-13
11.2.14 Job Settings List ........................................................................ 11-13
11.3 Fax basic screen default setting ................................................. 11-14
11.4 Initial setting .................................................................................. 11-17
11.5 Fax active screen .......................................................................... 11-19
C450 x-v
Page 8

11.6 Entering power save mode (fax) ..................................................11-22
11.7 Print/Fax output settings ..............................................................11-25
11.8 Header information .......................................................................11-28
11.9 Header/Footer position .................................................................11-31
11.10 Telephone line settings .................................................................11-34
11.11 TX/RX setting .................................................................................11-37
11.12 Function setting .............................................................................11-40
11.12.1 Function ON/OFF setting ............................................................11-40
11.12.2 Memory RX .................................................................................11-43
11.12.3 Closed network RX .....................................................................11-46
11.12.4 Forward TX setting ......................................................................11-49
11.12.5 Confidential RX password check ................................................11-53
11.12.6 FAX RX setting ............................................................................11-56
11.12.7 TSI user box setting ....................................................................11-60
11.13 PBX (Private Branch Exchange) CN set ......................................11-64
11.14 Report settings ..............................................................................11-66
12 Explanation of reports and lists
12.1 Types of reports and lists ...............................................................12-3
12.1.1 Reports .........................................................................................12-3
12.1.2 Lists ...............................................................................................12-4
12.2 Activity report ..................................................................................12-5
12.2.1 Automatic printout ........................................................................12-5
12.2.2 Manual printout .............................................................................12-5
12.3 TX report ..........................................................................................12-9
12.3.1 Manual printout .............................................................................12-9
12.3.2 Automatic printout ........................................................................12-9
12.4 Polling TX report ............................................................................12-12
12.5 Polling RX report ...........................................................................12-14
12.6 Broadcast report ...........................................................................12-16
12.7 Sequence polling reception report ..............................................12-18
12.8 Reservation communication report .............................................12-20
12.9 Reservation polling TX report ......................................................12-22
12.10 Broadcast reserved report ...........................................................12-24
x-vi C450
Page 9

12.11 Sequence polling RX reservation report .................................... 12-26
12.12 Confidential RX report .................................................................. 12-28
12.13 Bulletin TX report .......................................................................... 12-30
12.14 Address book list .......................................................................... 12-32
12.15 Group address list ........................................................................ 12-35
12.16 Program list ................................................................................... 12-38
12.17 Subject/Text list ............................................................................ 12-41
12.18 Fax setting list ............................................................................... 12-44
12.18.1 Confidential/Bulletin list ............................................................. 12-48
12.18.2 Sender (TSI) RX box ................................................................... 12-49
13 Appendix
13.1 Number of stored pages to memory ............................................. 13-3
13.2 Entering text .................................................................................... 13-4
13.3 Fax terms ......................................................................................... 13-7
13.4 Index .............................................................................................. 13-11
C450 x-vii
Page 10

Page 11

1
Introduction
Page 12

Page 13

Introduction
1 Introduction
Thank you for your purchase of the Konica Minolta digital electronic photocopying machine.
This user's guide describes operating procedures and precautions for use of
the fax functions. Please read this user's guide before starting operation of
the machine.
After reading this user's guide, it is advisable to keep it close at hand to consult it any time when necessary in order to operate the fax functions at their
optimum condition.
For correct operation, also read the “User's guide – Copy operations” before
starting operation.
Acknoledgement
KONICA MINOLTA, KONICA MINOLTA Logo, and The essentials of imaging
are registered trademarks or trademarks of KONICA MINOLTA HOLDINGS,
INC.
PageScope and bizhub are registered trademarks or trademarks of KONICA
MINOLTA BUSINESS TECHNOLOGIES, INC.
Adobe, Adobe Logo, Acrobat, Acrobat Logo, PostScript and PostScript
Logo are registered trademarks or trademarks of Adobe Systems, Inc.
Other company names and product names used in this User's Guide are the
registered trademarks or trademarks of their respective companies.
1
Copyright
© 2004 by Konica Minolta Business Technologies, Inc. All rights reserved.
Exemption
Please observe the following points:
- A part or this user's guide may be used or duplicated without permission.
- Information written in this user's guide is subject to change without no-
tice.
C450 1-3
Page 14

1
1.1 Special notice to user
1.1.1 For Canada
NOTICE:
This product meets the applicable Industry Canada technical specifications.
The ringer equivalence number (REN) is an indication of the maximum
number of devices allowed to be connected to a telephone interface. The termination on an interface may consist of any combination of devices subject
only to the requirement that the sum of the RENs of all the devices does not
exceed five.
AVIS:
Le present materiel est conforme aux specifications techniques applicables
d'Industrie Canada.
L'indice d'equivalence de la sonnerie (IES) sert a indiquer le nombre maximal
de terminaux qui peuvent etre raccordes a une interface telephonique. La
terminaison d'une interface peut consister en une combinaison quelconque
de dispositifs, a la seule condition que la somme d'indices d'equivalence de
la sonnerie de tous les dispositifs n'excede pas 5.
1.1.2 For U.S.A.
FCC part 68 requirements:
This equipment complies with part 68 of the FCC rules and the requirements
adopted by the ACTA. On the cover of this equipment is a label that contains,
among other information, a product identifier in the format
US:AAAEQ##TXXXX. If required, this information must be provided to the telephone company.
This equipment uses certification jack USOC RJ11C.
A plug and jack used to connect this equipment to the premises wiring and
telephone network must comply with the applicable FCC part 68 rules and
requirements adopted by the ACTA.
A compliant telephone cord and modular plug is provided with this product.
It is designed to be connected to a compatible modular jack that is also compliant. See installation instructions for details.
The REN is used to determine the number of devices that may be connected
to a telephone line. Excessive RENs on a telephone line may result in the devices not ringing in response to an incoming call. In most but not all areas,
the sum of RENs should not exceed five (5.0).
To be certain of the number of devices that may be connected to a line, as
determined by the total RENs, contact the local telephone company For
products approved after July 23, 2001, the REN for this product is part of the
Introduction
1-4 C450
Page 15

Introduction
product identifier that has the format US: US:AAAEQ##TXXXX. The digits
represented by ## are the REN without a decimal point (e.g., 03 is a REN of
0.3). For earlier products, the REN is separately shown on the label.
If this equipment FK-502 causes harm to the telephone network, the telephone company will notify you in advance that temporary discontinuance of
service may be required. But if advance notice isn't practical, the telephone
company will notify the customer as soon as possible. Also, you will be advised of your right to file a complaint with the FCC if you believe it is necessary.
The telephone company may make changes in its facilities, equipment, operations or procedures that could affect the operation of the equipment. If
this happens the telephone company will provide advance notice in order for
you to make necessary modifications to maintain uninterrupted service.
If trouble is experienced with this equipment FK-502, for repair or warranty
information, please contact the Konica Minolta dealer location where you
purchased this equipment. If the equipment is causing harm to the telephone
network, the telephone company may request that you disconnect the
equipment until the problem is resolved.
Connection to party line service is subject to state tariffs. Contact the state
public utility commission, public service commission or corporation commission for information. If you home has specially wired alarm equipment connected to the telephone line, ensure the installation of FK-502 does not
disable you alarm equipment. If you have questions about what will disable
alarm equipment, consult your telephone company or a qualified installer.
The Telephone Consumer Protection Act of 1991 makes it unlawful for any
person to use a computer or other electronic device, including fax machines,
to send any message unless such message clearly contains in a margin at
the top or bottom of each transmitted page or on the first page of the transmission, the date and time it is sent and an identification of the business or
other entity, or other individual sending the message and the telephone
number of the sending machine or such business, other entity, or individual.
(The telephone number provided may not be a 900 number or any other
number for which charges exceed local or long-distance transmission charges.)
In order to program this information into your fax machine, you should complete the following steps: See “Header information” on page 11-28.
1
C450 1-5
Page 16

1
Introduction
Warning/Caution explained
7 WARNING
The exclamation point within an equilateral triangle followed by the
word “Warning” is intended to alert the user to the possibility that a disregard for the warning may result in fatal hazards or critical injuries.
% Be sure to focus your attention on the warning headings when reading
the copier user's guide.
7 CAUTION
The exclamation point within an equilateral triangle followed by the
word “Caution” is intended to alert the user to the possibility that a disregard for the caution may result in minor injuries or in physical damage.
% Be sure to focus your attention on the caution headings when reading
the copier user's guide.
1-6 C450
Page 17

Introduction
1.1.3 For New Zealand
Please observe the following points:
- This device is equipped with pulse dialing while the Telecom standard is
DTMF tone dialing. There is no guarantee that Telecom lines will always
continue to support pulse dialing.
- Use of pulse dialing, when this equipment is connected to the same line
as other equipment, may give rise to bell tinkle or noise and may also
cause a false answer condition. Should such problems occur, the user
should not contact the Telecom Fault Service.
- This equipment may not provide for the effective hand-over of a call to
another device connected to the same line.
- This equipment does not fully meet Telecom's impedance requirements.
Performance limitations may occur when used in conjunction with some
parts of the network. Telecom will accept no responsibility should difficulties arise in such circumstances.
- The grant of a telepermit for any item of terminal equipment indicates only
that Telecom has accepted that the item complies with minimum conditions for connection to its network. It indicates no endorsement of the
product by Telecom, nor does it provide any sort of warranty. Above all,
it provides no assurance that any item will work correctly in all respects
with another item of telepermitted equipment of a different make or model, nor does it imply that any product is compatible with all of Telecom's
network services.
- The automatic calling functions of this equipment must not be used to
cause a nuisance to other customers.
- Telepermitted equipment only may be connected to the auxiliary tele-
phone port. The auxiliary port is not specifically designed for 3-wire connected equipment. 3-wire might not respond to incoming ringing when
connected to this port.
1
1.1.4 For Europe
The facsimile has been approved in accordance with Council Decision 1999/
5/ EC for pan-European single terminal connection to the public switched telephone network (PSTN). However, due to differences between the individual
PSTNs provided in different countries, the approval does not, of itself, give
an unconditional assurance of successful operation on every PSTN network
terminal point.
In the event of problems, you should contact your equipment supplier in the
first instance.
C450 1-7
Page 18

1
1.2 Getting started (fax)
Sending
Perform the following basic procedure to send a fax.
1 Press [Fax] on the control panel to start the fax mode.
2 Set the functions as necessary.
Fax screen
Scan setting
screen
Introduction
Application
screen
Comm. setting
screen
1-8 C450
Page 19
Introduction
3 Use the keypad to enter the fax number
4 Place the original on the machine.
1
of the destination.
– If you make an incorrect entry,
press [Del.] to clear your entry.
– Press [C] (clear) to clear the whole
entry.
– For details, see “Placing the original
on the machine” on page 3-7.
5 Press [Start] on the control panel.
C450 1-9
Page 20

1
1.3 Features of the fax
Imprint the total number of pages on the fax
You can place the total number of pages on each page of the fax for quick
memory transmission. It is useful for the recipient, so that they can make sure
whether all pages of the fax have been received.
From: 01234567890123456 2004 /12 /31 23:59 P.005 / 010
!
Detail
For details, see “Number of originals” on page 3-44.
Send a fax at a specified time
This function allows you to specify the time to start sending a fax. You can
save money by specifying a transmission to start during the night or early in
the morning when telephone charges are less.
Introduction
!
Detail
For details, see “Timer transmission” on page 3-47.
1-10 C450
Page 21

Introduction
To be sent each time a page is read. (Quick memory TX)
This is a method by which the fax transmission is started upon a sheet of
original being read.
!
Sending faxes to a foreign country
You can employ a lower transmission rate if you send a fax to the location at
which the communication condition is poor.
!
1
Detail
For details, see “Memory transmissions and quick memory TX” on
page 3-41.
Detail
For details, see “International communication” on page 3-50.
C450 1-11
Page 22

1
Introduction
Frame erasure mode
You can send a fax by erasing dark bands sometimes created when transmitting a document bound in the form of book. You can also set the width of
marginal erasure according to your preference.
Width of
erasure
Ordinary transmission Frame erasure transmission
!
Detail
For details, see “Frame erase transmission” on page 7-13.
1-12 C450
Page 23
Introduction
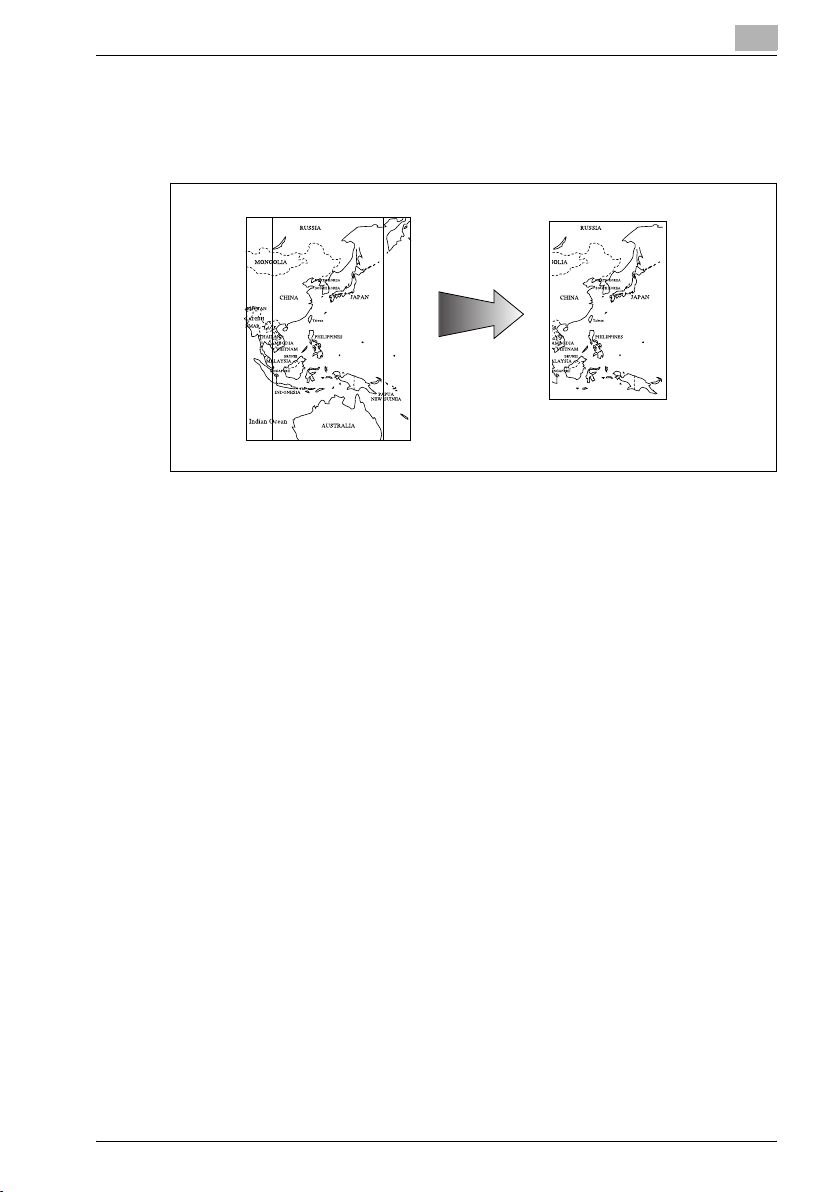
Send a fax in original size select mode
You can send a fax by designating the paper size for the document to be
sent. It is useful if you want to send only a portion of the original.
!
1
Detail
For details, see “Scan size” on page 7-22.
C450 1-13
Page 24
1
Introduction
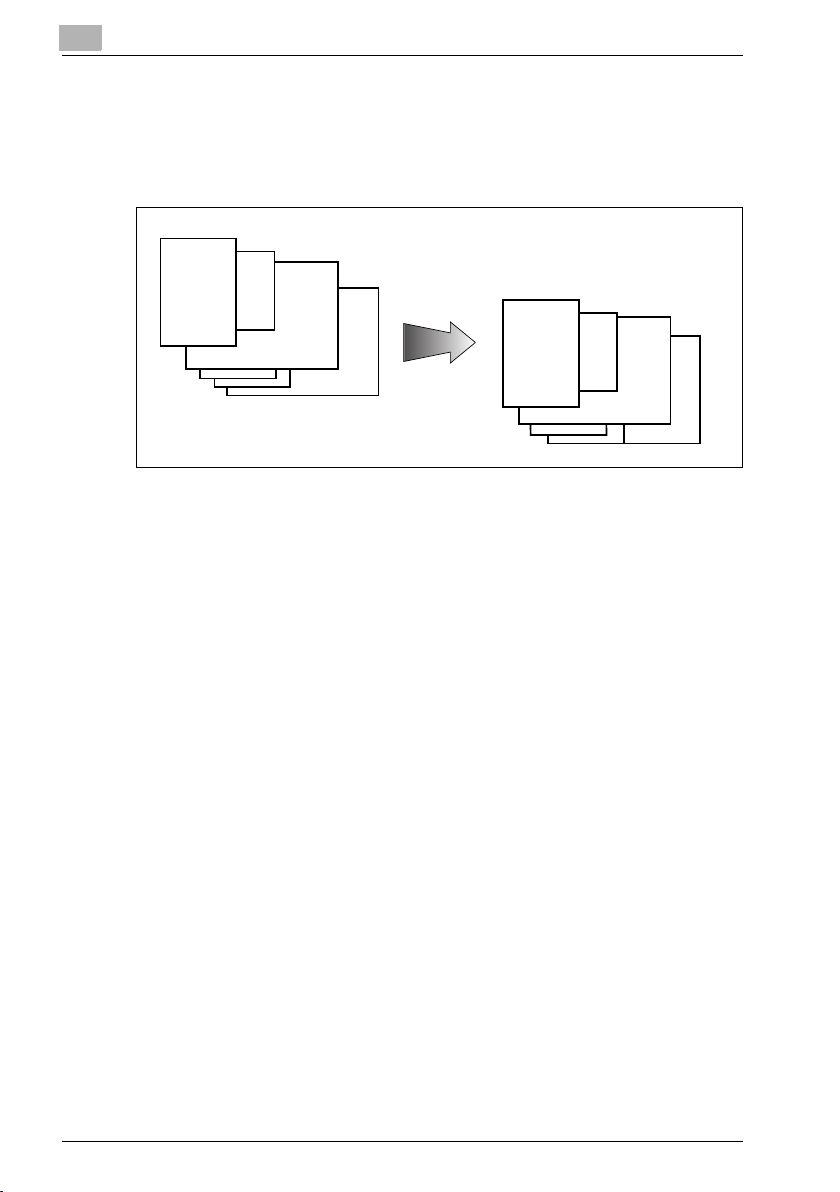
Setting and sending document pages of mixed sizes in a single operation
You can send pages of mixed sizes because the facsimile recognizes each
size and sends pages properly when the mixed original feature is used.
Transmitted and reproduced
in the same size as the original
pages at the destination.
You set document pages of
mixed sizes on the RADF.
!
Detail
For details, see “Mixed original” on page 7-8.
1-14 C450
Page 25
Introduction
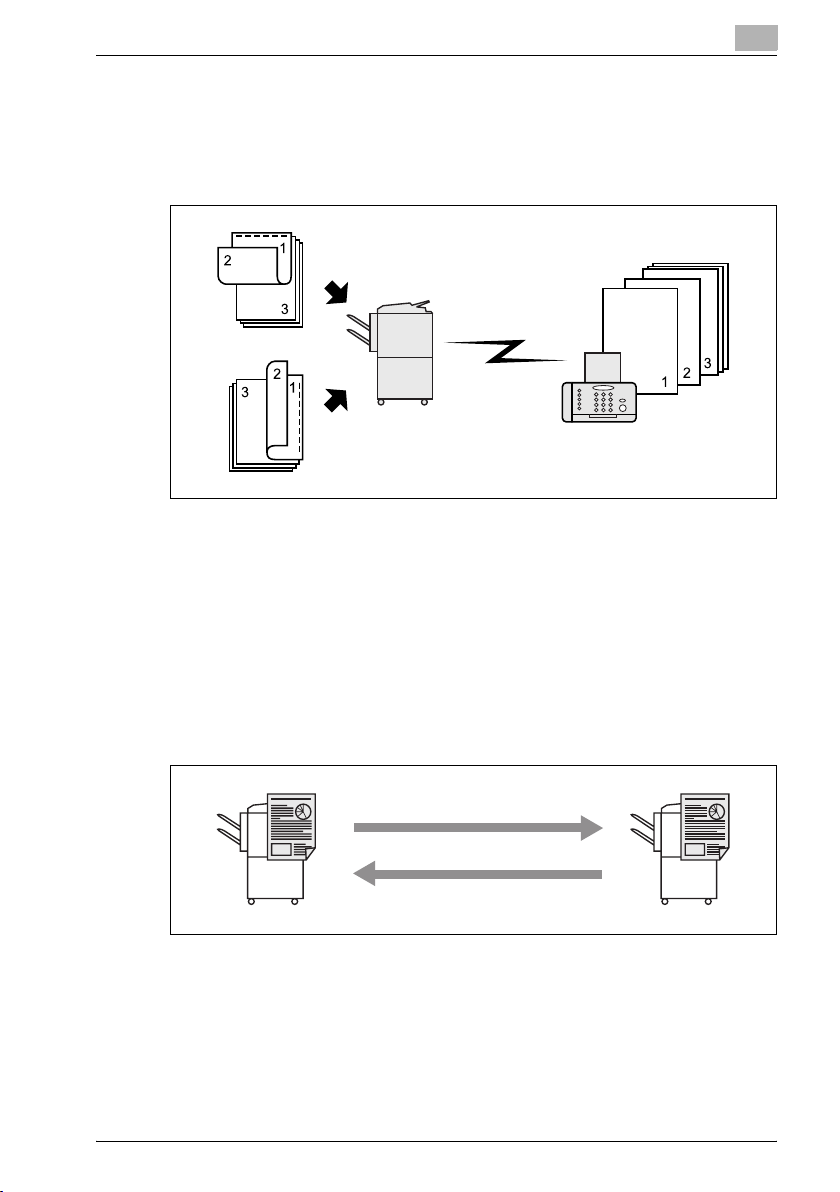
Specify the binding style of a two-sided document
You can specify the appropriate binding style when transmitting two-sided
documents. Binding style allows the pages of the document to be read appropriately by determining right to left or top to bottom.
1
Top/Bottom bind
Transmission
Left/Right bind
Destination fax
!
Detail
For details, see “Bind position” on page 7-10.
Sending a fax when it receives a polling command from the recipient
You can send a fax that has been read and stored in hard disk in the facsimile
when a polling command is sent from the recipient.
!
Detail
For details, see “Polling reception” on page 9-6.
C450 1-15
Page 26

1
Introduction
Sending a fax with ECM disabled
You can send a fax with ECM disabled to shorten the transmission time.
!
Detail
For details, see “ECM OFF” on page 7-38.
Polling specified document
You can store documents that you want to poll in the bulletin board of the
hard disk for polling transmission or polling reception.
!
Detail
For details, see “Bulletin” on page 9-9.
Sending a fax with the Super G3 mode disabled
You can send a fax with the Super G3 mode disabled if V.34 protocol is not
available because of restrictions on the Private Branch Exchange (PBX).
!
Detail
For details, see “V.34 OFF” on page 7-41.
1-16 C450
Page 27
Introduction
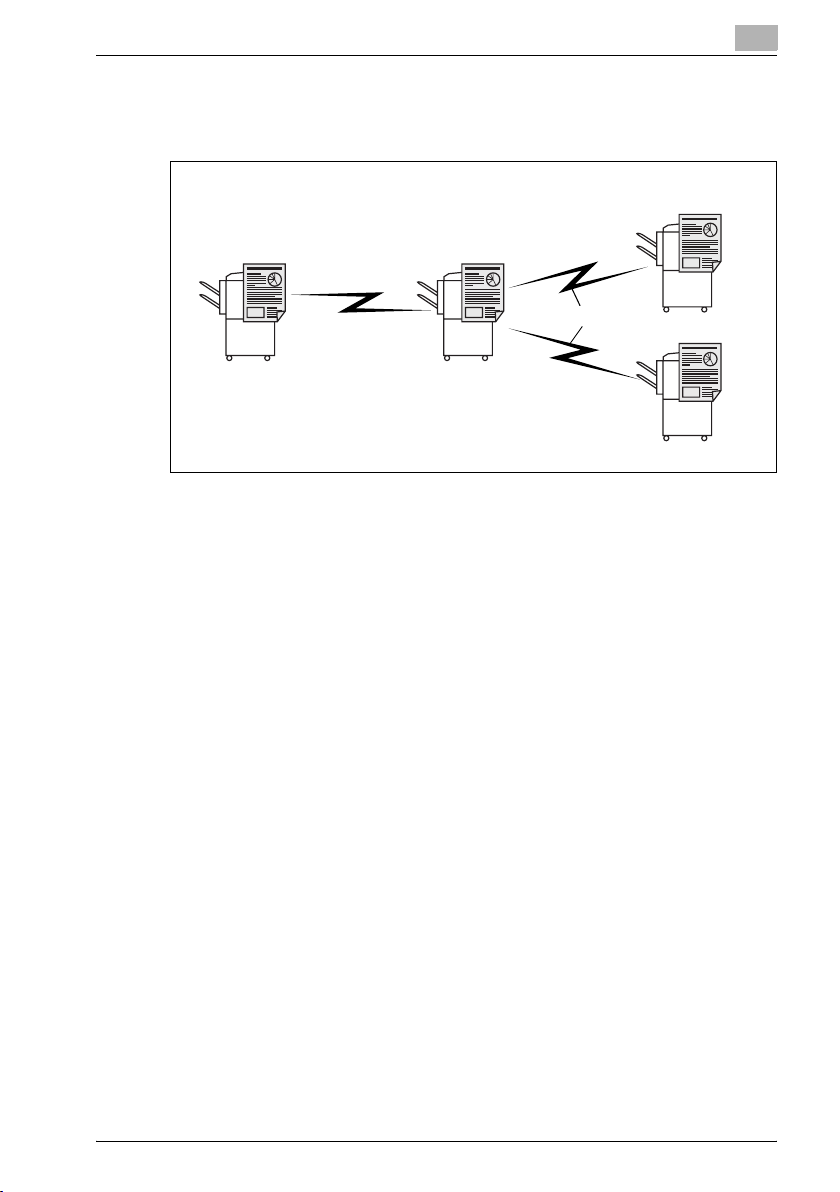
Relay fax
You can send a fax to a recipient via an intermediate relay station.
1
Remote station
Original station Intermediate relay station
Toll call
Local call
!
Detail
For details, see “Relay transmission request” on page 7-35.
This machine is not provided with a relay delivery function.
Remote station
C450 1-17
Page 28
1
Introduction
Use a confidential box
You can use a confidential box (similar to an inbox) to exchange confidential
information with specific person.
Sender
Classified document box
Receiver
!
Detail
For details, see “Confidential communication” on page 7-30.
Sending a fax protected with a password
You can send a fax protected with a password if the closed communication
is set at the recipient.
!
Detail
For details, see “Password transmission” on page 7-27.
1-18 C450
Page 29
Introduction
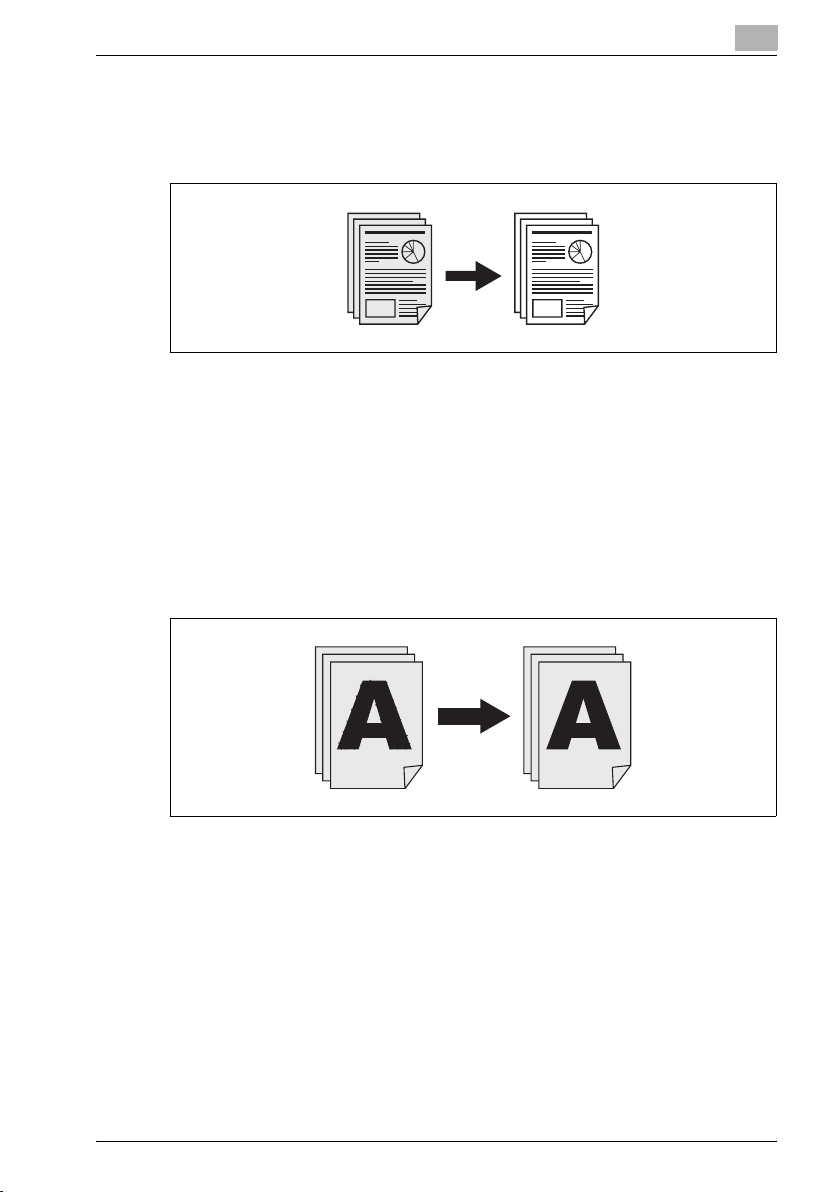
To be sent with the density in the background color adjusted
Transmission can be made after the density in the background color of the
original is adjusted.
!
To be sent with the edge of the character made clear
Transmission can be made after adjustments are made so that blurred characters are made clear to give them a smooth impression.
1
Detail
For details, see “Background adjustment” on page 7-16.
!
Detail
For details, see “Sharpness” on page 7-19.
C450 1-19
Page 30
1
Introduction
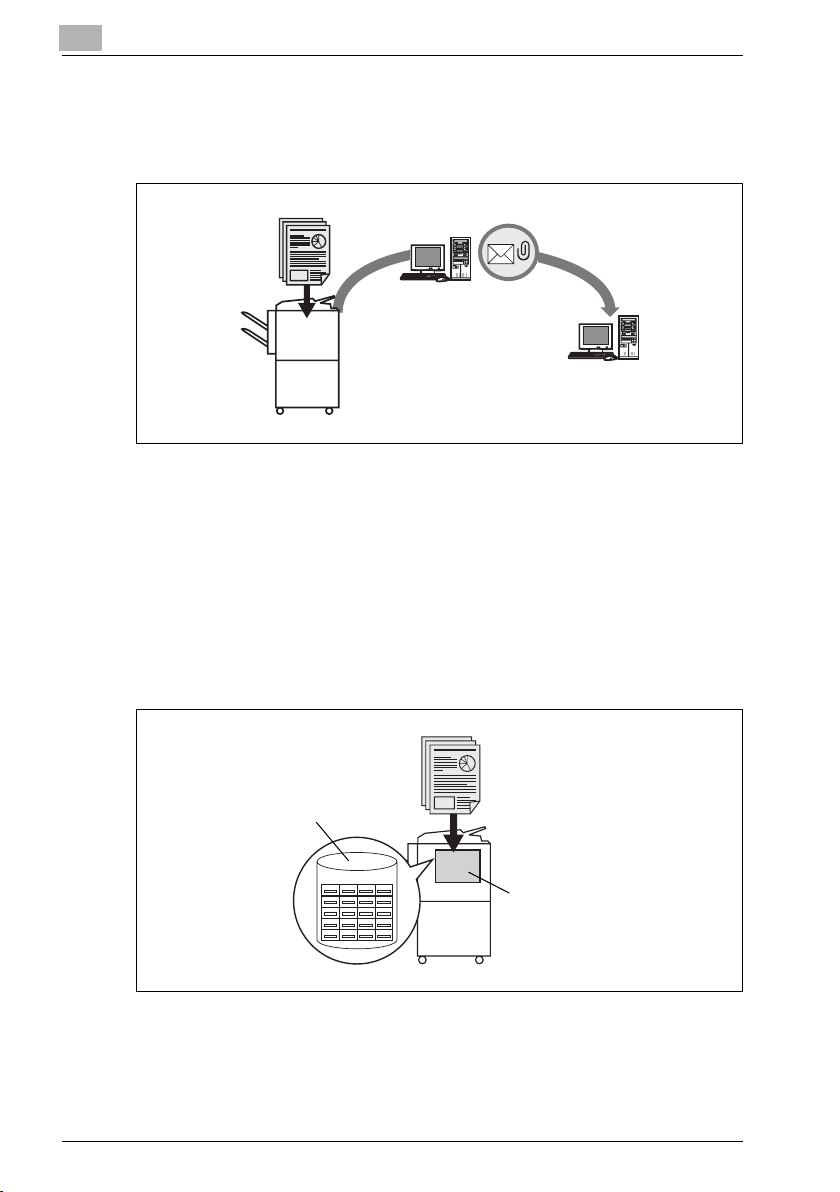
An e-mail is sent from the fax screen
An original that has been read can be sent as an e-mail from the fax screen
to the computer.
Mail server
E-mail
!
Detail
For details, see “Direct input” on page 3-26.
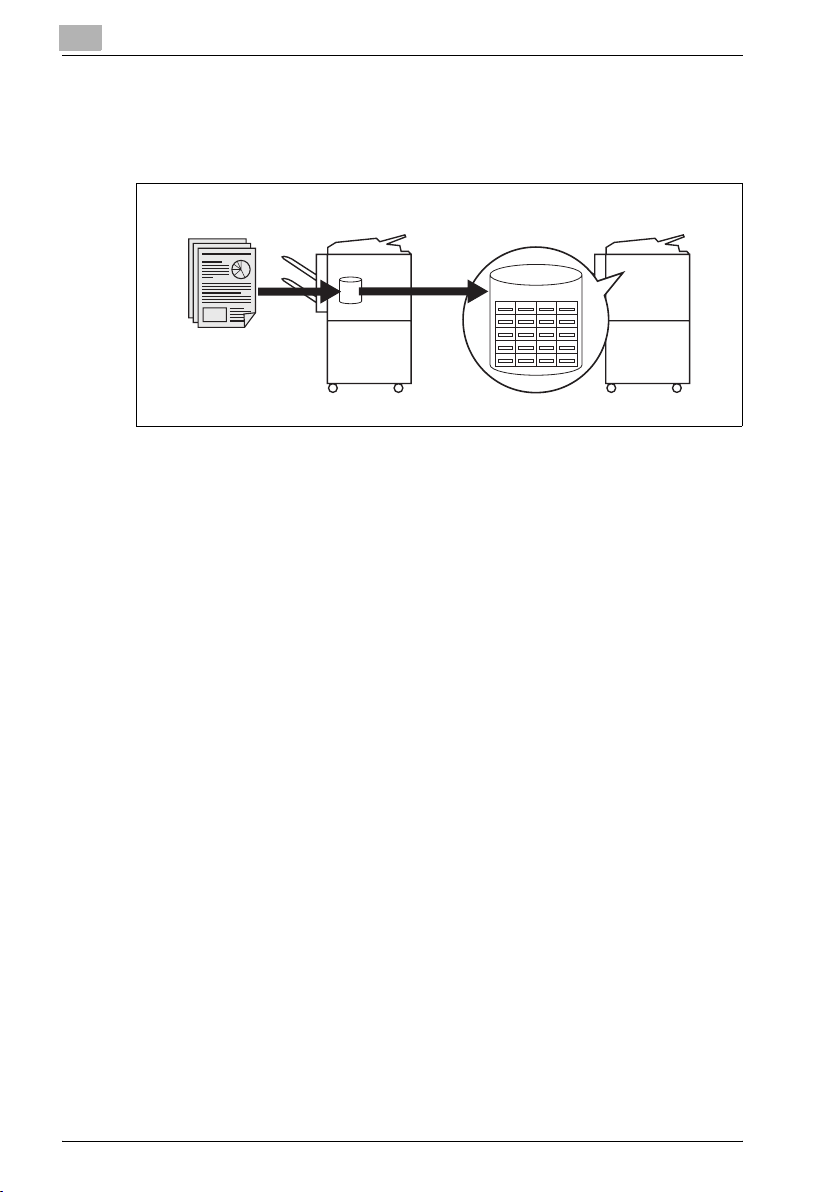
To be saved in the box
An original that has been read can be saved in the box created in the internal
hard disk.
Box
Hard disk
!
Detail
For details, see “Fax reception using the box” on page 2-18.
1-20 C450
Page 31

Introduction
1.4 Explanation of Manual Conventions
The marks and text formats used in this manual are described below.
Safety advices
6 DANGER
Failure to observe instructions highlighted in this manner may result in
fatal or critical injuries in fact of electrical power.
% Observe all dangers in order to prevent injuries.
7 WARNING
Failure to observe instructions highlighted in this manner may result in
serious injuries or property damage.
% Observe all warnings in order to prevent injuries and to ensure safe use
of the machine.
7 CAUTION
Failure to observe instructions highlighted in this manner may result in
slight injuries or property damage.
% Observe all cautions in order to prevent injuries and to ensure safe use
of the machine.
1
Sequence of action
1 The number 1 as formatted here indi-
cates the first step of a sequence of
actions.
An illustration inserted
2 Subsequent numbers as formatted
here indicate subsequent steps of a
sequence of actions.
Text formatted in this style pro-
?
vides additional assistance.
% Text formatted in this style describes the action that will ensure the
desired results are achieved.
C450 1-21
here shows what operations
must be performed.
Page 32

1
Introduction
Tips
2
Note
Text highlighted in this manner contains useful information and tips to ensure safe use of the machine.
2
Reminder
Text highlighted in this manner contains information that should be reminded.
!
Detail
Text highlighted in this manner contains references for more detailed information.
Special text markings
[Stop] key
The names of keys on the control panel are written as shown above.
MACHINE SETTING
Display texts are written as shown above.
1-22 C450
Page 33

Introduction
1.5 Descriptions and symbols for documents and paper
The use of words and symbols in this manual are explained below.
1.5.1 “Width” and “Length”
Whenever paper dimensions are mentioned
in this manual, the first value always refers to
the width of the paper (shown as “Y” in the illustration) and the second to the length
(shown as “X”).
1.5.2 Paper orientation
Lengthwise (w)
If the width (Y) of the paper is shorter than the
length (X), the paper has a vertical or portrait
orientation, indicated by w.
1
Crosswise (v)
If the width (Y) of the paper is longer than the
length (X), the paper has a horizontal or landscape orientation, indicated by v.
C450 1-23
Page 34

1
1.6 User’s guide
The following user's guide have been prepared for this machine.
User's guide – Copy operations
This manual contains details on basic operations and the operating procedures for the various copy functions.
- Refer to this user's guide for details on operating procedures for copy
functions, including precautions on installation/use, turning the machine
on/off, loading paper, and troubleshooting operations such as clearing
paper misfeeds.
User's guide – Network scanner operations
This manual contains details on specifying network settings for standard
equipment and on operations for scanning functions.
- Refer to this user's guide for details on operating procedures for network
functions and for using scan to e-mail, scan to FTP and scan to PC
(SMB).
User's guide – Box operations
This manual contains details on operating procedures for using the boxes.
- Refer to this user's guide for details on operating procedures for using
the boxes on the hard disk.
Introduction
User utilities CD
User’s guide – Print operations
This manual contains details on operating procedures using the standard
built-in print controller.
- Refer to this user's guide for details on operating procedures for using
the print functions.
Post Script CD
PageScope utility CD
This manual contains details on operating procedures for printing.
- Refer to this user's guide for details on operating procedures for using
the print functions.
User's guide – Facsimile operations (this manual)
This manual contains details on operating procedures for faxing.
- Refer to this user's guide for details on operating procedures for fax func-
tions when the fax kit is installed.
1-24 C450
Page 35

Introduction
User's guide – Enlarge display operations
This manual contains details on operating procedures for using copy functions in enlarge display mode.
- Refer to this user's guide for details on operating procedures in enlarge
1
display mode.
C450 1-25
Page 36

1
Introduction
1-26 C450
Page 37

2
Before use
Page 38

Page 39

Before use
2 Before use
2.1 Restriction matter
2
Note
No sending or reception of a fax in color is available for this fax kit.
This fax kit can be connected to phone lines as shown below.
- Local phone lines (including facsimile communication networks)
- PBX (private branch exchange two wire system)
With respect to the telephone line to be used, be sure to check the following.
- A business phone cannot be connected as an outside line.
- When the digital private line is multiplexed in the corporate network that
is used by the customer, the facsimile communication may be subject to
the following constraints.
– The transmission speed is restricted.
– Communication by the Super G3 is not available.
There may occur once in a while communication errors in the setting made
when the product was shipped from the factory. These constraints are due
to the multiplexed device that restricts the band available for the line to the
utmost limit on the assumption that voice is used.
However, these constraints vary depending on a device that makes up the
network. For more information, refer to the administrator of the network that
you use.
2
C450 2-3
Page 40

2
Mode Memor
Mode Chec
Star
Main P
er
2.2 Control panel
2.2.1 Control panel
Before use
1235
Power Save
Access
Mode Memor
Utility/
Counter
Mode Chec
24
23
22
Help
Accessibility
Enlarge Display
Contrast
674
Fax
Box
Scan
ABC DEF
JKLGHI MNO
TUVPQRS WXYZ
y
k
16
Reset
Copy
Interrupt
Proof Copy
Star
t
Power
8
9
10
Stop
11
12
Data
Main P
ower
1314151718192021
No. Name Description
1 [Power Save] key Press to enter power save mode. While the machine is
in power save mode, the indicator on the [Power Save]
key lights up in green and the touch panel goes off. To
cancel power save mode, press the [Power Save] key
again.
2 Touch panel Displays various screens and messages.
Specify the various settings by directly touching the
panel.
3 [Access] key If user authentication or account track settings have
been applied, press this key after entering the user
name and password (for user authentication) or the
account name and password (for account track) in order to use this machine.
4 [Box] key Press to enter box mode. While the machine is in box
mode, the indicator on the [Box] key lights up in green.
For details, refer to "User's guide – Box operations".
5 [Fax] key Press to enter fax mode. While the machine is in fax
mode, the indicator on the [Fax] key lights up in green.
6 [Scan] key Press to enter scan mode. While the machine is in
scan mode, the indicator on the [Scan] key lights up in
green. For details, refer to "User's guide – Network
scanner operations".
7 [Copy] key Press to enter copy mode. (As a default, the machine
is in copy mode.) While the machine is in copy mode,
the indicator on the [Copy] key lights up in green. For
details, refer to "User's guide – Copy operations".
2-4 C450
Page 41

Before use
No. Name Description
8 [Reset] key Press to clear all settings (except programmed set-
9 [Interrupt] key Copy screen is displayed after scanning original doc-
10 [SUB POWER] button Pressed to turn on/off machine operations, for exam-
11 [Stop] key Press to stop the operation that is selected box mode,
12 [Start] key Press to start the operation that is selected box mode,
13 Main power indicator Lights up in green when the machine is turned on with
14 Data indicator Flashes in green while a print job is being received.
15 [Proof Copy] key Not used for fax mode.
16 Keypad Use to type in the number. It can be used at the time
17 [C] (clear) key Press to erase a value (such as the fax number,
18 [Mode Check] key Press to display screens showing the specified set-
19 [Utility/Counter] key Press to display the utility mode screen. It can be used
20 [Mode Memory] key Not used for fax mode.
21 Contrast dial Use to adjust the contrast of the touch panel.
22 [Enlarge Display] key Not used for fax mode.
23 [Accessibility] key Press to display the screen for specifying user acces-
tings) entered in the control panel and touch panel.
uments. Then It change to the interrupt mode. While
the machine is in interrupt mode, the indicator on the
[Interrupt] key lights up in green and the message
“Now in interrupt mode.” appears on the touch panel.
To cancel interrupt mode, press the [Interrupt] key
again.
ple, for copying, printing or scanning. When tu rned off,
the machine enters a state where it conserves energy.
fax mode, scan mode or copy mode.
While in fax mode, press the [Stop] key during fax
transmission to stop the fax transmission.
fax mode, scan mode or copy mode. While in fax
mode, fax transmission is started.
When this machine is ready to begin operation, the indicator on the [Start] key lights up in green. If the indicator on the [Start] key lights up in orange, operation
cannot begin.
Press to restart a stopped job. For details on jobs, refer to "User's guide – Copy operations".
the [Main power] button
Lights up in green when data is being printed.
of registration of a fax number and data.
Use to type in the number of copies, zoom ratio, various settings.
number of copies, a zoom ratio, or a size) entered using the keypad.
tings.
in case of utilities operation or confirming the number
of copies, fax communication or scanning.
sibility functions.
2
C450 2-5
Page 42

2
Before use
No. Name Description
24 [Help] key Press to display the help main menu screen, where de-
scriptions of the various functions and details of operations can be displayed. For details, refer to "User’s
guide – Copy operations".
2
Reminder
Do not apply extreme pressure to the touch panel, otherwise it may be
scratched or damaged.
Never push down on the touch panel with force, and never use a hard or
pointed object to make a selection in the touch panel.
When the screen instructing you to call your service representative appears and copying is no longer possible, a malfunction may have occurred. Note the malfunction code, immediately unplug the machine, and
then contact the service representative to inform them of the malfunction
code.
2-6 C450
Page 43

Before use
2.3 First-use settings
2.3.1 Must-set items
After installation, you must set the following items to use the facsimile functions. You will not be able to execute the fax communication if these items
are not set properly.
- Header information
– Registers the fax number and name of this facsimile.
- Telephone line settings
– Sets the telephone line and the receiving method.
Header information
Set the following items.
!
Detail
For details, refer to “Header information” on page 11-28.
Item Description
Sender name Set the name of this machine. The name is a string of up to 30
Sender fax no. Set the fax number of this machine. The fax ID is a number of up
characters. The name can contain with any alphanumeric character and symbols.
to 20 digits. The ID can contain any number between 0 and 9, the
+ symbol, spaces, * symbol, and # symbol.
2
Telephone line settings
Set the following items.
!
Detail
For details, refer to “Telephone line settings” on page 11-34.
Item Description
Dialing method Select between tone dialing line and pulse dial line (PB, pulse).
Receive mode Select between automatic re ception and manual reception.Select
C450 2-7
“Auto RX” for automatic reception.
Select “Manual RX” if you often receive calls to an external handset connected to this machine.
Page 44

2
2.4 Useful functions
When the program and address book has been registered. Just pressing the
[Program] or [Address Book], the information of registration can be called.
2.4.1 Address book
Registering into the [Address Book] the destination to which a message is
frequently sent, you can call the information of registration only by pressing
the [Address Book] key.
!
Detail
If the name and search character are registered when registering the address book for the address book, an address can be specified using a reference character.
Address book
This section describes the procedures for setting the fax number, destination
name, and retrieval character of an abbreviated destination.
1 Press [Utility/Counter] on the control panel to open the utility mode
screen if it is not already open.
– For the address book, up to 2,000 addresses (0001 to 2000) can be
registered including the address book of other functions of this machine.
– You can confirm the registered information in the abbreviation list.
Before use
2 Press [One-Touch Registration].
– For utility mode, the number displayed in the key can also be se-
lected by entering it through the numeric keypad.
In the case of [One-Touch Registration], enter 1 through the keypad.
2-8 C450
Page 45

Before use
2
3 Press [Fax].
4 Press [Address Book].
5 Press the destination to register.
– The item which can be registered for the address book is the fol-
lowing three items.
–[Abbr. Dial]:
Registering the fax number.
–[E-Mail]:
Registering the e-mail address. This machine can specify an e-mail
address as a fax destination.
– If it has been registered. This feature is convenient when transmit-
ting a picture to an e-mail address simultaneously with fax transmission.
– [User Box]:
Registering the box name. This machine can specify a box in an internal hard disk as a fax destination.
– If it has been registered. This feature is convenient when storing a
picture to a box simultaneously with fax transmission.
C450 2-9
Page 46

2
Before use
– If abbreviated destination are already registered, you can press
[Edit] in that screen to edit the contents of the list. For details, refer
to “Registering the e-mail for the address book” on page 10-9.
6 Press [New].
7 Press [Name], enter the name of the abbreviated destination and press
[OK].
– For the operation of the entering character, see page 13-4.
– The name can be a string of up to 24 characters.
8 Enter the destination.
– When [Abbr. Dial] is selected in the step 5. Enter the fax number to
the destination by the keypad.
– When [E-Mail] is selected in the step 5. Press [E-Mail Address] and
then enter the e-mail address.
– When [User Box] is selected in the step 5. Press [User Box Name]
and then select the box.
– Numbers containing up to 38 digits can be entered.
– Unregistered no. is displayed in the [Stored No.] field.
– To correct a wrong entry, use [Delete] or [C] (clear).
– In order to select the box, it is necessary to register the box in ad-
vance.
– For the registration method of the boxes, see “User’s guide – Box
operations.”
9 Press [Index] to entry the characters for search and then press [OK].
– Press the search key of the search character you want to register
from among [ABC] - [etc].
2-10 C450
Page 47

Before use
2
10 Press [Line Setting] if necessary to select [Overseas TX], [ECM OFF] or
[V.34 OFF] and then press [OK].
– When [E-Mail] or [User Box] is selected in the step 5. There is no
[Line Setting].
11 Press [OK].
Registration is performed and the registered destination is displayed
on a list.
When proceeding with the registration of the address book, go to step
6.
12 Press [Exit].
C450 2-11
Page 48

2
2.4.2 Program
Registering into the [Program] the destination and communication functions,
you can call the information of registration only by pressing the [Program]
key.
!
Detail
You can register the scan setting and comm. setting functions. For details, refer to “Registering the program” on page 10-25.
Program
This section describes procedures for registering into the [Program] the registration name and destination.
1 Press [Utility/Counter] on the control panel to open the utility mode
screen if it is not already displayed.
– For the program, up to 400 (001 to 400) can be registered.
2 Press [One-Touch Registration].
– In the utility mode, it is also possible to enter a number displayed in
the key through the keypad for selection. In the case of [One-Touch
Registration], enter the “1” on the keypad.
Before use
3 Press [Fax].
4 Press [Program].
2-12 C450
Page 49

Before use
2
5 Select the program no. you want to register and then press [Edit].
6 Press [Name], enter the name of the program and press [OK].
– The name can be a string of up to 24 characters.
– For the operation of the entering character, see page 13-4.
C450 2-13
Page 50

2
Before use
7 Press [Dest.] to select the destination.
– When registering a destination that has been already registered, se-
lect [Select From Address Book] to enter it through either [Abbr. Di-
al], [User Box], [Group] or [E-Mail Address], and then press [OK].
– When entering a fax number, press [Direct Input], enter a destina-
tion by selecting Dial Number, User Box or E-Mail address, and
then press [OK].
– To correct a wrong entry, use [Delete] or [C] (clear).
– In order to select a box, it is necessary to register a box in advance.
– For the registration method of the boxes, see “User’s guide – Box
perations).”
8 Press [Close] and then press [OK].
– To stop registering the program, press [Cancel].
The list of program is displayed.
When proceeding with the registration of the program, go to step 5.
9 Press [Exit].
2-14 C450
Page 51

Before use
2.5 Fax screen
The fax screen is displayed when the [Fax] key is pressed on the control panel. The fax screen contains [Program], [Group], [Address Book] or [Direct Input].
15
No. Name Description
1 Job list The list of the jobs in the queue for execution, the job
2 Program Displays program select screen.
3 Group Displays group select screen.
4 Address book Displays address book select screen.
5 Direct input A screen is displayed in which dialing is made by using
6 No. of dest. The number of destinations to which transmission has
7 Memory The remaining amount of memory to be used while in
8 Off-hook Press when you want to TX/RX a fax manually. When
9 Name dest. The display can be switched between the name and
10 Page indicator The page of the list of program destination is dis-
11 Page list The page of the list of program destination can be
12345
14
history, and the error jobs is displayed.
a special symbol such as a tone and a pause. Pressing
[Scan to E-Mail] allows you to display the keyboard
screen in which the e-mail address is entered.
been set is displayed.
operation is displayed.
you press this key, a signal noise sounds.
the telephone number of the destination that is being
displayed.
played.
specified.
2
6
7
8
9
10
11
12
13
C450 2-15
Page 52

2
Before use
No. Name Description
12 Scan setting The menu is displayed in which a method to read an
13 Comm. setting The menu is displayed in which a method for commu-
14 Destination ndicator The destination set is displayed.
15 Sub area The description according to the operations being set
original, such as original image type, resolution or application, is set.
nication such as timer TX or polling RX is set.
on the right side is displayed. For the operation of the
fax, the explanation of each function and the broadcast
destinations are displayed.
2-16 C450
Page 53

Before use
2.6 User authentication and account track
When using this machine, the machine may be set so that the user name, the
department name and the password are to be entered. Entering the necessary information in the screen displayed shows the normal screen. For particulars of the department name and the user name, contact your
administrator.
2.6.1 When the user authentication has been set
!
Detail
For details of the user authentication and the account track, see “User's
Guide – Copy Operations”.
2
2.6.2 When the account track has been set
C450 2-17
Page 54

2
2.7 Fax reception using the box
Using the PC-Fax RX feature and the memory RX functions of this machine
allows you to save the documents received in the box in the hard disk without printing them immediately. And when a confidential document is received, it is saved automatically in the confidential user box in the hard disk.
Documents saved in the box can be printed with this machine or imported
into the computer on the network. In this section, a general description is given of the fax reception by means of the box.
- For the creation of a box and the download of documents received in the
box through the PC-Fax RX feature, see “User's guide – Box operations".
- When the box of this machine is specified as a destination while in the fax
sending, documents that have been read can be saved in the box.
Sender Original
Before use
Hard disk
2-18 C450
Page 55

Before use
2.7.1 Type of boxes
For the hard disk of this machine, there are the public user ox and the system
user box provided.
- For the public user box, there are a fixed box (no. 0) / specified box (no.
1 to 999999999) provided.
- For the system user box, there are 4 types of boxes available, such as
bulletin board user box / polling TX user box / memory RX user box / secure print user box.
For this machine, using these boxes allows the functions listed in the table
below to be used.
Box name Function
Public user
box
Fixed box (0) When the fixed box is specified as a place into
Specified box (public
user box / personal user
box: no. 1 - 99999999)
which documents received are stored in the PC-fax
RX feature, the documents received are saved in
this box.
!
Detail
For details, refer to“Operations of the
PC-fax RX feature” on page 2-21
The public/personal user box functions as the confidential user box when the confidential RX is set to
ON.
When the specified box is specified as a place into
which documents received are stored in the PC-fax
RX feature, and when the TSI user box setting is
specified, the documents received are saved in the
box with a relevant number.
In the case of the PC-fax RX feature:
Saved in the box with a number specified in the
sub-address by the sender.
In the case of the TSI RX:
Saved in the box a number corresponding to the TSI
user box setting.
2
!
Detail
For details, refer to “Operations of the
PC-fax RX feature” on page 2-21
C450 2-19
Page 56

2
Box name Function
System user
box
Bulletin board user box This is a box into which documents for perusal are
registered. Documents registered in the bulletin
board user box can be polling transmitted according to the polling instruction from the other party.
!
Detail
For details, refer to “Bulletin” on page 9-9
Polling TX user box Originals read for the polling transmission are saved
in this box.
!
Detail
For details, refer to “Polled transmission”
on page 9-4
Memory RX user box When the memory RX is set to ON, documents re-
ceived are not printed but saved in this box.
!
Detail
For details, refer to “Memory reception”
on page 8-3
Secure print user box This box is used when the confidential print is made
optionally in the print controller.
Before use
!
Detail
For details of the secure print user box,
see “User's guide – Printer operations".
2-20 C450
Page 57

Before use
2.7.2 Operations of the PC-fax RX feature
!
Detail
For details, refer to “FAX RX setting” on page 11-56
When setting the PC-fax RX feature or TSI user box setting, documents received are saved in the fixed box (0) or public user box (1 to 999999999) in
the hard disk.
The box into which documents received are saved is set in [Fax RX Setting]
of the utility mode. For the relationship between [Fax RX Setting] and the reception method, see the table below.
2
[Fax RX Setting] of the
utility mode
Fax RX setting: OFF Documents received are not saved in the box, but printed immedi-
Fax RX setting: ON
RX output: fixed box
Fax RX setting: ON
RX output: specified box
Reception method
ately.
In the following cases, however, documents received are saved in
the box.
• In the case of the confidential RX
(When the sub-address in the F-code is representing a number for
the confidential user box):
Documents confidentially received are saved in the confidential
user box regardless of the setting of the PC-fax RX feature. When
the sub-address is different from a number for the confidential
user box, follow the setting in [Incorrect User Box No. Entry] of
utility mode.
• When the memory RX is set to ON:
When not corresponding to 1. above, documents received are
saved in the memory RX user box.
Documents received are saved in the memory RX user box.
In the following cases, however, documents received are saved in a
different box, or printed.
• In the case of the confidential RX
(When the sub-address in the F-code is representing a number for
the confidential user box):
Documents received are saved in the confidential user box regardless of the setting of the PC-fax RX feature. When the subaddress is different from a number for the confidential user box,
follow the setting in [Incorrect User Box No. Entry] of utility mode.
Documents received are saved in the specified box (1 to 999999999)
with a number specified by the sub-address.
In the following cases, however, documents received are saved in a
different box, or printed.
• When the sub-address is not specified or there is no specified
box:
Documents received are saved in the memory RX user box.
• In the case of the confidential RX (When the sub-address of the Fcode is representing a number for the confidential user box):
Documents received are saved in the confidential user box regardless of the setting of the PC-fax RX feature. When the subaddress is different from a number for the confidential user box,
follow the setting in [Incorrect User Box No. Entry] of utility mode.
C450 2-21
Page 58

2
Before use
2-22 C450
Page 59

3
Transmission
Page 60

Page 61

Transmission
3Transmission
3.1 Simple fax transmission
Simple fax transmission
The following is an explanation of procedures for simple fax transmission.
No sending or reception of a fax in color is available. If you want to send an
e-mail in color, use the scan function. For more information of the scan function, see “User's guide – Network scanner operations”.
Although the explanation here covers the procedure for sending a one-sided
document using the basic procedure, various functions are available for each
step of the procedure to make sending facsimiles even more convenient. Refer “Transmission applications” on page 7-3 to for further details.
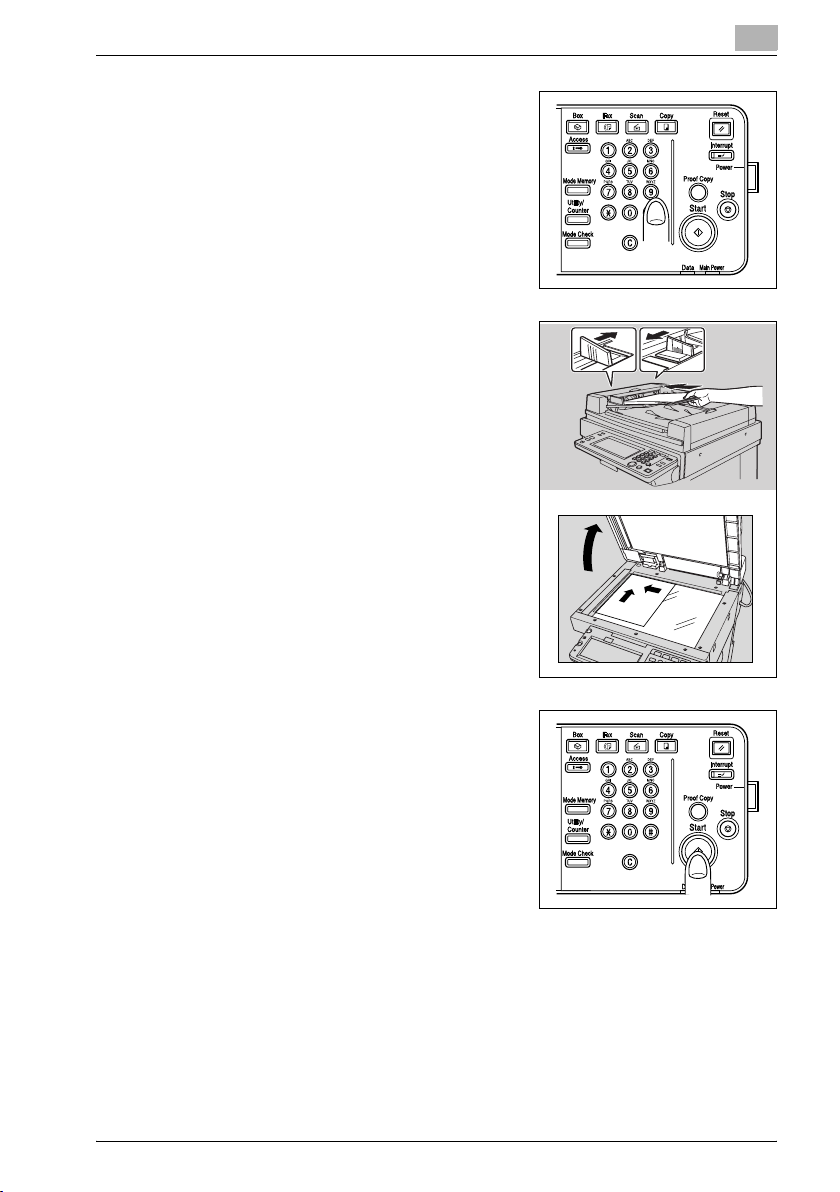
1 Press [Fax] on the control panel to open the fax screen.
2 Press [Scan Setting] to set the function and then press [OK].
3
C450 3-3
Page 62

3
Transmission
– The scan setting in the fax screen is set as follows at the time of
purchase.
– Original image type Text
– Density Standard
– Simplex/Duplex Single sided
–Resolution Fine
– For details, refer to “Setting transmission conditions” on page 3-11.
– For details, refer to “Opening the scan setting screen and comm.
setting screen” on page 7-3.
3 Press [Comm. Setting] to set the function and then press [OK].
– See “Transmission applications” on page 7-3 for detail.
3-4 C450
Page 63

Transmission
4 Select the destination.
5 Place the original on the machine.
3
– Setting the destination is as follows.
–Keypad
– Program
–Group
– Address book
–Direct input
– Registering the fax number of the destination in advance with ab-
breviated destination or pogram makes it simple to select the destination.
– When cancelling a destination that has been selected, select a des-
tination you want to cancel once again.
– Press [RESET] to clear the whole entry.
– For details, refer to “Registering the address book” on page 10-5
and “Registering the program” on page 10-25.
– When [Manual Destination Input] in [Security Setting] of the utility
mode is set to [Restrict], [Direct Input] is not displayed. For the set-
ting of [Manual Destination Input], contact your administrator.
The fax number entered is displayed in the broadcast destinations.
– For details, refer to “Placing the
original on the machine” on
page 3-7.
C450 3-5
Page 64

3
Transmission
6 Press [Start].
– The machine begins to scan the original and transmission starts.
– The following screen will appear if the TX result report check screen
is programmed to appear. If you want to print the TX report, press
[Yes].
– To interrupt transmission, press [Stop].
– When it can not transmit, see page 5-3.
– If the transmission fails, TX report is automatically output (if the TX
report is programmed to print). For details of report settings, see
“Report settings” on page 11-66.
– For more information about the TX report, see “TX report” on
page 12-9.
3-6 C450
Page 65

Transmission
3.2 Placing the original on the machine
The ADF and platen glass can be used to scan originals with this machine.
When an original is placed in the ADF, the original is automatically fed
through the ADF and scanned.
3.2.1 Using the ADF
When using the ADF, multiple originals can be scanned automatically. In addition, two-sided originals can be sent.
Using the ADF
1 Close the ADF.
2 Align the originals starting with the first page.
3 Place the originals in the ADF with the side to be scanned facing up.
3
– To make a proper print of the header information (sender name/
sender fax no.), insert the trailing edge of the original into the ADF.
4 Adjust paper guides.
– In mixed original mode, extend the
paper guides to fit the largest paper
size, and place the remaining origi-
nals aligned in the top left corner.
C450 3-7
Page 66

3
3.2.2 Placing originals on the platen glass
Use the platen glass for originals that cannot be placed in the ADF (such as
a book or thick/thin originals).
Placing originals on the platen glass
1 Open the ADF.
2 Place the original face down in the left
rear corner, aligning the edge with the
left measuring guide.
3 Gently close the ADF.
Transmission
3-8 C450
Page 67

Transmission
3.2.3 Sending multiple originals from the platen glass
Originals that cannot be sent with the ADF can be sent by using the platen
glass.
Sending multiple originals from the platen glass
1 If the fax screen is not displayed, press [Fax] on the control panel to
open the fax screen.
2 Select a destination.
3 Set the desired functions as necessary.
4 Place the original on the platen glass.
Press [Scan Setting] - [Separate Scan]
- [OK] and then press [Start].
5 Place the next original on the platen
glass and press [Start].
– Repeat this procedure until all orig-
inals to be sent have been scanned.
The scanned originals are stored in
memory.
3
6 Press [Finish].
The document reading mode is canceled.
7 Press [Start].
Transmission begins.
C450 3-9
Page 68

3
Transmission
3.2.4 Transmitting originals by using both the ADF and the platen glass
You can scan originals by using both the ADF and the platen glass and you
can also scan the large amounts of originals by placing them on the ADF in
several times.
Transmitting originals by using both the ADF and the platen glass
1 If the fax screen is not displayed, press [Fax] on the control panel to
open the fax screen.
2 Select a destination.
3 Set the desired functions as necessary.
4 Place the original on the platen glass.
Press [Scan Setting] - [Separate Scan]
- [OK] and then press [Start].
– Document placed on the ADF will
take precedence over those on the
platen glass.
– For details, refer to “Placing the
original on the machine” on
page 3-7.
5 Place the next original on the ADF or
the platen glass and press [Start].
– Repeat this procedure until all orig-
inals to be sent have been scanned.
The scanned originals are stored in
memory.
6 Press [Finish].
The Document reading mode is canceled.
7 Press [Start].
Transmission begins.
3-10 C450
Page 69

Transmission
3.3 Setting transmission conditions
Original image type, density, simplex/duplex and resolution are displayed
when [Scan Setting] is pressed on the fax screen. These can be used to set
transmission conditions according to the type of original to be sent.
!
Detail
The condition for transmission cannot be set in units of page.
Setting transmission conditions
1 Press [Scan Setting] on the fax screen.
2 Press the key desired to be set
.
3
C450 3-11
Page 70

3
3.3.1 Original image type
Set quality according to the contents of the original. There are 4 types of
quality settings. Text is default at the time of purchase.
Quality setting Description
Text Press this when scanning originals containing text only.
Text/Photo Press this when scanning originals containing both text and pho-
Photo Press this when scanning originals containing photographs (half-
Dot matrix Press this when scanning originals containing text which are thin-
Transmission
If this mode is selected and an original of pictures is scanned,
neutral tints of the pictures turn black without being reproduced.
tographs (half-tone).
Select this mode in either case when both characters and pictures are contained in one page, and when both pages of characters and those of pictures are contained in one document.
tone) only.
ly written in pencil as a whole.
3-12 C450
Page 71

Transmission
3.3.2 Density
Set density according to the lightness or darkness of the original. Density can
be set in 9 steps. Standard is set at the time of purchase.
Density seting Description
Light Press to scan originals so that they are lighter than the density de-
Std. Press to scan originals at a density that is between Darker and
Dark Press to scan originals so that they are darker than the density
3
tected with Standard.
Lighter. Used when returning to the default setting.
detected with Standard.
C450 3-13
Page 72

3
3.3.3 Simplex/Duplex
This is used to set the manner in which originals are scanned according to
the type of original. There are 2 types. Single sided is set at the time of purchase.
Simplex/Duplex setting Description
Single sided Press this when scanning one-sided originals.
Double sided Press this when scanning two-sided originals.
Transmission
3-14 C450
Page 73

Transmission
3.3.4 Resolution
This is used to set the fineness at which originals are to be scanned. The following 4 settings are available for resolution. Fine is set at the time of purchase.
Resolution setting Description
Std. Press this when the sending time is cut short.
Fine Press this when scanning normal originals.
Super fine Press this when scanning originals containing small graphics or
Ultra fine Press this when scanning originals containing especially fine
3
text.
graphics or text.
!
Detail
As originals are scanned with increasing fineness, the amount of data
that is sent also increases, and more time is required for transmission.
When ultra fine or super fine has been selected and the receiving machine is not equipped with the resolution, originals are sent at a resolution
corresponding to the reception capability of the receiving machine.
C450 3-15
Page 74

3
3.3.5 Confirming settings and communication results
The settings and communication results of the fax screen and fax application
screen can be confirmed by using [Mode Check] on the control panel.
Confirming settings and communication results
1 Press [Fax] on the control panel.
2 Press [Mode Check] on the control panel.
3 Press a key of setting you want to confirm
.
Transmission
4 Confirm the settings.
– The four kinds of the setting as follows can be confirmed.
– Destination
Confirming the destination.
– Pressing [Dest.] in the screen shown by pressing [Details] allows
you to change the destination.
3-16 C450
Page 75

Transmission
3
–Scan setting
Confirming the scan setting. Press each setting key in the screen,
and the Scan Setting screen corresponding to each appears, and
the setting can be change.
– For details of the scan setting screen, see “Opening the scan set-
ting screen and comm. setting screen” on page 7-3.
– Pressing [Fwd. ] to display the next screen, pressing [ Back] to
display the previous screen.
– Communication setting
Confirming the communication setting. Press each setting key in
the screen, and the communication setting or line setting screen
corresponding to each appears, and the setting can be change.
C450 3-17
Page 76

3
Transmission
– For details of the communication setting screen, see “Opening the
scan setting screen and comm. setting screen” on page 7-3.
– Pressing [Fwd. ] to display the next screen, pressing [ Back] to
display the previous screen.
–E-mail setting
When transmitting by the e-mail, you can confirm or input the file
name, subject, from (the sender's e-mail address), and text.
– When no setting is made in [From], an e-mail address that has been
set in [Input Machine Address] in the utility Mode is put in it.
– For details of [Input Machine Address], see “User’s guide – Copy
perations”.
– For details of the Default of the Subject and Text, see page 10-38,
page 10-46.
5 Press [Close] twice after completion of confirmation.
The fax screen will be restored.
!
Detail
When the scan setting or communication aetting is changed, It moves to
the scan setting screen or communication setting screen. It does not return to the mode check screen.
3-18 C450
Page 77

Transmission
3.3.6 Registering the address book from the mode check screen
A destination that is shown on the mode check screen can be registered in
[Address Book].
Registering from the mode check screen
3
1 Press [Fax] on the control panel.
2 Press [Mode Check] on the control panel.
3 Press [Destination]
.
4 Select destination that you want to register in [Address Book], and then
press [Details].
C450 3-19
Page 78

3
Transmission
5 Press [Save in Address Book].
– When the destination has been already registered, [Save in Address
Book] is not displayed.
– When the box is specified as the destination, [Set. Dest.] is dis-
played. With an e-mail address entered in [Set. Dest.], it is possible
to send an e-mail indicating the end of a job after completion of the
job.
6 Press [Search Name] to set the character to search, and then press
[OK].
7 Press [Name] to enter the registration name, and then press [OK].
8 When there is no trouble found with the entries, press [Yes].
– When cancelling the registration, press [No].
9 Press [Close] three times to return to the fax screen.
A selected destination is registered in [Address Book].
3-20 C450
Page 79

Transmission
3.4 Selecting one destination
3.4.1 Selecting one destination
The following methods can be used when selecting 1 destination.
- Keypad
- Program
- Address book
- Direct input
Keypad
1 Enter the fax number of the destination
where the fax is to be sent.
– Numbers containing up to 38 digits
can be entered.
– Press [DEL.] on the fax screen, if a
mistake has been made in entering
a single number.
– Press [C] (clear) to clear the whole
entry.
The fax number that has been entered is displayed in the broadcast
destinations.
3
2 Press [Start].
Transmission begins.
C450 3-21
Page 80

3
Transmission
Program
When a destination has been registered for program, it can be dialed by
pressing Program.
1 Press [Program] in the fax screen.
2 Select the programmed destination you want to use.
– The setting for the registered function is activated.
– Press or when desiring to display the next or previous
screen.
The destination that has been specified is displayed in the broadcast
destinations.
3 Press [Start].
Transmission begins.
2
Note
When the comm. setting function is set in the program, the function is automatically set.
Two or more programs cannot be specified.
When the destination is an e-mail address, the subject, the text, the file
name, and the from of the sender can be set manually. For details, refer
to “Confirming settings and communication results” on page 3-16
3-22 C450
Page 81

Transmission
Address book
A destination can be dialed by searching among the names in the destination
list registered for address book.
1 Press [Address Book] on the fax screen.
2 Press the search character to search.
3
– Each time the [Name Dest.] is pressed, the display switches
between the fax number and the registration name.
– Two or more destination can be specified.
– A search is made when the characters at the beginning coincide
each other.
C450 3-23
Page 82

3
Transmission
–
Searching in [Detail Search]
– Press [Detail Search].
– Press [Name], [Fax Number] or [E-Mail] and enter an item you want
to make a search for.
–Press [OK].
The results of the search will be displayed.
–
Searching in [LDAP Search]
– Press [LDAP Search].
3-24 C450
Page 83

Transmission
3 Press the key of the destination name to which you want to send the
3
– Authenticate it when the LDAP authentication is required.
– Press either [Basic Search] or [Advanced Search] and then enter a
search condition. Press [OK].
– The result of the search will be displayed.
– For more information of the LDAP search, see "User's guide – Net-
work scanner operations".
fax.
– An alphabet shown before the key represents the following descrip-
tion.
ADial
BBox
EE-mail
The destination that has been specified is displayed in the broadcast
destinations.
4 Press [Start].
Transmission begins.
C450 3-25
Page 84

3
Transmission
Direct input
Special dialing symbols such as [Tone], [Pause] and [-] can also be entered.
Scan to e-mail or save in user box can be made.
When [Save in User Box] is to be conducted, the box is necessary to be registered in advance.
For more information of the registration of the box, See “User's guide – Box
operations”.
0 When [Manual Destination Input] in [Security Setting] of the utility mode
is set to [Restrict], [Direct Input] is not displayed. For the setting of [Manual Destination Input], contact your administrator.
1 Press [Direct Input] in the faxscreen.
2 Enter a dialing symbol such as tone, pause or “-” as required, and then
enter the fax number of the destination through the keypad.
3-26 C450
Page 85

Transmission
3
–
Tone
When using a rotary dialing (pulse) telephone line, press [Tone] to
select push-button tone mode. This is used when using a fax infor-
mation service and so forth when [Tone] is selected. A “T” is dis-
played on the screen.
– In case of the dial (pulse) line, you can switch it to the push-button
tone using the asterisk [1] key.
Pause
–
Press [Pause] to insert a space in a dialed number. Pressing [Pause]
once creates an interval of one second between numbers. Multiple
spaces can also be entered. A “P” is displayed on the screen.
– When the PBX connection is ON and a call is made from the internal
line to the outside line, press [Pause] after the outside line number
such as “0” so that dialing is made more surely. “P” is displayed on
the screen.
-
–
This is entered as a separation symbol when dialing. It has no effect
on dialing. A “-” is displayed on the screen.
–
Abbr. dial
Enter the abbreviated dialing number (up to 2,000 from 0001 to
2000) through the keypad and specify the destination registered in
the address book.
On the screen, A abbr. number: Destination name is displayed as
seen in the example “A0001: KMBT”.
Scan to e-mail
–
An e-mail attached with an image is sent.
– When the destination is an e-mail address, the subject of the e-mail,
the text, the file name of image, and the from of the sender can be
set manually. For details, refer to “Setting transmission conditions”
on page 3-11.
– No sending or reception of a fax in color is available. If you want to
send an image in color, use the scan function. For more information
of the scan function, see “User's guide – Network scanner opera-
tions”.
Recently dialed #
–
A fax transmission is made to the destination to which transmission
was made previously.
– For details of Recently dial #, see “Manual redialing” on page 3-30
Save in user box
–
An image is saved in the internal hard disk.
3 Press [Start].
Transmission begins.
C450 3-27
Page 86

3
3.4.2 Selecting multiple destinations
Faxes can be sent to multiple destinations in a single operation. This function
is referred to as sequential multiple station transmission.
The following methods can be used to select multiple destinations.
- Keypad
- Group
- Address book
- Direct Input
They can also be used in combination.
!
Detail
Up to 605 addresses (500 by abbreviation, 100 by keypad and 5 e-mail
destinations by direct input) can be specified as destinations.
Selecting multiple destination
1 Specify as many destinations as necessary to which you want to send
a message. (See “Selecting one destination” on page 3-21.)
–
In case of keypad or direct input
– When entering through the keypad or direct input, the next destina-
tion can be specified by pressing [Next Dest.] that is displayed
when a destination is specified.
In case of group
–
– Press [Group] in the fax screen.
– Press the group number key.
– Press the key for the destination in the group.
To select all numbers within the group, press the [Select All].
Transmission
2 Press [Start].
!
Detail
Specification can also be made by pressing the [Group] in the direct input
to enter the group no. (01 to 99, 00).
When specification is made by using the method above, transmission is
made to all destinations registered in the group.
3-28 C450
Page 87

Transmission
3.4.3 To confirm/delete a destination
To confirm/delete a destination
You can confirm or delete selected destinations.
1 Press [Fax] on the control panel and press [Mode Check].
2 Press [Destination].
3 Confirm destinations.
3
4 To delete a destination, select the destinations to be deleted in the list
and then press [Del.].
– Pressing [Details] displays the detail information screen.
– Pressing or displays the previous or next screen.
The message screen appears.
5 Press [Yes].
6 Press [Close] twice.
The fax screen will be restored.
C450 3-29
Page 88

3
3.4.4 Manual redialing
Redialing is to dial the same destination again.
To redial manually
1 Press [Direct Input], and then press [Recently Dialed #].
– Up to the five newest facsimile numbers which were dialed are dis-
played.
2 Select the destination you want to redial from the displayed destina-
tions.
Transmission
3-30 C450
Page 89

Transmission
3.5 Scanning
3.5.1 When original size cannot be detected
When original size cannot be detected
If the size of the original cannot be detected, the following screen is displayed. Set the original size when this screen is displayed.
1 Press the original size key.
2 Press [OK].
3
3.5.2 When memory capacity is exceeded
Using memory transmission, if a large number of pages are sent of if the images on the originals are especially detailed. When this happens, transmit the
document by selecting auick memory TX (you can select the quick memory
TX by clearing memory TX in the comm. setting screen).
!
Detail
For details, refer to “Error message displayed” on page 5-6.
C450 3-31
Page 90

3
3.6 When unable to send
When unable to send
When you are unable to send a fax due to a line trouble or the like, a screen
to check the redial is displayed.
1 Press [OK].
– Redialing starts after the set time has elapsed.
– In case that no transmission can still be made even when redialed,
a screen is displayed in which you can check that the job was not
successfully completed.
2 Press [OK].
To delete a job of failed transmission, press the [Job List] and delete
that job.
!
Detail
When redialing as usual in the utility mode setting, no screen indicating
the redial is displayed.
Transmission
Redialing
Redialing refers to dialing the number of the same destination again.
If a facsimile cannot be sent due to a busy signal from the receiving machine
or for some other reason, the machine redials the number after a predetermined amount of time has elapsed. During that interval before the number is
redialed, the transmission document is treated as a reserved document waiting to be sent.
!
Detail
The redialing function is set at factory to redial one time after a threeminute interval. The number of redials and the redialing interval can be
changed in the utility mode. For details, refer to “Telephone line settings”
on page 11-35.
3-32 C450
Page 91

Transmission
3.7 Reserving transmission
Reserving transmission
The next transmission can be reserved during communication or printing.
This function is referred to as transmission reservation.
0 [Off-Hook] cannot be used for transmission reservation.
0 When [Transmission Display] is set to OFF, [Next Job Reservation] is not
displayed.
0 For more information of [Transmission Display], see page 11-19.
1 Press [Fax] on the control panel to display the fax screen.
2 Press [Next Job Reservation].
3 Place the original.
– For details, refer to “Placing origi-
nals on the platen glass” on
page 3-8.
– To delete a reserved transmission,
press [Job List] - [Fax TX], select
the job you want to delete from
[Current Jobs] and press [Delete].
– Although the reservation list key on
the fax screen will flash when the
machine has run out of paper or pa-
per has become jammed in the ma-
chine while processing a job prior
to the transmission reservation,
transmissions can still be reserved.
3
4 Set the desired functions as necessary.
– See “Setting transmission condi-
tions” on page 3-11 for setting
functions on the fax screen.
– See “Opening the scan setting screen and comm. setting screen”
on page 7-3 for setting functions on the fax application screen.
5 Select a destination.
6 Press [Start].
C450 3-33
Page 92

3
3.8 Manual transmission
Manual transmission
This operation is performed when sending documents and confirming the
status of the receiving machine.
Memory transmission cannot be used with manual transmission.
1 Press [Fax] on the control panel to display the fax screen.
2 Place the original.
– For details, refer to “Placing the original on the machine” on
page 3-7.
3 Press [Off-Hook].
– If [RX] has been selected, press [TX] to switch to the transmission
mode.
4 Set the functions of scan setting as necessary.
– See “Setting transmission conditions” on page 3-11 for setting
functions on the fax screen.
– See “Application functions overview” on page 7-5 for setting func-
tions on the fax application screen.
Transmission
5 Select the destination with the keypad.
– You can input up to 60 digits.
– Pressing [On-Hook] returns the display to the fax screen.
– When an external telephone is connected, documents can be sent
by lifting up the receiver of the external telephone.
6 When the signal sounds, press [Start] of the off-hook screen.
– Pressing [Start] on the control panel allows the off-hook start fax
communication screen confirmation to appear. Transmission starts
when you press [Yes].
– When the external telephone is connected, hang up the receiver of
the external telephone after pressing [Start].
Transmission begins.
3-34 C450
Page 93

Transmission
3.9 Canceling transmission
The specific procedure for canceling transmission depends on whether communication is in progress or a document to be sent has been reserved. With
the FK-502, transmission instructions and images stored in memory are referred to as reserved jobs. Jobs reserved for communication and jobs currently being processed are simultaneously displayed on the job list screen.
3.9.1 Canceling communication in progress
When communication is in progress, transmission can be cancelled with the
procedure described below.
Canceling communication in progress
1 Press [Job List] on the fax screen.
2 Press [Fax TX].
3 Check to see if the active jobs in the [Current Jobs] have been selected.
4 Select the job you want to delete, and press [Delete].
5 Press [Yes].
Transmission is cancelled.
3
6 Press [Exit].
The fax screen will be restored.
C450 3-35
Page 94

3
3.9.2 Canceling reserved jobs
By deleting the reserved job, the transmission is canceled.
Canceling reserved jobs
1 Press [Job List] on the fax screen.
2 Press [Fax TX].
3 Press [Current Jobs].
4 Press [Timer Jobs].
5 Select the reservation document desired to be canceled, and press
[Delete].
– Press or to display the next or previous screen.
The message appears.
6 Press [Yes].
The reserved document is deleted.
7 Press [Exit].
The fax screen will be restored.
Transmission
3-36 C450
Page 95

Transmission
3.10 Confirm the job list
Confirming reserved documents
The condition of reservations for transmission accumulated in the memory
can also be checked by the job list displayed on the screen.
1 Press [Job List] on the fax screen.
2 Press [Fax TX].
3 Press [Current Jobs].
4 Press [Timer Jobs] or [Active Jobs].
5 Confirm the job, press [Exit].
– Pressing or displays the previous or next screen.
– If you select the job and press [Check Jobs] or [Detail], details infor-
mation can be confirmed.
– The remaining amount of memory is displayed at the upper right of
the fax screen. While in the fax communication, this memory is
used and its remaining amount is displayed.
Fax screen will be restored.
3
C450 3-37
Page 96

3
3.11 Confirming communication results
Confirming communication results
Pressing [Job List] in the fax screen allows you to check the results of transmission.
1 Press [Job List] on the control panel.
2 Press [Print], [Fax TX] or [Fax RX/User Box].
3 Press [Job History].
Transmission
3-38 C450
Page 97

Transmission
4 Confirm the communication results.
–
Fax TX
–Type:
The type of the fax, e-mail and box is displayed.
–Dest:
The fax number, the e-mail address and the box name of the des-
tination are displayed.
– Time Stored:
The date and hour when the transmission is specified are dis-
played.
–# of Pgs.:
The number of documents that have been transmitted is displayed.
–Result:
“Job complete”, “Deleted by user”, “Deleted due to error”, “Re-
leased” (staple or punch) or “Job cancelled” is displayed.
Fax RX/User box
–
– User Name:
User name is displayed while in the user authorization and account
name is displayed while in the account track. In the cases of other
than the above, the type of the copy, print and fax-RX etc. is dis-
played.
–Document Name:
The name of the document that has been received or saved is dis-
played.
3
C450 3-39
Page 98

3
Transmission
– Time Stored:
The date and hour when the document has been received are displayed.
–# of Pgs.:
The number of documents that have been received is displayed.
–Result:
“Job complete”, “Deleted by user”, “Deleted due to error”, “Released” (staple or punch), “Page separation print”. “Registration
completed”, “Registration failed” or “Job cancelled” is displayed.
– Pressing the [Comm. Setting] allows you to check the results of
communication in the form of the fax TX report or the fax RX report.
At this time, the activity report, TX report, and RX report can be
printed out.
– Pressing [Details] displays the detail information screen.
5 Press [Exit] twice after completion of confirmation.
The fax screen will be restored.
3-40 C450
Page 99

Transmission
3.12 Memory transmissions and quick memory TX
There are two ways to send documents with this machine.
3.12.1 Memory transmission
With memory transmission, all pages being sent are first scanned and stored
in memory before transmission. The document is automatically numbered by
total page number, and the images on the first page are shown on communication results report.
However, when a large number of pages are sent or when the images on the
originals are sent at high resolution.
The machine is automatically set to memory TX when any of the following
procedures is performed.
- [Quick Memory TX] is set on the comm. setting screen.
3.12.2 Quick memory transmission
In this transmission method, a facsimile is sent as soon as each page is
scanned. This allows documents to be sent without exceeding memory capacity in the case of sending a large number of pages.
!
Detail
In the case of the quick memory RX, the “Memory” on the screen remains
unchanged.
3
C450 3-41
Page 100

3
3.12.3 To perform a quick memory transmission
Quick memory transmission
1 Press [Fax] on the control panel to view the fax screen, if it is not al-
ready displayed.
2 Press [Comm. Setting] on the fax screen.
3 Press [Quick Memory TX].
4 Press [OK].
– To cancel the setting, press [Cancel].
The quick memory TX is set to return to the fax screen.
Transmission
5 Set other functions if necessary.
– See “Setting transmission conditions” on page 3-11 for setting
functions on the fax screen. See “Opening the scan setting screen
and comm. setting screen” on page 7-3 for setting functions on the
fax application screen.
6 Designate the destination.
– For details, refer to “Selecting one destination” on page 3-21.
7 Set the original document.
– For details, refer to “Placing the original on the machine” on
page 3-7.
8 Press [Start].
The FK-502 reads the document and stores it in memory as a reserved
document before transmission starts.
3-42 C450
 Loading...