

Page 1
Advanced Information
Page 2

Page 3

Contents
Contents
1 Welcome
1.1 Product Overview..........................................................................1-1
1.2 Trademarks and Copyrights ........................................................1-2
2 Before Using the Controller
2.1 Operating Environment................................................................2-1
2.2 Accessories...................................................................................2-1
2.3 Password for Administrator Mode ..............................................2-2
2.4 About This Manual........................................................................2-2
3 Connecting to a Computer
3.1 Using a Network Connection.......................................................3-1
3.2 Using a Parallel Connection.........................................................3-3
3.2.1 Specifying the Interface Settings ................................................3-4
4 Installing the Printer Driver
4.1 When This Machine and the Computer are Connected
Using a Network Connection .......................................................4-2
4.1.1 Installing the Printer Driver Using the Add Printer Wizard..........4-2
4.2 When This Machine and the Computer are Connected
Using a Parallel Connection.........................................................4-7
4.2.1 Installing the Printer Driver Using Plug and Play........................4-7
4.2.2 Installing the Printer Driver Using the Add Printer Wizard........4-11
4.3 Uninstalling the Printer Driver...................................................4-15
5 Setting Up the Printer Driver
5.1 Displaying the Printer Driver Setup Dialog Box.........................5-1
5.1.1 Displaying the Printer Driver Setup Dialog Box in
Windows 98/Me..........................................................................5-1
5.1.2 Displaying the Printer Driver Setup Dialog Box in
5.1.3 Displaying the Printer Driver Setup Dialog Box in
C350 i
Windows 2000/NT 4.0 ................................................................5-2
Windows XP/Server 2003...........................................................5-2
Page 4

Contents
5.2 Common Controls ........................................................................ 5-3
5.3 Settings ......................................................................................... 5-5
5.3.1 Setup Tab ..................................................................................5-5
5.3.2 Paper Tab .................................................................................. 5-5
5.3.3 Quality Tab................................................................................. 5-5
5.3.4 Device Option Setting Tab......................................................... 5-6
5.3.5 Job Management Tab................................................................ 5-6
5.4 Setting Device Options ................................................................ 5-7
5.5 Printing Multiple Pages on One Page.........................................5-8
5.6 Printing Pages With Watermarks................................................ 5-9
5.6.1 Editing the Watermark ............................................................. 5-10
5.6.2 Specifying Detailed Settings for the Watermark ...................... 5-11
5.7 Specifying Duplex/Booklet Printing.......................................... 5-13
5.8 Stapling Documents................................................................... 5-15
5.9 Hole Punching Documents........................................................ 5-16
5.10 Folding Documents.................................................................... 5-17
5.11 Adding a Cover and/or Interleaf When Printing....................... 5-18
5.12 Printing to Suit the Paper Size .................................................. 5-19
5.13 Items That Cannot Be Set Simultaneously .............................. 5-20
6 Network Printing in a Windows Environment
6.1 Network Connection Methods That Can Be Selected in Each
Windows OS.................................................................................. 6-1
6.2 Setting the IP Address for This Machine.................................... 6-2
6.3 Accessing PageScope Web Connection....................................6-3
6.4 Windows Printing......................................................................... 6-4
6.4.1 Operations on This Machine...................................................... 6-4
6.4.2 Printer Driver Settings................................................................ 6-5
6.5 LPR Printing (Windows 2000/XP/NT 4.0/Server 2003)............... 6-6
6.5.1 Operations on This Machine...................................................... 6-6
6.5.2 Printer Driver Settings................................................................ 6-6
6.6 IPP Printing (Windows 2000/XP/Server 2003) ............................ 6-8
6.6.1 Operations on This Machine...................................................... 6-8
6.6.2 Installing the Printer Driver.......................................................6-10
ii C350
Page 5

Contents
6.7 Setting Up a Print Service in NetWare ......................................6-12
6.7.1 For Remote Printer Mode With NetWare 4.x Bindery
6.7.2 For Print Server Mode With NetWare 4.x Bindery
6.7.3 For NetWare 4.x Remote Printer Mode (NDS).........................6-16
6.7.4 For NetWare 4.x/5.x/6 Print Server Mode (NDS) .....................6-18
6.7.5 For NetWare 5.x/6 Novell Distributed Print Services
6.7.6 Setting Up a Client (Windows) Settings When Using the
6.8 Checking Printer Driver Operation After Installation...............6-22
6.8.1 Test Printing From the Computer .............................................6-22
Emulation..................................................................................6-12
Emulation..................................................................................6-14
(NDPS) .....................................................................................6-20
NetWare Server........................................................................6-21
7 Specifying Printer Settings From the Control Panel
7.1 “Printer Setting” Screen in Utility Mode.....................................7-1
7.1.1 “Default Setting” Screen .............................................................7-2
7.1.2 “Report Types” Screen ...............................................................7-7
7.2 “Printer Setting” Screen in Administrator Mode........................7-8
8 Using the Scan Functions
8.1 Overview ........................................................................................8-1
8.1.1 Environment Required for the Scan Functions...........................8-2
8.1.2 Supported File Formats..............................................................8-3
8.1.3 File Name ...................................................................................8-4
8.1.4 Scan to E-mail ............................................................................8-5
8.1.5 Scan to FTP Server....................................................................8-6
8.1.6 Scan to PC .................................................................................8-7
8.1.7 Scan to HDD...............................................................................8-8
8.1.8 Scan to Internet FAX ..................................................................8-9
8.1.9 Internet FAX Reception ............................................................8-10
8.2 Basic Setup of the Scan Functions...........................................8-11
8.3 Settings for Scanning.................................................................8-13
8.3.1 Scan Mode Screen...................................................................8-14
8.3.2 Address Screen........................................................................8-15
8.3.3 Original Setting Screen.............................................................8-16
C350 iii
Page 6

Contents
8.3.4 MISC. Screen........................................................................... 8-17
8.3.5 Registering the Scan Mode Default Settings ........................... 8-21
8.4 Checking the Transmission Settings ....................................... 8-22
8.5 URL Notification Using E-mail...................................................8-23
8.6 Registering Destinations in Advance.......................................8-25
8.6.1 One-Touch Key Registration.................................................... 8-25
8.6.2 Temporary Registration ........................................................... 8-29
8.6.3 Registering Recipient E-Mail Addresses Using
8.7 Performing Scan to E-Mail Operations..................................... 8-40
8.7.1 Flow of Scan Operation ...........................................................8-40
8.7.2 Specifying Scan to E-mail Settings.......................................... 8-41
8.7.3 Setting the E-mail Subject and Text.........................................8-44
8.7.4 Setting the Destination............................................................. 8-45
8.7.5 Error Notification ...................................................................... 8-45
8.8 Performing Scan to FTP Server Operations ............................ 8-46
8.8.1 Flow of Scan Operation ...........................................................8-46
8.8.2 Registering FTP Servers.......................................................... 8-48
8.8.3 Setting the Proxy Server.......................................................... 8-51
8.8.4 Setting the Destination............................................................. 8-52
8.9 Performing Scan to PC Operations .......................................... 8-53
8.9.1 Flow of Scan Operation ...........................................................8-53
8.9.2 Setting the FTP Application ..................................................... 8-54
8.9.3 Setting the Destination............................................................. 8-54
8.10 Performing Scan to HDD Operations........................................8-55
8.10.1 Flow of Scan Operation ........................................................... 8-55
8.10.2 Creating User Boxes................................................................ 8-57
8.10.3 Setting the Storage Period of the Scanned Data..................... 8-59
8.10.4 Setting the Destination............................................................. 8-60
8.10.5 Retrieving the Scanned Data from the Hard Disk .................... 8-61
8.11 Performing Scan to Internet FAX Operations.......................... 8-64
8.11.1 Flow of Scan Operation ........................................................... 8-65
8.11.2 Setting the E-mail Transmission ..............................................8-66
8.11.3 Setting the E-mail Subject and Text......................................... 8-69
LDAP Search ...........................................................................8-33
iv C350
Page 7

Contents
8.11.4 Setting the Destination .............................................................8-70
8.11.5 Error Notification.......................................................................8-71
8.12 Performing Internet FAX Reception Operations ......................8-72
8.12.1 Flow of Operation .....................................................................8-72
8.12.2 Setting the Internet FAX Reception..........................................8-73
8.12.3 Set the Internet FAX Print.........................................................8-75
9 Scanning Images Using TWAIN (PC Scanning
Function)
9.1 Operating Environment................................................................9-1
9.2 Installing the TWAIN Driver..........................................................9-1
9.3 Setting the Panel Lock Timeout for TWAIN................................9-2
9.4 Retrieving Images Using TWAIN .................................................9-3
9.4.1 Setting the Option Dialog Box ....................................................9-5
9.4.2 Searching the Scanner ...............................................................9-6
10 Using the Box Functions
10.1 Overview ......................................................................................10-1
10.1.1 Environment Required for the Box Functions...........................10-2
10.2 Using the Box Functions............................................................10-3
10.3 Selecting the File to be Forwarded............................................10-4
10.4 Specifying the Forward Destination..........................................10-5
10.5 Specifying Settings on the MISC. Screen.................................10-6
10.6 Checking the Transmission Settings........................................10-9
10.7 URL Notification Using E-mail .................................................10-10
10.8 Performing Forward to E-mail Operations..............................10-12
10.8.1 Flow of Forwarding Operation ................................................10-12
10.8.2 Error Notification.....................................................................10-13
10.9 Performing Forward to FTP Server Operations .....................10-14
10.9.1 Flow of Forwarding Operation ................................................10-14
10.10 Performing Forward to PC Operations ...................................10-16
10.10.1 Flow of Forwarding Operation ................................................10-16
C350 v
Page 8

11 Job Management
11.1 Print Job Management............................................................... 11-1
11.1.1 Specifying the Job Operation................................................... 11-1
11.1.2 Print and Hold .......................................................................... 11-2
11.1.3 Store to HDD............................................................................ 11-3
11.1.4 Store to Memory ...................................................................... 11-4
11.1.5 Proof and Print ......................................................................... 11-5
11.1.6 Lock Job................................................................................... 11-6
11.1.7 Number of Jobs That Can Be Stored.......................................11-7
11.1.8 Identifying a Print Job by Name ............................................... 11-7
11.1.9 Transmitting a Print Job to This Machine When the
Copy Track Mode Is Set .......................................................... 11-8
11.1.10 Printing Pages with a Distribution Number .............................. 11-9
11.2 Job Operations on PageScope Web Connection.................. 11-10
12 Using PageScope Web Connection
12.1 System Requirements................................................................12-1
12.2 Accessing PageScope Web Connection.................................. 12-1
12.2.1 Operation ................................................................................. 12-1
12.3 Page Structure............................................................................ 12-2
12.4 Logging in to Administrator Mode............................................ 12-4
12.4.1 Cache Function of Web Browsers ........................................... 12-5
12.5 User Mode ...................................................................................12-7
12.5.1 System Tab.............................................................................. 12-7
12.5.2 Job Tab .................................................................................. 12-17
12.5.3 File Tab .................................................................................. 12-23
12.5.4 Print Tab ................................................................................ 12-27
12.5.5 Scan Tab................................................................................ 12-31
12.6 Administrator Mode.................................................................. 12-34
12.6.1 System Tab............................................................................ 12-34
12.6.2 File Tab .................................................................................. 12-40
12.6.3 Print Tab ................................................................................ 12-44
12.6.4 Scan Tab................................................................................ 12-46
12.6.5 Network Tab........................................................................... 12-50
Contents
vi C350
Page 9

Contents
13 Using the BOX Utility
13.1 System Requirements ................................................................13-1
13.2 Supported File Formats..............................................................13-2
13.3 Installing the BOX Utility ............................................................13-2
13.4 Using the Box Functions............................................................13-3
13.5 Registering the Copier................................................................13-4
13.6 Connecting the Copier................................................................13-6
13.7 Main Window ...............................................................................13-7
13.7.1 Changing the Display Mode .....................................................13-7
13.7.2 Common Operations in the Main Window................................13-9
13.8 Image Display Window.............................................................13-13
13.9 Backing Up and Restoring Image Data...................................13-16
13.9.1 Backing Up Image Data..........................................................13-16
13.9.2 Restoring Image Data.............................................................13-17
13.10 Creating Compact PDFs...........................................................13-19
13.11 If an Error Is Displayed.............................................................13-20
14 Troubleshooting
14.1 Unable To Print............................................................................14-1
14.2 Unable To Specify Desired Settings or Unable To Print as
Specified ......................................................................................14-2
15 Specifications
16 Index
C350 vii
Page 10

Contents
viii C350
Page 11

Welcome
1Welcome
This manual describes the printing and scanning functions and operations
of the printer controller for the Konica Minolta digital color copier C350.
1.1 Product Overview
The printer controller is a device used for adding printing, network printing,
scanning and box functions to the C350 copier.
Available printer controller functions
G Printing from a computer (using the PCL5c printer driver)
G Support of network protocols including TCP/IP, NetBEUI, and IPX/
SPX
G Direct printing over the network using Windows, LPR, or IPP printing
G Transfer and notification over the network of image data scanned with
this machine
G Fax operations using the Internet (Internet fax transmission/reception)
G Forwarding image data stored in the hard disk of this machine
G Specify settings for this machine and the printer controller from a client
computer over the network (using a Web browser)
G Capture images using software installed on a computer (using the
TWAIN driver)
1
C350 1-1
Page 12

1
1.2 Trademarks and Copyrights
Trademarks
G KONICA MINOLTA, the KONICA MINOLTA logo, and PageScope are
trademarks of KONICA MINOLTA HOLDINGS, INC.
G Ethernet is a registered trademark of Xerox Corporation.
G Microsoft, Windows and Windows NT are either registered trademarks
or trademarks of Microsoft Corporation in the United States and/or
other countries.
G Novell and NetWare are registered trademarks of Novell, Inc.
G PCL is a registered trademark of Hewlett-Packard Company Limited.
G Netscape Communications, the Netscape Communications logo,
Netscape Navigator, Netscape Communicator, and Netscape are
trademarks of Netscape Communications Corporation.
G All other product and brand names are trademarks or registered
trademarks of their respective companies or organizations.
BOX Utility:
G This software is based in part on the work of the Independent JPEG
Group.
Compact-VJE
Copyright 1986-2003 VACS Corp.
Copyright © 2004 KONICA MINOLTA BUSINESS TECHNOLOGIES,
INC.
Please note that the display screens used in this manual may differ from
the actual screens that appear on your computer display. Also,
specifications and other information contained in this manual are subject
to change without notice.
Welcome
1-2 C350
Page 13

Before Using the Controller
2 Before Using the Controller
2.1 Operating Environment
The printer controller operates in the following environments.
Computer IBM PC or compatible
Operating System Windows 98/98SE, Windows Me, Windows 2000, Windows XP,
RAM 64 MB or more
Network Connection Connection
Parallel Connection IEEE1284 (Compatible/Nibble/ECP)
Web Browser
(when using PageScope
Web Connection)
2.2 Accessories
Windows NT 4.0 (SP 6a or later), or Windows Server 2003
Method
Protocol TCP/IP, NetBEUI, or IPX/SPX (NetWare 4.x, 5.x,
(Optional local interface kit is required.)
Microsoft Internet Explorer Ver.5.5 or later (JavaScriptcompliant), or
Netscape Communicator Ver.4.5 or later (JavaScript-compliant)
Ethernet 10Base-T/100Base-TX
and 6)
2
Printer Driver CD-ROM
The Printer Driver CD-ROM contains the following.
G Printer Driver for Windows
G Font Manager
G TWAIN Driver
G BOX Utility
G User’s Manual (this manual: PDF file)
G Latest Information (Readme.txt)
Note
The Readme.txt file contains important updated information. Be sure
to read it.
To use the “Store to HDD”, “Distribution” (for printing pages with a
distribution number), Scan to HDD, or Box functions, the optional hard
disk must be installed on this machine.
(To use the “Distribution” function, an additional 256 MB of RAM must
be installed.)
C350 2-1
Page 14

2
Before Using the Controller
2.3 Password for Administrator Mode
A password (administrator access code) is required to enter the
Administrator mode described in this manual.
Ask the administrator of this machine for the password.
2.4 About This Manual
This manual is divided into chapters that describe how to connect the
device to a computer, printing functions, network printing functions,
scanning functions, box functions, job management functions, how to
specify machine settings from the computer, and other operations.
Depending on the operation that you want to perform, refer to the
corresponding page listed below.
Operation Refer to
Using this machine from a computer
(printing functions, scanning functions, and
machine setting from a computer)
Using this machine as a printer “4 Installing the Printer Driver”
Connecting this machine to a network and
performing network printing
Specifying printer settings with this machine “7 Specifying Printer Settings From the
Using this machine as a scanner (scanning
functions)
Capturing images using software installed
on a computer (PC scanning functions)
Forwarding the image data stored in the
hard disk of this machine (Box functions)
Managing print and scan jobs “11 Job Management”
Specifying machine settings from the
computer
Using the BOX Utility “13 Using the BOX Utility”
When problems occur “14 Troubleshooting”
“3 Connecting to a Computer”
“5 Setting Up the Printer Driver”
“6 Network Printing in a Windows
Environment”
Control Panel”
“8 Using the Scan Functions”
“9 Scanning Images Using TWAIN (PC
Scanning Function)”
“10 Using the Box Functions”
“12 Using PageScope Web Connection”
2-2 C350
Page 15

Connecting to a Computer
3 Connecting to a Computer
In order to send print data from a computer to this machine, or to capture
data scanned using this machine, it is necessary to connect this machine
to the computer.
There are two ways to connect this machine to the computer. A network
connection can be used to connect this machine to the computer over a
network, or a parallel connection can be used to connect this machine
directly to the computer.
Network connection Use an Ethernet cable to connect this machine to a network.
Parallel connection Use a parallel cable to connect this machine directly to the
parallel port of a computer.
Note
To connect this machine to a computer using a parallel connection, the
optional local interface kit is required.
3.1 Using a Network Connection
3
To use this machine in a network environment, use a 10Base-T/100BaseTX cable (Ethernet cable) to connect this machine to the network.
Important
Be sure to use a Category 5 or 5E cable that complies with the
10Base-T/100Base-TX standard.
Always use a 10Base-T/100Base-TX cable that is shielded. Failure to
do so may result in radio frequency interference.
C350 3-1
Page 16
3
Connecting to a Computer
Connection procedure
1 Make sure this machine is turned off.
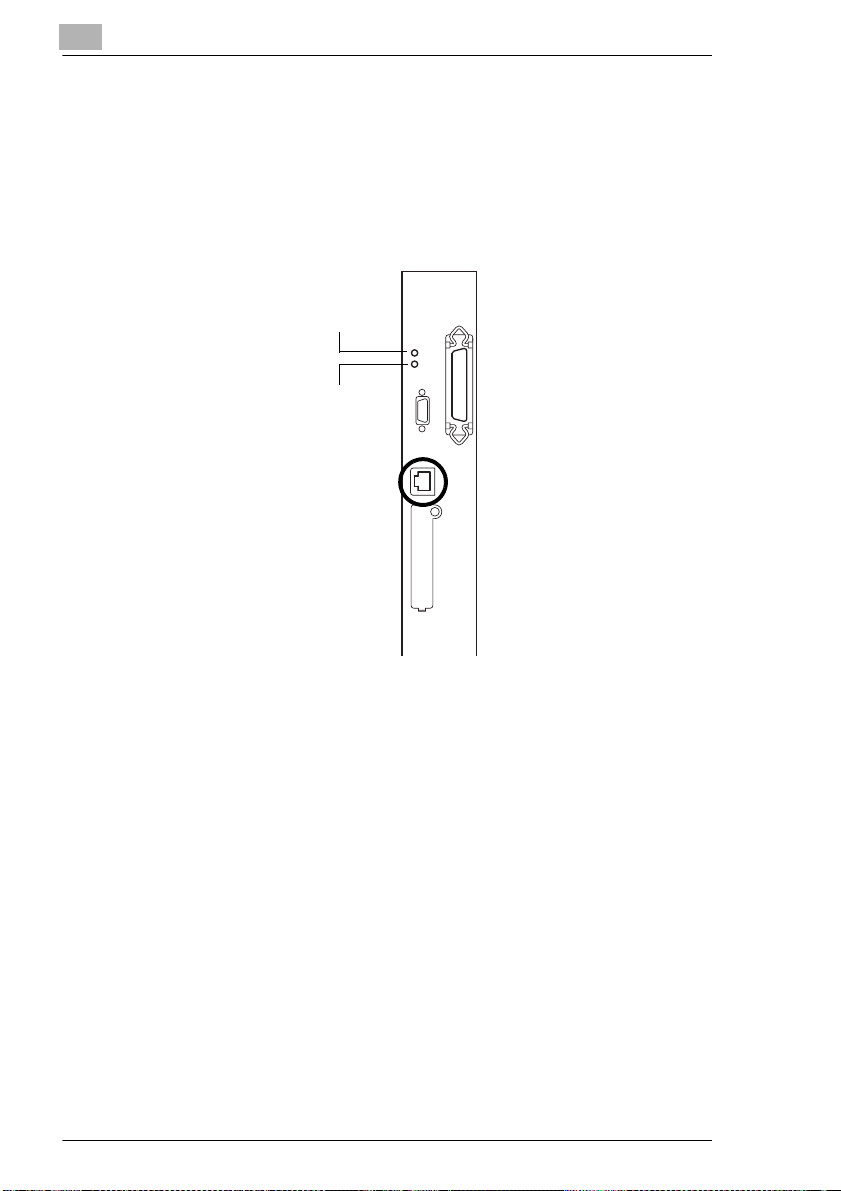
2 Connect one end of the 10Base-T/100Base-TX cable to the 10Base-
T/100Base-TX port on this machine, and connect the other end of the
cable to the network hub.
LED 1
LED 2
This machine is now connected to the network.
3 When this machine is turned on, LED1 will light up.
H LED1: LINK Lights up if this machine is properly connected
to the network.
H LED2: ACT Blinks depending on the data reception status.
3-2 C350
Page 17

Connecting to a Computer
3.2 Using a Parallel Connection
Use a parallel cable (IEEE 1284, Centronics) to connect the parallel port
on this machine to the parallel port on the computer.
The parallel port on this machine supports IEEE 1284 Type B.
Note
To connect this machine to the computer using a parallel connection,
the optional local interface kit is required.
Always use a parallel cable that is shielded. Failure to do so may result
in radio frequency interference.
Memo
To install the printer driver using Plug and Play, use the parallel cable
to connect this machine to the computer when you install the printer
driver (refer to “Installing the Printer Driver Using Plug and Play” on
page 4-7).
Connection procedure
3
1 Turn this machine and the computer off.
2 Connect one end of the parallel cable to the parallel port (printer port)
on the computer.
3 Connect the other end of the parallel cable to the parallel port on the
back of this machine. Use the two clips to secure the interface cable
connector.
This machine is now connected to the computer.
C350 3-3
Page 18
3
3.2.1 Specifying the Interface Settings
If necessary, specify the parallel interface settings from this machine’s
control panel.
Parallel interface setting
1 Press the [Utility] key on this machine’s control panel, touch [Admin.
Mode], and then enter the administrator access code.
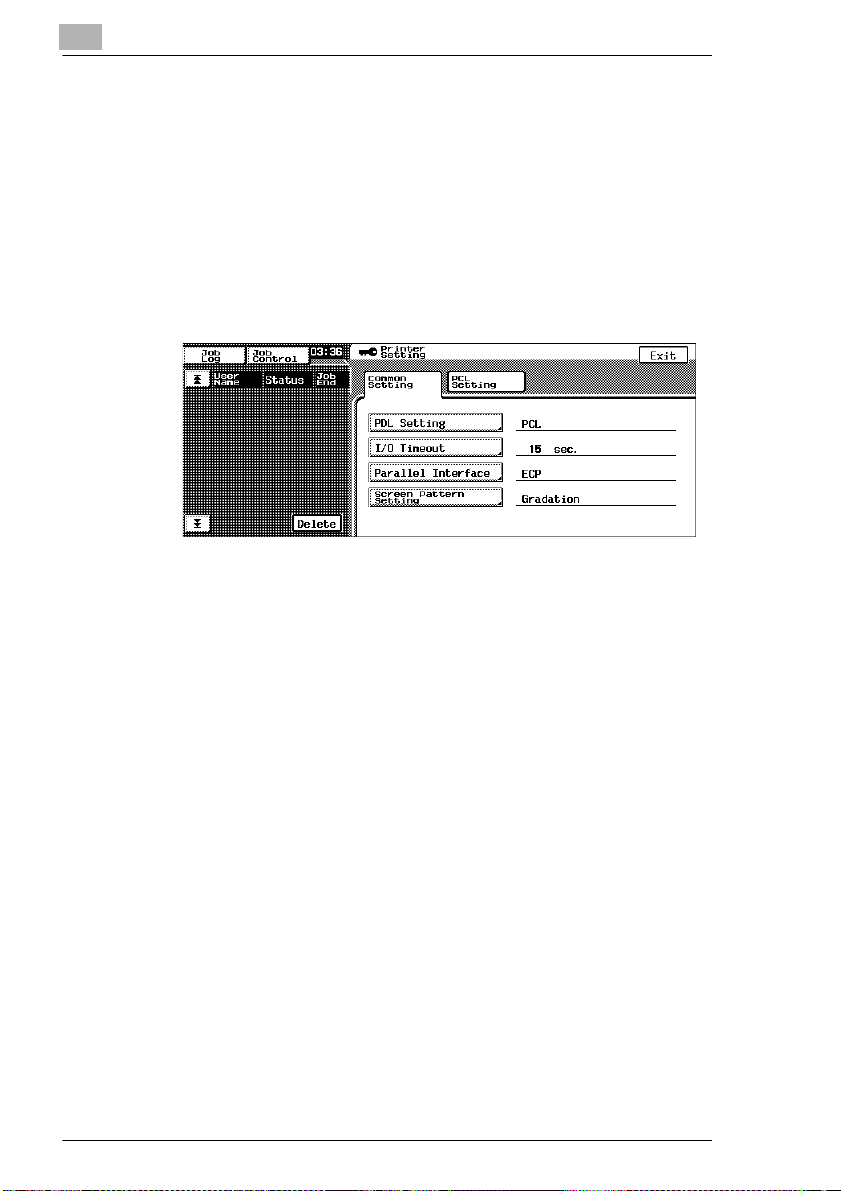
2 Touch [Printer Setting], then [Common Setting].
3 Specify settings for the following.
H I/O Timeout: Set the communication timeout. (10 to 300
seconds)
H Parallel Interface: Set the mode to be used with the parallel
interface. (“Compatible”, “Nibble”, or “ECP”)
Connecting to a Computer
3-4 C350
Page 19

Installing the Printer Driver
4 Installing the Printer Driver
This chapter describes how to install the printer driver from the supplied
CD-ROM.
The installation procedure differs depending on how this machine is
connected to the computer. If this machine is connected to the computer
using a parallel connection, the printer driver can be installed using Plug
and Play or the Add Printer Wizard.
The installation method also differs depending on the version of Windows
that you are using. Refer to the table below for the appropriate procedure
for installing the printer driver on your computer.
Connection method Refer to
Network connection “When This Machine and the Computer are Connected Using
Parallel connection “Installing the Printer Driver Using Plug and Play” on page 4-7
a Network Connection” on page 4-2
“For Windows 98/Me/2000/NT 4.0” on page 4-2
“For Windows XP/Server 2003” on page 4-4
“For Windows 98” on page 4-7
“For Windows Me” on page 4-8
“For Windows 2000” on page 4-9
“For Windows XP/Server 2003” on page 4-10
“Installing the Printer Driver Using the Add Printer Wizard” on
page 4-11
“For Windows 98/Me/2000/NT 4.0” on page 4-11
“For Windows XP/Server 2003” on page 4-13
4
Note
To connect this machine to a computer using a parallel connection, the
optional local interface kit is required.
C350 4-1
Page 20
4
Installing the Printer Driver
4.1 When This Machine and the Computer are Connected Using a Network Connection
4.1.1 Installing the Printer Driver Using the Add Printer Wizard
Note
In order to perform IPP printing operations, the printer driver must be
installed so that IPP printing can be set up when the printer driver is
installed.
For further details on IPP printing, refer to “IPP Printing (Windows
2000/XP/Server 2003)” on page 6-8.
For Windows 98/Me/2000/NT 4.0
1 While Windows is running, load the CD-ROM into the computer’s CD-
ROM drive.
2 In Windows, click the [Start] button, point to “Settings”, and then click
“Printers”.
3 Double-click the “Add Printer” icon.
The Add Printer Wizard starts up.
4 Follow the on-screen instructions.
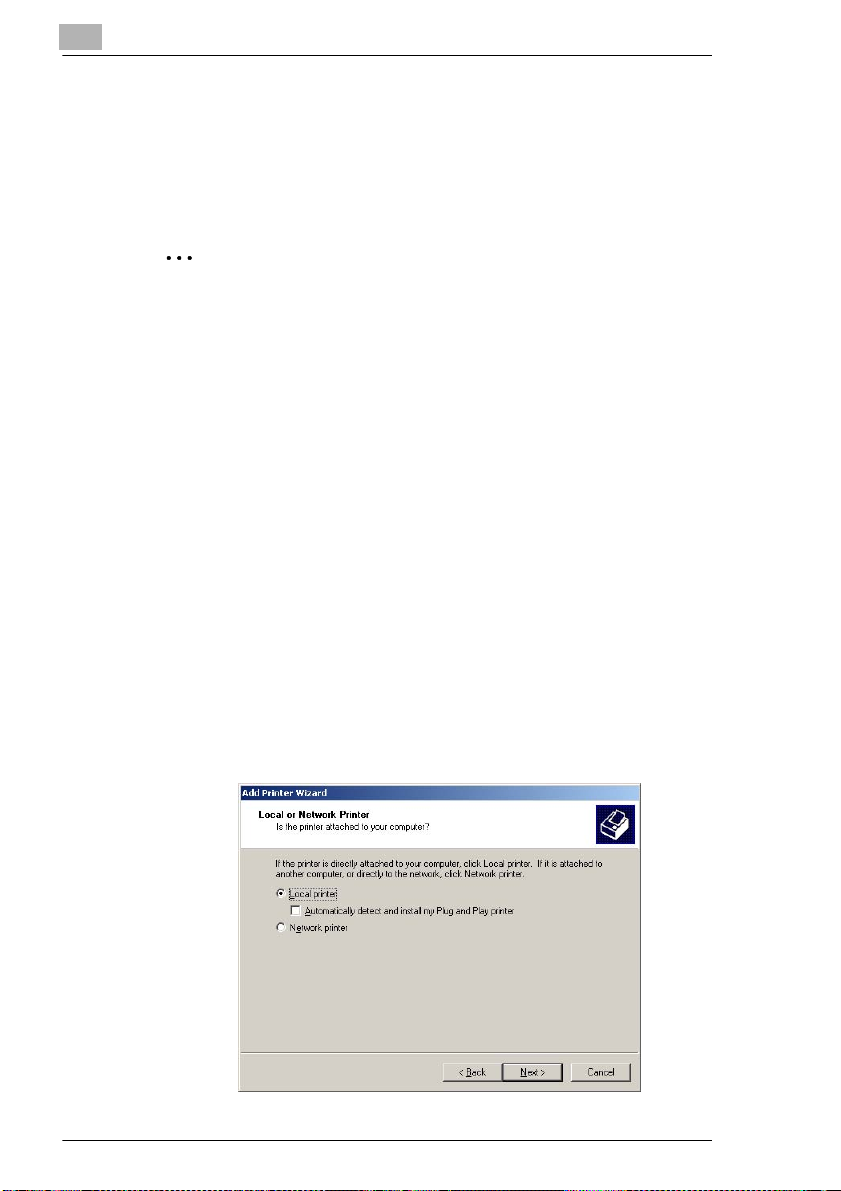
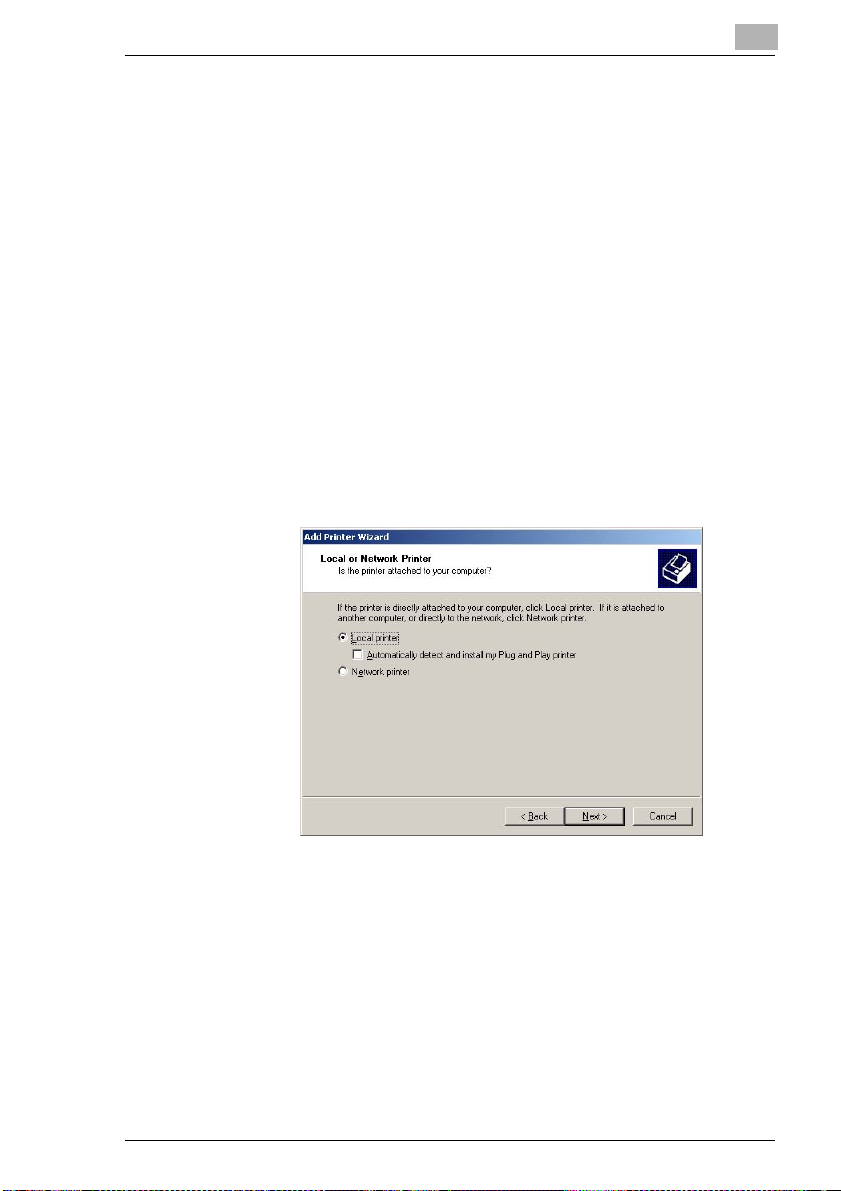
5 On the screen for selecting the printer connection, select Local
printer.
4-2 C350
Page 21
Installing the Printer Driver
Note
For details on installing the printer driver in a network environment,
refer to “6 Network Printing in a Windows Environment”. Because
it is necessary to specify other network settings in advance when
installing the printer driver using a network connection, install it
using a local connection at this time.
6 Click the [Next] button.
7 Click the [Have Disk] button.
8 Click the [Browse] button.
9 Depending on the version of Windows that you are using, specify the
directory on the CD-ROM that contains the printer driver, and then
click the [OK] button.
H For Windows 98: (CD-ROM)\Driver\English\Printer\Win9xME
H For Windows Me: (CD-ROM)\Driver\English\Printer\Win9xME
H For Windows 2000: (CD-ROM)\Driver\English\Printer\Win2KXP
H For Windows NT 4.0: (CD-ROM)\Driver\English\Printer\WinNT40
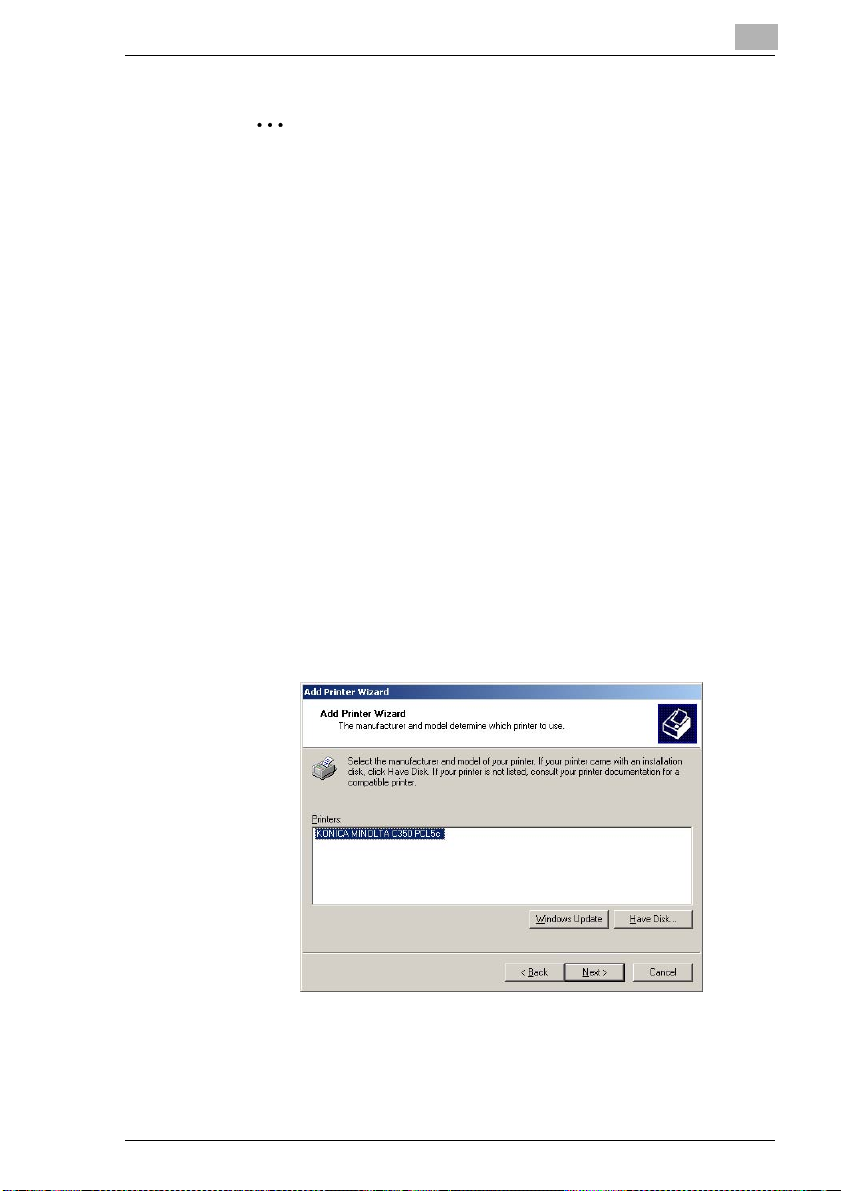
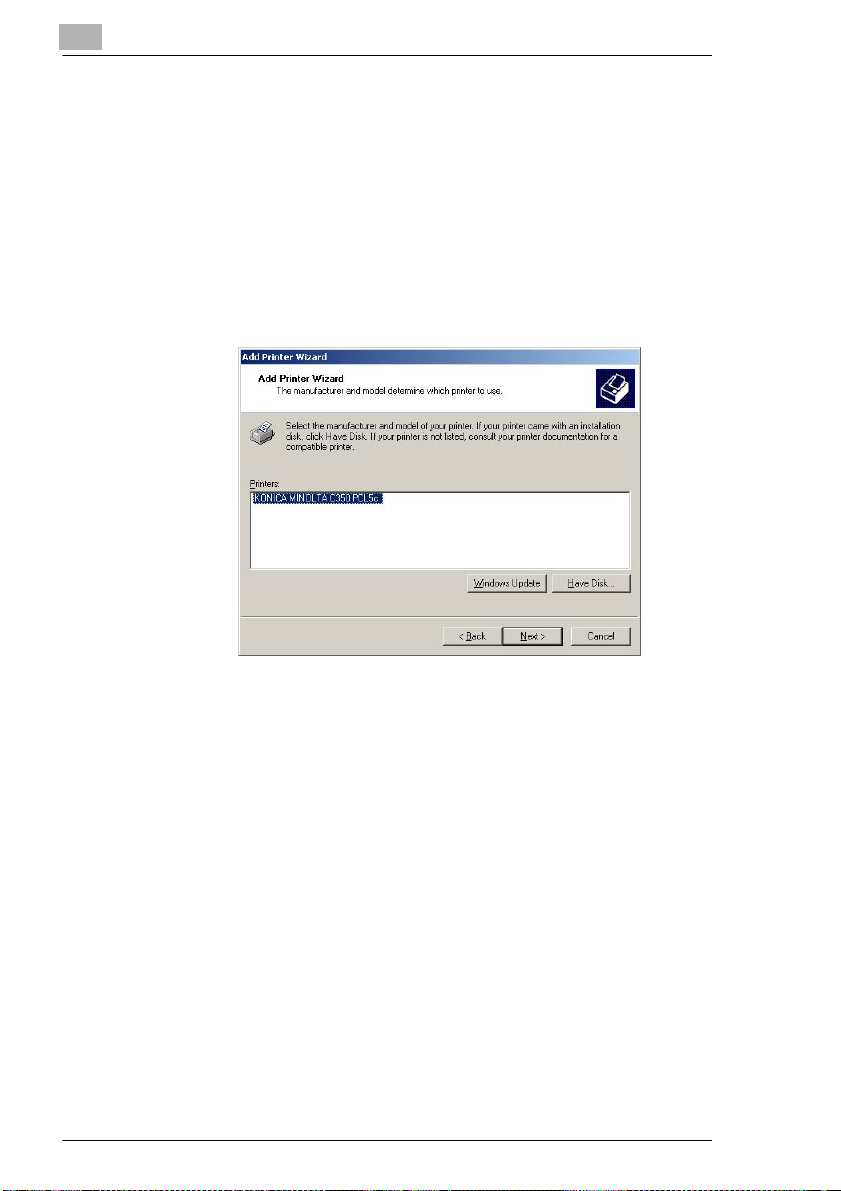
10 Click the [OK] button.
The Printers list appears.
4
11 Click the [Next] button.
12 Specify the connection port. Select LPT1 here.
C350 4-3
Page 22
4
Installing the Printer Driver
13 Follow the on-screen instructions to perform the installation.
Note
Do not perform a test print at this point.
Perform the test print after the network settings have been
specified.
14 When installation is complete, make sure that the icon of the installed
printer appears in the “Printers” window.
15 Remove the CD-ROM from the CD-ROM drive.
This completes the printer driver installation.
For Windows XP/Server 2003
1 While Windows is running, load the CD-ROM into the computer’s CD-
ROM drive.
2 In Windows, click the [Start] button, and then click “Printers and
Faxes”.
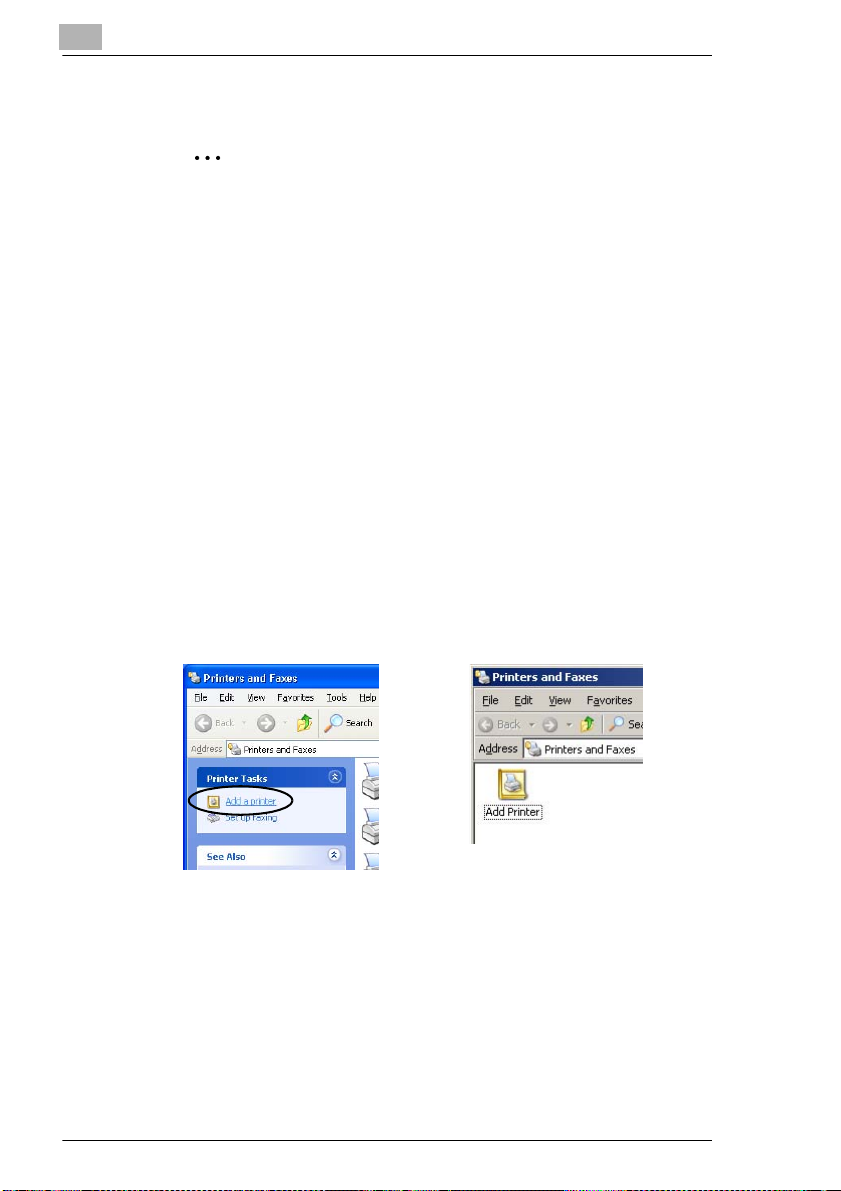
3 For Windows XP, click Add a printer on the Printer Tasks menu.
For Windows Server 2003, double-click the “Add Printer” icon.
Windows XP Windows Server 2003
The Add Printer Wizard starts up.
4 Click the [Next] button.
4-4 C350
Page 23
Installing the Printer Driver
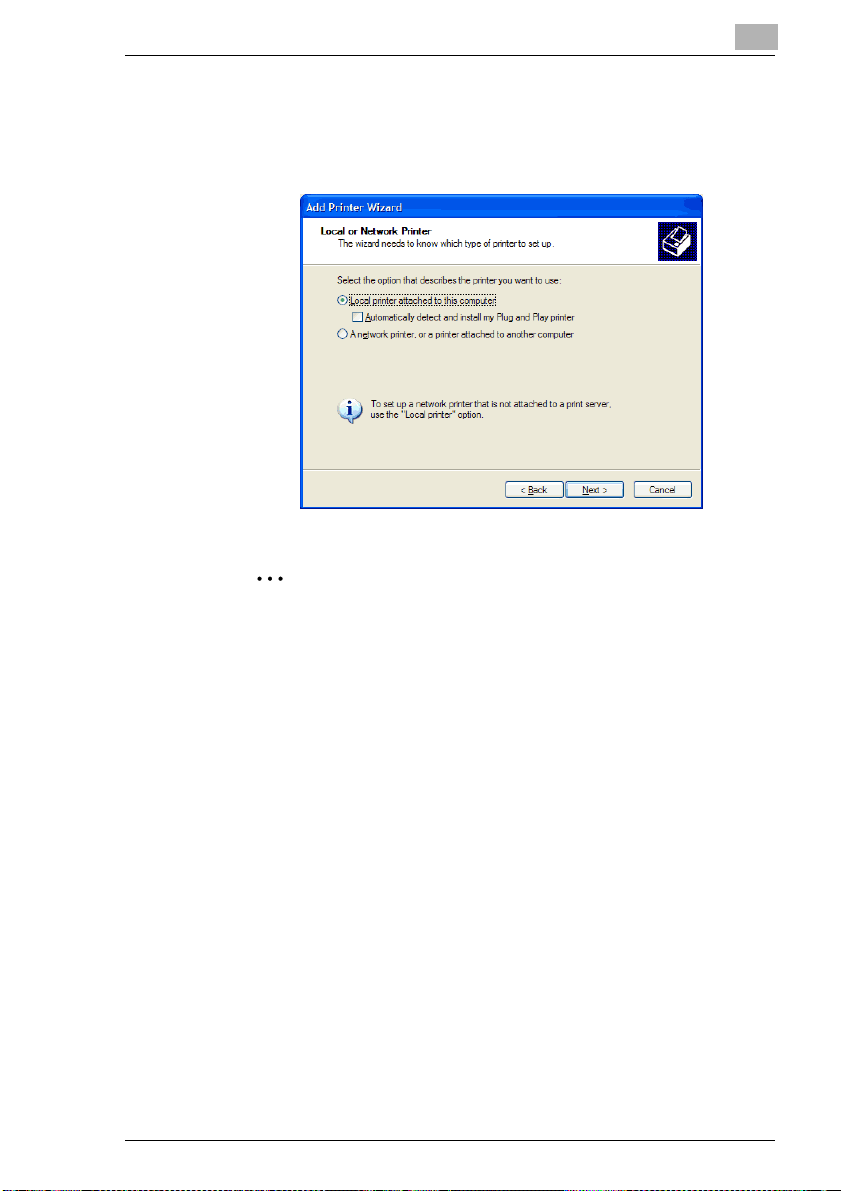
5 Select Local printer attached to this computer, and then click the
[Next] button.
Clear the Automatically detect and install my Plug and Play
printer check box.
Note
For details on installing the printer driver in a network environment,
refer to “6 Network Printing in a Windows Environment”. Because
it is necessary to specify other network settings in advance when
installing the printer driver using a network connection, install it
using a local connection at this time.
4
6 The Select Printer Port dialog box appears. Select LPT1 here, and
then click the [Next] button.
7 Click the [Have Disk] button.
8 Click the [Browse] button.
9 Specify the directory on the CD-ROM
(\Driver\English\Printer\Win2KXP) that contains the printer driver for
Windows XP/Server 2003, and then click the [OK] button.
C350 4-5
Page 24
4
Installing the Printer Driver
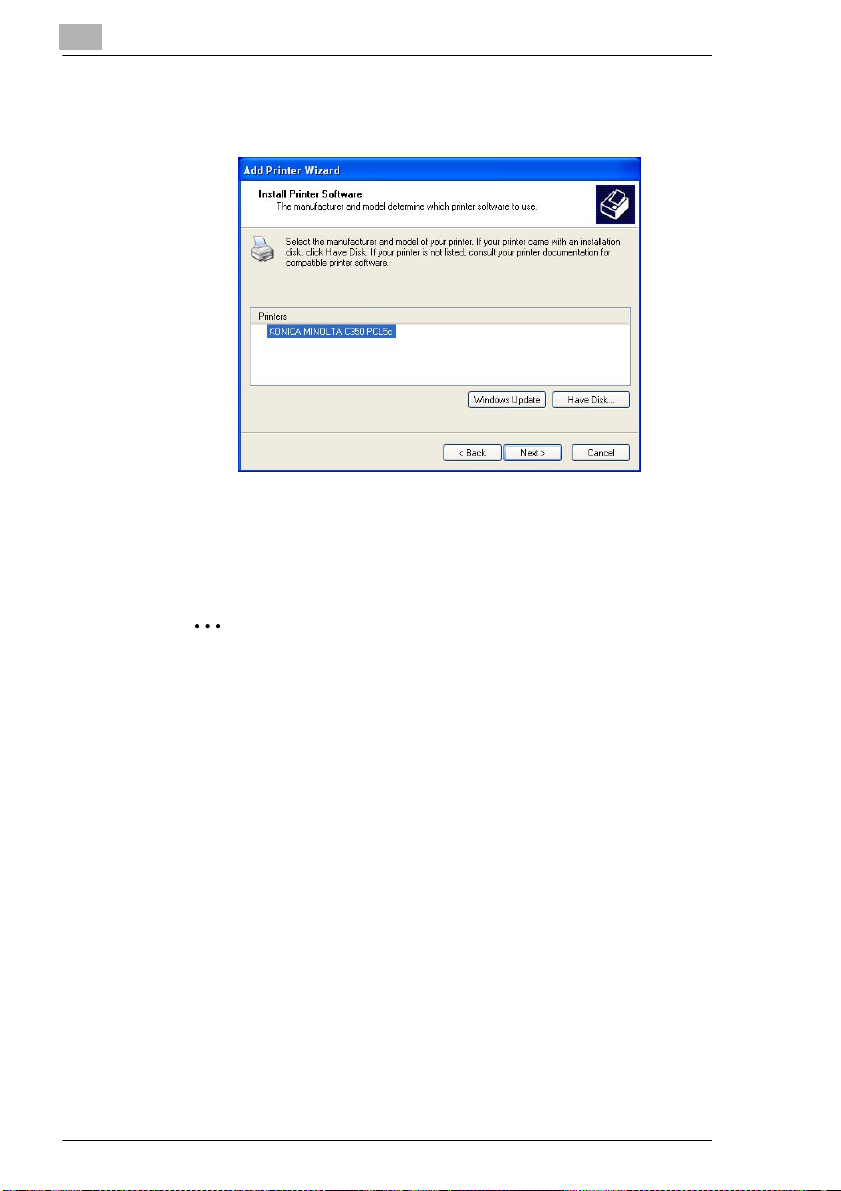
10 Click the [OK] button.
The Printers list appears.
11 Click the [Next] button.
12 Follow the on-screen instructions to start the installation.
Note
Perform a test print after the network settings have been specified.
13 When installation is complete, make sure that the icon of the installed
printer appears in the “Printers and Faxes” window.
14 Remove the CD-ROM from the CD-ROM drive.
This completes the printer driver installation.
4-6 C350
Page 25

Installing the Printer Driver
4.2 When This Machine and the Computer are Connected Using a Parallel Connection
Note
To connect this machine to a computer using a parallel connection, the
optional local interface kit is required.
4.2.1 Installing the Printer Driver Using Plug and Play
For Windows NT 4.0, Plug and Play cannot be used to install the printer
driver. Refer to the procedure for installing the printer driver using the Add
Printer Wizard. If you are using Windows NT 4.0, exit the Add Printer
Wizard started by Plug and Play, click the “Add Printer” icon, and then
install the printer driver (refer to “Installing the Printer Driver Using the Add
Printer Wizard” on page 4-11).
For Windows 98
1 After using a parallel cable to connect this machine to the computer,
turn on the computer.
4
Note
Do not disconnect and connect the cable while the computer is
starting up.
2 Insert the CD-ROM into the computer’s CD-ROM drive.
3 Turn this machine on.
The Add New Hardware Wizard dialog box appears.
4 Click the [Next] button.
5 Select Search for the best driver for your device (Recommended),
and then click the [Next] button.
6 Select Specify a location, and then click the [Browse] button.
7 Specify the directory on the CD-ROM
(\Driver\English\Printer\Win9xME) that contains the printer driver for
Windows 98, and then click the [OK] button.
C350 4-7
Page 26

4
Installing the Printer Driver
8 Click the [Next] button, and then proceed according to the on-screen
instructions.
9 The Add New Hardware Wizard dialog box appears again.
Repeat steps 4 through 8.
10 When installation is complete, make sure that the icon of the installed
printer appears in the “Printers” window.
11 Remove the CD-ROM from the CD-ROM drive.
This completes the printer driver installation.
For Windows Me
1 After using a parallel cable to connect this machine to the computer,
turn on the computer.
Note
Do not disconnect and connect the cable while the computer is
starting up.
2 Insert the CD-ROM into the computer’s CD-ROM drive.
3 Turn this machine on.
The Add New Hardware Wizard dialog box appears.
4 Select Automatic search for a better driver (Recommended), and
then click the [Next] button.
5 Select Specify a Location, and then click the [Browse] button.
6 Specify the directory on the CD-ROM
(\Driver\English\Printer\Win9xME) that contains the printer driver for
Windows Me, and then click the [OK] button.
7 Click the [Next] button, and then proceed according to the on-screen
instructions until the [Finish] button is displayed.
8 Click the [Finish] button.
9 When installation is complete, make sure that the icon of the installed
printer appears in the “Printers” window.
4-8 C350
Page 27

Installing the Printer Driver
10 Remove the CD-ROM from the CD-ROM drive.
This completes the printer driver installation.
For Windows 2000
1 After using a parallel cable to connect this machine to the computer,
turn on the computer.
Note
Do not disconnect and connect the cable while the computer is
starting up.
2 Insert the CD-ROM into the computer’s CD-ROM drive.
3 Turn this machine on.
The Found New Hardware Wizard dialog box appears.
4 In the Install Hardware Device Drivers dialog box, select Search for a
suitable driver for my device (recommended), and then click the
[Next] button.
The Locate Driver Files dialog box appears.
4
5 Select Specify a location, and then click the [Next] button.
6 Specify the directory on the CD-ROM
(\Driver\English\Printer\Win2KXP) that contains the printer driver for
Windows 2000, and then click the [OK] button.
7 Click the [OK] button, and then proceed according to the on-screen
instructions until the Completing the Found New Hardware Wizard
dialog box is displayed.
8 Click the [Finish] button.
9 When installation is complete, make sure that the icon of the installed
printer appears in the “Printers” window.
10 Remove the CD-ROM from the CD-ROM drive.
This completes the printer driver installation.
C350 4-9
Page 28

4
Installing the Printer Driver
For Windows XP/Server 2003
1 After using a parallel cable to connect this machine to the computer,
turn on the computer.
Note
Do not disconnect and connect the cable while the computer is
starting up.
2 Insert the CD-ROM into the computer’s CD-ROM drive.
3 Turn this machine on.
The Found New Hardware Wizard dialog box appears.
4 Select Install from a list or specific location (Advanced), and then
click the [Next] button.
5 Under Search for the best driver in these locations, select Include
this location in the search, and then click the [Browse] button.
6 Specify the directory on the CD-ROM
(\Driver\English\Printer\Win2KXP) that contains the printer driver for
Windows XP/Server 2003, and then click the [OK] button.
7 Click the [Next] button. The Completing the Found New Hardware
Wizard dialog box appears.
8 Click the [Finish] button.
9 When installation is complete, make sure that the icon of the printer
installed printer appears in the “Printers and Faxes” window.
10 Remove the CD-ROM from the CD-ROM drive.
This completes the printer driver installation.
4-10 C350
Page 29
Installing the Printer Driver
4.2.2 Installing the Printer Driver Using the Add Printer Wizard
For Windows 98/Me/2000/NT 4.0
1 While Windows is running, load the CD-ROM into the computer’s CD-
ROM drive.
2 In Windows, click the [Start] button, point to “Settings”, and then click
“Printers”.
The “Printers” window appears.
3 Double-click the “Add Printer” icon.
The Add Printer Wizard starts up.
4 Proced according to the on-screen instructions.
5 In the screen for selecting the printer connection, select Local printer.
4
6 Click the [Next] button.
7 Click the [Have Disk] button.
8 Click the [Browse] button.
C350 4-11
Page 30
4
Installing the Printer Driver
9 Depending on the version of Windows that you are using, specify the
directory on the CD-ROM that contains the printer driver, and then
click the [OK] button.
H For Windows 98: (CD-ROM)\Driver\English\Printer\Win9xME
H For Windows Me: (CD-ROM)\Driver\English\Printer\Win9xME
H For Windows 2000: (CD-ROM)\Driver\English\Printer\Win2KXP
H For Windows NT 4.0: (CD-ROM)\Driver\English\Printer\WinNT40
10 Click the [OK] button.
The Printers list appears.
11 Click the [Next] button.
12 Specify the connected port. Select LPT1 or LPT2.
13 Follow the on-screen instructions to perform the installation.
14 When installation is complete, make sure that the icon of the installed
printer appears in the “Printers” window.
15 Remove the CD-ROM from the CD-ROM drive.
This completes the printer driver installation.
4-12 C350
Page 31

Installing the Printer Driver
For Windows XP/Server 2003
1 While Windows is running, load the CD-ROM into the computer’s CD-
ROM drive.
2 In Windows, click the [Start] button, and then click “Printers and
Faxes”.
3 For Windows XP, click Add a printer on the Printer Tasks menu.
For Windows Server 2003, double-click the “Add Printer” icon.
The Add Printer Wizard starts up.
4
Windows XP Windows Server 2003
4 Click the [Next] button.
5 Select Local printer attached to this computer, and then click the
[Next] button.
Clear the Automatically detect and install my Plug and Play
printer check box.
C350 4-13
Page 32

4
Installing the Printer Driver
6 The Select Printer Port dialog box appears. Select the connected port,
and then click the [Next] button.
7 Click the [Have Disk] button.
8 Click the [Browse] button.
9 Specify the directory on the CD-ROM
(\Driver\English\Printer\Win2KXP) that contains the printer driver for
Windows XP/Server 2003, and then click the [OK] button.
10 Click the [OK] button.
11 Click the [Next] button.
12 Follow the on-screen instructions to perform the installation.
13 When installation is complete, make sure that the icon of the installed
printer appears in the “Printers and Faxes” window.
14 Remove the CD-ROM from the CD-ROM drive.
This completes the printer driver installation.
4-14 C350
Page 33

Installing the Printer Driver
4.3 Uninstalling the Printer Driver
If it becomes necessary to delete the printer driver, for example, when you
want to reinstall the printer driver, follow the procedure below to delete the
driver.
Uninstalling the printer driver
1 For Windows 98/Me/2000/NT, click the [Start] button, point to
“Settings”, and then click “Printers”.
For Windows XP/Server 2003, click the [Start] button, and then click
“Printers and Faxes”.
2 In the “Printers” (for Windows XP/Server 2003, “Printers and Faxes”)
window, select the icon of the printer that you want to delete.
3 Press the [Delete] key on the computer keyboard to delete the printer
driver.
4 Follow the on-screen instructions to perform the uninstallation.
When the printer driver has been deleted, the printer icon will
disappear from the “Printers” (for Windows XP/Server 2003, “Printers
and Faxes”) window.
This completes the uninstallation procedure.
4
C350 4-15
Page 34

4
Installing the Printer Driver
4-16 C350
Page 35

Setting Up the Printer Driver
5 Setting Up the Printer Driver
The printer driver setup dialog box can be displayed from the “Printers”
(for Windows XP/Server 2003, “Printers and Faxes”) window of the
Windows. Settings specified in the printer driver setup dialog box
displayed using the procedure described below will be applied when
printing from any application.
Memo
To specify custom settings, click “Print” in the menu of the application,
and then click the [Properties] button next to the printer name in the
Print dialog box. Settings specified here apply only to the current file.
5.1 Displaying the Printer Driver Setup Dialog Box
5.1.1 Displaying the Printer Driver Setup Dialog Box in Windows 98/Me
Display procedure
5
1 In Windows, click the [Start] button, point to “Settings”, and then click
“Printers”.
2 Select the “KONICA MINOLTA C350 PCL5c” icon.
3 On the “File” menu, click “Properties”.
The printer driver setup dialog box shown below appears.
C350 5-1
Page 36

5
Setting Up the Printer Driver
Note
Use the settings on the 5 tabs at the top of the dialog box to set up the
printer driver.
5.1.2 Displaying the Printer Driver Setup Dialog Box in Windows 2000/NT 4.0
Display procedure
1 In Windows, click the [Start] button, point to “Settings”, and then click
“Printers”.
2 Select the “KONICA MINOLTA C350 PCL5c” icon.
3 To display the “Device Option Setting” tab, click “Properties” on the
“File” menu.
4 To display the “Setup”, “Paper”, “Quality”, or “Job Management” tab,
perform the following procedures after selecting the icon in step 2.
H For Windows 2000: On the “File” menu, click “Printing
Preferences”.
H For Windows NT 4.0: On the “File” menu, click “Document
Defaults”.
5.1.3 Displaying the Printer Driver Setup Dialog Box in Windows XP/Server 2003
Display procedure
1 In Windows, click the [Start] button, and then click “Printers and
Faxes”.
2 Select the “KONICA MINOLTA C350 PCL5c” icon.
3 To display the “Device Option Setting” tab, click “Properties” on the
“File” menu.
4 To display the “Setup”, “Paper”, “Quality”, or “Job Management” tab,
click “Printing Preferences” on the “File” menu after selecting the icon
in step 2.
5-2 C350
Page 37

Setting Up the Printer Driver
5.2 Common Controls
The following describes the common settings and buttons that are
displayed on all five tabs (“Setup”, “Paper”, “Quality”, “Device Option
Setting”, and “Job Management”).
OK
Click this button to close the printer driver setup dialog box and apply any
settings that have been changed.
5
Cancel
Click this button to cancel any settings that have been changed and close
the dialog box.
Apply
Click this button to apply any settings that have been changed without
closing the printer driver setup dialog box.
Help
Click this button to display the help for each item on the currently
displayed screen.
C350 5-3
Page 38

5
Setting Up the Printer Driver
Easy Set
The current settings on each tab can be saved as a set and retrieved when
you want to use them again.
To save the current settings, click the [Save] button. The Save Easy Set
Name dialog box appears. Enter the name of the set (10 characters or
less), and then click the [OK] button.
After the settings have been saved as a set, they can be retrieved by
selecting the appropriate set name from the drop-down list.
Select “Default” from the drop-down list to restore the tab’s default
settings.
When an existing set of settings is selected from the drop-down list, the
button changes to the [Delete] button. Click the [Delete] button to delete
the currently selected set.
Page Layout/Printer Figure
When Page Layout is selected, a preview of the page layout as specified
in the current printer driver settings is displayed, and a preview image can
be checked before actual printing is performed.
When any setting is changed, the page layout preview also changes.
When Printer Figure is selected, a printer figure is displayed showing any
options, such as the paper drawer, that are installed on this machine.
5-4 C350
Page 39

Setting Up the Printer Driver
5.3 Settings
5.3.1 Setup Tab
Item Description
N-up Prints multiple pages on one page.
Watermark Prints a watermark on the pages. The watermark text can be
Duplex/Booklet Selects the duplex or booklet printing setting.
Paper Source Specifies the paper source and the type of paper.
Output Setting Specifies an output setting such as stapling, hole punching, or
5.3.2 Paper Tab
Item Description
Original Document
Size
Output Paper Size Specifies the output paper size.
Copies Specifies the number of copies to be made.
Collate Specifies that the pages be output in sets.
Orientation Specifies the printing orientation.
Refer to “Printing Multiple Pages on One Page” on page 5-8.
changed or edited.
Refer to “Printing Pages With Watermarks” on page 5-9.
Refer to “Specifying Duplex/Booklet Printing” on page 5-13.
The paper source for the front cover, the back cover or for OHP
interleaving can also be specified.
Select a paper type specified with this machine.
Refer to “Adding a Cover and/or Interleaf When Printing” on
page 5-18.
folding.
Refer to “Stapling Documents” on page 5-15, “Hole Punching
Documents” on page 5-16, and “Folding Documents” on page 5-17.
Specifies the size of the original document. Custom paper sizes can
also be specified.
An enlargement or reduction ratio can also be specified.
Refer to “Printing to Suit the Paper Size” on page 5-19.
5
5.3.3 Quality Tab
Item Description
Select Color or
Grayscale
Exposure Modes Selects the color matching mode.
Use Printer Font Sets whether to use the printer font.
Resolution Specifies the print resolution (600
Download as
Bitmap
Glossy Mode Sets the glossy mode.
C350 5-5
Selects the color mode. If “Color (Manual)” is selected, clicking the
[Detail of Color Settings] button displays the Detail of Color Settings
dialog box, where detailed color settings can be specified.
Text: Text mode, Photo: Photo mode
× 600 dpi fixed).
Selects whether the font is downloaded as a bitmap or program
(vector font).
Page 40

5
5.3.4 Device Option Setting Tab
Item Description
Device Option Specifies the options installed on this machine.
Job Owner (Default User
Name)
Access Number (Default
Access Number)
About Enables the version of the printer driver to be viewed.
5.3.5 Job Management Tab
Item Description
Store Job Specifies the job storage method.
Job Owner Specifies the job user name and job name.
Distribution Prints a distribution number in the background.
Access Code Specifies the assigned access number (password) when the
Refer to “Setting Device Options” on page 5-7.
Selects the default user name that is shown as the job user
name on the control panel of this machine.
Refer to “Identifying a Print Job by Name” on page 11-7.
Sets the default for the access number (password).
Refer to “Transmitting a Print Job to This Machine When the
Copy Track Mode Is Set” on page 11-8.
• Delete After Printing: Deletes the job after it is printed.
• Print and Hold: Stores the job temporarily after it is printed.
• Store to HDD: Stores the job on the hard disk until it is
deleted from this machine.
• Store to Memory: Stores the job in memory until it is deleted
from this machine.
• Proof and Print: Prints only the first set of the job, and stores
the rest in the memory.
• Lock Job: Locks the job and specifies a password.
Refer to “Print Job Management” on page 11-1.
Refer to “Identifying a Print Job by Name” on page 11-7.
Refer to “Printing Pages with a Distribution Number” on
page 11-9.
Copy Track mode is set from this machine.
Refer to “Transmitting a Print Job to This Machine When the
Copy Track Mode Is Set” on page 11-8.
Setting Up the Printer Driver
Memo
For further details on the “Job Management” tab, refer to “Print Job
Management” on page 11-1.
5-6 C350
Page 41

Setting Up the Printer Driver
5.4 Setting Device Options
You can enable options installed on this machine from the printer driver.
Setting procedure
1 Display the printer driver setup dialog box (refer to “Displaying the
Printer Driver Setup Dialog Box” on page 5-1), and then click the
“Device Option Setting” tab.
2 From the Installable Options list, select the device that you want to
install, and then click the [Add] button.
5
Check that the device the you selected is displayed in the Installed
Options list.
Note
If options installed on this machine are not set up in the “Device Option
Setting” tab, you will not be able to use them from the printer driver.
After an option is installed on this machine, be sure to set it up in the
“Device Option Setting” tab.
C350 5-7
Page 42

5
Setting Up the Printer Driver
5.5 Printing Multiple Pages on One Page
You can print multiple-page documents on one page. This comes in handy
when you want to reduce the number of output pages.
Setting procedure
1 Click the “Setup” tab.
2 From the N-up drop-down list, select the number of pages to be
printed on one page.
2 pages 4 pages 9 pages 16 pages
H When the Border Line check box is selected, borders will be
printed around each page.
3 To change the printing order when an N-up setting is selected, click
the [N-up Style] button. Then, in the dialog box that appeared, select
one of the following modes.
Horiz.
Ascending
Selecting “Page Layout” allows you to check the page layout and printing
order.
Horiz.
Descending
Vert.
Ascending
Vert.
Descending
Note
When printing a job that contains pages of different sizes and
orientations, images may be missing or overlapping when the
document is printed.
5-8 C350
Page 43

Setting Up the Printer Driver
5.6 Printing Pages With Watermarks
You can print specific text in the background as a watermark.
Printing pages with watermarks
Setting procedure
1 Click the “Setup” tab.
2 Under Watermark, specify the necessary settings.
H Text: Select the text to be printed as the watermark.
<None>, CONFIDENTIAL, TOP SECRET,
COPY, DO NOT COPY, DRAFT, FINAL, or
PROOF
H 1st Page Only: Select this check box to print the watermark
only on the first page.
H Edit Watermark: Edit the text and position of the watermark.
When the text for the watermark is selected, a preview of the watermark
is displayed in the “Page Layout” preview box.
5
C350 5-9
Page 44

5
5.6.1 Editing the Watermark
You can edit the font and position of the watermark by clicking the [Edit
Watermark] button on the “Setup” tab.
No. Item Description
1 Preview The print image is displayed here.
2 Watermark Select the desired watermark from the list of existing
3 New Click to create a new watermark. A detailed settings dialog
4 Edit Click to edit the text selected in the Watermark list (2). A
5 Delete Click to delete the text selected in the Watermark list (2).
watermarks.
box appears.
detailed settings dialog box appears.
Refer to “Specifying Detailed Settings for the Watermark” on
page 5-11.
Setting Up the Printer Driver
1
2
3
4
5
5-10 C350
Page 45

Setting Up the Printer Driver
5.6.2 Specifying Detailed Settings for the Watermark
Click the [New] button or the [Edit] button in the dialog box for editing the
watermark in order to display a dialog box where you can specify detailed
settings for the watermark.
5
1
2
3
4
5
6
7
8
No. Item Description
1 Name Enter the name of the new watermark (up to 20 characters).
2 String Enter the text to be printed as the watermark (up to 255
3 Type Face Select the font for the text to be printed as the watermark from
4 Size Specify the size of the text.
5 Style Specify the style of the text.
6 Color Set the color of the text.
7 Shading Specify the density of the text.
characters).
the fonts installed on the computer.
Settings: 8 points to 200 points
Bold: Text will be printed in bold.
Italic: Text will be printed in italics.
Settings: 10 to 100% (in 1% increments)
9
C350 5-11
Page 46

5
Setting Up the Printer Driver
No. Item Description
8 Angle Specify the angle at which the text is printed on the page.
9 Position Specify the position where the watermark is printed.
• Fixed Angle: Standard fixed angle provided by the printer
driver.
Settings: “Horizontal”, “Vertical”, “Diagonal” and “User
Setting”
• User Setting: When “User Setting” is selected, an arbitrary
angle can be set.
Settings: -180 to +180 degrees
(-: clockwise; 0: horizontal; +: counterclockwise)
• Center: The watermark is printed in the center of the page.
• User Setting: The position is defined by the numeric values
entered in the “Horizontal” and “Vertical” boxes.
Setting value (Horizontal): -999 to 999 points
Setting value (Vertical): -999 to 999 points
(specified in 1-point increments; 72 points = 1 inch)
The “Position” setting defines the distance from the center. A
positive value in the “Horizontal” box is toward the right, and
a positive value in the “Vertical” box is upward.
A preview of the settings is displayed.
5-12 C350
Page 47

Setting Up the Printer Driver
5.7 Specifying Duplex/Booklet Printing
You can print a document onto both sides of a page or in a booklet format
(two facing pages).
Note
Duplex printing is available only if the optional duplex unit is installed
on this machine.
Duplex Printing
5
Left Binding
Print data Printout
Booklet Printing
Print data Printout
Top Binding
Print data Printout
C350 5-13
Page 48

5
Setting Up the Printer Driver
Setting procedure
1 Click the “Setup” tab.
2 Select one of the following duplex printing settings from the Duplex/
Booklet drop-down list.
Off The function is disabled.
Top Binding The print images are printed on both sides of a single page so
Left Binding The print images are printed on both sides of a single page so
Booklet Left Binding The print images for 4 pages are printed on both sides of a
Booklet Right Binding The print images of 4 pages are printed on both sides of a
that the file margin is at the top.
that the file margin is at the left edge.
single page so that the printout may be folded at its center to
form a booklet bound at its left edge.
single page so that the printout may be folded at its center to
form a booklet bound at its right edge.
Selecting “Page Layout” allows you to check the duplex/booklet printing
layout.
Note
When printing a job that contains pages of different sizes and
orientations, images may be missing or overlapping when the
document is printed.
5-14 C350
Page 49

Setting Up the Printer Driver
5.8 Stapling Documents
Note
The staple function is available only if the optional finisher FS-501 or
FS-601 is installed on this machine.
Setting procedure
1 Click the “Setup” tab.
2 Click the [Detail of Output Setting] button to display the detailed
settings dialog box.
5
3 From the Staple drop-down list, select one of the following settings.
H If the FS-501 is installed on this machine:
“OFF” or “Corner”
H If the FS-601 is installed on this machine:
“OFF”, “Corner”, “Top Side 2 Points”, “Left Side 2 Points”, or “Auto
2 Points”
Memo
If the FS-501 is installed on this machine, up to 30 pages can be
stapled at a time.
If the FS-601 is installed on this machine, up to 50 pages of A4/Letter
or smaller paper, or 25 pages of B4/Legal or larger paper can be
stapled at a time.
C350 5-15
Page 50

5
5.9 Hole Punching Documents
Note
The hole punch function is available only when optional finisher FS601 is installed on this machine.
Setting procedure
1 Click the “Setup” tab.
2 Click the [Detail of Output Setting] button to display the detailed
settings dialog box.
3 From the Punch and Punch Holes drop-down lists, select one of the
following settings.
H Punch: “OFF”, “Top Side Punch”, “Left Side Punch”, or “Auto
Punch”
H Punch Holes: “2”, “3”, or “4”
Note
When using the hole punch function, always select “4” from the Punch
Holes drop-down list.
No holes will be punched if “2” or “3” is selected.
Setting Up the Printer Driver
5-16 C350
Page 51

Setting Up the Printer Driver
5.10 Folding Documents
The folding function is used in combination with a booklet printing setting
to produce booklets that are folded and stapled at the center.
Note
The folding function is available only if optional finisher FS-601 is
installed on this machine.
Setting procedure
1 Click the “Setup” tab.
2 Click the [Detail of Output Setting] button to display the detailed
settings dialog box.
3 From the Folding drop-down list, select one of the following settings.
H OFF: The folding function is disabled.
H Crease + Center Staple:
5
Produces booklets that are folded and stapled
at the center.
Memo
Up to 10 pages can be folded at a time.
C350 5-17
Page 52

5
Setting Up the Printer Driver
5.11 Adding a Cover and/or Interleaf When Printing
A front cover and/or back cover can be added to each of the copy sets.
Also, when printing on overhead projector transparencies, an interleaf can
be inserted between the transparencies.
Setting procedure
1 Click the “Setup” tab.
2 Click the [Detail of Paper Source] button under Paper Source to
display the detailed settings dialog box.
3 Specify the desired settings.
Cover Page
A front cover and/or back cover can be added to each of the copy sets.
You can also select to print data on the covers or leave them blank.
Front Cover Page Adds a front cover.
With Image Prints data on the front cover.
Front Cover Page Source Specifies the paper source for the front cover.
Back Cover Page Adds a back cover.
With Image Prints data on the back cover.
Back Cover Page Source Specifies the paper source for the back cover.
(Tray 1 to 4, or LCC)
(Tray 1 to 4, or LCC)
OHP Interleaving
When printing on overhead projector transparencies, interleaves can be
inserted between the transparencies.
OHP Interleaving Enables the “OHP Interleaving” function.
OHP Interleaving Paper Source Specifies the paper source for the interleaves.
(Tray 2 to 4, or LCC)
Note
When using the “OHP Interleaving” function, specify “1” in
When printing on overhead projector transparencies, only the multiple
bypass tray or the 1st drawer can be set as the paper source.
The “OHP Interleaving” function cannot be used in combination with
duplex printing.
For details on loading overhead projector transparencies into the paper
source, refer to the User’s Manual supplied with this machine.
5-18 C350
Copies
box.
Page 53

Setting Up the Printer Driver
5.12 Printing to Suit the Paper Size
You can enlarge or reduce documents created with an application when
printing to match the output paper size.
5
Print data
Setting procedure
Printout
1 Click the “Paper” tab.
2 Check that the size specified in the Original Document Size box is
the same as that of the document created with the application.
3 Select the Output Paper Size check box, and then specify the size of
the paper to be printed.
4 When the Fit to Paper check box is selected, the size of the document
is automatically adjusted to the size of the paper selected for printing.
Note
Make sure that paper of the size set in in the Output Paper Size box
is loaded in this machine.
C350 5-19
Page 54

5
Setting Up the Printer Driver
5.13 Items That Cannot Be Set Simultaneously
Limitations on Paper Size and Function Combinations
Paper Source Paper Type Output Setting
Tray 1
Tray 2, 3, 4
LCC
Manual Feed Tray
Plain Paper
Thick 1
Thick 2
Thick 3
Transparency
Envelope
Duplex
Booklet
A3 Wide xx x xxx
A3 x x
JIS B4 x x
A4 x
JIS B5 x x
A5 x x x x
Original Document Size
JIS B6 x x x x x x x x
A6 xx xxx xxx
Postcard xx xxxxxxx
203 x 330 mm x x x
210 x 330 mm x x x
216 x 330 mm x x x
220 x 330 mm x x x
Legal x x x
Letter x
Executive x x x x
Invoice x x x x x
Ledger x x
11 x 14 x x x
Envelope B5 x x x xxxxx
Envelope Com 10 x x x xxxxx
Envelope C5 x x x xxxxx
Envelope DL x x x xxxxx
Envelope Monarch x x x xxxxx
K16 x x x x
K8 x x x
Custom size xx xxxxxxx
Blank: Possible combination
x: Not possible to combine
N-up
Staple
Punch
Folding
5-20 C350
Page 55

Setting Up the Printer Driver
Limitations on Function Combinations
Manual Feed Tray x
Tray 1
Tray 2 xxxxxx
Paper Source
Tray 3, 4 xxxxxx
LCC xxxxxx x
OHP Interleaving x x x x x x x x
Duplex xxxxxx
Booklet xxxxxx x x
Output Setting
Staple xxxxxx x x
Punch x x x x x x
Folding xxxxxx x
Glossy Mode xxxxx xx
Blank: Possible combination
x: Not possible to combine
Paper Type Output Setting
Plain Paper
Thick 1
Thick 2
Thick 3
Transparency
Envelope
OHP Interleaving
Duplex
5
Booklet
N-up
Folding
Cover Page
C350 5-21
Page 56

5
Setting Up the Printer Driver
Limitations on Other Combinations
Tab Function 1 Tab Function 2
1 Setup N-up Paper Scaling
2 Setup N-up Quality Download as Bitmap
3 Setup Booklet Quality Download as Bitmap
4 Setup OHP Interleaving Paper Copies
5 Setup OHP Interleaving Job
6 Setup Staple - Top Side 2
Points
7 Setup Staple Paper Uncollated
8 Setup Folding Paper Uncollated
9 Paper Output Paper Size Quality Download as Bitmap
10 Paper Scaling Quality Download as Bitmap
11 Paper Uncollated Job
12 Paper Uncollated Job
13 Quality Grayscale Quality Exposure Modes
14 Quality Use Printer Font Quality Download as Bitmap
Management
Setup Left Side Punch
Management
Management
Distribution Number
Proof and Print
Distribution Number
5-22 C350
Page 57

Network Printing in a Windows Environment
6 Network Printing in a Windows
Environment
6.1 Network Connection Methods That Can Be Selected in Each Windows OS
This chapter describes the settings that must be specified for network
printing.
Setting procedures differ depending on the method of network printing
used (Windows, LPR, or IPP printing). Select the best method of network
printing for your Windows environment.
Network Printing from a Windows OS
6
Protocol
Used
Windows
Printing
LPR Printing TCP/IP ❍❍❍❍
IPP Printing TCP/IP ❍❍ ❍
NetBEUI ❍❍❍❍❍❍
Windows
98/98SE
Windows MeWindows
2000
Windows XPWindows
NT 4.0
Windows
Server
2003
Note
To perform Windows printing, the NetBEUI protocol must be installed
on your computer.
Before setting up network printing, refer to the procedure described in
“4 Installing the Printer Driver” and install the printer driver.
To perform network printing, change the printer port for the installed
printer driver to one for a network connection, and then change the
settings on this machine as necessary.
For an IPP connection, it is necessary to start with the step for
installing the printer driver.
Network Printing in a NetWare Environment
NetWare Version Protocol Used Emulation Service Mode
NetWare 4.x IPX NDS/Bindery PServer/NPrinter
NetWare 5.x/6 IPX NDS PServer
TCP/IP NDPS(lpr)
C350 6-1
Page 58

6
Network Printing in a Windows Environment
6.2 Setting the IP Address for This Machine
First, use this machine’s control panel to assign an IP address to this
machine.
Note
When specifying network settings, follow the instructions of the
network administrator.
Setting procedure
1 Press the [Utility] key on this machine’s control panel, touch [Admin.
Mode], and then enter the administrator access code.
2 Touch [Network Setting], [Common Setting], then [TCP/IP].
3 Specify settings for the following.
H IP Address: Set the IP address of this machine.
H Subnet Mask: Set the subnet mask for the network to which
you are connecting.
H Gateway Address:
Set the default gateway address for the
network to which you are connecting.
Note
Although the IP address is entered without using the DHCP server
in the procedure described here, it is also possible to automatically
assign the IP address from the DHCP server. When “DHCP” is set
to “Enable”, the IP address, subnet mask, and gateway address
settings are automatically assigned from the DHCP server on the
network, so it is not necessary to assign them manually. However,
note the following when setting “DHCP” to “Enable”.
6-2 C350
Page 59

Network Printing in a Windows Environment
Check with the network administrator that the DHCP server exists.
If the DHCP server does not exist, be sure to specify settings for
“IP Address”, “Subnet Mask”, and “Gateway Address”.
If the settings for the IP address and other items have been
assigned using the DHCP server, there is a possibility that they
may be automatically changed. When the settings for the IP
address and other items are changed, if the IP address has been
used to specify a printer on the network for printing, there is a
possibility that printing may not be possible because this machine
cannot communicate with the network. If “DHCP” has been set to
“Enable”, it is recommended that the IP address assigned to this
machine be fixed in the DHCP server settings.
4 To apply the settings, restart this machine (turn it off, then on again).
Turn this machine back on to enable the IP address.
6.3 Accessing PageScope Web Connection
Setting the IP address for this machine enables you to access PageScope
Web Connection.
Use your Web browser to directly access PageScope Web Connection.
Access procedure
6
1 Start up the Web browser.
2 In the URL field, enter the IP address for this machine as shown below,
and then press the [Enter] key.
H http://<IP_address_for_the_copier>/
Example: If the IP address for this machine is 192.168.0.10
http://192.168.0.10/
The initial page of PageScope Web Connection appears.
For further details on PageScope Web Connection, refer to “12 Using
PageScope Web Connection”.
C350 6-3
Page 60

6
Network Printing in a Windows Environment
6.4 Windows Printing
You can use Windows printing to print directly over the Microsoft network.
Note
To perform Windows printing, the NetBEUI protocol must be installed
on your computer.
6.4.1 Operations on This Machine
Set the IP address on this machine. For the setting procedure, refer to
“Setting the IP Address for This Machine” on page 6-2.
Specify the settings described below for Windows printing in PageScope
Web Connection.
Setting procedure
1 Start up PageScope Web Connection.
2 Enter the administrator access code, and log in to Administrator mode.
3 On the “Network” tab, click Common Setting, and then click
Windows Configuration in the sub-menu that appeared.
6-4 C350
Page 61

Network Printing in a Windows Environment
4 Specify settings for the following.
H Enable Windows Printing Service:
Set whether to use the Windows printing
service. Select “Enable” here.
H NetBIOS Name: Specify the NetBIOS name (up to 15
alphanumeric characters).
H Printing Service Name:
Specify the printing service name (up to 13
alphanumeric characters).
H WorkGroup Name:Specify the work group name (up to 15
alphanumeric characters).
5 To apply the settings, restart this machine (turn it off, then on again).
6.4.2 Printer Driver Settings
For Windows 98/Me
1 Click the [Start] button, point to “Settings”, and then click “Printers”.
2 Right-click the icon for the installed printer, and then click “Properties”.
3 On the “Details” tab, click the [Add Port] button.
4
Select
Network
configuration window that appeared, select the appropriate printer icon.
, and then click the [Browse] button. In the network
6
For Windows 2000/XP/NT 4.0/Server 2003
1 For Windows 2000/NT 4.0, click the [Start] button, point to “Settings”,
and then click “Printers”.
For Windows XP/Server 2003, click the [Start] button, and then click
“Printers and Faxes”.
2 Right-click the icon of the installed printer, and then click “Properties”.
3 Click the [Add Port] button on the “Ports” tab, double-click “Local Port”
or select “Local Port” and click the [New Port] button, and then enter
\\NetBIOS name\Printing Service name.
Note
Enter the same NetBIOS name and printing service name that you
entered in PageScope Web Connection (refer to “Operations on
This Machine” on page 6-4).
4 Click the [Close] button to apply the setting.
C350 6-5
Page 62

6
Network Printing in a Windows Environment
6.5 LPR Printing (Windows 2000/XP/NT 4.0/Server
2003)
The LPR print service is supported as standard in Windows 2000/XP/NT
4.0. TCP/IP is used as the network protocol.
6.5.1 Operations on This Machine
Specify the IP address for this machine. For the setting procedure, refer
to “Setting the IP Address for This Machine” on page 6-2.
6.5.2 Printer Driver Settings
For Windows 2000/XP/Server 2003
1 For Windows 2000, click the [Start] button, point to “Settings”, and then
click “Printers”.
For Windows XP/Server 2003, click the [Start] button, and then click
“Printers and Faxes”.
2 Right-click the icon of the installed printer, and then click “Properties”.
3 On the “Ports” tab, click the [Add Port] button.
4 In the Available Printer Ports list, select Standard TCP/IP Port, and
then click the [New Port] button.
5 When the Add Standard TCP/IP Printer Port Wizard starts up, click the
[Next] button.
6 In the Name of printer or IP address box, enter the IP address for this
machine, and then click the [Next] button.
7 Select Custom, and then click the [Settings] button.
8 Select LPR, enter “Print” in the Queue Name box, and then click the
[OK] button.
9 Click the [Next] button, and then click the [Finish] button to apply the
setting.
6-6 C350
Page 63

Network Printing in a Windows Environment
For Windows NT 4.0
1 Click the [Start] button, point to “Settings”, and then click “Printers”.
2 Right-click the icon of the installed printer, and then click “Properties”.
3 On the “Ports” tab, click the [Add Port] button.
4 In the Available Printer Ports list, select LPR Port, and then click the
[New Ports] button.
Note
If “LPR Port” is not in the list, click the [Start] button, point to
“Control Panel”, and then click “Network”. Then, on the “Service”
tab, click the [Add] button and install the Microsoft TCP/IP printing
service.
5 In the Name or address of server providing lpd box on the Add LPR
Compatible Printer dialog box, enter the IP address for this machine.
6 In the Name of printer or print queue on that server box, enter
“Print”.
6
7 Click the [OK] button to apply the setting.
C350 6-7
Page 64

6
Network Printing in a Windows Environment
6.6 IPP Printing (Windows 2000/XP/Server 2003)
The IPP (Internet Printing Protocol) print service is supported as a
standard in Windows 2000/XP/Server 2003. TCP/IP is used as the
network protocol.
6.6.1 Operations on This Machine
Specify the IP address for this machine. For the setting procedure, refer
to “Setting the IP Address for This Machine” on page 6-2.
Also, specify the IPP printing settings in PageScope Web Connection.
(Printing can be performed with the default settings.)
Setting procedure
1 Start up PageScope Web Connection.
2 Enter the administrator access code, and log in to Administrator mode.
3 On the “Network” tab, click Common Setting, and then click IPP in the
sub-menu that appeared.
6-8 C350
Page 65

Network Printing in a Windows Environment
4 Specify settings for the following.
H Printer URI: The URL of the printer that can be used for IPP
printing is displayed.
H Enable IPP: Set whether to perform IPP printing. Select
“Enable” here.
H Accept IPP Jobs: Set whether to use the IPP reception function.
H Operation Supported:
Specify print operations supported by IPP.
Then, on the “Print” tab of PageScope Web Connection, specify the
settings for IPP printing.
Setting procedure
1 In Administrator mode, click IPP in the menu on the “Print” tab.
6
2 Specify settings for the following.
H Printer Name: Specify the printer name (up to 127
alphanumeric characters).
H Printer Location: Specify the printer location (up to 127
alphanumeric characters).
H Printer Manufacturer and Model:
Specify the printer manufacturer details (up to
127 alphanumeric characters).
C350 6-9
Page 66

6
Network Printing in a Windows Environment
6.6.2 Installing the Printer Driver
For IPP printing, reinstall the printer driver.
Installation procedure
1 Load the supplied CD-ROM into the computer’s CD-ROM drive.
2 For Windows 2000, click the [Start] button, point to “Settings”, and then
click “Printers”.
For Windows XP/Server 2003, click the [Start] button, and then click
“Printers and Faxes”.
3 For Windows 2000/Server 2003, double-click “Add Printer”.
For Windows XP, click Add a printer on the Printer Tasks menu.
The Add Printer Wizard starts up.
4 Click the [Next] button.
5 In the Local or Network Printer dialog box, select Network printer,
and then click the [Next] button.
6 In the Locate Your Printer dialog box, select Connect to a printer on
the Internet or on your intranet.
7 In the URL field, enter the URL for this machine in the following format,
and then click the [Next] button.
H http://<IP_address_for_the_copier>/ipp
Example: If the IP address for this machine is 192.168.0.10
http://192.168.0.10/ipp
8 When the confirmation dialog box appears, click the [OK] button.
9 Click the [Have Disk] button.
10 Click the [Browse] button, specify the directory on the CD-ROM that
contains the printer driver (\Driver\English\Printer\Win2KXP), and then
click the [OK] button.
6-10 C350
Page 67

Network Printing in a Windows Environment
11 Check that “KONICA MINOLTA C350 PCL5c” is displayed in the
Printers list, and then click the [Next] button.
12 Select whether to set the printer as the default printer, and then click
the [Next] button.
13 Click the [Finish] button to exit the Add Printer Wizard.
Once the settings for the printer have been specified, you can use the
printer in the same way as a default local printer. Also, if you set up the
printer for sharing in Windows, it can be used as a network printer by other
Windows computers over the network.
6
C350 6-11
Page 68

6
Network Printing in a Windows Environment
6.7 Setting Up a Print Service in NetWare
The printer controller supports the following environments.
Network Printing in a NetWare Environment
NetWare Version Protocol Used Emulation Service Mode
NetWare 4.x IPX NDS/Bindery PServer/NPrinter
NetWare 5.x/6 IPX NDS PServer
TCP/IP NDPS(lpr)
6.7.1 For Remote Printer Mode With NetWare 4.x Bindery Emulation
Note
Before using bindery emulation, check that bindery emulation is
compatible with the NetWare Server.
Setting procedure
1 From a client computer, log on with Supervisor permissions to access
the NetWare server where the PServer is registered.
2 Start up Pconsole.
3 From the Available Options list, select “Quick Setup”, and then click
the [Enter] button.
4 Enter the appropriate names in the Print server, New printer, New
print queue and Print queue volume fields, select Other/Unknown
from the Printer type field, and then save the specified settings.
5 Click the [Esc] button to quit Pconsole.
6 Use the NetWare Server console to load PSERVER.NLM.
Note
For the queue user privileges, printer notification option,
assignment of multiple queues, and passwords, refer to the
NetWare documentation, and specify settings as necessary.
6-12 C350
Page 69

Network Printing in a Windows Environment
7 In Administrator mode of PageScope Web Connection, from the
“Network” tab, select Common Setting – NetWare Configuration,
and then specify the following settings for the printer controller.
H Enable NetWare: Select “Enable”.
H Frame Type: Select “Auto Detect”. (Select the frame type
according to the network environment.)
H Bindery/NDS: Select “Bindery”.
H Print Server Name:Print server name created in step 4
H Preferred File Server:
Name of the file server running PServer
H Print Queue Scan Rate:
1 (Change as necessary.)
H Mode: NPrinter
6
8 Restart this machine (turn it off, then on again).
9 Use the NetWare Server console to display the print server screen,
and then check that the created printer is shown as “Waiting for Job”
for the connected printer (0).
C350 6-13
Page 70

6
Network Printing in a Windows Environment
6.7.2 For Print Server Mode With NetWare 4.x Bindery Emulation
Note
Before using bindery emulation, check that bindery emulation is
compatible with the NetWare Server.
Setting procedure
1 From a client computer, log on with Supervisor permissions to access
the NetWare server where the PServer is registered.
2 Start up Pconsole.
3 From the Available Options list, select “Quick Setup”, and then click
the [Enter] button.
4 Enter the appropriate names in the Print server, New printer, New
print queue and Print queue volume fields, select Other/Unknown
from the Printer type field, and then save the specified settings.
5 Click the [Esc] button to quit Pconsole.
6-14 C350
Page 71

Network Printing in a Windows Environment
6 In Administrator mode of PageScope Web Connection, from the
“Network” tab, select Common Setting – NetWare Configuration,
and then specify the following settings for the printer controller.
H Enable NetWare: Select “Enable”.
H Frame Type: Select “Auto Detect”. (Select the frame type
according to the network environment.)
H Bindery/NDS: Select “Bindery”.
H Print Server Name:Print server name created in step 4
H Print Server Password:
Specify only when setting from the NetWare
Server.
H Preferred File Server:
Name of the file server that connects to
PServer
H Print Queue Scan Rate:
1 (Change as necessary.)
H Mode: PServer
6
7 Restart this machine (turn it off, then on again).
8 Use the NetWare Server console to load MONITOR.NLM.
9 Select the connection information and, in the active connection
column, check that the created PServer is connected.
C350 6-15
Page 72

6
Network Printing in a Windows Environment
6.7.3 For NetWare 4.x Remote Printer Mode (NDS)
Setting procedure
1 Log on to NetWare as an administrator from a client computer.
2 Start up NWadmin.
3 Select either the organization or organizational unit container that
offers the print service, and then click “Print Services Quick Setup” on
the “Tools” menu.
4 Enter the appropriate names in the Print Server name, Printer
Name, Print Queue Name, and Print Queue Volume fields, select
Other/Unknown from the Printer Type field, and then save the
settings.
Note
For settings for the queue user rights, printer notification option,
assignment of multiple queues, and password items, refer to the
NetWare documentation, and then specify settings as necessary.
6-16 C350
Page 73

Network Printing in a Windows Environment
5 In Administrator mode of PageScope Web Connection, click NetWare
Configuration in the sub-menu that appeared after clicking Common
Setting on the “Network” tab, and then specify the settings for this
machine.
6
H Enable NetWare: Select “Enable”.
H Frame Type: Select “Auto Detect”. (Selects the frame type
according to the network environment.)
H Bindery/NDS: Select “NDS”.
H Print Server Name:
Print server name created in step 4
H Print Server Password:
Set only if set on the NetWare Server.
H Preferred NDS Context:
Name of the tree node that PServer loads
H Preferred NDS Tree:
Enter “1”. (Change as necessary.)
H Mode: Select “NPrinter”.
H Printer Number: 255
(Set the number assigned to the printer (0 to
254) or 255.)
C350 6-17
Page 74

6
Network Printing in a Windows Environment
6 To apply the settings, restart this machine (turn it off, then on again).
7 Use the NetWare Server console to load PSERVER.NLM.
8 Use the NetWare Server console to display the print server screen,
and check that “C350” (created printer) is shown as “Waiting for Job”
for the connected printer (0).
6.7.4 For NetWare 4.x/5.x/6 Print Server Mode (NDS)
Note
To use the Print Server mode, IPX protocol must be loaded on the
NetWare server.
Setting procedure
1 Log on to NetWare as an administrator from a client computer.
2 Start up NWadmin.
3 Select either the organization or organizational unit container that
offers the print service, and then click “Print Services Quick Setup
(non-NDPS)” on the “Tools” menu.
4 Enter the appropriate names in the Print Server name, Printer
Name, Print Queue Name, and Print Queue Volume fields, select
Other/Unknown from the Printer Type field, and then click the
[Create] button.
Note
For settings for the queue user rights, printer notification option,
assignment of multiple queues, and password items, refer to the
NetWare documentation, and set them as necessary.
6-18 C350
Page 75

Network Printing in a Windows Environment
5 In Administration mode of PageScope Web Connection, click
NetWare Configuration in the sub-menu that appeared after clicking
Common Setting on the “Network” tab, and then specify the settings
for this machine.
6
H Enable NetWare: Select “Enable”.
H Frame Type: Select “Auto Detect”. (Selects the frame type
according to the network environment.)
H Bindery/NDS: Select “NDS”.
H Print Server Name:
Print server name created in step 4
H Print Server Password:
Set only if set on the NetWare Server.
H Preferred NDS Context:
Name of context node connecting the PServer
H Preferred NDS Tree:
Name of the tree to which PServer logs on
H Print Queue Scan Rate:
Enter “1”. (Change as necessary.)
H Mode: Select “PServer”.
6 To apply the settings, restart this machine (turn it off, then on again).
7 Use the NetWare Server console to load MONITOR.NLM.
8 Select the connection information, and in the active connection
column, check that the PServer that you created is connected.
C350 6-19
Page 76

6
Network Printing in a Windows Environment
6.7.5 For NetWare 5.x/6 Novell Distributed Print Services (NDPS)
Note
Before specifying settings for NDPS, check that the NDPS broker and
NDPS manager have been created and loaded.
Also, before performing the following procedure, check that the TCP/
IP protocol has been set in the NetWare server, and check that the IP
address has been set for this machine and that this machine is on.
Creating an NDPS printer agent
1 Log on to NetWare as an administrator from a client computer.
2 Start up NWadmin.
3 Right-click the organization or organizational unit container where you
will create the printer agent, and then click “NDPS Printer” on the
“Create” sub-menu.
4 In the NDPS Printer Name box, enter the printer name.
5 In the Printer Agent Source column, select Create a New Printer
Agent, and then click the [Create] button.
6 Check the printer agent name, and then in the NDPS Manager Name
box, browse through the NDPS manager names, and register one.
7 In Gateway Types, select Novell Printer Gateway, and then register
it.
8 In the “Configure Novell PDS for Printer Agent” window, select
“(None)” for the printer type, and “Novell Port Handler” for the port
handler type, and then register the settings.
9 In Connection type, select Remote (LPR on IP), and then register it.
10 Enter the IP address set for this machine as the host address, enter
“Print” as the printer name, and then click [Finish] to register the
settings.
11 The printer driver registration screen appears. Select “None” for each
OS to complete the registration.
6-20 C350
Page 77

Network Printing in a Windows Environment
6
Note
For settings for the queue user rights, printer notification option,
assignment of multiple queues, and password items, refer to the
NetWare documentation, and set them as necessary.
6.7.6 Setting Up a Client (Windows) Settings When Using the NetWare Server
Setting procedure
1 For Windows 98/Me/2000/NT 4.0, click the [Start] button, point to
“Settings”, and then click “Printers”.
For Windows XP/Server 2003, click the [Start] button, and then click
“Printers and Faxes”.
2 For Windows 98/Me/2000/NT 4.0/Server 2003, double-click “Add
printer”.
For Windows XP, click Add a printer on the Printer Tasks menu.
The Add Printer Wizard starts up.
3 In the port settings, browse the network, and specify the name of the
created queue (or NDPS printer name).
4 In the Printer Model list, specify the directory on the CD-ROM that
contains the printer driver for the environment to be used.
H For Windows 98: (CD-ROM)\Driver\English\Printer\Win9xME
H For Windows Me: (CD-ROM)\Driver\English\Printer\Win9xME
H For Windows 2000: (CD-ROM)\Driver\English\Printer\Win2KXP
H For Windows XP: (CD-ROM)\Driver\English\Printer\Win2KXP
H For Windows NT 4.0: (CD-ROM)\Driver\English\Printer\WinNT40
H For Windows Server 2003:
(CD-ROM)\Driver\English\Printer\Win2KXP
5 Follow the on-screen instructions to complete the installation.
C350 6-21
Page 78

6
Network Printing in a Windows Environment
6.8 Checking Printer Driver Operation After Installation
6.8.1 Test Printing From the Computer
Print a test page to check that the printer driver has been properly
installed.
Test printing procedure
1 For Windows 98/Me/2000/NT 4.0, click the [Start] button, point to
“Settings”, and then click “Printers”.
For Windows XP/Server 2003, click the [Start] button, and then click
“Printers and Faxes”.
2 Right-click the icon for the installed printer, and then click “Properties”.
3 In the dialog box that appeared, click the [Print Test] button or the
[Print Test Page] button.
6-22 C350
Page 79

Specifying Printer Settings From the Control Panel
7 Specifying Printer Settings From the
Control Panel
7.1 “Printer Setting” Screen in Utility Mode
After pressing the [Utility] key on this machine’s control panel, the
following screen appears.
Select [Printer Setting] to specify default settings and output reports.
7
C350 7-1
Page 80

7
Specifying Printer Settings From the Control Panel
7.1.1 “Default Setting” Screen
After touching [Default Setting], the following screens appear.
“Basic” tab
From the “Basic” tab, general default settings concerning the printer can
be specified.
If a print job is sent with not all settings specified, printing will be performed
with the settings specified here.
Default Tray
If this machine receives a print job where the paper source is not specified,
the paper source specified here will be used.
§ Select the desired paper drawer, and then touch [Enter].
7-2 C350
Page 81

Specifying Printer Settings From the Control Panel
Paper Size
If this machine receives a print job where the paper size is not specified,
the paper size specified here will be used.
§ Select the desired paper size, and then touch [Enter].
Output
If this machine receives a print job where double-sided printing or the
number of copies are not specified, the settings specified here will be
used.
7
1 Touch [Simplex] or [Duplex].
If “Duplex” is selected, specify the binding method.
2 To change the number of copies, press the [C] (clear) key, and then
use the keypad to specify the number of copies.
3 Touch [Enter].
C350 7-3
Page 82

7
Specifying Printer Settings From the Control Panel
Orientation
If this machine receives a print job where the image orientation is not
specified, the image orientation specified here will be used.
§ Touch [Portrait] or [Landscape], and then touch [Enter].
Lines per page
Specify the default number of lines per page.
1 Press the [C] (clear) key, and then use the keypad to specify the
number of lines (between 5 and 128 lines).
2 Touch [Enter].
7-4 C350
Page 83

Specifying Printer Settings From the Control Panel
“Font” tab
From the “Font” tab, default settings concerning the font can be specified.
Typeface
Specify the default font.
§ Select the desired font, and then touch [Enter].
Symbol Set
Specify the default symbol set.
7
§ Select the desired symbol set, and then touch [Enter].
C350 7-5
Page 84

7
Specifying Printer Settings From the Control Panel
Font Size
Specify the default font size.
1 To specify a scalable font size, touch the key below “Scalable Font”,
press the [C] (clear) key, and then use the keypad to specify the font
size (between 4.00 and 999.75).
2 To specify a bitmap font size, touch the key below “Bitmap Font”, press
the [C] (clear) key, and then use the keypad to specify the font size
(between 0.44 and 99.00).
3 Touch [Enter].
Initialize
To reset the printer settings to their defaults, touch [Initialize].
7-6 C350
Page 85

Specifying Printer Settings From the Control Panel
7.1.2 “Report Types” Screen
From this screen, configuration information for this machine and a test
page can be printed.
After touching [Report Types], the following screen appears.
Operating procedure
1 Select the report that you wish to print.
2 Press the [Start] key in this machine’s control panel.
The selected report is printed.
7
C350 7-7
Page 86

7
Specifying Printer Settings From the Control Panel
7.2 “Printer Setting” Screen in Administrator Mode
After pressing the [Utility] key on this machine’s control panel, touching
[Admin. Mode], then entering the administrator access code, the following
screen appears.
After touching [Printer Setting], the following screens appear.
“Common Setting” tab
From the “Common Setting” tab, various settings concerning the printer
can be specified.
PDL Setting
If the printer language only supports PCL, this key is not available.
7-8 C350
Page 87

Specifying Printer Settings From the Control Panel
I/O Timeout
The transmission timeout can be specified.
§ Use the keypad to specify the length of time (in seconds) until a
connection times out (between 10 and 300 seconds), and then touch
[Enter].
Parallel Interface
The mode for using a parallel interface can be specified.
7
§ Select the parallel interface mode, and then touch [Enter].
C350 7-9
Page 88

7
Specifying Printer Settings From the Control Panel
Screen Pattern Setting
The screen pattern setting for printing from a computer can be specified.
§ Touch [Gradation] or [Resolution], and then touch [Enter].
“PCL Setting” tab
From the “PCL Setting” tab, settings concerning PCL can be specified.
Overwrite A4 ← → Letter
If Letter (or A4) size is selected, but paper of the specified size is not
loaded, printing can continue with A4 (or Letter) size paper.
§ Touch [Yes] or [No], and then touch [Enter].
7-10 C350
Page 89

Using the Scan Functions
8 Using the Scan Functions
This chapter describes the setup and operating procedures of the scan
functions.
This machine’s control panel or PageScope Web Connection is used to
set up the scan functions. For details on the startup procedure of
PageScope Web Connection and the procedure for logging in to
Administrator mode, refer to “12 Using PageScope Web Connection”.
8.1 Overview
The following types of scan functions are available on this machine. Use
the appropriate type that matches your network environment and
application.
8
Scan to E-mail Sends scanned data as an attachment to an e-mail.
Scan to FTP Server Sends scanned data to an FTP server.
Scan to PC Sends scanned data to a computer using FTP.
Scan to HDD Sends scanned data to the optional hard disk.
Internet FAX Attaches the scanned data to an e-mail and sends it to a device
Refer to “Scan to E-mail” on page 8-5 and
“Performing Scan to E-Mail Operations” on page 8-40.
Refer to “Scan to FTP Server” on page 8-6 and
“Performing Scan to FTP Server Operations” on page 8-46.
Refer to “Scan to PC” on page 8-7 and
“Performing Scan to PC Operations” on page 8-53.
Refer to “Scan to HDD” on page 8-8 and
“Performing Scan to HDD Operations” on page 8-55.
that supports Internet faxing. In addition, received image data can
be printed.
Refer to “Scan to Internet FAX” on page 8-9,
“Internet FAX Reception” on page 8-10,
“Performing Scan to Internet FAX Operations” on page 8-64, and
“Performing Internet FAX Reception Operations” on page 8-72.
C350 8-1
Page 90

8
Using the Scan Functions
8.1.1 Environment Required for the Scan Functions
The following environment is required to send image data (send and
receive for Internet faxing) using the scan functions.
Note
All scan functions can only be used under a TCP/IP network
environment.
Environment
Required to Send
Image Data
Scan to E-mail Mail server (on the
Scan to FTP
server
Scan to PC FTP server application
Scan to HDD Optional hard disk
Scan to Internet
FAX
Internet FAX
reception
network)
FTP server (on the
network)
(on the receiving
computer)
(installed into this
machine)
Mail server (on the
network)
Environment
Required to Receive
Image Data
Mail client computer A maximum file size
FTP client computer
Client computer
Web browser or
BOX Utility
Mail server
Other Limitations
may be specified on
the mail server.
The destination must
have a device that
can receive Internet
faxes.
A maximum file size
may be specified on
the mail server.
8-2 C350
Page 91

Using the Scan Functions
8.1.2 Supported File Formats
You can select TIFF, PDF, or JPEG for the scan data file format.
The transmission file is created according to the specified file format.
One of the extensions below is attached to the file name according to the
specified file format.
.pdf for the PDF format, .jpg for the JPEG format, or .tif for the TIFF format
Note
Depending on the specified Color Mode setting, some file formats
cannot be selected (Refer to “Scan Mode Screen” on page 8-14).
PDF TIFF JPEG
Full Color ❍ X ❍
Gray Scale ❍ X ❍
Black ❍❍X
Note
The file format cannot be selected with the Scan to Internet FAX
operation. With this operation, the data is sent in the TIFF format
(“Black” Color Mode setting, 200 × 200 dpi).
8
If multiple pages of a document are scanned when the JPEG format is
selected, data is sent one page at a time.
Example: If 10 pages are scanned, 10 JPEG files are sent.
C350 8-3
Page 92

8
8.1.3 File Name
The file name of the image data is automatically assigned by the printer
controller.
The file name is assigned in the following format.
<device_name><date/time><automatic_number>.<extension>
Memo
If the e-mail message is divided for transmission, the pages that are
included in the attached files are used as a portion of the file names.
For example, if a ten-page document is divided into two files and the
files include pages 1 through 7 and pages 8 through 10, the two file
names are assigned as follows:
<device_name><date/time><automatic_number>P.1-7.<extension>
<device_name><date/time><automatic_number>P.8-10.<extension>
Setting the device name
1 Start up PageScope Web Connection.
2 Enter the administrator access code, and log in to Administrator mode.
Using the Scan Functions
3 On the “Scan” tab, click Scan in the menu.
4 The name entered in the Device Name box becomes the
<device_name> portion of the file name.
Note
The first nine characters of the name entered in the Device Name box
are used for the <device_name> portion of the file name.
8-4 C350
Page 93

Using the Scan Functions
8.1.4 Scan to E-mail
Sends the image data scanned on this machine as an attached file to an
e-mail address.
Suitable for sending low-resolution data.
Requires a network environment with a mail server.
8
Mail Server
Client Computer
Client Computer
For the setup and operating procedures, refer to “Performing Scan to E-
Mail Operations” on page 8-40.
C350 8-5
Page 94

8
8.1.5 Scan to FTP Server
Sends the image data scanned on this machine to a specified folder on
the FTP server.
Suitable for sending high-resolution data.
Requires a network environment with an FTP server.
Allows you to select whether to use the e-mail notification function, which
sends an e-mail message containing information indicating the storage
location of the image data (refer to “URL Notification Using E-mail” on
page 8-23). (A mail server is required for using the e-mail notification
function.)
Possible to access FTP servers on the Internet via a proxy server. (In such
case, a proxy server is required.)
Using the Scan Functions
FTP Server
Client Computer
Mail Server
For the setup and operating procedures, refer to “Performing Scan to FTP
Server Operations” on page 8-46.
8-6 C350
Page 95

Using the Scan Functions
8.1.6 Scan to PC
Sends the image data scanned on this machine directly to a computer
using FTP.
Requires an FTP server application on the computer and the application
must be running when receiving the image data.
For the setup and operating procedures, refer to “Performing Scan to PC
Operations” on page 8-53.
8
Client Computer
FTP server
application
C350 8-7
Page 96

8
8.1.7 Scan to HDD
Sends the image data scanned on this machine to a specified folder (box)
on the hard disk installed in this machine.
Suitable for sending high-resolution data.
Allows you to select whether to use the e-mail notification function, which
sends an e-mail message containing information indicating the storage
location of the image data (refer to “URL Notification Using E-mail” on
page 8-23). (A mail server is required for using the e-mail notification
function.)
Note
To use this scan function, an optional hard disk must be installed in
this machine.
Box
Using the Scan Functions
Computer
Optional
Hard Disk
For the setup and operating procedures, refer to “Performing Scan to HDD
Operations” on page 8-55.
8-8 C350
Mail Server
Page 97

Using the Scan Functions
8.1.8 Scan to Internet FAX
Attaches the image data scanned on this machine to an e-mail and sends
it to a device that supports Internet faxing.
The image data is sent with the “Black” Color Mode setting in the TIFF
format at 200 × 200 dpi.
Memo
Before sending document data using Internet faxing, check in advance
whether the receiving side is capable of receiving Internet faxes.
TIFF format
200
8
Black
× 200 dpi
Device that supports
Internet faxing
Printout
Mail Server
For the setup and operating procedures, refer to “Performing Scan to
Internet FAX Operations” on page 8-64.
C350 8-9
Page 98

8
8.1.9 Internet FAX Reception
Receives e-mails sent from a device that supports Internet faxing and
prints out the data.
The following image data can be received.
G “Black” Color Mode setting, TIFF format, 200 × 200 dpi/200 × 100 dpi
Printout
Using the Scan Functions
Device that supports
Internet faxing
Mail Server
For the setup and operating procedures, refer to “Performing Internet FAX
Reception Operations” on page 8-72.
8-10 C350
Page 99

Using the Scan Functions
8.2 Basic Setup of the Scan Functions
Using PageScope Web Connection or this machine’s control panel, enter
the basic settings for the scan functions.
Memo
For details on the startup procedure for PageScope Web Connection
and the procedure for logging in to Administrator mode, refer to
“12 Using PageScope Web Connection”.
Using PageScope Web Connection
1 Start up PageScope Web Connection.
2 Enter the administrator access code, and log in to Administrator mode.
3 On the “Scan” tab, click Scan in the menu.
8
4 Specify settings for the following.
Scan
Device Name Enter the device name of this machine (up to 36
C350 8-11
characters). The name entered here is the character string
that is attached to the front of the image file name that is
created by the scan function.
Refer to “File Name” on page 8-4.
Page 100

8
Using the Scan Functions
Color/Grayscale
Compression Level
Priority Compression Method
for Monochrome (PDF)
Priority Compression Method
for Monochrome (TIFF)
Send
Scanned File Separation Set the division method (in units of pages) when the
E-mail Address (From:) Specify the sender’s e-mail address (From address) that is
Set the image compression mode to high resolution,
standard, or low resolution.
Set the priority compression method of PDF files to MH or
MMR.
Set the priority compression method of TIFF files to MH or
MMR.
maximum size is exceeded for Scan to E-mail and Scan to
Internet FAX operations.
For e-mail transmission, refer to “Binary Division and
Scanned File Separation” on page 8-43.
For Scan to Internet FAX, refer to “Binary Division and
Scanned File Separation” on page 8-68.
used for e-mail messages sent from this machine. This is
the sender’s e-mail address that appears for Scan to E-mail
and Scan to Internet FAX operations, and for URL
notification by e-mail.
For e-mail transmission, refer to “Error Notification” on
page 8-45.
For Scan to Internet FAX, refer to “Error Notification” on
page 8-71.
For URL notification by e-mail, refer to “URL Notification
Using E-mail” on page 8-23.
Using this machine’s control panel
Settings for the “Device Name”, “Color/Grayscale Compression Level”,
and “Pri. Comp. Method for Monochrome” parameters can also be set
from this machine’s control panel.
1 On this machine’s control panel, press the [Utility] key, touch [Admin.
Mode], and then enter the administrator access code.
2 Touch [Scan Setting].
3 Specify settings for the “Device Name”, “Color/Grayscale
Compression Level”, and “Pri. Comp. Method for Monochrome”
parameters.
8-12 C350
 Loading...