

Page 1

bizhub C554e/C454e/
C364e/C284e/C224e
QUICK GUIDE
Page 2

Page 3

Table of contents
1 Introduction
1.1 Environmental Information............................................................................................................. 1-3
Environmental initiatives .................................................................................................................... 1-3
Energy Star®...................................................................................................................................... 1-3
What is an ENERGY STAR® Product?.............................................................................................. 1-3
Environmental benefits of power management ................................................................................. 1-4
Recycled Paper.................................................................................................................................. 1-4
Duplex printing................................................................................................................................... 1-4
1.2 Certification for USA, Canada, México, Brazil and Europe area ................................................ 1-5
For U.S.A............................................................................................................................................ 1-5
For Canada ........................................................................................................................................ 1-5
For México ......................................................................................................................................... 1-5
For Brazil............................................................................................................................................ 1-5
For Europe ......................................................................................................................................... 1-5
1.3 Safety information........................................................................................................................... 1-6
Warning and precaution symbols ...................................................................................................... 1-6
Meaning of symbols........................................................................................................................... 1-6
1.4 Regulation notices ........................................................................................................................ 1-10
CE Marking (Declaration of Conformity) for users of the European Union (EU)............................... 1-10
USER INSTRUCTIONS FCC PART 15 - RADIO FREQUENCY DEVICES (for U.S.A. users)............ 1-10
INTERFERENCE-CAUSING EQUIPMENT STANDARD (ICES-003 ISSUE 4) (for Canada users).... 1-10
For users in countries not subject to class B regulations................................................................ 1-10
GS Certification................................................................................................................................ 1-10
Laser safety...................................................................................................................................... 1-10
Internal laser radiation...................................................................................................................... 1-11
CDRH regulations ............................................................................................................................ 1-11
For European users.......................................................................................................................... 1-11
For Denmark users........................................................................................................................... 1-12
For Finland, Sweden users .............................................................................................................. 1-12
For Norway users............................................................................................................................. 1-12
Laser safety label ............................................................................................................................. 1-13
Ozone release .................................................................................................................................. 1-13
Acoustic noise (for European users only)......................................................................................... 1-13
For EU member states only ............................................................................................................. 1-13
Telephone Cable (For users in countries subject to class B regulations)........................................ 1-14
1.5 Caution notations and labels ....................................................................................................... 1-15
1.6 Special Notice to User.................................................................................................................. 1-16
For Europe ....................................................................................................................................... 1-16
1.7 Space requirements...................................................................................................................... 1-17
bizhub C554e/C454e ....................................................................................................................... 1-17
bizhub C364e/C284e/C224e ........................................................................................................... 1-18
1.8 Operation precautions.................................................................................................................. 1-19
Power source................................................................................................................................... 1-19
Operating environment .................................................................................................................... 1-19
Storage of copies............................................................................................................................. 1-19
Data stored in this machine ............................................................................................................. 1-19
1.9 Legal restrictions on copying ...................................................................................................... 1-20
1.10 Trademark acknowledgements.................................................................................................
Copyright ......................................................................................................................................... 1-22
Note ................................................................................................................................................. 1-22
1.11 Software End User License Agreement...................................................................................... 1-23
1.12 i-Option LK-105 v3 (searchable PDFs) End User License Agreement..................................... 1-25
.. 1-21
bizhub C554e/C454e/C364e/C284e/C224e Contents-1
Page 4

2 About This Machine
2.1 Intended use of office MFP devices.............................................................................................. 2-3
Intended use ...................................................................................................................................... 2-3
Impermissible operating conditions................................................................................................... 2-3
Exclusion of liability............................................................................................................................ 2-3
2.2 Introduction to User's Guide.......................................................................................................... 2-4
2.2.1 Target groups..................................................................................................................................... 2-4
2.2.2 [Quick Guide] (this manual) ................................................................................................................ 2-4
2.2.3 [User's Guide Online] ......................................................................................................................... 2-4
Layout of top page............................................................................................................................. 2-4
Operating environment ...................................................................................................................... 2-5
2.2.4 Symbols and notations used in this manual...................................................................................... 2-5
Procedural instruction........................................................................................................................ 2-5
Symbols and notations ...................................................................................................................... 2-6
Notations of application names ......................................................................................................... 2-6
2.3 About this machine ......................................................................................................................... 2-7
2.3.1 Optional components (bizhub C554e/C454e).................................................................................... 2-7
2.3.2 Optional components (bizhub C364e/C284e/C224e)...................................................................... 2-10
2.3.3 Name of parts (MFP) (bizhub C554e/C454e)................................................................................... 2-13
Front side ......................................................................................................................................... 2-13
Rear side.......................................................................................................................................... 2-14
2.3.4 Name of parts (MFP) (bizhub C364e/C284e/C224e) ....................................................................... 2-15
Front side ......................................................................................................................................... 2-15
Rear side.......................................................................................................................................... 2-16
2.3.5 Name of parts (Optional units) ......................................................................................................... 2-17
Finisher FS-535, Saddle Stitcher SD-512, Punch Kit PK-521 (bizhub C554e) ................................ 2-17
Job Separator JS-602 (bizhub C554e) ............................................................................................ 2-19
Z Folding Unit ZU-606 (bizhub C554e) ............................................................................................ 2-20
Post Inserter PI-505 (bizhub C554e)................................................................................................ 2-21
Finisher FS-533, Punch Kit PK-519 ................................................................................................. 2-22
Job Separator JS-506...................................................................................................................... 2-23
Finisher FS-534, Saddle Stitcher SD-511, Punch Kit PK-520 ......................................................... 2-24
Large Capacity Unit LU-301/LU-204 ............................................................................................... 2-26
2.4 Power supply................................................................................................................................. 2-27
2.4.1 Turning the power on and off........................................................................................................... 2-27
2.4.2 Operating the Power key ................................................................................................................. 2-28
2.4.3 Power save function ........................................................................................................................ 2-29
Reducing power consumption.....................................................................................................
2.5 Control Panel................................................................................................................................. 2-30
2.5.1 Name of parts .................................................................................................................................. 2-30
2.6 Touch Panel................................................................................................................................... 2-32
2.6.1 Main Menu ....................................................................................................................................... 2-32
Layout of main menu ....................................................................................................................... 2-32
Customizing the main menu ............................................................................................................ 2-33
2.6.2 Operating the Touch Panel .............................................................................................................. 2-33
Tap ................................................................................................................................................... 2-33
Double-tap ....................................................................................................................................... 2-33
Flick.................................................................................................................................................. 2-34
Drag ................................................................................................................................................. 2-34
Pan................................................................................................................................................... 2-34
Long-tap .......................................................................................................................................... 2-34
Drag & Drop ..................................................................................................................................... 2-35
Pinch in/Pinch out............................................................................................................................ 2-35
Rotation............................................................................................................................................ 2-35
Precautions on using the Touch panel ............................................................................................ 2-36
2.6.3 How to display the keypad .............................................................................................................. 2-36
How to move the keypad................................................................................................................. 2-37
How to close the keypad ................................................................................................................. 2-37
To display the keypad all the time ................................................................................................... 2-37
.... 2-29
Contents-2 bizhub C554e/C454e/C364e/C284e/C224e
Page 5

2.6.4 Entering characters.......................................................................................................................... 2-38
When typing in "Group1":................................................................................................................ 2-38
2.7 Jobs................................................................................................................................................ 2-39
2.7.1 Job screen ....................................................................................................................................... 2-39
2.7.2 Multi-job function............................................................................................................................. 2-39
2.8 Loading Paper ............................................................................................................................... 2-40
2.8.1 Loading paper in Tray 1 to Tray 4.................................................................................................... 2-40
2.8.2 LCT (built-in)..................................................................................................................................... 2-41
2.8.3 Loading paper into the Large Capacity Unit.................................................................................... 2-42
2.8.4 Bypass Tray ..................................................................................................................................... 2-43
Applicable paper types .................................................................................................................... 2-40
How to load paper ........................................................................................................................... 2-40
Applicable paper types .................................................................................................................... 2-41
How to load paper ........................................................................................................................... 2-41
Applicable paper types .................................................................................................................... 2-42
How to load paper ........................................................................................................................... 2-42
Applicable paper types .................................................................................................................... 2-43
Applicable paper sizes..................................................................................................................... 2-43
How to load paper ........................................................................................................................... 2-43
3 Basic Settings and Operations
3.1 Print Function .................................................................................................................................. 3-3
3.1.1 Required settings and basic operations (For Windows OS).............................................................. 3-3
Preparation flow................................................................................................................................. 3-3
Operation flow.................................................................................................................................... 3-3
Checking the cable connection ......................................................................................................... 3-4
Checking network settings of this machine....................................................................................... 3-4
Installing the printer driver ................................................................................................................. 3-5
Printing data....................................................................................................................................... 3-5
Types of printer drivers ...................................................................................................................... 3-6
3.1.2 Required settings and basic operations (For Mac OS)...................................................................... 3-6
Preparation flow................................................................................................................................. 3-6
Operation flow.................................................................................................................................... 3-7
Checking the cable connection ......................................................................................................... 3-7
Checking network settings of this machine....................................................................................... 3-7
Installing the printer driver ................................................................................................................. 3-9
Adding and configuring a printer driver ........................................................................................... 3-10
Printing data..................................................................................................................................... 3-10
3.2 Scan-to-Send function ................................................................................................................. 3-11
3.2.1 Various transmission methods......................................................................................................... 3-11
Sending data to your computer (SMB Send)................................................................................... 3-11
Transmitting data as E-mail attachment (E-mail TX)........................................................................ 3-11
Saving data to the USB memory device (External memory)............................................................ 3-11
Various methods for transmitting and saving data.......................................................................... 3-12
3.2.2 Sending data to your Windows computer (SMB Send)................................................................... 3-12
Preparation flow............................................................................................................................... 3-13
Operation flow.................................................................................................................................. 3-13
Checking the cable connection ....................................................................................................... 3-13
Checking network settings of this machine..................................................................................... 3-14
Checklist .......................................................................................................................................... 3-14
Checking computer information ...................................................................................................... 3-15
Configuring your computer.............................................................................................................. 3-15
Registering destinations .................................................................................................................. 3-16
Sending the original ......................................................................................................................... 3-18
3.2.3 Sending data to your Mac computer (SMB Send)........................................................................... 3-20
Preparation flow............................................................................................................................... 3-20
Operation flow.................................................................................................................................. 3-20
Checking the cable connection ....................................................................................................... 3-21
Checking network settings of this machine..................................................................................... 3-21
Configuring this machine (Mac OS X 10.7 or later).......................................................................... 3-22
Checklist .......................................................................................................................................... 3-23
bizhub C554e/C454e/C364e/C284e/C224e Contents-3
Page 6

Checking computer information ...................................................................................................... 3-23
Configuring your computer.............................................................................................................. 3-23
Registering destinations .................................................................................................................. 3-24
Sending the original ......................................................................................................................... 3-26
3.2.4 Transmit the scanned data via E-mail (E-mail TX) ........................................................................... 3-28
Preparation flow............................................................................................................................... 3-28
Operation flow.................................................................................................................................. 3-28
Checking the cable connection ....................................................................................................... 3-29
Checking network settings of this machine..................................................................................... 3-29
Configuring the E-mail transmission environment ........................................................................... 3-30
Configuring administrator information ............................................................................................. 3-31
Sending the original ......................................................................................................................... 3-32
3.3 Fax Function .................................................................................................................................. 3-34
3.3.1 Required settings and basic operations .......................................................................................... 3-34
Preparation flow............................................................................................................................... 3-34
Operation flow.................................................................................................................................. 3-34
Checking the cable connection ....................................................................................................... 3-35
Registering transmission information .............................................................................................. 3-35
Selecting the dialing method ........................................................................................................... 3-36
Sending the original ......................................................................................................................... 3-37
3.3.2 Sending a fax directly from a PC (PC-FAX TX)................................................................................ 3-39
Preparation flow............................................................................................................................... 3-39
Operation flow.................................................................................................................................. 3-40
Checking the cable connection ....................................................................................................... 3-40
Checking network settings of this machine..................................................................................... 3-41
Installing the fax driver..................................................................................................................... 3-42
Sending data.................................................................................................................................... 3-43
3.4 Copy Function ............................................................................................................................... 3-44
3.5 Registering a destination ............................................................................................................. 3-47
3.5.1 Registering an address book ........................................................................................................... 3-47
3.5.2 Information required to register a destination.................................................................................. 3-52
3.5.3 Registering a group.......................................................................................................................... 3-53
3.5.4 Retrieving a registered destination .................................................................................................. 3-55
3.6 Using a USB memory device ....................................................................................................... 3-57
3.6.1 Printing data in a USB memory device............................................................................................ 3-57
3.6.2 Saving the scanned data in the USB memory device (External memory) ....................................... 3-59
3.7 Using the guidance function........................................................................................................ 3-63
3.7.1 Guidance screen.............................................................................................................................. 3-63
Basic operations .............................................................................................................................. 3-44
User authentication.......................................................................................................................... 3-46
Using the Control Panel to register an address book - Registration from Utility............................. 3-47
Using the Control Panel to register an address book - Registration in scan/fax mode .................. 3-49
Using a computer to register a one-touch destination .................................................................... 3-51
Registering a new group.................................................................................................................. 3-53
Retrieving a destination ................................................................................................................... 3-55
Specifying a destination................................................................................................................... 3-56
Printing data..................................................................................................................................... 3-57
Specifying functions to be permitted for external memory.............................................................. 3-59
Saving data in the USB memory device .......................................................................................... 3-61
Getting help on the currently displayed screen: .............................................................................. 3-63
Getting help on the desired function or procedure:......................................................................... 3-65
Help Menu list .................................................................................................................................. 3-67
Contents-4 bizhub C554e/C454e/C364e/C284e/C224e
Page 7

4 Advanced Functions
4.1 Using advanced functions.............................................................................................................. 4-3
4.1.1 What are advanced functions?.......................................................................................................... 4-3
4.1.2 Association with application .............................................................................................................. 4-4
4.1.3 Registering the i-Option license......................................................................................................... 4-4
Preparation flow................................................................................................................................. 4-4
Registering the i-Option license......................................................................................................... 4-5
Enabling the i-Option function ........................................................................................................... 4-7
Configuring each function.................................................................................................................. 4-8
5 Troubleshooting
5.1 Main messages and remedies....................................................................................................... 5-3
5.1.1 When a message appears to replace consumables or carry out cleaning........................................ 5-3
5.1.2 When a paper jam message persists................................................................................................. 5-4
5.1.3 When an error message appears....................................................................................................... 5-4
5.1.4 When [Stabilizing image.] appears..................................................................................................... 5-5
5.2 When printing quality has deteriorated......................................................................................... 5-6
5.2.1 Cleaning the Electrostatic Charger .................................................................................................... 5-6
5.2.2 Cleaning the Print Head Glass........................................................................................................... 5-7
5.3 When the machine cannot be powered on................................................................................... 5-9
5.4 When the Touch Panel is not visible ........................................................................................... 5-10
5.5 When a message appears to replace consumables or carry out cleaning ............................. 5-12
When staples in the finisher have run out........................................................................................ 5-12
When the punch scrap box is full .................................................................................................... 5-12
When toner is running out in the Toner Cartridge............................................................................ 5-13
When the Drum Unit needs to be replaced ..................................................................................... 5-13
When a Developing Unit needs to be replaced ............................................................................... 5-14
When a Waste Toner Box is full....................................................................................................... 5-14
5.5.1 Replacing a Toner Cartridge............................................................................................................ 5-15
bizhub C554e/C454e ....................................................................................................................... 5-15
bizhub C364e/C284e/C224e ........................................................................................................... 5-16
5.5.2 Replacing a Waste Toner Box ......................................................................................................... 5-17
bizhub C554e/C454e ....................................................................................................................... 5-17
bizhub C364e/C284e/C224e ........................................................................................................... 5-18
5.5.3 Replacing a Drum Unit..................................................................................................................... 5-19
bizhub C554e/C454e ....................................................................................................................... 5-19
bizhub C364e/C284e/C224e ........................................................................................................... 5-20
6Index
6.1 Index by item ................................................................................................................................... 6-3
bizhub C554e/C454e/C364e/C284e/C224e Contents-5
Page 8

Contents-6 bizhub C554e/C454e/C364e/C284e/C224e
Page 9

1
Introduction
Page 10

Page 11

1.1 Environmental Information
1 Introduction
This [Quick Guide] uses illustrations to describe operating procedures for the most commonly used functions
in an easy-to-understand way.
Start by using this manual to become proficient with the useful functions that this machine offers.
For details on the various functions, refer to the User’s Guides on the DVD included with this machine.
In order to operate the machine safely and properly, be sure to read the safety information on page 1-6 of
this manual before use.
In addition, this manual contains the following information. Be sure to read the manual before using the machine.
- Items that must be observed to use the machine safely
- Information regarding product safety
- Precautions when using the machine
- Descriptions on trademarks and copyrights
The illustrations and screens used in this manual may appear slightly different from views of the actual equipment and screens.
Tips
- Please keep this manual as well as the attached CD/DVD in a safe place where you can access them
easily.
1
1.1 Environmental Information
Environmental initiatives
The company continuously strives to reduce the negative environmental impacts of all stages of its business
operations.
As part of such activities, the company is implementing resource-saving steps by reducing the number of
pages in the User's Guide.
For the information necessary to operate the machine, please refer to the bundled User's Guide DVD (HTML
format). This guide has an excellent search function.
Functions such as keyword search and filtering by purpose are very useful to help users find what they need
to know.
Energy Star®
As an ENERGY STAR® Partner, this machine meets the ENERGY STAR® Guidelines for energy efficiency.
What is an ENERGY STAR® Product?
An ENERGY STAR® product has a special feature that allows it to automatically switch to a "low-power
mode" after a period of inactivity. An ENERGY STAR
on utility bills and helps protect the environment.
bizhub C554e/C454e/C364e/C284e/C224e 1-3
®
product uses energy more efficiently, saves you money
Page 12

1
Environmental Information
1.1
Environmental benefits of power management
Electricity consumption of a device depends on both its properties and the way of using the device.
Suitable power management setting offers you resource saving usage way. By setting the time to go into
power saving modes (e.g. sleep mode) shorter (or optimal), electricity consumption can be reduced.
Recycled Paper
This product can print on recycled paper and environmental stewardship initiatives certified paper which
complies with European standard EN 12281 as well as virgin paper. In addition it can print on lighter paper,
64g/m2 for example. Using such light paper contributes to resources-saving.
Duplex printing
With a product which has a duplex unit, you can print on both sides of paper automatically.
Using this function leads to reducing consumption of natural resources and your cost.
Attached printer driver provides this duplex printing function as initial setting in your computer (The setting
can be changed after installation manually).
1-4 bizhub C554e/C454e/C364e/C284e/C224e
Page 13

1.2 Certification for USA, Canada, México, Brazil and Europe area
1.2 Certification for USA, Canada, México, Brazil and Europe area
For U.S.A
This product is certified by the following model name in U.S.A.
Konica Minolta branded model bizhub C554e, bizhub C454e, C302300 (bizhub C364e, bizhub C284e and
bizhub C224e), and bizhub C224e.
For Canada
This product is certified by the following model name in Canada.
Konica Minolta branded model bizhub C554e, bizhub C454e, C302300 (bizhub C364e, bizhub C284e and
bizhub C224e), and bizhub C224e.
For México
This product is certified by the following model name in México.
Konica Minolta branded model bizhub C554e, bizhub C454e, C302300 (bizhub C364e, bizhub C284e and
bizhub C224e), and bizhub C224e.
For Brazil
1
This product is certified by the following model name in Brazil.
Konica Minolta branded model bizhub C554e, bizhub C454e, C302300 (bizhub C364e, bizhub C284e and
bizhub C224e), and bizhub C224e.
For Europe
This product is certified by the following model name Europe.
Konica Minolta branded model bizhub C554e, bizhub C454e, C302300 (bizhub C364e, bizhub C284e and
bizhub C224e), and bizhub C224e.
bizhub C554e/C454e/C364e/C284e/C224e 1-5
Page 14
1
1.3 Safety information
This section contains detailed instructions on the operation and maintenance of this machine. To achieve optimum utility of this device, all operators should carefully read and follow the instructions in this manual.
Please read the following section before connecting the machine to the supply. It contains important information related to user safety and preventing equipment problems.
Make sure you observe all of the precautions appear in each section of this manual.
KM_Ver.07D_OE
Reference
- Some parts of the contents of this section may not correspond with the purchased product.
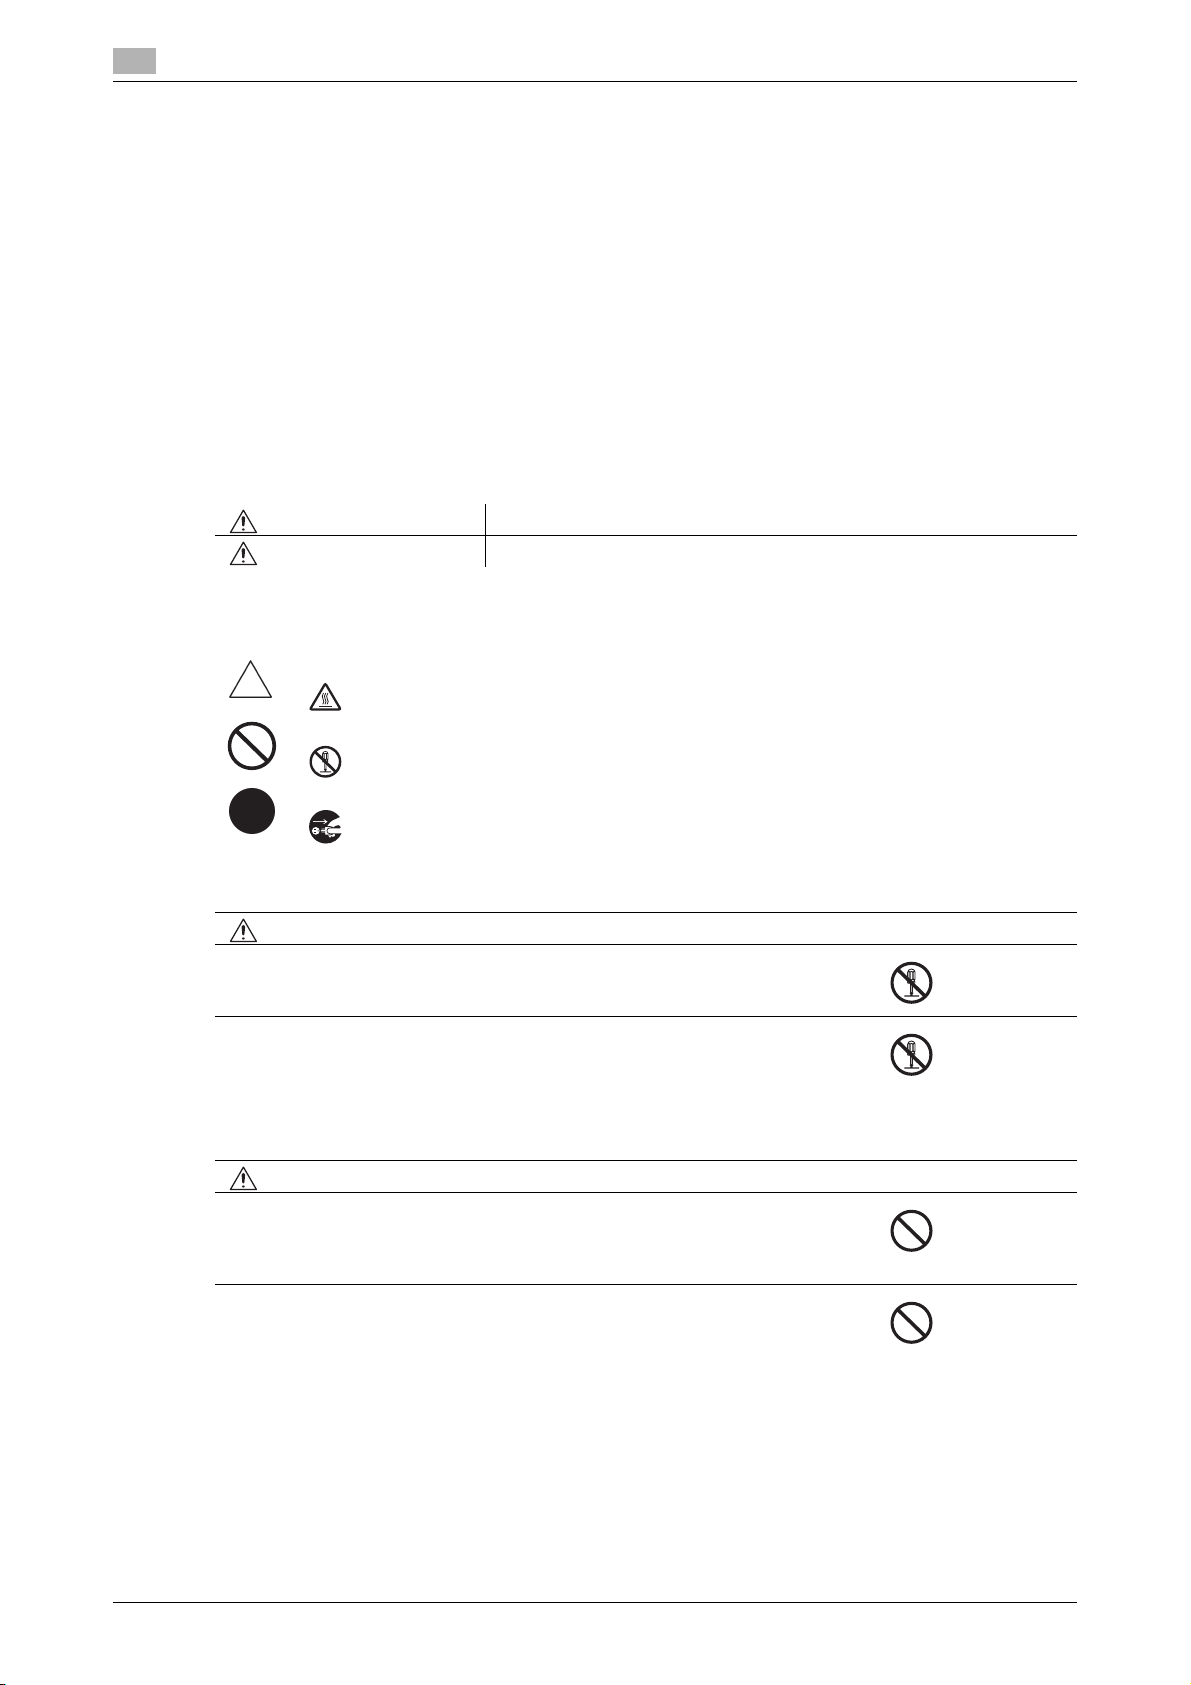
Warning and precaution symbols
The following indicators are used on the warning labels or in the manuals to categorize the level of safety
warnings.
WARNING Ignoring this warning could cause serious injury or even death.
CAUTION Ignoring this caution could cause injury or damage to property.
Meaning of symbols
Safety information
1.3
A triangle indicates a danger against which you should take precaution.
This symbol warns against cause burns.
A diagonal line indicates a prohibited course of action.
This symbol warns against dismantling the device.
A solid circle indicates an imperative course of action.
This symbol indicates you must unplug the device.
Disassemble and modification
WARNING
• Do not modify this product, as a fire, electrical shock, or breakdown could
result. If the product employs a laser, the laser beam source could cause
blindness.
• Do not attempt to remove the covers and panels which have been fixed to
the product. Some products have a high-voltage part or a laser beam source
inside that could cause an electrical shock or blindness.
Power cord
WARNING
• Use only the power cord supplied in the package. If a power cord is not supplied, only use the power cord and plug that is specified in POWER CORD
INSTRUCTION. Failure to use this cord could result in a fire or electrical
shock.
• Do not use the power cord other than being supplied in the package. If a
power cord is not supplied, only use the power cord and plug that is specified in POWER CORD INSTRUCTION. Failure to use this cord could result
in a fire or electrical shock.
1-6 bizhub C554e/C454e/C364e/C284e/C224e
Page 15
1.3 Safety information
Power cord
• Do not scratch, abrade, place a heavy object on, heat, twist, bend, pull on,
or damage the power cord. Use of a damaged power cord (exposed core
wire, broken wire, etc.) could result in a fire or breakdown.
Should any of these conditions be found, immediately turn OFF the power
switch, unplug the power cord from the power outlet, and then call your authorized service representative.
Power source
WARNING
• Do not use the power source voltage other than being specified on the machine. Failure to do that could result in a fire or electrical shock.
• Do not use a multiple outlet adapter to connect any other appliances or machines.
Use of a power outlet for more than the marked current value could result in
a fire or electrical shock.
• Do not use an extension cord in principle. Use of an extension cord could
cause a fire or electrical shock. Contact your authorized service representative if an extension cord is required.
CAUTION
• The outlet must be near the equipment and easily accessible. Otherwise you
can not pull out the power plug when an emergency occurs.
1
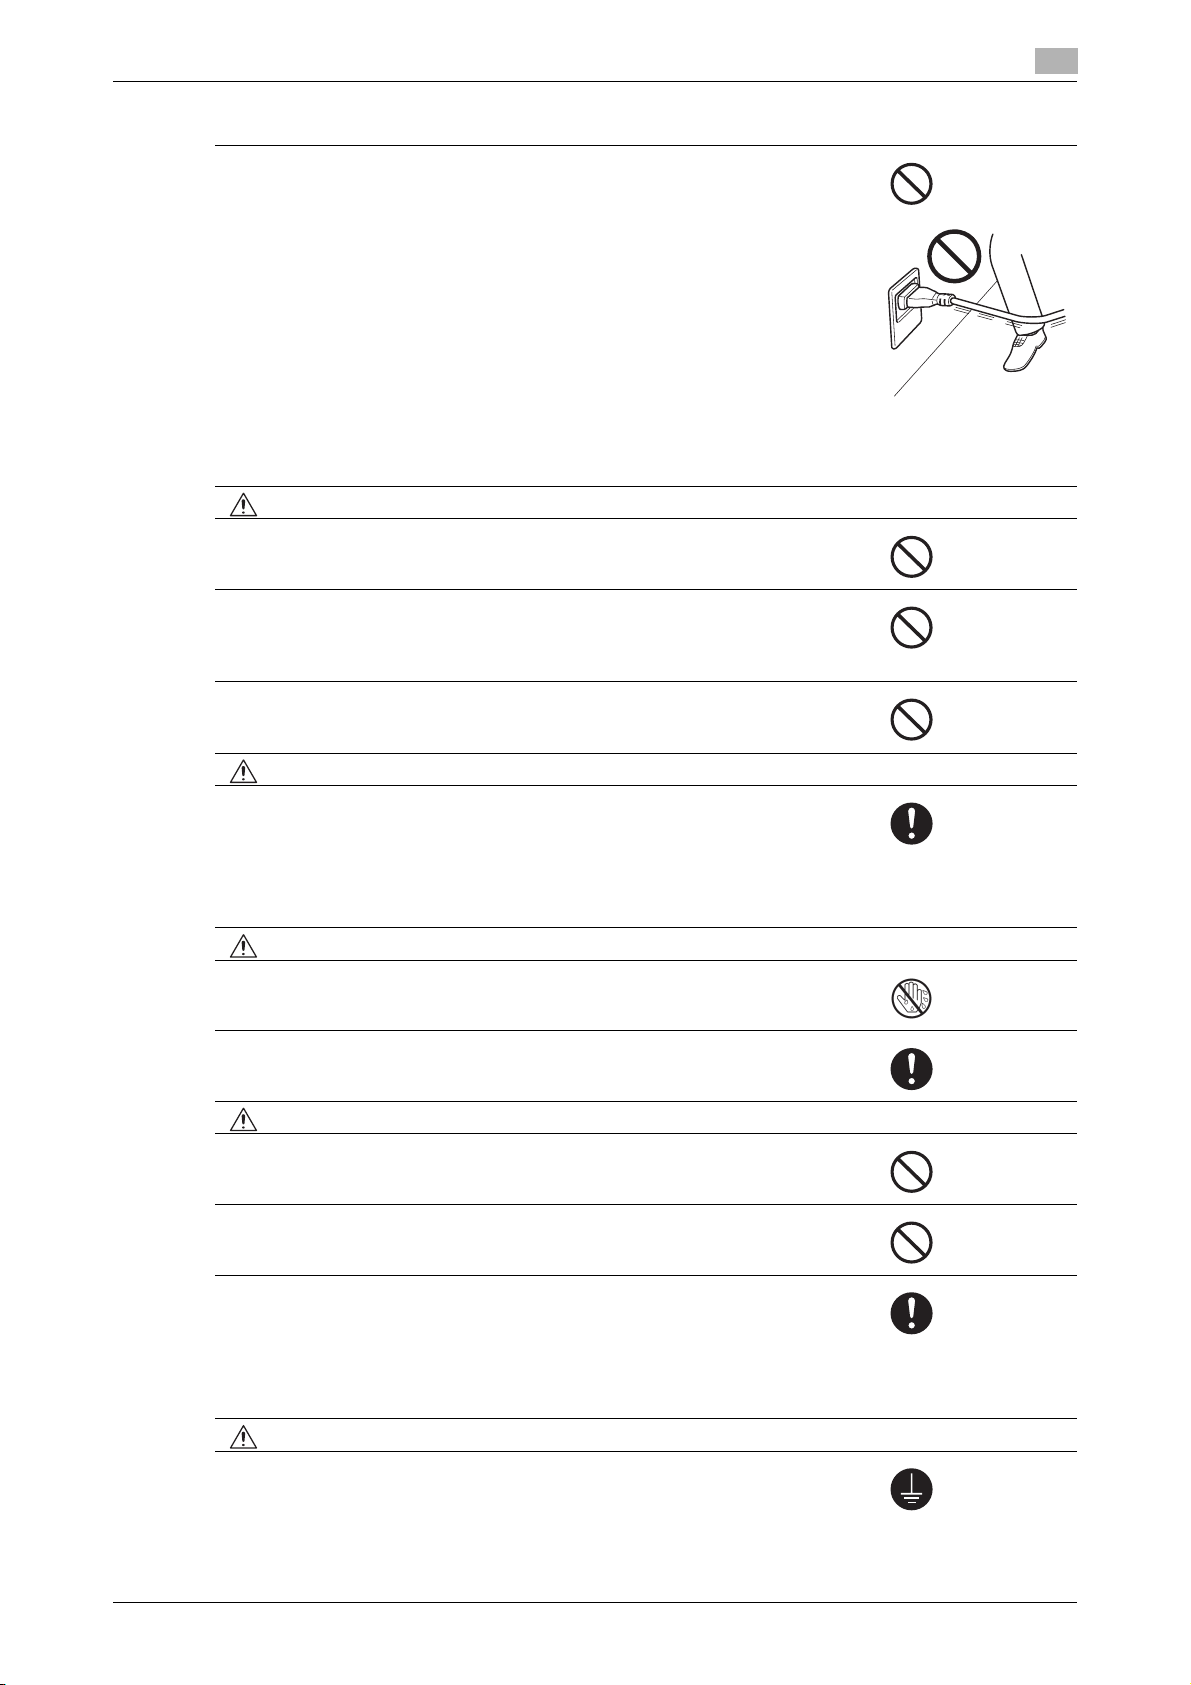
Power plug
WARNING
• Do not unplug and plug in the power cord with a wet hand, as an electrical
shock could result.
• Plug the power cord all the way into the power outlet. Failure to do this could
result in a fire or electrical shock.
CAUTION
• Do not place any objects around the power plug, as the power plug may be
difficult to pull out when an emergency occurs.
• Do not tug the power cord when unplugging. Pulling on the power cord
could damage the cord, resulting in a fire or electrical shock.
• Remove the power plug from the outlet more than one time a year and clean
the area between the plug terminals. Dust that accumulates between the
plug terminals may cause a fire.
Grounding
WARNING
• Make sure to ground this product. (Connect the power cord to an electrical
outlet that is equipped with a grounding terminal.) Failure to do so and an
unlikely event of leakage could result in a fire or electrical shock.
bizhub C554e/C454e/C364e/C284e/C224e 1-7
Page 16
1
Installation
WARNING
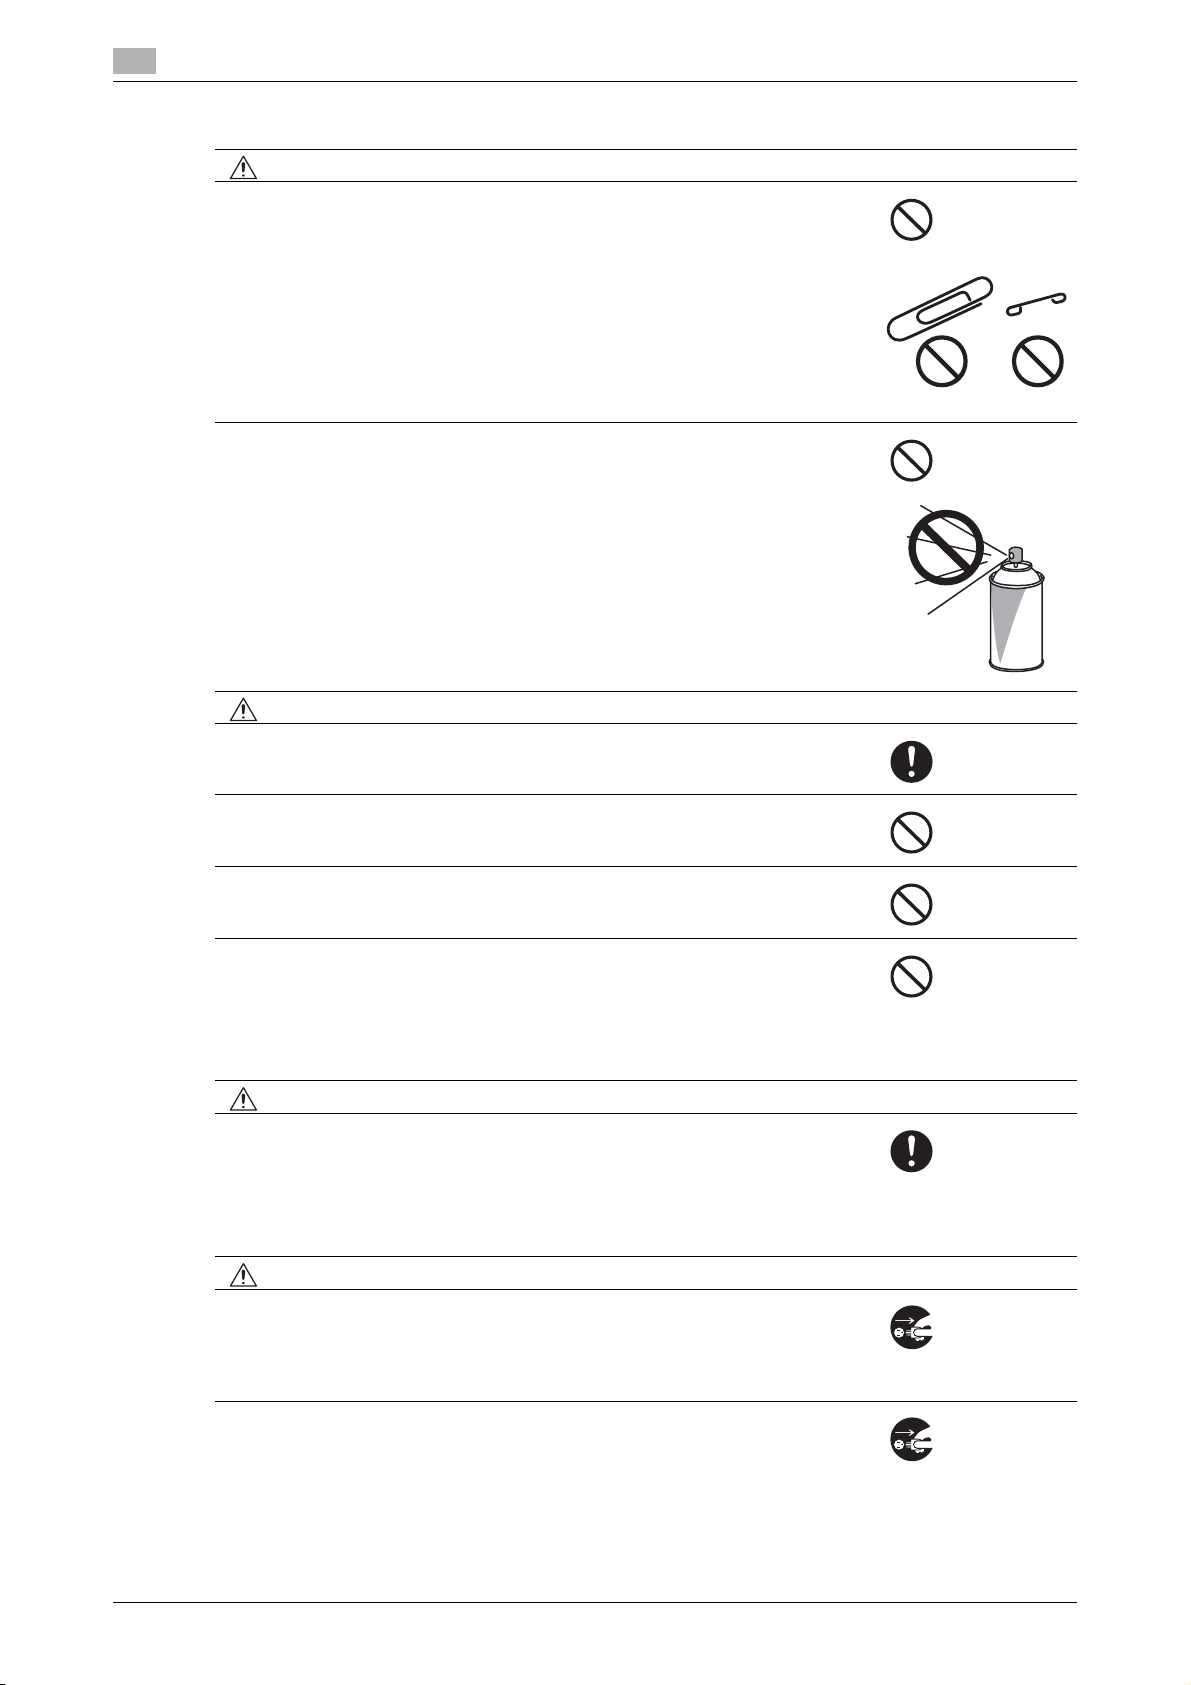
• Do not place a flower vase or other container that contains water, or metal
clips or other small metallic objects on this product. Spilled water or metallic
objects dropped inside the product could result in a fire, electrical shock, or
breakdown.
Should a piece of metal, water, or any other similar foreign matter get inside
the product, immediately turn OFF the power switch, unplug the power cord
from the power outlet, and then call your authorized service representative.
• Do not use flammable sprays, liquids, or gases inside or near this machine.
Do not clean the inside of this machine using a flammable gas duster. A fire
or explosion could result.
Safety information
1.3
CAUTION
• After installing this product, mount it on a secure base. If the unit moves or
falls, it may cause personal injury.
• Do not place the product in a dusty place, or a site exposed to soot or
steam, near a kitchen table, bath, or a humidifier. A fire, electrical shock, or
breakdown could result.
• Do not place this product on an unstable or tilted bench, or in a location subject to a lot of vibration and shock. It could drop or fall, causing personal injury or mechanical breakdown.
• Do not let any object plug the ventilation holes of this product. Heat could
accumulate inside the product, resulting in a fire or malfunction.
Ventilation
CAUTION
• Using this product in a poorly ventilated room for a long time or producing
a large volume of copies or prints may cause the odor of exhaust air from
the machine. Ventilate the room well.
Actions in response to troubles
WARNING
• Do not keep using this product, if this product becomes inordinately hot or
emits smoke, or unusual odor or noise. Immediately turn OFF the power
switch, unplug the power cord from the power outlet, and then call your authorized service representative. If you keep on using it as is, a fire or electrical shock could result.
• Do not keep using this product, if this product has been dropped or its cover
damaged. Immediately turn OFF the power switch, unplug the power cord
from the power outlet, and then call your authorized service representative.
If you keep on using it as is, a fire or electrical shock could result.
1-8 bizhub C554e/C454e/C364e/C284e/C224e
Page 17
1.3 Safety information
Actions in response to troubles
CAUTION
• The inside of this product has areas subject to high temperature, which may
cause burns.
When checking the inside of the unit for malfunctions such as a paper misfeed, do not touch the locations (around the fusing unit, etc.) which are indicated by a "Caution HOT" caution label.
Consumables
WARNING
• Do not throw the toner cartridge or toner into an open flame. The hot toner
may scatter and cause burns or other damage.
CAUTION
• Do not leave toner-related parts (toner units, PC drum units, imaging units
or developing units) within easy reach of children. Licking any of these parts
or ingesting toner could damage your health.
• Do not store toner-related parts (toner units, PC drum units, imaging units
or developing units) near devices susceptible to magnetism, such as precision equipment and data storage devices, otherwise they may malfunction.
They could cause these products to malfunction.
1
When moving the machine
CAUTION
• Whenever moving this product, be sure to disconnect the power cord and
other cables. Failure to do this could damage the cord or cable, resulting in
a fire, electrical shock, or breakdown.
• When moving this product, always hold it at the locations specified in the
User’s Guide or other documents. If the unit is moved while held at locations
other than those specified, it may fall, causing severe personal injury.
When using the machine
CAUTION
• When using the machine, do not look at the light of the lamp for a prolonged
time. Eyestrain could result.
Papers
CAUTION
• Do not use stapled paper, conductive paper (such as silver paper or carbon
paper) or treated heat-sensitive/inkjet paper, otherwise a fire may result.
When the Fax is not installed:
Before successive holidays
CAUTION
• Unplug the product when you will not use the product for long periods of
time.
bizhub C554e/C454e/C364e/C284e/C224e 1-9
Page 18

1
1.4 Regulation notices
CE Marking (Declaration of Conformity) for users of the European Union (EU)
This product complies with the following EU directives:
2009/125/EC, 2006/95/EC, 2004/108/EC and 1999/5/EC directives.
This declaration is valid for the area of the European Union.
This device must be used with a shielded interface cable. The use of non-shielded cables is likely to result in
interference with radio communications and is prohibited under CISPR rules and local rules.
D.o.C. is available at "http://www.konicaminolta.eu/".
USER INSTRUCTIONS FCC PART 15 - RADIO FREQUENCY DEVICES (for U.S.A. users)
NOTE: This equipment has been tested and found to comply with the limits for a Class A digital device, pursuant to Part 15 of the FCC Rules.
These limits are designed to provide reasonable protection against harmful interference when the equipment
is operated in a commercial environment. This equipment generates, uses and can radiate radio frequency
energy and, if not installed and used in accordance with the instruction manual, may cause harmful interference to radio communications. Operation of this equipment in a residential area is likely to cause harmful interference in which case the user will be required to correct the interference at his own expense.
Regulation notices
1.4
7 WARNING
- The design and production of this unit conform to FCC regulations, and any changes or modifications
must be registered with the FCC and are subject to FCC control. Any changes made by the purchaser
or user without first contacting the manufacturer will be subject to penalty under FCC regulations.
- This device must be used with a shielded interface cable. The use of non-shielded cables is likely to
result in interference with radio communications and is prohibited under FCC rules.
INTERFERENCE-CAUSING EQUIPMENT STANDARD (ICES-003 ISSUE 4) (for Canada users)
This Class A digital apparatus complies with Canadian ICES-003.
Cet appareil numérique de la classe A est conforme à la norme NMB-003 du Canada.
For users in countries not subject to class B regulations
7 WARNING
- This is a Class A product. In a domestic environment this product may cause radio interference in which
case the user may be required to take adequate measures.
- This device must be used with a shielded interface cable. The use of non-shielded cables is likely to
result in interference with radio communications and is prohibited under CISPR rules and local rules.
GS Certification
Konica Minolta branded model bizhub C554e, bizhub C454e, C302300 (bizhub C364e, bizhub C284e and
bizhub C224e), and bizhub C224e.
Laser safety
This is a digital machine which operates using a laser. There is no possibility of danger from the laser provided
the machine is operated according to the instructions in the manuals.
Since radiation emitted by the laser is completely confined within protective housing, the laser beam cannot
escape from the machine during any phase of user operation.
This machine is certified as a Class 1 laser product per IEC 60825-1: 2007: This means the machine does not
produce hazardous laser radiation.
1-10 bizhub C554e/C454e/C364e/C284e/C224e
Page 19
1.4 Regulation notices
Laser Aperture of
the Print Head Unit
Print Head
Internal laser radiation
Maximum Average Radiation Power: 11.2 μW (bizhub C554e) / 9.4 μW (bizhub C454e) / 7.4 μW (C302300
(bizhub C364e, bizhub C284e and bizhub C224e)) at the laser aperture of the print head unit.
Wavelength: 770-800 nm
This product employs a Class 3B laser diode that emits an invisible laser beam.
The laser diode and the scanning polygon mirror are incorporated in the print head unit.
The print head unit is NOT A FIELD SERVICE ITEM:
Therefore, the print head unit should not be opened under any circumstances.
1
CDRH regulations
This machine is certified as a Class 1 Laser product under Radiation Performance Standard according to the
Food, Drug and Cosmetic Act of 1990. Compliance is mandatory for Laser products marketed in the United
States and is reported to the Center for Devices and Radiological Health (CDRH) of the U.S. Food and Drug
Administration of the U.S. Department of Health and Human Services (DHHS). This means that the device
does not produce hazardous laser radiation.
The label shown on page 1-13 indicates compliance with the CDRH regulations and must be attached to laser products marketed in the United States.
7 CAUTION
Use of controls, adjustments or performance of procedures other than those specified in this manual
may result in hazardous radiation exposure.
- This is a semiconductor laser. The maximum power of the laser diode is 20 mW and the wavelength is
770-800 nm.
For European users
7 CAUTION
Use of controls, adjustments or performance of procedures other than those specified in this manual
may result in hazardous radiation exposure.
- This is a semiconductor laser. The maximum power of the laser diode is 20 mW and the wavelength is
770-800 nm.
bizhub C554e/C454e/C364e/C284e/C224e 1-11
Page 20

1
Regulation notices
1.4
For Denmark users
7 ADVARSEL
Usynlig laserstråling ved åbning, når sikkerhedsafbrydere er ude af funktion. Undgå udsættelse for
stråling. Klasse 1 laser produkt der opfylder IEC60825 sikkerheds kravene.
- Dette er en halvlederlaser. Laserdiodens højeste styrke er 20 mW og bølgelængden er 770-800 nm.
For Finland, Sweden users
LOUKAN 1 LASERLAITE
KLASS 1 LASER APPARAT
7 VAROITUS
Laitteen Käyttäminen muulla kuin tässä käyttöohjeessa mainitulla tavalla saattaa altistaa käyttäjän
turvallisuusluokan 1 ylittävälle näkymättömälle lasersäteilylle.
- Tämä on puolijohdelaser. Laserdiodin sunrin teho on 20 mW ja aallonpituus on 770-800 nm.
7 VARNING
Om apparaten används på annat sätt än i denna bruksanvisning specificerats, kan användaren utsättas för osynlig laserstrålning, som överskrider gränsen för laserklass 1.
- Det här är en halvledarlaser. Den maximala effekten för laserdioden är 20 mW och våglängden är 770-
800 nm.
7 VAROITUS
- Avattaessa ja suojalukitus ohitettaessa olet alttiina näkymättömälle lasersäteilylle. Älä katso säteeseen.
7 VARNING
- Osynlig laserstrålning när denna del är öppnad och spärren är urkopplad. Betrakta ej strålen.
For Norway users
7 ADVARSEL!
Dersom apparatet brukes på annen måte enn spesifisert i denne bruksanvisning, kan brukeren utsettes for unsynlig laserstråling som overskrider grensen for laser klass 1.
- Dette en halvleder laser. Maksimal effekt till laserdiode er 20 mW og bølgelengde er 770-800 nm.
1-12 bizhub C554e/C454e/C364e/C284e/C224e
Page 21
1.4 Regulation notices
bizhub C554e/C454e
Only for the U.S.A.
Only for Europe
Other Area
bizhub C364e/C284e/C224e
Only for the U.S.A.
Only for Europe
Other Area
Laser safety label
A laser safety label is attached to the outside of the machine, as shown below.
1
Ozone release
Locate the Machine in a Well-Ventilated Room
A negligible amount of ozone is generated during normal operation of this machine. An unpleasant odor may,
however, be created in poorly ventilated rooms during extensive machine operations. For a comfortable,
healthy and safe operating environment, it is recommended that the room be well ventilated.
Placer l’appareil dans une pièce largement ventilée
Une quantité d’ozone négligable est dégagée pendant le fonctionnement de l’appareil quand celui-ci est utilisé normalement. Cependant, une odeur désagréable peut être ressentie dans les pièces dont l’aération est
insuffisante et lorsque une utilisation prolongée de l’appareil est effectuée. Pour avoir la certitude de travailler
dans un environnment réunissant des conditions de confort, santé et de sécurité, il est préférable de bien
aérer la pièce ou se trouve l’appareil.
Acoustic noise (for European users only)
Der höchste Schalldruckpegel beträgt 70 dB(A) oder weniger gemäß EN ISO 7779.
For EU member states only
This symbol means: Do not dispose of this product together with your household
waste!
Please refer to the information of your local community or contact our dealers regrading the proper handling of end-of-life electric and electronic equipments. Recycling of this product will help to conserve natural resources and prevent
potential negative consequences for the environment and human health caused
by inappropriate waste handling.
This product complies with RoHS (2011/65/EU) Directive.
bizhub C554e/C454e/C364e/C284e/C224e 1-13
Page 22
1
Regulation notices
1.4
Telephone Cable (For users in countries subject to class B regulations)
Connect a telephone cable with a ferrite core to the telecommunication port of this machine. (Connect the
modular jack on the ferrite-core-equipped end of the telephone cable to the telecommunication port.)
1-14 bizhub C554e/C454e/C364e/C284e/C224e
Page 23
1.5 Caution notations and labels
1.5 Caution notations and labels
Safety precaution notations and labels appear on this machine at the following positions.Be very careful that
an accident does not occur when operations such as removing paper jams and staple jams are performed.
1
NOTICE
Do not remove caution labels or notations. If any caution label or caution notation is soiled, please clean to
make legible. If you cannot make them legible, or if the caution label or notation is damaged, please contact
your service representative.
bizhub C554e/C454e/C364e/C284e/C224e 1-15
Page 24

1
1.6 Special Notice to User
For Europe
The Facsimile has been approved in accordance with Council Decision 1999/5/ EC for pan-European single
terminal connection to the public switched telephone network (PSTN). However, due to differences between
the individual PSTNs provided in different countries, the approval does not, of itself, give an unconditional
assurance of successful operation on every PSTN network terminal point.
In the event of problems, you should contact your equipment
supplier in the first instance.
Special Notice to User
1.6
1-16 bizhub C554e/C454e/C364e/C284e/C224e
Page 25

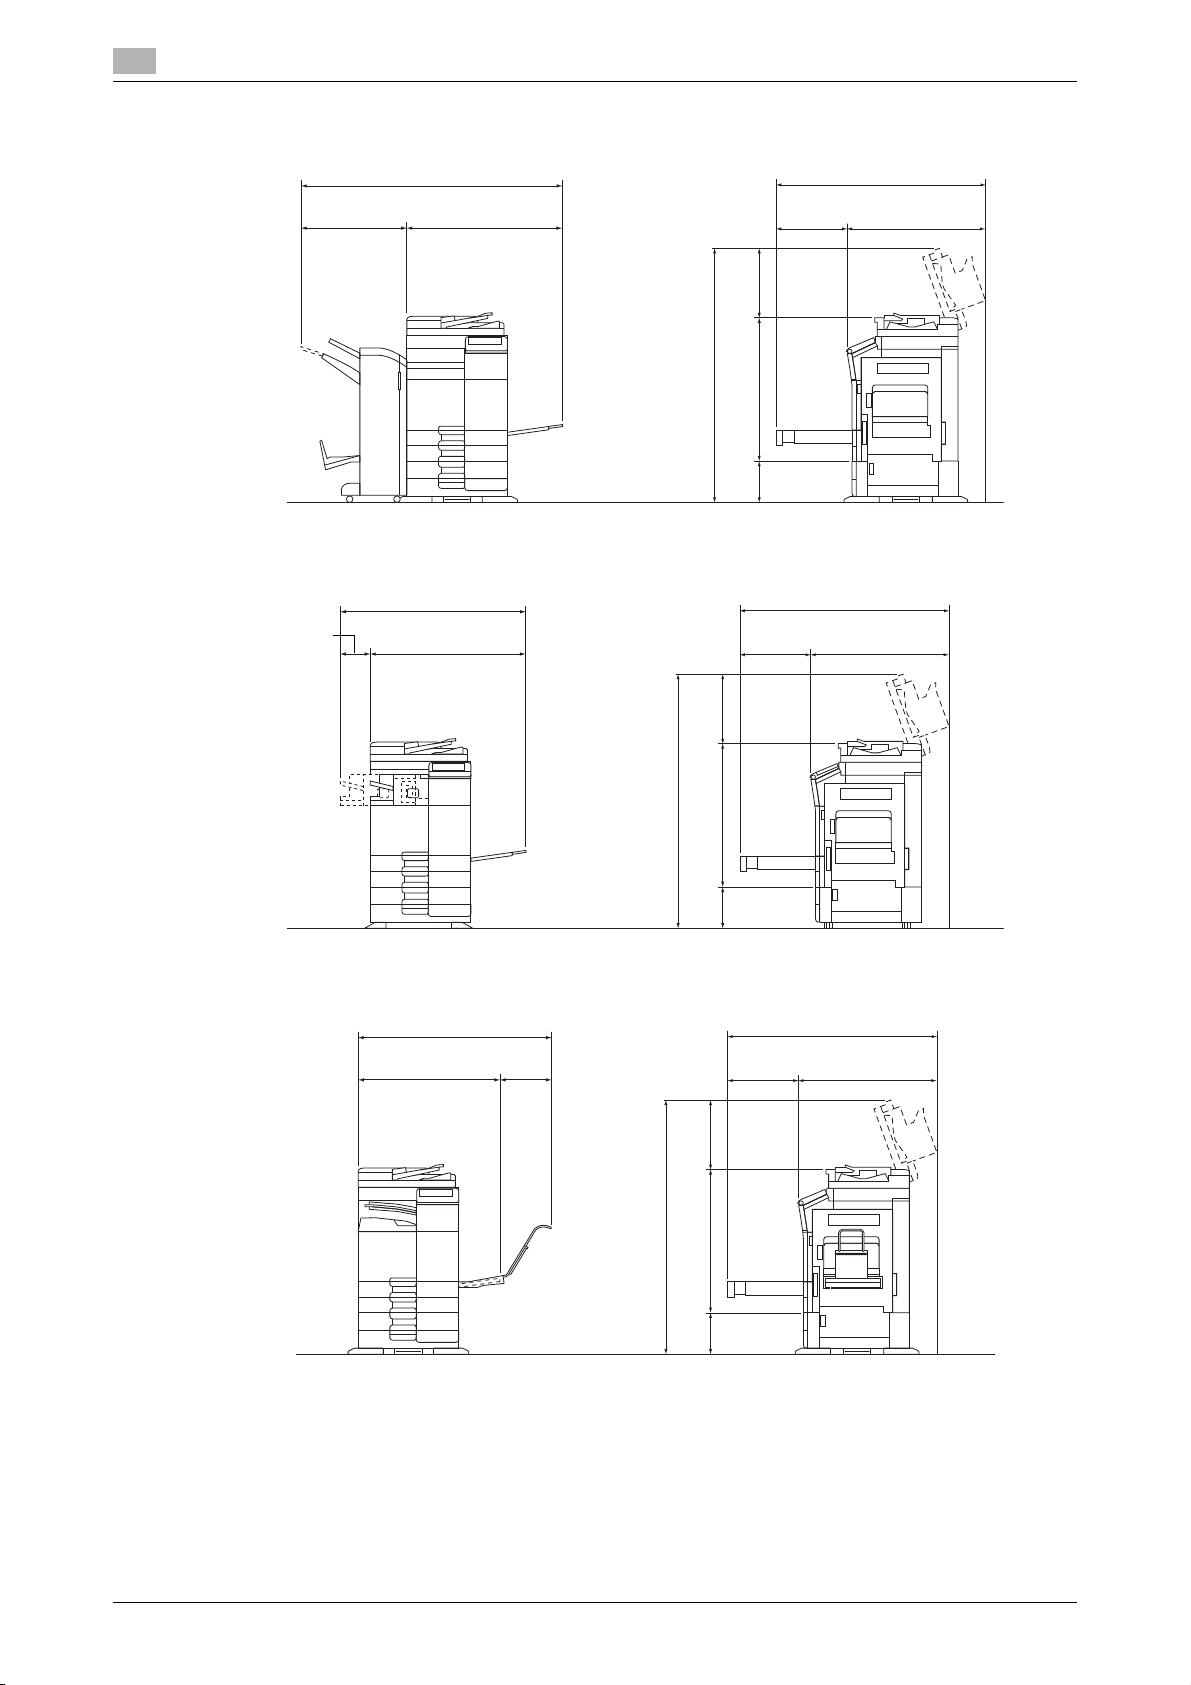
1.7 Space requirements
bizhub C554e+PC-210+FS-535+SD-512+ZU-606+PI-505+LU-204
100-3/8 (2548) 49-1/16 (1246)
61-1/8 (1553)
36-1/4 (921)
15-3/16
(386)
34-11/16 (881) 49 (1244)
9-3/8
(238)
16-7/8
(428)
32-3/16 (818)
7-5/16
(185)
Unit: inch (mm)
9-11/16
(246)
bizhub C554e/C454e+PC-210+FS-534+SD-511+LU-301
80-3/8 (2041) 49-1/16 (1246)
61-1/8 (1553)
36-1/4 (921)
15-3/16
(386)
25-7/8 (658) 38-11/16 (982)
15-13/16
(401)
16-7/8
(428)
32-3/16 (818)
Unit: inch (mm)
9-11/16
(246)
bizhub C554e/C454e+PC-210+FS-533+MK-730
52-7/16 (1332)
49-1/16 (1246)
61-1/8 (1553)
36-1/4 (921)
15-3/16
(386)
6-11/16
(170)
34-1/8 (867)
11-5/8
(295)
16-7/8
(428)
32-3/16 (818)
Unit: inch (mm)
9-11/16
(246)
1.7 Space requirements
To ensure that machine operation, consumables replenishing, part replacement, and regular maintenance
can easily be performed, adhere to the recommended space requirements detailed below.
bizhub C554e/C454e
1
bizhub C554e/C454e/C364e/C284e/C224e 1-17
Page 26
1
bizhub C364e/C284e/C224e + DF-624 + PC-210 + FS-534 + SD-511
62-7/8 (1597)
26 (660) 36-7/8 (937)
Unit: inch (mm)
48-13/16 (1240)
61 (1550)
35-11/16 (906)
15-11/16
(398)
16-7/8
(428)
31-15/16 (812)
9-11/16
(246)
bizhub C364e/C284e/C224e + DF-624 + PC-210 + FS-533
36-7/8 (937)6-11/16
(170)
43-9/16 (1107)
Unit: inch (mm)
48-13/16 (1240)
61 (1550)
35-11/16 (906)
15-11/16
(398)
16-7/8
(428)
31-15/16 (812)
9-11/16
(246)
bizhub C364e/C284e/C224e + DF-624 + PC-210 + JS-506 + MK-730
34-1/8 (867)
11-5/8
(295)
45-3/4 (1162)
Unit: inch (mm)
48-13/16 (1240)
61 (1550)
35-11/16
15-11/16
(398)
16-7/8
(428)
31-15/16 (812)
9-11/16
(246)
bizhub C364e/C284e/C224e
Space requirements
1.7
NOTICE
Be sure to allow a clearance of 8 inches (200 mm) or more at the back of this machine for the ventilation duct.
1-18 bizhub C554e/C454e/C364e/C284e/C224e
Page 27

1.8 Operation precautions
1.8 Operation precautions
To ensure the optimum performance of this machine, observe the precautions described below.
Power source
The power source requirements are as follows.
- Voltage fluctuation: Maximum ± 10% (at 110 V/120 V/220 to 240 V AC)
- Frequency fluctuation: Maximum ± 3 Hz (at 50 Hz/60 Hz)
– Use a power source with as little voltage or frequency fluctuations as possible.
Operating environment
The environmental requirements for correct operation of the machine are as follows.
- Temperature: 50°F (10°C) to 86°F (30°C) with fluctuations of no more than 18°F (10°C) within an hour
- Humidity: 15% to 85% with fluctuations of no more than 10% within an hour
Storage of copies
To store copies, follow the recommendation listed below.
- Copies that are to be kept for a long time should be kept where they are not exposed to light in order
to prevent them from fading.
- Adhesive that contains solvent (e.g., spray glue) may dissolve the toner on copies.
- Color copies have a thicker layer of toner than normal black-and-white copies. Therefore, when a color
copy is folded, the toner at the fold may peel off.
1
Data stored in this machine
For the machine with hard disk, it is suggested to delete all data stored in all hard disk areas using the overwrite all data function to prevent leakage of data prior to transfer or disposal of the machine, or returning of
the leased machine.
For details of the overwrite all data function, refer to the DVD. Contact your service representative before deleting data.
It is recommended to backup HDD periodically as the measures for HDD defect. For the detail information of
HDD backup, contact your service representative.
bizhub C554e/C454e/C364e/C284e/C224e 1-19
Page 28

1
1.9 Legal restrictions on copying
Certain types of originals must never be copied with the purpose or intent to pass copies of such originals
off as the originals.
The following is not a complete list, but is meant to be used as a guide to responsible copying.
<Financial Instruments>
- Personal checks
- Traveler’s checks
- Money orders
- Certificates of deposit
- Bonds or other certificates of indebtedness
- Stock certificates
<Legal Originals>
- Food stamps
- Postage stamps (canceled or uncanceled)
- Checks or drafts drawn by government agencies
- Internal revenue stamps (canceled or uncanceled)
- Passports
- Immigration papers
- Motor vehicle licenses and titles
- House and property titles and deeds
<General>
- Identification cards, badges, or insignias
- Copyrighted works without permission of the copyright owner
In addition, it is prohibited under any circumstances to copy domestic or foreign currencies, or works of art
without permission of the copyright owner.
When in doubt about the nature of an original, consult with legal counsel.
NOTICE
This machine provides the forgery prevention function in order to prevent financial instruments from being
copied illegally.
We appreciate your understanding that printed images may infrequently have some noise or image data may
not be stored under certain circumstances due to this forgery prevention function.
Legal restrictions on copying
1.9
1-20 bizhub C554e/C454e/C364e/C284e/C224e
Page 29

1.10 Trademark acknowledgements
1.10 Trademark acknowledgements
KONICA MINOLTA, the KONICA MINOLTA logo, Giving Shape to Ideas, PageScope, and bizhub are registered trademarks or trademarks of KONICA MINOLTA, INC.
Netscape is a registered trademark of Netscape Communications Corporation in the United States and other
countries.
Mozilla and Firefox are trademarks of the Mozilla Foundation.
Novell and Novell NetWare are registered trademarks of Novell, Inc. in the United States and other countries.
Microsoft, Windows, Windows Vista, Windows 7, and Windows 8 are either registered trademarks or trademarks of Microsoft Corporation in the United States and/or other countries.
PowerPC is a trademark of IBM Corporation in the United States, or other countries, or both.
In regard to the Citrix Technology Member
KONICA MINOLTA, INC. is a Citrix Technology Member
The Citrix Technology Member is a program that, in combination with a solution of Citrix, promotes and develops solutions in order to be an industry leader in providing customers with better solutions.
XenApp
Apple, Macintosh and Mac OS are registered trademarks of Apple Computer, Inc. Safari is a trademark of
Apple Computer, Inc.
Adobe, the Adobe logo, Acrobat and PostScript are either registered trademarks or trademarks of Adobe
Systems Incorporated in the United States and/or other countries.
Ethernet is a registered trademark of Xerox Corporation.
PCL is a registered trademark of Hewlett-Packard Company Limited.
CUPS and CUPS logo are registered trademark of Easy Software Products.
This machine and PageScope Box Operator are based in part on the work of the Independent JPEG Group.
Compact-VJE
Copyright 1986-2009 Yahoo Japan Corp.
RC4
RSA and BSAFE are registered trademarks or trademarks of EMC Corporation in the United States and other
countries.
TM
, Citrix XenServerTM and Citrix Presentation ServerTM are trademarks of Citrix
®
is a registered trademark or trademark of EMC Corporation in the United States and/or other countries.
1
®
License information
[This product/Product name] includes RSA BSAFE Cryptographic software from EMC Corporation.
Advanced Wnn
"Advanced Wnn"© OMRON SOFTWARE CO., Ltd. 2006 All Rights Reserved.
ABBYY and FineReader are registered trade marks of ABBYY Software House.
Copyright © Extended Systems, Inc., 2000-2005.
Portions copyright ©iAnywhere Solutions, Inc.,
and Sybase, an SAP Company 2005-2012.
All rights reserved.
ThinPrint is a registered trademark or trademark of Cortado AG in Germany and other countries.
bizhub C554e/C454e/C364e/C284e/C224e 1-21
Page 30

1
Trademark acknowledgements
All other product and brand names are trademarks or registered trademarks of their respective companies or
organizations.
1.10
Copyright
KONICA MINOLTA, INC. maintains the copyright of the printer drivers.
© 2013 KONICA MINOLTA, INC. All Rights Reserved.
Note
User's Guide may not be reproduced in part or in full without permission.
KONICA MINOLTA, INC. will not be held liable for any incidents caused by using this printing system or User's Guide.
Information included in User's Guide is subject to change without notice.
1-22 bizhub C554e/C454e/C364e/C284e/C224e
Page 31

1.11 Software End User License Agreement
1.11 Software End User License Agreement
PLEASE READ CAREFULLY THE LICENSE AGREEMENT BELOW BEFORE DOWNLOADING, INSTALLING
OR USING THE SOFTWARE. DOWNLOADING, INSTALLING OR USING THE SOFTWARE SHALL BE
DEEMED YOUR LAWFUL ACCEPTANCE OF THE TERMS AND CONDITIONS BELOW. IF YOU DO NOT
AGREE TO THEM, DO NOT DOWNLOAD, INSTALL, NOR USE THE SOFTWARE.
1. SOFTWARE
"Software" means this computer program (software), independent from its distribution channel, i.e.
whether downloaded on royalty-free basis (which may include digitally encoded, machine readable,
scalable outline font data as encoded in a special format) or obtained on DVD or any other physical data
carrier, together with all codes, techniques, software tools, format, design, concepts, methods and ideas associated with the computer program and all documentation related thereto.
2. COPYRIGHT AND INTELLECTUAL PROPERTY RIGHTS
This is a license agreement and not an agreement for sale. Konica Minolta Business Solutions Europe
GmbH ("Konica Minolta") owns, or has been licensed from other owners ("Konica Minolta Licensor"),
copyrights and other intellectual property rights of the Software, and any and all rights and title to the
Software and any copy made from it are retained by Konica Minolta or Konica Minolta Licensor. In no
event, this Agreement shall be deemed to assign any copyright and/or any intellectual property rights
of the Software from Konica Minolta or Konica Minolta Licensor to you. Except as stated in this Agreement, you are not granted any rights to patents, copyrights, trade names, trademarks (whether registered or unregistered), or any other rights, franchises or licenses in respect of the Software. The
Software is protected by copyright laws and international treaty provisions.
3. LICENSE
Konica Minolta hereby grants to you, and you agree to accept a non-exclusive, non-transferable and
limited license, and you may:
(i) install and use the Software only on your computer(s) connected via inhouse network with a product
for which this Software is designed;
(ii) allow users of the computers described above to use the Software, provided that you assure that all
such users comply with the terms of this Agreement;
(iii) use the Software only for your own customary business or personal purpose;
(iv) make one copy of the Software only for backup or installation purpose in the support of the normal
and intended use of the Software;
(v) transfer the Software to other party by transferring a copy of this Agreement and all documentation
along with the Software, provided that (a) you must, at the same time, either transfer to such other party
or destroy all your other copies of the Software, (b) such transfer of possession terminates your license
from Konica Minolta, and (c) you must assure that such other party has agreed to accept and be bound
by the terms and conditions of this Agreement. If such other party does not accept such terms and conditions then you shall not transfer any copy of the Software.
4. RESTRICTIONS
(1) You must not without the prior written consent of Konica Minolta:
(i) use, copy, modify, merge or transfer copies of the Software except as provided herein;
(ii) reverse engineer, reverse assemble, reverse compile or any other way analyze the Software except
permitted by law;
(iii) sublicense, rent, lease or distribute the Software or any copy thereof; or
(iv) remove, use, or alter any trademark, logo, copyright or other proprietary notices, legends, symbols
or labels in the Software.
(2) You agree that you will not export the Software in any form in violation of any applicable laws and
regulations regarding export control of any country.
5. LIMITED WARRANTIES
The Software is provided to you “as is” without any warranties whatsoever. The express terms of this
Agreement are in lieu of all other warranties, express or implied and Konica Minolta, its affiliate companies and Konica Minolta Licensor disclaim all warranties with regard to the Software, express or implied,
including, without limitation, implied warranties of merchantability, fitness for a particular purpose and
non-infringement of third party rights. The disclaimer of warranty hereunder does not affect your statutory rights. In case of the disclaimer is not allowed by applicable law, the disclaimer shall only apply
to you to the maximum extent permitted by the law.
6. LIMITATION OF REMEDIES
In no event will Konica Minolta, its affiliate companies nor Konica Minolta Licensor be liable for any lost
profits, lost data, or any other indirect, special, punitive, incidental or consequential damages that result
from use or inability to use the Software, even if Konica Minolta, its affiliate companies, its authorized
remarketers or Konica Minolta Licensor have been advised of the possibility of such damages or for any
claim by you based on a third party claim.
1
bizhub C554e/C454e/C364e/C284e/C224e 1-23
Page 32

1
Software End User License Agreement
7. TERMINATION
You may terminate this license at any time by destroying the Software and all your copies of it. This
Agreement shall also terminate if you fail to comply with any terms hereof. Upon such termination, you
must immediately destroy all copies of the Software in your possession.
8. GOVERNING LAW
This Agreement shall be governed by the laws of the country where the delivery is made to the original
customer.
9. SEVERABILITY
In the event that any part or parts of this Agreement shall be held illegal or null and void by any court or
administrative body of competent jurisdiction, such determination shall not affect the remaining parts
of this Agreement and they shall remain in full force and effect as if such part or parts determined illegal
or void had not been included.
10. NOTICE TO US GOVERNMENT END USERS
The Software is a "commercial item," as that term is defined at 48 C.F.R. 2.101 (October 1995), consisting of "commercial computer software" and "commercial computer software documentation," as
such terms are used in 48 C.F.R. 12.212 (September 1995). Consistent with 48 C.F.R. 12.212 and 48
C.F.R. 227.7202-1 through 227.7202-4 (June 1995), all U.S. Government End Users shall acquire the
Software with only those rights set forth herein.
YOU ACKNOWLEDGE THAT YOU HAVE READ THIS AGREEMENT, UNDERSTAND IT, AND AGREE TO BE
BOUND BY ITS TERMS AND CONDITIONS. NEITHER PARTY SHALL BE BOUND BY ANY OTHER STATEMENTS OR REPRESENTATIONS THAT ARE INCONSISTENT WITH THE TERMS AND CONDITIONS OF
THIS AGREEMENT. NO AMENDMENT TO THIS AGREEMENT IS EFFECTIVE UNLESS IN WRITING AND
SIGNED BY DULY AUTHORIZED REPRESENTATIVES OF EACH PARTY.
1.11
1-24 bizhub C554e/C454e/C364e/C284e/C224e
Page 33

1.12 i-Option LK-105 v3 (searchable PDFs) End User License Agreement
1.12 i-Option LK-105 v3 (searchable PDFs) End User License Agreement
Subject to your purchase of a license key of i-Option LK-105 v3 (searchable PDFs, or "Program"), KONICA
MINOLTA, INC. (KM) grants you a non-exclusive and non-transferable sublicense to use the Program provided that you comply with all terms and conditions stated in this Agreement.
1. You agree not to reproduce, modify, or adapt the Program. You may not allow a third party to use the
Program or transfer it to a third party.
2. You agree that you will not attempt to alter, disassemble, decrypt, reverse engineer, or decompile the
Program.
3. KM or its licensor own the copyright and other intellectual property rights. No copyright or other intel-
lectual property rights shall be transferred to you through the granting to you of a license to use the
Program.
4. IN NO EVENT WILL KM OR ITS LICENSOR BE LIABLE TO YOU FOR ANY CONSEQUENTIAL, INCI-
DENTAL INDIRECT, PUNITIVE OR SPECIAL DAMAGES, INCLUDING ANY LOST PROFITS OR LOST
SAVING, EVEN IF KM HAS BEEN ADVISED OF THE POSSIBILITY OF SUCH DAMAGES, OR FOR ANY
CLAIM BY ANY THIRD PARTY. KM OR ITS LICENSOR DISCLAIMS ALL WARRANTIES WITH REGARD
TO THE PROGRAM, EXPRESS OR IMPLIED, INCLUDING, WITHOUT LIMITATION IMPLIED WARRANTIES OF MERCHANTABILITY, FITNESS FOR A PARTICULAR PURPOSE, TITLE AND NON-INFRINGEMENT OF THIRD PARTY RIGHTS. SOME STATES OR JURISDICTIONS DO NOT ALLOW THE
EXCLUSION OR LIMITATION OF INCIDENTAL, CONSEQUENTIAL OR SPECIAL DAMAGES, SO THE
ABOVE LIMITATIONS MAY NOT APPLY TO YOU.
5. You agree that you will not export the Program in any form in violation of any applicable laws and reg-
ulations regarding export control of any countries.
6. Notice to Government End Users (this provision shall apply to U.S. government end users only) The Pro-
gram is a "commercial item," as that term is defined at 48 C.F.R.2.101, consisting of "commercial computer software" and "commercial computer software documentation," as such terms are used in 48
C.F.R. 12.212. Consistent with 48 C.F.R. 12.212 and 48 C.F.R. 227.7202-1 through 227.7202-4, all U.S.
Government End Users acquire the Program with only those rights set forth herein.
7. This license shall automatically terminate upon a failure on your part to comply with any term or condi-
tion of this Agreement, in which case you agree to immediately stop use of the Program.
8. This Agreement shall be governed by the laws of Japan.
1
bizhub C554e/C454e/C364e/C284e/C224e 1-25
Page 34

1
i-Option LK-105 v3 (searchable PDFs) End User License Agreement
1.12
1-26 bizhub C554e/C454e/C364e/C284e/C224e
Page 35

2
About This Machine
Page 36

Page 37

2.1 Intended use of office MFP devices
2 About This Machine
2.1 Intended use of office MFP devices
Intended use
This Multi Function Product incorporates the functionality of multiple office devices in one. It is designed to
be used as an office system for the following purposes:
- Print, copy, scan and fax documents.
- Use available finishing functions such as duplexing, stapling, hole-punching and booklet creation if ap-
propriate options are installed.
- Store scanned documents on external USB memory devices; send scanned documents to network
scan destinations such as FTP, WebDAV and Email.
The intended use also requires that:
- The system is used within the limits of device specifications and specifications of optional components,
- All safety instructions in the related user’s guides are observed,
- Legal restrictions on copying (see page 1-20) are observed,
- Inspection and maintenance instructions are adhered to,
- General, national and company safety provisions are observed.
2
Impermissible operating conditions
The system may not be operated if:
- Errors or damage have been discovered,
- Maintenance intervals have been exceeded,
- Mechanical or electrical functions do not work as they should.
Exclusion of liability
The manufacturer of the system assumes no liability for damages if the system was operated under impermissible conditions.
bizhub C554e/C454e/C364e/C284e/C224e 2-3
Page 38

2
2
3
4
1
2.2 Introduction to User's Guide
The user's guide of this product is provided on a DVD which includes the [Quick Guide] (PDF) and the [User's
Guide Online] (HTML).
If you want to learn about more detailed functions or operation methods, refer to the [User's Guide Online].
2.2.1 Target groups
The user’s guides (see page 2-4) are intended for the following users of the system:
User Persons using the system for its intended use (see page 2-3) as well as managing
system functions and consumables according to the assigned user rights.
Administrator Persons managing consumables, system functions, users and access rights; adjust-
ing system settings, and establishing network connections.
Everyone who uses this system must have read and understood the related user’s guides.
2.2.2 [Quick Guide] (this manual)
This guide describes basic machine procedures and setting methods used to configure each function. It introduces important functions that make it easier to use this machine.
This guide also contains notes and precautions that should be followed in order to use this machine.
Please be sure to read this manual before using this machine.
Introduction to User's Guide
2.2
2.2.3 [User's Guide Online]
The DVD which includes the User's Guide is provided with this machine.
Select a desired function on the top page (Home), and check the details of the function.
Selecting [Introduction] on the top page (Home) allows you to view detailed methods for using the User's
Guide.
Layout of top page
2-4 bizhub C554e/C454e/C364e/C284e/C224e
Page 39

2.2 Introduction to User's Guide
No. Name Description
1 [Search by Function] Searches for desired information using functions such as printing or
2 [Search] Enter one or multiple keywords to search within the User's Guide.
3 [Search by Usage] Searches for the required operations of this machine based on the
4 [Search by Illustration] Searches for the required operations of this machine based on the
Operating environment
Item Specifications
Supported Operating Systems Windows XP (SP3), Windows Vista (SP2), Windows 7 (SP1), Win-
Supported Web browsers Windows: Internet Explorer 6.x/7.x/8.x/9.x/10.x (Desktop version),
Display resolution 1024 x 768 pixels or more
2
scanning and buttons displayed on the touch panel.
(Some pages are not targeted for searching.)
request format of "wanting to do something". This function provides
security measures against various situations and methods to bring
about cost reductions.
output result, functions, and operation images.
dows 8
Mac OS X10.4/10.5/10.6/10.7/10.8
Firefox 3.x/4.x/ESR 10.0 or later, Google Chrome
Mac OS: Safari 3.1 or later /4.x/5.x/6.x
• We recommend that you use the latest Web browser that is compatible with your operating system to help you use this machine
more conveniently and comfortably.
• Check that JavaScript in your Web browser is enabled. The User's Guide uses JavaScript for the page display and search functions.
• In Internet Explorer 6.x/7.x, it may take some time for a page to
display after you click a button or a menu in the table of contents.
2.2.4 Symbols and notations used in this manual
Procedural instruction
0 This check mark symbol shows a precondition of a procedure.
1 This format number "1" represents the first step.
2 This format number represents the order of serial steps.
% This symbol indicates a supplementary explanation of a procedural instruction.
bizhub C554e/C454e/C364e/C284e/C224e 2-5
Page 40

2
Introduction to User's Guide
2.2
Symbols and notations
7 WARNING
- This symbol indicates that a failure to heed the instructions may lead to death or serious injury.
7 CAUTION
- This symbol indicates that negligence of the instructions may lead to mishandling that may cause injury
or property damage.
NOTICE
This symbol indicates a risk that may result in damage to this machine or documents.
Follow the instructions to avoid property damage.
Tips
- This symbol indicates supplemental information of a topic as well as options required to use a function.
d Reference
This symbol indicates reference functions related to a topic.
Notations Description
Related setting This shows the settings related to a particular topic for any user.
Related setting (for the administrator)
0 This check mark symbol shows a precondition of a procedure.
% This symbol indicates a supplementary explanation of a procedural in-
[ ] An item enclosed by brackets [ ] indicates a key name on the Touch Panel
Bold text This presents a key name, part name, product name, or option name on
This shows the settings related to a topic only for administrators.
struction.
or computer screen, or the name of a user's guide.
the Control Panel.
Notations of application names
This manual describes application names as shown below.
Application name Notations used in this manual
PageScope Web Connection Web Connection
PageScope My Panel Manager My Panel Manager
2-6 bizhub C554e/C454e/C364e/C284e/C224e
Page 41

2.3 About this machine
2.3 About this machine
2.3.1 Optional components (bizhub C554e/C454e)
Various optional components can be added to meet your office requirements.
2
bizhub C554e/C454e/C364e/C284e/C224e 2-7
Page 42

2
About this machine
No. Name Description
1 Main unit Scans the original in the scanner section, and prints a scanned im-
2 Fax Kit FK-511 Required to use the fax function.
3 Authentication Unit
AU-102 (Biometric Type)
4 Authentication Unit
AU-201 (IC Card Type)
5 Working Table WT-506 Provides an area to temporarily place an original or other materials.
6 Keypad KP-101 It is equipped on the side of the Control Panel. Allows you to enter
7 Keyboard Holder KH-102 Install this holder to use an external keyboard.
8 Security Kit SC-508 Supports functions such as Copy Guard to prevent unauthorized
9 Fax Mount Kit MK-728 This unit is required to install FAX Kit FK-508.
10 FAX Kit FK-508 Used to add telephone lines.
11 Mount Kit MK-730 Used to print on banner paper.
12 Large Capacity Unit
LU-301
13 Large Capacity Unit
LU-204
14 Image Controller IC-414 Built-in Image Controller. Installing this unit provides higher quality
15 Desk DK-510 Used to place this machine on the floor.
16 Paper Feed Cabinet
PC-410
17 Paper Feed Cabinet
PC-210
18 Paper Feed Cabinet
PC-110
19 Desk DK-705 Used to place this machine on the floor.
20 Saddle Stitcher SD-511 Used to add the bind/fold function to the
21 Finisher FS-534 Sorts, groups, or staples output sheets as required.
22 Punch Kit PK-520 Used to add the punch function to the Finisher FS-534.
23 Saddle Stitcher SD-512 Used to add the bind/fold function to the Finisher FS-535 (only for
24 Finisher FS-535 Sorts, groups, or staples output sheets as required (only for bizhub
25 Punch Kit PK-521 Used to add the punch function to the Finisher FS-535 (only for
26 Z Folding Unit ZU-606 Adds the Z-fold or punch function to the Finisher FS-535 (only for
27 Job Separator JS-602 Feeds out printed sheets (only for bizhub C554e).
28 Post Inserter PI-505 Inserts a cover sheet into copied or printed sheets (only for bizhub
29 Output Tray OT-506 Collects printed pages.
30 Finisher FS-533 Sorts, groups, or staples output sheets as required. This unit can be
31 Punch Kit PK-519 Used to add the punch function to the Finisher FS-533.
age in the printer section.
Working Table WT-506 is required as a stand.
Working Table WT-506 is required as a stand.
This is also used when the Authentication Unit is installed.
numbers by using the hardware keypad.
copying.
This option can be used in North America.
Fax Mount Kit MK-728 is required to install FAX Kit FK-508.
This option can be used in North America.
Allows you to load up to 3000 sheets of 8-1/2 e 11 (A4) size paper.
Allows you to load up to 2500 sheets of SRA3 or 11 e 17 (A3) size
paper.
printing results.
Can load up to 2500 sheets of 8-1/2 e 11 (A4) size paper.
Can load up to 500 sheets respectively into the top and bottom
trays.
Can load up to 500 sheets into the top tray. (The bottom tray is a
storage box.)
Finisher FS-534.
bizhub C554e).
C554e).
bizhub C554e).
bizhub C554e).
C554e).
installed in this machine.
2.3
2-8 bizhub C554e/C454e/C364e/C284e/C224e
Page 43

2.3 About this machine
No. Name Description
32 Job Separator JS-506 Used to separate output sheets into two trays in the body of the ma-
The following options are built into this machine and are not shown in the figure above.
33 Stamp Unit SP-501 Stamps a scanned original when sending a fax.
34 Spare TX Marker Stamp 2A replacement stamp for the Stamp Unit SP-501.
2
chine.
35 Local Interface Kit
EK-607
36 Video Interface Kit
VI-506
37 i-Option LK-101 v3 Supports the web browser function that is one of the advanced
38 i-Option LK-102 v3 Supports the PDF processing function that is one of the advanced
39 i-Option LK-105 v3 Supports the searchable PDF function that is one of the advanced
40 i-Option LK-106 Used to add a bar code font that is one of special fonts.
41 i-Option LK-107 Used to add a unicode font that is one of special fonts.
42 i-Option LK-108 Used to add an OCR font that is one of special fonts.
43 i-Option LK-110 Supports advanced functions such as a function that converts a file
44 i-Option LK-111 Supports the ThinPrint function that is one of the advanced func-
45 i-Option LK-115 Allows you to manage confidential information on this machine us-
46 Upgrade Kit UK-204 Required when:
47 Upgrade Kit UK-208 Allows you to use this machine in a wireless network environment.
The following options are not shown in the figure.
48 Heater HT-509 Prevents paper in a paper tray from being affected by humidity.
49 Power Supply BOX
MK-734
50 Mount Kit MK-735 Required to install Authentication Unit AU-201 (IC Card Type).
Install this unit when using the linkage function with a Bluetoothcompatible device.
This unit is required to install Image Controller IC-414.
functions.
functions.
functions.
into a DOCX or XLSX type, a function that generates highly-functional and high quality data, and the E-mail RX Print function. For
details on the available functions, refer to the [User's Guide Online]
on the DVD.
tions.
ing TPM (Trusted Platform Module) that is one of the advanced
functions.
• Installing i-Option;
• Using the My Address function in conjunction with My Panel
Manager; and
• Using the Overlay or Registered Overlay function.
Desk DK-510 or Paper Feed Cabinet is required to install this unit.
Used to turn Heater operations on or off.
bizhub C554e/C454e/C364e/C284e/C224e 2-9
Page 44

2
2.3.2 Optional components (bizhub C364e/C284e/C224e)
Various optional components can be added to meet your office requirements.
About this machine
2.3
2-10 bizhub C554e/C454e/C364e/C284e/C224e
Page 45

2.3 About this machine
No. Name Description
1 Main unit Scans the original in the scanner section, and prints a scanned im-
2 Original Cover OC-511 Used to fix the loaded originals.
3 Reverse Automatic Doc-
ument Feeder DF-624
4 Dual Scan Document
Feeder DF-701
5 Fax Kit FK-511 Required to use the fax function.
6 Authentication Unit
AU-102 (Biometric Type)
7 Authentication Unit
AU-201 (IC Card Type)
8 Working Table WT-506 Provides an area to temporarily place an original or other materials.
9 Keypad KP-101 It is equipped on the side of the Control Panel. Allows you to enter
10 Keyboard Holder KH-102 Install this holder to use an external keyboard.
11 Security Kit SC-508 Supports functions such as Copy Guard to prevent unauthorized
12 Fax Mount Kit MK-728 This unit is required to install FAX Kit FK-508.
13 FAX Kit FK-508 Used to add telephone lines.
14 Mount Kit MK-730 Used to print on banner paper.
15 Image Controller IC-414 External image controller. Installing this unit provides the higher-
16 Desk DK-705 Used to place this machine on the floor.
17 Desk DK-510 Used to place this machine on the floor.
18 Paper Feed Cabinet
PC-410
19 Paper Feed Cabinet
PC-210
20 Paper Feed Cabinet
PC-110
21 Finisher FS-534
22 Saddle Stitcher SD-511 Used to add the bind/fold function to the Finisher FS-534.
23 Punch Kit PK-520 Used to add the punch function to the Finisher FS-534.
24 Finisher FS-533 Sorts, groups, or staples output sheets as required. This unit can be
25 Punch Kit PK-519 Used to add the punch function to the Finisher FS-533.
26 Job Separator JS-506 Used to separate output sheets into two trays in the body of the ma-
The following options are built into this machine and are not shown in the figure above.
27 Stamp Unit SP-501 Stamps a scanned original when sending a fax.
28 Spare TX Marker Stamp 2A replacement stamp for the Stamp Unit SP-501.
2
age in the printer section.
Automatically feeds and scans originals by page.
Scans the front and back sides of the sheet at the same time. This
enables higher-speed scanning.
The Working Table WT-506 is required as a stand.
The Working Table WT-506 is required as a stand.
This is also used when the Authentication Unit is installed.
numbers by using the hardware keypad.
copying.
This option can be used in North America.
Fax Mount Kit MK-728 is required to install FAX Kit FK-508.
This option can be used in North America.
quality printing result (only for bizhub C364e/C284e).
Can load up to 2500 sheets of 8-1/2 e 11 (A4) size paper.
Can load up to 500 sheets respectively into the top and bottom
trays.
Can load up to 500 sheets into the top tray. (The bottom tray is a
storage box.)
Sorts, groups, or staples output sheets as required. The Desk DK-
510 or Paper Feed Cabinet is required to install this unit.
installed in this machine.
chine.
29 Local Interface Kit
EK-607
30 Video Interface Kit
VI-506
bizhub C554e/C454e/C364e/C284e/C224e 2-11
Install this unit when using the linkage function with a Bluetoothcompatible device.
This unit is required to install Image Controller IC-414 onto bizhub
C364e or bizhub C284e.
Page 46

2
About this machine
No. Name Description
31 i-Option LK-101 v3 Supports the web browser function that is one of the advanced
functions.
32 i-Option LK-102 v3 Supports the PDF processing function that is one of the advanced
33 i-Option LK-105 v3 Supports the searchable PDF function that is one of the advanced
34 i-Option LK-106 Used to add a bar code font that is one of special fonts.
35 i-Option LK-107 Used to add a unicode font that is one of special fonts.
36 i-Option LK-108 Used to add an OCR font that is one of special fonts.
37 i-Option LK-110 Supports advanced functions such as a function that converts a file
38 i-Option LK-111 Supports the ThinPrint function that is one of the advanced func-
39 i-Option LK-115 Allows you to manage confidential information on this machine us-
40 Upgrade Kit UK-204 Required when:
41 Upgrade Kit UK-208 Allows you to use this machine in a wireless network environment.
42 Upgrade Kit UK-209 Used to connect an Android tablet terminal to this machine and dis-
The following options are not shown in the figure.
43 Heater HT-509 Prevents paper in a paper tray from being affected by humidity.
44 Power Supply BOX
MK-734
45 Mount Kit MK-735 Required to install Authentication Unit AU-201 (IC Card Type).
functions.
functions.
into a DOCX or XLSX type, a function that generates highly-functional and high quality data, and the E-mail RX Print function. For
details on the available functions, refer to the [User's Guide Online]
on the DVD.
tions.
ing TPM (Trusted Platform Module) that is one of the advanced
functions.
• Installing i-Option;
• Using the My Address function in conjunction with My Panel
Manager; and
• Using the Overlay or Registered Overlay function.
play the Control Panel on the Android tablet terminal, enabling remote-control operations.
• This unit is required when using Original Cover or Reverse Au-
tomatic Document Feeder.
• If you are using Dual Scan Document Feeder, Upgrade Kit
UK-209 (dual scan board) is already installed on this machine.
Desk DK-510 or Paper Feed Cabinet is required to install this unit.
Used to turn Heater operations on or off.
2.3
2-12 bizhub C554e/C454e/C364e/C284e/C224e
Page 47

2.3 About this machine
2.3.3 Name of parts (MFP) (bizhub C554e/C454e)
Front side
The illustration shows the main unit that contains the Output Tray and Paper Feed Cabinet.
2
No. Name Description
1 Control Panel Use the Touch Panel or buttons on this panel to operate this ma-
chine.
2 Original Tray Load the original.
3 Stylus Pen Used to operate the Touch Panel.
4 Bypass Tray Used to load custom-size paper or special paper.
5 Paper-Empty Indicator Flashes orange when a tray runs low on paper and lights up orange
when the tray runs out of paper.
6 Paper Tray Used to load standard-size paper.
7 Lower Front Door Open this door to replace consumables or to maintenance this ma-
chine.
8 Upper Front Door Open this door to replace a Toner Cartridge.
9 Data Indicator Flashes blue while this machine is receiving a job. If a job is current-
ly spooled, this indicator lamp lights up blue.
10 Status Indicator Flashes white during printing.
11 Warning Indicator Flashes orange if a warning occurs. Lights up orange if this machine
bizhub C554e/C454e/C364e/C284e/C224e 2-13
has stopped due to an error.
Page 48

2
About this machine
2.3
Rear side
The illustration shows the main unit that contains the Paper Feed Cabinet, Fax Kit FK-511, FAX Kit FK-508,
Fax Mount Kit, and Power Supply BOX.
(FAX Kit FK-508 and Fax Mount Kit can be used in North America.)
No. Name
1 Telephone Jack 1/2 (LINE PORT 1/2)
2 Jack for connecting a telephone (TEL PORT1/2)
3 Power Cord
4 Heater Power Switch
5 Telephone Jack 3/4 (FAX3/4)
6 USB Port (Type A) USB2.0/1.1
7 Network Connector (10Base-T/100Base-TX/1000Base-T)
8 USB Port (Type B) USB2.0/1.1
d Reference
For details, refer to the [User's Guide Online] on the DVD.
2-14 bizhub C554e/C454e/C364e/C284e/C224e
Page 49

2.3 About this machine
2.3.4 Name of parts (MFP) (bizhub C364e/C284e/C224e)
Front side
The illustration shows the main unit that contains the Reverse Automatic Document Feeder and Paper
Feed Cabinet.
2
1
2
10
9
3
8
7
6
4
5
No. Name Description
1 Control Panel Use the Touch Panel or buttons on this panel to operate this ma-
chine.
2 Original Tray Load the original.
3 Stylus Pen Used to operate the Touch Panel.
4 Bypass Tray Used to load custom-size paper or special paper.
5 Paper-Empty Indicator Flashes orange when a tray runs low on paper and lights up orange
6 Paper Tray Used to load standard-size paper.
7 Front Door Open this door to replace consumables or to maintenance this ma-
8 Data Indicator Flashes blue while this machine is receiving a job. If a job is current-
9 Status Indicator Flashes white during printing.
10 Warning Indicator Flashes orange if a warning occurs. Lights up orange if this machine
when the tray runs out of paper.
chine.
ly spooled, this indicator lamp lights up blue.
has stopped due to an error.
bizhub C554e/C454e/C364e/C284e/C224e 2-15
Page 50

2
About this machine
2.3
Rear side
The illustration shows the main unit that contains the Reverse Automatic Document Feeder, Paper Feed
Cabinet, Fax Kit FK-511, FAX Kit FK-508, Fax Mount Kit, and Power Supply BOX.
(FAX Kit FK-508 and Fax Mount Kit can be used in North America.)
No. Name
1 Telephone Jack 1/2 (LINE PORT 1/2)
2 Jack for connecting a telephone (TEL PORT1/2)
3 Power Cord
4 Heater Power Switch
5 Telephone Jack 3/4 (FAX3/4)
6 USB Port (Type A) USB2.0/1.1
7 Network Connector (10Base-T/100Base-TX/1000Base-T)
8 USB Port (Type B) USB2.0/1.1
d Reference
For details, refer to the [User's Guide Online] on the DVD.
2-16 bizhub C554e/C454e/C364e/C284e/C224e
Page 51

2.3 About this machine
2.3.5 Name of parts (Optional units)
This section shows the names of distinctive parts for each optional unit that can be installed in this machine.
Finisher FS-535, Saddle Stitcher SD-512, Punch Kit PK-521 (bizhub C554e)
2
No. Name
1 Output Tray
2 Punch Kit
3 Punch Scrap Box
4 Staple Cartridge
5 Saddle Stitcher
bizhub C554e/C454e/C364e/C284e/C224e 2-17
Page 52

2
About this machine
2.3
No. Name
1 Staple Cartridge
2 Folding Output Tray
2-18 bizhub C554e/C454e/C364e/C284e/C224e
Page 53

2.3 About this machine
Job Separator JS-602 (bizhub C554e)
2
No. Name
1 Output Tray
bizhub C554e/C454e/C364e/C284e/C224e 2-19
Page 54

2
Z Folding Unit ZU-606 (bizhub C554e)
About this machine
2.3
No. Name
1 Z Folding/Conveyance Unit
2 Punch Scrap Box
2-20 bizhub C554e/C454e/C364e/C284e/C224e
Page 55

2.3 About this machine
Post Inserter PI-505 (bizhub C554e)
2
No. Name
1 Lower Tray
2 Upper Tray
3 Post Inserter Control Panel
d Reference
For details on how to use the Post Inserter Control Panel, refer to the User's Guide DVD.
bizhub C554e/C454e/C364e/C284e/C224e 2-21
Page 56

2
Finisher FS-533, Punch Kit PK-519
About this machine
2.3
No. Name
1 Staple Cartridge
2 Punch Kit
3 Output Tray
4 Tray Extension
2-22 bizhub C554e/C454e/C364e/C284e/C224e
Page 57

2.3 About this machine
Job Separator JS-506
2
No. Name
1 Output Tray
bizhub C554e/C454e/C364e/C284e/C224e 2-23
Page 58

2
About this machine
Finisher FS-534, Saddle Stitcher SD-511, Punch Kit PK-520
2.3
No. Name
1 Output Tray
2 Punch Scrap Box
3 Staple Cartridge
4 Saddle Stitcher
2-24 bizhub C554e/C454e/C364e/C284e/C224e
Page 59

2.3 About this machine
2
No. Name
1 Punch Kit
2 Staple Cartridge
3 Folding Output Tray
bizhub C554e/C454e/C364e/C284e/C224e 2-25
Page 60

2
Large Capacity Unit LU-301/LU-204
About this machine
2.3
d Reference
For details, refer to the [User's Guide Online] on the DVD.
2-26 bizhub C554e/C454e/C364e/C284e/C224e
Page 61

2.4 Power supply
2.4 Power supply
This machine provides two power switches: Power key on the Control Panel and Main Power Switch on
the machine. Under normal conditions, operate the Power key of the control panel. Use Main Power
Switch to restart this machine.
2.4.1 Turning the power on and off
Turn the power on and off only when necessary, for example, when the administrative settings are changed
or a power failure occurs.
1 Open the Lower Front Door or Front Door, and turn the Main
Power Switch on.
2
2 Turn the Main Power Switch off.
NOTICE
To restart this machine, turn the Main Power Switch off and on again after 10 or more seconds have passed.
bizhub C554e/C454e/C364e/C284e/C224e 2-27
Page 62

2
2.4.2 Operating the Power key
To immediately shift to the power save mode, for example, when work is finished or when not operating this
machine for a long period of time, press the Power key.
The machine shifts to different power save modes depending on how long the Power key is pressed.
Pressing the Power key briefly during operation shifts to the low power or sleep mode. Holding down the
Power key shifts to the Sub Power OFF mode.
To return this machine from the power save mode to the normal mode, press the Power key again.
In the low power or sleep mode, you can return this machine from the power save mode to the normal mode
simply by placing your hand close to the Control Panel.
Power supply
2.4
Status of this machine Description
Power Save
mode
Normal mode During oper-
Low Power or
Sleep mode
Sub Power
OFF mode
ation
Flashes blue.
This machine returns to the normal mode when data or faxes are received.
Lights up orange.
This machine can receive data or faxes, but cannot scan or print an
original. If data or faxes are received when the machine is in the Sub
Power OFF mode, they are printed when the machine returns to the
normal mode.
Lights up blue.
2-28 bizhub C554e/C454e/C364e/C284e/C224e
Page 63

2.4 Power supply
2
1
2.4.3 Power save function
If the specified time (default: 15 minutes) elapses after the machine becomes inactive, the machine automatically shifts to the power save mode; for example, the touch panel display is turned off. The Power key flashes
blue in the power save mode. The power save mode returns to the normal mode by pressing any key on the
Control Panel for instance.
There are two power save modes: the low power mode and the sleep mode. Sleep mode provides a greater
power saving effect than Low Power mode. However, the time required to return to Normal mode is longer
than the time required to revert to Low Power mode.
d Reference
The time required to shift to each mode can be changed in the Administrator Settings. For details, refer to the
[User's Guide Online] on the DVD.
Reducing power consumption
To reduce power consumption in the standby state, change [Power Key Setting] to [Sub Power OFF].
Tap [Utility], and select [Administrator Settings] - [System Settings] - [Power Supply/Power Save Settings] [Power Key Setting].
2
After the setting is changed, the power save mode shifts as shown below depending on how the Power key
is pressed.
- Pressing the Power key
– This machine shifts to the Sub Power OFF mode.
– In the Sub Power OFF mode, the machine can receive data or faxes, but cannot scan or print an original.
– If data or faxes are received when the machine is in the Sub Power OFF mode, they are printed when
the machine returns to the normal mode.
- Holding down the Power key
– This machine shifts to the ErP Auto Power OFF mode.
– In the ErP Auto Power OFF mode, this machine cannot receive data or faxes and also cannot scan or
print an original.
– This function provides a greater power saving effect than the Sub Power OFF mode, which is close to
the state where the main power is turned off.
To enable the machine to return to the normal mode from the Sub Power OFF or ErP Auto Power OFF mode,
press the Power key again.
d Reference
For details, refer to the [User's Guide Online] on the DVD.
bizhub C554e/C454e/C364e/C284e/C224e 2-29
Page 64

2
2.5 Control Panel
The Keypad KP-101 is equipped on the right side of the Control Panel.
2.5.1 Name of parts
Control Panel
2.5
No. Name Description
1 Touch Panel Various screens and messages are displayed. Directly touch the
Touch panel to configure each setting.
2 [Menu] Tap this button to display the main menu.
3 [Enlarge Display] Enters Enlarge Display mode.
4 [Guidance] Tap this button to display the Help Menu. You can display descrip-
5 [Access] If user authentication or account track is enabled, enter the user
6 [Interrupt] Tap this button to enter the Interrupt mode. The indicator lamp
7 [Preview] Tap this button to print a single proof copy to be checked before
8 Reset Press this key to reset all settings, excluding the registered ones,
9 Stop Press this key to temporarily stop an active copy, scan, or print job.
10 Start Press to start the copy, scan or fax operation.
11 Register key Press each key to switch the display of the Touch Panel to a func-
tions of the functions and operating procedures on the screen.
name and password for user authentication or the account name
and password for account track, then tap this button to start the use
of this machine. After a target operation is completed, tap this button once again to end the use of this machine.
lights up blue in the Interrupt mode. To cancel the Interrupt mode,
tap [Interrupt] again.
printing a large number of copies. This function can also display a
finishing image with the current settings on the Touch Panel.
that you entered using the Control Panel.
tion assigned to a Register key.
• 1 (Scan/Fax): Switches to the scan/fax function.
• 2 (Copy): Switches to the copy function.
• 10Keypad (Keypad): Displays the Keypad on the Touch panel.
The Register key can be assigned to any function in the Administrator Settings to be easy to use.
2-30 bizhub C554e/C454e/C364e/C284e/C224e
Page 65

2.5 Control Panel
No. Name Description
12 Power Press this key to switch to the power save mode.
13 Warning Indicator Flashes orange if a warning occurs.
Equipped with the Keypad KP-101
2
In the normal mode, the key lights up blue. In the power save mode,
the key blinks blue or lights up orange.
To create a higher power saving effect, you can change the setting
in [Power Key Setting] of Administrator Settings. For [Power Key
Setting], refer to page 2-29.
Lights up orange if this machine has stopped due to an error.
No. Name Description
1 Keypad Use this Keypad to enter numeric values such as the number of
2 C Press this key to cancel numeric values such as the number of cop-
copies, zoom ratio, and fax number.
ies, zoom ratio, and size you entered using the Keypad.
bizhub C554e/C454e/C364e/C284e/C224e 2-31
Page 66

2
1
2
2.6 Touch Panel
2.6.1 Main Menu
Tap [Menu] on the Control Panel to display the main menu. In the main menu, you can configure settings
such as frequently used functions or a shortcut key for jumping to each mode.
Layout of main menu
Touch Panel
2.6
No. Name Description
1 [Accessibility] Tap this button to adjust a Touch Panel pressing position, change
[Counter] Tap this button to display the total number of pages printed on this
[Job List] Tap this button to display active or standby jobs. If necessary, you
2 Main menu keys Display shortcut keys assigned to any function.
[Utility] Tap this button to configure settings of this machine or view the use
keying sounds, and configure the operating environment of the
Control Panel.
machine on a function or color basis.
can view job logs or print a communication report. For details, refer
to page 2-39.
By default, the main menu shows [Copy], [Scan/Fax], [User Box],
[Sound Setting], and [Utility].
status of this machine.
• [Utility] is always displayed.
2-32 bizhub C554e/C454e/C364e/C284e/C224e
Page 67

2.6 Touch Panel
Customizing the main menu
The main menu can be extended to three screens as necessary. Up to 25 keys can be assigned to three main
menu screens which can be switched.
In addition, you can specify your favorite background pattern.
2
d Reference
For details, refer to the [User's Guide Online] on the DVD.
2.6.2 Operating the Touch Panel
The Touch Panel of this machine supports user-friendly operations, such as, sliding a finger on the Touch
Panel.
Tap
Lightly touch the screen with your finger, then remove your finger
from the screen immediately. This action can select or determine a
menu.
Double-tap
Lightly touch the screen with your finger twice in succession. Used
to retrieve detailed information, to enlarge a thumbnail or preview
image, and to open a User Box.
bizhub C554e/C454e/C364e/C284e/C224e 2-33
Page 68

2
Flick
Make a slight fillip while sliding your finger on the screen. Used to
scroll the destination/job list or to feed a page in the Main menu
screen/Preview screen.
Drag
To move the scroll bar or document, place your finger on it and
move your finger. Used to move the scroll bar or document.
Touch Panel
2.6
Pan
Slide your finger parallel in a front-to-back and side-to-side direction on the screen. Used to move to the intended display location if
data spans multiple screens.
Long-tap
Hold down the document by the finger. Used to display the icon related to the document.
2-34 bizhub C554e/C454e/C364e/C284e/C224e
Page 69

2.6 Touch Panel
Drag & Drop
Slide your finger to the intended place and release it while a document is selected. Used to move the document to the intended place.
Pinch in/Pinch out
Place two fingers on the screen and then open or close them. Used
to enlarge or reduce a preview image.
2
Rotation
Place two fingers on the screen and then rotate them. Used to rotate
a preview image.
bizhub C554e/C454e/C364e/C284e/C224e 2-35
Page 70

2
Precautions on using the Touch panel
This machine features a capacitance-base touch panel. Note the following points when operating the Touch
Panel.
- Use your finger or the Stylus Pen supplied with this machine. Note that the Touch Panel will not re-
spond appropriately if you operate it using your nail or a pen tip instead of your finger or the Stylus Pen.
- Applying a strong force to the Touch Panel will damage the Touch Panel, and potentially cause a
breakage.
- When operating in the Touch Panel, do not press on it using excessive force or with a pointed object
such as a mechanical pencil.
- The Touch Panel may not respond appropriately, if operated with a wet finger.
- The Touch Panel will not respond appropriately, if operated with hands with gloves on. It is recom-
mended that you use the Stylus Pen supplied with this machine or your finger.
- The Touch Panel may not respond appropriately, if the distance between you and a fluorescent lamp
is 20 inches (50 cm) or less while you are operating the Touch Panel.
- Avoid using the Touch Panel at a site near a device that generates electric noise (such as a generator
and an air conditioner). The electric noise may cause the Touch Panel to operate erratically.
2.6.3 How to display the keypad
When tapping the input area on the copy screen and etc. for entering the number of copies or entering adjustment values, the Keypad will be displayed.
It can also be displayed by pressing the 10keypad provided for the Register key.
Touch Panel
2.6
Input area for entering the number of copies
Input area for entering values
2-36 bizhub C554e/C454e/C364e/C284e/C224e
Page 71

2.6 Touch Panel
How to move the keypad
Move your finger while the upper side of Keypad is being pressed.
How to close the keypad
After entering, tap [Close] to close the Keypad.
It can also be closed by pressing the 10keypad provided for the
Register key.
2
To display the keypad all the time
The Keypad can be displayed all the time on the copy screen, print setting screen for boxes or browser.
d Reference
For details, refer to the [User's Guide Online] on the DVD.
bizhub C554e/C454e/C364e/C284e/C224e 2-37
Page 72

2
1
2
2.6.4 Entering characters
When entering characters to register an address or program, use the keyboard screen displayed on the
Touch Panel.
When typing in "Group1":
1 To type in uppercase letters or symbols, tap the [Shift] key.
% If you mistyped, tap [ ] or [ ] to move the cursor to the character you want to clear, then tap the
[Delete] key.
% Tap the [Shift] key again to return to the original keyboard screen.
Touch Panel
2.6
2 After typing completes, tap [OK].
2-38 bizhub C554e/C454e/C364e/C284e/C224e
Page 73

2.7 Jobs
3
12
4
5
6
2.7 Jobs
2.7.1 Job screen
A job refers to an operation such as printing, sending, receiving, or saving.
When you tap [Job List] in the main menu or the main screen of each mode, the Job screen appears.
In the Job screen, you can view a list or history of a job currently being executed or print a sending-receiving
result report.
In general, jobs are executed starting from the job at the top of the list of currently active jobs. If you are in a
hurry to execute any particular jobs, you can rearrange the job execution order.
2
No. Description
1 Displays jobs.
2 Select a job type. In [Comm. List], you can also print a sending-receiving result report.
3 Tap this button to narrow down the jobs to be displayed.
4 Tap this button to delete a job.
5 Tap this button to select a job to be executed preferentially.
6 Tap this button to view details of a selected job.
2.7.2 Multi-job function
While a job is active, you can register another job. Up to 251 jobs can be registered in total.
The table below shows the maximum number of jobs that can be registered for each function.
Function Minimum number of jobs Maximum number of jobs
Copy 5 61
Print 10 66
Scan 5 61
Fax memory TX 50 106
Fax RX 100 156
Sharing 56 -
Reference
- These values may vary depending on conditions.
- For details, refer to the [User's Guide Online] on the DVD.
bizhub C554e/C454e/C364e/C284e/C224e 2-39
Page 74

2
2.8 Loading Paper
2.8.1 Loading paper in Tray 1 to Tray 4
Up to 500 sheets of plain paper can be loaded into each tray. Tray3 and Tray4 are optional.
Applicable paper types
Plain paper, single-side-only paper, thin paper, special paper, thick paper, letterhead, colored paper, and recycled paper
How to load paper
1 Pull out the tray.
NOTICE
Be careful not to touch the Film.
Loading Paper
2.8
2 Slide the Lateral Guide to fit the size of the paper to be load-
ed.
3 Load paper into the tray.
% Load paper into the tray with the print side facing up.
4 When loading paper other than plain paper, specify the paper type. For details, refer to page 2-43.
2-40 bizhub C554e/C454e/C364e/C284e/C224e
Page 75

2.8 Loading Paper
2.8.2 LCT (built-in)
Up to 2500 sheets of plain paper can be loaded into the LCT (built-in). The LCT (built-in) is an option.
Applicable paper types
Plain paper, single-side-only paper, thin paper, special paper, thick paper, letterhead, colored paper, and recycled paper
How to load paper
1 Pull out the tray.
NOTICE
Be careful not to touch the Film.
2
2 Load paper into the right tray.
% Load paper into the tray with the print side facing up.
NOTICE
Do not load the tray with paper of a size other than that previously specified. To change the paper size, contact your service representative.
3 Load paper into the left tray.
% Load paper into the tray with the print side facing up.
4 When loading paper other than plain paper, specify the paper type. For details, refer to page 2-43.
bizhub C554e/C454e/C364e/C284e/C224e 2-41
Page 76

2
2.8.3 Loading paper into the Large Capacity Unit
Up to 3000 sheets of plain paper can be loaded into Large Capacity Unit LU-301, and up to 2500 sheets of
plain paper into Large Capacity Unit LU-204.
The Large Capacity Unit is an option.
Applicable paper types
Plain paper, single-side-only paper, thin paper, special paper, thick paper, letterhead, colored paper, recycled paper
How to load paper
1 Open the door.
Loading Paper
2.8
2 Lift the Paper Feed Roller, and load paper into the unit.
% Load paper into the tray with the print side facing down.
NOTICE
Exercise care not to touch the surface of the Paper Feed Roller with your hand.
Do not load the Large Capacity Unit with paper of a size other
than that previously specified. To change the paper size, contact your service representative.
3 When loading paper other than plain paper, specify the paper type. For details, refer to page 2-43.
2-42 bizhub C554e/C454e/C364e/C284e/C224e
Page 77

2.8 Loading Paper
2.8.4 Bypass Tray
Use the Bypass Tray when printing on a paper size other than for paper trays, or printing on envelopes or
transparencies.
To use the Bypass Tray, load paper and specify the paper type.
Applicable paper types
Plain paper, single-side-only paper, special paper, thick paper, postcard (4 e 6 (A6 Card)), transparency, letterhead, colored paper, envelope, label sheets, index paper, recycled paper, and banner paper
Applicable paper sizes
Type Size
Standard-size paper 12 e 18 w to 5-1/2 e 8-1/2 w/v, 4 e 6 w, SRA3 w, A3 w to A6 w, B4 w to
Custom-size paper Paper width: 3-9/16 to 12-5/8 inches (90 mm to 320 mm)
How to load paper
2
B6 w, A6 card w, 8 e 13 w, 16K w/v, 8K w, banner paper
Paper length: 5-1/2 to 47-1/4 inches (139.7 mm to 1,200 mm)
1 Open the tray.
% To load large-sized paper, pull out the Tray Extension.
% To load banner paper, install the Mount Kit MK-730 for
banner paper.
NOTICE
Exercise care not to touch the surface of the Paper Feed Roller with your hands.
2 After loading paper, adjust the Lateral Guide.
% Load paper into the tray with the print side facing down.
bizhub C554e/C454e/C364e/C284e/C224e 2-43
Page 78

2
1
2
3 Specify the paper type. Tap [Paper].
4 Select [#], then tap [Change Tray Setting].
Loading Paper
2.8
5 Select the paper type.
2-44 bizhub C554e/C454e/C364e/C284e/C224e
Page 79

2.8 Loading Paper
1
3
2
3
2
4
6 Specify the paper size.
% For Auto Detect
[Auto Detect] detects the paper size automatically when standard-size paper is loaded into a tray.
2
% For Standard Size
[Standard Size] is available when loading a postcard or standard-size paper for overseas.
bizhub C554e/C454e/C364e/C284e/C224e 2-45
Page 80

2
3
2
3
4
2
% For Custom Size
% For Wide Paper
Loading Paper
2.8
2-46 bizhub C554e/C454e/C364e/C284e/C224e
Page 81

3
Basic Settings and
Operations
Page 82

Page 83

3.1 Print Function
3 Basic Settings and Operations
3.1 Print Function
3.1.1 Required settings and basic operations (For Windows OS)
Print data created on your computer via the network.
This section describes how to configure standard print settings using the installer.
3
Preparation flow
The following describes a preparation flow to print data. For details, refer to the relevant page.
This preparation is not required the second time or subsequent times.
1 Checking the cable connection (Administrator)
% Check that this machine is correctly connected to the network cable. For details, refer to page 3-4.
2 Checking network settings of this machine (Administrator)
% Check the network settings of this machine. For details, refer to page 3-4.
The network can be used with the default settings unless otherwise requested.
3 Installing the printer driver
% Install the printer driver on the computer. For details, refer to page 3-5.
Operation flow
The following describes a flow to print data from your computer. For details, refer to page 3-5.
1 Opening original data
% Open the data you want to print using the application software.
2 Configuring the printer driver for printing
% Select a printer driver, and change the setting if necessary before printing.
bizhub C554e/C454e/C364e/C284e/C224e 3-3
Page 84

3
Checking the cable connection
Check that a LAN cable is connected to the LAN port of this machine and the green LED is on.
Checking network settings of this machine
Tap [Utility], and select [Device Information]. Check that the IP address is displayed.
• For IPv4 environment • For IPv6 environment
Print Function
3.1
Tips
- In general, the default settings are available for network connection; however, some network environ-
ments require a change on network settings.
- If no IP address is displayed, you need to configure the network. Tap [Utility], and select [Administrator
Settings] - [Network Settings] - [TCP/IP Settings]. Configure the required settings to suit your environment. For details, refer to the [User's Guide Online] on the DVD.
3-4 bizhub C554e/C454e/C364e/C284e/C224e
Page 85

3.1 Print Function
Installing the printer driver
Use the installer to install the printer driver.
0 This operation requires administrator privileges for your computer.
1 Insert the DVD-ROM which includes the printer driver into the
DVD-ROM drive of the computer.
2 Click [Printer Install].
3 Proceed with the procedure according to the on-screen instructions.
This automatically searches for the appropriate network and displays printers and MFPs that are compatible with the printer driver.
3
4 Select this machine from the list.
% If multiple identical models are displayed, check the IP address to select an appropriate one. For
details on how to check the IP address of this machine, refer to page 3-4.
5 Select the check boxes of the printer drivers to be installed.
6 Click [Install].
7 Click [Finish].
Printing data
1 Open the data you want to print using the application software.
2 In the [File] menu, click [Print].
3 Select the installed printer driver, and click [Print].
Tips
- Clicking [Preferences] can change the setting of the printer driver as required.
- If user authentication is enabled in this machine, specify the required data such as the user name and
password.
bizhub C554e/C454e/C364e/C284e/C224e 3-5
Page 86

3
Types of printer drivers
Select a printer driver that will meet your printing requirements.
Driver type Description
PCL This is a standard driver for printing general office documents. Among the three
drivers, this driver provides the fastest printing speed.
PS This driver is effective to exactly print data that is created using PostScript-com-
patible application software from Adobe or other vendors. This driver is often used
in graphics and light printing applications where good color reproducibility is important.
XPS Developed after Windows Vista, this driver supports XML Paper Specification
(XPS). This driver has several advantages, including high-quality reproduction of
translucence.
3.1.2 Required settings and basic operations (For Mac OS)
Print data created on your computer via the network.
This section describes how to configure a printer driver, for the OS X 10.6 environment, Bonjour connection,
and use of metric-size paper as major conditions.
Print Function
3.1
Preparation flow
The following describes a preparation flow to print data. For details, refer to the relevant page.
This preparation is not required the second time or subsequent times.
1 Checking the cable connection (Administrator)
% Check that this machine is correctly connected to the network cable. For details, refer to page 3-7.
2 Checking network settings of this machine (Administrator)
% Check the network settings of this machine. For details, refer to page 3-7.
The network can be used with the default settings unless otherwise requested.
3 Installing the printer driver
% Install the printer driver on the computer. For details, refer to page 3-9.
4 Adding and configuring a printer driver
% Set up your computer so that data can be printed using the installed printer driver. For details, refer
to page 3-10.
3-6 bizhub C554e/C454e/C364e/C284e/C224e
Page 87

3.1 Print Function
1
Operation flow
The following describes a flow to print data from your computer. For details, refer to page 3-10.
1 Opening original data
% Open the data you want to print using the application software.
2 Configuring the printer driver for printing
% Select a printer driver, and change the setting if necessary before printing.
Checking the cable connection
Check that a LAN cable is connected to the LAN port of this machine and the green LED is on.
3
Checking network settings of this machine
1 Tap [Utility], and select [Device Information]. Check that the IP address is displayed.
• For IPv4 environment • For IPv6 environment
2 Specify the Bonjour name. Tap [Utility], and select [Administrator Settings] - [Network Settings] - [Bon-
jour Setting] - [ON].
bizhub C554e/C454e/C364e/C284e/C224e 3-7
Page 88

3
2
3
Print Function
% The Bonjour name is displayed on the printer driver as a connected device name. For "bizhub C364e
(5A:0C:4B)", "bizhub C364e" indicates the product name, and "(5A:0C:4B)" indicates the last three
bytes of the MAC address.
% To change the Bonjour name, tap [Bonjour Name], and enter the name using the displayed key-
board.
3.1
If no IP address is displayed in Step 1, you need to set up the network.
- Tap [Utility], and select [Administrator Settings] - [Network Settings] - [TCP/IP Settings]. Configure the
required settings to suit your environment. For details, refer to the [User's Guide Online] on the DVD.
3-8 bizhub C554e/C454e/C364e/C284e/C224e
Page 89

3.1 Print Function
Installing the printer driver
Use the installer to install the printer driver.
0 This operation requires administrator privileges for your computer.
1 Insert the DVD-ROM which includes the printer driver into the
DVD-ROM drive of the computer.
2 Select the target printer driver, and copy it to the desktop.
Example: /Driver/OS_10_6_x/Letter/
bizhub_C554_C364_106.pkg (Printer driver for OS X 10.6)
% When ordinarily using metric-sized paper, select a printer
% The last three digits of the printer driver name indicate the
3
driver in the "A4" directory.
version of the operating system.
3 Double-click the file copied onto the desktop.
4 Proceed with the procedure according to the on-screen instructions until the installation screen ap-
pears.
5 Click [Install].
6 When a prompt message appears to ask you to enter the name and password, type in the name and
password of the user with administrator privileges.
7 Click [Close].
bizhub C554e/C454e/C364e/C284e/C224e 3-9
Page 90

3
Print Function
3.1
Adding and configuring a printer driver
Set up your computer so that data can be printed using the installed printer driver.
0 This operation requires administrator privileges for your computer.
1 In the Apple Menu, click [System Preferences] - [Print & Fax].
2 Click [+].
This automatically searches for the appropriate network and displays printers and MFPs that are compatible with the printer driver.
3 Select a printer for the Bonjour connection. Search for this machine from the list of printers for which
[Kind] is set to [Bonjour], and click it.
% If you cannot identify the connected machine because multiple same product names are listed,
check with the administrator.
This automatically searches for a printer driver compatible with the selected printer.
4 Check that the printer driver is displayed.
5 Select the installed optional units.
Printing data
1 Open the data you want to print using the application software.
2 From the [File] menu, select [Print].
3 Select the Bonjour name of this machine.
Tips
- If necessary, you can change the settings of the printer driver.
3-10 bizhub C554e/C454e/C364e/C284e/C224e
Page 91

3.2 Scan-to-Send function
3.2 Scan-to-Send function
3.2.1 Various transmission methods
The original data scanned by this machine can be sent and saved using a variety of methods.
Sending data to your computer (SMB Send)
Send scanned data to a computer on the network. Once settings are configured, you can send data easily.
For details, refer to page 3-12 and page 3-20.
3
Transmitting data as E-mail attachment (E-mail TX)
Send scanned data as an E-mail attachment. This function is useful when you want to forward data to an
outside location. For details, refer to page 3-28.
Saving data to the USB memory device (External memory)
Directly save scanned data on the USB memory device connected to this machine. For details, refer to
page 3-59.
bizhub C554e/C454e/C364e/C284e/C224e 3-11
Page 92

3
Scan-to-Send function
3.2
Various methods for transmitting and saving data
In addition to the above, data can be sent and saved in various methods. Select the appropriate one to meet
your needs.
- Issuing a scan instruction from a computer (Web service function)
- Saving data to a User Box on the HDD (Save in User Box)
- Sending to an FTP server (FTP TX)
- Sending to a WebDAV server (WebDAV Send)
d Reference
For details, refer to the [User's Guide Online] on the DVD.
3.2.2 Sending data to your Windows computer (SMB Send)
Send scanned data to a computer on the network.
Once settings are configured, you can send data easily.
3-12 bizhub C554e/C454e/C364e/C284e/C224e
Page 93

3.2 Scan-to-Send function
Preparation flow
The following describes a preparation flow for sending scanned data. For details, refer to the relevant page.
This preparation is not required the second time or subsequent times.
1 Checking the cable connection (Administrator)
% Check that this machine is correctly connected to the network cable. For details, refer to page 3-13.
2 Checking network settings of this machine (Administrator)
% Check the network settings of this machine. For details, refer to page 3-14.
The network can be used with the default settings unless otherwise requested.
3 Checking computer information
% Check the information required for Store Address, and fill out the checklist. For details, refer to
page 3-15.
4 Configuring your computer
% Configure settings to share a computer, or create a dedicated folder to receive files. For details, refer
to page 3-15.
5 Registering destinations
% Register destinations to which files are sent while checking the checklist. For details, refer to
page 3-16.
3
Operation flow
The following describes a transmission flow. For details, refer to page 3-18.
1 Loading the original
2 Selecting a destination
% Select a registered destination, and check the settings such as the file type and image quality.
3 Press the Start key.
% Press the Start key to scan the original.
Checking the cable connection
Check that a LAN cable is connected to the LAN port of this machine and the green LED is on.
bizhub C554e/C454e/C364e/C284e/C224e 3-13
Page 94

3
Scan-to-Send function
3.2
Checking network settings of this machine
Tap [Utility], and select [Device Information]. Then, check that the IP address is displayed.
• For IPv4 environment • For IPv6 environment
Tips
- In general, the default settings are available for network connection; however, some network environ-
ments require a change on network settings.
- If no IP address is displayed, you need to configure the network. Tap [Utility], and select [Administrator
Settings] - [Network Settings] - [TCP/IP Settings]. Configure the required settings to suit your environment. For details, refer to the [User's Guide Online] on the DVD.
Checklist
While making notes in the checklist shown below, check computer information and configure settings for
preparation. The completed checklist is used for Store Address.
Name Entry column Detail
Host Address Host name or IP address to which the scanned data is sent page 3-15
File Path Name of the dedicated folder to receive the scanned data page 3-15
User ID User name required to log in to the computer page 3-15
Password Password required to log in to the computer
• You should not enter this column for security reasons.
3-14 bizhub C554e/C454e/C364e/C284e/C224e
Contact your system administrator.
Page 95

3.2 Scan-to-Send function
Checking computer information
Check the host address and user ID, and write them down.
1 Display the Properties window of the computer.
% In Windows 8, right-click on the Start window, then select [All apps] - [Computer]. On the toolbar,
select [Computer] - [System properties].
% In Windows Vista/7, from the Start menu, select [Computer] - [System properties].
% In Windows XP, open the Start menu, and right-click on [My Computer], and select [Properties].
2 Check the computer name, and write it down in the Host address column of the checklist.
3 Open the command prompt.
% In Windows 8, right-click on the Start window, then select [All apps] - [Command Prompt].
% In Windows Vista/7, from the Start menu, select [All Programs] - [Accessories] - [Command Prompt].
% In Windows XP, open the Start menu, and select [Programs] - [Accessories] - [Command Prompt].
4 Check the user name, and write it down in the User ID column of the checklist.
Configuring your computer
Create a new folder, and enable the sharing settings.
0 This operation requires administrator privileges for your computer.
3
1 Display the Network and Sharing Center window to configure a sharing setting.
% In Windows 8, right-click on the Start window, select [All apps] - [Control Panel] - [Network and In-
ternet] - [Network and Sharing Center] - [Change advanced sharing settings], then select the [Turn
on file and printer sharing] check box.
% In Windows 7, from the Start menu, select [Control Panel] - [Network and Internet] - [Network and
Sharing Center] - [Change advanced sharing settings] then select the [Turn on file and printer sharing] check box.
% In Windows Vista, open the Start menu, select [Control Panel] - [Network and Sharing Center], then
turn on [File sharing].
% For Windows XP, the control panel setting is not required.
2 Create a new folder, and write down the folder name in the File path column of the checklist.
3 Only for Windows XP, check the folder options.
% Double-click the folder, select [Tools] - [Folder Options...] then click the [View] tab.
% Clear the [Use simple file sharing (Recommended)] check box.
4 Configure the setting to share the folder created in Step 2. Right-click on the folder, then click [Proper-
ties].
% For Windows XP, right-click on the folder, then click [Sharing and Security].
5 Click the [Sharing] tab, then click [Advanced Sharing].
% For Windows XP, [Advanced Sharing] does not appear.
6 Select the [Share this folder] check box, then click [Permissions].
7 Select [Everyone] from the [Group or user names:] list, then select all of the [Allow] check boxes.
bizhub C554e/C454e/C364e/C284e/C224e 3-15
Page 96

3
1
2
3
Scan-to-Send function
3.2
Registering destinations
While checking the created checklist, register the folder for receiving the scanned data as an address book
of this machine.
1 Tap [Utility], and select [One-Touch/ User Box Reg.] - [Create One-Touch Destination] - [Address Book
(Public)] - [PC (SMB)].
2 Tap [New].
3 For [Name], specify the name to be displayed on the assigned key.
For [Sort Character], enter the same name as [Name].
% This sets the appropriate index for the name, which you entered into [Name], to [Index]. To change
the setting, tap [Index].
3-16 bizhub C554e/C454e/C364e/C284e/C224e
Page 97

3.2 Scan-to-Send function
2
3
1
3
1
2
4 While checking the checklist, enter the user ID and password you wrote down.
5 While checking the checklist, enter the host address and file path you wrote down.
% When not specifying a folder, enter a slash "/" for the file path. When specifying a folder, enter only
the folder name without slash "/".
3
6 Tap [Close].
bizhub C554e/C454e/C364e/C284e/C224e 3-17
Page 98

3
2
1
Sending the original
1 Load the original.
2 Tap [Scan/Fax].
Scan-to-Send function
3.2
3 Select a destination.
3-18 bizhub C554e/C454e/C364e/C284e/C224e
Page 99

3.2 Scan-to-Send function
4 Check the setting if necessary.
% Tap [Check Setting] to check the setting.
% You can also check the setting using the keys displayed on the Touch Panel.
% To change the setting, tap the desired key on the Touch Panel.
Settings Description
[Simplex/Duplex] Select whether to scan one or both sides of the original.
[Resolution] Specify the scanning resolution.
[Color] Select whether to scan the original in color or black and white
[File Type] Select the type of the file to save scanned data.
[Scan Size] Specify the size of the original to be scanned.
[File Name/Subject
Name/Other]
3
mode.
Change the file name or the subject of an E-mail to be sent.
5 Press the Start key.
bizhub C554e/C454e/C364e/C284e/C224e 3-19
Page 100

3
3.2.3 Sending data to your Mac computer (SMB Send)
Send scanned data to a computer on the network.
Once settings are configured, you can send data easily.
Preparation flow
The following describes a preparation flow for sending scanned data. For details, refer to the relevant page.
This preparation is not required the second time or subsequent times.
Scan-to-Send function
3.2
1 Checking the cable connection (Administrator)
% Check that this machine is correctly connected to the network cable. For details, refer to page 3-21.
2 Checking network settings of this machine (Administrator)
% Check the network settings of this machine. For details, refer to page 3-21.
3 Checking computer information
% Check the information required for Store Address, and fill out the checklist. For details, refer to
page 3-23.
4 Configuring your computer
% Configure settings to share a computer, or create a dedicated folder to receive files. For details, refer
to page 3-23.
5 Registering destinations
% Register destinations to which files are sent while checking the checklist. For details, refer to
page 3-24.
Operation flow
The following describes a transmission flow. For details, refer to page 3-26.
1 Loading the original
2 Selecting a destination
% Select a registered destination, and check the settings such as the file type and image quality.
3 Press the Start key.
% Press the Start key to scan the original.
3-20 bizhub C554e/C454e/C364e/C284e/C224e
 Loading...