

Page 1
4 A
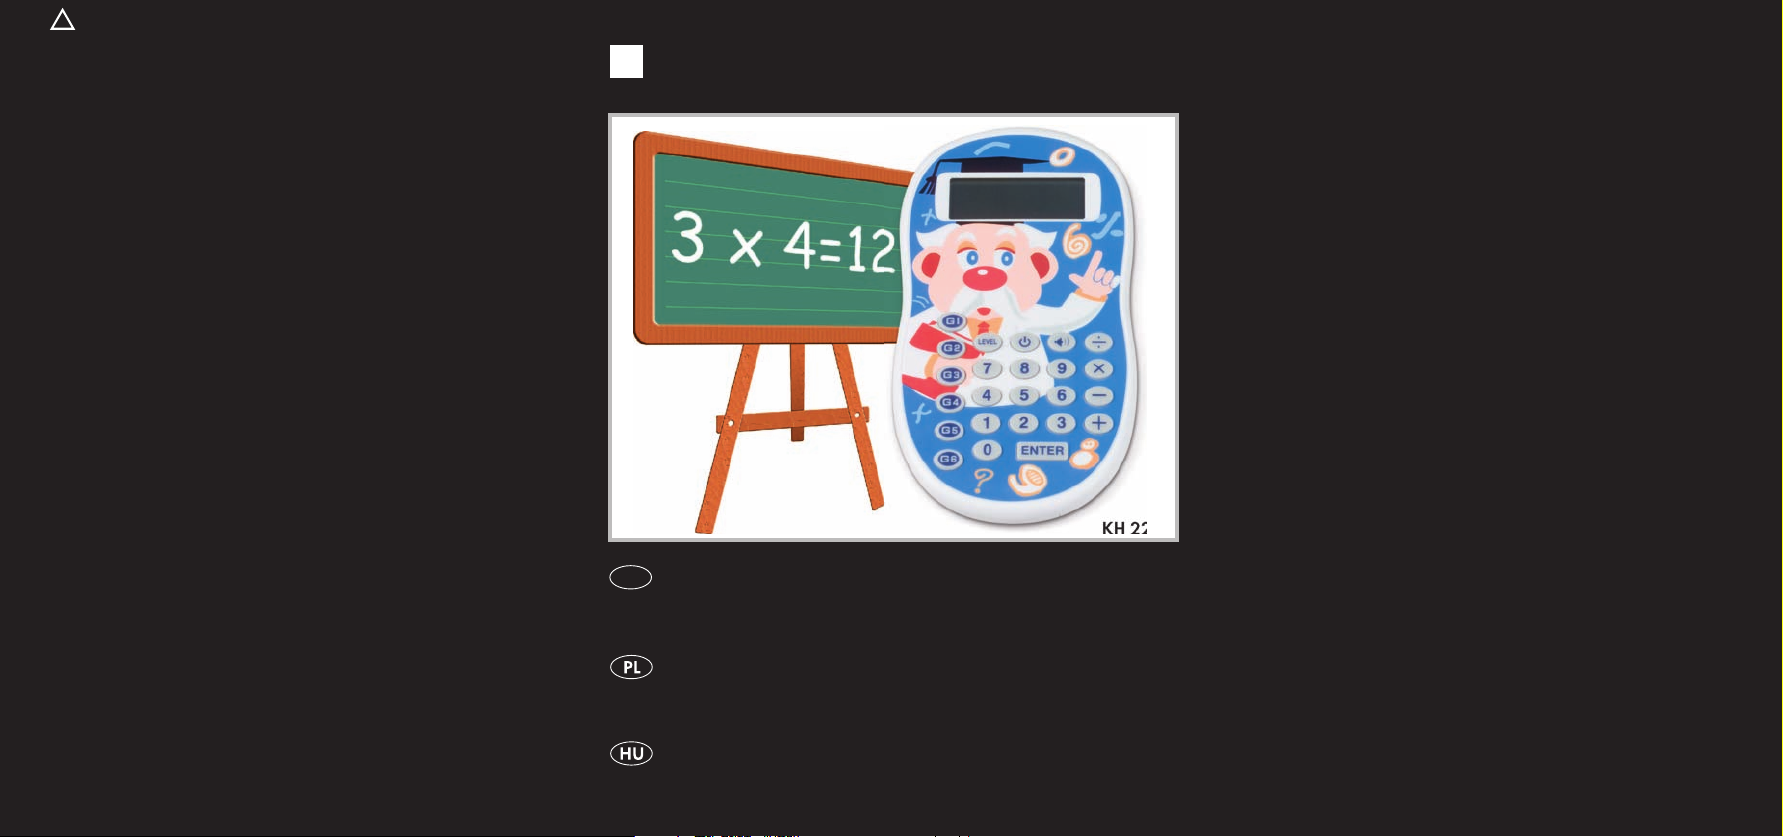
CALCULATOR TRAINER
GB
CALCULATOR TRAINER
KH 2283
KOMPERNASS GMBH
BURGSTRASSE 21 • D-44867 BOCHUM
www.kompernass.com
ID-NR.: KH2283-03/08-V3
Instruction Manual
TRENER MATEMATYCZNY
Instrukcja obs³ugi
SZÁMOLÁSGYAKORLÓ
Használati útmutató
Page 2
KH2283
1^
1%
1$
1#
1@
1!
q
1&
w
e
r
t
y
u
i
2)
o1)
1( 1*
1(
Page 3
- 1 -
Read the operating instructions carefully before using the device for the rst time
and preserve this booklet for later reference. Pass this booklet on to whoever
might acquire the device at a future date.
CONTENTS Page
Intended use 2
Items supplied 2
Technical Data 2
Please read the safety instructions 2
Operational features 4
Initial operation of the device 4
Changing the batteries 5
Handling of batteries 5
Switching the device on and off 5
Selecting the training programme 6
The display 7
Setting the difficulty level 8
Muting the acoustic function 8
The training programme in particular 8
Cleaning and care 12
Disposal 13
CE Conformity 13
Importer 14
Warranty and Service 14
Page 4
- 2 -
Intended use
This calculator trainer is intended exclusively for calculation
and memory prociency for the young and old (5 years and
up) and does not provide the functions of a pocket calculator.
The device is not intended for use in commercial or industrial
environments. No warranty claims will be granted for damage
resulting from improper use!
Items supplied
1 Calculator trainer
1 Transparent protective cover
1 Operating instruction booklet
Technical Data
LCD indicator
Over 300.000 tasks
Power supply: 1 x 3V (Typ CR2032)
Measurements (W x H x D): 8,2 x 15,3 x 1,3 cm
Weight : approx. 80 g
Operating temperature: 5° - 40°C
Storage temperature : —20° - 60°C
Please read the safety instructions
Do not allow children under 5 years of age to handle elec-•
tronic devices unsupervised because they often underesti-
mate the danger of personal injury.
NEVER submerse the device in water. Wipe it only with a
•
slightly damp cloth.
Page 5
- 3 -
Do not expose the device to rain and never use it in a humid •
or wet environment.
You must not open the device housing or repair the device
•
yourself. Should you do so, the safety of the device may be
compromised and the warranty becomes void.
Risk of explosion!
Do not throw batteries into a re. Do not recharge the •
batteries.
Riskofre!
Do not use the device near hot surfaces.•
Do not operate or store the device in hot locations and do •
not subject the device to direct sunlight or strong articial
light sources. Otherwise, it may overheat and become
irreparably damaged.
Do not place open re sources, such as candles, on the
•
device.
Riskofpersonalinjury!
Keep batteries away from children. Children can put batteries •
into their mouths and swallow them. If a battery is swallowed
medical assistance must be sought immediately.
Page 6
- 4 -
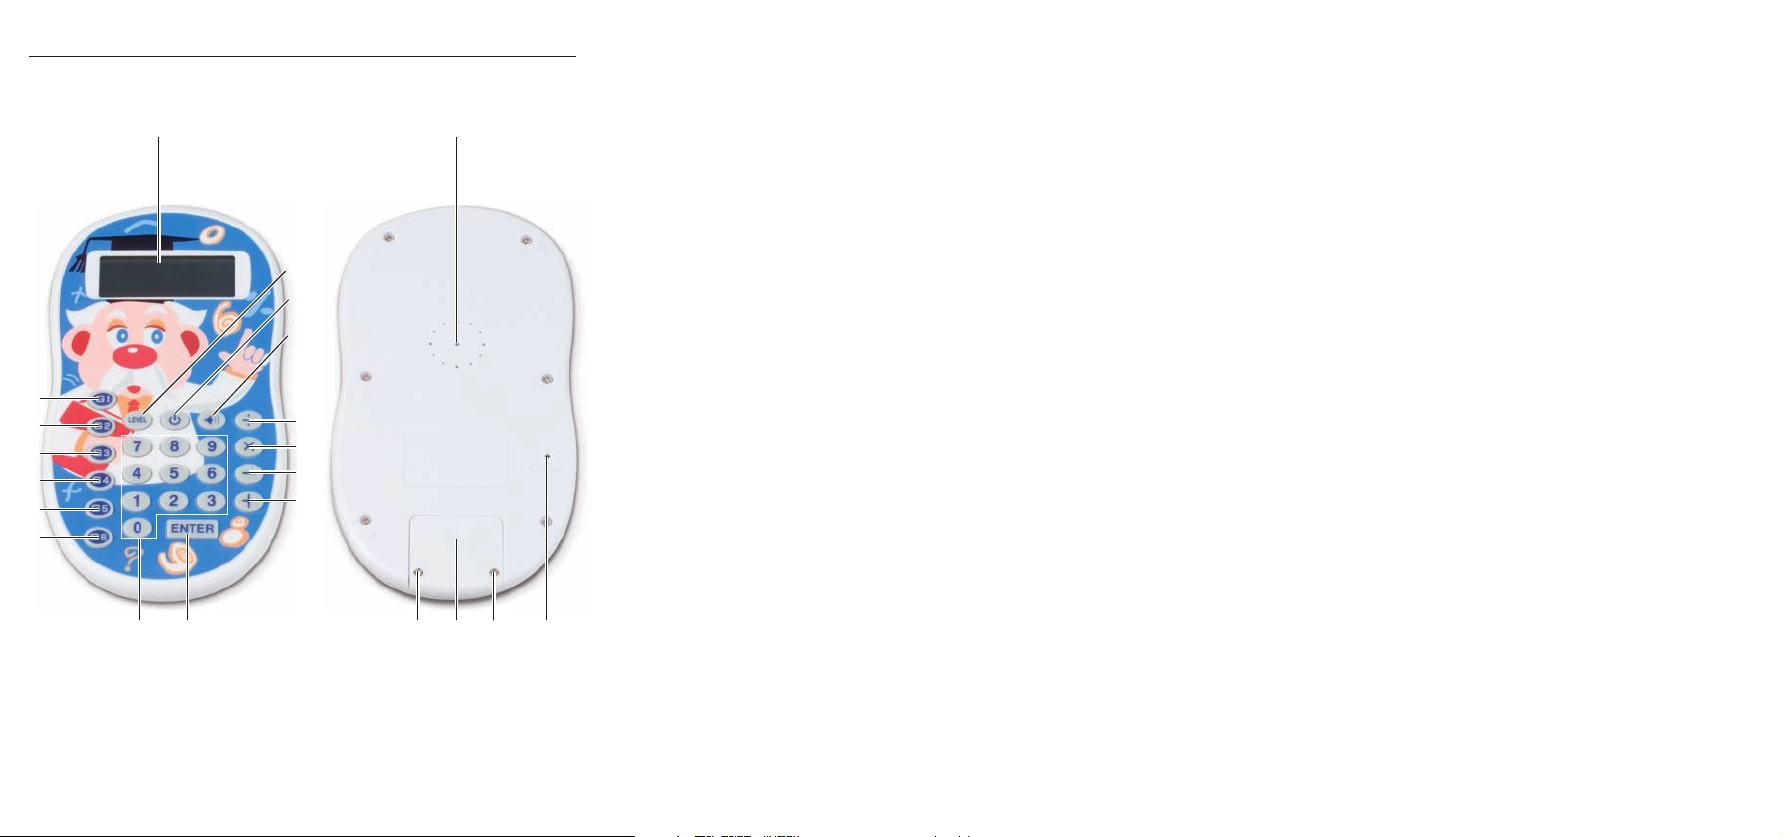
Operational features
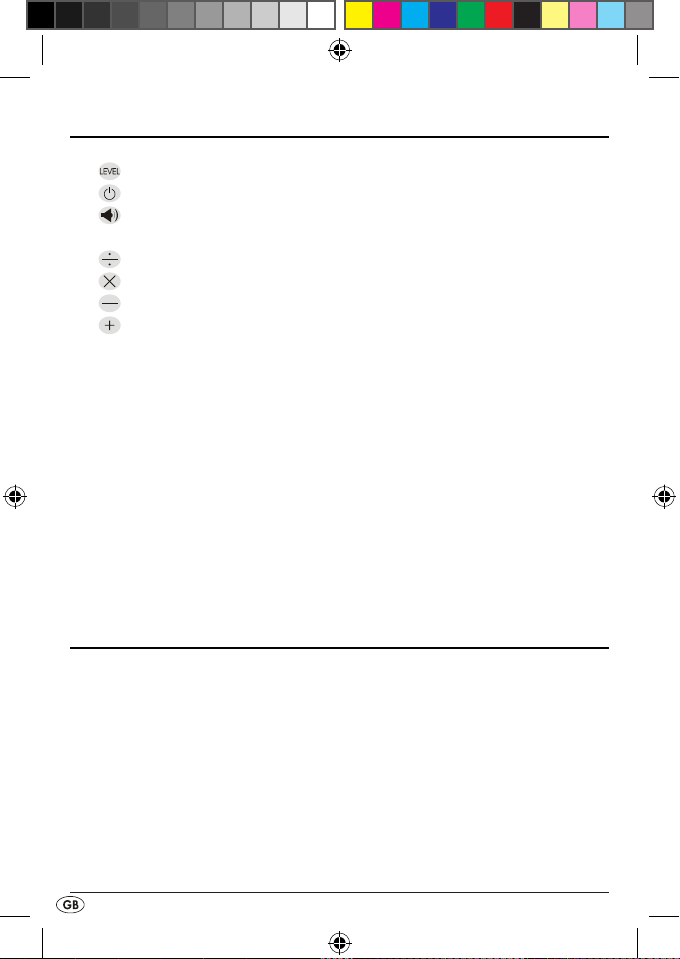
q Display
w - For selection of the diculty level
e - On/O switch
r - Switches the acoustic function on and
o
t - Division button
y - Multiplication button
u - Subtraction button
i - Addition button
o ENTER - Input button
aNumber buttons for entering number values
sProgramme button G 6 - accesses training programme 6
d Programme button G 5 - accesses training programme 5
f Programme button G 4 - accesses training programme 4
gProgramme button G 3 - accesses training programme 3
h Programme button G 2 - accesses training programme 2
j Programme button G 1 - accesses training programme 1
k Speaker for beep sounds
l RESET - To reset the device
; Battery compartment screws
2) Battery compartment cover
Initial operation of the device
Remove the calculator trainer and accessories from the >
packaging.
Remove all possible sticky tape/foils.
>
The battery is already preinstalled. To protect against prema-
>
ture discharging an isolation strip has been placed between
the poles. Simply pull this out before initial operation.
Page 7
- 5 -
Changing the batteries
The device requires a 3V lithium battery type CR2032, which is
already preinstalled. If the display remains blank after it has been
switched on the batteries are depleted. To change the batteries
open the battery compartment on the rear panel of the device.
For this unscrew both of the screws
> ; and remove the
battery compartment cover 2).
Before removing the old batteries please memorize their
>
position in the compartment by means of the inscription.
The plus sign is visible from the outside.
Remove the batteries and replace them with fresh ones of
>
the same type. Thereby the plus sign must still be visible
from the outside otherwise the device will not function and
could be damaged.
Place the battery compartment cover
> 2) back on and screw
it down rmly.
Handling of batteries
Leaking batteries can cause damage to the calculator trainer.
If you do not intend to use the calculator trainer for a long
>
period of time then remove the batteries.
When a battery has leaked put on protective gloves and
>
clean the battery compartment with a dry cloth.
Do not attempt to recharge the batteries.
>
Switching the device on and o
To switch the device on press the > button e. In the display q
the rst calculation task appears.
To switch the device o press the
> button e again.
Page 8
- 6 -
Selecting the training programme
Press one of the G buttons 1!-1^ to select from the following
training programmes:
G 1•
Task type: Basic calculation operations, addition, subtraction, division and multiplication are selectable, 5 diculty
levels are available.
G 2•
Task type: Recognize the calculation operation by means
of the results, 5 diculty levels are available.
G 3•
Task type: Sequence recognition, recognizing the 4th value
from the previous 3, 3 diculty levels available.
G 4•
Task type: Retention of number chains, 5 diculty levels
available.
G 5•
Task type: Input of the sum terms which lead to the given
result, 3 diculty levels available.
G 6•
Task type: Addition with memory training, 5 diculty levels
available.
Page 9
- 7 -
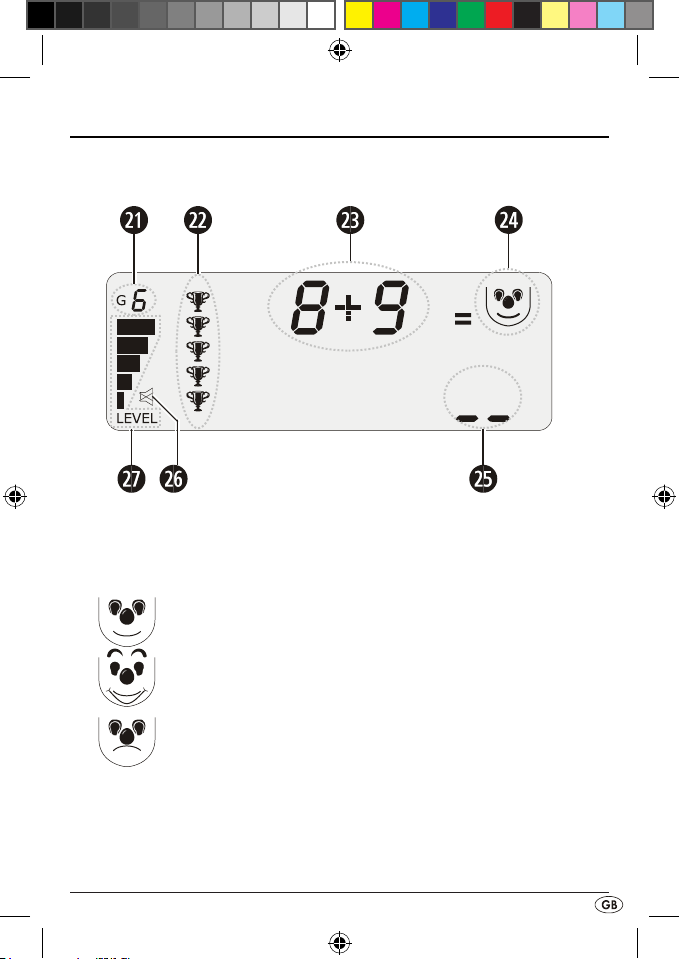
The display
In the display you can read the respective task and further
information:
2!Indicator for the current training programme
2@Indicator for the already solved task
2#Calculation tasks to be solved
2$
Answer evaluation by means of stylized facial features:
normal face, there are no scheduled evaluations,
happy face, the answer is correct,
sad face, the answer is incorrect.
2%Answer indicator
2^Acoustic function indicator
2&Selected diculty level indicator
Page 10
- 8 -
Setting the diculty level
The training programmes oer you 3 and/or 5 dierent diculty
levels.
Press the
> button w to switch up to the next diculty level.
If the highest level was already set the device will switch back
to the lowest level.
The bar indicator 2& in the display q shows you the currently
selected diculty level. The display of only one bar indicates the
lowest diculty level, if the display q shows 3 and/or 5 bars, this
is an indication of the highest diculty level.
Muting the acoustic function
The acoustic function acknowledges every press of a button with a
short beep sound and after your answer entry, plays a short theme
music depending on wether the entry was correct or not.
To switch the device's acoustic function on or o press the
>
button r.
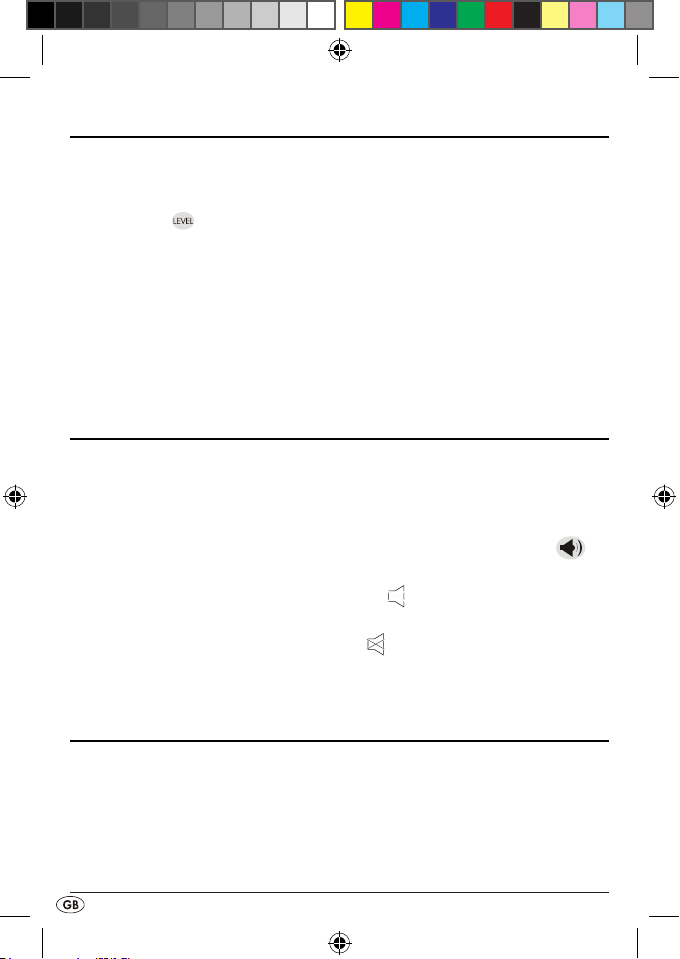
When the acoustic function is active the
symbol lights up in the
display q.
When the function is switched o the
symbol lights up in the dis-
play q.
The training programme in particular
Here you learn details pertaining to the training programmes.
G 1 - Basic calculation operations
To select this programme press the button G 1
> j. In the display
q the rst calculation task appears. Thereby the strokes in the an-
swer indicator 2% show how many digits the correct answer has.
Page 11
- 9 -
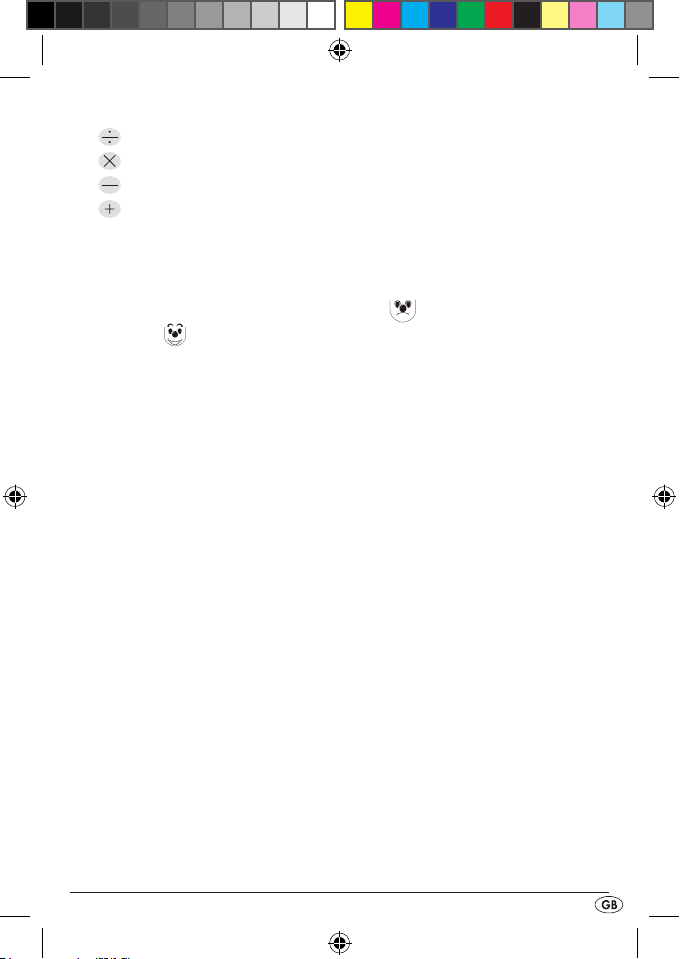
Press the . . . >
button t when you want the device to set division tasks,
button y when you want the device to set multiplication tasks,
button u when you want the device to set subtraction tasks,
button i when you want the device to set addition tasks.
Enter the solution via the number buttons and press the
>
ENTER button o.
The device evaluates your entry in 3 ways:
The face is depicted as either sad (• incorrect entry) or
happy ( correct entry),
a corresponding melody is played (only when the acoustic •
function is switched on),
with a correct entry, in the display • q is shown an additional
goblet (%).
When approx. 20 seconds has elapsed without an input the
>
task is considered unsolved and/or incorrect.
After the input of an incorrect answer the same task will be
>
presented to you a second time. If, after this you are still
unable to solve the task the device shows the solution in the
display q and then oers you a new task.
Press the ENTER button
> o when you want to skip over the
task. If this is the rst time that the device has set this task
then you will be oered a second chance here also. Then
press the ENTER button o again and the device will show
the solution in the display q and oers you a new task.
After every 5 tasks the device determines an evaluation of
>
your entries. For each solved task you receive 20 points
and a goblet (%).
A higher diculty level in this programme results in the numbers
being greater.
Page 12

- 10 -
G 2 - Recognize the carried out calculation operation
To select this programme press the button G 2
> 1%. In the
display q the rst task appears.
In the upper line you will see 2 numbers. Now determine
>
which of the 4 basic calculation types must be applied to
the numbers in order to achieve the answer located in the
lower line.
Within approx. 20 seconds press the corresponding button
>
and then the arithmetic operator will be superimposed
between the two numbers.
Press the ENTER button
> o to conrm your selection.
We have already described under G 1 how the device evaluates
your entries and/or behaves when the entry is missing or incorrect. The implementation of the "second chance" and the evalu-
ation of your entries accordingly also applies here therefore
we will dispense with a repetition here and with explanations
of other training programmes.
A higher diculty level in this programme results in the numbers
being greater.
G 3 - Sequence recognition
To select this programme press the button G 3
> 1$. In the
display q 3 numbers appear.
Here you must recognize which logical sequence the numbers
>
form when read from left to right.
Within approx. 20 seconds enter the next highest number in
>
the sequence as the answer and press the ENTER button o.
G 4 - Retention of numbers
To select this programme press the button G 4
> 1#. In the
display q a four digit number appears.
Page 13
- 11 -
Memorize this number, after a few seconds the number >
disappears.
Now enter, Within approx. 20 seconds, the number as the
>
answer and press the ENTER button o.
A higher diculty level in this programme results in the numbers
being greater.
G 5 - Sequence recognition
To select this programme press the button G 5
> 1@. In the
display q in the lower line, a number followed by an arith-
metic operator appears.
Now enter, within approx. 20 seconds, for the empty eld
>
the number by which the term will achieve the answer shown
in the upper line.
In this programme, after the entry of an incorrect answer or if
you do not enter any answer at all, the device will immediately
set a new task and will not oer a second chance.
In this programme a higher diculty level results in the device
increasing the number of sum terms.
G 6 - Addition with memory training
To select this programme press the button G 6
> 1!. In the
display q a term appears in the upper line.
Memorize the 2 sum terms then within approx. 20 seconds,
>
enter the answer and press the ENTER button o.
If the answer was correct you will now receive another task,
>
in which the 2nd sum term is hidden by a ashing segment
and is therefore not shown.
Now recall to mind the number you have just memorized
>
and in this way calculate the answer. Now memorize the
1st sum term of this task.
Page 14
- 12 -
Enter the answer and press the ENTER button > o.
If the answer was correct you will now receive another task,
>
in which the 1st sum term is hidden by a ashing segment.
Now recall to mind the number you have just memorized
>
and in this way deduce the answer.
Enter the answer and press the ENTER button
> o.
In this programme a higher diculty level results in the
described operations being solved repeatedly.
Resetting the device
If the device functions appear to you to be impaired or it does
not behave as described in these instructions you will have to
reset it. For this press the RESET button 1* carefully with a thin,
sharp object through the housing opening on the rear panel of
the device. This will return the device to its default settings.
Cleaning and care
NEVER submerse the device or its components in water or •
other uids!
Do not allow any liquids to penetrate the housing.
•
Cleaning the housing:
Clean the housing surface with a slightly damp cloth
Never use petrol, solvents or detergents that can
damage plastics!
Page 15

- 13 -
Disposal
Do not dispose of the device in your normal
domestic waste. This device is subject to the
European Guidelines 2002/96/EG.
Batteries/rechargeable batteries
Used batteries/rechargeable batteries may not be disposed
•
of in household waste.
Batteries/rechargeable batteries can contain toxic substances,
•
which may damage the environment. Therefore, dispose of
the batteries/rechargeable batteries in accordance with
statutory regulations.
Every consumer is legally obligated to surrender batteries/
•
rechargeable batteries to a community collection centre in
their district or to a dealer. The purpose of this obligation is
to ensure that batteries are disposed of in a non-polluting
manner.
Only dispose of batteries when they are fully discharged.
•
Dispose of packaging materials in an environmentally
friendly manner.
CE Conformity
This device has been tested and approved regarding con-
formance with the fundamental requirements and other relevent
regulations of the EMV directive 2004/108/EG.
Page 16

- 14 -
Importer
Kompernass GmbH
Burgstrasse 21
44867 BOCHUM, GERMANY
www.kompernass.com
Warranty and Service
The warranty for this device is for 3 years from the date of purchase. The device has been manufactured with care and meticulously examined before delivery. Please retain your receipt as
proof of purchase. In the event of a warranty claim, please make
contact by telephone with our service department. Only in this
way can a post-free dispatch of your goods be assured.
The warranty covers only claims for material and maufacturing
defects, not for worn parts or for damage to fragile components,
e.g. buttons or batteries. The device is intended solely for private
domestic use, not for commercial applications.
In the event of misuse and improper handling, use of force and
interference not carried out by our authorized service branch,
the warranty will become void. Your statutory rights are not
restricted in any way by this warranty.
DES Ltd
Units 14-15
Bilston Industrial Estate
Oxford Street
Bilston
WV14 7EG
Tel.: 0870/787-6177
Fax: 0870/787-6168
e-mail:
support.uk@kompernass.com
Irish Connection
Harbour view
Howth
Co. Dublin
Tel: 00353 (0) 87 99 62 077
Fax: 00353 18398056
e-mail:
support.ie@kompernass.com
Page 17

- 15 -
Przed pierwszym użyciem zapoznaj się z instrukcją obsługi i zachowaj ją w
celu późniejszego wykorzystania. Przekazując urządzenie innej osobie należy jej również udostępnić niniejszą instrukcję obsługi.
SPIS TREŚCI STRONA
Zastosowanie zgodnie z przeznaczeniem 16
Zakres dostawy 16
Dane techniczne 16
Należy przeczytać zasady bezpieczeństwa 16
Elementy obsługi 18
Uruchamianie urządzenia 18
Wymiana baterii 19
Obchodzenie się z bateriami 19
Włączanie i wyłączanie urządzenia 19
Wybieranie programu treningowego 20
Wyświetlacz 21
Ustawianie stopnia trudności 22
Wyłączanie dźwięków 22
Szczegółowy opis programu treningowego 22
Czyszczenie i pielęgnacja 27
Utylizacja 27
Deklaracja zgodności CE 28
Importer 28
Gwarancja i serwis 28
Page 18

- 16 -
Zastosowanie zgodnie z przeznaczeniem
Trener matematyczny jest przeznaczony wyłącznie do trenowania pamięci i zdolności liczenia dla wszystkich osób
(w wieku powyżej pięciu lat) i nie oferuje funkcji typowego kalkulatora. Urządzenie nie nadaje do użytku w zastosowaniach
przemysłowych i komercyjnych. Szkody spowodowane używaniem urządzenia niezgodnie z jego przeznaczeniem nie będą
uznawane za podstawę do udzielenia gwarancji!
Zakres dostawy
1 trener matematyczny
1 przezroczysta osłona
1 instrukcja obsługi
Dane techniczne
Wyświetlacz LCD
ponad 300.000 zadań
Zasilanie: 1 x 3V (typ CR2032)
Wymiary (S x W x G): 8,2 x 15,3 x 1,3 cm
Masa: ok. 80 g
Temperatura robocza: 5 ° - 40 °C
Temperatura przechowywania: -20 ° - 60 °C
Należy przeczytać zasady bezpieczeństwa
Nie pozwalać dzieciom w wieku poniżej pięciu lat obcho-•
dzić się z urządzeniami elektrycznymi bez nadzoru, gdyż
mogą one nie być w stanie ocenić ewentualnego niebezpieczeństwa obrażeń.
Page 19

- 17 -
Nigdy nie zanurzać urządzenia w wodzie. Do wycierania •
używać lekko zwilżonej szmatki.
Urządzenia nie wolno wystawiać na działanie deszczu ani
•
używać go w wilgotnym lub mokrym środowisku.
Obudowa nie jest przeznaczona do otwierania lub naprawy.
•
Stanowi to poważne zagrożenie i powoduje wygaśnięcie
gwarancji.
Niebezpieczeństwowybuchu!
Baterii nie wolno wrzucać do ognia. Nigdy nie ładować •
rozładowanych baterii.
Niebezpieczeństwopożaru!
Nie używać urządzenia w pobliżu gorących powierzchni.•
Nie używać ani nie stawiać urządzenia w gorących miejscach •
lub miejscach wystawionych bezpośrednio na działanie
promieni słonecznych albo silnych źródeł światła. Działanie
wysokiej temperatury może spowodować przegrzanie urządzenia i trwałe uszkodzenie.
Na urządzeniu nie wolno stawiać otwartych źródeł ognia,
•
takich jak np. świece.
Niebezpieczeństwoobrażeń!
Baterie nie powinny nigdy trać w ręce dzieci. Dziecko •
może wziąć baterię do buzi i połknąć ją. W razie połknięcia
baterii należy natychmiast skorzystać z pomocy medycznej.
Page 20

- 18 -
Elementy obsługi
q wyświetlacz
w - do wybierania stopnia trudności
e - włącznik/wyłącznik
r - włącza i wyłącza dźwięki
t - przycisk dzielenia
y - przycisk mnożenia
u - przycisk odejmowania
i - przycisk dodawania
o ENTER - przycisk wprowadzania
aprzyciski cyfrowe do wprowadzania liczb
sprzycisk programu G 6 - wywołuje program treningowy 6
d przycisk programu G 5 - wywołuje program treningowy 5
f przycisk programu G 4 - wywołuje program treningowy 4
gprzycisk programu G 3 - wywołuje program treningowy 3
h przycisk programu G 2 - wywołuje program treningowy 2
j przycisk programu G 1 - wywołuje program treningowy 1
k głośnik do sygnalizacji dźwiękowej
l RESET - do resetowania urządzenia
; śruby komory baterii
2) pokrywa komory baterii
Uruchamianie urządzenia
Wyjąć trener matematyczny wraz z akcesoriami z opako- >
wania.
Usunąć wszystkie taśmy lub folie samoprzylepne.
>
Bateria jest już włożona do środka urządzenia. W celu
>
zapobieżenia przedwczesnemu rozładowaniu się baterii
między jej biegunami umieszczono pasek izolacyjny. Przed
pierwszym użyciem urządzenia należy go zdjąć.
Page 21

- 19 -
Wymiana baterii
Urządzenie jest zasilane z baterii litowej 3 V typu CR2032, która jest już zainstalowana w chwili dostawy. Jeżeli po włączeniu
wyświetlacz pozostaje ciemny, to bateria jest wyczerpana.
W celu wymiany baterii należy otworzyć komorę baterii, znajdującą się od tyłu urządzenia.
W tym celu wykręcić obie śruby mocujące
> ; i zdjąć pokrywę
komory baterii 2).
Przed wyjęciem baterii należy zapamiętać jej ustawienie,
>
kierując się przy tym napisem na baterii. Znak plusa jest
widoczny od zewnątrz.
Wyjąć baterię i włożyć świeżą baterię tego samego typu.
>
Znak plusa musi być przy tym widoczny od zewnątrz,
inaczej urządzenie nie będzie działać i może zostać uszkodzone.
Założyć pokrywę komory baterii
> 2) i przykręcić ją.
Obchodzenie się z bateriami
Wylanie się baterii może spowodować uszkodzenie trenera
matematycznego.
Jeżeli trener matematyczny nie będzie używany przez
>
dłuższy czas, należy wyjąć baterie.
W razie wylania się baterii należy ubrać rękawice ochronne
>
i oczyścić komorę baterii suchą szmatką.
Nie próbować ponownie ładować baterii.
>
Włączanie i wyłączanie urządzenia
W celu włączenia urządzenia należy nacisnąć przycisk >
e. Na wyświetlaczu q pojawia się pierwsze zadanie
matematyczne.
Page 22

- 20 -
Aby wyłączyć urządzenie należy ponownie nacisnąć >
przycisk
e.
Wybieranie programu treningowego
Nacisnąć jeden z przycisków G 1!-1^, aby wybrać jeden
z poniższych programów treningowych:
G1•
Typ zadania: Dostępne są podstawowe operacje matematyczne, dodawanie, odejmowanie, dzielenie i mnożenie
z pięcioma stopniami trudności.
G2•
Typ zadania: Rozpoznawanie operacji matematycznych
w oparciu o wynik z pięcioma stopniami trudności.
G3•
Typ zadania: Rozpoznawanie ciągów, wyliczanie czwartej
wartości w oparciu o trzy poprzednie z trzema stopniami
trudności.
G4•
Typ zadania: Zapamiętywanie ciągów liczb z pięcioma
stopniami trudności.
G5•
Typ zadania: Wprowadzanie składnika sumy, prowadzącego
do zadanego wyniku z trzema stopniami trudności.
G6•
Typ zadania: Dodawanie z treningiem pamięci z pięcioma
stopniami trudności.
Page 23

- 21 -
Wyświetlacz
Na wyświetlaczu można odczytać zadanie do wykonania
oraz dodatkowe informacje:
2! Pokazuje aktualny program treningowy
2@ Pokazuje zrealizowane już zadania
2# Zadanie matematyczne do rozwiązania
2$
Ocena wyniku przez wyświetlanie emotikonek:
normalna twarz - brak oceny,
uśmiechnięta twarz - wynik jest prawidłowy,
smutna twarz - wynik jest nieprawidłowy.
2% Wskazanie wyniku
2^ Sygnalizator dźwięków
2& Wskazanie wybranego stopnia trudności
Page 24

- 22 -
Ustawianie stopnia trudności
Programy treningowe posiadają trzy lub pięć różnych stopni
trudności.
Nacisnąć przycisk
> w, aby przełączyć na wyższy stopień
trudności. Jeżeli ustawiony jest już najwyższy stopień trudności, urządzenie przełącza wtedy z powrotem na najniższy
stopień.
Wskaźnik paskowy 2& na wyświetlaczu q pokazuje ustawiony
w danej chwili stopień trudności. Wyświetlenie tylko jednego
segmentu symbolizuje najniższy stopień trudności, a gdy wyświetlacz q pokazuje 3 lub 5 segmentów, informuje to o najwyższym stopniu trudności.
Wyłączanie dźwięków
Funkcja akustyczna potwierdza każde naciśnięcie przycisku krótkim
piśnięciem, a po wprowadzeniu wyniku odtwarza krótką melodyjkę,
zależną od tego, czy wynik był poprawny czy też nie.
W celu włączenia lub wyłączenia funkcji akustycznej urzą-
>
dzenia należy nacisnąć przycisk
r.
Jeżeli dźwięki są aktywne, na wyświetlaczu q widoczny jest
symbol
.
Gdy funkcja dźwięków jest wyłączona, na wyświetlaczu q
świeci symbol
.
Szczegółowy opis programu treningowego
Poniżej opisane zostały szczegóły dostępnych programów treningowych.
Page 25

- 23 -
G 1 - podstawowe operacje matematyczne
Aby wybrać ten program, należy nacisnąć przycisk G 1
> j.
Na wyświetlaczu q pojawia się pierwsze zadanie matematyczne. Kreski we wskazaniu wyniku 2% sygnalizują przy
tym, ile miejsc ma prawidłowy wynik.
Nacisnąć . . .
>
przycisk t, jeżeli urządzenie ma zadawać przykłady
dzielenia,
przycisk y, jeżeli urządzenie ma zadawać przykłady
mnożenia,
przycisk u, jeżeli urządzenie ma zadawać przykłady
odejmowania,
przycisk i, jeżeli urządzenie ma zadawać przykłady
dodawania.
Wprowadzić wynik za pomocą przycisków cyfrowych i na-
>
cisnąć przycisk ENTER o.
Urządzenie ocenia wynik na trzy sposoby:
Pojawia się albo smutna twarz (• wynik błędny) lub wesoła
( wynik prawidłowy),
słychać odpowiednią melodię (tylko przy włączonych •
dźwiękach),
przy poprawnym wyniku na wyświetlaczu • q pokazywany
jest dodatkowy puchar (%).
Upłynięcie 20 sekund bez wprowadzenia wyniku powo-
>
duje, że zadanie zostaje uznane za nierozwiązane lub
rozwiązane błędnie.
Po wprowadzeniu błędnego wyniku to samo zadanie
>
jest pokazywane jeszcze raz. Jeżeli zadanie nie zostanie
ponownie rozwiązane, urządzenie pokazuje wynik na
wyświetlaczu q i zadaje nowy przykład.
Page 26

- 24 -
Nacisnąć przycisk ENTER > o, chcąc pominąć to zadanie.
Jeżeli urządzenie zadało ten przykład po raz pierwszy,
to oferuje ono wtedy drugą szansę. Ponowne naciśnięcie
przycisku ENTER o powoduje, że urządzenie pokazuje
wynik na wyświetlaczu q i oferuje nowy przykład.
Po każdorazowo pięciu zadaniach urządzenie dokonuje
>
oceny wyników. Za każde rozwiązane zadanie otrzymu-
jesz 20 punktów i puchar (%).
Wyższy stopień trudności w tym programie powoduje, że liczby stają się wyższe.
G 2 - rozpoznawanie przeprowadzonych operacji
matematycznych
Aby wybrać ten program, należy nacisnąć przycisk G 2
> 1%.
Na wyświetlaczu q pojawia się pierwsze zadanie.
W górnym rzędzie widoczne są dwie liczby. Należy teraz
>
określić, która z czterech podstawowych operacji matema-
tycznych musi zostać użyta, aby z tych liczb uzyskać poka-
zany u dołu wynik.
W przeciągu 20 sekund należy nacisnąć odpowiedni przy-
>
cisk, a znak operacji matematycznej zostanie wyświetlony
pomiędzy obydwoma liczbami.
Nacisnąć przycisk ENTER
> o, aby potwierdzić dokonany
wybór.
Sposób oceniania wyników przez urządzenie oraz jego
zachowanie przy braku lub błędnym wyniku opisaliśmy już
w punkcie G 1. Także w tym przypadku obowiązują informacje
dotyczące „drugiej szansy” oraz oceny wyników, dlatego nie
będziemy ich już powtarzać przy opisach następnych programów
treningowych.
Wyższy stopień trudności w tym programie powoduje, że liczby
stają się wyższe.
Page 27

- 25 -
G 3 - rozpoznawanie ciągów
Aby wybrać ten program, należy nacisnąć przycisk G 3
> 1$.
Na wyświetlaczu q pojawiają się trzy liczby.
Należy tu określić, jaką kolejność logiczną (ciąg liczb)
>
tworzą te liczby od lewej do prawej.
W przeciągu ok. 20 sekund należy wpisać jako wynik
>
następną wyższą liczbę w kolejności i nacisnąć przycisk
ENTER o.
G 4 - zapamiętywanie liczb
Aby wybrać ten program, należy nacisnąć przycisk G 4
> 1#.
Na wyświetlaczu q pojawia się czterocyfrowa liczba.
Należy dobrze zapamiętać tę liczbę, gdyż zniknie ona po
>
kilku sekundach.
W przeciągu ok. 20 sekund należy teraz wpisać tę liczbę
>
jako wynik i nacisnąć przycisk ENTER o.
Wyższy stopień trudności w tym programie powoduje, że liczby
stają się wyższe.
G 5 - rozpoznawanie ciągów
Aby wybrać ten program, należy nacisnąć przycisk G 5
> 1@.
W dolnym rzędzie na wyświetlaczu q pojawia się liczba
ze znakiem operacji matematycznej.
Teraz w przeciągu ok. 20 sekund należy wpisać do puste-
>
go liczbę, z którą zadany wzór daje wynik, pokazywany
w górnym rzędzie.
W tym programie, po wprowadzeniu błędnego wyniku lub
w razie braku wyniku urządzenie natychmiast postawi nowe
zadanie, nie dając drugiej szansy.
Wyższy stopień trudności w tym programie powoduje, że
urządzenie zwiększa liczbę składników sumy.
Page 28

- 26 -
G 6 - dodawanie z treningiem pamięci
Aby wybrać ten program, należy nacisnąć przycisk G 6
> 1!.
W górnym rzędzie na wyświetlaczu q pojawia się wzór.
Należy zapamiętać drugi składnik sumy, a następnie w
>
przeciągu ok. 20 sekund wpisać wynik i nacisnąć przycisk
ENTER o.
Jeżeli wynik był prawidłowy, pojawia się następne zadanie,
>
w którym drugi składnik sumy jest ukryty pod migającym
segmentem i dlatego niewidoczny.
Wstawić zapamiętaną liczbę i w ten sposób wyliczyć wynik.
>
Teraz należy zapamiętać pierwszy składnik sumy tego
zadania.
Wprowadzić wynik i nacisnąć przycisk ENTER
> o.
Jeżeli wynik był prawidłowy, pojawia się następne zadanie,
>
w którym pierwszy składnik sumy jest ukryty pod migającym
segmentem.
Wstawić zapamiętaną liczbę i w ten sposób wyliczyć wynik.
>
Wprowadzić wynik i nacisnąć przycisk ENTER
> o.
Wyższy stopień trudności w tym programie powoduje, że
opisane procesy należy powtarzać większą liczbę razy.
Resetowanie urządzenia
Jeżeli działanie urządzenia wydaje się być zakłócone lub
urządzenie nie zachowuje się zgodnie z opisem w tej instrukcji,
należy go zresetować. W tym celu nacisnąć ostrożnie przycisk
RESET 1* cienkim, ostrym przedmiotem, wprowadzonym do
otworu obudowy, znajdującego się od tyłu urządzenia. Powoduje to przywrócenie ustawień fabrycznych urządzenia.
Page 29

- 27 -
Czyszczenie i pielęgnacja
Nigdy nie zanurzać urządzenia w wodzie lub w innych •
cieczach!
Nie wolno dopuścić do przedostania się cieczy do wnętrza
•
obudowy.
Czyszczenie obudowy:
Powierzchnię obudowy należy czyść lekko zwilżoną
szmatką. Nie stosować benzyny, rozpuszczalników lub
środków do czyszczenia, niszczących tworzywo sztuczne.
Utylizacja
W żadnym przypadku nie należy wyrzucać
urządzenia do normalnych śmieci domowych.
Ten produkt jest objęty stosowaniem dyrektywy europejskiej 2002/96/WE.
Baterie i akumulatory
Baterii lub akumulatorów nie wolno wyrzucać razem ze
•
śmieciami domowymi.
Baterie bądź akumulatory mogą zawierać substancje tok-
•
syczne, szkodliwe dla środowiska. Dlatego bezwzględnie
należy utylizować baterie lub akumulatory zgodnie z obowiązującymi wymaganiami ustawowymi.
Każdy konsument jest ustawowo zobowiązany do od-
•
dawania wszystkich baterii i akumulatorów w punktach
zbiorczych gminy lub dzielnicy albo do zwracania ich do
handlu. Celem tego obowiązku jest ekologiczna utylizacja
baterii lub akumulatorów.
Page 30

- 28 -
Baterie lub akumulatory należy oddawać tylko w rozładowa-•
nym stanie.
Wszystkie materiały wchodzące w skład opakowania
należy przekazać do odpowiednich punktów zbiórki
odpadów.
Deklaracja zgodności CE
Urządzenie zostało przetestowane i posiada dopuszczenie
w zakresie podstawowych wymagań i innych obowiązujących
przepisów dyrektywy o kompatybilności elektromagnetycznej
2004/108/WE.
Importer
KOMPERNASS GMBH
BURGSTRASSE 21
44867 BOCHUM, GERMANY
www.kompernass.com
Gwarancja i serwis
Urządzenie objęte jest trzyletnią gwarancją, licząc od daty
zakupu. Urządzenie zostało starannie wyprodukowane i dokładnie sprawdzone przed wysyłką. Należy zachować paragon jako dowód zakupu.Chcąc skorzystać z gwarancji należy
skontaktować się telefonicznie z serwisem. Tylko w ten sposób
można zagwarantować bezpłatną wysyłkę zakupionego produktu.
Page 31

- 29 -
Gwarancja obejmuje wyłącznie wady materiałowe i fabryczne,
natomiast nie obejmuje części ulegających zużyciu ani uszkodzeń części łatwo łamliwych, np. wyłącznika lub akumulatorów. Produkt przeznaczony jest wyłącznie do użytku domowego, a nie do zastosowań przemysłowych i profesjonalnych.
Gwarancja wygasa w razie niewłaściwego lub niezgodnego
z instrukcją użycia, użycia siły lub w przypadku ingerencji, nie
podjętych przez autoryzowaną placówkę serwisową.
Niniejsza gwarancja nie ogranicza ustawowych praw nabywcy
urządzenia.
Kompernass Service Polska
ul. Strycharska 4
26-600 Radom
Tel.: 048 360 91 40
048 360 94 32
Faks: 048 384 65 38
048 369 93 63
E-mail: support.pl@kompernass.com
Page 32

- 30 -
Page 33

- 31 -
Az első használat előtt gyelmesen olvassa el a használati utasítást majd későbbi
használatra tegye el. A készülék harmadik fél részére történő továbbadásakor
adja át a leírást is.
TARTALOMJEGYZÉK Oldalszám
Rendeltetésszerűhasználat 32
Tartozékok 32
Műszakiadatok 32
Kérjük,olvassaelabiztonságitudnivalókat 32
Akezelőelemek 34
Helyezzeüzembeakészüléket 34
Azelemekcseréje 35
Azelemekkezelése 35
Akészülékki-ésbekapcsolása 35
Agyakorlóprogramkiválasztása 36
Akijelző 37
Állítsabeanehézségifokot 38
Ahangnémítása 38
Agyakorlóprogramokbemutatása 38
Tiszításésápolás 42
Ártalmatlanítás 43
CEmegfelelőség 43
Forgalmazza 44
Garanciaésszerviz 44
Page 34

- 32 -
Rendeltetésszerűhasználat
Ez a számolásgyakorló kizárólag atalok (5 éves kortól) és
idősebbek számoló és emlékezőtehetségének fejlesztésére
való, nem rendelkezik a számológép funkcióival. A készülék
nem alkalmas kereskedelmi vagy ipari használatra. A készülék
rendeltetésellenes használatából eredő károkért nem vállalunk
felelősséget!
Tartozékok
1 számolásgyakorló
1 átlátszó védőtasak
1 használati útmutató
Műszakiadatok
LCD kijelző
több mint 300.000 feladat
Feszültségellátás: 1 x 3V (CR2032 típusú)
Mérete (hosszúság x
szélesség x magasasság): 8,2 x 15,3 x 1,3 cm
Súly : kb. 80 g
Üzemelési hőmérséklet: 5° - 40°C
Tárolási hőmérséklet : -20° - 60°C
Kérjük,olvassaelabiztonságitudnivalókat
Ne engedje, hogy 5 éven aluli gyermekek felügyelet nélkül •
használják az elektromos készüléket, hisz nem mindig tudják
helyesen megítélni a lehetséges balesetveszélyt.
Ne merítse a készüléket vízbe! Csak enyhén nedves kendő-
•
vel törölje meg.
Page 35

- 33 -
Soha ne tegye ki a készüléket esőnek és ne használja ned-•
ves vagy vizes környezetben.
Nem szabad a készülék házát kinyitnia vagy javítania.
•
Ez nem biztonságos és a garancia is érvénytelenné válik.
Robbanásveszély!
Ne dobja az elemet a tűzbe. Ne töltse fel az elemeket.•
Tűzveszély!
Soha ne használja a készüléket forró felületek közelében.•
Ne üzemeltesse vagy tárolja a készüléket forró, vagy köz-•
vetlen napsugárzásnak ill. erős mesterséges fénynek kitett
helyeken. Máskülönben túlhevülhet és helyrehozhatatlan
kár keletkezhet benne.
Ne tegyen nyílt tűzforrást a készülékre, mint pl. gyertyát.
•
Sérülésveszély!
Ne engedje, hogy az elemek gyermek kezébe jussanak. •
A gyermekek a szájukba vehetik az elemeket és lenyelhetik
őket. Ha valaki lenyelné az elemeket, azonnal orvoshoz kell
fordulni.
Page 36

- 34 -
Akezelőelemek
q kijelző
w - a nehézségi fok kiválasztásához
e - kapcsoló
r - ki- és bekapcsolja a hangot
t - osztás gomb
y - szorzás gomb
u - kivonás gomb
i - összeadás gomb
o ENTER - beadó gomb
aa számértékek beadására szolgáló számgombok
sG 6 programgomb - a 6-os gyakorlóprogramot hívja le
dG 5 programgomb - az 5-ös gyakorlóprogramot hívja le
fG 4 programgomb - a 4-es gyakorlóprogramot hívja le
gG 3 programgomb - a 3-as gyakorlóprogramot hívja le
hG 2 programgomb - a 2-es gyakorlóprogramot hívja le
iG 1 programgomb - az 1-es gyakorlóprogramot hívja le
k a csipogó hang hangszórója
l RESET - a készülék visszahelyezéséhez
; az elemrekesz csavarjai
2) az elemrekesz fedele
Helyezzeüzembeakészüléket
Vegye ki a számológyakorlót és a tartozékokat a csomago- >
lásból.
Vegye le az esetleg rajta lévő ragasztószalagokat és fóliákat.
>
Az elemek már bele vannak szerelve. A korai kisülés elleni
>
védelemként a polaritások között szigetelőcsík található. Beüzemelés előtt egyszerűen húzza ki.
Page 37

- 35 -
Azelemekcseréje
A készülékbe 3V-os CR2032 típusú lítium elem kell, mely már
benne található. Ha a kijelző bekapcsolás után sötét marad, az
elem lemerült. Az elem cseréjéhez nyissa fel a készülék hátoldalán lévő elemrekeszt.
Csavarja ki mindkét csavart
> ; és vegye le az elemrekesz
fedelét 2) .
Mielőtt kivenné a régi elemet, jegyezze meg az elem hely-
>
zetét a felirat alapján. A pozitív jel kívülről látható.
Vegye ki az elemeket és helyezzen be egy azonos típusú új
>
elemet. A pozitív jelnek kívülről kell látszania, máskülönben
a készülék nem működik és kár keletkezhet benne.
Helyezze vissza az elemrekesz fedelét
> 2) és csavarozza
vissza.
Azelemekkezelése
A kifolyó elemsav kárt okozhat a számolásgyakorlóban.
Ha hosszabb ideig nem használja a számolásgyakorlót,
>
vegye ki belőle az elemet.
Ha kifolyna az elem, vegyen fel védőkesztyűt és száraz
>
kendővel tisztítsa meg az elemrekeszt.
Ne próbálja meg feltölteni az elemet.
>
Akészülékki-ésbekapcsolása
A készülék bekapcsolásához nyomja meg a > e gombot.
A kijlezőn q az első számolási feladat jelenik meg.
A készülék kikapcsolásához nyomja meg ismét a
> e
gombot.
Page 38

- 36 -
Agyakorlóprogramkiválasztása
Nyomja meg a 1!-1^G-gombok egyikét, hogy válasszon az
alábbi gyakorlóprogramok közül:
G1•
Feladattípus: alapvető számolási feladatok, összeadás,
kivonás, osztás és szorzás választható ki,
5 nehézségi fokozat állítható be.
G2•
Feladattípus: az eredmény alapján kell felismerni a
számolási feladatot, 5 nehézségi fokozat állítható be.
G3•
Feladattípus: sorozatfelismerés, 3 megadott értékből
kitalálni a 4. értéket, 3 nehézségi fokozat állítható be.
G4•
Feladattípus: számsorok megjegyzése, 5 nehézségi
fokozat állítható be.
G5•
Feladattípus: az összeadandók beadása, mely a megadott
összeadási eredményt adja, 3 nehézségi fokozat állítható be.
G6•
Feladattípus: összeadás memóriagyakorlással, 5 nehézségi
fokozat állítható be.
Page 39

- 37 -
Akijelző
A kijelzőn olvashatja el az adott feladatot és további információkat szerezhet:
2!az aktuális gyakorlóprogram kijelzése
2@a már megoldott feladatok kijelzése
2#a megoldandó számolási feladat
2$
eredmény kiértékelése az alábbi stilizált arckifejezések
ábrázolásával:
normális arc, nincsen értékelés,
vidám arc, az eredmény helyes,
szomorú arc, az eredmény hibás.
2% eredménykimutatás
2^ hang jelzése
2& a kiválasztott nehézségi fokozat kijelzése
Page 40

- 38 -
Állítsabeanehézségifokot
A gyakorlóprogramok 3 ill. 5 különböző nehézségi fokozatot
nyújtanak.
Nyomja meg a
> wgombot, ha egy nehézségi fokozattal
feljebb szeretne kapcsolni. Ha már a legmagasabb fokozaton
volt előtte, a készülék automatikusan a legkisebb fokozatra
kapcsol vissza.
A kijelzőn q lévő oszlopos kijelzés 2& az éppen kiválasztott
nehézségi fokozatot mutatja. Ha csak egy oszlop jelenik meg,
az a legkisebb nehézségi fokozatot jelöli, ha a kijelző q 3 ill.
5 oszlopot jelez ki, akkor az a legmagasabb nehézségi fokozatot jelöli.
Ahangnémítása
A hang valamennyi gombnyomást rövid csipogással igazol vissza
és az eredmény beadása után rövid felismerhető dallamot játszik le
aszerint, hogy a beadott érték helyes, vagy helytelen volt-e.
A készülék hangjának ki- és bekapcsolásához nyomja meg
>
a
r gombot.
Ha a hang be van kapcsolva, a
jelzés világít a kijelzőn q.
Ha a hang ki van kapcsolva, a
jelzés világít a kijelzőn q.
Agyakorlóprogramokbemutatása
Most pedig az egyes gyakorlóprogramokról tudhat meg részleteket.
G1-alapvetőszámolásifeladatok
Ennek a programnak a kiválasztásához nyomja meg a G 1 >
j gombot. A kijelzőn q az első számolási feladat jelenik
meg. Közben az eredménykijelző 2% csíkjai jelzik, hogy
Page 41

- 39 -
hány helyiértékű a helyes eredmény.
Nyomja meg az . . .
>
tgombot, ha azt szeretné, hogy a készülék osztási fel-
adatot tegyen fel,
ygombot, ha azt szeretné, hogy a készülék szorzási
feladatot tegyen fel,
ugombot, ha azt szeretné, hogy a készülék kivonási
feladatot tegyen fel,
igombot, ha azt szeretné, hogy a készülék összeadási
feladatot tegyen fel.
Adja be a megoldást a számgombok segítségével és nyomja
>
meg az ENTER gombot o.
A készülék az Ön által beadott eredményt háromféle módon
értékelheti:
Vagy a szomorú (• a beadott eredmény hibás) vagy
vidám (
a beadott eredmény helyes) arc jelenik meg,
és az arcokhoz tartozó dallam szólal meg (csak ha a hang •
be van kapcsolva),
helyes beadott eredmény esetén a kijelzőn • q még egy ser-
leg (%) is megjelenik.
Ha kb. 20 másodpercig nem nyom meg egy gombot sem,
>
a készülék úgy veszi, mintha nem vagy rosszul oldotta volna
meg a feladatot.
A hibás eredmény beadása után még egyszer felteszi a ké-
>
szülék ugyanazt a kérdést. Ha a feladatot akkor sem tudja
megoldani, a készülék kijelzi a megoldást a kijelzőn q és
új feladatot kínál fel.
Nyomja meg az ENTER gombot
> o, ha át szeretné ugrani a
feladatot. Ha a készülék először adta ezt a feladatot, akkor
még van egy esélye. Ismét nyomja meg az ENTER gombot
o, ekkor a készülék a kijelzőn q megmutatja a megoldást
és újabb feladatot ad.
Page 42

- 40 -
5 feladat után a készülék kiértékeli az eredményeit. Vala- >
mennyi megoldott feladatért 20 pont és egy serleg (%) jár.
Magasabb nehézségi foknak ebben a programban az az
eredménye, hogy a számok magasabbak lesznek.
G2-azelvégzettszámolásifeladatfelismerése
Ennek a programnak a kiválasztásához nyomja meg a G 2 > 1%
gombot. A kijelzőn q az első feladat jelenik meg.
A felső sorban 2 számot lát. Határozza meg, hogy a 4
>
számolási feladat közül melyiket kell alkalmazni a számokra,
hogy az alsó sorban látható eredményt kapjuk.
Kb. 20 másodpercen belül nyomja meg a megfelelő gom-
>
bot, majd az adott számolási jel megjelenik a két szám
között.
Választásának igazolásához nyomja meg az ENTER gom-
>
bot o.
Hogy a készülék mi szerint és hogyan értékeli a hibás vagy
helyes beadott eredményt, már leírtuk a G 1 programnál. Itt is
érvényes a "második lehetőség" és a beadott érték kiértékelése,
ezért a többi gyakorlóprogramnál sem ismételjük meg még
egyszer ezeket a pontokat.
Magasabb nehézségi foknak ebben a programban az az
eredménye, hogy a számok magasabbak lesznek.
G3-sorozatfelismerése
Ennek a programnak a kiválasztásához nyomja meg a G 3 >
1$gombot. A kijelzőn q 3 szám jelenik meg.
Itt azt kell kitalálnia, hogy a balról jobbra következő szá-
>
mok milyen logikus matematikai sort alkotnak.
Kb. 20 másodpercen belül adja be a soronkövetkező szá-
>
mot, majd nyomja meg az ENTER gombot o.
Page 43

- 41 -
G4-számokmemorizálása
Ennek a programnak a kiválasztásához nyomja meg a G 4 >
1# gombot. A kijelzőn q négy helyiértékű szám jelenik meg.
Jól jegyezze meg, mert pár másodperc után eltűnik.
>
Kb. 20 másodpercen belül adja be a megjegyzett számot,
>
majd nyomja meg az ENTER gombot o.
Magasabb nehézségi foknak ebben a programban az az
eredménye, hogy a számok magasabbak lesznek.
G5-sorozatfelismerése
Ennek a programnak a kiválasztásához nyomja meg a G 5 >
1@ gombot.
A kijelzőn
> q az alsó sorban egy szám és egy számolási jel
jelenik meg.
Kb. 20 másodpercen belül adja be az üres mezőbe azt a
>
számot, mellyel a számolási feladat a felső sorban kijelzett
értéket eredményezi.
Ebben a programban a készülék hibás érték beadása esetén
vagy ha semmilyen értéket nem adott be, azonnal új feladatot
ad és nem kínál második javítási lehetőséget.
A magasabb nehézségi fokozatnak ebben a programban az
a lényege, hogy a készülék növeli az összeadandó értékek
számát.
G6-összeadásmemórifejlesztéssel
Ennek a programnak a kiválasztásához nyomja meg a G 6 >
1!
gombot. A kijelzőn q a felső sorban matematikai feladat
jelenik meg.
Jegyezze meg a 2. összeadandót, majd kb. 20 másodper-
>
cen belül adjja be az eredményt és nyomja meg az ENTER
gombot o.
Page 44

- 42 -
Ha az eredmény helyes, akkor még egy feladatot kap, >
amelyben a 2. összeadandó villogó szegmensként el van
takarva, ezért nem jelenik meg.
Adja be az előbb megjegyzett számot és így számolja ki az
>
eredményt. Most ennek a feladatnak az 1. hozzáadandó
értékét jegyezze meg.
Adja be az eredményt és nyomja meg az ENTER gombot
> o.
Ha az eredmény helyes volt, akkor másik feladatot kap,
>
melyben az 1. hozzádanadó érték villogó szegmensként
takarva van.
Adja be az előbb megjegyzett számot és így számolja ki
>
az eredményt.
Adja be az eredményt és nyomja meg az ENTER gombot
> o.
A magasabb nehézségi fokozat ebben a programban azt
jelenti, hogy a leírt feladatokat többször kell megcsinálni.
Akészülékvisszahelyezése
Ha úgy érzi, hogy a készülék nem működik megfelelően vagy
nem a leírás szerint reagál, akkor vissza kell helyezni. Ehhez
óvatosan nyomja meg a RESET kapcsolót 1* egy vékony és
hegyes tárggyal a készülék hátoldalán lévő burkolat nyílásán
át. Ez a készüléket a kiszállítási állapotába helyezi vissza.
Tiszításésápolás
Soha ne merítse a készülék részeit vízbe vagy más folyadékba!•
Ne engedje, hogy folyadék kerüljön a burkolatba.•
Aburkolattisztítása:
Akészülékfelületétenyhénnedvesronggyal
tisztítsa.Sohanehasználjonbenzint,oldószert
vagyműanyagotoldótisztítószert!
Page 45

- 43 -
Ártalmatlanítás
Semmiesetresedobjaakészüléketaháztartásihulladékba.Atermékreaz2002/96/EK
irányelvvonatkozik.
Elemek/akkuk
Az elemeket/akkukat nem szabad a háztartási hulladékba
•
dobni.
Az elemek/akkuk mérgező anyagokat tartalmazhatnak,
•
melyek káros hatással vannak a környezetre. Az elemeket/
akkukat ezért mindenképpen az érvényes törvényes előírásoknak megfelelően selejtezze ki.
Minden felhasználó törvényes kötelessége, hogy az elemeket/
•
akkukat leadja lakóhelye gyűjtőhelyén vagy a kereskedőnél.
Ez a kötelezettség azt a célt szolgálja, hogy az elemek/akkuk
környezetkímélő ártalmatlanításra kerülhessenek.
Az elemeket és akkukat csak lemerült állapotban adják le.
•
Valamennyi csomagolóanyagot juttasson el a környezetbarát hulladékhasznosítóhoz.
CEmegfelelőség
A készülék az elektromágneses összeférhetőségre vonatkozó
2004/108/EK irányelv alapvető elvárásaival és más idevonatkozó előírásokkal megegyezve került bevizsgálása és engedélyezésre.
Page 46

- 44 -
Forgalmazza
Kompernass GmbH
Burgstrasse 21
44867 BOCHUM, GERMANY
www.kompernass.com
Garanciaésszerviz
A készülékre 3 év garanciát adunk a vásárlás dátumától számítva.
A készüléket gondosan gyártottuk, és szállítás előtt lelkiismeretesen ellenőriztük. Kérjük, a vásárlás igazolására őrizze meg
a pénztári blokkot. Kérjük, garanciaigény esetén vegye fel a
kapcsolatot telefonon az Ön közelében lévő szervizzel. Csak
ebben az esetben garantálhatjuk, hogy ingyen tudja beküldeni
az árut.
A garancia csak anyag- és gyártási hibára vonatkozik, nem
pedig kopásra vagy törékeny részek (pl. kapcsoló vagy elem)
sérülésére. A termék csakis magán és nem pedig kereskedelmi
használatra alkalmas.
A garancia érvényét veszti visszaélésszerű vagy szakavatatlan
kezelés, erőszak alkalmazása vagy olyan beavatkozások
esetén, amelyeket nem engedélyeztetett szervizelő üzleteink
hajtottak végre. Az Ön törvényes jogait ez a garancia nem
korlátozza.
Hornos kft.
H - 2600 Vác
Zrínyi utca 39.
Telefon +36 27 314 212
Telefax +36 27 317 212
e-mail: support.hu@kompernass.com
 Loading...