

Page 1

KOMPERNASS GMBH
BURGSTRASSE 21 · D-44867 BOCHUM
www.kompernass.com
ID-Nr.: DAZ2.4A1-11/10-V2
IAN: 58846
ELECTRIC TOOTHBRUSH
Operating instructions
ELEKTRIČNA ČETKICA ZA ZUBE
Upute za upotrebu
PERIUŢĂ DE DINŢI ELECTRICĂ
Instrucţiuni de utilizare
R
ЕЛЕКТРИЧЕСКА ЧЕТКА ЗА ЗЪБИ
Ръководство за експлоатация
7
ELECTRIC TOOTHBRUSH DAZ 2.4 A1
ΗΛΕΚΤΡΙΚΗ ΟΔΟΝΤΟΒΟΥΡΤΣΑ
Οδηүίες χρήσης
CV_DAZ2.4A1_58846_LB7.indd 1-3CV_DAZ2.4A1_58846_LB7.indd 1-3 11.01.2011 9:53:09 Uhr11.01.2011 9:53:09 Uhr
Page 2

5
6
1
3
9
8
7
0
4
2
DAZ 2.4 A1
CV_DAZ2.4A1_58846_LB7.indd 4-6CV_DAZ2.4A1_58846_LB7.indd 4-6 11.01.2011 9:53:10 Uhr11.01.2011 9:53:10 Uhr
Page 3

Index Page
Intended use 2
Safety Notices 2
Items supplied 3
Technical data 3
Appliance description 4
Set-up/Wall holder 4
First use 5
Fitting / removing brush heads 6
Operation 6
Brushing one’s teeth 6
Cleaning and care 9
Travelling case 10
Disposal 11
Warranty and Service 11
Importer 12
Read the operating instructions carefully before using the
device for the fi rst time and preserve this booklet for later
reference. Pass this manual on to whoever might acquire
the device at a future date.
- 1 -
Page 4

Intended use
This appliance is intended for personal dental care in domestic
situations. The appliance is not intended for use in commercial,
industrial or medical environments. It is not suitable for animal
care.
Safety Notices
To avoid damage, do not permit liquids of any kind to •
enter the appliance and do not submerse it in water.
Avoid also a possible penetration by foreign objects.•
In the event of malfunction or apparent damage, make •
contact with our Customer Services.
Ensure that the power cable never becomes wet or damp •
during operation. Place the power cable such that it cannot
become trapped or damaged in any way. Risk of electric
shock!
The power cable on this appliance cannot be replaced. In •
the event of it being damaged the whole appliance must
be disposed of.
NEVER touch the charging station if it has fallen into water. •
First of all remove the plug from the wall socket! Risk of
electric shock!
This appliance is not intended for use by individuals (in-•
cluding children) with restricted physical, physiological or
intellectual abilities or defi ciences in experience and/or
knowledge unless they are supervised by a person responsible for their safety or receive from this person instruction
in how the appliance is to be used.
Children should be supervised to ensure that they do not •
play with the appliance.
The electric toothbrush may only be recharged with the •
supplied charging station. Otherwise, the appliance could
be irreparably damaged.
Do not submerse the hand element or the charging station •
in water or other liquids. This would cause irreparable
damage to the appliance.
- 2 -
Page 5
Items supplied
Before using the appliance for the fi rst time, check to ensure
that the following items are available and undamaged.
Hand element
8 Brush heads
Charging station
Travelling case
2 Screws
2 Plugs
Order card
Operating instructions
Remove all packaging materials and foils from the appliance.
Technical data
Power supply:
Power consumption : 2 W
Protection rating
(Charging station): IP X7
Protection class: II /
Charging time: approx. 14 - 16 hours
(fi rst charging)
Protection type
(Hand element): IP X4
100 - 240 V ˜ 50 - 60 Hz
- 3 -
Page 6

Appliance description
1 Brush head
2 Brush holder
3 Charging station
4 Wall holder
5 Charge indicator
6 Pulse LED (yellow)
7 Soft LED (green)
8 “Clean” LED (orange)
9 On/Off switch
0 Travelling case
Set-up/Wall holder
The charging station 3 may only be operated free-standing
in dry rooms.
In moist rooms, especially in the vicinity of water (bath), the
charging station 3 must be fi rmly fi xed to the wall, to protect
it from falling into water.
• Pull the wall holder 4 downwards from underneath the
charging station 3.
• Using the screw openings of the wall holder 4, mark the
spacing for the boreholes on the wall. Check to ensure that
there is a mains power socket in close vicinity.
• Before boring the holes, check to ensure that there are no
electrical or water conduits behind the markings.
• Affi x the wall holder 4 using the plugs and screws.
• When you have attached the wall holder 4, guide the
power cable through the right or left recess in the wall
holder 4 (see magnifi cation on the fold-out side).
Using the guide rails, slide the charging station 3 onto the
wall holder 4.
• Ensure that the power cable is not trapped and that it lies
properly in the recesses.
- 4 -
Page 7

First use
Before taking the appliance into use check to ensure that it is
in a fault-free condition. If it is not, it may not be used.
• Insert the power plug into a wall socket.
• Before the fi rst use, clean the new brush heads 1 with
clear water.
• Place a replacement brush head on the brush holder 2,
open the cover of the charging station 3 and slide the
brush holder 2 in.
• Place the hand element on the charging station 3 so that
it slides onto the spike in the base.
• Allow the hand element to charge up for approx. 14 -
16 hours before using it for the fi rst time. The charging
light 5 on the front of the hand appliance glows red
during the charging process.
• Use the hand element repeatedly, and without charging
the battery, until the performance is noticeably weaker or
the toothbrush stops working and the charge indicator 5
blinks red. First then recharge the battery for 14 - 16 hours.
When the appliance is fully charged, the charge indicator 5
glows green.
• Charge and discharge the toothbrush completely 3 times.
The battery will have then reached its full capacity.
• You can now leave the hand element in the charging
station 3 after every use, so as to always have full power
available.
For care of the batteries, we recommend the following:
When the hand element is fully charged, remove the plug
of the charging station 3 from the mains power socket. First
reinsert the plug into the mains power socket and recharge
the hand element when the movement of the toothbrush is
noticeably weaker or the charge indicator 5 blinks.
- 5 -
Page 8

Fitting / removing brush heads
To remove the brush head 1, turn it clockwise and then pull
it upwards.
To fi t the brush head 1 place it slightly off set on the hand
element and then turn it anti-clockwise.
The brush head 1 must engage on being put back on. To
avoid damage to the appliance, use only original brush heads.
(For replacement brush heads, see the order card)
Operation
This toothbrush has 3 diff erent performing levels:
- “Clean”: normal speed level, orange LED 8
For cleaning the teeth.
- “Soft”: slow speed level, green LED 7
For cleaning the teeth of people with sensitive gums.
- “Pulse”: variable speed levels, yellow LED 6
For massaging the gums.
• Press the on/off switch 9 once to switch the level “Clean”
on. The “Clean” LED 8 glows.
• Press once more to switch to the level “Soft”. The “Soft”
LED 7 glows.
• Press it a third time to switch to the level “Pulse”.
The “Pulse” LED 6 glows.
• To switch the toothbrush off , press once more on the on/
off switch 9.
Brushing one’s teeth
Warning
Due to the unaccustomed operation some gum bleeding may
initially occur, this is normal. Should this continue for more
than two weeks, consult your dentist.
- 6 -
Page 9

• Place the brush head 1 on the hand element.
• Moisten the brush under fl owing water.
• Apply some toothpaste to the moistened brush.
Notice
Wait until the appliance is in the mouth before switching it on,
to avoid spray.
• With the on/off switch 9 select the desired operating
level.
Notice
This toothbrush has a 30 second interval timer, so that all four
jaw quandrants can be cleaned equally.
• Divide your jaw into four sections (quadrants): upper left,
upper right, lower left and lower right.
• Begin in one quadrant:
Place the brush head 1 on your gums and move the brush
upwards/downwards from the gums to over the crown of
the tooth.
Proceed in this manner on both the inside and the outside
surfaces of the tooth. Start again from the gums for each
individual tooth.
- 7 -
Page 10

Do not forget the back surfaces of the rear molars.
To clean the chewing surfaces, direct the rotating brush
head with light pressure over the chewing surfaces.
• After 30 seconds the toothbrush interrupts its operation
briefl y twice, to signalise to you that you should start to
clean the next quadrant. Clean all jaw quadrants with the
same technique.
• After two minutes the toothbrush stops its operation briefl y
4 times. This informs you that you have complied with the
dental recommendation of two minutes cleaning.
• Press the on/off switch 9 repeatedly until the toothbrush
stops.
• First take the toothbrush out of your mouth when it has
stopped.
• After use, clean the brush head 1 thoroughly under running water.
• Remove the brush head 1 from the hand element.
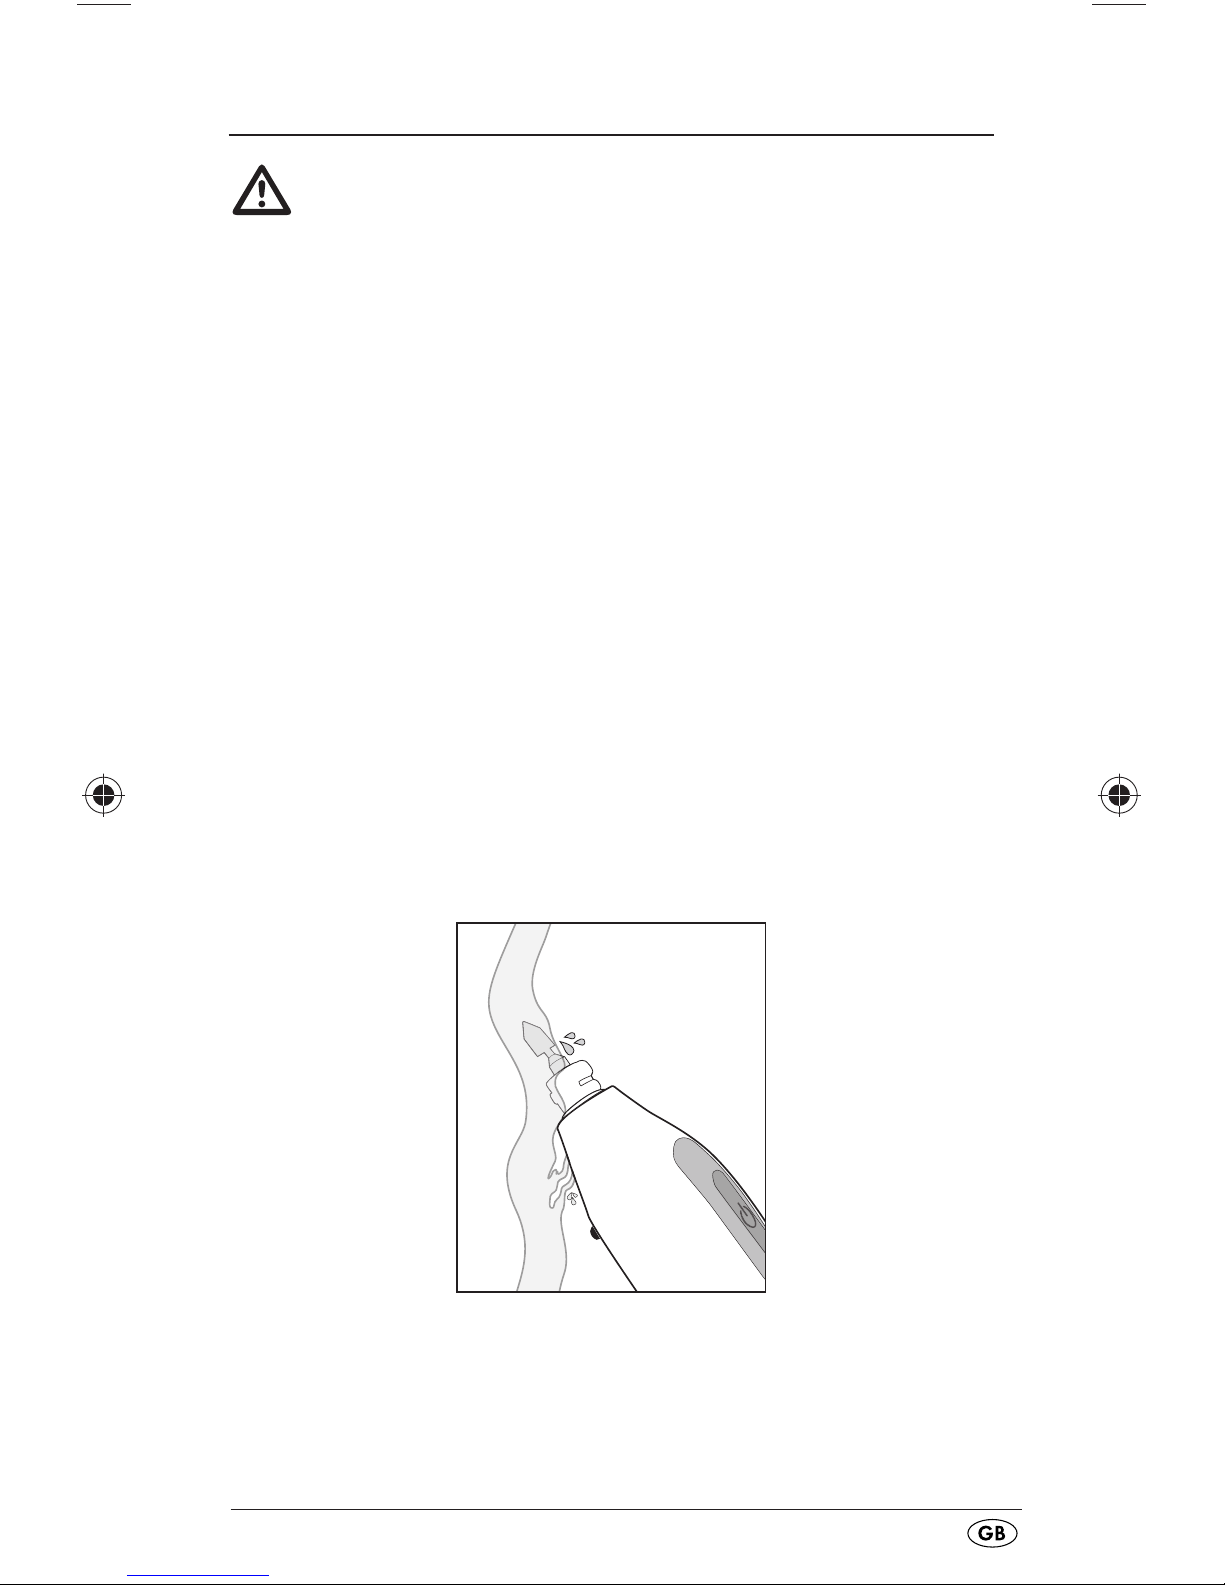
Clean the drive shaft on the hand element, into which the
brush head is inserted, under running water.Hold the hand
element so that the water from the top can drip out of the
rear outlet openings.
• Afterwards, clean the rear outlet openings: Let the water
run over the handle from the rear, so that the outlet openings are free of contamination.
Notice
Regularly massage your gums. This promotes blood circulation
and thus the health preservation of the gums. Set the level at
“Pulse” and guide the moistened brush over your gums with a
light pressure.
- 8 -
Page 11
Cleaning and care
Warning:
First remove the plug from the mains power socket before
cleaning the charging station 3. There is a risk of receiving
an electric shock!
• NEVER open the housing of the charging station 3 or the
toothbrush! They cannot be resealed in a water-tight manner.
• Clean the charging station 3 only with a soft, lightly
moistened cloth. Do not use detergents or solvents. They
can damage the plastic surfaces.
• Remove the brush head 1 from the hand element. After
use, clean the brush heads 1 thoroughly under running water.
We recommend cleaning the brush heads 1 in a standard
commercial cleaning fl uid for dental prosthetics every 2 - 4
weeks. After about 3 months, at the latest however when
the bristles bend outwards, you should fi t a new brush head 1.
• Clean the drive shaft on the hand element, into which the
brush head is inserted, under running water. Hold the hand
element so that the water from the top can drip out of the
rear outlet openings:
- 9 -
Page 12

• Afterwards, clean the rear outlet openings:
Let the water run over the handle from the rear, so that the
outlet openings are free of contamination:
• The brush holder 2 can be cleaned without problem with
water and a little liquid soap. To do this, simply lift the
brush holder 2 upwards.
Travelling case
Should you wish to take the toothbrush with you on a tour, you
can pack both the hand element and two brush heads in the
travelling case 0.
- 10 -
Page 13

Disposal
Do not dispose of the appliance in your normal
domestic waste. This product is subject to the
provisions of European Directive 2002/96/EC.
Dispose of the appliance through a registered specialist disposal
fi rm or through your community waste disposal department.
Observe the currently applicable regulations.
In case of doubt, contact your local waste disposal facility.
Disposal of batteries/accumulators
Used batteries/rechargeable batteries may not be disposed
of in household waste. Every consumer is statutorily obliged
to dispose of batteries at a collection site of his community/
city district or at a retail store.
The purpose of this obligation is to ensure that batteries are disposed of in a non-polluting manner. Only dispose of batteries/
-cells when they are fully discharged.
Dispose of the packaging materials in an environ-
mentally responsible manner.
Warranty and Service
The warranty for this appliance is for 3 years from the date
of purchase. The appliance has been manufactured with care
and meticulously examined before delivery. Please retain your
receipt as proof of purchase. In the event of a warranty claim,
please make contact by telephone with our Service Department. Only in this way can a post-free despatch for your
goods be assured.
The warranty covers only claims for material and maufacturing defects, but not for transport damage, for wearing parts or
for damage to fragile components, e.g. buttons or batteries.
This product is for private use only and is not intended for
commercial use. The warranty is void in the case of abusive
and improper handling, use of force and internal tampering
not carried out by our authorized service branch.
- 11 -
Page 14

Your statutory rights are not restricted in any way by this
warranty.
The warranty period will not be extended by repairs made
under warranty. This applies also to replaced and repaired
parts. Any damage and defects extant on purchase must be
reported immediately after unpacking the appliance, at the
latest, two days after the purchase date. Repairs made after
the expiration of the warranty period are subject to payment.
Service Great Britain
Tel.: 0871 5000 720 (£ 0.10/Min.)
E-Mail: kompernass@lidl.gb
Service Ireland
Tel.: 1890 930 034
(0,08 EUR/Min., (peak))
(0,06 EUR/Min., (off peak))
E-Mail: kompernass@lidl.ie
CY
Service Cyprus
Tel.: 8009 4409
E-Mail: kompernass@lidl.cy
Importer
KOMPERNASS GMBH
BURGSTRASSE 21
44867 BOCHUM, GERMANY
www.kompernass.com
- 12 -
Page 15

Order card
DAZ 2.4 A1
Quantity
ordered
(max. 3 sets per
order)
Add. £ 3,50 p&p. £
Total sum: £
Name of article Cost p.
8-piece Set of
Toothbrush Heads
for Toothbrush
DAZ 2.4 A1
7,50 £ £
Total sum
Unit
Payment method: Bank Transfer
Location, Date Signature
Page 16

How to order:
1. Enter under “Sender/orderer” your name, address and
telephone number (for possible queries) in block capitals.
2. Bank Transfer (BACS): Please transfer the complete amount
to our account below:
Natwest Bank Plc
Hammersmith Branch
Sort Code: 60-50-06
Account No: 37758829
Account Name: Domestic Electrical Solutions UK Limited
On your transfer, please provide the article(s) you ordered
as well as your complete name and address. Then post your
completed order card to our postal address below.
DES UK LTD
Unit B7
Oxford Street Industrial Park
Vulcan Road
Bilston/ West Midlands
WV14 7LF
Please affi x suffi cient postage to the letter.
Write your name as the sender on the envelope.
Sender / Orderer
(please complete in block captals)
Surname, fi rst name
Street
Post code, town
Country
Telephone
Page 17

Sadržaj Strana
Uporaba u skladu sa namjenom 16
Sigurnosne upute 16
Obim isporuke 17
Tehnički podaci 17
Opis uređaja 18
Postavljanje/Zidni držač 18
Prva uporaba 19
Postavljanje/skidanje glave četke 20
Rukovanje 20
Pranje zubi 21
Čišćenje i održavanje 23
Putni etui 24
Zbrinjavanje 25
Jamstvo i servis 26
Uvoznik 26
Upute za rukovanje prije prve uporabe pažljivo pročitajte i
sačuvajte ih za kasnije korištenje.Ukoliko uređaj dajete trećim
osobama, priložite i ove upute.
- 15 -
Page 18

Uporaba u skladu sa namjenom
Ovaj uređaj je predviđen za osobnu njegu zubiju u okviru
domaćinstva. Nije predviđen za uporabu u komercijalnim,
industrijskim ili medicinskim područjima, kao niti u oblasti
njege životinja.
Sigurnosne upute
Ne dopustite da tekućine prodru u unutrašnjost uređaja, •
a uređaj ne zaronite pod vodu, kako biste izbjegli ošteće-
nja.
Izbjegavajte prodiranje stranih tijela.•
U slučaju funkcionalnih smetnji ili vidljivih oštećenja se •
obratite servisu za kupce.
Obratite pažnju na to, da za vrijeme pogona uređaja •
mrežni kabel nikada ne može biti mokar ili vlažan. Mrežni kabel vodite tako, da ne može biti ugnječen ili na drugi
način oštećen. Opasnost od strujnog udara!
Mrežni priključni vod ovog uređaja ne može biti zami-•
jenjen. U slučaju oštećenja ovog voda uređaj mora biti
zbrinut.
Stanicu za punjenje nikada ne dotaknite, ako je upala •
u vodu. Obavezno prethodno izvucite mrežni utikač!
Opasnost od strujnog udara!
Ovaj uređaj nije namijenjen da bude korišten od strane •
osoba (uključujući djecu) sa ograničenim fizičkim, senzoričnim i mentalnim osobinama i nedostatkom iskustva ili
znanja, osim ako ove osobe stoje pod nadzorom druge
osobe zadužene za njihovu sigurnost, ili ako su od nje
primili upute za ispravno korištenje uređaja.
Djeca bi trebala biti pod nadzorom, čime treba biti osigu-•
rano da se ne mogu igrati ovim uređajem.
Električna četkica za zube smije biti punjena isključivo •
pomoću isporučene stanice za punjenje. U protivnom
uređaj može biti nepopravljivo oštećen.
Ručni dio uređaja i stanicu za punjenje nikada ne uronite •
u vodu ili u druge tekućine. To dovodi do nepopravljivih
oštećenja ur
eđaja!
- 16 -
Page 19

Obim isporuke
Prije puštanja uređaja u pogon prekontolirajte kompletnost
obima isporuke i pogledajte, postoje li eventualno vidljiva
oštećenja.
Ručni dio uređaja
8 glave sa četkicama
Stanica za punjenje
Putni etui
2 vijka
2 tiple
Karta za narudžbu
Upute za uporabu
Uklonite sve materijale pakiranja i sve folije sa uređaja.
Tehnički podaci
Pogonsko napajanje:
Snaga: 2 W
Vrsta zaštite
(stanica za punjenje): IP X7
Zaštitna klasa: II /
Vrijeme punjenja: ca. 14 - 16 sati
(prvo punjenje)
Vrsta zaštite
(ručni dio uređaja): IP X4
Izjava o sukladnosti za ovaj proizvod dostupna je na internet
stranici www.lidl.hr.
100 - 240 V ˜ 50 - 60 Hz
- 17 -
Page 20

Opis uređaja
1 Glava četkice
2 Držač četkice
3 Stanica za punjenje
4 Zidni držač
5 Pokazivač punjenja
6 Pulsni LED (žuti)
7 Soft-LED (zeleni)
8 „Clean“-LED (narančasti)
9 Prekidač Uklj/Isklj
0 Putni etui
Postavljanje/Zidni držač
Stanica za punjenje 3 smije isključivo u suhim prostorijama
biti pogonjena slobodno stojeća.
U vlažnim prostorijama, posebno u blizini vode (kupaonica)
stanica za punjenje 3 mora biti čvrsto montirana, kako bi
bila zaštićena od nehotičnog upadanja u vodu.
• Izvucite zidni držač 4 prema dolje iz stanice za punjenje 3.
• Na zidu kroz otvore zidnog držača 4 označite ispravno
rastojanje otvora za bušenje. Pritom obratite pažnju
na to, da se mrežna utičnica mora nalaziti u blizini na
dohvatu ruke.
• Prije bušenja otvora provjerite, da se iza oznaka eventualno ne nalaze kablovi pod naponom ili vodovodne cijevi.
• Učvrstite zidni držač 4 uz pomoć vijaka i tipli.
• Nakon što ste zidni držač 4 učvrstili, provucite mrežni
kabel kroz desni ili lijevi utor na zidnom držaču 4 (vidi
lupu na isklopivoj stranici).
Zatim gurnite stanicu za punjenje 3 uz pomoć šina vodili-
ca na zidni držač 4.
• Obratite pažnju na to, da mrežni kabel ne bude ukliješten i
da na ispravan način ulegne u utore.
- 18 -
Page 21
Prva uporaba
Prije stavljanja uređaja u pogon uvjerite se, da je on u
besprijekornom stanju. U protivnom uređaj ne smije biti
upotrebljavan.
• Mrežni utikač utaknite u utičnicu.
• Prije prve uporabe očistite novu glavu četkice 1 sa
bistrom vodom.
• Nataknite zamjenske glave četkice na držač za četkice 2,
otvorite poklopac stanice za punjenje 3 i gurnite držač
četkice 2 unutra.
• Postavite ručni dio uređaja tako na stanicu za punjenje
3, da može kliznuti na klin postolja.
• Pustite da se ručni dio uređaja ca. 14 - 16 sati napuni,
prije nego što ga po prvi puta koristite. Oznaka punjenja
5 na prednjem dijelu ručnog dijela uređaja za vrijeme
punjenja svijetli u crvenoj boji.
• Ručni dio uređaja bez punjenja koristite toliko puta, dok
snaga osjetno ne oslabi ili četkica za zube prestane sa
okretanjem, dok oznaka punjenja 5 trepti u crvenoj boji.
Tek nakon toga četkicu za zube ponovo napunite u trajanju
od 14 - 16 sati. Kada je uređaj napunjen, signalizacija
punjenja 5 svijetli u zelenoj boji.
• Ukupno tri puta kompletno ispraznite i napunite četkicu
za zube. Nakon toga baterija dostiže svoj puni kapacitet.
• Sada ručni dio uređaja nakon svake uporabe možete
odložiti u stanici za punjenje 3, kako biste svakoga puta
na r
aspolaganju imali punu snagu.
Za održavanje baterije dajemo slijedeći savjet: Kada je
ručni dio uređaja napunjen, izvucite mrežni utikač stanice
za punjenje 3 iz utičnice. Mrežni utikač u utičnicu vratite tek
onda, kada pokreti četkice za zube oslabe ili oznaka punjenja 5 trepti; tada ponovo napunite ručni dio uređaja.
- 19 -
Page 22

Postavljanje/skidanje glave četke
Za skidanje glave četkice 1 okrenite je u smjeru kazaljke
sata i zatim je povlačenjem prema gore skinite.
Za postavljanje glave četkice 1 istu blagim pomakom
postavite na ručni dio uređaja i okrenite u smjeru protivnom
kazaljci sata.
Glava četkice 1 prilikom postavljanja mora uleći u ležište.
Koristite isključivo originalne glave sa četkicom, kako biste
spriječili oštećenje uređaja.
(Zamjenske glave četke - vidi narudžbenu kartu)
Rukovanje
Ova četkica za zube ima 3 različita stupnja brzine:
- „Clean“: stupanj normalne brzine, narančasti LED 8
Za čišćenje zubi.
- „Soft“: stupanj niske brzine, zeleni LED 7
Za čišćenje zubi osoba sa osjetljivim desnima.
- „Pulse“: naizmjenični stupanj brzine, žuti LED 6
Za masažu desni.
• Pritisnite jednom tipku za uključivanje/isključivanje 9,
da biste stupanj brzine "Clean" uključili. „Clean“-LED 8
svijetli.
• Još jednom pritisnite ovu tipku, da biste uključili stupanj
brzine „Soft“. „Soft“-LED 7 svijetli.
• Tipku pritisnite po treći puta, da biste podesili stupanj
brzine „Pulse“. „Pulse“-LED 6 svijetli.
• Ako četkicu za zube želite zagasiti, još jednom pritisnite
tipku za uključivanje/isključivanje 9.
- 20 -
Page 23

Pranje zubi
Upozorenje
U početku uslijed neuobičajenog nadraživanja može doći
u manjoj mjeri do krvarenja desni, što predstavlja normalnu
pojavu. Ukoliko to potraje duže od dva tjedna, trebali biste
za savjet upitati svoga zubara.
• Nataknite glavu četkice 1 na ručni dio uređaja.
• Četkicu navlažite pod mlazom tekuće vode.
• Nanesite nešto paste za zube na vlažnu četkicu.
Napomena
Uređaj međutim uključite tek kada se četkica nalazi u ustima,
kako biste izbjegli rasprskavanje.
• Pomoću tipke za uključivanje/isključivanje 9 podesite
željeni stupanj snage.
Napomena
Ova četkica za zube ima timer za intervale u trajanju od po 30
sekundi, kako biste sva četiri dijela čeljusti ravnomjerno mogli očistiti.
• Vilicu podijelite u četiri dijela (kvadranta): gore lijevo,
gore desno, dolje lijevo i dolje desno.
- 21 -
Page 24

• Započnite u jednom od kvadranata:
Prislonite glavu četkice 1 na zubno meso, a zatim četkicom sa desni prijeđite na zub.
Tako postupite sa unutrašnjom stranom kao i sa vanjskom
stranom zuba. Za svaki zub nanovo postavite četkicu na
desni.
Ne zaboravite na stražnju stranu zadnjeg kutnjaka.
Za čišćenje površine za žvakanje vodite rotirajuću četkicu
uz blagi pritisak preko ovih površina.
• Nakon 30 sekundi četkica za zube 2 x nakratko prestaje
sa radom, kako bi Vam signalizirala da trebate prijeći na
slijedeći kvadrant vilice. Sva četiri kvadranta očistite istom
tehnikom čišćenja.
• Nakon dvije minute četkica za zube 4 x nakratko prestaje
sa radom. U tom trenutku ste prali zube u trajanju od
dvije minute, u skladu sa preporukom zubara.
• Pritisnite tipku za uključivanje/isključivanje 9 toliko puta,
dok se četkica za zube ne zaustavi.
• Zatim izvadite četkicu za zube iz usta.
• Očistite glave četkice 1 nakon uporabe temeljito pod
mlazom tekuće vode.
• Skinite glavu četke 1 sa ručnog dijela.
Očistite pogonsku osovinu na ručnom dijelu, na koji se
postavlja glava četke, pod mlazom tekuće vode. Držite ručni
dio tako, da voda sa gornje strane može otjecati iz stražnjih
otvora.
• Nakon toga očistite stražnje otvore: Pustite vodu da sa
stražnje strane teče preko ručnog dijela, tak
o da otvori
budu oslobođeni nečistoća.
Napomena
Redovno masirajte desni. To potiče cirkulaciju krvi u desnima
i pogoduje održavanju zdravih desni. Podesite stupanj brzine „Pulse“ i navlaženom četkicom uz blagi pritisak prijeđite
preko površine desni.
- 22 -
Page 25

Čišćenje i održavanje
Upozorenje:
Mrežni utikač izvucite iz mrežne utičnice, prije nego što stani-
cu za punjenje 3 čistite. Postoji opasnost od strujnog udara!
• Nikada ne otvarajte kućište stanice za punjenje 3 ili kući-
šte četkice za zube! Ona ne mogu ponovo biti zatvorena
tako da budu vodonepropusna.
• Očistite stanicu za punjenje 3 isključivo pomoću
mekane, blago navlažene krpe. Ne koristite sredstva za
čišćenje ili sredstva za rastvaranje. Ova sredstva mogu
oštetiti plastičnu površinu uređaja.
• Skinite glavu četke 1 sa ručnog dijela. Očistite glave
četkice 1 nakon uporabe temeljito pod mlazom tekuće
vode.
Preporučamo čišćenje glavi četke 1 u uobičajenoj
tekućini za čišćenje zubnih proteza približno svaka 2-4
tjedna. Nakon približno 3 mjeseca, najkasnije međutim
kada se vlakna počinju savijati prema vani, trebali biste
koristiti novu glavu četke 1.
• Očistite pogonsku osovinu na ručnom dijelu, na koji se
postavlja glava četke, pod mlazom tekuće vode. Držite
ručni dio tak
iz stražnjih otvora.
o, da voda sa gornje strane može otjecati
- 23 -
Page 26

• Nakon toga očistite stražnje otvore:
Pustite vodu da sa stražnje strane teče preko ručnog
dijela, tako da otvori budu oslobođeni nečistoća.
• Držač četke 2 bez problema možete čistiti sa vodom i
malo sapunice. U tu svrhu držač četkice 2 jednostavno
možete izvući prema gore.
Putni etui
Ako četkicu za zube želite sobom ponijeti na kratko putovanje, možete ručni dio uređaja i dvije glave četkice staviti u
putni etui 0.
- 24 -
Page 27

Zbrinjavanje
Uređaj nikako ne bacajte u obično kućno smeće.
Ovaj proizvod podliježe europskoj smjernici
2002/96/EC.
Uređaj zbrinite preko autoriziranog poduzeća za zbrinjavanje
otpada ili preko Vašeg komunalnog poduzeća. Obratite
pažnju na aktualno važeće propise.
U slučaju dvojbe se povežite sa Vašom mjesnom ustanovom
za zbrinjavanje otpada.
Zbrinjavanje baterija/akumulatora
Baterije/akumulatori ne smiju biti zbrinuti zajedno sa kućnim
smećem. Svaki potrošač ima zakonsku obavezu, da baterije/
akumulatore preda na sabirnom mjestu svoje općine/svog
kvarta, ili u trgovini.
Ova obaveza služi za to, da baterije/akumulatori mogu biti
zbrinuti na način neškodljiv za okoliš. Baterije/akumulatore
vratite isključivo u ispražnjenom stanju.
Sve materijale ambalaže zbrinite na način neškod-
ljiv za okoliš.
- 25 -
Page 28

Jamstvo i servis
Na ovaj uređaj vrijedi jamstvo u trajanju od 3 godine od datuma kupovine. Uređaj je pažljivo proizveden i prije isporuke
brižljivo kontroliran.
Molimo sačuvajte blagajnički račun kao dokaz o kupnji.
Molimo vas, da se u slučaju garancije telefonski povežete sa
svojom servisnom ispostavom. Samo na taj način vaša roba
može biti besplatno uručena. Jamstvo vrijedi samo za greške
materijala i greške u izradi, a ne za transportna oštećenja,
potrošne dijelove niti za oštećenja lomljivih dijelova, na
primjer prekidača ili baterija. Proizvod je namjenjen isključivo za privatnu, a ne za komercijalnu uporabu. U slučaju
zlouporabe ili nenamjenske uporabe, primjene sile i u slučaju
zahvata, koji nisu izvršeni od strane naše autorizirane servisne ispostave, jamstvo prestaje važiti. Vaša zakonska prava
ovim jamstvom ostaju netaknuta.
Jamstveni rok se ne produžava korištenjem prava na jamstvo.
To vrijedi i za zamijenjene i popravljene dijelove. Eventualno
već prilikom kupovine prisutna oštećenja i nedostaci moraju
biti javljeni odmah nakon raspakiranja, najkasnije međutim
dva dana nakon datuma kupovine. Nakon isteka jamstvenog
roka izvršene popravke podliježu obavezi plaćanja.
Servis Hrvatska
Tel.: 0800 777 999
E-Mail: kompernass@lidl.hr
Uvoznik
Lidl Hrvatska d.o.o. k.d.,
p.p. 61
10020 Novi Zagreb
Proizvođač:
KOMPERNASS GMBH
BURGSTRASSE 21
D-44867 BOCHUM, Njemačka
www.kompernass.com
- 26 -
Page 29
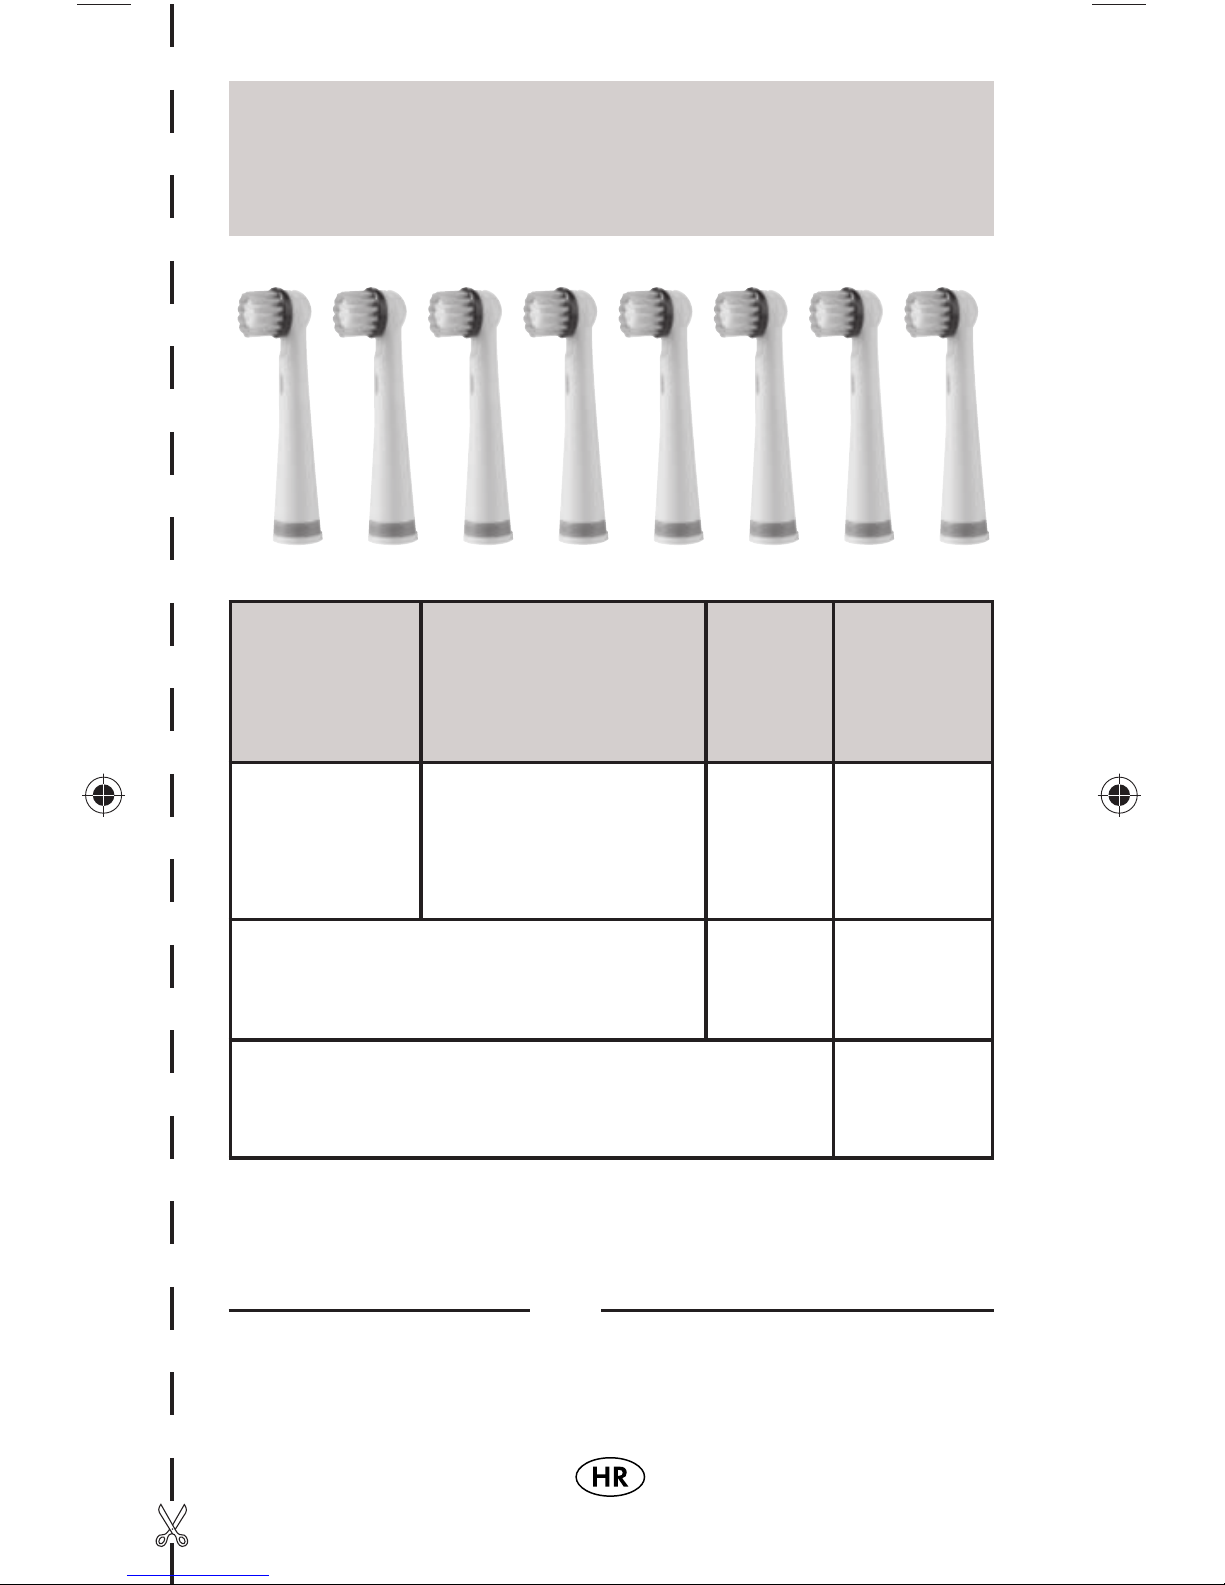
Karta za narudžbu
DAZ 2.4 A1
Naručena
količina
(maks. 3 kompleta
po narudžbi)
uklj. troškove za poštarinu, rukovanje, pakiranje i otpremu
Ukupan iznos: HRK
Način plaćanja: Transfer
Opis artikla Jed.
8-dijelni komplet glava četkice za zube
DAZ 2.4 A1
Ukupan
cijena
60 HRK HRK
iznos
20 HRK
Mjesto, Datum Potpis
Page 30

Ovako možete naručiti:
1. U polje „pošiljatelj/naručilac“ unesite svoje ime, svoju
adresu i svoj broj telefona (za eventualna povratna pitanja)
tiskanim slovima.
2. Transferirajte ukupan iznos unaprijed na račun:
Microtec sistemi d.o.o.
Account number:
2360000-1101550399
Bank: Zagrebačka banka
Prilikom transfera kao svrhu upotrebe navedite artikal, kao i
vaše ime i mjesto stanovanja. Zatim potpuno ispunjenu kartu
za narudžbu u omotnici pošaljite na našu dolje navedenu
poštansku adresu.
Ovlašteni servis: Microtec sistemi
d.o.o.
Koprivnička 27 a
10000 Zagreb
Molimo vas, da dovoljno frankirate pošiljku.
Napišite svoje ime kao pošiljatelja na omotnicu.
Pošiljatelj / Naručilac
(molimo potpuno i TISKANIM SLOVIMA ispuniti)
Ime, prezime
Ulica
Broj/Mjesto
Zemlja
Telefon
Page 31

Sadržaj Strana
Utilizarea conform destinaţiei 30
Indicaţii de siguranţă 30
Furnitura 31
Date tehnice 31
Descrierea aparatului 32
Amplasarea/suportul pentru montare pe perete 32
Prima utilizare 33
Montarea/demontarea capului de periaj 34
Operarea 34
Spălarea dinţilor 34
Curăţarea şi îngrijirea 37
Toc pentru călătorii 38
Eliminarea aparatelor uzate 39
Garanţia şi service-ul 40
Importator 40
Citiţi cu atenţie instrucţiunile înainte de prima utilizare şi
păstraţi-le pentru o consultare ulterioară. Dacă înmânaţi
aparatul unor terţi, ataşaţi şi instrucţiunile de utilizare.
- 29 -
R
Page 32

Utilizarea conform destinaţiei
Acest aparat este destinat îngrijirii personale a dinţilor. Este
interzisă utilizarea în scopuri profesionale şi industriale sau
ca instrument medicinal ori pentru îngrijirea animalelor.
Indicaţii de siguranţă
Pentru a evita defectarea, nu permiteţi infi ltrarea umezelii •
în aparat şi nu-l cufundaţi în apă.
Evitaţi intrarea corpurilor străine în aparat.•
În cazul în care apar defecţiuni sau daune vizibile, adresaţi-vă •
atelierului de service.
Asiguraţi-vă că în timpul funcţionării cablul de alimentare •
nu se va uda sau umezi. Ghidaţi cablul de alimentare
astfel încât să nu fi e strivit sau deteriorat în alt mod. Pericol
de electrocutare!
Cablul de alimentare al acestui aparat nu poate fi înlocuit. •
Dacă cablul se deteriorează, aparatul trebuie casat.
Nu atingeţi niciodată încărcătorul, dacă acesta a căzut în •
apă. Scoateţi mai întâi, neapărat, cablul din priză! Pericol
de electrocutare!
Acest aparat nu este destinat utilizării de către persoane •
(inclusiv copii) cu capacităţi fi zice, senzoriale sau mentale
limitate sau cu o experienţă şi/sau cunoştinţe limitate,
cu excepţia cazului în care sunt supravegheate de către
o persoană responsabilă cu siguranţa lor sau au primit
instrucţiuni de la aceasta privind modul de utilizare a
aparatului;
Copiii trebuie supravegheaţi, pentru a împiedica utilizarea •
aparatului ca jucărie.
Peria de dinţi electrică poate fi încărcată numai cu încărcă-•
torul livrat. Altfel, aparatul se poate defecta ireparabil!
RR
- 30 -
Page 33

Nu introduceţi aparatul sau încărcătorul în apă sau în alte •
lichide. Acest lucru ar conduce la defectarea ireparabilă a
aparatului!
Furnitura
Înainte de punerea în funcţiune, verifi caţi dacă furnitura este
completă şi dacă prezintă deteriorări vizibile.
Aparat
8 capete de periaj
Încărcător
Toc pentru călătorii
2 şuruburi
2 dibluri
Cupon de comandă
Instrucţiuni de utilizare
Îndepărtaţi toate materialele de ambalare şi foliile de pe
aparat.
Date tehnice
Alimentare:
Consum: 2 W
Tip protecţie
(staţia de încărcător): IP X7
Clasa de protecţie: II/
Timp de încărcare: cca 14 - 16 ore
(prima încărcare)
Tip protecţie (aparatul): IP X4
100 - 240 V ˜ 50 - 60 Hz
- 31 -
R
Page 34

Descrierea aparatului
1 Cap de periaj
2 Suport pentru periuţă
3 Încărcător
4 Suport de montare pe perete
5 Afi şaj încărcare
6 LED „Puls“ (galben)
7 LED „Delicat“ (verde)
8 LED „Curăţare“ (portocaliu)
9 Buton pornit/oprit
0 Toc pentru călătorii
Amplasarea/suportul pentru montare
pe perete
Funcţionarea încărcătorului 3 este permisă numai în încăperi
uscate (montate mobilă).
În încăperile umede, în special în apropierea apei (baie),
încărcătorul 3 trebuie montat fi x, prentru a preveni căderea
neintenţionată în recipientele cu apă.
• Scoateţi suportul de montare pe perete 4 din încărcător 3,
trăgând în jos.
• Prin orifi ciile suportului de montare în perete 4 marcaţi
distanţa corectă pentru găuri. Asiguraţi-vă că în imediata
apropiere nu se afl ă nicio priză.
• Înainte de găurire asiguraţi-vă că în spatele marcajelor,
prin perete nu trec conducte de apă sau cabluri electrice.
• Montaţi suportul 4 pe perete cu ajutorul şuruburilor şi al
diblurilor.
• După montarea suportului 4 introduceţi cablul prin decu-
pajul din partea dreaptă sau stângă a suportului 4 (a se
vedea imaginea mărită de pe pagina pliantă). Apoi fi xaţi
încărcătorul 3 cu ajutorul şinelor de ghidare în suportul
pentru perete 4.
• Cablul de alimentare nu trebuie strivit, ci trebuie să fi e
aşezat corect în decupaje.
RR
- 32 -
Page 35

Prima utilizare
Înainte de punerea în funcţiune a aparatului, trebuie să vă
convingeţi că este în stare ireproşabilă de funcţionare. În caz
contrar, utilizarea aparatului este interzisă.
• Introduceţi ştecărul în priză.
• Înainte de prima utilizare, curăţaţi capul de periaj 1 cu
apă curată.
• Introduceţi capul de periaj de schimb în suportul pentru
periuţe 2, deschideţi capacul încărcătorului 3 şi introdu-
ceţi suportul periuţei 2.
• Aşezaţi aparatul în încărcător 3 astfel încât dornul să
alunece în suport.
• Lăsaţi aparatul să se încarce cca 14 - 16 ore, înainte de
a-l utiliza pentru prima oară. Indicatorul de încărcare 5 din
partea din faţă a aparatului este roşu în timpul încărcării.
• Utilizaţi aparatul fără a-l încărca până când puterea este
sesizabil redusă sau până când periuţa se opreşte din
funcţionare şi indicatorul de încărcare 5 clipeşte roşu.
Apoi încărcaţi periuţa de dinţi din nou timp de 14 - 16 ore.
Când aparatul este încărcat, indicatorul de încărcare 5
este verde.
• Descărcaţi şi încărcaţi periuţa de dinţi în total de 3 ori.
După aceea, acumulatorul va ajunge la capacitatea sa
deplină.
• Acum puteţi aşeza aparatul în încărcător 3 după fi ecare
utilizare, pentru a funcţiona la fi ecare utilizare la capacitate
maximă.
Pentru îngrijirea acumulatorilor vă recomandăm: dacă aparatul
s-a încărcat, scoateţi ştecărul încărcătorului 3 din priză.
Introduceri din nou ştecărul în priză, numai când sesizaţi că
mişcarea periuţei este simţitor mai slabă sau când clipeşte
încărcătorul 5; în aceste cazuri încărcaţi din nou aparatul.
- 33 -
R
Page 36

Montarea/demontarea capului de
periaj
Pentru a demonta capul de periaj 1 rotiţi-l în sens orar şi
trageţi în sus.
Pentru a monta capul de periaj 1 aşezaţi-l uşor înclinat în
aparat şi rotiţi-l în sens antiorar.
La introducere, capul de periaj 1 trebuie să se blocheze.
Utilizaţi numai capete de periaj originale, pentru a evita
defectarea aparatului. (Pentru capete de periaj de schimb a
se vedea cuponul de comandă)
Operarea
Această periuţă de dinţi electrică deţine 3 trepte de putere:
- „Curăţare“: treapta normală de viteză, LED portocaliu 8
Pentru curăţarea dinţilor.
- „Delicat“: treapta de viteză redusă, LED verde 7
Pentru curăţarea dinţilor în cazul gingiilor sensibile.
- „Puls“: treaptă cu viteze alternante, LED galben 6
Pentru masarea gingiilor.
• Apăsaţi o singură dată butonul pornit/oprit 9, pentru a
porni treapta „Curăţare“. Se aprinde LED-ul „Curăţare“ 8.
• Mai apăsaţi o dată butonul pentru a porni treapta „Delicat“.
Se aprinde LED-ul „Delicat“ 7.
• Apăsaţi a treia oară butonul pentru a porni treapta „Puls“.
Se aprinde LED-ul „Puls“ 6.
• Pentru oprirea periuţei de dinţi mai apăsaţi o dată butonul
pornit/oprit 9.
Spălarea dinţilor
Avertizare:
La început, datorită frecării neobişnuite, pot apărea hemoragii
la nivelul gingiilor - acest lucru este normal. Dacă situaţia persistă
mai mult de două săptămâni, consultaţi medicul stomatolog.
R
R
- 34 -
Page 37

• Introduceţi capul de periaj 1 în aparat.
• Umeziţi periuţa sub jet de apă.
• Aplicaţi pastă de dinţi pe periuţa umedă.
Indicaţie:
Pentru a evita împroşcarea pastei, porniţi aparatul numai
după ce aţi introdus periuţa în gură.
• De la butonul pornit/oprit 9 reglaţi treapta dorită.
Indicaţie:
Această periuţă de dinţi deţine un temporizator cu un interval
de 30 de secunde pentru curăţarea uniformă a celor patru
părţi ale maxilarului.
• Împărţiţi maxilarul în patru părţi (cvadrante):
sus stânga, sus dreapta, jos stânga şi jos dreapta.
• Începeţi în unul dintre cvadrante:
Aşezaţi capul de periaj 1 pe gingie şi mişcaţi-l dinspre
gingie asupra dintelui.
- 35 -
R
Page 38

Procedaţi în acelaşi mod şi pe partea interioară, şi pe
partea exterioară a dintelui. Pentru fi ecare dinte în parte,
aşezaţi periuţa pe gingie.
Nu uitaţi de partea interioară a măselelor din spate.
Pentru curăţarea suprafeţelor de mestecat, treceţi periuţa,
apăsând uşor, pe aceste suprafeţe ale dinţilor.
• După 30 de secunde periuţa se opreşte scurt, de 2 ori,
pentru a vă semnaliza că puteţi începe să curăţaţi următorul
cvadrant. Curăţaţi toate cele patru cvadrante în acelaşi
mod.
• După două minute, periuţa se opreşte scurt de patru ori.
Astfel este îndeplinită recomandarea medicului stomatolog
de a curăţa dinţii timp de 2 minute.
• Apăsaţi butonul pornit/oprit 9 până la oprirea periuţei
de dinţi.
• După aceea, scoateţi periuţa din gură.
• După utilizare, curăţaţi periuţa 1 sub jet de apă.
• Demontaţi capul de periaj 1 din aparat.
Curăţaţi sub jet de apă arborii de antrenare în care este
montat capul de periaj. Ţineţi aparatul astfel încât apa să
intre pe sus, iar apoi să iasă prin orifi ciile din spate.
• Curăţaţi apoi orifi ciile din spate: lăsaţi apa să curgă din
spate peste aparat până când orifi ciile sunt curate.
Indicaţie:
Masaţi regulat gingiile. Acest lucru favorizează irigarea cu
sânge şi astfel menţinerea sănătăţii gingiilor. Reglaţi treapta
„Puls“ şi treceţi peria umedă, apăsând uşor, peste gingie.
R
R
- 36 -
Page 39

Curăţarea şi îngrijirea
Avertizare:
Scoateţi ştecărul din priză înainte de a curăţa încărcătorul 3.
Pericol de electrocutare!
• Nu deschideţi niciodată carcasa încărcătorului 3 sau a
periuţei de dinţi! După deschidere, acestea nu mai pot fi
închise etanş.
• Curăţaţi încărcătorul 3 numai cu un prosop moale şi
uşor umed. Nu utilizaţi detergenţi sau solvenţi. Aceştia pot
deteriora suprafeţele din plastic.
• Demontaţi capul de periaj 1 din aparat. După utilizare,
curăţaţi temeinic capetele de periaj 1 sub jet de apă.
Vă recomandăm curăţarea capetelor de periaj 1 în
soluţie obişnuită de curăţare a protezelor o dată la 2 - 4
săptămâni. După cel târziu 3 luni, când perii s-au îndoit
spre exterior, trebuie să înlocuiţi capul de periaj 1 cu unul nou.
• Curăţaţi sub jet de apă arborii de antrenare în care este
montat capul de periaj. Ţineţi aparatul astfel încât apa să
intre pe sus, iar apoi să iasă prin orifi ciile din spate.
- 37 -
R
Page 40

• Curăţaţi apoi orifi ciile din spate:
lăsaţi apa să curgă din spate peste aparat până când
orifi ciile sunt curate.
• Suportul periuţei 2 poate fi curăţat fără probleme cu apă
şi puţin săpun. Pentru aceasta, trageţi suportul periuţei 2
în sus pentru a-l demonta.
Toc pentru călătorii
Dacă doriţi să luaţi cu dumneavoastră periuţa în călătorie,
puteţi transporta aparatul şi două capete de periaj în tocul
pentru călătorii 0.
R
R
- 38 -
Page 41

Eliminarea aparatelor uzate
Nu aruncaţi aparatul sub nicio formă în gunoiul
menajer obişnuit. Acest produs cade sub incidenţa
directivei europene 2002/96/EC.
Eliminaţi aparatul prin intermediul unei fi rmei specializate şi
autorizate sau prin intermediul serviciului local de eliminare
a deşeurilor. Respectaţi reglementările actuale în vigoare.
Dacă aveţi nelămuriri, contactaţi serviciul dumneavoastră
local de eliminare a deşeurilor.
Eliminarea bateriilor/acumulatorilor uzaţi
Este interzisă eliminarea bateriilor/acumulatorilor uzaţi în
resturile menajere. Fiecare utilizator are obligaţia legală de a
preda bateriile/acumulatori uzaţi unui centru de colectare din
regiune sau la ghişeele din magazine.
Această obligaţie are scopul de a asigura eliminarea ecologică
a bateriilor/acumulatorilor. Predaţi bateriile/acumulatorii
numai dacă sunt descărcaţi.
Eliminaţi toate materialele de ambalare într-un mod
ecologic.
- 39 -
R
Page 42

Garanţia şi service-ul
Pentru acest aparat, se acordă o garanţie de 3 ani începând
cu data cumpărării. Aparatul a fost produs cu grijă şi verifi cat
cu scrupulozitate înaintea livrării.
Păstraţi bonul de casă pentru a dovedi cumpărarea. Dacă aveţi
solicitări privind garanţia, contactaţi telefonic centrul dumneavoastră de service. Numai astfel poate fi asigurată o expediere
gratuită a produsului dumneavoastră. Garanţia acoperă numai
defectele de material sau de fabricaţie, nu şi deteriorările
rezultate în urma transportului, piesele de uzură sau deteriorările apărute la componentele fragile, de ex. comutatoare sau
acumulatoare. Aparatul este destinat numai pentru uz privat şi
nu pentru o utilizare profesională. În cazul manevrării abuzive
sau necorespunzătoare, uzului de forţă şi intervenţiilor care nu
au fost realizate de către fi liala noastră autorizată de service,
garanţia îşi pierde valabilitatea. Drepturile dumneavoastră
legale nu sunt limitate prin această garanţie.
Perioada de garanţie nu este prelungită după realizarea
reparaţiilor realizate în perioada garanţie. Acest lucru este
valabil şi pentru piesele înlocuite şi reparate. Deteriorările şi
defi cienţele prezente deja la cumpărare trebuie semnalate
imediat după dezambalare sau cel târziu în două zile de
la data cumpărării. Reparaţiile necesare după expirarea
perioadei de garanţie se efectuează contra cost.
R
Service România
Tel.: 0800896637
E-Mail: kompernass@lidl.ro
Importator
KOMPERNASS GMBH
BURGSTRASSE 21
44867 BOCHUM, GERMANIA
www.kompernass.com
- 40 -
Page 43

Περιεχόμενα Σελίδα
Употреба по предназначение 42
Указания за безопасност 42
Окомплектовка на доставката 43
Технически характеристики 43
Описание на уреда 44
Поставяне/опора за стена 44
Първата употреба 45
Поставяне /сваляне на накрайниците 46
Обслужване 46
Миене на зъбите 46
Почистване и поддържане 49
Пътнически комплект 50
Изхвърляне 51
Гаранция и сервиз 52
Вносител 52
Прочетете внимателно ръководството за обслужване
преди да използвате уреда за първи път и го запазете за
по-нататъшна употреба. Когато предавате уреда на
трети лица, предайте и това ръководство с него.
- 41 -
Page 44

Употреба по предназначение
Този уред е предвиден за лична хигиена на зъбите в
домашни условия. Той не е предвиден за стопанска,
промишлена или медицинска цел, както и за хигиена на
животни.
Указания за безопасност
Не допускайте в уреда да проникнат течности и не •
го потапяйте във вода, за да предотвратите повреди.
Избягвайте проникването на чужди тела.•
При неправилно функциониране или видими щети се •
обърнете към клиентския сервиз.
По време на работа внимавайте мрежовият кабел •
никога да не може да се намокри или навлажни.
Полагайте го така, че никога да не се притиска или
поврежда по някакъв друг начин. Опасност от електрически удар!
Съединителният проводник на този уред не може да •
бъде заменен. При наличие на повреда на проводника
уредът трябва да се предаде като скрап.
Никога не докосвайте зарядното устройство, ако то •
падне във вода. Непременно изключете първо щепсела!
Опасност от електрически удар!
Този уред не е предвиден за използване от лица (вклю-•
чително и деца) с ограничени физически, органолептични или умствени способности или от лица, които
не притежават необходимия опит и/или знания, освен
ако не са под надзора на лица, отговорни за тяхната
безопасност или не са получили от тях указания как
трябва да се използва уредът.
Децата трябва да останат под наблюдение, за да се •
гарантира, че не играят с уреда.
Електрическата четка за зъби може да се зарежда само •
с доставеното зарядно устройство. В противен случай тя
може да се развали без да може да се поправи повече!
- 42 -
Page 45

Не потапяйте уреда или зарядното устройство във •
вода или други течности. Това води до непоправими
щети на уреда!.
Окомплектовка на доставката
Преди използване проверете окомплектоването на
доставката и наличие на евентуални видими повреди.
Ръчен уред
8 накрайника
Зарядно устройство
Пътнически комплект
2 болта
2 дюбела
Картон за поръчка
Ръководство за обслужване
Отстранете от уреда опаковъчните материали и фолиото.
Технически характеристики
Захранващо напрежение: 100 - 240 V ˜ 50 - 60 Hz
Консумирана мощност: 2 W
Вид на защита
(зарядно устройство): IP X7
Клас на защита: II/
Време на зареждане: ок. 14 - 16 часа
(първоначално зареждане)
Вид на защита
(ръчен уред): IP X4
- 43 -
Page 46

Описание на уреда
1 накрайник
2 държач за накрайника
3 зарядно устройство
4 опора за стена
5 зарядна индикация
6 импулсна лампичка (жълта)
7 лампичка с мека светлина (зелена)
8 лампичка „Clean“ (оранжева)
9 копче за вкл./изкл.
0 пътнически комплект
Поставяне/опора за стена
Зарядното устройство 3 може да се използва само в
сухи помещения в изправено състояние.
Във влажни помещения, особено в близост до вода (вана)
зарядното устройство 3 трябва да е монтирано здраво,
за да бъде предпазено от неволно падане във водата.
• Изтеглете опората за стена 4 надолу от зарядното
устройство 3.
• Маркирайте на стената правилното разстояние на
отворите за опората на стената 4. При това обърнете
внимание контактът да се намира в близост до нея.
• Преди да пробиете се уверете, че зад маркировката
не се намират нито водопроводи, нито електрически
кабели.
• Закрепете опората за стена 4 с помощта на болтовете
и дюбелите.
• След като закрепите опората 4, прекарайте кабела
през десния или левия процеп на опората 4 (виж
лупата на разгъващата се страница). Пъхнете след
това зарядното устройство 3 в опората за стена 4 с
помощта на направляващите шини.
• Обърнете внимание на това кабелът да не е притиснат
и да уляга правилно в процепа.
- 44 -
Page 47

Първата употреба
Преди да използвате уреда, убедете се в това, че той се
намира в безупречно състояние. В противен случай той
не трябва да се използва.
• Включете щепсела в контакта.
• Преди първата употреба почистете новия накрайник 1
с чиста вода.
• Пъхнете резервния накрайник върху дръжката 2,
отворете капака на зарядното устройство 3 и пъхнете
дръжката 2 в нея.
• Поставете ръчния уред така върху зарядното устрой-
ство 3, че той да се плъзне върху щифта на опората.
• Оставете ръчния уред да се зареди за около 14 - 16
часа, преди да го използвате за първи път. Зарядната
индикация 5 отпред на ръчния уред свети червено по
време на зареждането.
• Използвайте след това ръчния уред, без да го зареждате, докато мощността му видимо намалее или четката за
зъби спре да работи и зарядната индикация 5 започне
да мига червено. Заредете четката за зъби тогава отново
за 14 -1 6 часа. След като уредът се зареди, зарядната
индикация 5 светва зелено.
• Разредете и заредете четката за зъби изцяло общо 3 х.
Едва тогава акумулаторната батерия ще достигне
пълната си мощност.
• Сега вече можете да поставите ръчния уред след всяко
използване в зарядното устройство 3, за да имате
винаги пълна мощност.
За да поддържате акумулаторната батерия Ви препоръчваме следното: Когато ръчният уред се зареди, изключете
щепсела на зарядното устройство 3 от контакта. Включете
щепсела отново в контакта, когато движенията на четката
за зъби намалеят видимо или зарядната индикация 5
започне да мига и заредете отново ръчния уред.
- 45 -
Page 48

Поставяне /сваляне на накрайниците
За да свалите накрайника 1, завъртете го в посока на
часовниковата стрелка и го изтеглете след това нагоре.
За да поставите накрайника 1 поставете го леко изместен
върху ръчния уред и го завъртете в посока обратна на
часовниковата стрелка. Накрайникът 1 трябва да кликне
при поставяне. Използвайте само оригинални накрайници,
за да предотвратите щети на уреда.
(резервни накрайници вижте картона за поръчка)
Обслужване
Тази четка за зъби има различни степени на мощност:
- „Clean“: нормална степен на скорост, оранжева
лампичка 8
За почистване на зъбите
- „Soft“: бавна степен на скорост, зелена лампичка 7
За почистване на зъби с чувствителни венци.
- „Pulse“: редуваща се степен на скоростта, жълта
лампичка 6
За масажиране на венците.
• Натиснете веднъж копчето за вкл./изкл. 9, за да вклю-
чите степента „Clean“. Лампичката „Clean“ 8 светва.
• Натиснете още веднъж, за да настроите степен „Soft“.
Лампичката „Soft“ 7 светва.
• Натиснете трети път, за да настроите степента „Pulse“.
Лампичката „Pulse“ 6 светва.
• За да изключите четката за зъби, натиснете още
веднъж бутона за вкл./изкл. 9.
Миене на зъбите
Предупреждение
Отначало венците могат да се разкървят поради необичайното търкане, това е нормално. Ако това обаче продължи
повече от две седмици, потърсете зъболекар.
- 46 -
Page 49

• Поставете накрайника 1 върху ръчния уред.
• Намокрете четката под течаща вода.
• Поставете малко паста за зъби върху мократа четка.
Указание
Включете уреда едва, когато го поставите в устата, за да
предотвратите пръски.
• Настройте степента на мощност с помощта на копчето
за вкл./изкл. 9.
Указание
Тази четка за зъби има 30 секунден таймер, за да можете да
почистете равномерно и четирите квадранти на челюстта.
• Разделете челюстта си на четири части (квадранта):
горе вляво, горе вдясно, долу вляво и долу вдясно.
• Започнете в един квадрант:
Поставете накрайника 1 върху венеца и прекарайте
четката от венеца към зъба.
- 47 -
Page 50

Постъпете по един и същ начин от вътрешната и външна-
та страна на зъба. Започнете при всеки зъб от венеца.
Не забравяйте вътрешната страна на кътника.
За да почистете дъвчещите повърхности, преминете
с въртящата се четка през тях като натискате леко.
• След 30 секунди четката за зъби прекъсва 2 x за
кратко, за да Ви сигнализира, че трябва да почистете
следващия квадрант на челюстта. Почиствайте всички
квадранти по един и същ начин.
• След две минути четката за зъби спира да работи
4 x за кратко време. Това означава. че сте изпълнили
препоръките на зъболекарите за почистване на зъбите
за 2 минути.
• Натиснете копчето за вкл./изкл. 9 докато четката за
зъби спре.
• Едва тогава извадете четката 1 от устата.
• Почистете основно накрайниците под течаща вода
след всяка употреба.
• Свалете главата на четката 1 от дръжката.
Мийте задвижващия вал на дръжката, на която се
поставя главата на четката, под течаща вода. Дръжте
дръжката така, че водата отгоре да може да се оттича
на капки през задните изходящи отвори.
• След това почистете задните изходящи отвори: Оставете водата да тече отзад по дръжката, така че изходящите отвори да се почистят от замърсяванията.
Указание
Масажирайте редовно венците си. Това подпомага оросяването с кръв и по този начин запазването на венеца.
Настройте степента на мощност „Pulse“ и прекарайте
мократа четка върху венеца.
- 48 -
Page 51

Почистване и поддържане
Предупреждение:
Изключете първо щепсела от контакта, преди да почистете
зарядното устройство 3. Съществува опасност от електрически удар!
• Никога не отваряйте корпуса на зарядното устройство
3 или на четката! Те не могат да се затворят отново
водонепроницаемо.
• Почиствайте зарядното устройство 3 само с мека,
леко навлажнена кърпа. Не използвайте препарати
за почистване или разтворители. Те могат да повредят
пластмасовата повърхност.
• Свалете главата на четката 1 от дръжката. След
употреба измивайте старателно главите на четката 1
под течаща вода.
Препоръчваме измиване на главите на четката 1 в
обикновена течност за почистване на зъбни протези
приблизително на всеки 2 - 4 седмици. След около
3 месеца, но най-късно след като космите се извият
навън, трябва да използвате нова глава на четката 1.
• Мийте задвижващия вал на дръжката, на която се
поставя главата на четката, под течаща вода. Дръжте
дръжката така, че водата отгоре да може да се оттича
на капки през задните изходящи отвори:
- 49 -
Page 52

• След това почистете задните изходящи отвори:
Оставете водата да тече отзад по дръжката, така че
изходящите отвори да се почистят от замърсяванията.
• Можете да почиствате държача за четката 2 без-
проблемно с вода и малко сапунен разтвор. За тази цел
просто издърпайте държача за четката 2 нагоре.
Пътнически комплект
Ако се наложи да вземете четката за кратко пътуване
със себе си. Вие можете да поставите в пътническия
комплект 0 ръчния уред, два накрайник.
- 50 -
Page 53

Изхвърляне
В никакъв случай не изхвърляйте уреда с обикновените битови отпадъци. Този уред подлежи
на европейската Директива 2002/96/EC.
Изхвърляйте уреда чрез лицензирана фирма за изхвърляне на отпадъци или общинската служба за изхвърляне на
отпадъци. Спазвайте актуално валидните разпоредби.
В случай на съмнение се свържете със службата за
изхвърляне на отпадъци.
Рециклиране на батериите
Батериите не трябва да се изхвърлят с домашните отпадъци.
Всеки потребител е задължен от закона да предаде
батериите в пункт за вторични суровини в общината /
квартала или в магазин.
Това задължение служи за екологично рециклиране
на батериите. Връщайте батериите само, когато те са
разредени.
Предавайте опаковъчните материали за екологично рециклиране.
- 51 -
Page 54

Гаранция и сервиз
За този уред вие получавате гаранция от 3 години от датата
на закупуване. Уредът е произведен старателно и е проверен добросъвестно преди доставката.
Запазете касовата бележка като доказателство за покупката. В гаранционен случай се свържете по телефона с
вашия сервиз. Само по този начин може да се осигури
безплатното изпращане на вашата стока. Даването на
гаранция важи само за материални или фабрични дефекти, но не и за транспортни щети, износващи се части или
при повреда на лесно чупливи части, напр. ключове или
акумулаторни батерии. Продуктът е предназначен единствено за домашна, а не за професионална употреба.
При непозволена и неправилна употреба, при прилагане
на сила или интервенции, които не са извършени от
нашия оторизиран сервизен филиал, гаранцията отпада.
Законните ви права не се ограничават от тази гаранция.
Гаранционният срок не се удължава от гаранцията. Това
важи и за сменени и ремонтирани части. За евентуалните,
налични още при закупуването повреди и недостатъци
трябва да се съобщи веднага след разопаковането, но найкъсно два дена след датата на закупуване. След като изтече
гаранционният срок, ремонтите трябва да се заплащат.
Сервизно обслужване България
Тел.: 00800 111 4920
E-мейл: kompernass@lidl.bg
Вносител
KOMPERNASS GMBH
BURGSTRASSE 21
44867 BOCHUM, GERMANY
www.kompernass.com
- 52 -
Page 55

Φορма за поръчка
DAZ 2.4 A1
Количество
(макс. 3 компле-
кта на поръчка)
вкл. разноски за пощ. услуги,
опаковка и експедиране.
Обща сума: BGN
Забележка: Всички цени са в български лева и с включено ДДС.
Описание на
продукта
Комплект от 8 накрайника за четка
за зъби
DAZ 2.4 A1
Единич-
на цена
16 BGN BGN
Обща
сума
4 BGN
Начин на плащане: Банков превод/ Наложен платеж/
Място, дата: Подпис
На място
Page 56

Така можете да поръчате:
1. В графата „подател/поръчващ” нанесете с големи букви името,
адреса и телефонния си номер (при евентуални въпроси).
2. Моля, посочете предпочитания от Вас начин на плащане.
Имате три варианта:
A. Банков превод: Преведете предварително сумата на банкова
сметка
ИМЕ НА БАНКАТА:
Юробанк И Еф Джи България АД/
Пощенска банка
BIC CODE: BPBIBGSF
АДРЕС НА БАНКАТА:
клон Дондуков
IBAN No.:
BG13 BPBI 7940 1055 0964 01
БЕНЕФИЦИЕНТ:
БУШОНА ЕООД
При извършване на превода посочете като основание за плащане
продукта, Вашето име и местожителство. След това изпратете
изцяло попълнената и поставена в плик карта на посочения
пощенски адрес.
Важно:
Извършете банковия превод без допълнителни такси за
получателя, таксите на Вашата банка остават за Ваша сметка.
B. Наложен платеж: Плащате с наложен платеж при
получаване.
C. На място: Вие купувате директно от нас на адреса, даден по-долу.
Нашият адрес:
Bushona Ltd. / Бушона ЕООД
ул. Искър 49
София 1504
горещ телефон02/ 4917478
Важно:
•Облепете с марки Вашата пратка.
•Напишете името си върху плика като подател.
Подател / Поръчващ (изцяло с ГОЛЕМИ БУКВИ)
Име, фамилия
Улица
А. ек. /място
Страна
Телефон
Page 57

Περιεχόμενα Σελίδα
Χρήση σύμφωνη με τους κανονισμούς 56
Υποδείξεις ασφαλείας 56
Σύνολο αποστολής 57
Τεχνικές πληροφορίες 57
Περιγραφή συσκευής 58
Τοποθέτηση/Συγκράτηση τοίχου 58
Πρώτη χρήση 59
Τοποθέτηση/ απομάκρυνση κεφαλής βούρτσας 60
Χειρισμός 60
Καθαρισμός των δοντιών 61
Καθαρισμός και φροντίδα 64
Θήκη ταξιδιού 65
Απομάκρυνση 66
Εγγύηση και σέρβις πελατών 67
Εισαγωγέας 68
Διαβάστε τις οδηγίες χειρισμού πριν από την πρώτη χρήση
προσεκτικά και φυλάξτε τις για την μετέπειτα χρήση. Παραδώστε το εγχειρίδιο σε όποιον παραδοθεί στη συνέχεια η
συσκευή.
- 55 -
Page 58

Χρήση σύμφωνη με τους κανονισμούς
Αυτή η συσκευή προβλέπεται για την ατομική φροντίδα των
δοντιών στον οικιακό τομέα. Δεν προορίζεται για την επαγγελματική ή βιομηχανική χρήση, τη χρήση στον ιατρικό τομέα ή
για την περιποίηση ζώων.
Υποδείξεις ασφαλείας
Μην επιτρέπετε να διεισδύουν υγρά μέσα στη συσκευή και •
μην την βυθίζετε σε νερό, ώστε να αποφεύγετε φθορές.
Αποφεύγετε τη διείσδυση ξένων σωμάτων.•
Απευθυνθείτε σε περίπτωση ελαττωματικών λειτουργιών ή •
αναγνωρίσιμων βλαβών στο τμήμα εξυπηρέτησης πελατών.
Προσέχετε ώστε κατά τη λειτουργία το καλώδιο δικτύου να •
μην βρέχεται ή υγραίνεται ποτέ. Οδηγείτε το καλώδιο δικτύου έτσι ώστε να μην μπλέκεται ή να μην πάθει περαιτέρω
βλάβη. Κίνδυνος ηλεκτροπληξίας!
Η καλωδίωση δικτύου αυτής της συσκευής δεν μπορεί να •
αντικατασταθεί. Εάν φθαρεί η καλωδίωση, τότε πρέπει να
απορριφθεί η συσκευή.
Ποτέ μην αγγίζετε το σταθμό φόρτισης όταν αυτός έχει πέ-•
σει μέσα στο νερό. Τραβάτε οπωσδήποτε πρώτα το βύσμα
δικτύου! Κίνδυνος ηλεκτροπληξίας!
Αυτή η συσκευή δεν προορίζεται για χρήση από άτομα •
(συμπεριλαμβανομένων παιδιών) με περιορισμένες φυσικές, αισθητηριακές ή πνευματικές δυνατότητες ή με έλλειψη
εμπειρίας και/ ή με έλλειψη γνώσεων, εκτός εάν επιτηρούνται μέσω ενός υπεύθυνου ατόμου για την ασφάλειά τους
ή εάν έχουν λάβει υποδείξεις για το πώς χρησιμοποιείται
η συσκευή.
Τα παιδιά πρέπει να επιτηρούνται ώστε να εξασφαλίζεται •
ότι δεν παίζουν με τη συσκευή.
Η ηλεκτρική οδοντόβουρτσα επιτρέπεται να φορτίζεται •
μόνο με τον απεσταλμένο σταθμό φόρτισης. Αλλιώς μπορεί η συσκευή να πάθει ανεπανόρθωτη βλάβη!
Μη βυθίζετε τη συσκευή χειρός ή το σταθμό φόρτισης •
στο νερό ή σε άλλα υγρά. Αυτό οδηγεί σε ανεπανόρθωτες
βλάβες στη συσκευή!
- 56 -
Page 59

Σύνολο αποστολής
Ελέγχετε πριν από την ενεργοποίηση το σύνολο αποστολής
για την πληρότητα και για ενδεχόμενες ορατές φθορές.
Συσκευή χειρός
8 Κεφαλές βουρτσών
Σταθμός φόρτισης
Θήκη ταξιδιού
2 βίδες
2 πείροι
Κάρτα παραγγελίας
Οδηγίες χρήσης
Απομακρύνετε όλα τα υλικά συσκευασίας και τις μεμβράνες
από τη συσκευή.
Τεχνικές πληροφορίες
Παροχή τάσης:
Μέγιστη απορρόφηση
ισχύος: 2 W
Είδος προστασίας
(Σταθμός φόρτισης): IP X7
Κατηγορία προστασίας: II /
Χρόνος φόρτισης: περ. 14 - 16 ώρες
(φόρτιση για πρώτη φορά)
Είδος προστασίας
(τμήμα χειρός): IP X4
100 - 240 V ˜ 50 - 60 Hz
- 57 -
Page 60
Περιγραφή συσκευής
1 Κεφαλή βούρτσας
2 Συγκράτηση βούρτσας
3 Σταθμός φόρτισης
4 Συγκράτηση τοίχου
5 Ένδειξη φόρτισης
6 Pulse-LED (Παλμοί) (κίτρινο)
7 Soft-LED (Μαλακό) (πράσινο)
8 „Clean“-LED (Καθαρό) (πορτοκαλί)
9 Διακόπτης on/off
0 Θήκη ταξιδιού
Τοποθέτηση/Συγκράτηση τοίχου
Ο σταθμός φόρτισης 3 επιτρέπεται να λειτουργεί μόνο σε
στεγνούς χώρους ελεύθερα κείμενος.
Σε υγρούς χώρους κυρίως κοντά στο νερό (μπάνιο) πρέπει ο
σταθμός φόρτισης 3 να είναι σταθερά μονταρισμένος ώστε να
είναι προστατευμένος από μη ηθελημένη πτώση μέσα στο νερό.
• Τραβήξτε τη συγκράτηση τοίχου 4 προς τα κάτω έξω
από το σταθμό φόρτισης 3.
• Σημειώστε στον τοίχο μέσω των ανοιγμάτων διάτρησης
της συγκράτησης τοίχου 4 τη σωστή απόσταση για τις
οπές διάτρησης. Προσέχετε τότε ότι θα υπάρχει μια πρίζα
δικτύου σε προσβάσιμο σημείο.
• Βεβαιώνεστε πριν από τη διάτρηση ότι πίσω από τα σημάδια
δεν θα περνάνε ούτε γραμμές ρεύματος ούτε γραμμές νερού.
• Στερεώστε τη συγκράτηση τοίχου 4 με τη βοήθεια των βιδών
και των πείρων.
• Αφότου έχετε στερεώσει τη συγκράτηση τοίχου 4, οδηγήστε
το καλώδιο δικτύου μέσα από την δεξιά ή την αριστερή
εγκοπή στη συγκράτηση τοίχου 4 (βλέπε μεγέθυνση στην
πλευρά ανοίγματος).
Ωθήστε στη συνέχεια το σταθμό φόρτισης 3 με τη βοήθεια
των γραμμών οδήγησης στη συγκράτηση τοίχου 4.
• Προσέχετε ώστε το καλώδιο δικτύου να μην μαγκώνεται και
να έχει σωστή θέση στις εγκοπές.
- 58 -
Page 61

Πρώτη χρήση
Πριν την πρώτη χρήση σιγουρευτείτε ότι η συσκευή βρίσκεται σε
άψογη κατάσταση. Ειδάλλως δεν επιτρέπεται να την χρησιμοποιήσετε.
• Εισάγετε το βύσμα δικτύου στην πρίζα.
• Πριν από την πρώτη χρήση καθαρίστε την νέα κεφαλή
βούρτσας 1 με καθαρό νερό.
• Εισάγετε τις εφεδρικές κεφαλές βουρτσών στη συγκράτηση
βούρτσας 2, ανοίξτε το κάλυμμα του σταθμού φόρτισης
3 και ωθήστε τη συγκράτηση βούρτσας 2 μέσα.
• Τοποθετήστε τη συσκευή χειρός έτσι επάνω στο σταθμό
φόρτισης 3, ώστε να γλιστρά στον άξονα στην υποδοχή.
• Αφήστε τη συσκευή χειρός να φορτίσει για περ. 14 - 16
ώρες προτού τη χρησιμοποιήσετε για πρώτη φορά.
Η ένδειξη φόρτισης 5 μπροστά στη συσκευή χειρός
ανάβει κόκκινη κατά τη διάρκεια της φόρτισης.
• Στη συνέχεια χρησιμοποιείτε τη συσκευή χειρός τόσο
συχνά χωρίς να την φορτίζετε έως ότου η απόδοση γίνει
αισθητά πιο αδύναμη ή έως ότου η οδοντόβουρτσα
σταματήσει τη λειτουργία και η ένδειξη φόρτισης 5
αναβοσβήνει κόκκινη. Μόνο μετά φορτίστε πάλι την
οδοντόβουρτσα για 14 - 16 ώρες. Όταν η συσκευή έχει
φορτιστεί, ανάβει η ένδειξη φόρτισης 5 πράσινη.
• Αποφορτίστε και φορτίστε την οδοντόβουρτσα συνολικά
3 φορές πλήρως. Στη συνέχεια ο συσσωρευτής επιτυγχάνει την πλήρη του απόδοση.
• Τώρα μπορείτε να τοποθετείτε τη συσκευή χειρός μετά από
κάθε χρήση στο σταθμό φόρτισης 3, ώστε να έχετε πάντα
στη διάθεσή σας την πλήρη απόδοση.
Για τη φροντίδα των συσσωρευτών προτείνουμε το εξής:
Όταν η συσκευή χειρός έχει φορτιστεί, τραβάτε το βύσμα δικτύου του σταθμού φόρτισης 3 από την πρίζα. Τοποθετήστε το
βύσμα πάλι στην πρίζα μόνο όταν οι κινήσεις της οδοντόβουρτσας έχουν γίνει αισθητά αδύναμες ή η ένδειξη φόρτισης 5
αναβοσβήνει και φορτίστε πάλι τη συσκευή χειρός.
- 59 -
Page 62

Τοποθέτηση/ απομάκρυνση κεφαλής
βούρτσας
Για την απομάκρυνση της κεφαλής βούρτσας 1, περιστρέψτε
την δεξιόστροφα και τραβήξτε την στη συνέχεια προς τα επάνω.
Για την τοποθέτηση της κεφαλής βούρτσας 1 τοποθετήστε
την με ελαφριά μετατόπιση επάνω στο τεμάχιο χειρός και
περιστρέψτε την αριστερόστροφα.
Η κεφαλή βούρτσας 1 πρέπει κατά την τοποθέτηση να
κουμπώσει. Χρησιμοποιείτε μόνο γνήσιες κεφαλές βουρτσών
ώστε να αποφεύγετε βλάβες στη συσκευή.
(Για εφεδρικές κεφαλές βουρτσών βλέπε κάρτα παραγγελίας)
Χειρισμός
Αυτή η οδοντόβουρτσα έχει 3 διαφορετικές βαθμίδες
απόδοσης:
- „Clean“ (Καθαρό): κανονική βαθμίδα ταχύτητας,
πορτοκαλί LED 8
Για τον καθαρισμό των δοντιών.
- „Soft“ (Μαλακό): αργή βαθμίδα ταχύτητας,
πράσινο LED 7
Για τον καθαρισμό των δοντιών με ευαίσθητα ούλα.
- „Pulse“ (Παλμοί): εναλλασσόμενη βαθμίδα
ταχύτητας, κίτρινο LED 6
Για μασάζ των ούλων.
• Πιέστε μια φορά το διακόπτη ενεργοποίησης/απενεργο-
ποίησης 9, ώστε να ενεργοποιήσετε τη βαθμίδα απόδοσης
„Clean“. Το LED „Clean“ 8 ανάβει.
• Πιέστε άλλη μια φορά ώστε να ρυθμίσετε τη βαθμίδα
απόδοσης „Soft“. Το LED „Soft“ 7 ανάβει.
• Πιέστε μια τρίτη φορά ώστε να ρυθμίσετε τη βαθμίδα
απόδοσης „Pulse“. Το LED „Pulse“ 6 ανάβει.
• Για να απενεργοποιήσετε την οδοντόβουρτσα, πιέστε
άλλη μια φορά στο διακόπτη ενεργοποίησης/απενεργοποίησης 9.
- 60 -
Page 63

Καθαρισμός των δοντιών
Προειδοποίηση
Στην αρχή ίσως εμφανιστεί λίγο αίμα από τα ούλα λόγω του
ασυνήθιστου ερεθισμού, αυτό είναι φυσιολογικό. Εάν αυτό
κρατήσει περισσότερο από δύο εβδομάδες, πρέπει να συμβουλευτείτε τον οδοντίατρο σας.
• Εισάγετε την κεφαλή βούρτσας 1 στο τμήμα χειρός.
• Βρέξτε τη βούρτσα κάτω από ρέον νερό.
• Τοποθετήστε λίγη οδοντόκρεμα επάνω στην υγραμένη
βούρτσα.
Υπόδειξη
Ενεργοποιείστε τη συσκευή πρώτα στο στόμα, ώστε να αποφύγετε εκτοξεύσεις.
• Ρυθμίστε την επιθυμούμενη βαθμίδα απόδοσης στο διακό-
πτη ενεργοποίησης/απενεργοποίησης 9.
Υπόδειξη
Αυτή η οδοντόβουρτσα έχει έναν χρονοδιακόπτη διαλειμμάτων
30 δευτερολέπτων, ώστε να μπορείτε να καθαρίζετε ομοιόμορφα
και τα τέσσερα τεταρτοκύκλια της γνάθου.
- 61 -
Page 64

• Χωρίστε τη γνάθο σε τέσσερα τμήματα (τεταρτοκύκλια): επά-
νω αριστερά, επάνω δεξιά, κάτω αριστερά και κάτω δεξιά.
• Ξεκινήστε σε ένα τεταρτοκύκλιο:
Τοποθετήστε την κεφαλή βούρτσας 1 στα ούλα και οδηγείστε τη βούρτσα ξεκινώντας από τα ούλα πάνω από τα
δόντια. Ακολουθήστε την ίδια διαδικασία με την εσωτερική
πλευρά καθώς και με την εξωτερική πλευρά του δοντιού.
Για κάθε δόντι τοποθετείτε εκ νέου τη βούρτσα επάνω στο
ούλο.
Μην ξεχάσετε την πίσω πλευρά του πίσω τραπεζίτη.
Για να καθαρίσετε τις επιφάνειες μάσησης, οδηγήστε την
περιστρεφόμενη βούρτσα με ελαφριά πίεση πάνω από τις
επιφάνειες μάσησης.
• Μετά από 30 δευτερόλεπτα η οδοντόβουρτσα διακόπτει
2 φορές για λίγο τη λειτουργία, για να σας δείξει ότι πρέπει να καθαρίσετε το επόμενο τεταρτοκύκλιο της γνάθου.
Καθαρίζετε όλα τα τεταρτοκύκλια της γνάθου με την ίδια
τεχνική.
• Μετά από δύο λεπτά σταματά η οδοντόβουρτσα τη
λειτουργία 4 φορές για λίγο.Έτσι έχετε επιτύχει την οδοντιατρική πρόταση των 2 λεπτών για τον καθαρισμό των
δοντιών.
• Πιέστε το διακόπτη ενεργοποίησης/απενεργοποίησης 9
τόσες φορές έως ότου σταματήσει η οδοντόβουρτσα.
- 62 -
Page 65

• Μόνο μετά θα βγάλετε την οδοντόβουρτσα από το στόμα.
• Καθαρίζετε τις κεφαλές βούρτσας 1 μετά τη χρήση λεπτο-
μερώς κάτω από ρέον νερό.
• Αφαιρέστε την κεφαλή βούρτσας 1 από το τμήμα χειρός.
Καθαρίστε κάτω από τρεχούμενο νερό τον άξονα μετάδο-
σης κίνησης του τμήματος χειρός, στον οποίο εισάγεται η
κεφαλή βούρτσας. Κρατάτε το τμήμα χειρός έτσι ώστε το
νερό να μπορεί να στάζει από επάνω και έξω από τα πίσω
ανοίγματα εξόδου.
• Στη συνέχεια καθαρίστε τα πίσω ανοίγματα εξόδου:
Αφήστε το νερό να τρέξει από πίσω πάνω από το τμήμα
χειρός, έτσι ώστε τα ανοίγματα εξόδου να είναι ελεύθερα
από ακαθαρσίες.
Υπόδειξη
Κάνετε ομοιόμορφο μασάζ στα ούλα σας. Αυτό βοηθά στην
κυκλοφορία του αίματος και έτσι στη διατήρηση της υγείας
των ούλων. Ρυθμίστε τη βαθμίδα απόδοσης „Pulse“ και
οδηγήστε την υγραμένη βούρτσα με ελαφριά πίεση πάνω από
τα ούλα.
- 63 -
Page 66

Καθαρισμός και φροντίδα
Προειδοποίηση:
Τραβάτε πρώτα το βύσμα από την πρίζα, προτού καθαρίσετε
το σταθμό φόρτισης 3. Υπάρχει κίνδυνος ηλεκτροπληξίας!
• Ποτέ μην ανοίγετε το περίβλημα του σταθμού φόρτισης 3
ή της βούρτσας! Αυτά δεν μπορούν να κλειστούν πάλι
στεγανά.
• Καθαρίζετε το σταθμό φόρτισης 3 μόνο με ένα μαλακό,
ελαφρώς νωπό πανί. Μην χρησιμοποιείτε απορρυπαντικά
ή διαλύτες. Αυτά μπορεί να καταστρέψουν τις πλαστικές
επιφάνειες.
• Αφαιρέστε την κεφαλή βούρτσας 1 από το τμήμα χειρός.
Καθαρίζετε τις κεφαλές βουρτσών 1 μετά τη χρήση λεπτομερώς κάτω από τρεχούμενο νερό.
Προτείνουμε έναν καθαρισμό των κεφαλών βουρτσών
1 σε υγρό καθαρισμού του εμπορίου για προθέσεις
δοντιών, περίπου κάθε 2 - 4 εβδομάδες. Μετά από περ. 3
μήνες, το αργότερο όμως όταν οι τρίχες γέρνουν προς τα έξω,
πρέπει να χρησιμοποιήσετε μια νέα κεφαλή βούρτσας 1.
• Καθαρίστε κάτω από τρεχούμενο νερό τον άξονα μετάδο-
σης κίνησης του τμήματος χειρός, στον οποίο εισάγεται η
κεφαλή βούρτσας. Κρατάτε το τμήμα χειρός έτσι ώστε το
νερό να μπορεί να στάζει από επάνω και έξω από τα πίσω
ανοίγματα εξόδου.
- 64 -
Page 67

• Στη συνέχεια καθαρίστε τα πίσω ανοίγματα εξόδου:
Αφήστε το νερό να τρέξει από πίσω πάνω από το τμήμα
χειρός, έτσι ώστε τα ανοίγματα εξόδου να είναι ελεύθερα
από ακαθαρσίες.
• Μπορείτε εύκολα να καθαρίσετε τη βάση βούρτσας 2
με νερό και λίγο σαπουνάδα. Για αυτό μπορείτε απλά να
τραβήξετε τη συγκράτηση βούρτσας 2 προς τα επάνω
και έξω.
Θήκη ταξιδιού
Εάν θέλετε να πάρετε μαζί την οδοντόβουρτσα σε ένα σύντομο
ταξίδι, μπορείτε να φυλάξετε το τμήμα χειρός καθώς και δύο
κεφαλές βούρτσας στη θήκη ταξιδιού 0.
- 65 -
Page 68

Απομάκρυνση
Σε καμία περίπτωση μην πετάτε τη συσκευή στα
φυσιολογικά απορρίμματα. Αυτό το προϊόν
υπόκειται στην Ευρωπαϊκή Οδηγία 2002/96/EC.
Απομακρύνετε τη συσκευή μέσω μιας εγκεκριμένης επιχείρησης
απόρριψης ή μέσω της κοινοτικής επιχείρησης απόρριψης.
Προσέχετε τις τρέχουσες ισχύουσες προδιαγραφές.
Σε περίπτωση αμφιβολιών ελάτε σε επαφή με την επιχείρηση
απόρριψης.
Απόρριψη μπαταριών/ συσσωρευτών
Οι μπαταρίες/ συσσωρευτές δεν επιτρέπεται να απορρίπτονται
μέσω των οικιακών απορριμμάτων. Κάθε χρήστης είναι νομικά
υποχρεωμένος να παραδίδει τις μπαταρίες / τους συσσωρευτές
σε ένα σημείο συγκέντρωσης της κοινότητας / της πόλης του
ή στο εμπόριο.
Αυτή η υποχρέωση εξυπηρετεί στο να απομακρύνονται οι
μπαταρίες / συσσωρευτές με έναν φιλικό προς το περιβάλλον
τρόπο. Επιστρέφετε τις μπαταρίες / τους συσσωρευτές μόνο
σε αποφορτισμένη κατάσταση.
Οδηγείτε όλα τα υλικά συσκευασίας σύμφωνα με μια
φιλική προς το περιβάλλον απόρριψη.
- 66 -
Page 69

Εγγύηση και σέρβις πελατών
Έχετε για αυτή τη συσκευή 3 χρόνια εγγύηση από την ημερομηνία αγοράς. Η συσκευή κατασκευάστηκε και ελέγχθηκε
προσεκτικά πριν από την αποστολή.
Παρακαλούμε φυλάξτε την απόδειξη ταμείου ως απόδειξη
για την αγορά. Σε περίπτωση εγγύησης ελάτε σε επικοινωνία
με το τμήμα του σέρβις τηλεφωνικά. Μόνο έτσι μπορεί να
εξασφαλιστεί μια δωρεάν αποστολή του εμπορεύματός σας.
Η απόδοση εγγύησης ισχύει μόνο για σφάλματα υλικού ή
κατασκευής, όχι όμως για φθορές από τη μεταφορά, για
εξαρτήματα φθοράς ή για βλάβες σε εύθραυστα εξαρτήματα,
π.χ. διακόπτες ή συσσωρευτές. Το προϊόν προορίζεται μόνο
για την ιδιωτική και όχι για την επαγγελματική χρήση. Σε
περίπτωση κακής μεταχείρισης και ακατάλληλης χρήσης, σε
χρήση βίας και σε παρεμβάσεις οι οποίες δεν διεξήχθησαν
από το εξουσιοδοτημένο μας τμήμα σέρβις, η εγγύηση παύει
να ισχύει. Τα νομικά σας δικαιώματα δεν περιορίζονται μέσω
αυτής της εγγύησης.
Ο χρόνος εγγύησης δεν επεκτείνεται μέσω της απόδοσης εγγύησης. Αυτό ισχύει και για εξαρτήματα που έχουν αντικατασταθεί και επισκευαστεί. Ενδεχόμενες υπάρχουσες φθορές και
ελλείψεις κατά την αγορά πρέπει να αναφέρονται αμέσως μετά
την αποσυσκευασία, το αργότερο ωστόσο δύο ημέρες μετά
την ημερομηνία αγοράς. Επισκευές που εμφανίζονται μετά το
χρόνο εγγύησης, χρεώνονται.
Σέρβις Ελλάδα
Tel.: 801 5000 019 (0,03 EUR/Min.)
E-Mail: kompernass@lidl.gr
CY
Σέρβις Κύπρος
Tel.: 8009 4409
E-Mail: kompernass@lidl.cy
- 67 -
Page 70

Εισαγωγέας
KOMPERNASS GMBH
BURGSTRASSE 21
44867 BOCHUM, ΓΕΡΜΑΝΙΑ
www.kompernass.com
- 68 -
Page 71

КЬсфб рбсбггелЯбт
DAZ 2.4 A1
Рпуьфзфб
(ìÝã. 3 óåô áíÜ
рбсбггелЯб)
ухн Эопдб дйбчеЯсйузт гйб
фбчхдспмйкЬ фЭлз, дйбчеЯсйуз,
ухукехбуЯб кбй брпуфплЮ.
Ухнплйкь рпуь:
¼спй рлзсщмЮт : Κατάθεση σε τραπεζικό λογαριασμό
РесйгсбцЮ
рспъьнфпт
Уеф кецблюн гйб
пдпнфьвпхсфует
8 фем. DAZ 2.4 A1
ÔéìÞ
мпнЬдбт
8 € €
Ухнплйкь
ðïóü
4 €
€
Фьрпт, змеспмзнЯб ХрпгсбцЮ
Page 72

έτσι εκτελείτε την παραγγελία:
1. Σημειώνετε με κεφαλαία κάτω από το “Αποστολέας/
πελάτης” το όνομά σας, την προσφώνησή σας και το
αριθμό του τηλεφώνου σας (για ενδεχόμενες ερωτήσεις).
2. Κατάθεση σε τραπεζικό λογαριασμό: Καταθέτετε το
συνολικό ποσό εκ των προτέρων στον ακόλουθο τραπεζικό
λογαριασμό
Kompernaß Handelsgesellschaft mbH
IBAN: DE03440100460799566462
SWIFT (BIC): PBNKDEFF 440
Τράπεζα: Postbank Dortmund AG
Εφόσον πληρώνετε με κατάθεση στον τραπεζικό λογαριασμό,
σημειώστε στο έντυπο κατάθεσης στο σημείο εξόδων το πεδίο
“shared” (μοιρασμένα έξοδα). Διαφορετικά δεν μπορούμε να
διεκπεραιώσουμε την παραγγελία σας.
Στην κατάθεσή σας να αναφέρετε ως σκοπό χρήσης το
προϊόν όπως επίσης το όνομα και τη διεύθυνσή σας. Στέλνετε
την πλήρως συμπληρωμένη κάρτα παραγγελίας μέσα σ’ ένα
φάκελο στην ακόλουθη ταχυδρομική μας διεύθυνση.
Kompernaß Handelsgesellschaft mbH
Burgstrasse 21
44867 Bochum
Deutschland
Παρακαλείσθε να επικολλήσετε στο φάκελο την απαιτούμενη
αξία γραμματοσήμων.
Σημειώστε το όνομά σας ως αποστολέα επάνω στο φάκελο
БрпуфплЭбт / РбсбггЭлщн
(рбсбкблпэме ухмрлзсюуфе рлЮсщт кбй ме КЕЦБЛБЙБ)
Ерюнхмп, ьнпмб
Ïäüò
Фбчхдспмйкьт кюдйкбт, фьрпт
Xþñá
ФзлЭцщнп
 Loading...