


PAC1402W
Portable Air Conditioner
Owner’s Manual
For more information on other great EdgeStar and Koldfront products on the web, go to http://www.edgestar.com
To use the EdgeStar self-diagnostic tool, go to https://support.edgestar.com
PAC1402W
V2.5-06202017

Electrical Safety
This unit is designed for indoor use only.
Do not use the unit in extremely humid or wet environments.
Do not wet the housing or control panel.
Do not pull the unit by the cord.
Always turn the unit off and unplug it from the socket when cleaning.
Unplug the unit if it is not going to be used for a long period of time.
Do not operate the unit with a damaged plug or loose socket.
Use only the correct power supply with appropriate amperage.
If the power cord is damaged, it must be replaced by the manufacturer, a service agent, or a qualified
technician.
Do not remove any part of the casing unless instructed to do so by an authorized technician.
General Safety
This portable air conditioner is not intended to be used by children.
Children should be supervised to ensure that they do not play with this product.
Do not allow children to play with the controls or drop any objects into the air outlets or vents.
Do not place objects or let any person sit on top of the unit.
Only use in the upright position on a flat, level surface and provide at least 20 inches of clearance
from any walls or objects.
Route the power cord carefully to avoid a tripping hazard.
This unit is intended for domestic use only. Do not use the portable air conditioner for industrial or
commercial use. Any other use may invalidate the warranty.
Important Safety Information
Improper handling can cause serious damage to the appliance and / or to the user.
Please read the following safety information.
Improper handling can cause serious damage to the appliance and/or to the user. Please read
the following safety information.
i
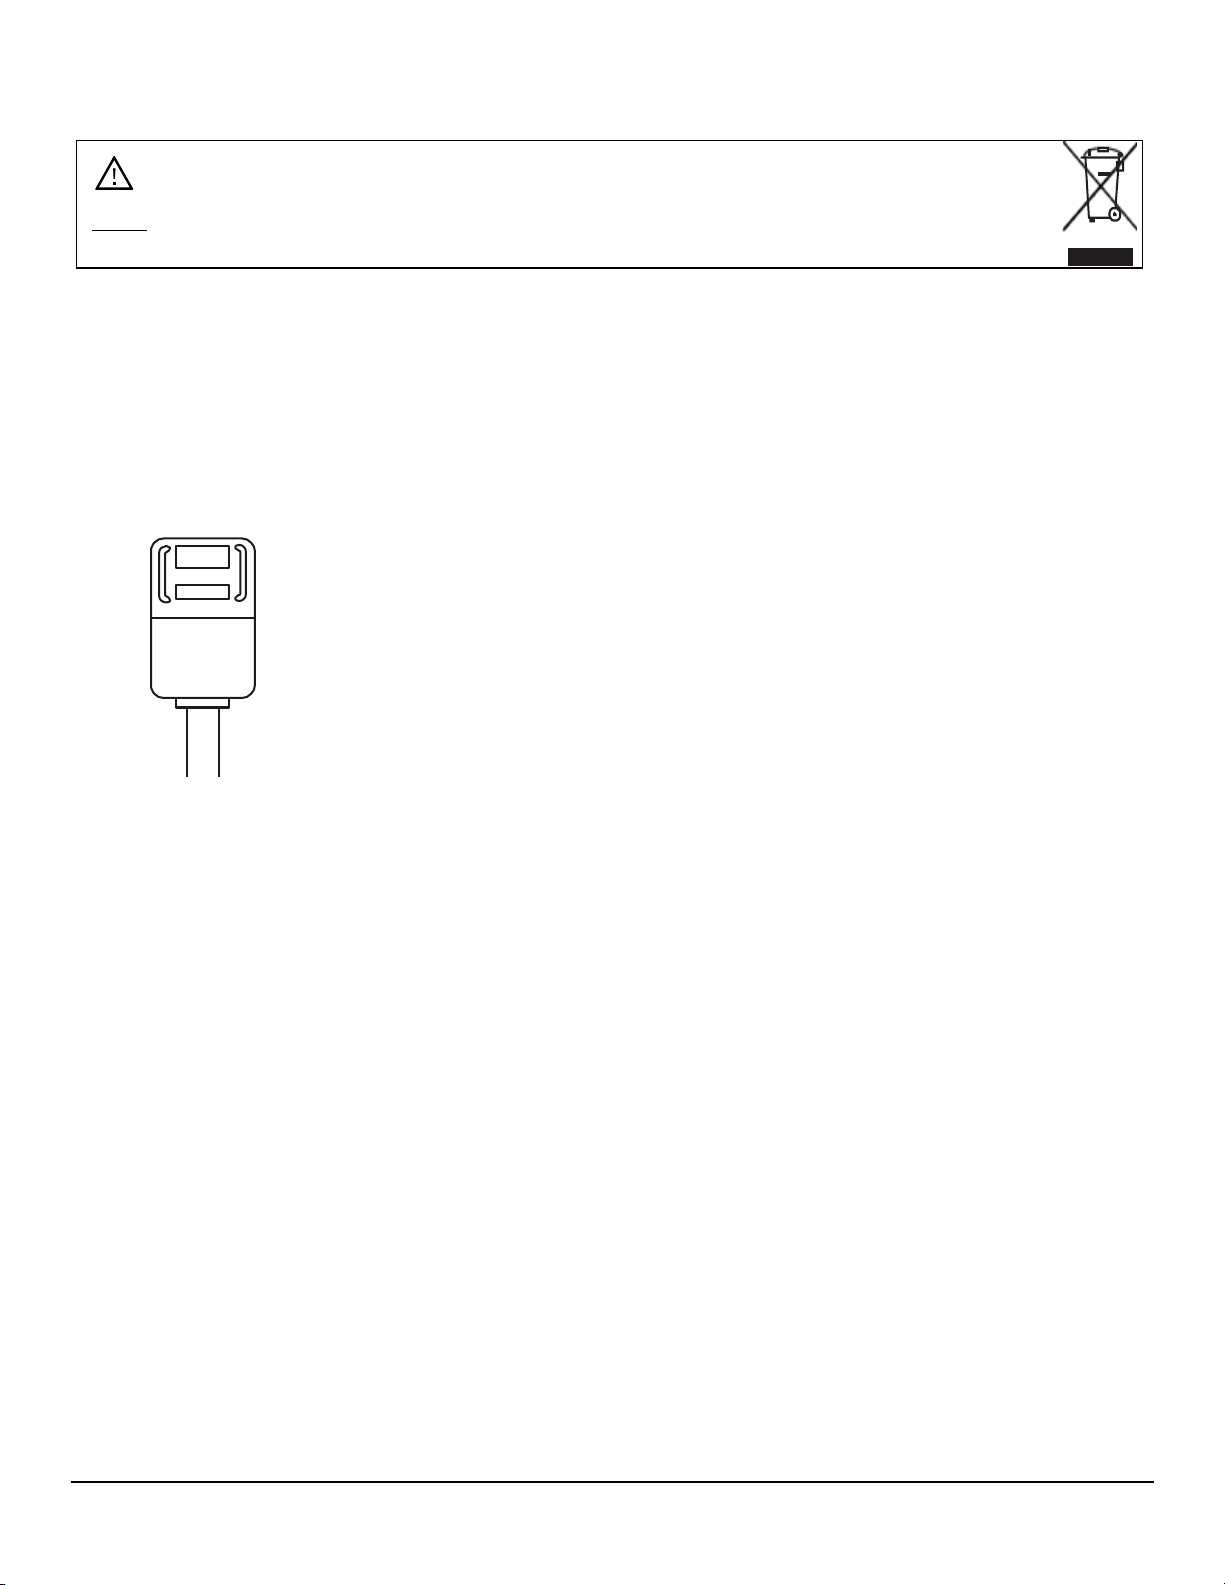
Operation of Safety Plug
Note: Electrical products should not be disposed of with household waste. Please contact
your local recycling center for more information about how to recycle electronic waste.
RESET
TEST
Your portable air conditioner is supplied with a Leakage-Current Detection and Interruption
(LCDI) safety plug. This device provides protection to reduce the risk of fire due to arcing faults in
the power supply cord. Before using your portable air conditioner, follow the instructions below to
ensure that the LCDI plug is working properly:
1. Plug the power cord into a grounded outlet.
2. Press the TEST button on the LCDI plug. This should trip the plug and cut the power to the air
conditioner. If the plug does not trip and you are able to turn on the unit, please contact
EdgeStar support.
DO NOT USE YOUR PORTABLE AIR CONDITIONER IF THE TEST FAILS.
Press the RESET button to start using your air conditioner.
DO NOT use the TEST and RESET buttons as an ON / OFF switch.
ii

Table of Contents
IMPORTANT SAFETY INFORMATION ................................................................................................................ I
OPERATION OF SAFETY PLUG………….. ........................................................................................................ II
TABLE OF CONTENTS…… ……… …… ...............................................................................................................1
INTRODUCTION………………………….. .............................................................................................................2
PARTS IDENTIFICATION…………………. ...........................................................................................................3
FRONT VIEW .........................................................................................................................................................3
BACK VIEW ...........................................................................................................................................................3
WINDOW KIT AND EXHAUST HOSE INSTALLATION INSTRUCTIONS ..............................................................4
PREPA RATIONS FOR INSTALLING THE WINDOW KIT ......................................................................................................4
Window Kit Parts list……………………………. ......................................................................................................4
INSTALLATION PREPARATION ...................................................................................................................................5
Location……………… ……… …… ……………. .......................................................................................................5
Window Slider Kit Preparation……… ……… ….................................................................................................. .....5
INSTALLATION IN A DOUBLE HUNG SASH W INDOW.......................................................................................................6
INSTALLATION IN A SLIDING SA SH WINDOW ................................................................................................................7
CONNECTING THE EXHAUST HOSE............................................................................................................................9
NOTES ABOUT THE EXHAUST HOSE ................................................................................................ ............. 11
DRAINING THE UNIT……………………… ......................................................................................................... 12
CONTINUOUS DRAIN............................................................................................................................................. 12
MANUAL DRAIN ................................................................................................................................................... 12
CONTROL PANEL OVERVIEW…………… ……… …........................................................................................... 13
USING THE CONTROL PANEL………………. ................................................................................................... 14
LED DISPLAY...................................................................................................................................................... 14
MODE INDICA TOR LIGHTS...................................................................................................................................... 14
Cooling Operation…………………………….................................................................. ....................................... 14
Dry Operation (Dehumidify)……………………….................................................................................................. 14
Auto Operation…… …………………………………................................................................................................ 14
Fan Operation……… ……… ……… ……………….. ............................................................................................... 14
POWER BUTTON .................................................................................................................................................. 14
SWING ............................................................................................................................................................... 14
TIMER ................................................................................................................................................................ 15
SLEEP................................................................................................................................................................ 15
INCREASE / DECREASE ......................................................................................................................................... 15
FAN INDICATOR LIGHTS......................................................................................................................................... 15
REMOTE CONTROL…………………….. ............................................................................................................ 16
REMOTE CONTROL BATTERIES .............................................................................................................................. 18
ERROR CODES…………………………. ................................................................................................ ............. 18
MAINTENANCE…………… ……… ……. ............................................................................................................. 18
CLEANING THE UNIT ............................................................................................................................................. 18
CLEANING THE PRE-FILTER ................................................................................................................................... 19
PREPA RATION FOR STORA GE ................................................................................................................................ 19
ENERGY SAVING GUIDE………… …. ............................................................................................................... 19
TROUBLESHOOTING…… ……… …… ................................................................ ............................................... 20
SPECIFICATIONS………… ……… ……. ............................................................................................................. 22
EDGESTAR LIMITED
WAR R A N TY … … … … .
........................................................................................................... 23
1

Introduction
Thank you for purchasing this Koldfront by EdgeStar portable air conditioner. We hope that this
purchase will be the beginning of a lasting and rewarding relationship between you and
EdgeStar. We will provide the customer support and exemplary products necessary to nurture
that relationship.
This manual contains important information regarding the proper installation, use, and
maintenance of your portable air conditioner. Following this manual will ensure that your product
will work at its peak performance, efficiency, and safety.
Please save the original product packaging in case you need to safely transport your portable air
conditioner.
For Your Records:
Please write down the model number and serial number below for future reference.
Both numbers are located on the ratings label on the back of your unit and are
needed to obtain warranty service. You may also want to staple your receipt to this
manual as it is the proof of your purchase, and is also needed for service under your
warranty.
Model Number:
Serial Number:
Date of Purchase:
For a more efficient experience, please do the following before contacting customer service:
If you received a damaged product, immediately contact the dealer that sold you the
product.
Read and follow this instruction manual carefully to help you install, use and maintain your
portable air conditioner.
Read the troubleshooting section of this manual as it will help you diagnose and solve
common issues.
Visit us on the web at http://www.edgestar.com for product guides, additional
troubleshooting resources, and up-to-date information. You can also find an interactive
self-diagnostic tool at https://support.edgestar.com. If you need service, our friendly
customer service representatives are available via email at service@edgestar.com or by
telephone at 1 (866) 319-5473.
2
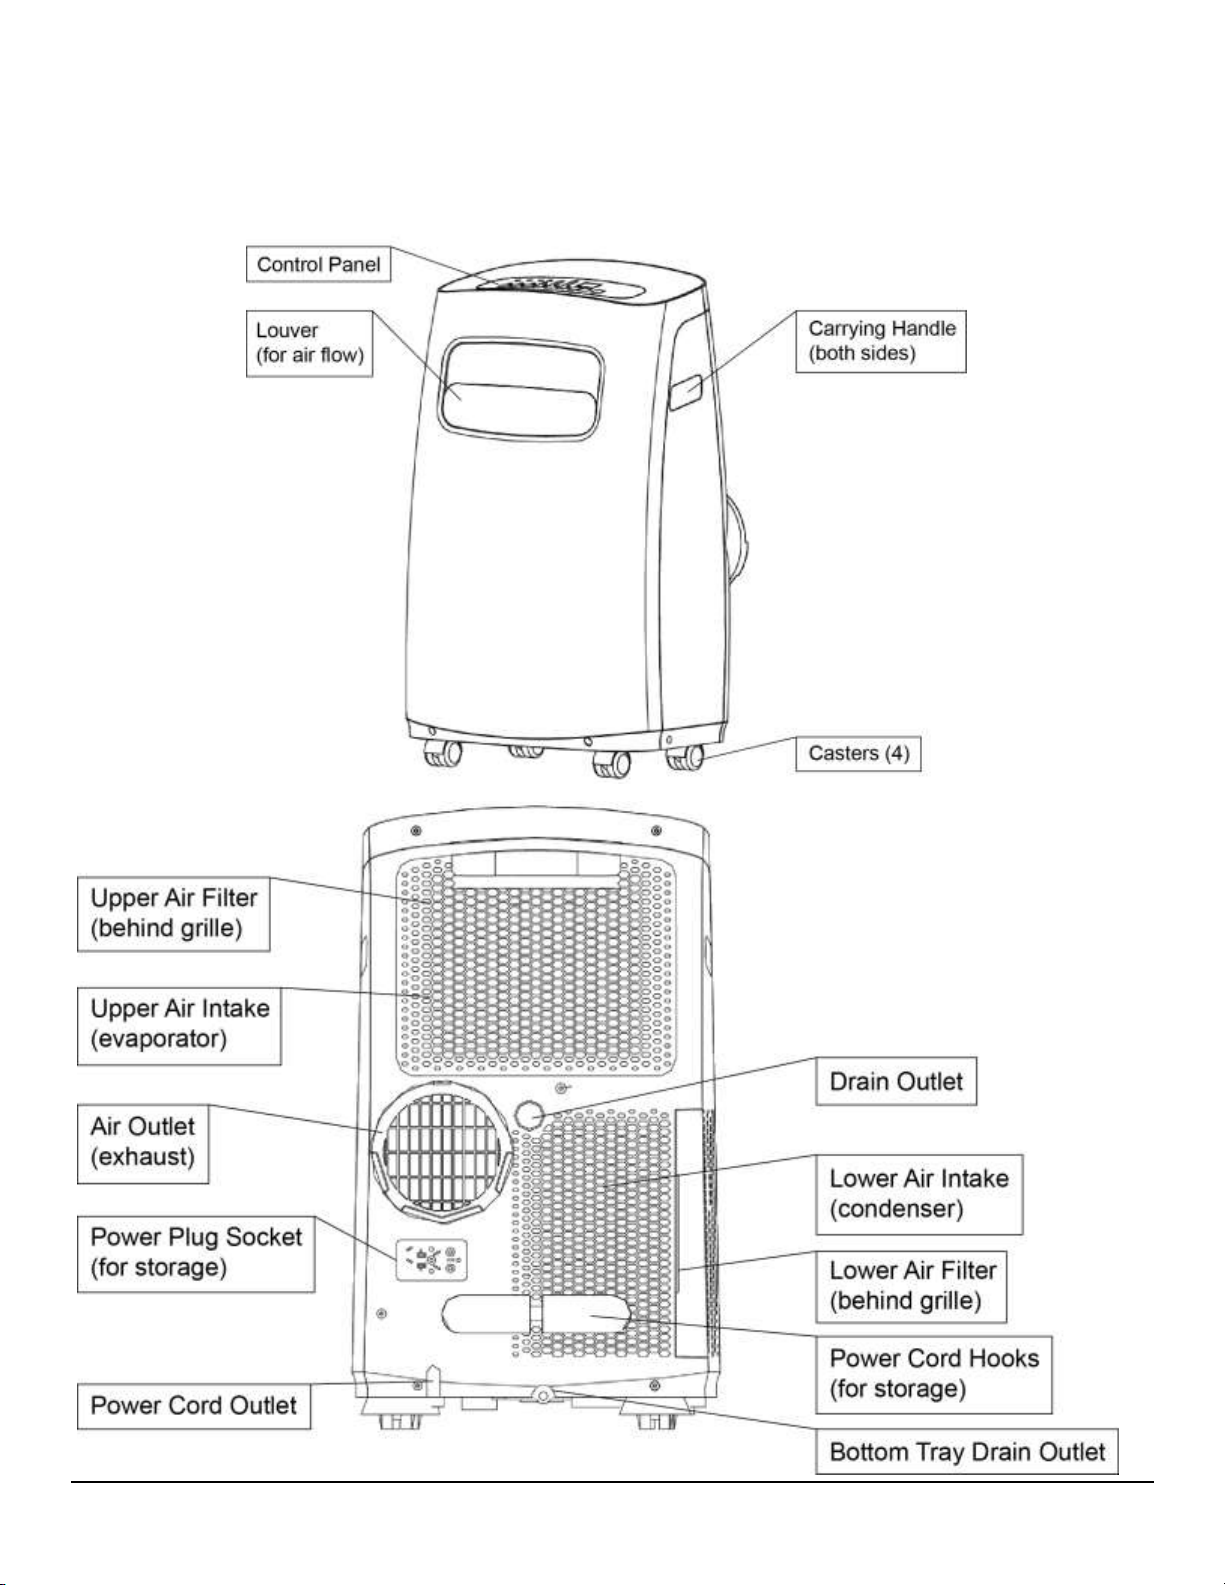
Parts Identification
Front View
Back View
3
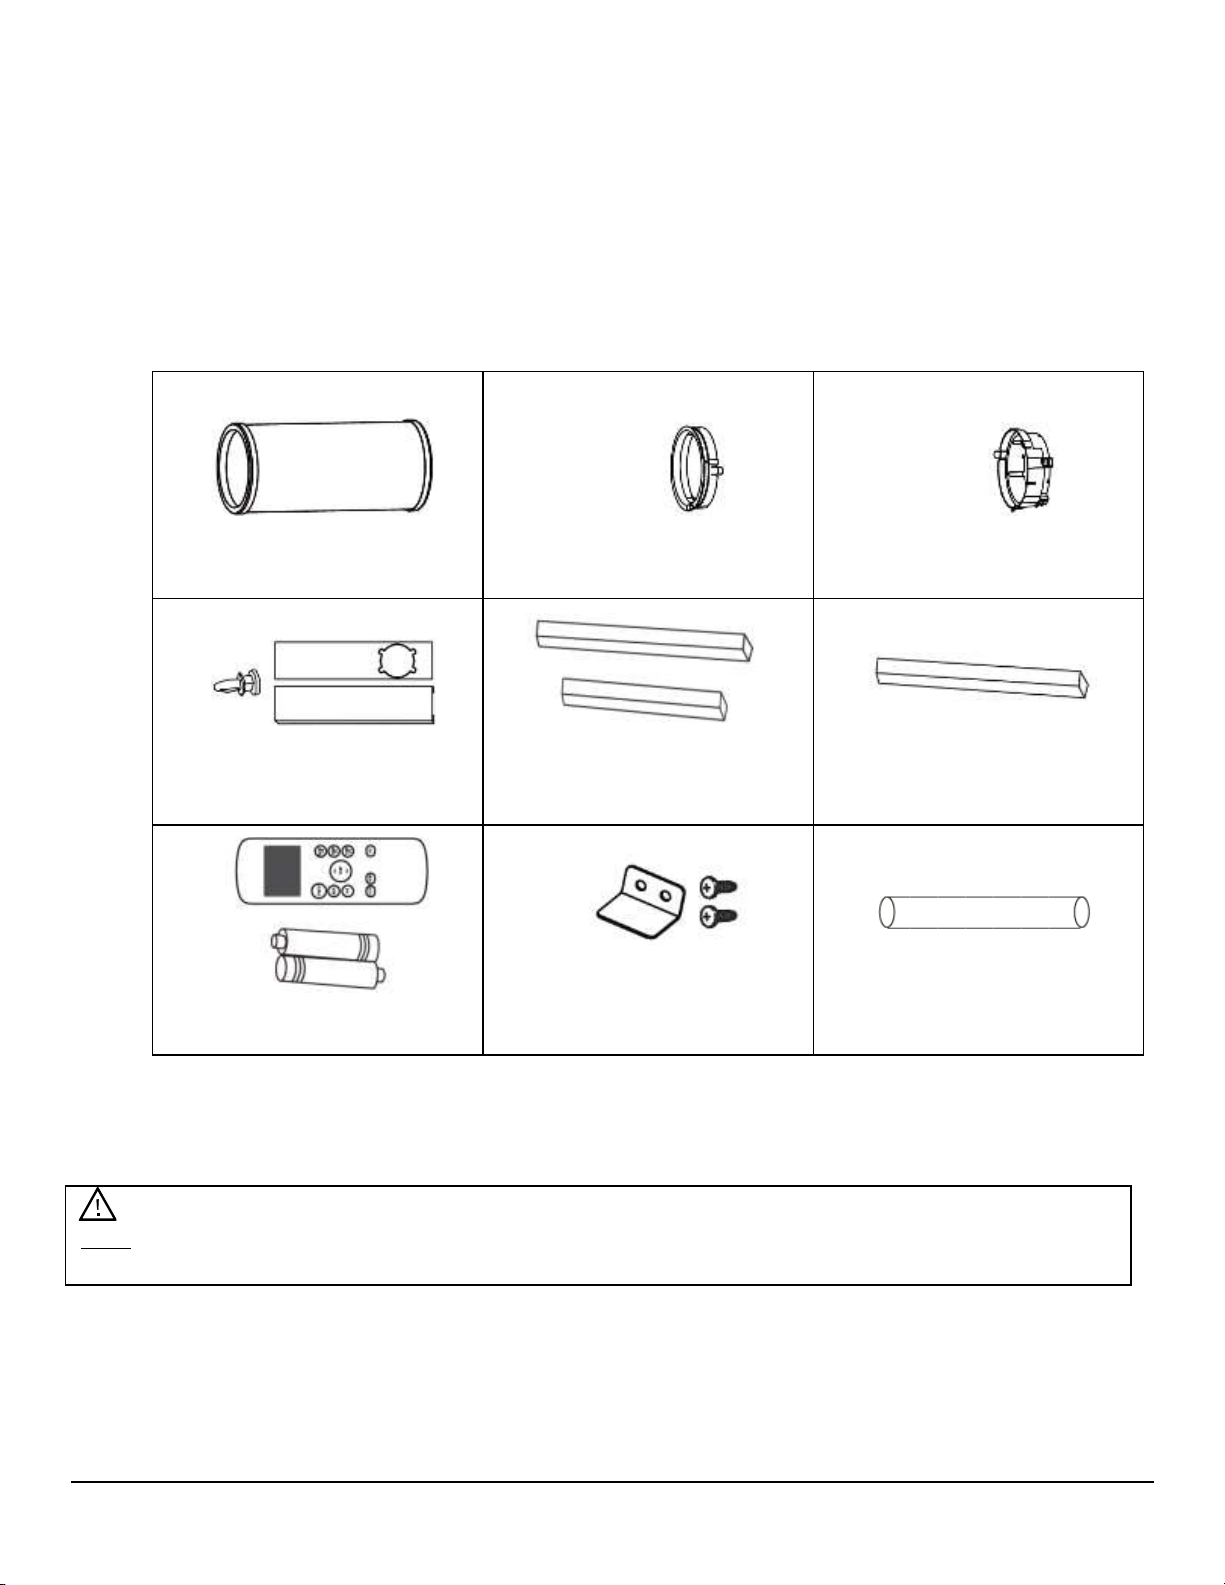
Window Kit and Exhaust Hose Installation Instructions
Exhaust Hose
Hose Adaptor A
Window Kit Adapter B
Adjustable Window
Slider Kit (with bolt)
Foam Seal – (Adhesive)
- two (2) short pieces
- two (2) long pieces
Foam Seal
(Non-Adhesive)
- one (1) long piece
Remote Control with
Batteries
Security Bracket with two
(2) screws
Drain Hose
Note: You may need to contact your electrician if your room’s circuit is not able to power your
unit.
Preparations for Installing the Window Kit
You must vent your portable air conditioner when running it in cooling mode. Your unit includes a
window exhaust kit that can be used to vent the unit out of a window.
Before you begin, make sure that you have all the parts necessary for installation and that a
suitable location is picked.
Window Kit Parts list:
If you have multiple windows, choose one that is near an electrical outlet that will be able to
provide sufficient power to your unit. See the power requirements listed on the product label
printed on the side, or on the back of your portable air conditioner.
Your window kit can be installed on a horizontal or vertical sliding window as shown in the
following images and instructions. Follow the instructions for your desired window kit installation.
4

Installation Preparation
Before you begin, make sure you have all the parts necessary for installation and that you have
selected a suitable location.
Location
When choosing a location, please keep in mind:
The air conditioner should be placed on a firm, level location in order to minimize noise and
vibration. Your appliance has casters to aid in placement. Use caution when rolling on
carpet and do not attempt to roll the unit over any objects as this may result in the unit
tipping over.
Never place any obstacles near the air inlet or outlet of the unit.
Allow at least 20” of space from the wall for efficient performance.
Window Slider Kit Preparation:
Your window slider kit has been designed to fit most standard vertical and horizontal window
applications
If the window opening is less than the minimum length of the window slider kit, you may trim
the slider panel B. (Trim the side farthest from the exhaust port).
Slide Panel A inside panel B and adjust to the correct width. To secure the panels together,
press the Window Slider Kit ‘Bolt’ into the appropriate slot on the edge of Panel A.
5
 Loading...