

Kohler OVE Vanity Lavatory K-19950T, OVE Vanity Lavatory K-19951T Installation Instructions Manual
OVE
INSTALLATION INSTRUCTIONS
VANITY LAVATORY
K-19950T, K-19951T
-1-
1072204-T01-A
, 2007
Copyright Kohler China Ltd., 2007
·
·
·
Observe all local plumbing and building codes.
Prior to installation, unpack the new lavatory and inspect it
for damage. Return the lavatory to its protective carton
until you are ready to install it.
All information in these instructions are based the latest
product information available at the time of publication.
Kohler China reserves the right to make changes in
product characteristics, packaging, or availability at any
time without notice.
Make sure that the wall and floor are square
and plumb to ensure proper installation.
IMPORTANT:
·
·
·
ORDERING INFORMATION
OVE Vanity Lavatory ..........................................K-19950T
Includes Mounting Kits .....................................1034692
OVE Vanity Lavatory ..........................................K-19951T
Includes Mounting Kits .....................................1034692
..................................................K-19950T
........................................................1034692
..................................................K-19951T
........................................................1034692
REQUIRED MATERIALS/
(NOT SUPPLIED)
TOOLS
·
·
·
·
·
Level
Drill with bit6mm
14mm wrench
Framing square
Channel lock pliers
Tape measure
·
·
·
·
·
·
·
6mm
14mm
528137
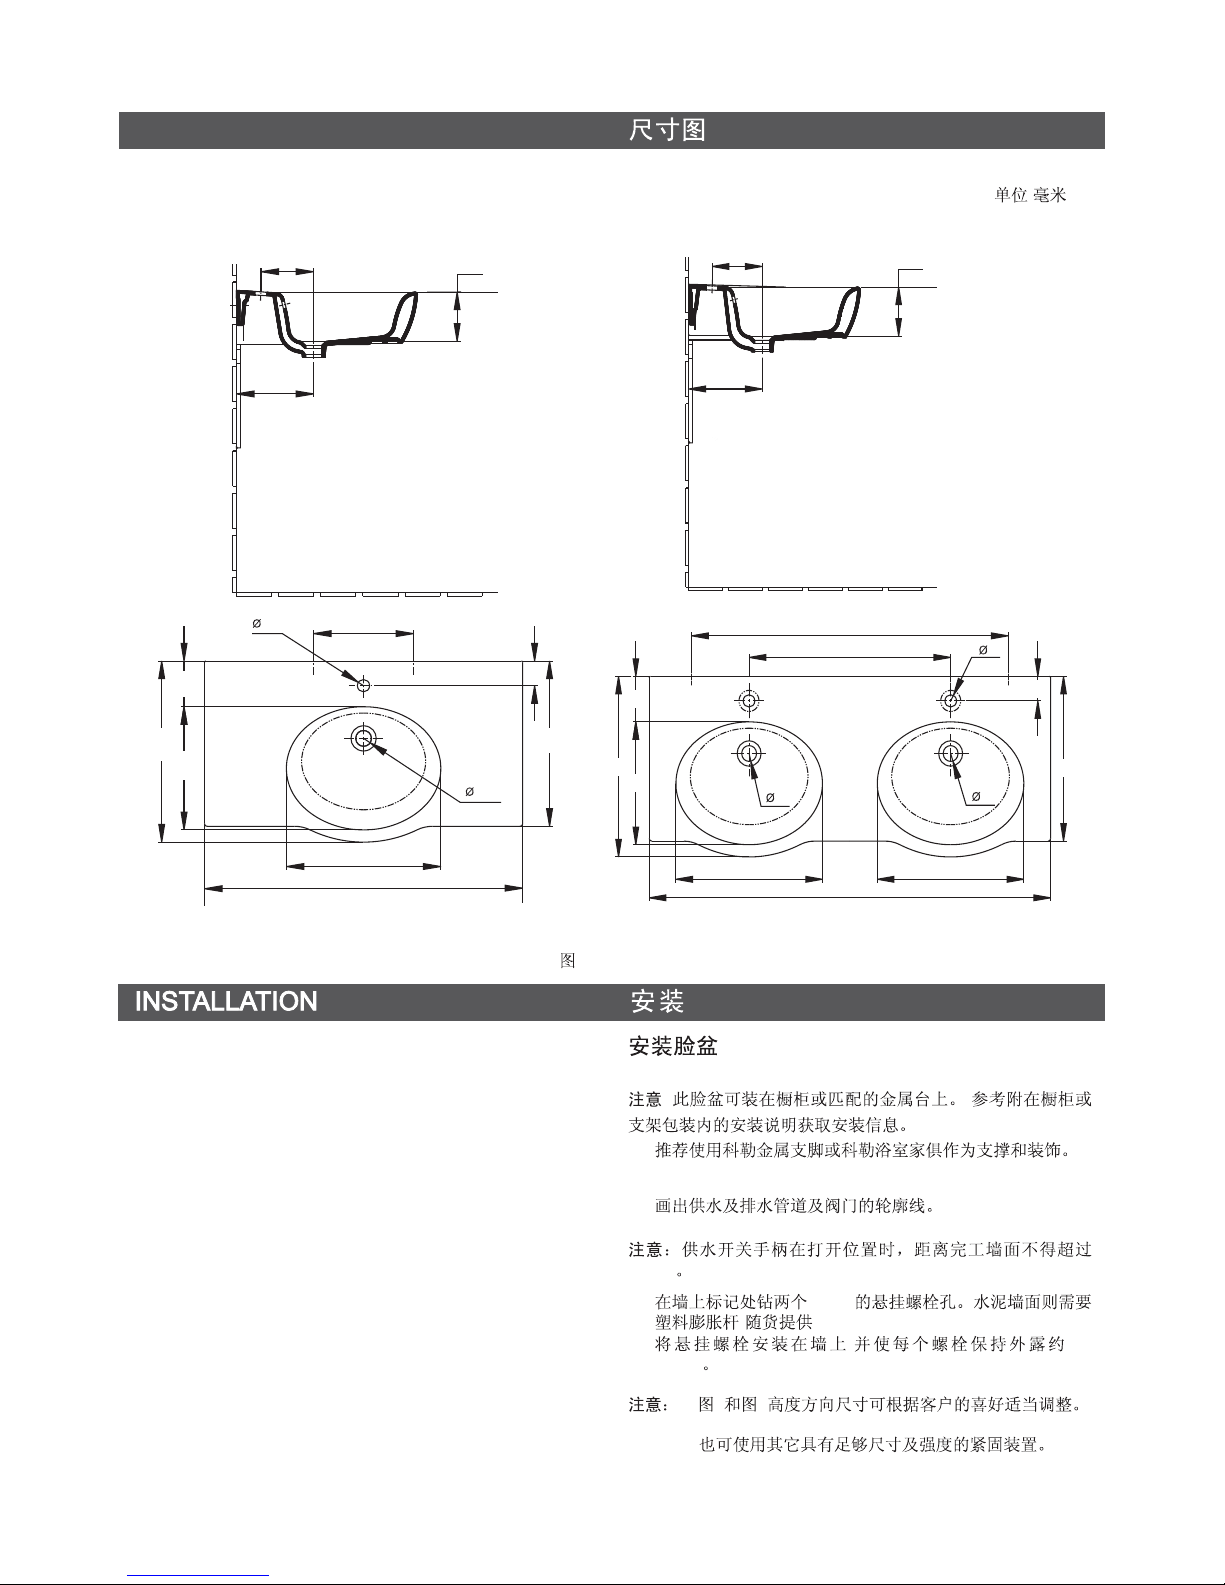
ROUGHING-IN DIMENSIONS
ROUGHING-IN DIMENSIONS
UNIT: mm
:
Fig.#1
1
K-19951T
140
216
68
35
462
45
925
605
130
505
344
45
440
1195
440
150
K-19950T
150
140
216
280
35
130
505
344
440
895
45
68
462
Install the Basin
Note! The lavatory tops can be installed on a cabinet or
matching metal stand (refer to Installation and User Guide
packed with the cabinet or stand for installation details).
Recommend Kohler metal square leg or Kohler bathroom
furniture for support or decoration.
!
!(
)
!
-2-
1072204-T01-A
·
76mm
· Rough-in the supplies and the drain piping.
The supply stop handles cannot extend more than
76mm from the finish wall when in the open position.
NOTE:
·
·
10mm
()
, 55-
60mm
1. 2 3
2.
··Drill two 10mm hanger bolt holes at the marks on the wall.
The nylon anchors is needed for concrete wall (supplied).
Mount hanger bolts to the wall so approximately 55-60mm
of each bolt remains exposed.
1. Height dimensions marked in fig. 2 and fig. 3 could
be adjusted per your requirement.
2. Other fastening devices of sufficient size and
strength may also be used.
NOTE:
 Loading...