

Page 1
Installation Guide
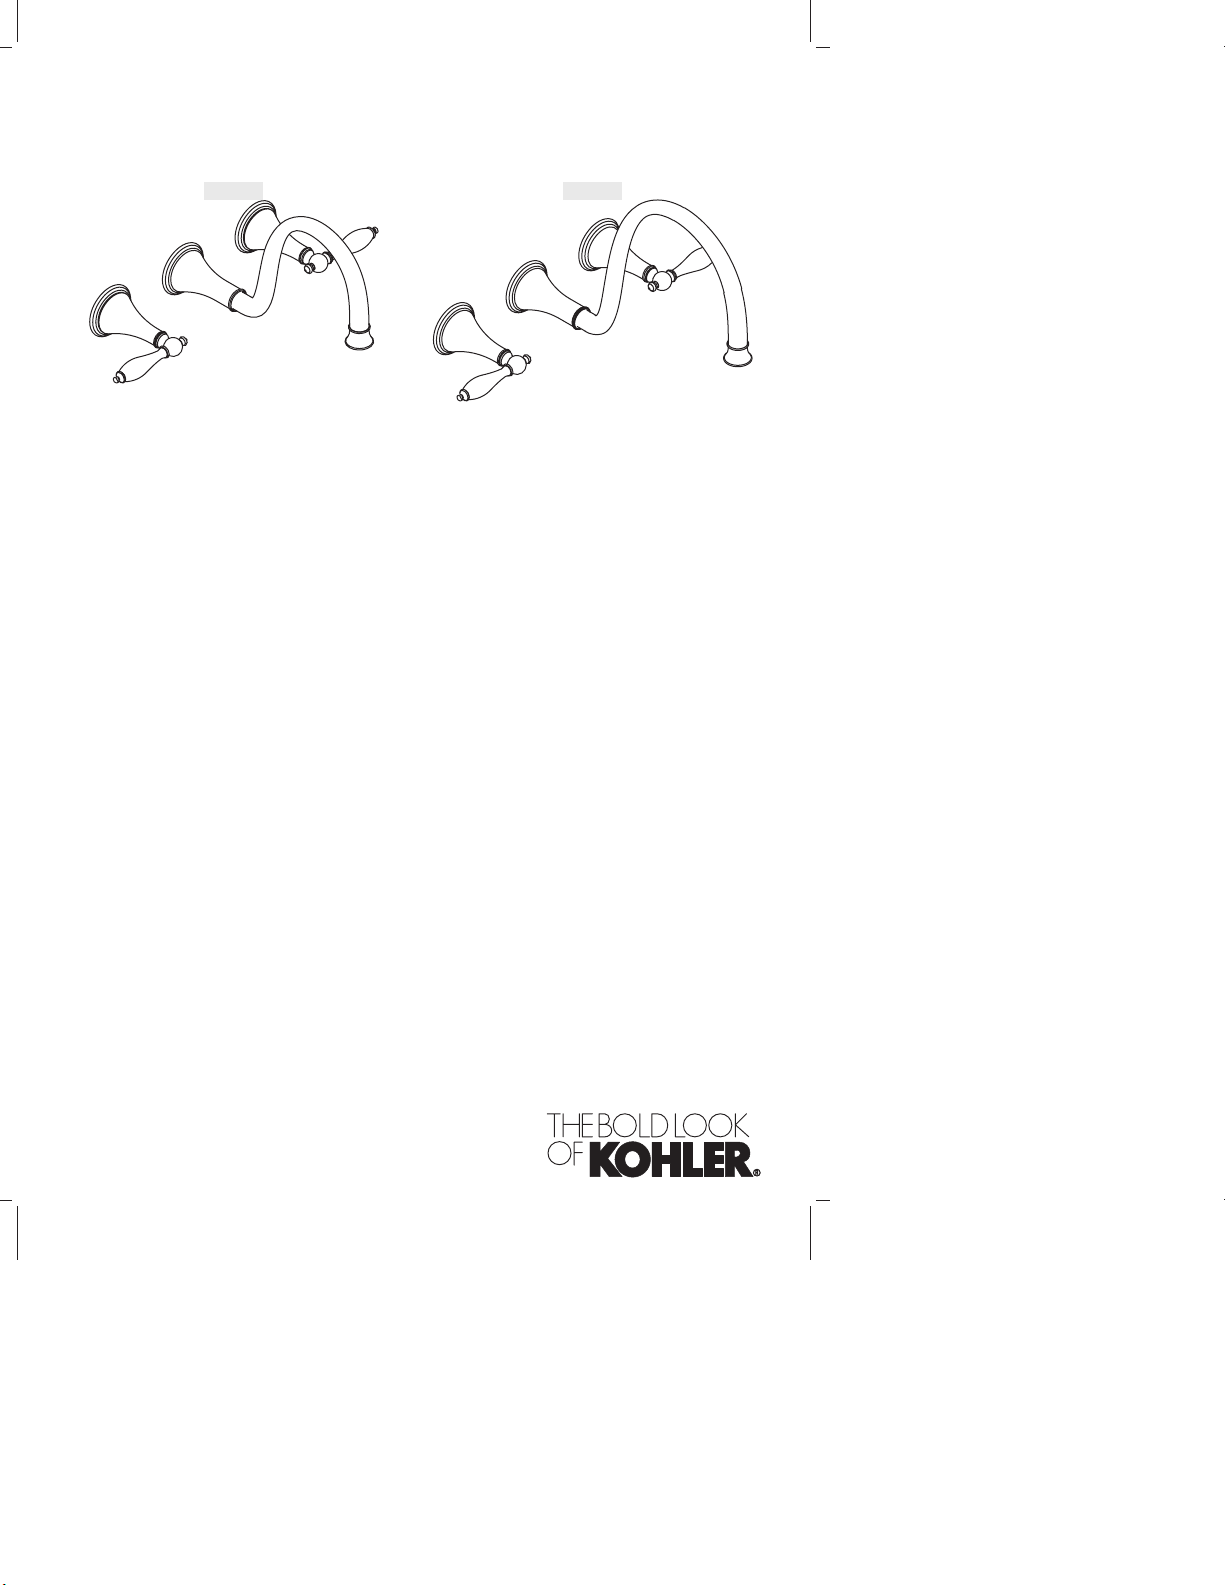
Wall-Mount Lavatory Faucet Trim
K-T343 K-T344
M product numbers are for Mexico (i.e. K-12345M)
Los números de productos seguidos de
M corresponden a México (Ej.
K-12345M)
Français, page “Français-1”
Español, página “Español-1”
1032951-2-A
Page 2

Tools and Materials
Phillips
Screwdriver
Hex
Wrench
Plumbers
Putty
Thank You For Choosing Kohler Company
We appreciate your commitment to Kohler quality. Please take a few
minutes to review this manual before you start installation. If you
encounter any installation or performance problems, please don’t
hesitate to contact us. Our phone numbers and website are listed on
the back cover. Thanks again for choosing Kohler Company.
Before You Begin
Shut off the main water supply.
Observe all local plumbing and building codes.
If needed, complete the finished wall before beginning this
installation.
Kohler Co. reserves the right to make revisions in the design of
faucets without notice, as specified in the Price Book.
1032951-2-A 2 Kohler Co.
Page 3
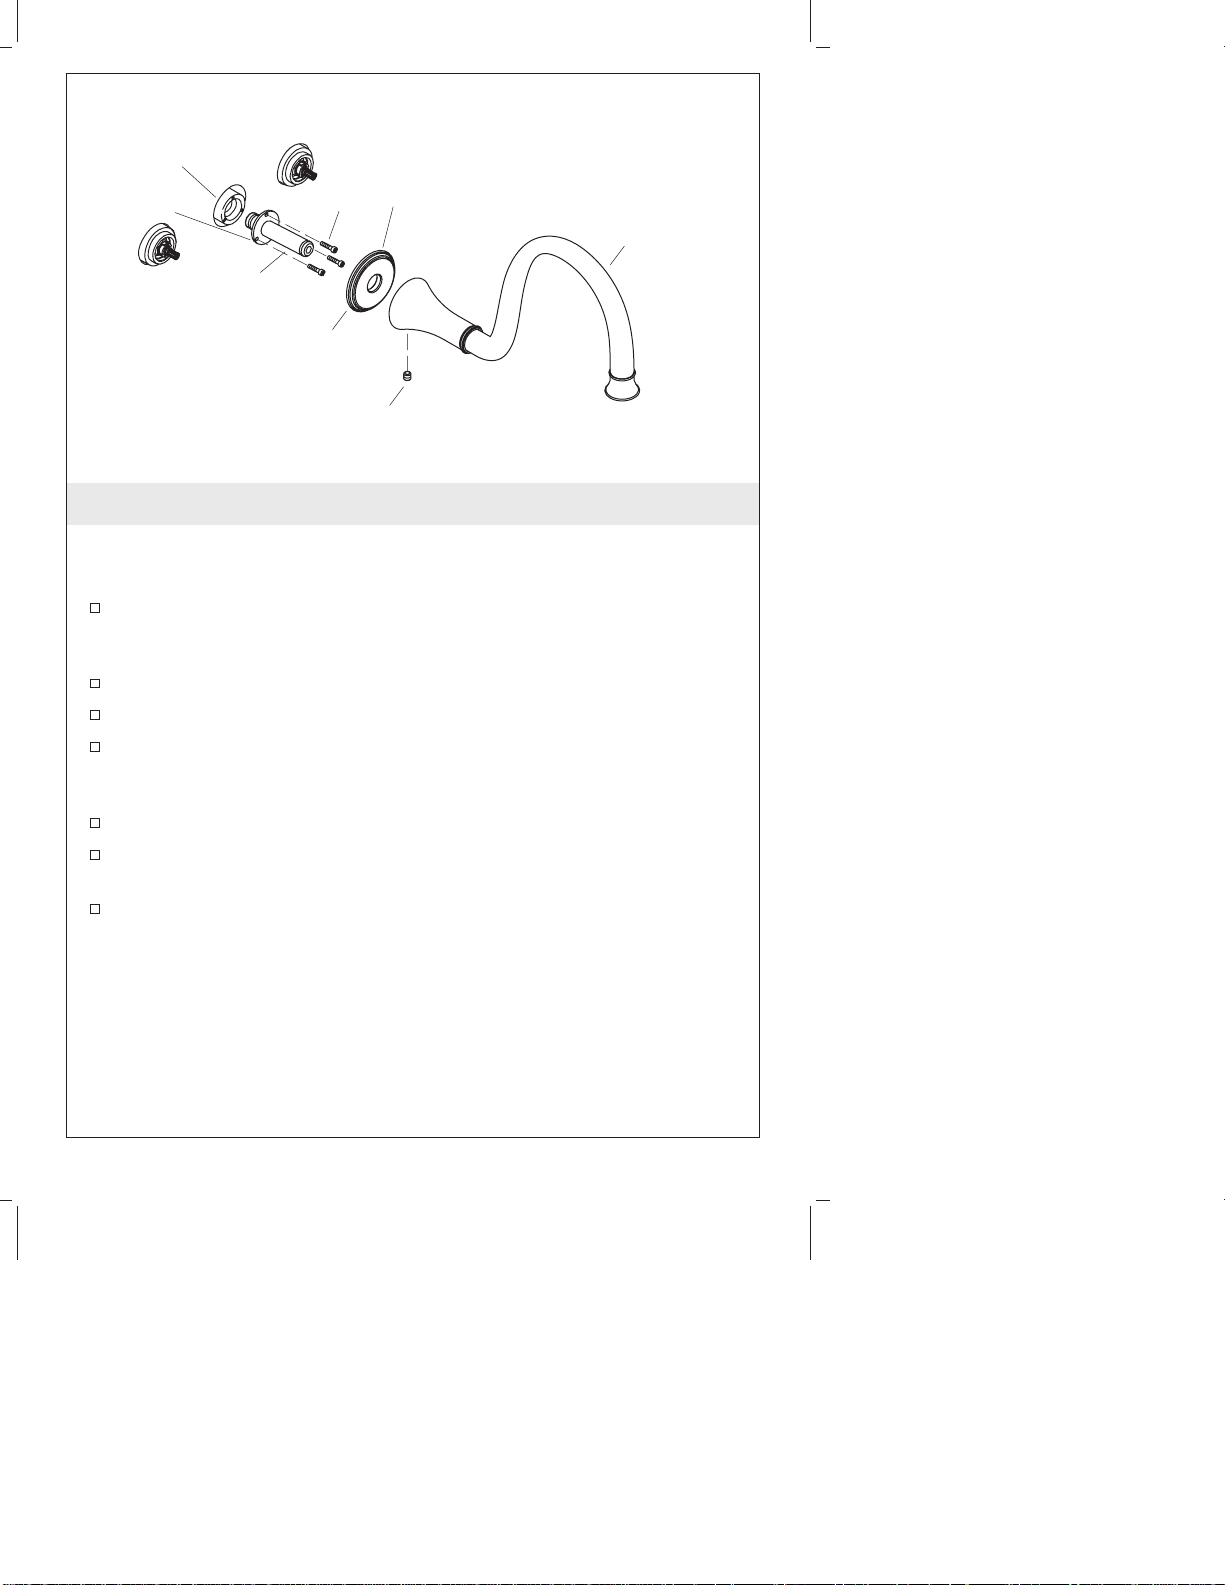
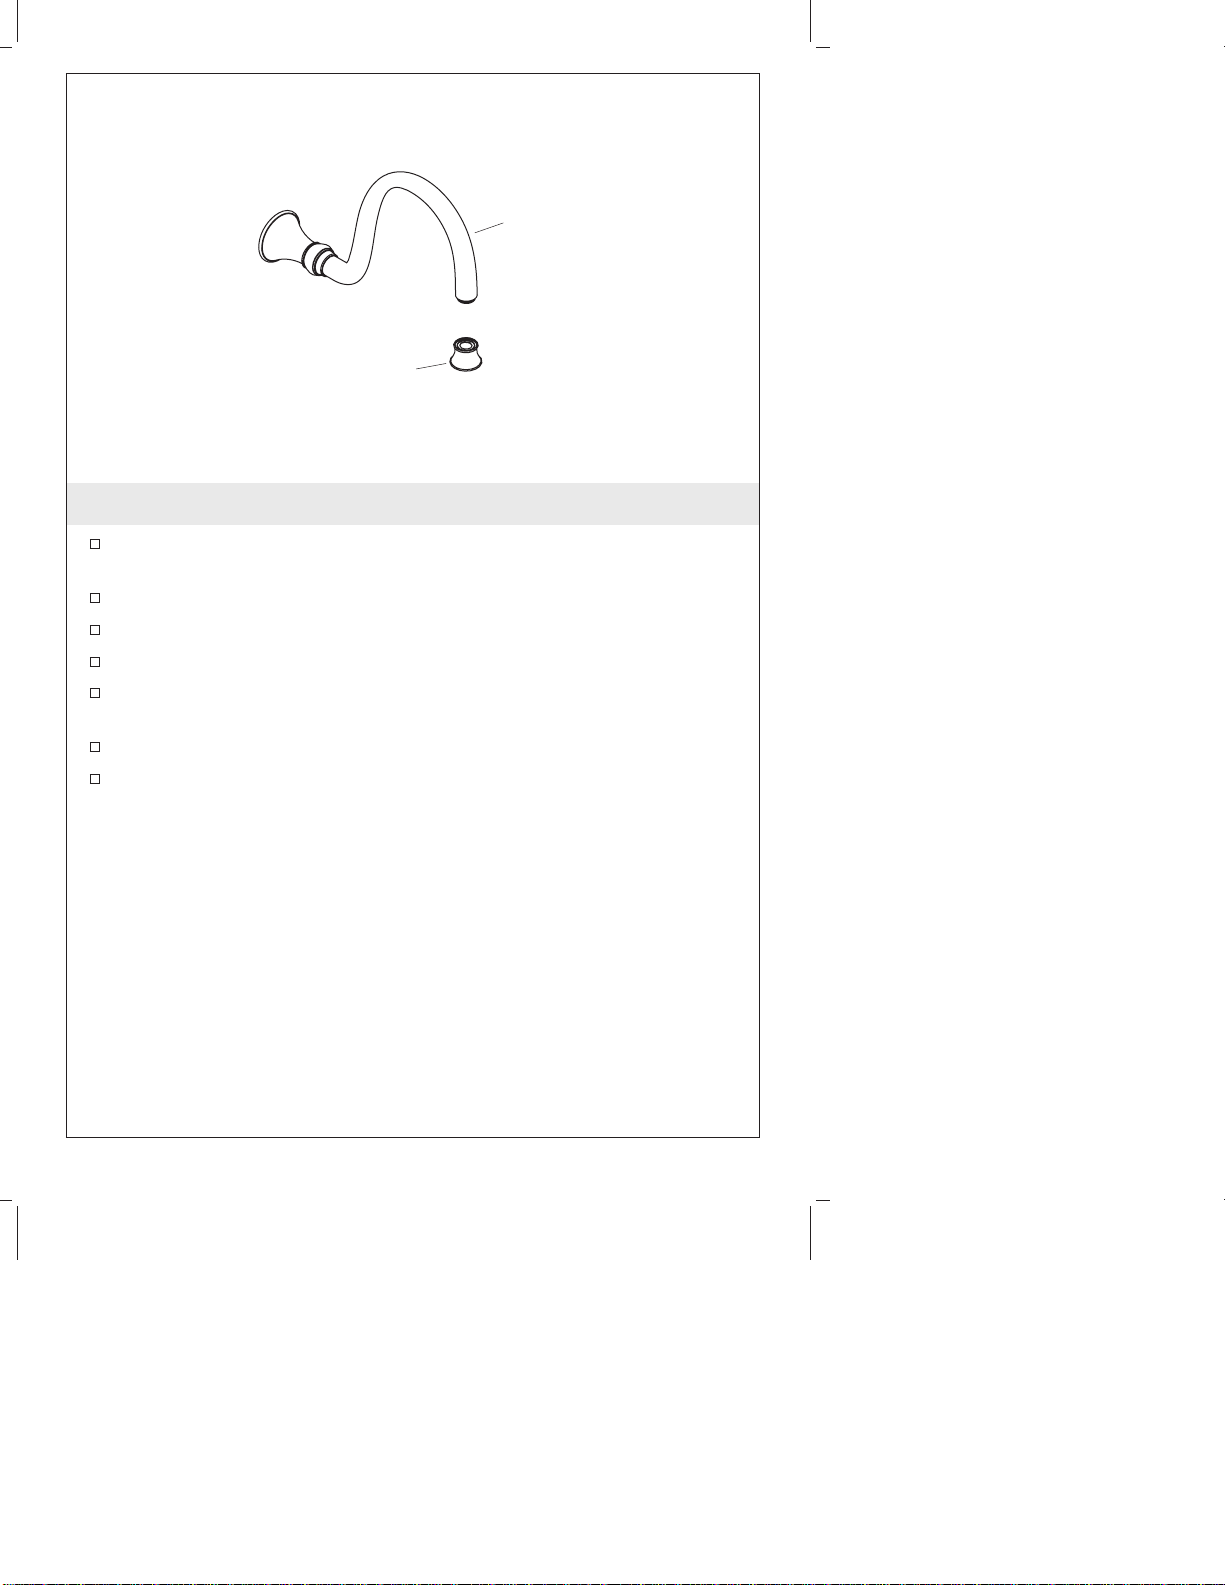
Faucet Outlet
Port
Flange
Screws
Spout
Shank
Spout
Escutcheon
Setscrew
Apply plumbers
putty.
Spout
1. Install the Spout
IMPORTANT! Use care when installing the spout to avoid
scratching the finish.
Back the setscrew out of the spout or remove it to prevent
damage to the spout shank when installing the spout to the
faucet outlet port.
Insert the inlet end of the spout shank into the faucet outlet port.
Secure the spout shank using the three provided screws.
Apply plumbers putty or other sealant to the back surface of the
spout escutcheon according to the putty manufacturer’s
instructions.
Press the spout escutcheon firmly against the finished wall.
Slide the spout onto the spout shank, position as desired, and
tighten the setscrew to secure the spout in place.
Remove any excess putty or sealant.
Kohler Co. 3 1032951-2-A
Page 4
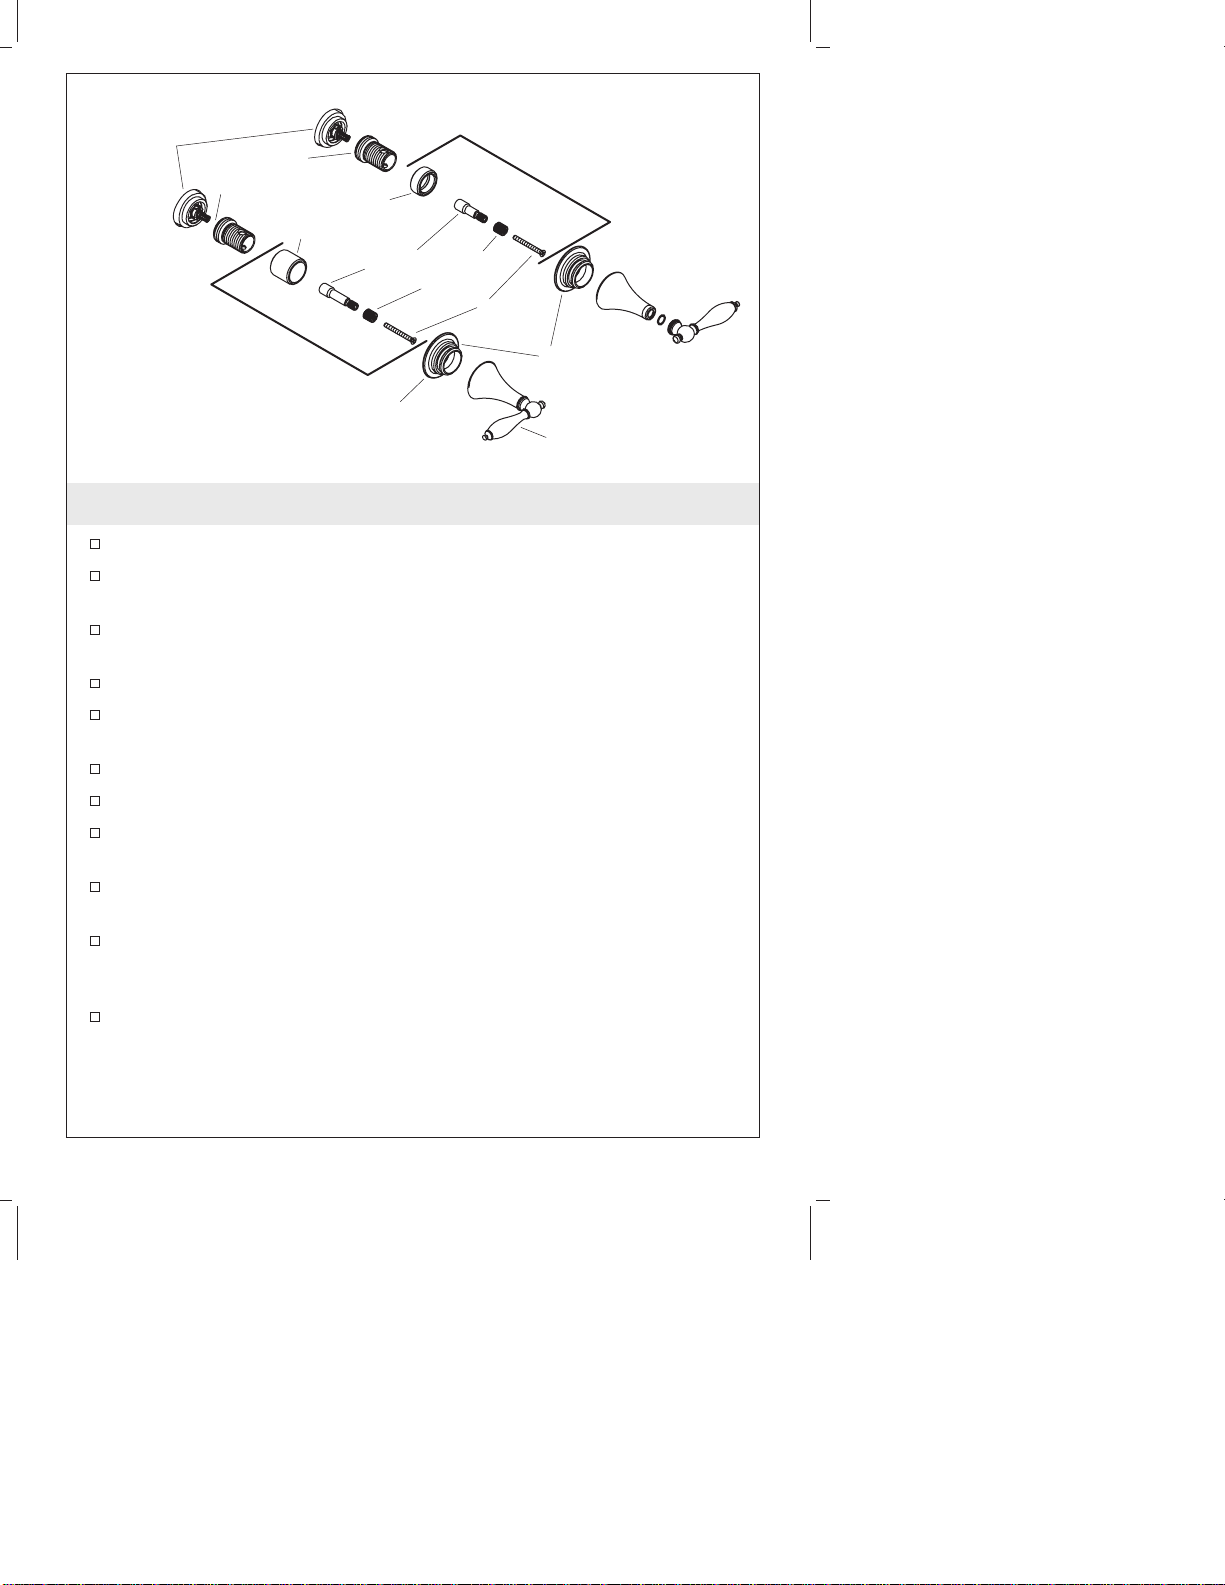
Valve
Body
Threaded
Sleeve
Wall Thickness
5/8" to 1-1/4"
(1.6 cm to 3.2 cm)
Escutcheon
Nut
Stem
Extension
Spline
Adapter
Wall Thickness
Less than 5/8" (1.6 cm)
Screw
Escutcheon
Apply plumbers
putty.
Handle
2. Install the Handles
Determine the thickness of the finished wall.
If the finished wall is less than 5/8″ (1.6 cm) thick, use the
supplied hardware kit numbered 1031071.
If the finished wall is 5/8″ (1.6 cm) to 1-1/4″ (3.2 cm) thick, use
the supplied hardware kit numbered 1031072.
Slide a spline adapter from kit 1031073 onto the stem extension.
Place a stem extension on the valve stem. Secure with the screw
provided.
Thread a threaded sleeve onto the valve body.
Thread a sleeve extension onto the threaded sleeve.
Apply plumbers putty or other sealant to the back of the
escutcheon according to the putty manufacturer’s instructions.
Thread an escutcheon onto the threaded sleeve. Remove any
excess putty or sealant.
Press a handle over the stem extension and move the handle to
the closed position (Hot = Counterclockwise, Cold = Clockwise).
Lever handles should be horizontal when closed.
If adjustment is needed to achieve the desired handle alignment,
remove the handle, screw and spline adapter. Turn the spline
adapter 1/4 turn. Check the handle position. Repeat the
procedure until the proper handle position is achieved. Secure
with the screw.
1032951-2-A 4 Kohler Co.
Page 5
Install the Handles (cont.)
Thread the handle assembly onto the escutcheon. To maintain the
proper handle alignment, hold the handle in place with one hand
and turn the base of the handle with the other hand.
Repeat the procedures with the second handle.
Kohler Co. 5 1032951-2-A
Page 6
Spout
Aerator
3. Complete the Installation
Ensure that both faucet handles are turned off (hot =
counterclockwise to close, cold = clockwise to close).
Turn on the water supplies and check the installation for leaks.
Repair as needed.
Remove the aerator.
Open the valves and run water through the spout for about a
minute to remove any debris. Check for leaks.
Remove all debris from the aerator.
Turn the valves off, and reinstall the aerator.
1032951-2-A 6 Kohler Co.
Page 7

Guide d’installation
Garniture de robinet de lavabo à montage
mural
Outils et matériels
Tournevis
cruciforme
Clé
hexagonale
Mastic de
plombier
Merci d’avoir choisi la compagnie Kohler
Nous apprécions votre engagement envers la qualité Kohler. Veuillez
prendre s’il vous plaît quelques minutes pour lire ce manuel avant de
commencer l’installation. Ne pas hésiter à nous contacter en cas de
problème d’installation ou de fonctionnement. Nos numéros de
téléphone et notre adresse du site internet sont au verso. Merci encore
d’avoir choisi la compagnie Kohler.
Avant de commencer
Couper l’alimentation d’eau principale.
Respecter tous les codes de plomberie et de bâtiment locaux.
Si nécessaire, compléter le mur fini avant de commencer cette
installation.
Kohler Co. se réserve le droit d’apporter toutes modifications au
design des robinets et ceci sans préavis, comme spécifié dans le
catalogue des prix.
Kohler Co. Français-1 1032951-2-A
Page 8

Port de sortie
de robinet
Bride
Bec
manche
Applique du
bec
Vis de retenue
Appliquer du mastic
de plomberie.
Vis
Bec
1. Installer le bec
IMPORTANT ! Travailler avec soin lors de l’installation du bec, pour
ne pas en endommager sa finition.
Retirer les vis de fixation du bec, pour éviter d’endommager le
bec pendant son installation sur le port de sortie du robinet.
Insérer l’extrémité d’entrée du manche du bec dans le port de
sortie du robinet.
Sécuriser le manche du bec avec les trois vis fournies.
Appliquer du mastic de plombier ou un produit semblable à
l’arrière de l’applique du bec selon les instructions du fabricant.
Presser fermement l’applique du bec contre le mur fini.
Glisser le bec sur le manche, positionner tel que désiré, et serrer
la vis de retenue pour sécuriser le bec en place.
Retirer tout excédent de mastic de plombier ou joint d’étanchéité.
1032951-2-A Français-2 Kohler Co.
Page 9

Corps de
la valve
Manchon
fileté
Épaisseur du mur
5/8" de 1-1/4"
(1,6 cm à 3,2 cm)
Écrou pour
l'applique
Extension
de la tige
Adaptateur à
cannelures
Épaisseur du mur
moins de 5/8" (1,6 cm)
Vis
Applique
Appliquer du mastic
de plomberie.
Poignée
2. Installer les poignées
Déterminer l’épaisseur du mur fini.
Si le mur fini est d’une épaisseur inférieure à 5/8″ (1,6 cm),
utiliser le kit de boulonnerie 1031071 fourni.
Si le mur fini est d’une épaisseur de 5/8″ (1,6 cm) à 1-1/4″ (3,2
cm), utiliser le kit de boulonnerie 1031072 fourni.
Glisser un adaptateur à cannelure du kit 10310730 sur l’extension
de la tige.
Placer une extension de la tige sur la tige de valve. Sécuriser avec
les vis fournies.
Visser un manchon fileté sur le corps de la valve.
Visser une extension de tige sur le manchon.
Appliquer du ruban d’étanchéité ou un produit semblable à
l’arrière de l’applique selon les instructions du fabricant.
Visser une applique sur le manchon. Retirer tout excédent de
mastic de plombier ou joint d’étanchéité.
Presser une poignée sur l’extension de la tige et mettre la poignée
en position fermée (Chaud = vers la gauche, Froid = vers la
droite). Les poignées de levier devraient être en position
horizontale lorsqu’elles sont fermées.
Kohler Co. Français-3 1032951-2-A
Page 10

Installer les poignées (cont.)
Si un ajustage est nécessaire pour effectuer l’alignement désiré de
poignée, retirer cette dernière, la vis et l’adaptateur à cannelure.
Pivoter l’adaptateur à cannelure d’1/4 de tour. Vérifier la position
de la poignée. Répéter la procédure jusqu’au bon positionnement
de la poignée. Sécuriser avec la vis.
Visser l’ensemble de poignée sur l’applique. Pour maintenir un
bon alignement, maintenir la poignée en place d’une main et
pivoter sa base de l’autre main.
Répéter les procédures avec la seconde poignée.
1032951-2-A Français-4 Kohler Co.
Page 11

Bec
Aérateur
3. Compléter l’installation
S’assurer de fermer les deux poignées, (chaud = vers la gauche,
froid = vers la droite).
Ouvrir les robinets d’alimentation d’eau et vérifier s’ilyades
fuites.
Réparer au besoin.
Retirer l’aérateur.
Ouvrir les valves, et faire couler l’eau à travers le bec pendant
environ une minute pour retirer tous débris. Vérifier s’ilyades
fuites.
Retirer tous les débris de l’aérateur.
Fermer les valves, et ré-installer l’aérateur.
Kohler Co. Français-5 1032951-2-A
Page 12

Guía de instalación
Guarnición de la grifería mural de lavabo
Herramientas y materiales
Destornillador
de punta de
cruz (Phillips)
Llave
hexagonal
Masilla de
plomería
Gracias por elegir los productos de Kohler
Apreciamos su elección por la calidad de Kohler. Dedique unos
minutos para leer este manual antes de comenzar la instalación. En
caso de problemas de instalación o de funcionamiento, no dude en
contactarnos. Nuestros números de teléfono y nuestra página web se
encuentran en la última página. Gracias nuevamente por escoger a
Kohler.
Antes de comenzar
Cierre el suministro principal de agua.
Cumpla con todos los códigos locales de plomería y de
construcción.
De ser necesario, termine la pared acabada antes de empezar esta
instalación.
La empresa Kohler se reserva el derecho de modificar el diseño
de la grifería sin previo aviso, tal como se especifica en la lista de
precios.
Kohler Co. Español-1 1032951-2-A
Page 13

Puerto de salida
de la grifería
Brida
Vástago del
surtidor
Tornillos
Chapetón del
surtidor
Tornillo de fijación
Aplique masilla
de plomería.
Surtidor
1. Instale el surtidor
¡IMPORTANTE! Tenga cuidado al instalar el surtidor para evitar
dañar el acabado.
Desenrosque el tornillo de fijación del surtidor o retírelo para
evitar dañar el vástago del surtidor cuando instale el surtidor en
el puerto de salida de la grifería.
Inserte el extremo de entrada del vástago del surtidor en el
puerto de salida de la grifería.
Fije el vástago del surtidor con los tres tornillos incluidos.
Aplique una tira de masilla de plomería u otro sellador en la
parte posterior del chapetón del surtidor, según las instrucciones
del fabricante.
Presione bien el chapetón del surtidor contra la pared acabada.
Deslice el surtidor sobre el vástago del surtidor, en la posición
deseada y apriete el tornillo de fijación para fijar el surtidor en su
lugar.
Elimine el exceso de masilla de plomería o sellador.
Kohler Co. Español-2 1032951-2-A
Page 14

Cuerpo
de válvula
Espesor de la pared
entre 5/8" y 1-1/4"
(entre 1,6 cm y 3,2 cm)
Manga
roscada
Tuerca del
chapetón
Extensión de espiga
Adaptador
de ranura
Espesor de la pared
inferior a 5/8" (1,6 cm)
Tornillo
Chapetón
Aplique masilla
de plomería.
Manija
2. Instale las manijas
Determine el espesor de la pared acabada.
Si la pared acabada tiene un espesor inferior a 5/8″ (1,6 cm),
utilice el juego de fijación incluido, número 1031071.
Si la pared acabada tiene un espesor entre 5/8″ (1,6 cm) y 1-1/4″
(3,2 cm), utilice el juego de fijación incluido, número 1031072.
Deslice un adaptador de ranura del juego 1031073 por la
extensión de espiga.
Coloque una extensión de espiga en la espiga de la válvula. Fije
con el tornillo incluido.
Enrosque una manga roscada en el cuerpo de la válvula.
Enrosque una extensión de la manga en la manga roscada.
Aplique una tira de masilla de plomería u otro sellador en el
chapetón según las instrucciones del fabricante.
Enrosque un chapetón en la manga roscada. Elimine el exceso de
masilla de plomería o sellador.
Presione una manija sobre la extensión de la espiga y mueva la
manija a la posición cerrada (agua caliente = se cierra girando a la
izquierda, agua fría = se cierra girando a la derecha). Las manijas
de palanca deben estar en posición horizontal cuando estén
cerradas.
1032951-2-A Español-3 Kohler Co.
Page 15

Instale las manijas (cont.)
Si es necesario realizar ajustes para alcanzar la alineación deseada
de la manija, retire la manija, el tornillo y el adaptador de ranura.
Gire el adaptador de ranura un cuarto de vuelta. Compruebe la
posición de la manija. Repita este procedimiento hasta obtener la
posición correcta de la manija. Fije con el tornillo.
Enrosque el montaje de la manija sobre el chapetón. Para
mantener la alineación correcta de la manija, sostenga la manija
en su lugar con una mano y gire la base de la manija con la otra.
Repita estos procedimientos con la segunda manija.
Kohler Co. Español-4 1032951-2-A
Page 16

Surtidor
Aireador
3. Termine la instalación
Verifique que las manijas de la grifería estén cerradas (agua
caliente = se cierra girando a la izquierda) (agua fría = se cierra
girando a la derecha).
Abra los suministros de agua y verifique que no haya fugas.
Repare según sea necesario.
Retire el aireador.
Abra las válvulas y deje correr el agua por el surtidor durante un
minuto aproximadamente para eliminar los residuos. Verifique
que no haya fugas.
Elimine las impurezas del aireador.
Cierre las válvulas y vuelva a instalar el aireador.
1032951-2-A Español-5 Kohler Co.
Page 17

1032951-2-A
Page 18

1032951-2-A
Page 19

1032951-2-A
Page 20

USA: 1-800-4-KOHLER
Canada: 1-800-964-5590
México: 001-877-680-1310
kohler.com
©2004 Kohler Co.
1032951-2-A
 Loading...