

Page 1
GILFORD VITREOUS CHINA
BEFORE YOU BEGIN
TOOLS AND MA TERIALS REQUIRED
Measuring tape
Carpenters square
Sealant
Pencil
Various carpentry tools
NOTES
With the exception of the support framing, the cabinet
designs illustrated below are intended as suggestions
only. Your specific installation requirements may vary
from those shown.
All information in these instructions is based upon the
latest product information available at the time of
publication. Kohler Co. reserves the right to make
changes in product characteristics, packaging, or
availability at any time without notice.
Fixture dimensions are nominal and conform to
tolerances in ASME Standard A112.19.2M.
All illustrations in this manual assume installation with a
standard, 24” countertop. Other countertop sizes may
also be used.
KITCHEN SINK
PRODUCT REQUIREMENTS
Due to the special nature of this installation, Kohler Co.
recommends that an experienced cabinet maker build the
new cabinet or modify an existing cabinet to achieve a
satisfactory installation.
T o ensure proper fit of the sink in the cabinet, we suggest
you provide the cabinet maker with the actual sink that will
be installed.
A wood support frame must be constructed to support 300
lbs. Follow all framing instructions exactly.
INSTALLATION
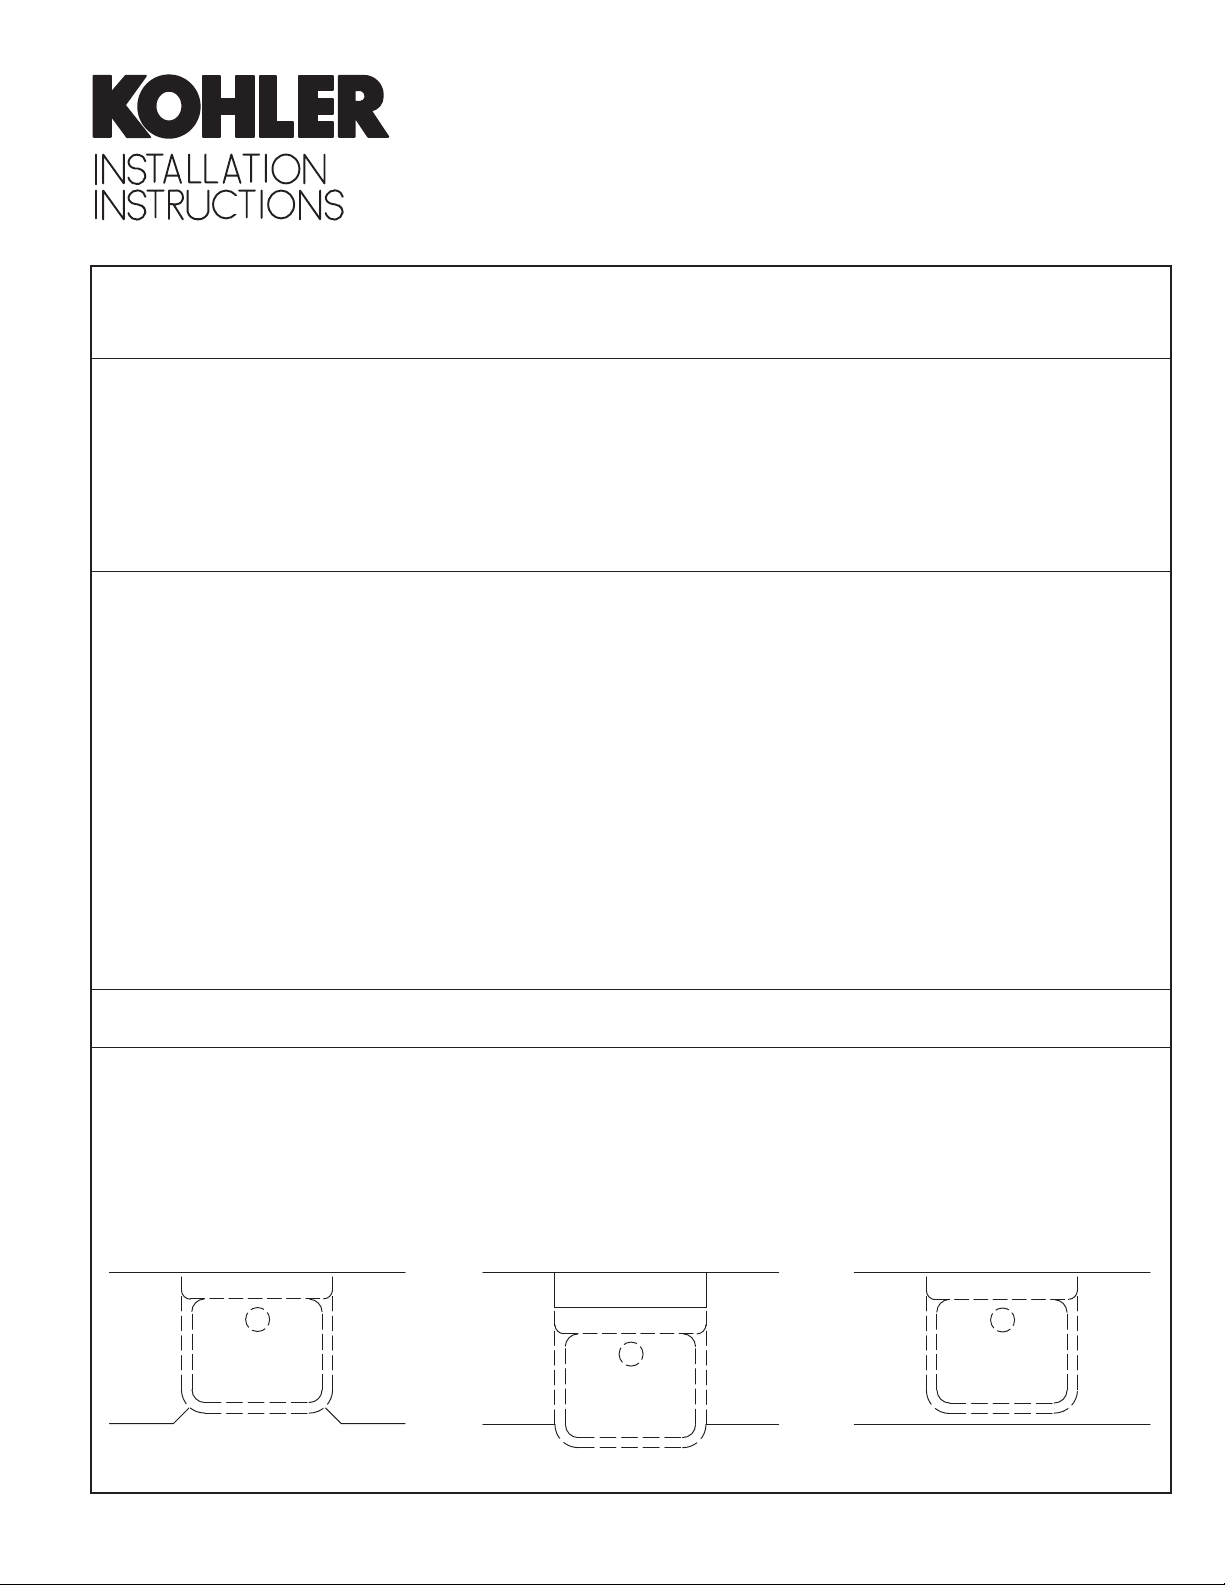
DETERMINE CABINET DESIGN
Before proceeding, determine whether or not the sink will
be installed with the front apron exposed. Several basic
cabinet design options are shown for your convenience.
You may also use a design of your own.
The sink should either be set back against the finished
wall, or positioned so the sink front rim flange extends
2-3/4” from the front of the cabinet.
SINK BACK, EXPOSED APRON SINK BACK, ENCLOSED APRONSINK FORWARD, EXPOSED APRON
116351-2-AA (-)
Copyright 1997 Kohler Co.
Page 2
CONSTRUCT CABINET AND SUPPORT
FRAME
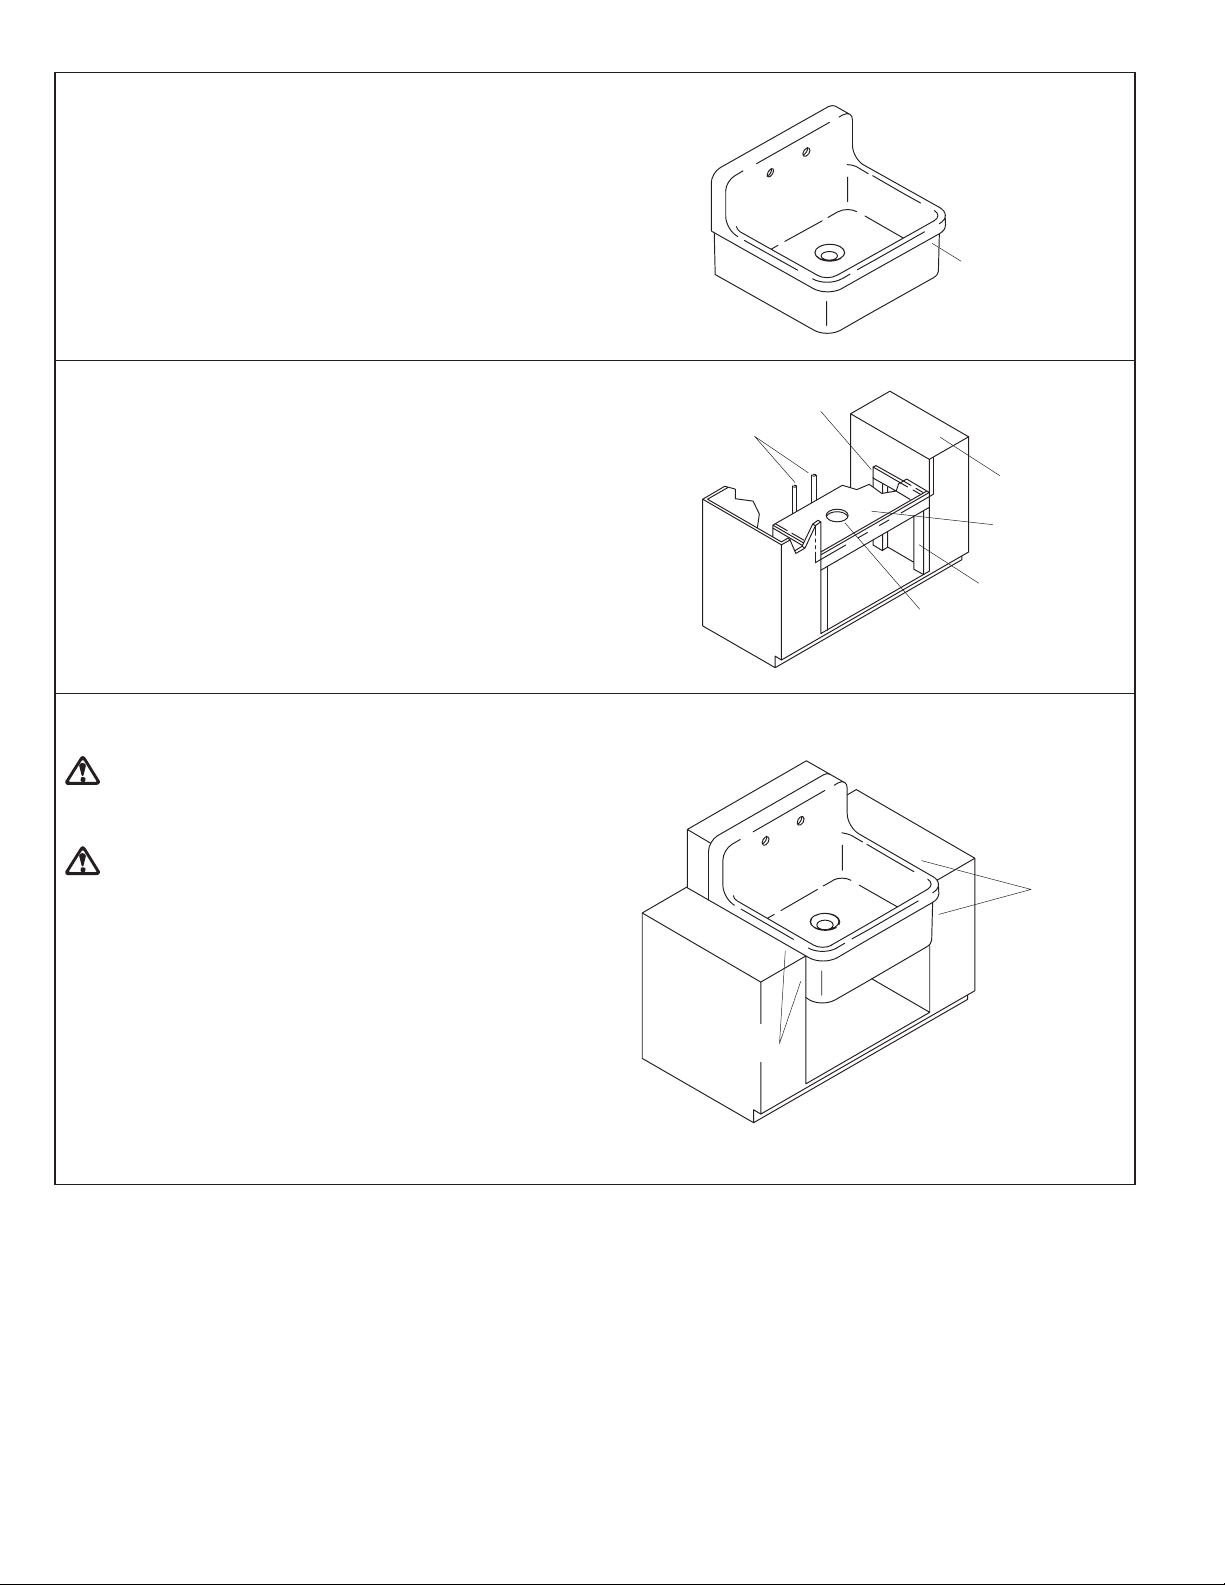
Measure the actual size of the sink below the rim flange.
The cabinet opening should equal the sink dimensions to
ensure a minimum gap between the sink apron and the
cabinet.
If the sink is not available at the time of cabinet and
support frame construction, make allowances to add
wood filler strips or spacers to the cabinet opening after
you install the cabinet, and before you install the sink.
Measure
Sink Below
Rim Flange
Carefully measure and sketch the cut-out area according
to the measurements taken from the actual sink. Cut out
the countertop.
Construct and level a wood support and frame inside the
cabinet opening. Use 2x4 lumber and 1/2” plywood.
Provide adequate clearance for water supplies between
the support and the finished wall. Locate and cut a hole
for the drain.
Route the water supply lines and drain piping.
Clean the countertop around the cutout.
INST ALL SINK
CAUTION: Risk of personal injury or product
damage. Handle with care. Vitreous china can break
or chip if the fittings are overtightened, or if the
product is handled carelessly.
CAUTION: Risk of personal injury or property
damage. Large vitreous china sinks are very heavy.
Get help lifting the sink.
Carefully lift the sink into position in the cabinet. Verify
proper fit, and modify the cut-out area as needed to obtain
a satisfactory fit.
Apply a bead of high-quality sealant around the sink
edges. Carefully wipe away any excess.
Install the sink strainer, and connect to the drain
assembly.
Install the faucet. Be sure to follow all instructions packed
with the faucet.
Clean up with a non-abrasive cleaner.
2x4 Frame
Water Supplies
Countertop
1/2” Plywood
Support
2x4 Frame
Drain Hole
Apply
Sealant
Apply
Sealant
116351-2-AA (-)
2
Kohler Co., Kohler, WI
 Loading...