

Page 1

Installation Guide
Deck-Mount Bath Filler
K-8360
M product numbers are for Mexico (i.e. K-12345M)
Los números de productos seguidos de
M corresponden a México (Ej.
K-12345M)
Français, page “Français-1”
Español, página “Español-1”
1082513-2-A
Page 2
Tools and Materials
1/8" Hex Wrench
Plus:
• Rags
Before You Begin
Observe all local plumbing and building codes.
Shut off the water supply.
The valve is sold separately. Please read the instructions packed
with the valve for installation procedures.
Complete the finished deck material before installing the product.
Kohler Co. reserves the right to make revisions in the design of
faucets without notice, as specified in the Price Book.
1082513-2-A 2 Kohler Co.
Page 3
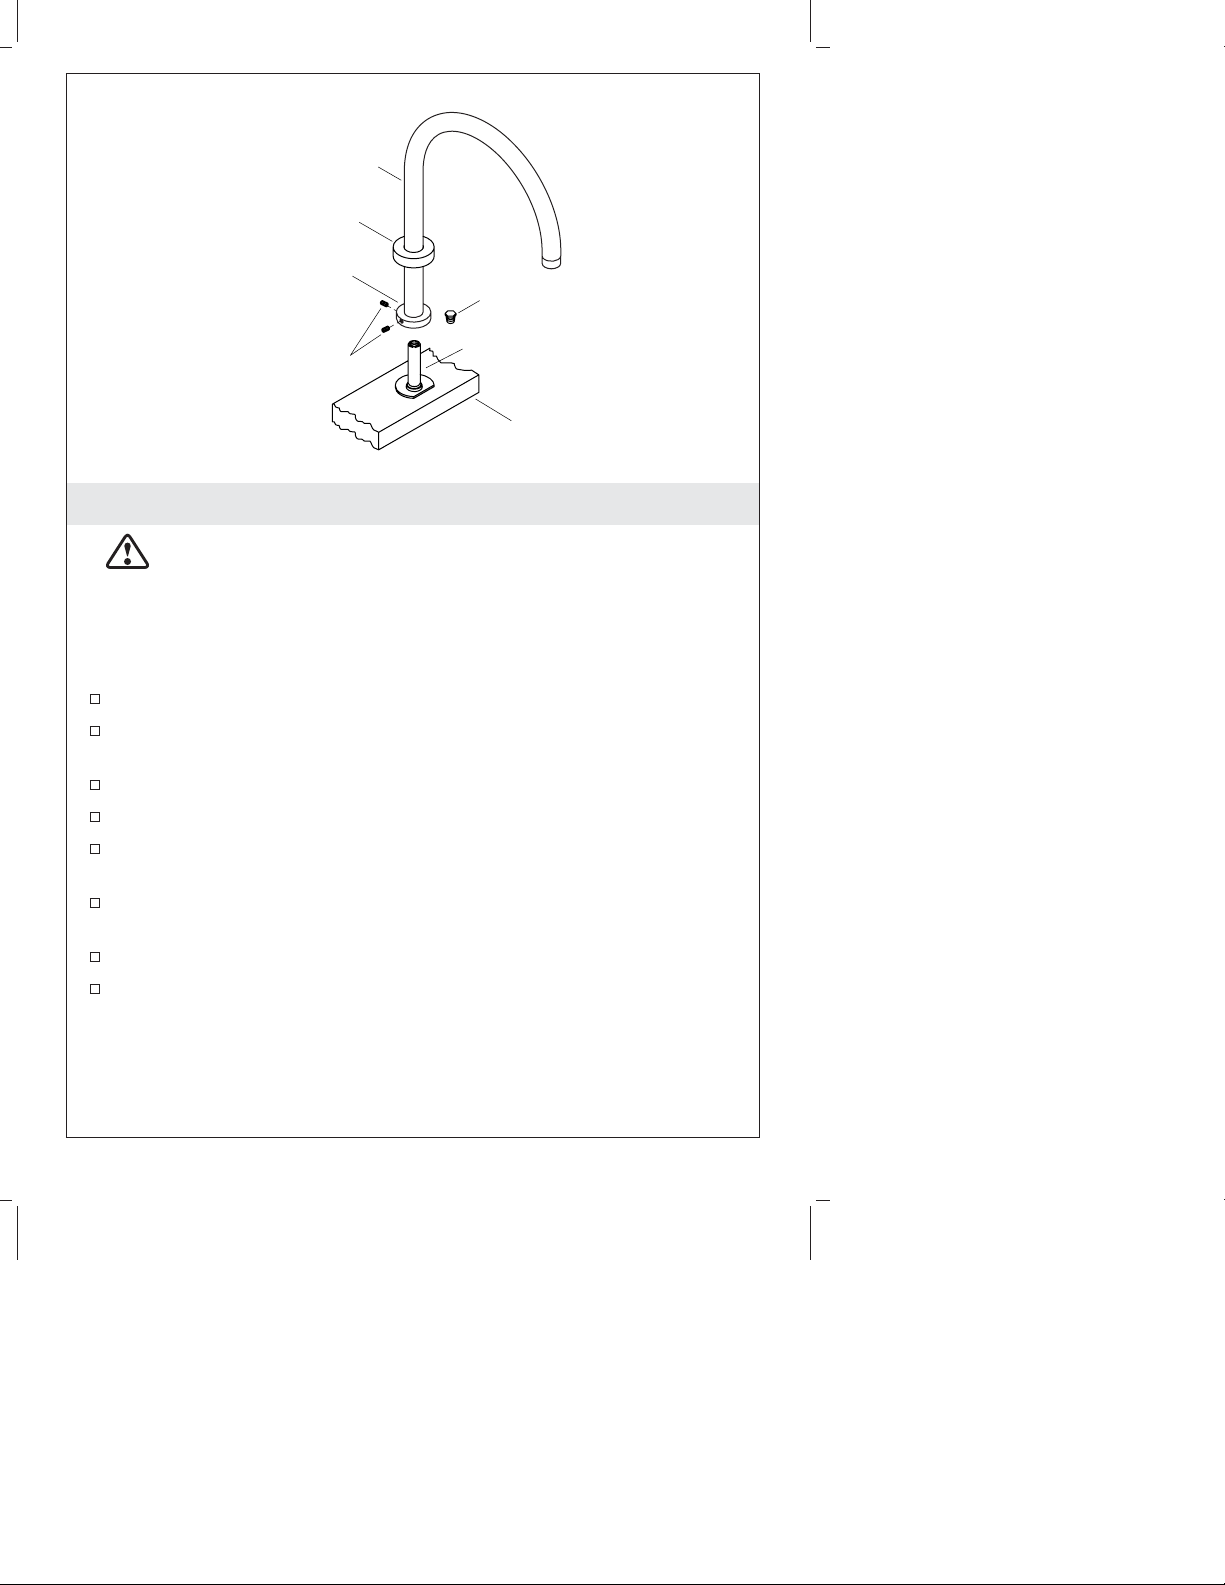
Spout
Escutcheon
Base
Pipe Plug
Supply Tube
Setscrew
Finished Deck
1. Install the Spout
CAUTION: Risk of personal injury. Do not lean over the
pipe plug when turning or removing the plug. The lines may
be pressurized.
NOTICE: Keep the supply tube clean above the finished deck. This
will prevent damage to the O-ring seal (not shown) in the base of
the spout.
Remove the plaster guard (not shown) from the supply tube.
Wrap a rag around the pipe plug. This will prevent water from
spraying as the pipe plug is being removed.
Remove the pipe plug from the supply tube.
Slide the escutcheon up the spout.
Using a 1/8″ hex wrench, back the setscrews off at the base of the
spout just enough to allow clearance for the supply tube.
Position the spout on the supply tube, then carefully press down
until the spout contacts the finished deck.
Align the spout as desired, then tighten the setscrews at the base.
Slide the escutcheon down the spout until it is flush with the
finished deck.
Kohler Co. 3 1082513-2-A
Page 4
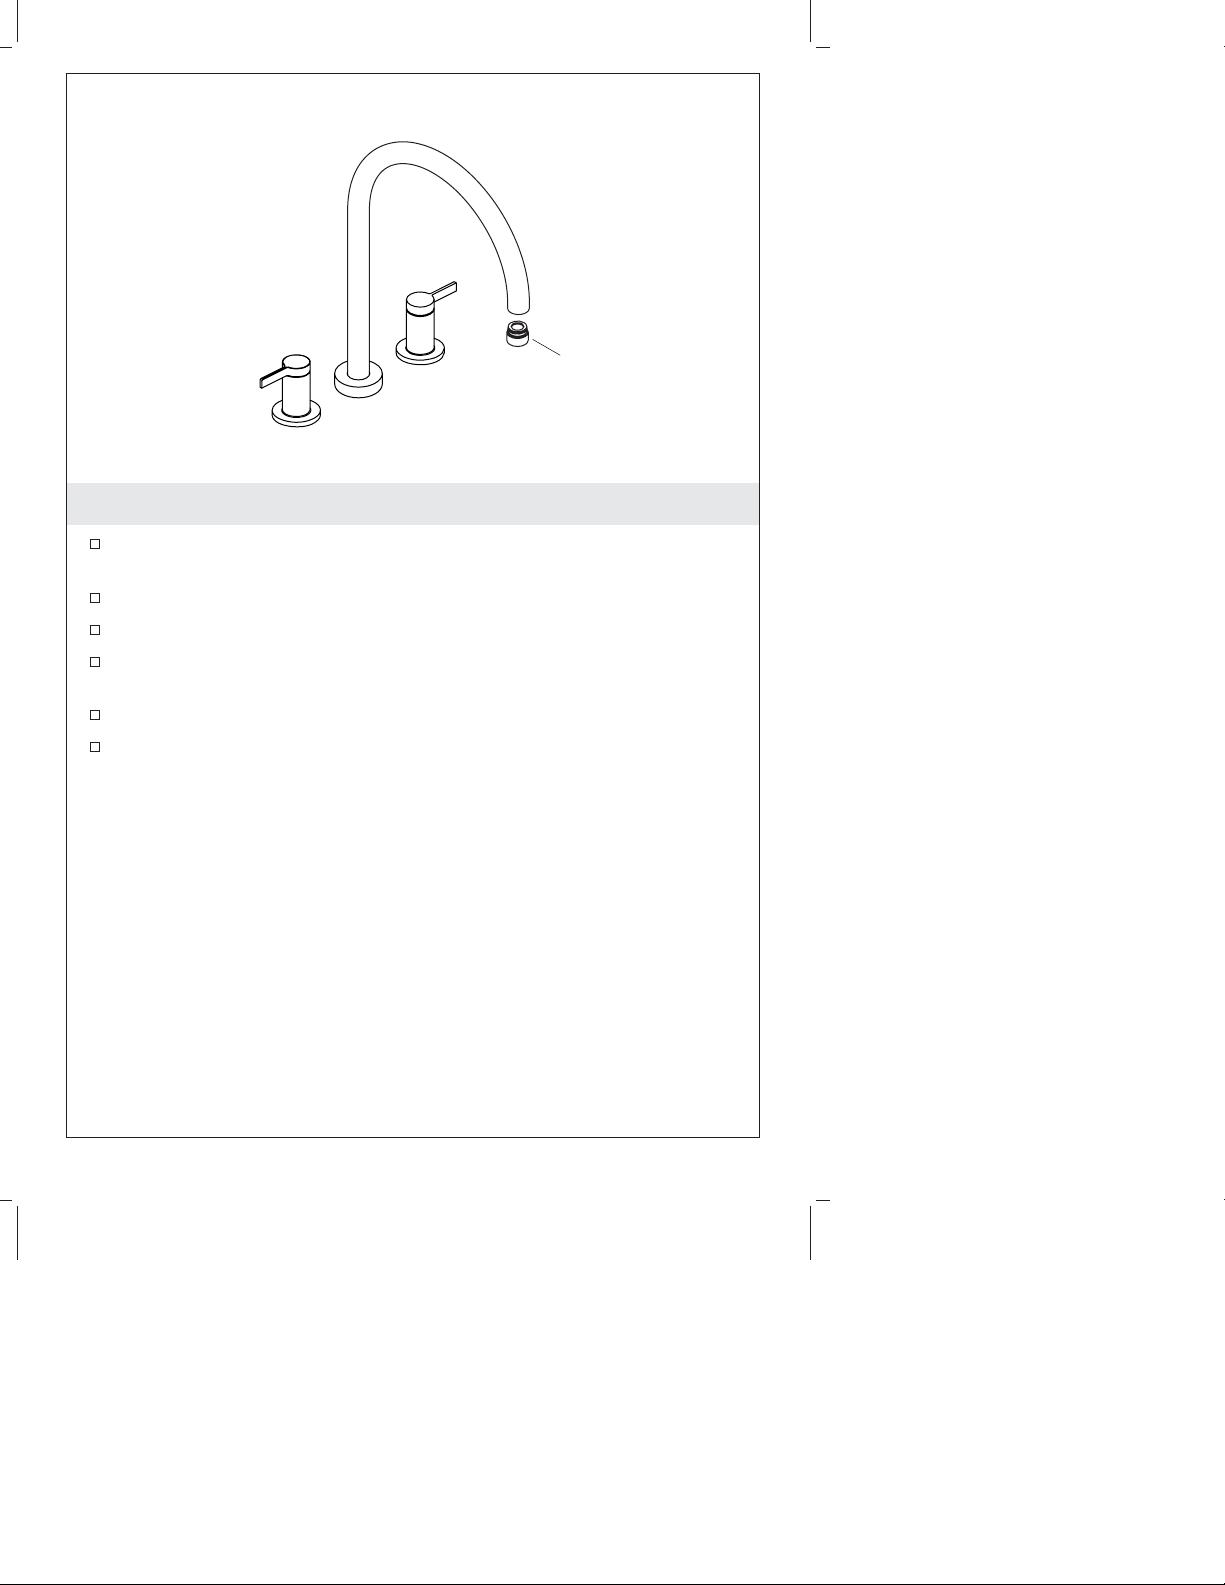
Aerator
2. Complete the Installation
Install the handles following the handle manufacturer’s
installation instructions.
Remove the aerator.
Turn on the main water supply and check for leaks.
Turn on the hot and cold valves and run water through the spout
to remove debris. Check for leaks.
Turn off the hot and cold valves.
Reinstall the aerator.
1082513-2-A 4 Kohler Co.
Page 5

Guide d’installation
Remplisseur de baignoire sur comptoir
Outils et matériels
Clé hexagonale de 1/8"
Plus:
• Chiffons
Avant de commencer
Respecter tous les codes de plomberie et de bâtiment locaux.
Couper l’alimentation d’eau.
La valve est vendue séparément. Veuillez s’il vous plait lire les
instructions d’installation emballées avec la valve.
Compléter le matériau du comptoir fini avant d’installer le
produit.
Kohler Co. se réserve le droit d’apporter toutes modifications au
design des robinets et ceci sans préavis, comme spécifié dans le
catalogue des prix.
Kohler Co. Français-1 1082513-2-A
Page 6

Bec
Applique
Base
Bouchon de tuyau
Tuyau d'alimentation
Vis de retenue
Comptoir fini
1. Installer le bec
ATTENTION : Risque de blessures corporelles. Ne pas se
pencher sur le bouchon du tube au moment de le tourner et
de le retirer. Les lignes peuvent être pressurisées.
AVIS : Tenir le tuyau d’alimentation bec propre au-dessus du
comptoir fini. Ceci préviendra un endommagement du joint torique
(non-illustré) à la base du bec.
Retirer le renfort de plâtre (non-illustré) du tube d’alimentation.
Envelopper un chiffon autour du bouchon du tuyau. Ceci
préviendra l’eau de jaillir lorsque le bouchon du tuyau est retiré.
Retirer le bonchon du tuyau d’alimentation.
Glisser l’applique sur le bec.
Avec une clé hexagonale de 1/8″, reserrer les vis de retenue à la
base du bec juste assez pour permettre un espace pour le tuyau
d’alimentation.
Positionner le bec sur le tube d’alimentation, et presser
délicatement vers le bas jusqu’à ce que le bec touche le comptoir
fini.
Aligner le bec selon le désir et serrer les vis de retenue à la base.
Glisser l’applique dans le bec jusqu’à ce qu’elle soit à égalité avec
le comptoir fini.
1082513-2-A Français-2 Kohler Co.
Page 7

Aérateur
2. Compléter l’installation
Installer les poignées en suivant les instructions d’installation du
fabricant.
Retirer l’aérateur.
Ouvrir l’alimentation d’eau principale et vérifier s’ilyades
fuites.
Ouvrir les valves d’eau chaude et froide et faire couler l’eau à
travers le bec pour chasser tous les débris. Vérifier s’ilyades
fuites.
Fermer les valves d’eau chaude et froide.
Réinstaller l’aérateur.
Kohler Co. Français-3 1082513-2-A
Page 8

Guía de instalación
Llenador de bañera de montaje en cubierta
Herramientas y materiales
Llave hexagonal de 1/8"
Más:
• Trapos
Antes de comenzar
Cumpla con todos los códigos locales de plomería y construcción.
Cierre el suministro principal de agua.
La válvula se vende por separado. Lea las instrucciones incluidas
con la válvula para obtener los procedimientos de instalación.
Termine el material de acabado de la cubierta antes de instalar el
producto.
Kohler Co. se reserva el derecho de modificar el diseño de la
grifería sin previo aviso, tal como se especifica en la lista de
precios.
Kohler Co. Español-1 1082513-2-A
Page 9

Surtidor
Chapetón
Base
Tapón de tubo
Tubo de suministro
Tornillo de fijación
Cubierta acabada
1. Instale el surtidor
PRECAUCIÓN: Riesgo de lesiones personales. Al girar o
retirar el tapón, no se incline sobre el tapón de tubo. Las
líneas pueden estar presurizadas.
AVISO: Mantenga el tubo de suministro limpio arriba de la cubierta
acabada. Esto evitará dañar el arosello (O-ring) (no se muestra) de la
base del surtidor.
Retire el protector de yeso (no se muestra) del tubo de suministro.
Envuelva el tapón de tubo en un trapo. Esto evitará que el agua
salpique al retirar el tapón de tubo.
Retire el tapón de tubo del tubo de suministro.
Deslice el chapetón hacia arriba del surtidor.
Con una llave hexagonal de 1/8″, desatornille los tornillos de
fijación de la base del surtidor lo suficiente para que haya espacio
para el tubo de suministro.
Coloque el surtidor en el tubo de suministro, luego presione con
cuidado hacia abajo hasta que el surtidor esté en contacto con la
cubierta acabada.
Alinee el surtidor según se desee, luego apriete los tornillos de
fijación de la base.
Deslice el chapetón en el surtidor hasta que esté al ras con la
cubierta acabada.
Kohler Co. Español-2 1082513-2-A
Page 10

Aireador
2. Termine la instalación
Instale las manijas siguiendo las instrucciones de instalación del
fabricante de la manija.
Quite el aireador.
Abra el suministro principal de agua y verifique que no haya
fugas.
Abra las válvulas del agua fría y caliente y deje correr el agua por
el surtidor para eliminar los residuos. Verifique que no haya
fugas.
Cierre las válvulas del agua fría y caliente.
Vuelva a instalar el aireador.
1082513-2-A Español-3 Kohler Co.
Page 11

1082513-2-A
Page 12

USA: 1-800-4-KOHLER
Canada: 1-800-964-5590
México: 001-877-680-1310
kohler.com
©2007 Kohler Co.
1082513-2-A
 Loading...