

Kohler K-6356 Installation Manual

Installation Guide
Kitchen Sink Faucet
K-6356
M product numbers are for Mexico (i.e. K-12345M)
Los números de productos seguidos de
M corresponden a México (Ej.
K-12345M)
Français, page “Français-1”
Español, página “Español-1”
1025491-2-C
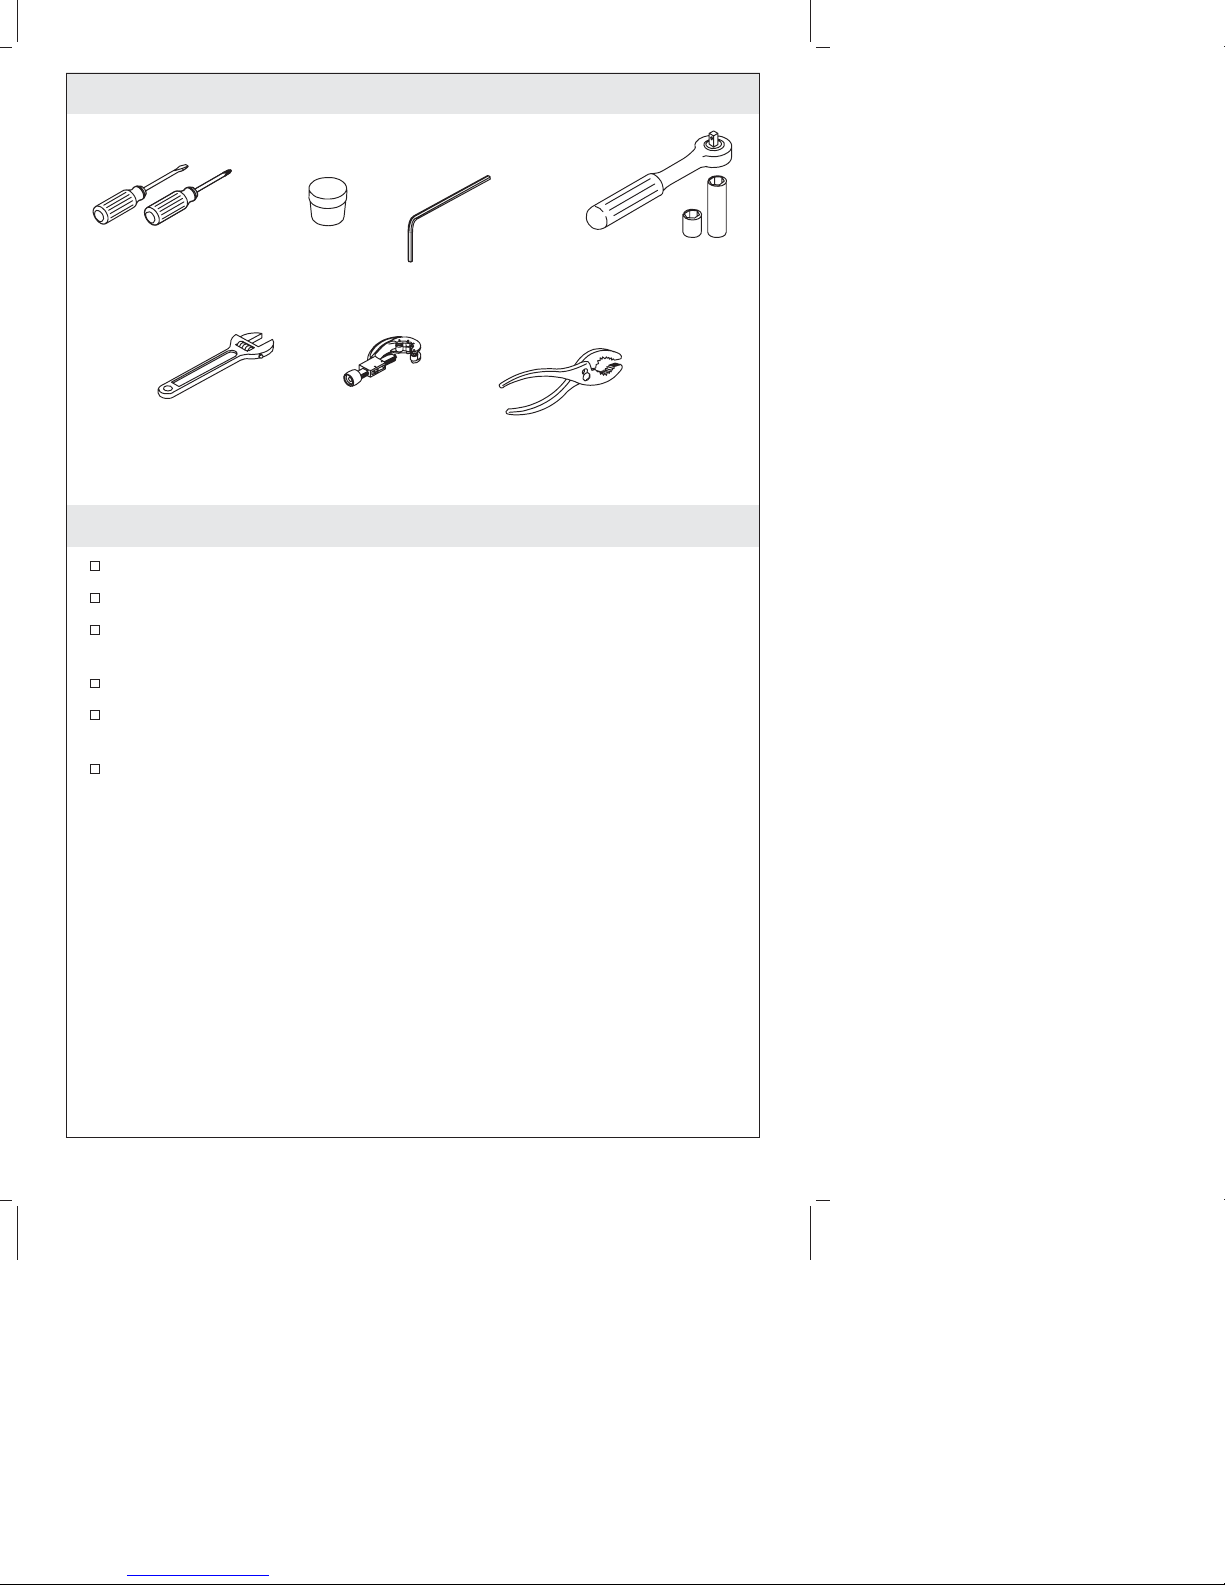
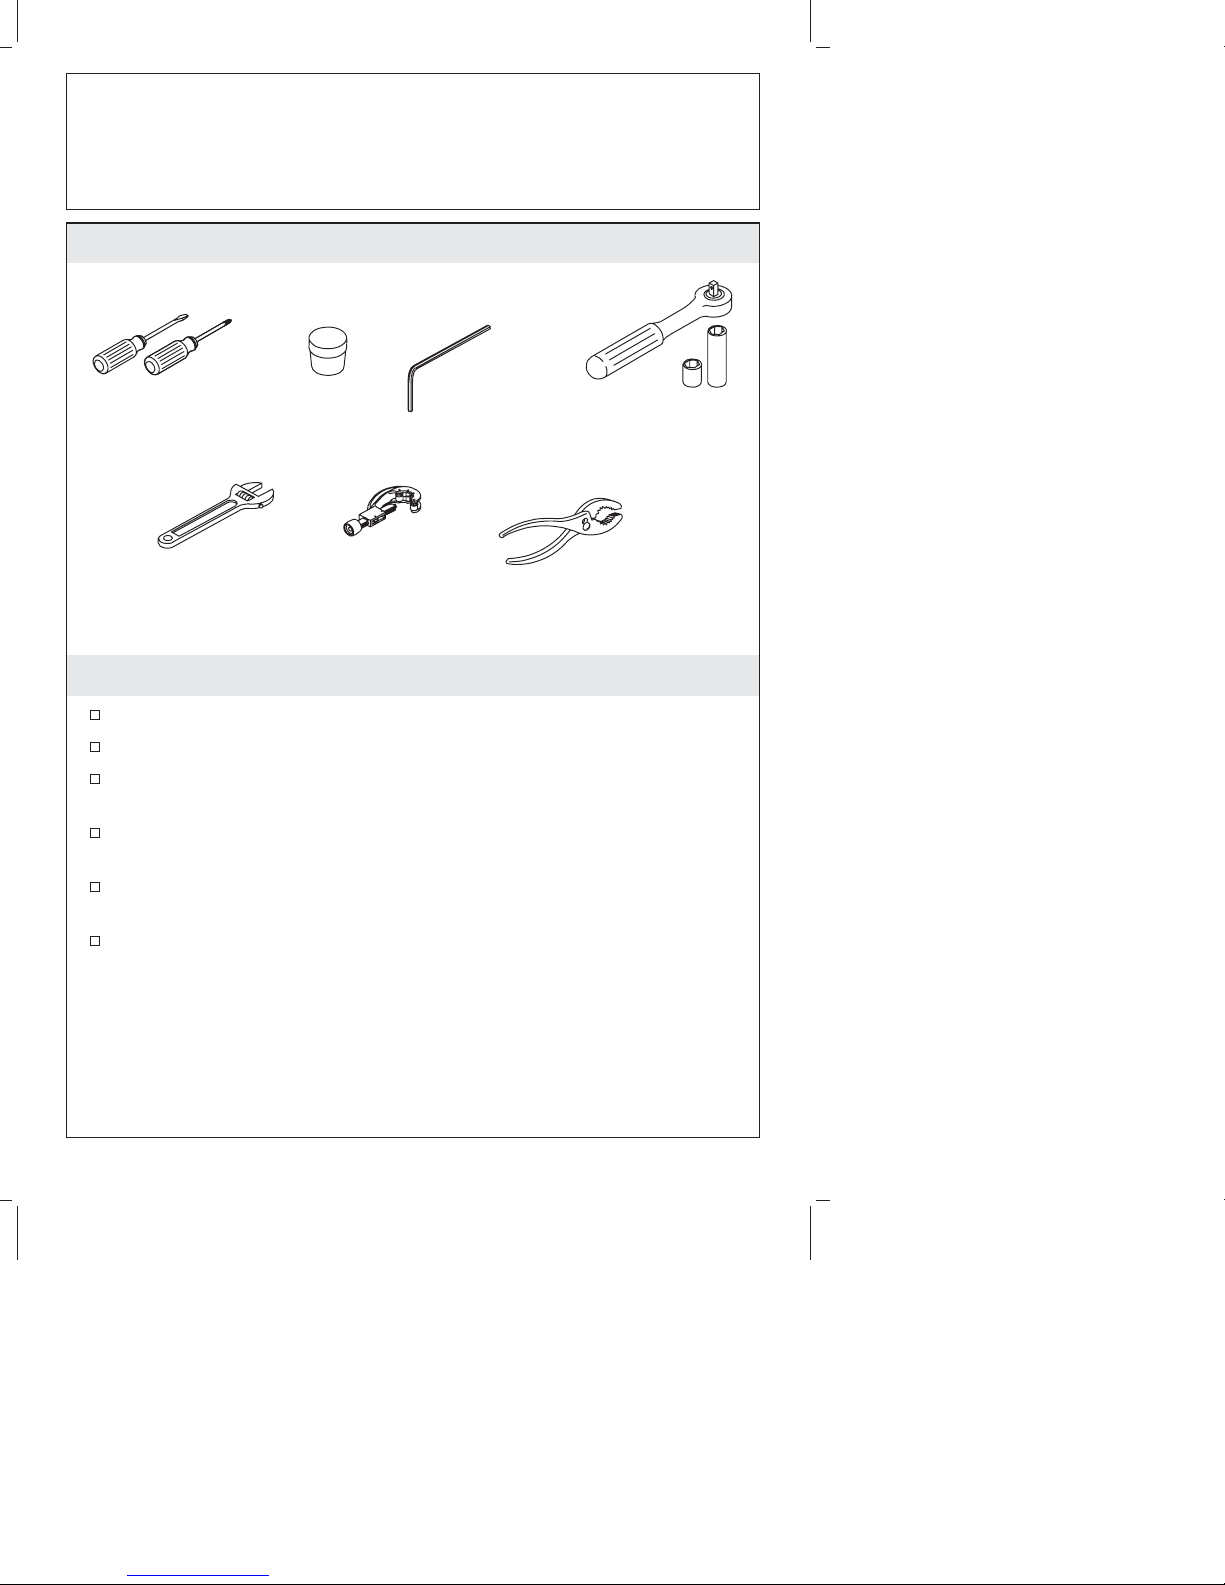
Tools and Materials
Assorted
Screwdrivers
Adjustable
Wrench
Plumbers
Putty
Tube Cutter
5/64" Hex
Wrench
Socket Wrench with
7/16" Deep Socket
Pliers
Before You Begin
Observe all local plumbing and building codes.
Shut off the water supplies.
Carefully inspect waste and supply tubing for any sign of
damage and replace if necessary.
Do not attach a dishwasher to the faucet spray outlet.
For new installations, assemble the faucet to the sink before
installing the sink.
Kohler Co. reserves the right to make revisions in the design of
faucets without notice, as specified in the Price Book.
1025491-2-C 2 Kohler Co.
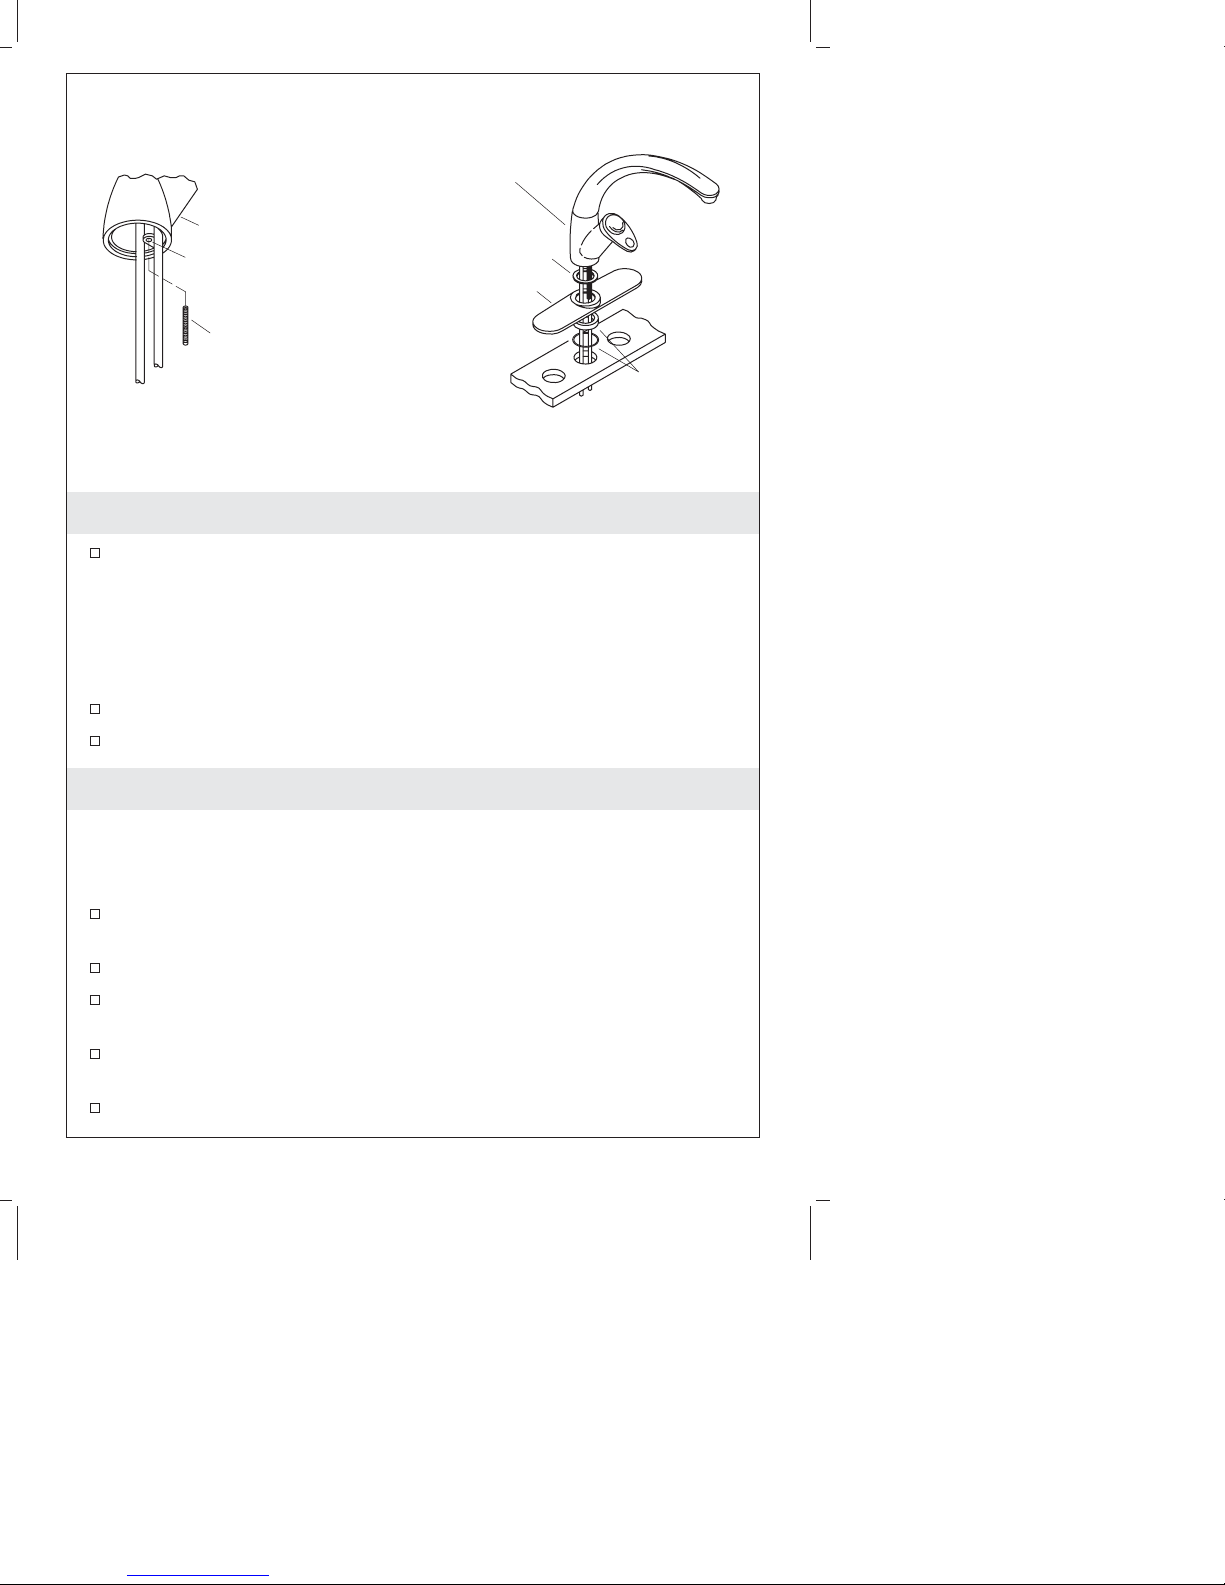
Faucet Body
Faucet Body
Threaded Hole
Mounting Stud
Rubber
Washer
Escutcheon
Spacer and
O-Ring
1. Install the Mounting Stud
Screw the mounting stud into the threaded hole at the bottom of
the faucet body. The mounting stud should extend slightly
beyond the threaded hole in the body.
For 1-hole Installations:
NOTE: The escutcheon, spacer, and O-ring are not required.
Slide the rubber washer over the faucet tubing and hose.
Insert the faucet tubing and hose into the hole.
2. Install the Escutcheon (Optional)
NOTE: For installation on marble, do not use plumbers putty. Use
the self-adhesive gaskets provided. Remove the paper backing and
apply the gaskets (adhesive side down) over the outside holes.
Apply a bead of plumbers putty or other sealant to the underside
of the escutcheon according to the manufacturer’s instructions.
Insert the O-ring into the groove of the spacer.
Slide the rubber washer, escutcheon, and spacer (O-ring side
down) over the faucet tubing and hose.
Insert the faucet tubing and hose into the center hole, carefully
aligning the escutcheon.
Press down on the escutcheon. Remove any excess putty.
Kohler Co. 3 1025491-2-C
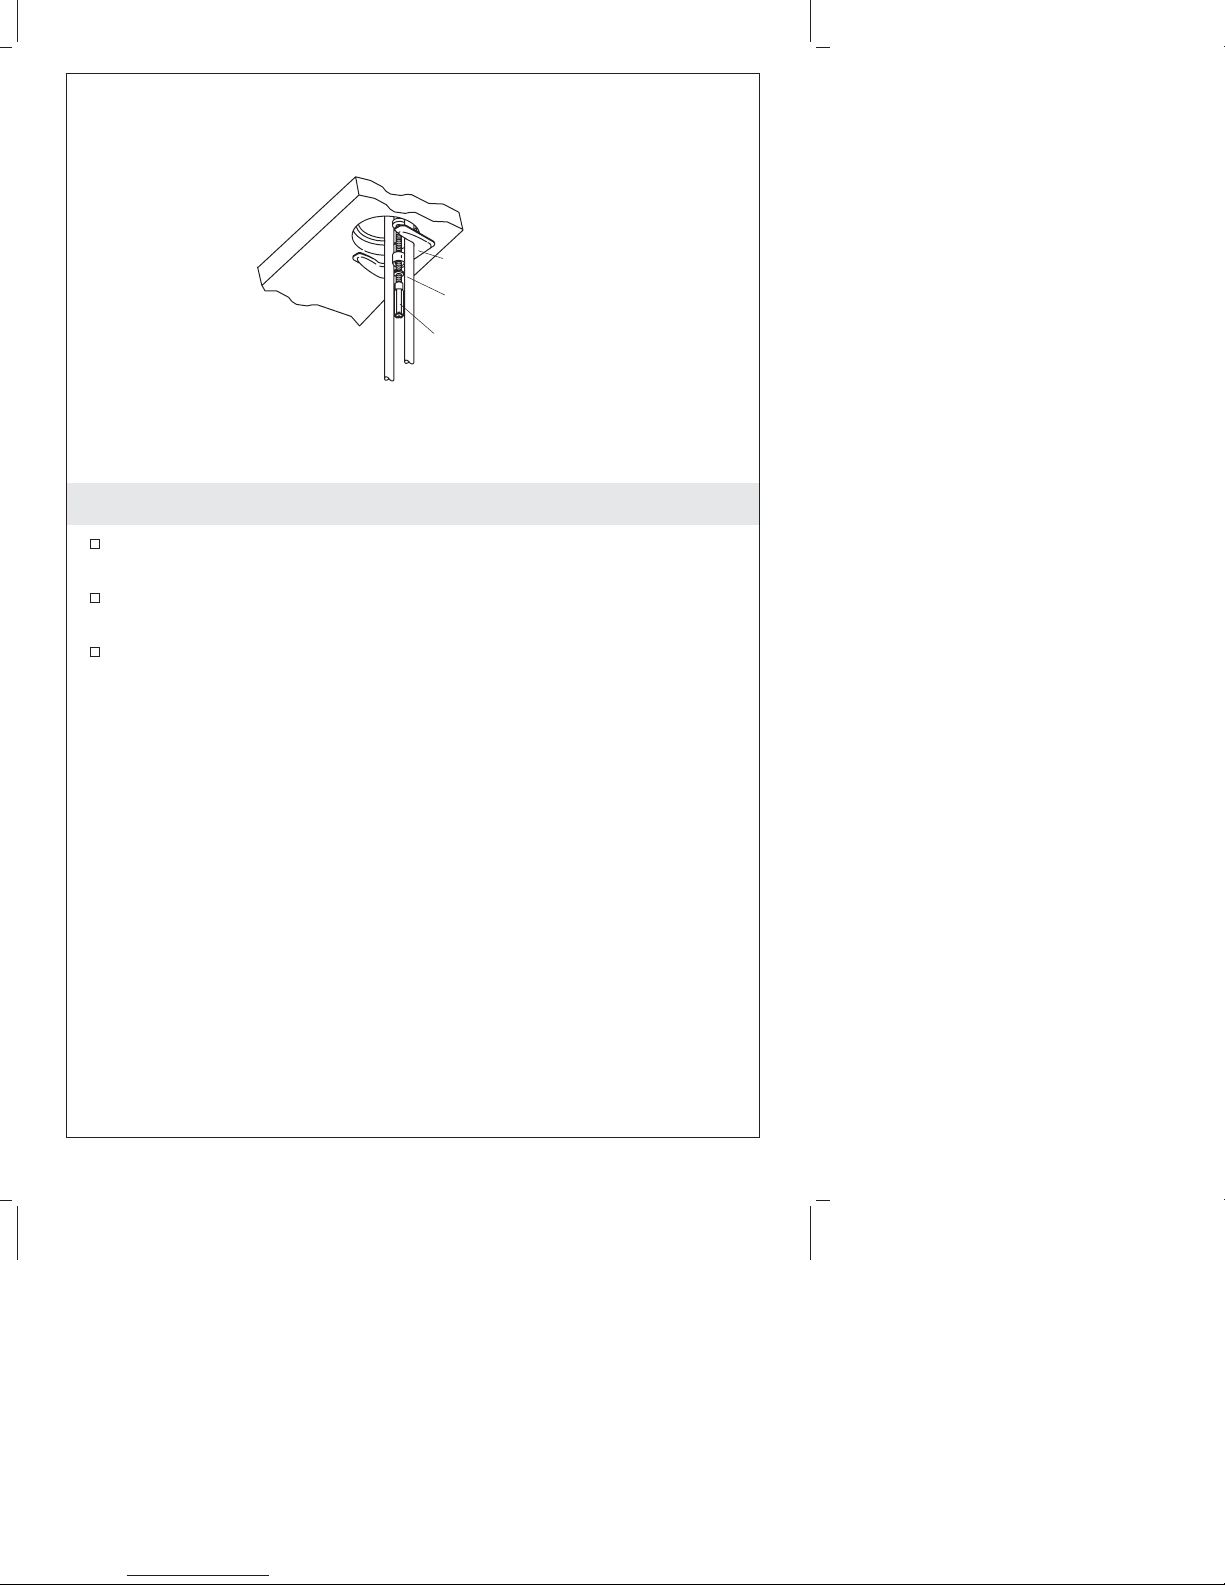
Bracket
Washer
Nut
3. Secure the Faucet
Position the bracket, washer, and nut to the mounting stud from
the underside of the sink.
Position the faucet and escutcheon on the sink to obtain the
desired alignment.
Tighten the nut to secure the faucet to the sink. For best access,
use a socket wrench with a 7/16” deep socket.
1025491-2-C 4 Kohler Co.
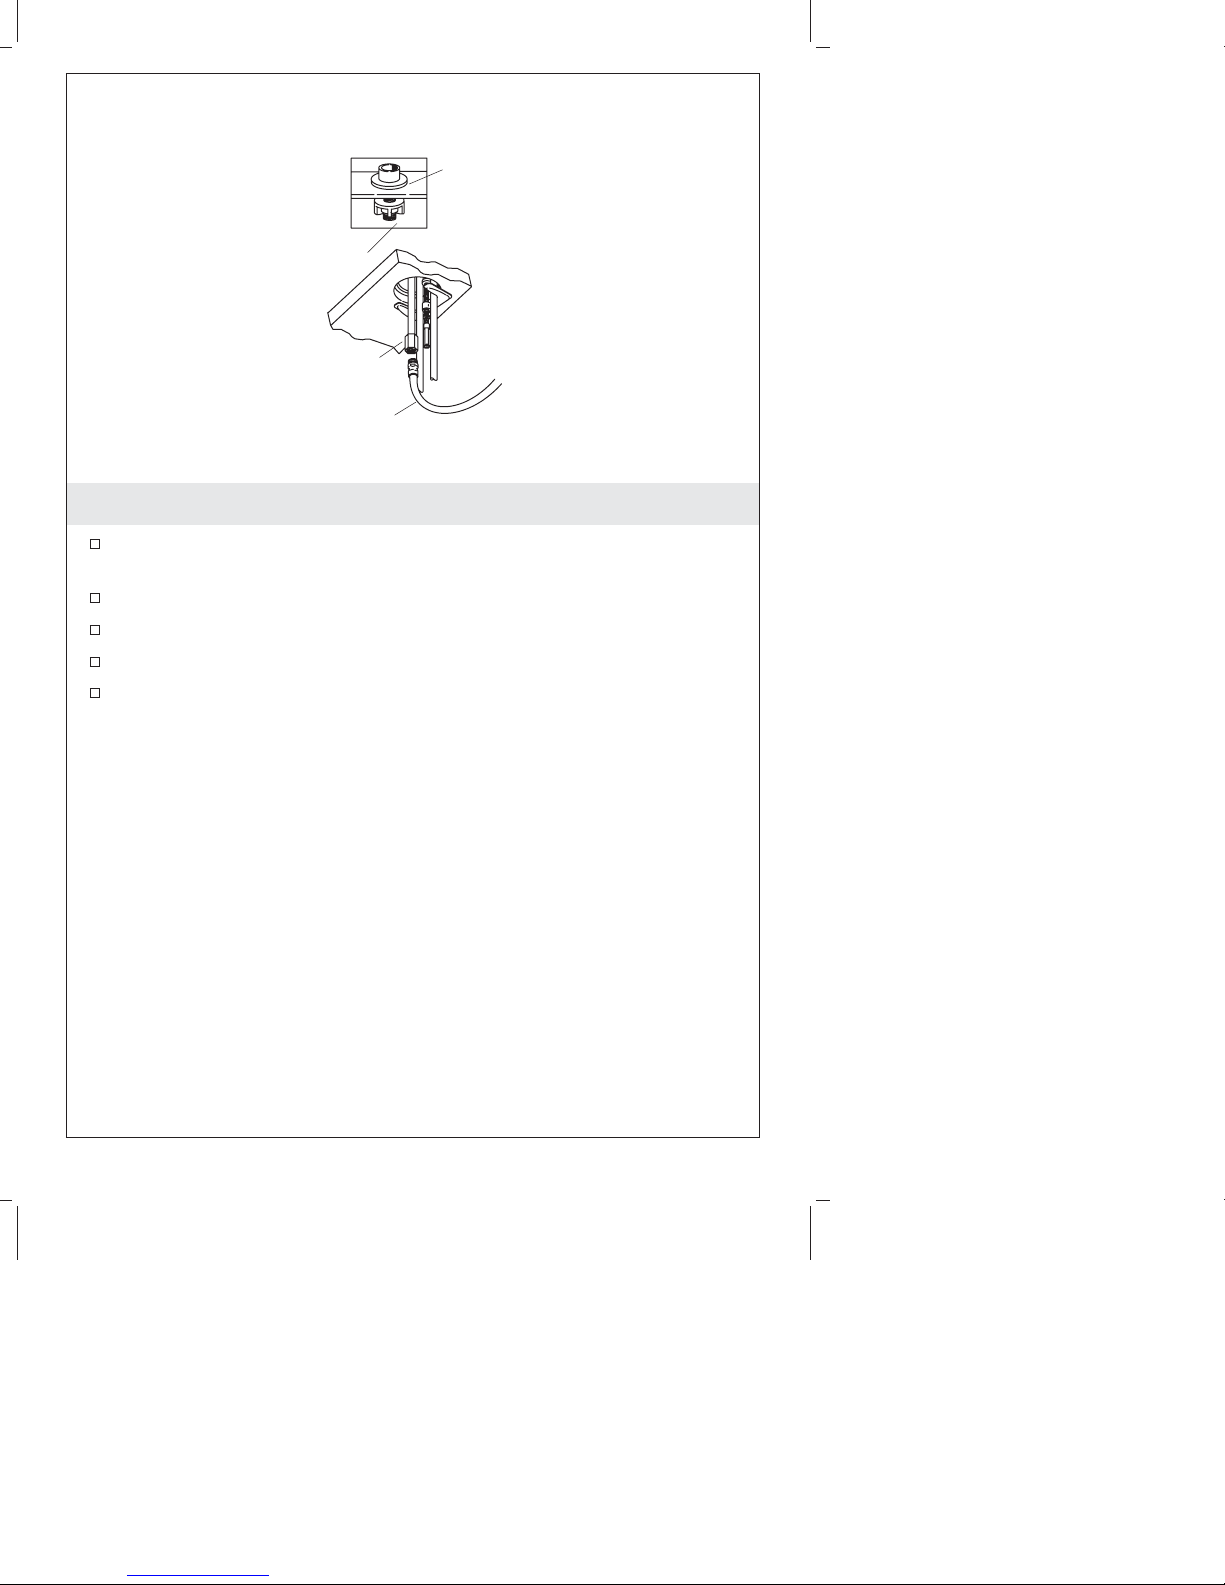
Apply
plumbers
putty.
Spray
Guide Nut
Spray Tube
Spray Hose
4. Connect the Spray Hose
Apply a ring of plumbers putty or other sealant to the spray
guide according to the manufacturer’s instructions.
Insert the spray guide into the sink hole.
Attach and tighten the spray guide nut.
Insert the spray hose end through the spray guide from the top.
Secure the hose to the external threads on the spray tube.
Kohler Co. 5 1025491-2-C
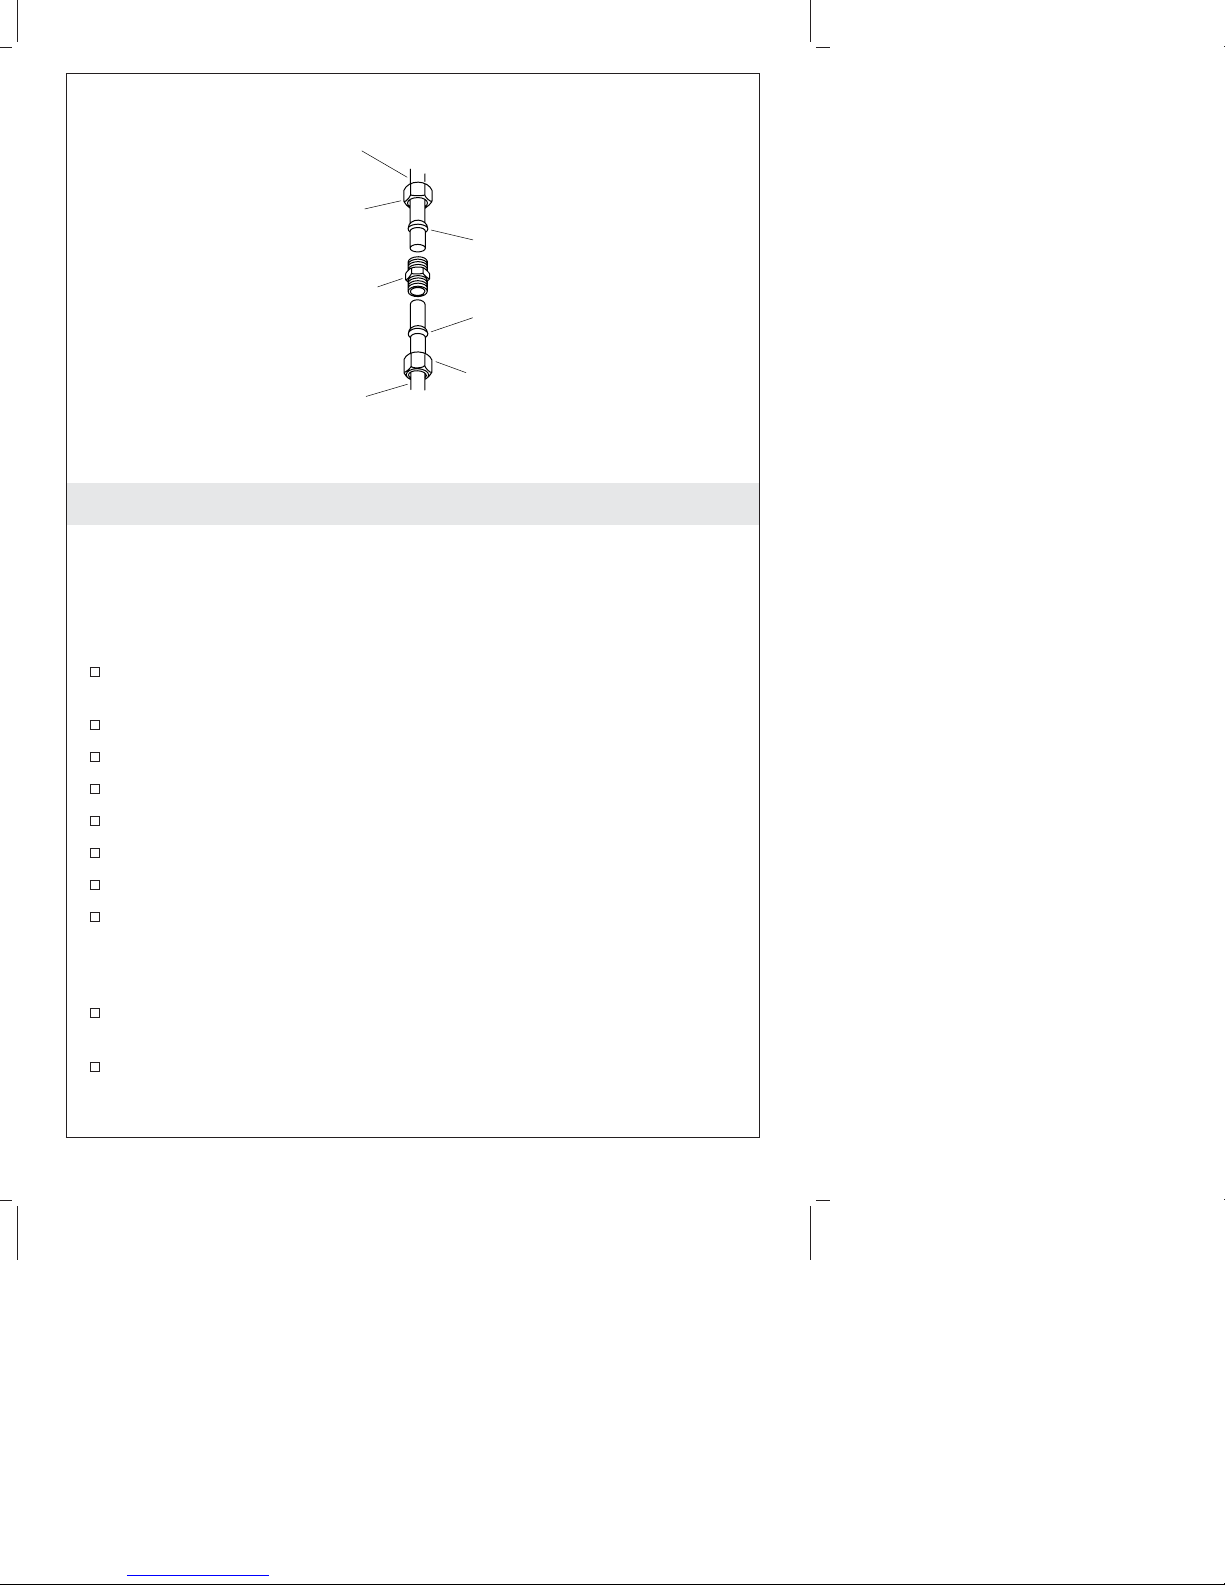
Copper
Tubing
Coupling
Nut
Ferrule
Compression
Fitting
Ferrule
Coupling
Supply
Nut
Tube
5. Install the Supplies
NOTE: If the supply tubes need to be cut, allow for required
penetration of the tube into the supply stop.
NOTE: If the sink is not installed, install it at this time. Be sure to
follow all instructions packed with the sink.
Allow for required penetration of the supply tubes into the
supply stops.
Cut the supply tubes as needed.
Slide the coupling nut then the ferrule onto the copper tubing.
Set the compression fittings over the copper tubing.
Hand tighten the coupling nuts.
Slide the coupling nut then the ferrule onto each supply tube.
Set the compression fittings over the supply tubes.
Hand tighten the coupling nuts.
NOTE: Do not apply torque to the supply fittings at the bottom of
the faucet while installing or tightening the compression fittings.
Carefully bend the supply tubes to align them with the supply
stops.
Slide the coupling nuts and ferrules from the stops onto the
supply tubes.
1025491-2-C 6 Kohler Co.

Install the Supplies (cont.)
Insert the supply tubes into the outlets of the shut-off valves.
Tighten the coupling nuts on the shut-off valves.
Turn on the water supply.
6. Installation Checkout
Remove the aerator from the end of the spout by turning it
counterclockwise.
Turn on the main water supply.
Open the faucet handle to the ON position.
Flush hot then cold water through the faucet for about one
minute.
Push the faucet handle down to the OFF position.
Reattach the aerator by turning it clockwise.
Kohler Co. 7 1025491-2-C
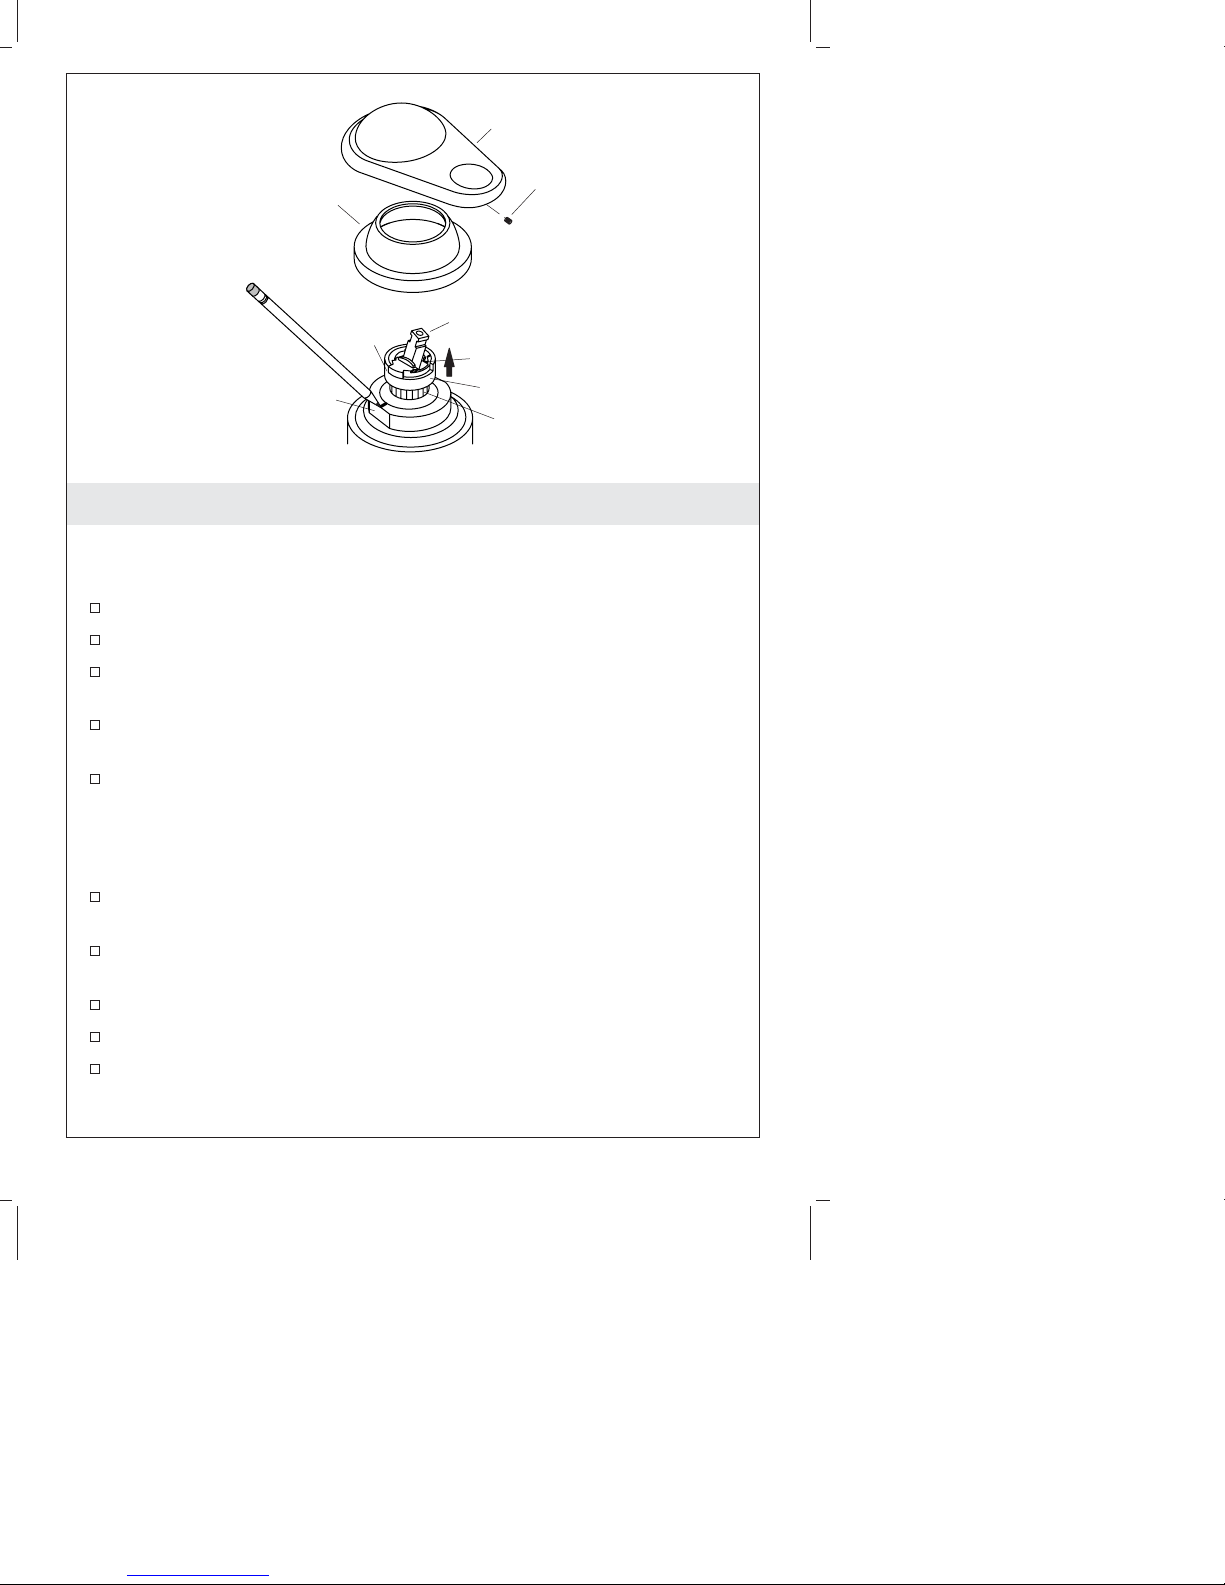
Handle
Bonnet
Setscrew
Valve Stem
Stop Tab
Top Disc
Mounting Nut
Indexer
Splines
7. Optional Temperature Limiting Adjustment
NOTE: Before adjusting the water temperature, ensure the handle is
turned all the way to the left. This is the maximum hot position.
Loosen the setscrew.
Remove the handle and bonnet.
Turn on the water to the maximum temperature by pushing the
valve stem up and turning it clockwise.
Mark the current position of the temperature stop tab (top edge)
on the mounting nut with a marker or pencil.
Lift the indexer and top disc just enough to clear the valve
splines and to allow rotation.
NOTE: Each spline notch is an average 9.5°F (5.3°C) change in
temperature.
Turn the indexer, top disc, and valve stem counterclockwise until
the desired temperature is achieved.
Reinstall the indexer and top disc to the valve, making sure the
top disc is snapped fully into the indexer.
Turn off the water by pulling the valve stem down.
Reinstall the bonnet and handle.
Tighten the setscrew.
1025491-2-C 8 Kohler Co.
Guide d’installation
Robinet d’évier de cuisine
Outils et matériels
Tournevis
assortis
Clé à molette
Mastic de
plombier
Coupetubes
Clé
hexagonale
de 5/64"
Clé à douille
profonde de 7/16"
(1,1 cm)
Pinces
Avant de commencer
Respecter tous les codes de plomberie et de bâtiment locaux.
Couper les alimentations d’eau.
Vérifier avec soin si l’évacuation ou les tubes d’alimentation pour
déceler tout signe d’endommagement et remplacer si nécessaire.
Ne pas connecter un lave vaisselle à la sortie du vaporisateur du
robinet.
Pour de nouvelles installations, installer le robinet sur l’évier
avant d’installer ce dernier.
Kohler Co. se réserve le droit d’apporter toutes modifications au
design des robinets et ceci sans préavis, comme spécifié dans le
catalogue des prix.
Kohler Co. Français-1 1025491-2-C
 Loading...