

Kohler K-2607 Installation And Care Manual

Installation and Care Guide
Bridge Cabinet
K-2607
Français, page ″Français-1″
Español, página ″Español-1″
1207227-2-A
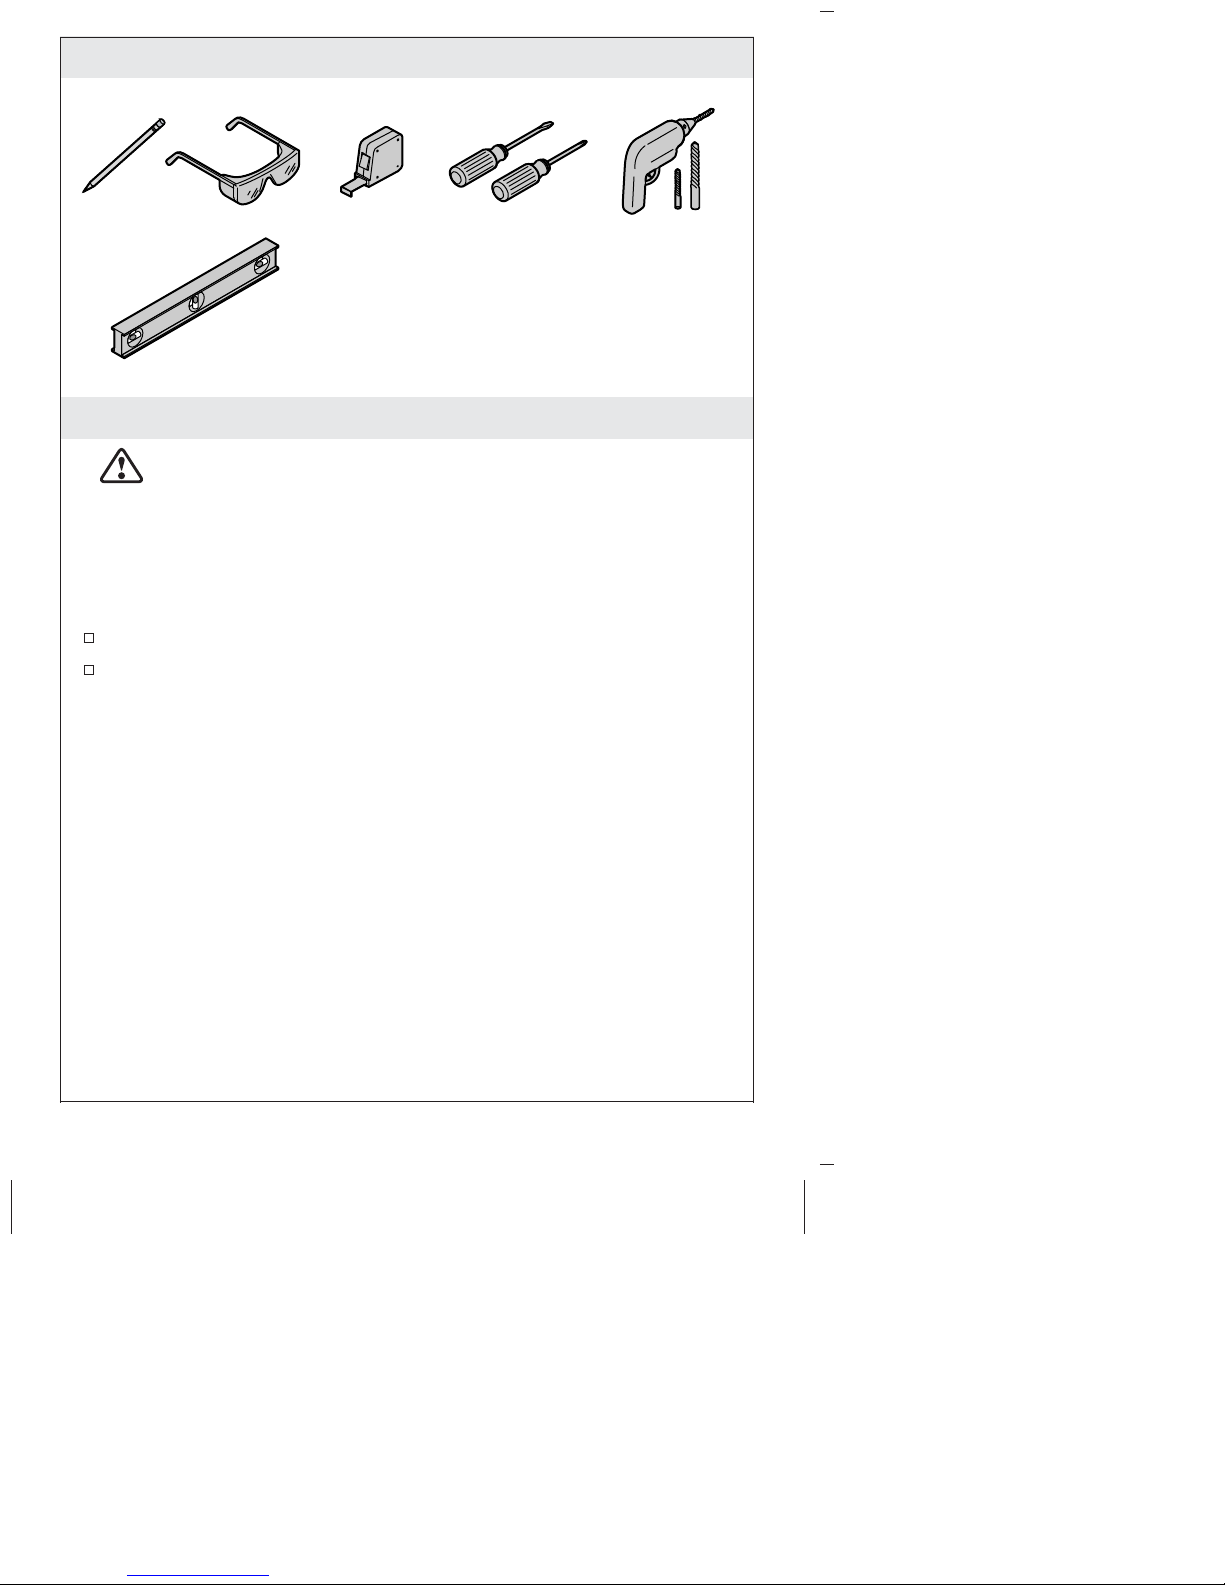
Tools
Plus:
• Wood Screws
• 2x6s
• 5/16" Lag Bolts and Washers
[Min 250 lb (113.4 kg) Load Bearing]
• Socket Wrenches
• Siliconized Acrylic Caulk
Important Information
CAUTION: Risk of property damage. Use care when
moving the cabinet to avoid impacting, sliding, or
side-loading the legs.
NOTE: The K-2607 bridge cabinet is designed to be installed with
the K-2604 vanity and is not intended to be installed individually.
Read both product installation instructions before beginning. The
vanity should be installed before the bridge cabinet.
Observe all local building codes.
To properly secure the cabinet, 2x6 backing material must be
installed behind the finished wall. Refer to the K-2604 vanity
installation instructions for site preparation.
1207227-2-A 2 Kohler Co.
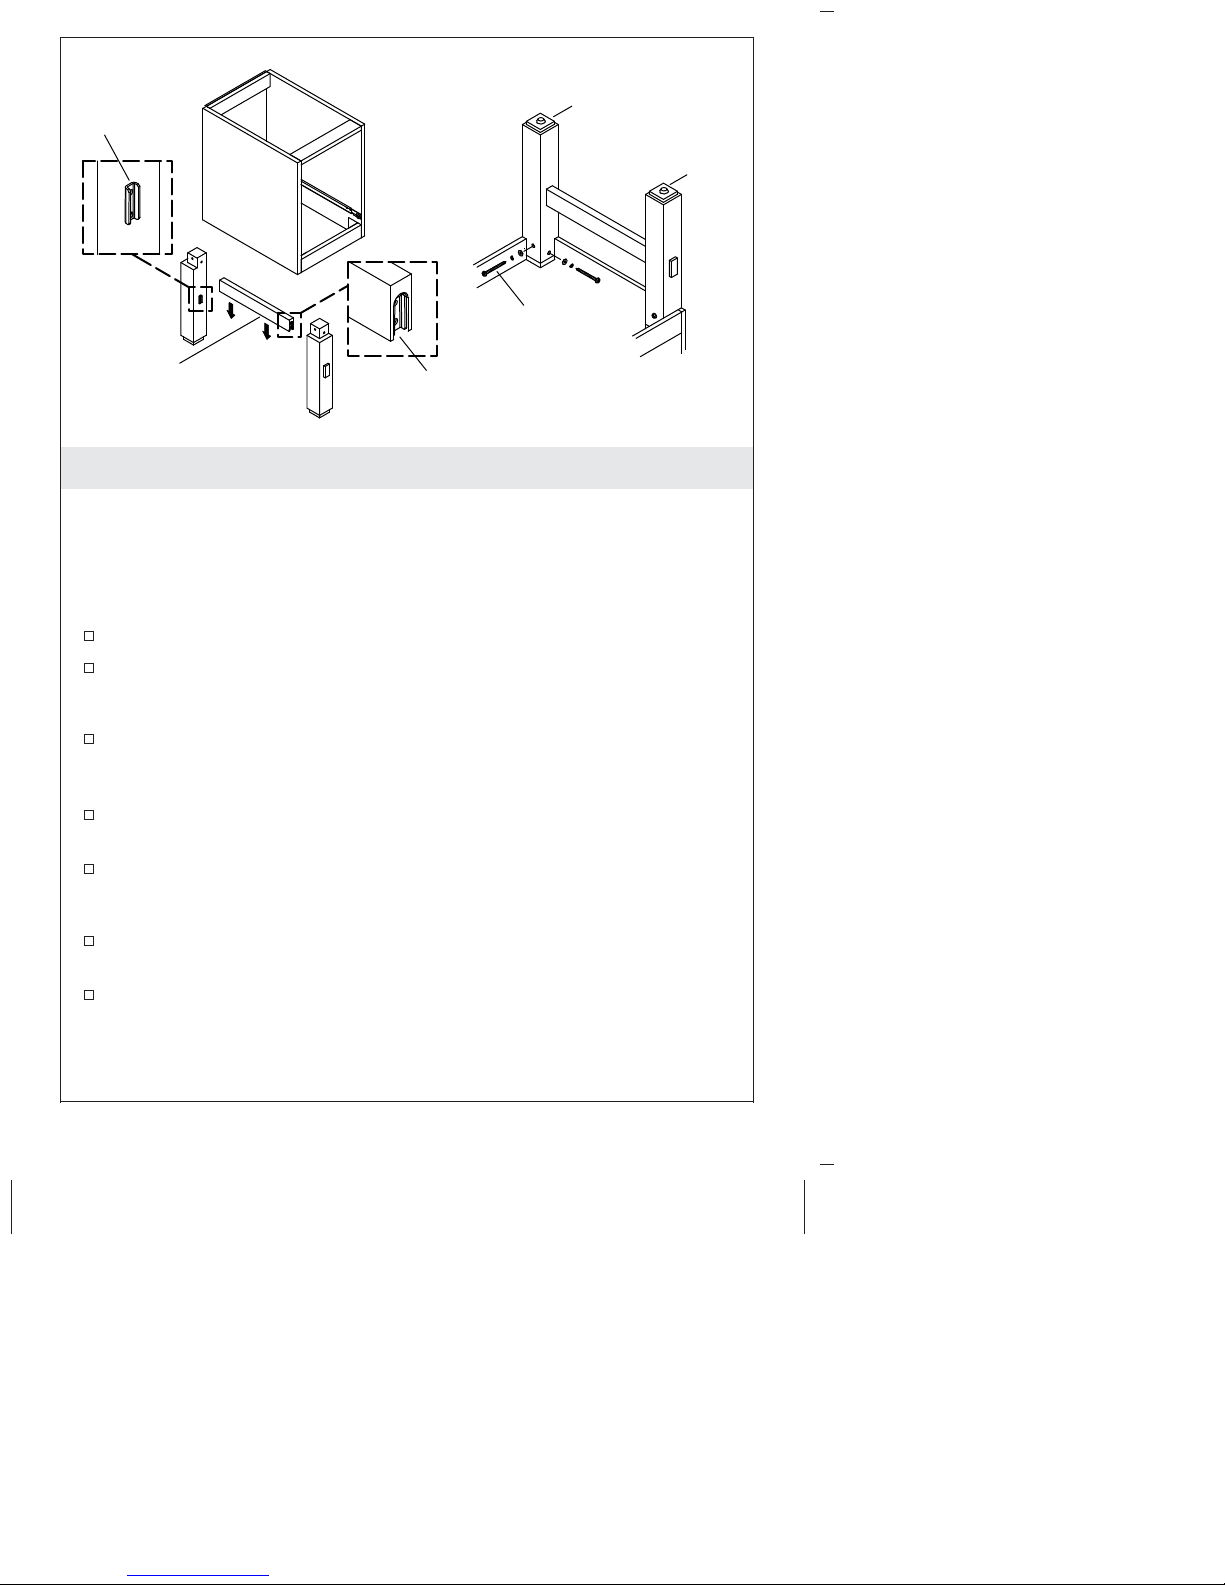
Clip
Rear Leg
Front
Leg
Screw
Cross Rail
Clip
1. Install Legs (Single Vanity Installation)
IMPORTANT! Legs are not required for installation between two
vanities.
NOTE: To protect the finished surface of the cabinet, perform
assembly tasks on a flat, padded work surface.
Place the cabinet upright on a flat, padded surface.
Remove the drawer to access the holes for leg attachment. Refer
to the ″Remove/Reinstall the Drawer″ section of this guide.
Determine whether the legs will be installed on the left or right.
The opposite side will be supported when installed to the K-2604
vanity.
Lay the cabinet on its side and position each leg so the clips face
toward each other (as shown).
Secure each leg post using two #8 x 2″ panhead screws, lock
washers, and flat washers.
Position the cross rail above the clips between the front and back
legs (as shown).
Evenly press down on the cross rail until the clips are fully
engaged. You may need to apply slight pressure on each end
until it clicks in place.
Kohler Co. 3 1207227-2-A
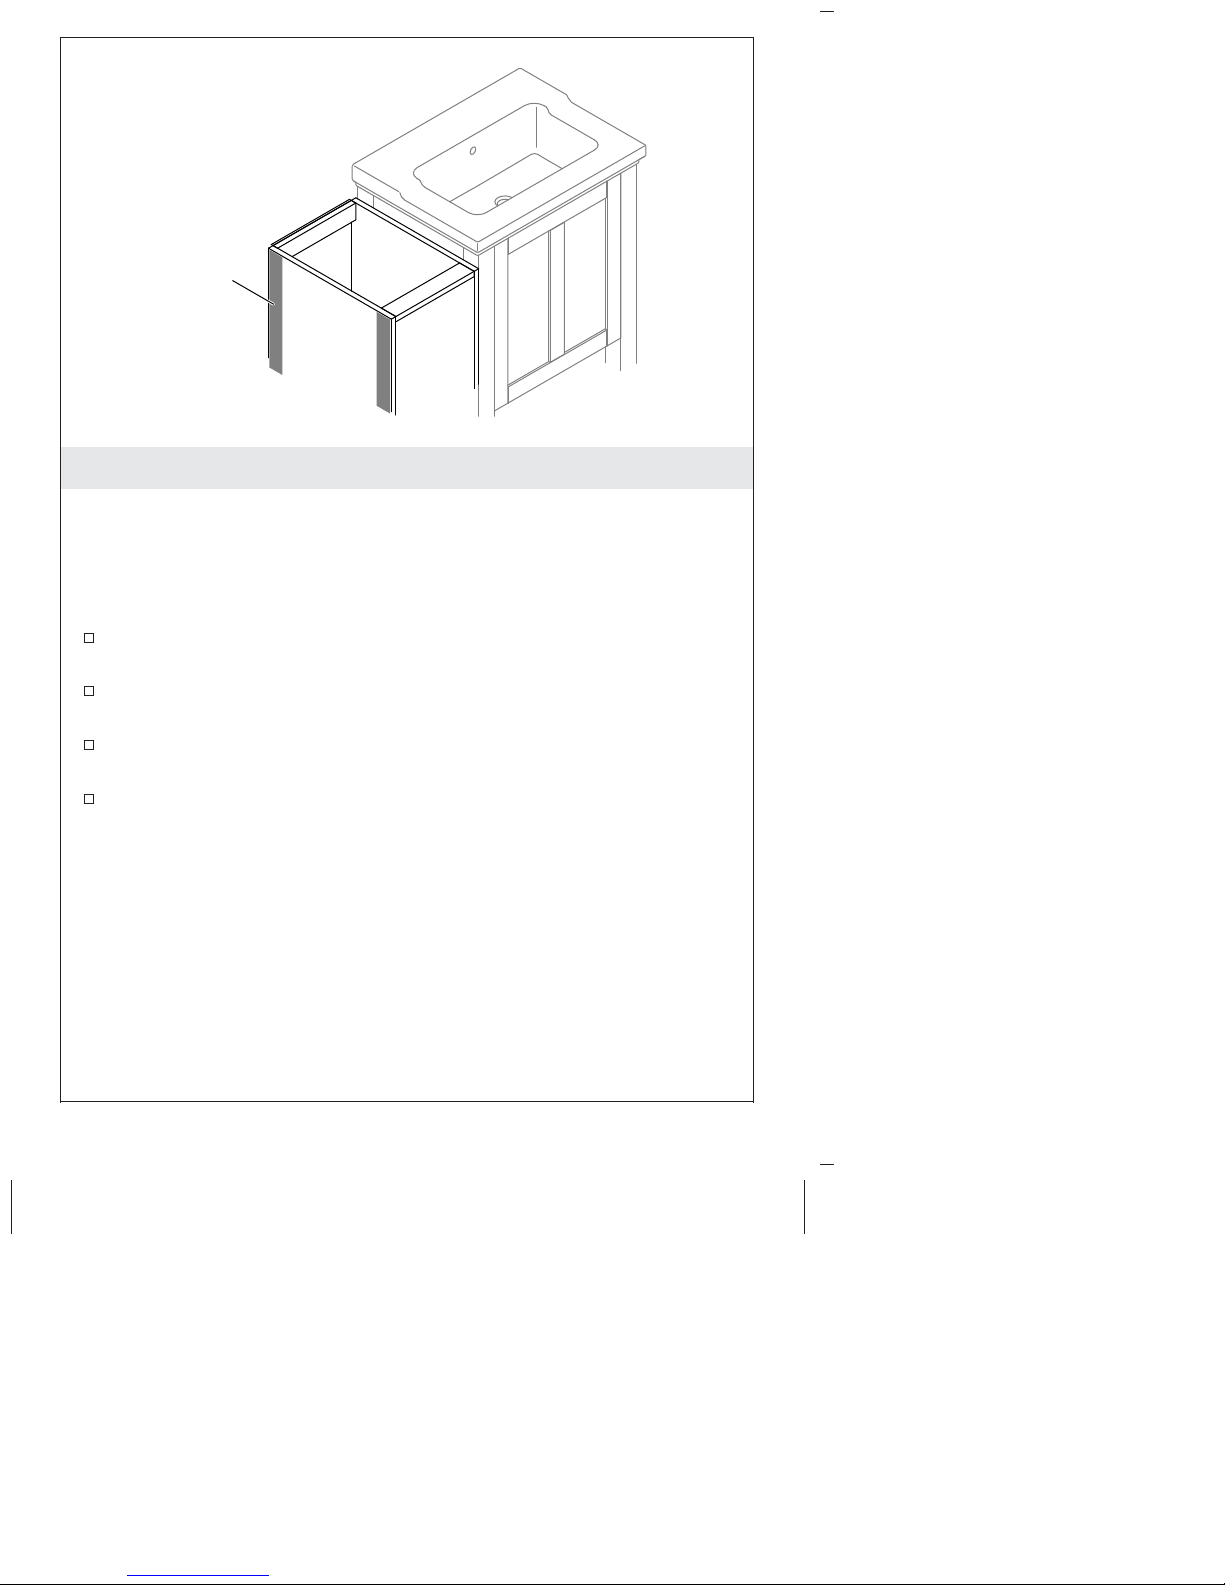
Spacer
2. Install Spacers (Double Vanity Installation)
NOTE: Attach spacers only for installation of the bridge between
two vanities.
IMPORTANT! Ensure the spacers do not extend past the top edge
of the bridge. Improper placement of spacers may interfere with the
installation of the stone top.
Remove the protective film from the adhesive strips on one of the
spacers.
Carefully position the spacer on the side of the bridge, flush with
the top and front edges.
Take a second spacer and position it on the side of the bridge,
flush with the top and back edges.
Flip the bridge over and repeat above for the other two spacers.
1207227-2-A 4 Kohler Co.
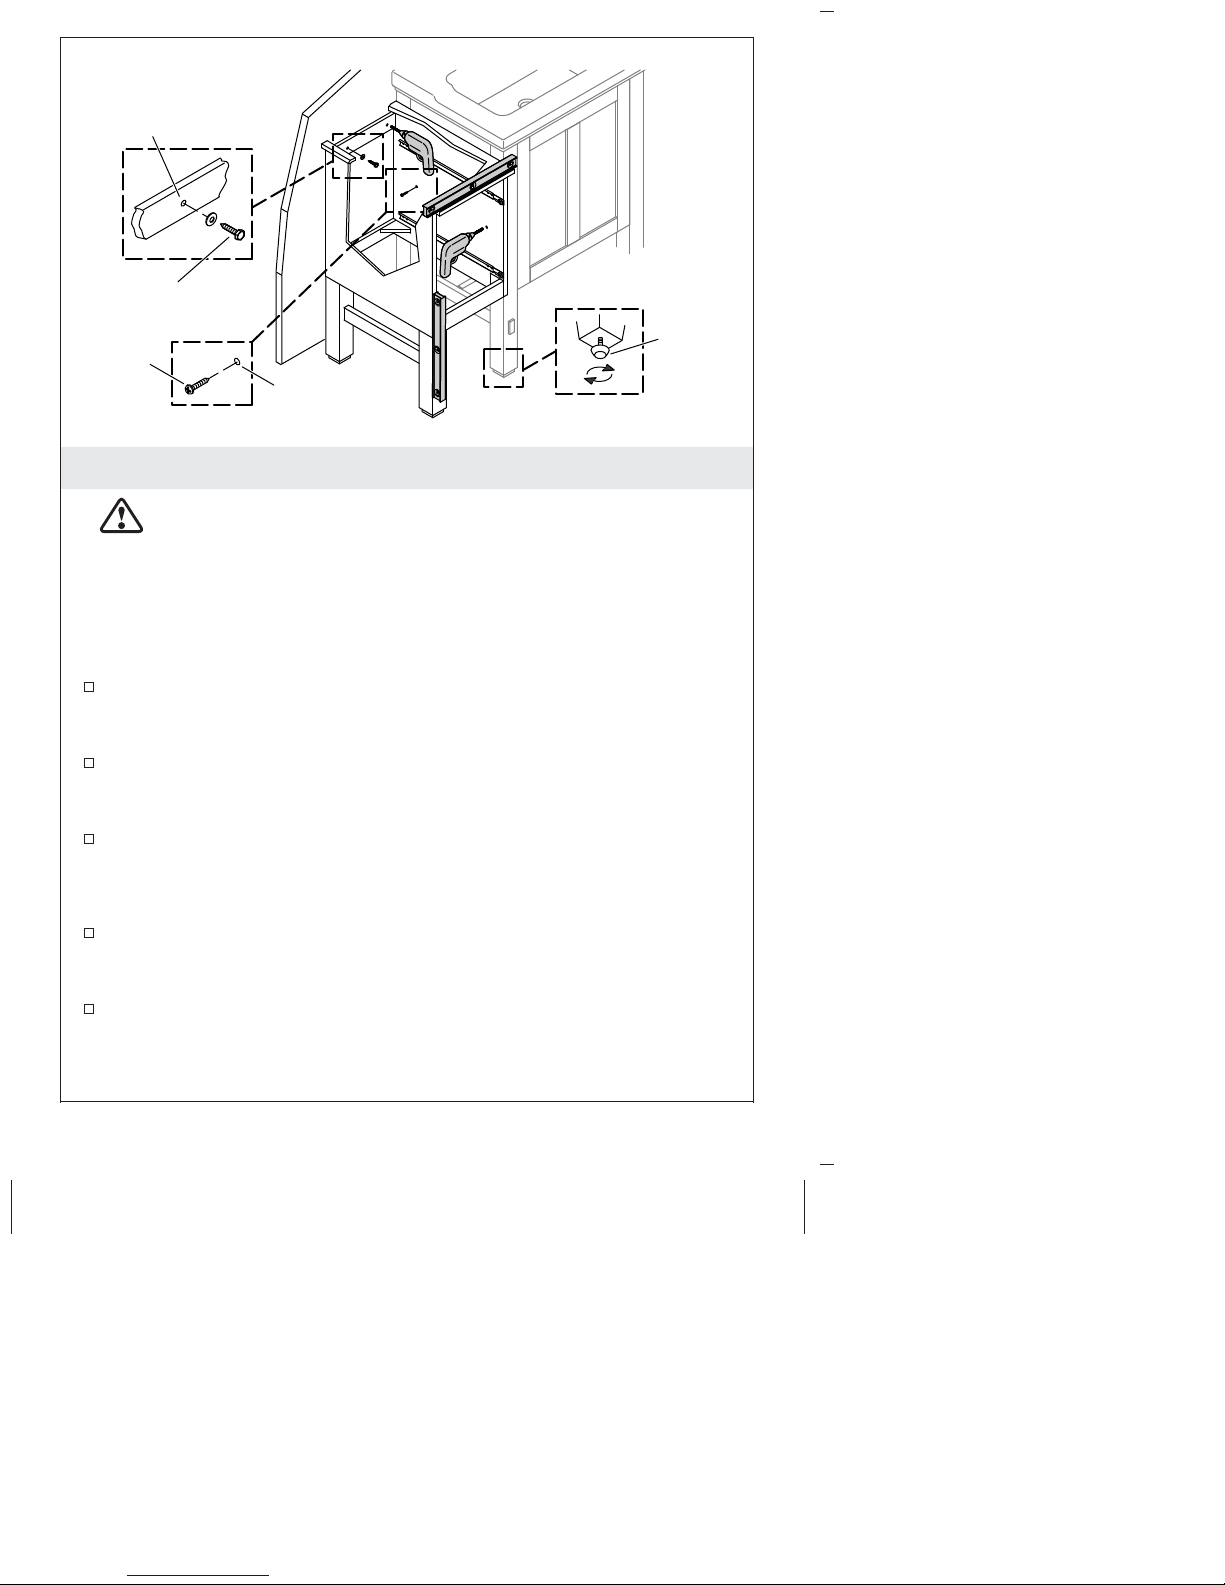
Pilot Hole
Lag Bolt
Screw
Pilot Hole
3. Secure the Cabinet
CAUTION: Risk of property damage. Use care when
moving the cabinet to avoid impacting, sliding, or
side-loading the legs.
NOTE: The K-2607 bridge cabinet is designed to be installed with
the K-2604 vanity and is not intended to be installed individually.
Read both product installation instructions before beginning. The
vanity should be installed before the bridge cabinet.
To properly secure the cabinet, 2x6 backing material must be
installed behind the finished wall. Refer to the K-2604 vanity
installation instructions for site preparation.
Use care to lift and place the cabinet in position against the
previously installed vanity and finished wall. Do not slide or
side-load the legs.
Verify the cabinet is level and flush against the vanity, and the
back rail is plumb against the wall. If necessary, turn the
leveler(s) to adjust the unit.
Leveler
Using a 1/4″ drill bit, drill two pilot holes through the back rail
and the finished wall. Verify the pilot holes are positioned to
ensure the lag bolts will engage the 2x6 backing material.
Using a 1/8″ drill bit, drill two pilot holes through the side of the
cabinet and into the vanity.
Kohler Co. 5 1207227-2-A

Secure the Cabinet (cont.)
Secure the bridge to the finished wall with two 5/16″ lag bolts
and washers (not provided).
Secure the bridge to the vanity using two #8 x 1-1/2″ panhead
screws (provided).
For Installation to Two Vanities
Install the second vanity according to the instructions packed
with the vanity. Ensure the vanity is flush against the bridge
before securing the vanity to the wall.
Using a 1/8″ drill bit, drill two pilot holes through the side of the
cabinet and into the second vanity.
Secure the cabinet to the vanity using two #8 x 1-1/2″ panhead
screws (provided).
1207227-2-A 6 Kohler Co.
Siliconized
Acrylic Caulk
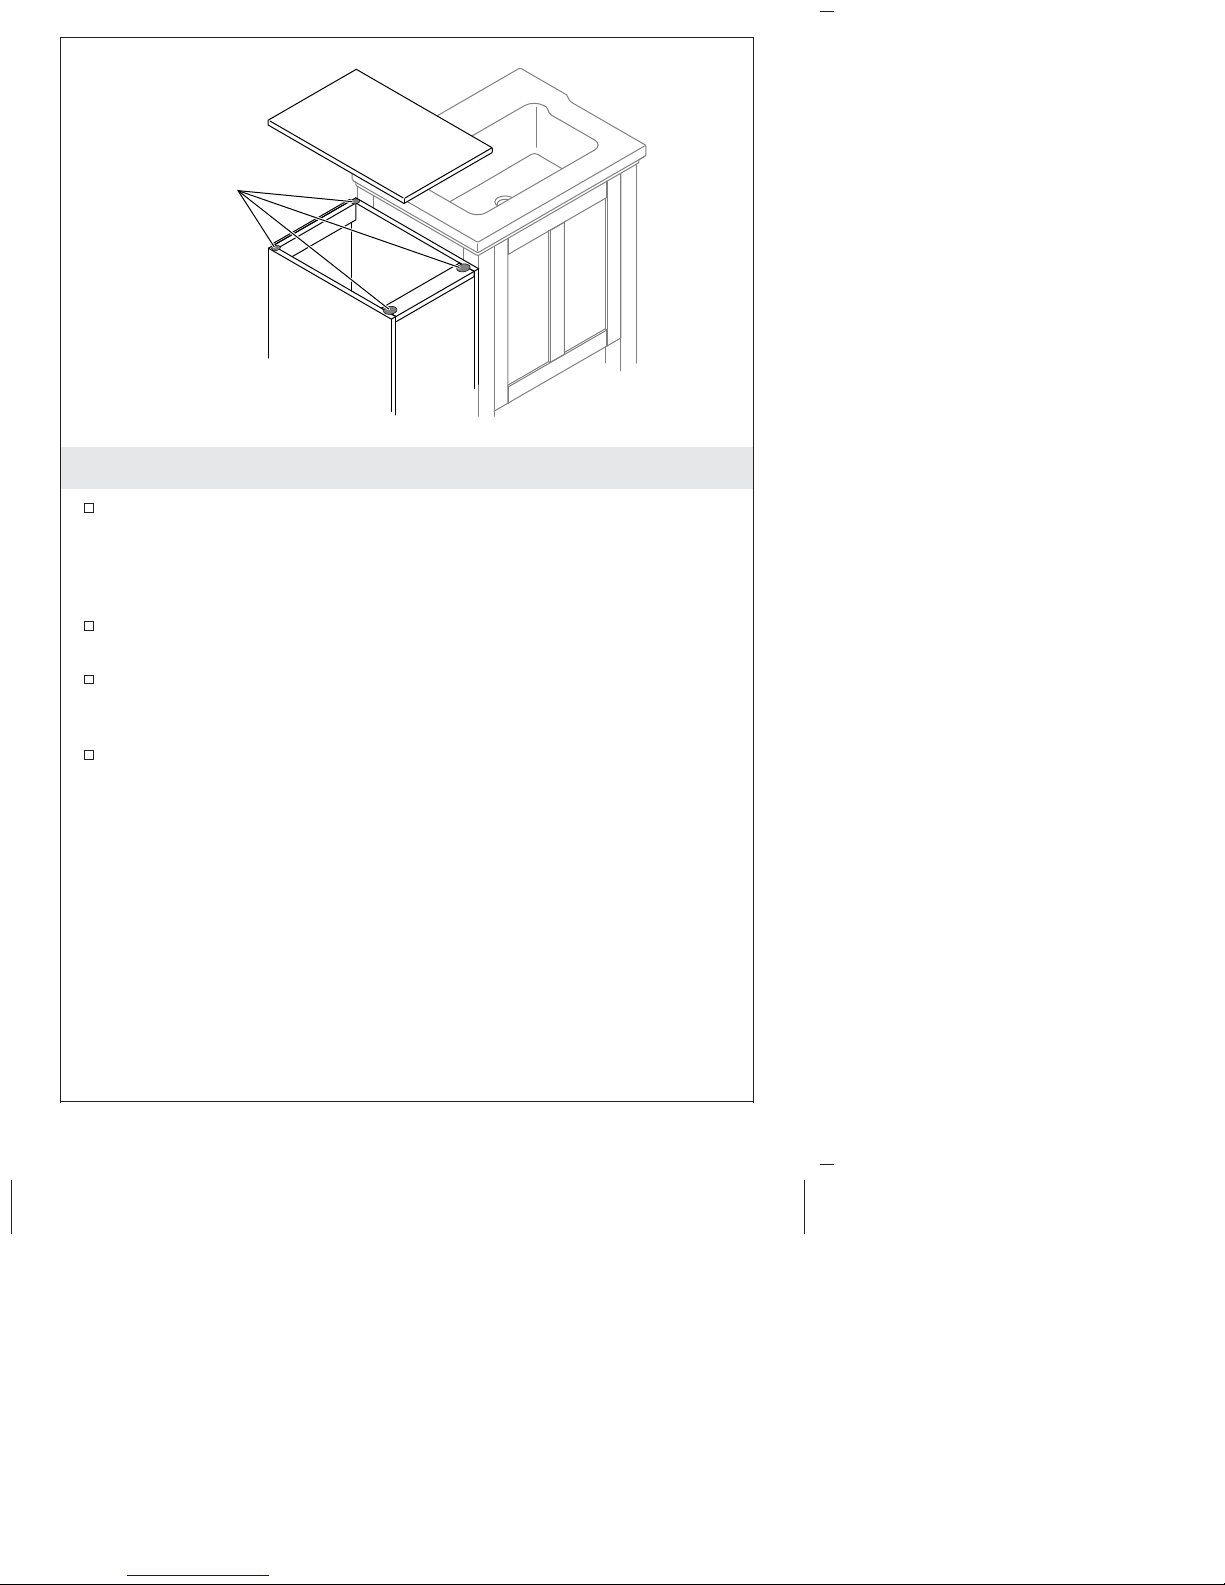
4. Install the Stone Top
Apply a 1/2″ (13 mm) bead of siliconized acrylic caulk in each
top corner of the bridge.
IMPORTANT! Ensure the finished side of the stone top is up when
installing.
Single Vanity Installations: Position the top so the back is flush
with the wall and the side is flush to the vanity; press into place.
Double Vanity Installations: Position the top so the back is flush
with the wall and the top is centered between the two vanities;
press into place.
Immediately wipe away any excess caulk.
Kohler Co. 7 1207227-2-A
Knob
Latch
Screw
Holes
Hook
Rail
Pin
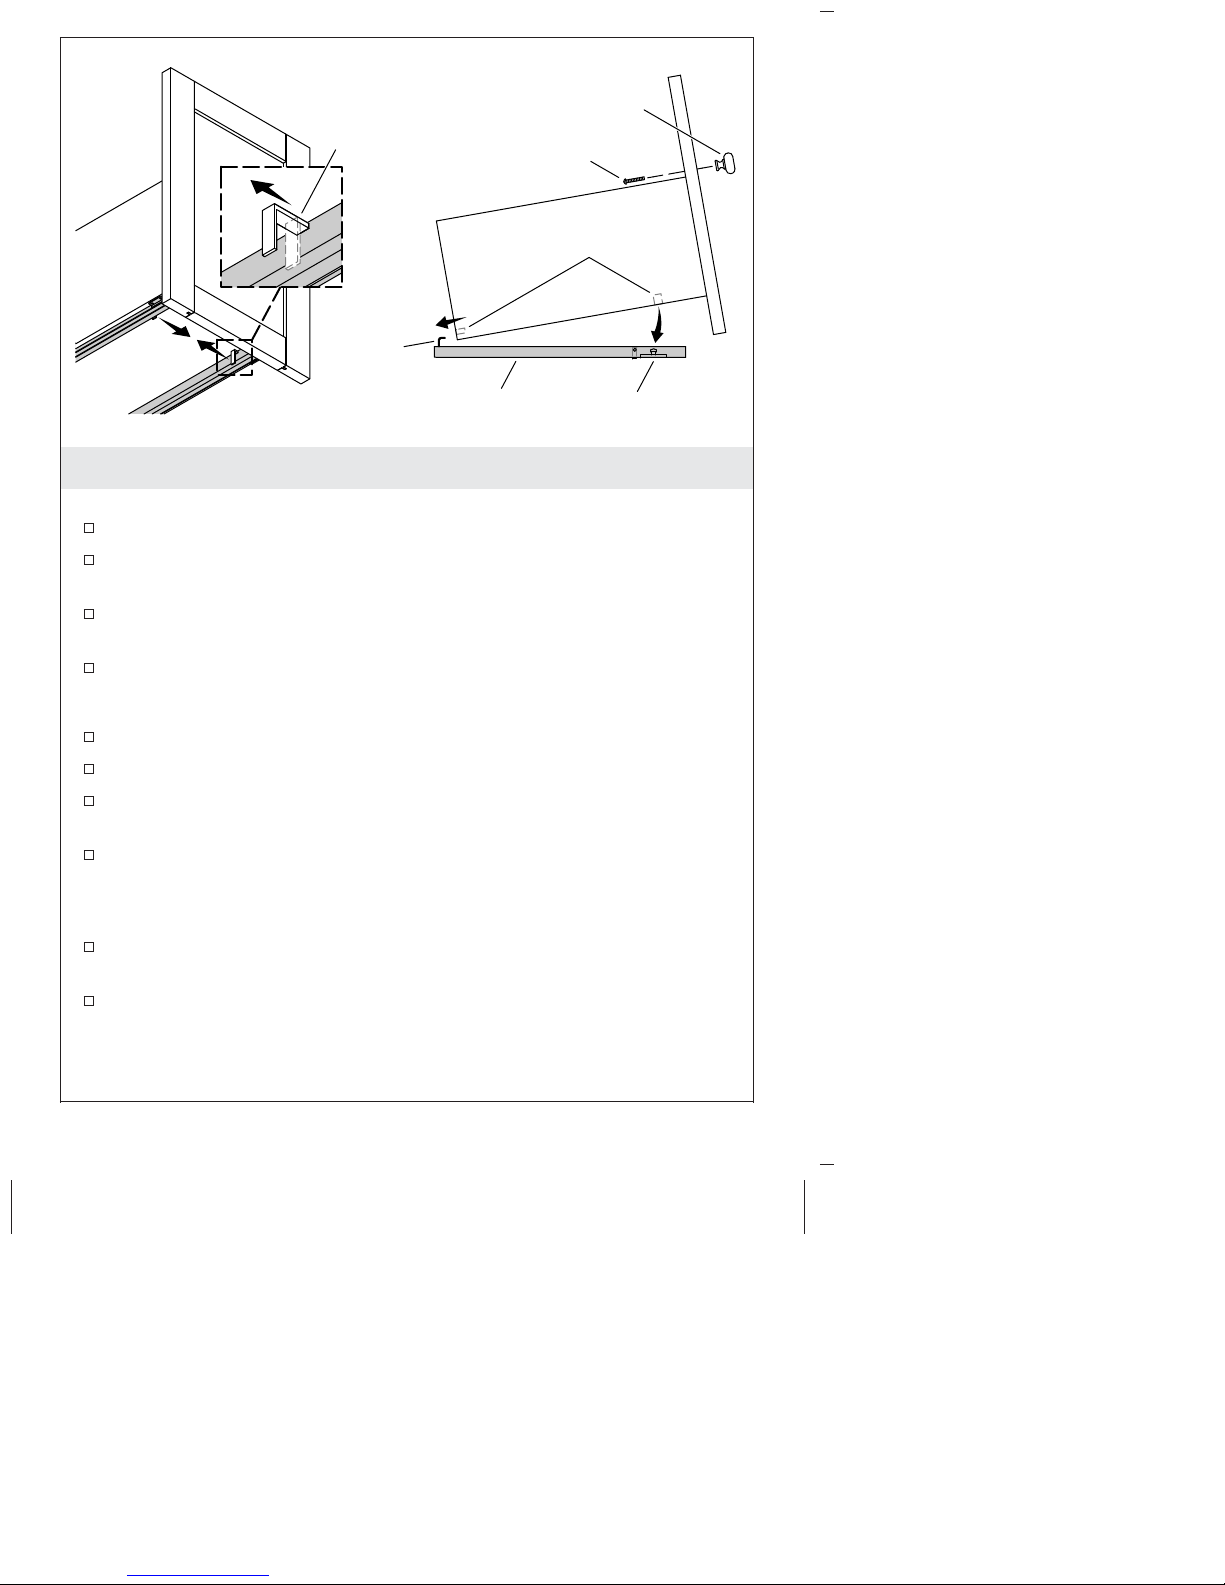
5. Remove/Reinstall the Drawer
Remove
Slide the drawer out until fully extended.
From underneath, pull the release latches toward the center of the
drawer.
Lift the front of the drawer and pull toward you to disengage
from the rails.
Once removed, lay the drawer on a flat, protective surface.
Reinstall
Fully extend the rails.
Align the holes in the back of the drawer with the rail hooks.
Rotate the drawer down onto the rails, engaging the front drawer
holes with the rail pins.
From underneath, push the release latches into the rails to secure
the drawer.
Install the Knob
From the inside of the drawer, insert the screw through the
predrilled hole.
Thread the knob onto the screw. Tighten securely.
1207227-2-A 8 Kohler Co.

Care and Cleaning
For best results, keep the following in mind when caring for your
KOHLER product:
Marble
NOTE: Application of a stone sealer will help make natural stone
surfaces less porous and more resistant to stains (stone sealer will
not make the surface stain proof).
•
Marble is a natural stone, thus its color and pattern can vary
greatly. Each marble surface has its own distinct characteristics.
This individuality makes each marble fixture a unique and
original addition to your home.
•
If a marble surface is given the proper care, it will retain its
beauty and durability. Without regular cleaning, dust particles can
settle on marble and can be ground into the surface and cause
damage. Wash marble regularly with fresh warm water and a
clean non-abrasive cloth. Add a neutral (ph balanced) cleaner to
help remove dirt and grime.
•
Avoid detergents that can be abrasive and contain chemicals high
in acid or alkaline. Petroleum (or oils such as animal fat) can
darken natural stone and leave a residue which, over time, can
build up and turn yellow. This buildup is difficult to remove.
•
Give marble the same attention you give to fine wood. Use
coasters under all drink containers. Wipe up stains immediately.
Do not allow heated items to come into contact with the marble
surface. To protect against scratches, use felt, leather, or cork
under all items placed on the marble surface.
Wood Surfaces
•
As with any smooth surface, avoid using abrasive cleaners as
they will scratch the surface. Wipe the wood surface regularly to
prevent buildup of soap and scum.
•
To protect against scratches, use felt, leather, or cork under all
items placed on the wood surface. To conceal scratches, a
touch-up marker is available for order. Contact a Kohler
distributor or call 1-800-4-KOHLER for ordering information.
•
Do not expose wood furniture to direct sunlight, drying heat
sources, or dampness.
Kohler Co. 9 1207227-2-A

Care and Cleaning (cont.)
•
Dust frequently with a soft cloth in the direction of the grain. Use
only products specifically made for cleaning wood. Avoid using
oily polishes or waxes, or products containing silicone. Blot spills
immediately with a soft, damp cloth.
•
Every six months, remove soil buildup by rubbing with a soft
cloth dampened in a 50/50 solution of warm water and an
ammonia-free detergent. Wipe clean with a cloth dampened in
warm water, then wipe dry.
For detailed cleaning information and products to consider, visit
www.kohler.com/clean. To order Care & Cleaning information, call
1-800-456-4537.
Warranty
ONE-YEAR LIMITED WARRANTY
KOHLER plumbing products are warranted to be free of defects in
material and workmanship for one year from date of installation.
Kohler Co. will, at its election, repair, replace or make appropriate
adjustment where Kohler Co. inspection discloses any such defects
occurring in normal usage within one (1) year after installation. Kohler
Co. is not responsible for removal or installation costs. Use of in-tank
toilet cleaners will void the warranty.
To obtain warranty service contact Kohler Co. either through your
Dealer, Plumbing Contractor, Home Center or E-tailer, or by writing
Kohler Co., Attn.: Customer Care Center, 444 Highland Drive, Kohler,
WI 53044, USA, or by calling 1-800-4-KOHLER (1-800-456-4537) from
within the USA and Canada, and 001-800-456-4537 from within Mexico,
or visit www.kohler.com within the USA, www.ca.kohler.com from
within Canada, or www.mx.kohler.com in Mexico.
IMPLIED WARRANTIES INCLUDING THAT OF
MERCHANTABILITY AND FITNESS FOR A PARTICULAR
PURPOSE ARE EXPRESSLY LIMITED IN DURATION TO THE
DURATION OF THIS WARRANTY. KOHLER CO. AND/OR
SELLER DISCLAIM ANY LIABILITY FOR SPECIAL, INCIDENTAL
OR CONSEQUENTIAL DAMAGES. Some states/provinces do not
allow limitations on how long an implied warranty lasts, or the
exclusion or limitation of special, incidental or consequential damages,
so these limitations and exclusions may not apply to you. This
warranty gives you specific legal rights. You may also have other
rights which vary from state/province to state/province.
This is Kohler Co.’s exclusive written warranty.
1207227-2-A 10 Kohler Co.
 Loading...