

Kohler K197744BN Installation Manual

Installation Guide
Single-Control Lavatory Faucet
K-19774
M product numbers are for Mexico (i.e. K-12345M)
Los números de productos seguidos de
M corresponden a México (Ej.
K-12345M)
Français, page ″Français-1″
Español, página ″Español-1″
1044534-2-B

Tools and Materials
Adjustable
Wrench
Plumbers
Putty
2.5 mm Hex
Wrench
Before You Begin
Observe all local plumbing and building codes.
Shut off the main water supply.
Inspect the supply tubing for damage. Replace as necessary.
If possible, install this faucet to the lavatory before installing the
lavatory.
Kohler Co. reserves the right to make revisions in the design of
faucets without notice, as specified in the Price Book.
1044534-2-B 2 Kohler Co.
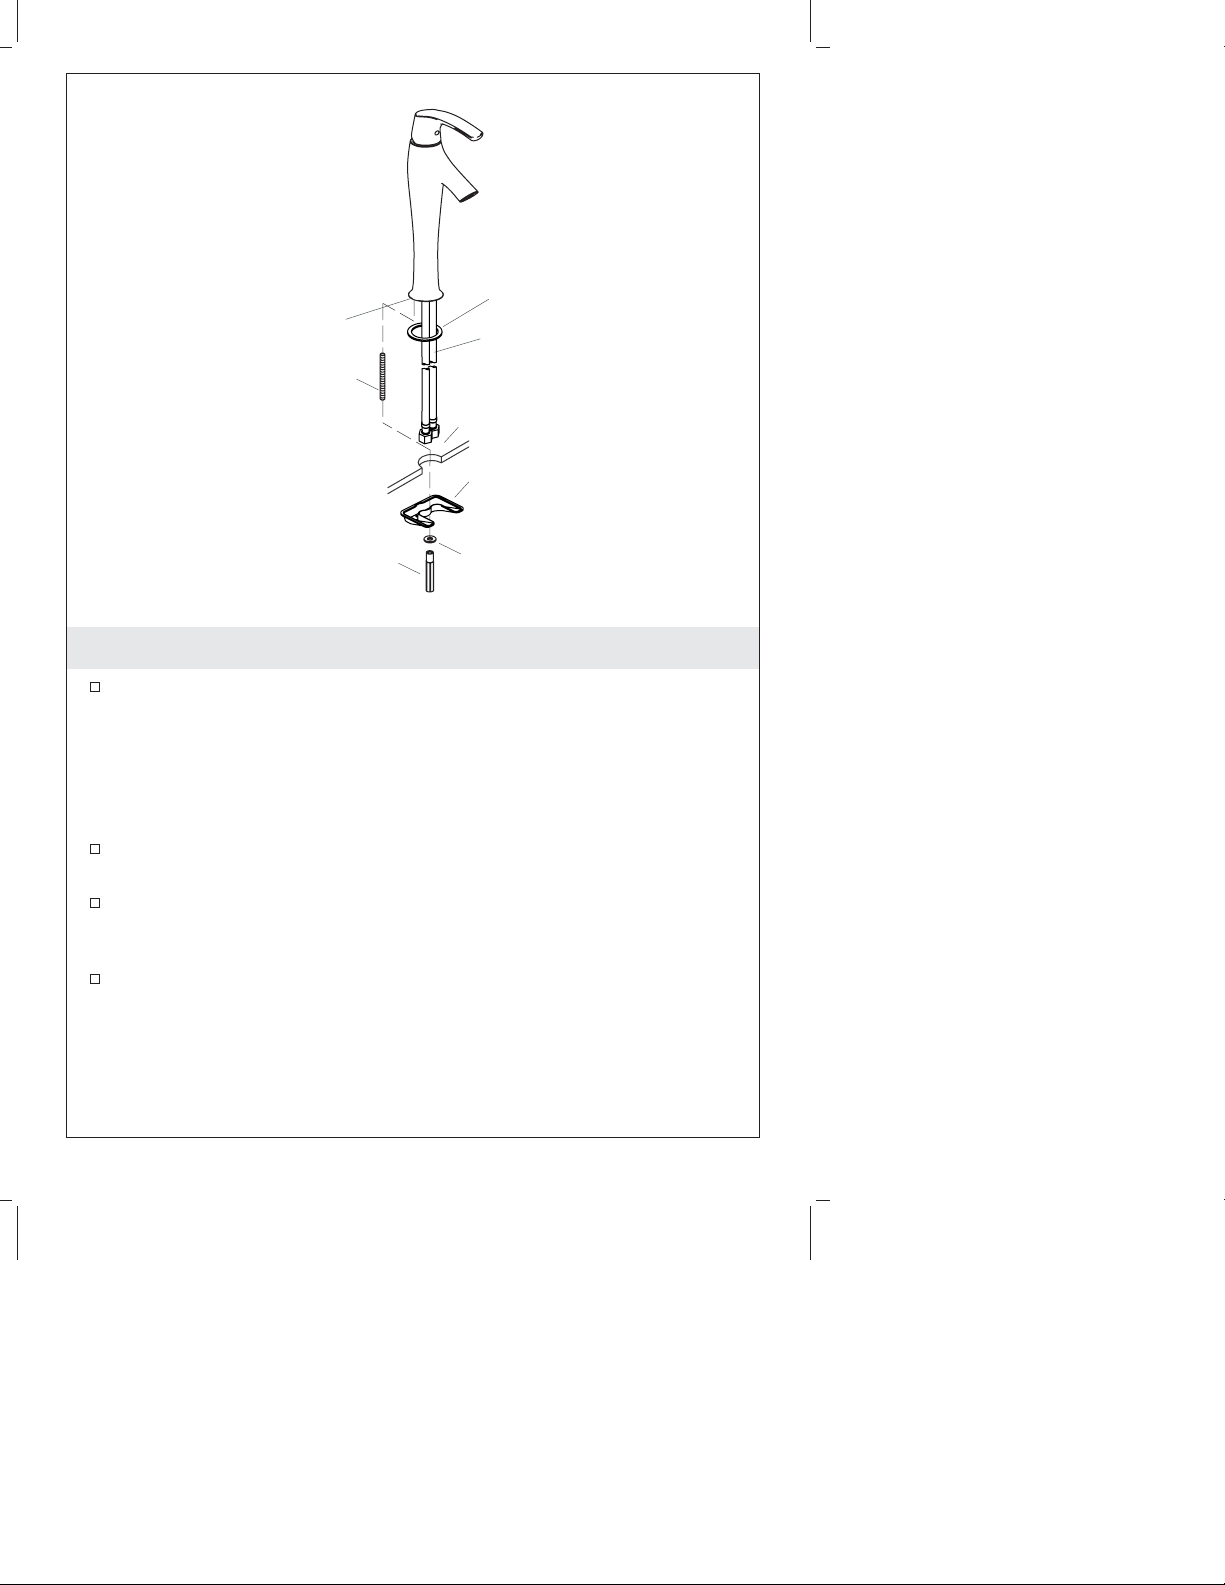
Rubber Washer
Apply plumbers putty.
Mounting Stud
Nut
Supply Inlet
Lavatory
Bracket
Washer
1. Install the Faucet
Thread the mounting studs into the holes in the bottom of the
faucet body.
NOTE: The base of the faucet may be attached to the lavatory using
either the supplied rubber washer or plumbers putty to form a
watertight seal. Do not attach the faucet to the lavatory using both
the rubber washer and plumbers putty.
For rubber washer attachment: Slide the washer over the supply
inlets and up to the faucet base.
For plumbers putty attachment: Apply the plumbers putty or
other sealant to the underside of the flange of the faucet base
according to the putty manufacturer’s instructions.
Feed the faucet supply inlets through the faucet hole of the
lavatory, then position the faucet. Slide the bracket and washer
over the stud and tighten the nut to secure.
Kohler Co. 3 1044534-2-B
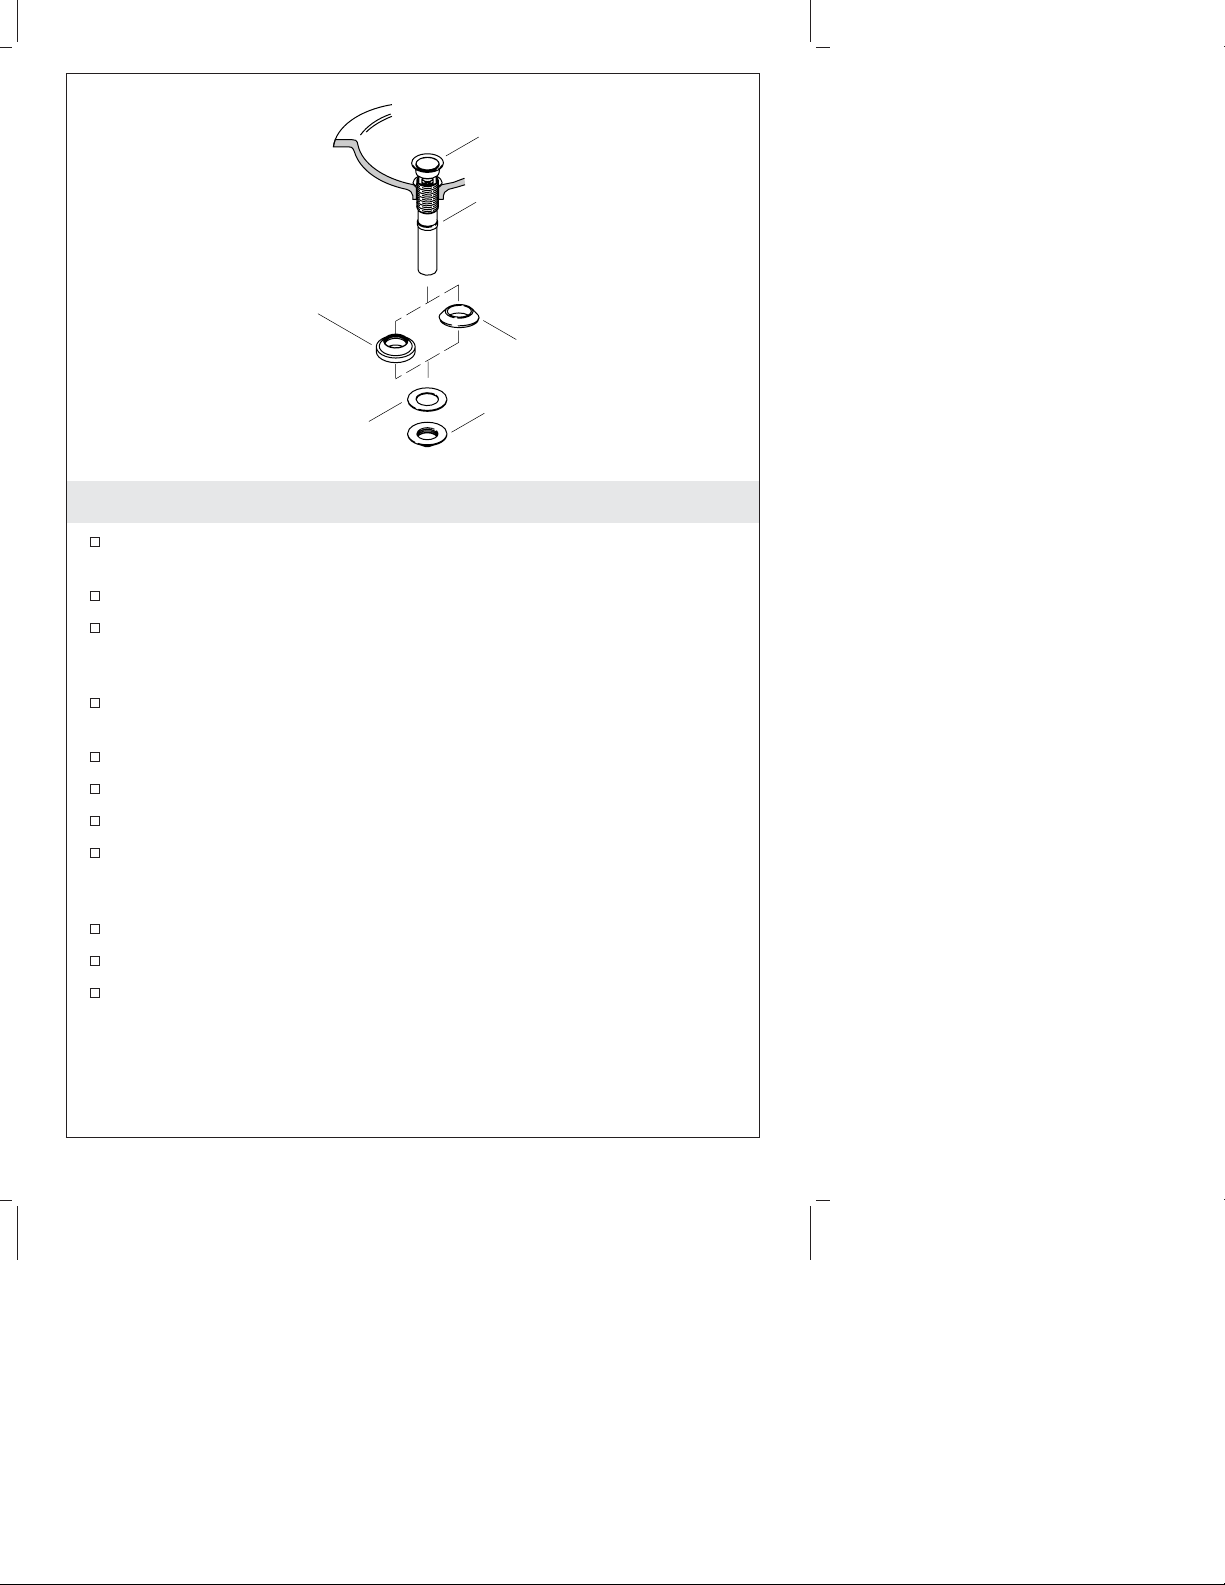
Flange
Drain Body
Thick Tapered Gasket
(for thin-walled vessel style
lavatory installations)
Tapered Gasket
Nut
Washer
2. Install the Drain
If present, remove the protective plastic cap from the drain and
discard.
Remove the nut, washer, and gasket from the drain body.
Apply a bead of plumbers putty or other sealant around the
underside of the flange according to the sealant manufacturer’s
instructions.
For drains with metal stoppers: Close the drain and rotate the
drain body until the logo is positioned horizontally.
Insert the drain into the drain hole and press into place.
Slide the gasket (tapered side up) onto the drain body.
Slide the washer over the threads on the drain body.
Thread the nut up the drain body until snug against the
underside of the lavatory. Use care not to rotate the drain while
tightening the nut.
Using a wrench, tighten the nut.
Remove any excess putty or sealant.
Connect the P-trap to the drain body.
1044534-2-B 4 Kohler Co.
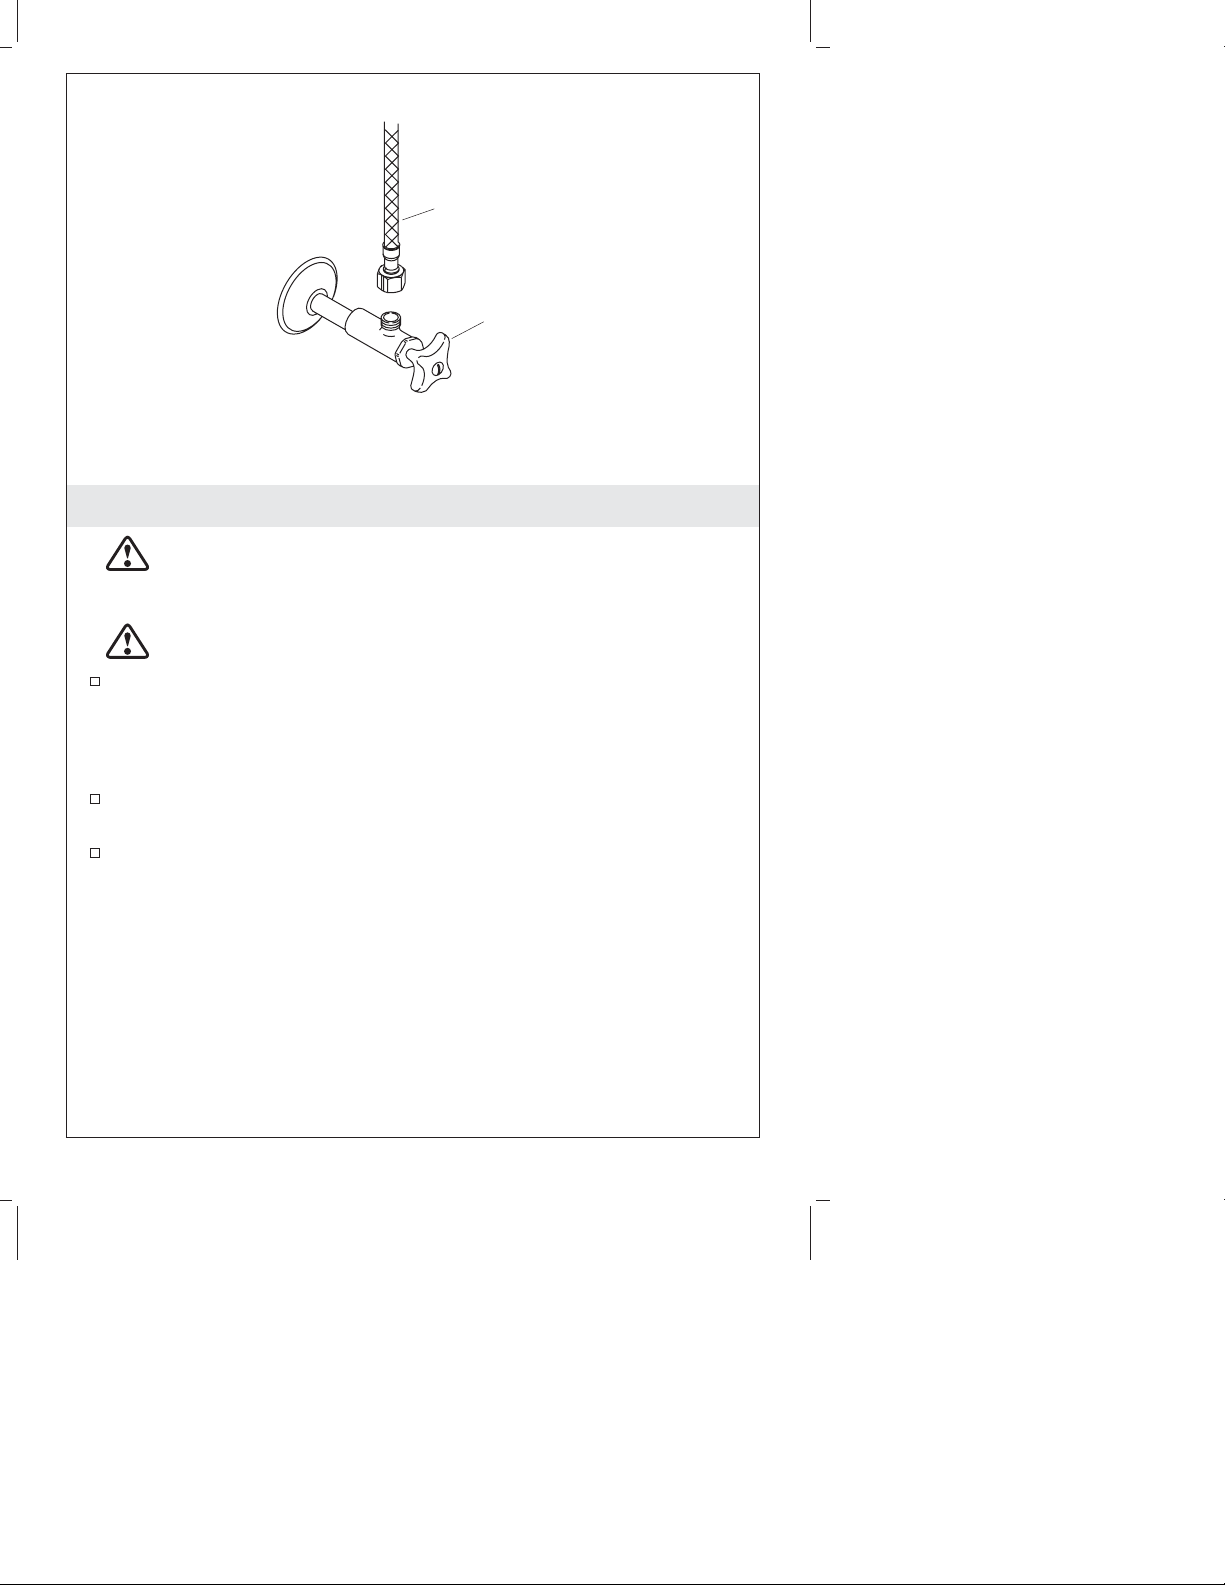
Supply
Hose
Supply
Stop
3. Connect the Supplies
CAUTION: Risk of restricted water flow and product
damage. Use extreme care when bending the supplies to
avoid kinking.
CAUTION: Risk of product damage. Do not overtighten the
connections.
If the lavatory is not installed, install it at this time. Follow the
lavatory manufacturer’s instructions.
NOTE: Connect the supply hose marked with a blue dot to the cold
supply.
Connect the supply hoses to the supply stops. Left is hot. Right is
cold.
Tighten the connections with an adjustable wrench.
Kohler Co. 5 1044534-2-B
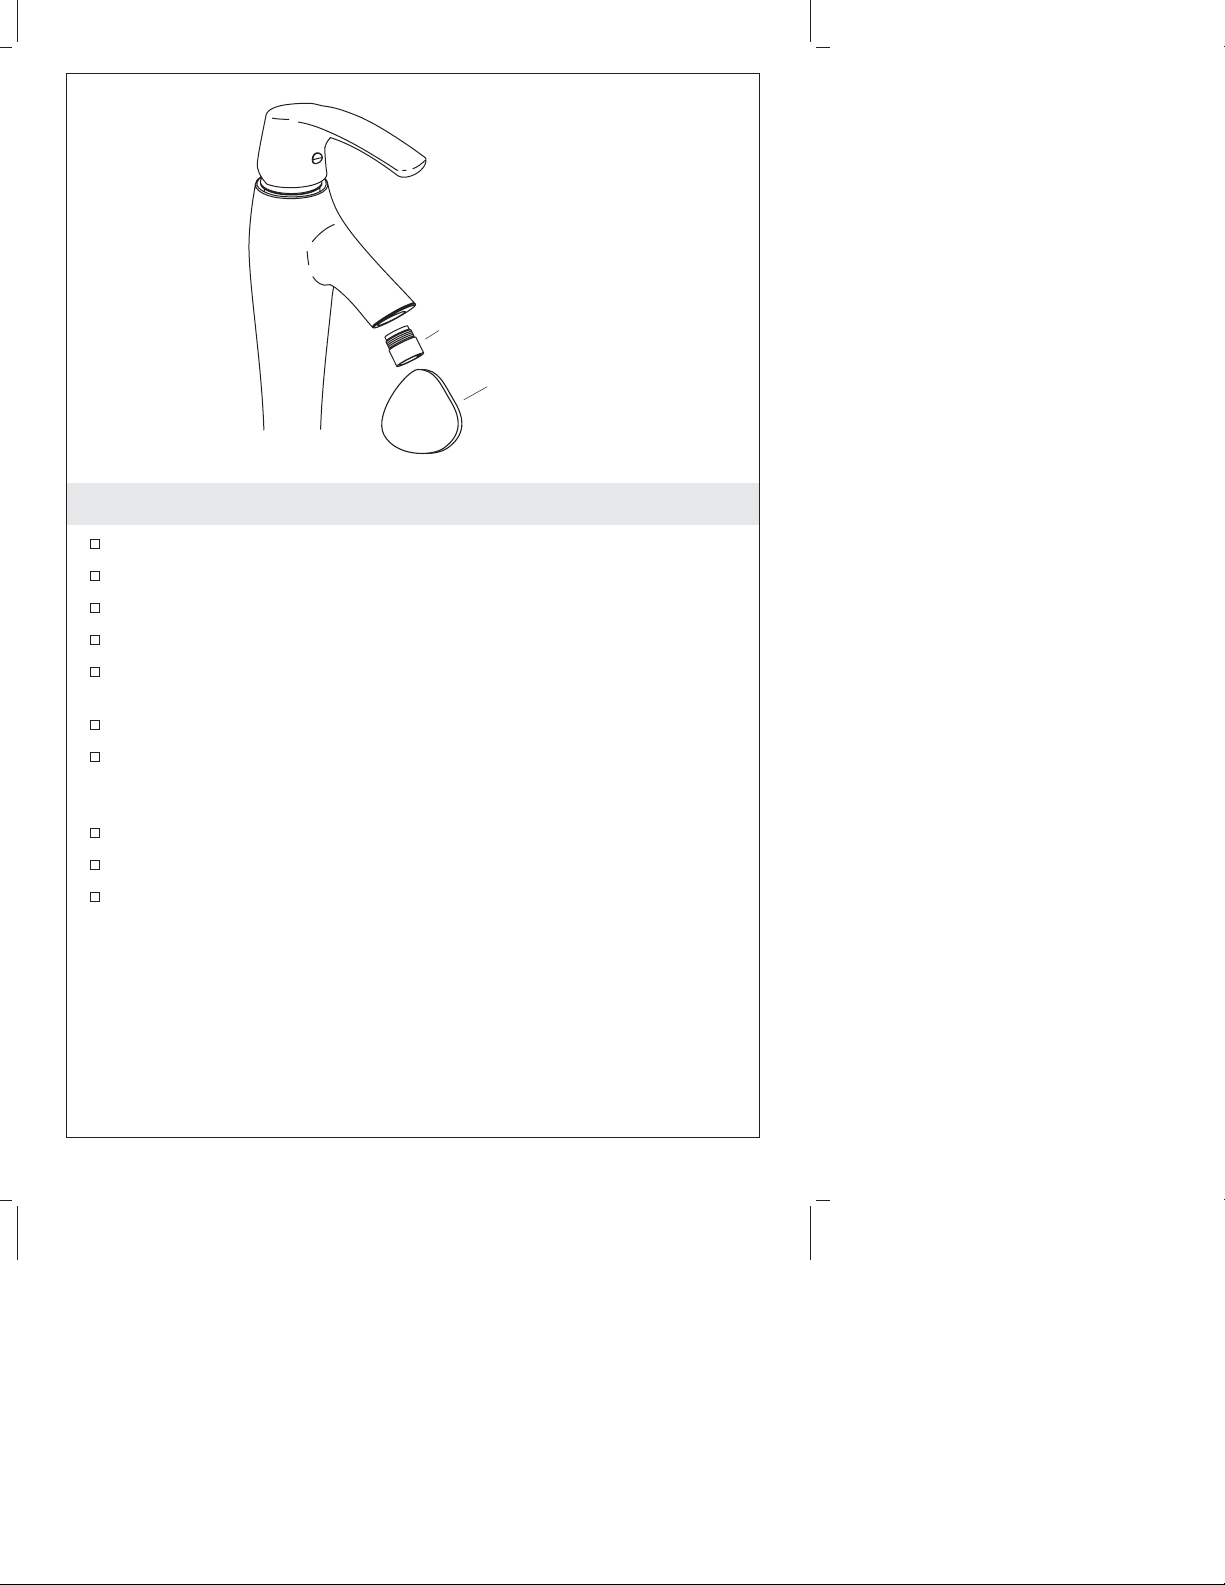
Aerator
Aerator Removal Tool
4. Installation Checkout
Connect the drain tailpiece into the P-trap.
Ensure all connections are tight.
Using the tool provided, remove the aerator.
Open the drain.
Turn on the main water supply and check for leaks. Repair as
needed.
Lift the lever handle to turn on the faucet.
Rotate the handle to the full hot position, then full cold. Allow
the water to run for approximately one minute to remove any
debris.
Check all connections for leaks and repair as needed.
Push the lever handle down to turn off the faucet.
Reinstall the aerator.
1044534-2-B 6 Kohler Co.
 Loading...