

Page 1

Installation Guide
Self-Rimming/Above-Counter Lavatory
K-2804, K-14225
M product numbers are for Mexico (i.e. K-12345M)
Los números de productos seguidos de
M corresponden a México (Ej.
K-12345M)
Français, page “Français-1”
Español, página “Español-1”
1018375-2-A
Page 2
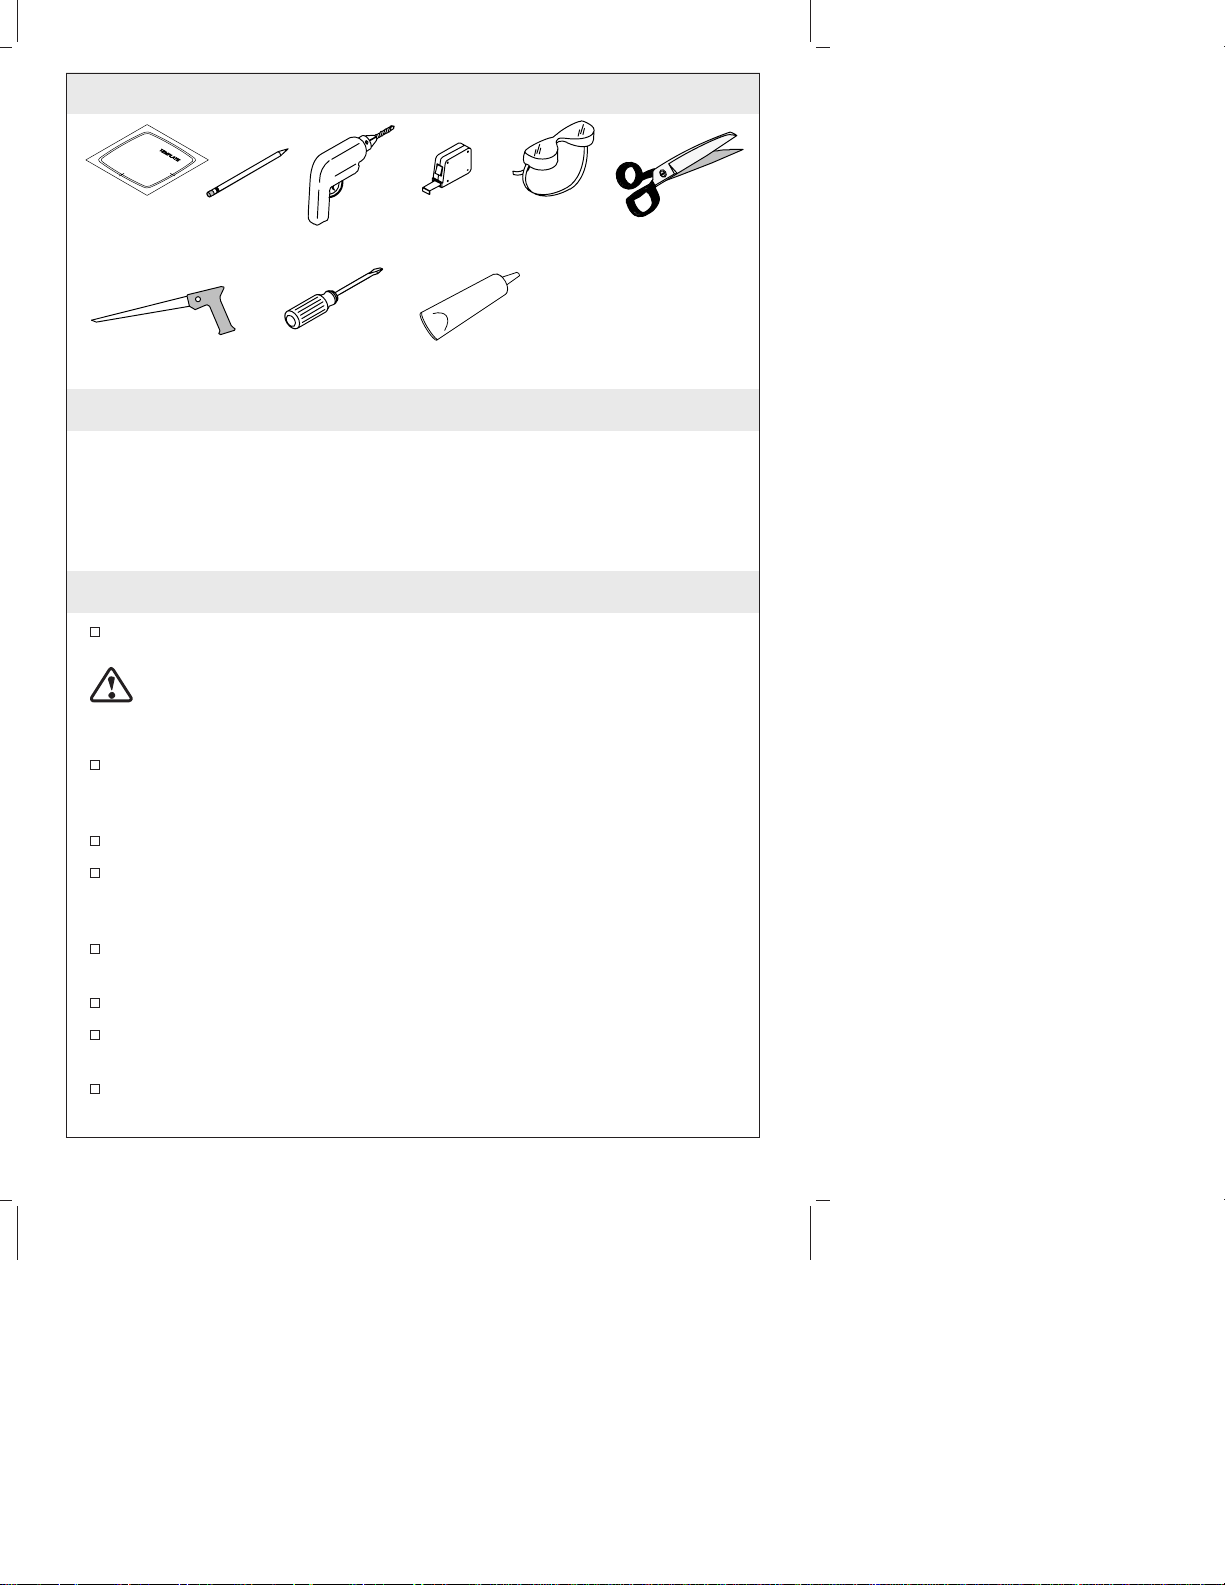
Tools and Materials
Template
(supplied)
Keyhole Saw
Pencil
Screwdriver
Drill
Tape
Measure
Sealant
Safety
Glasses
Plus:
1/2" drill bit
Safety Shoes
Scissors
Thank You For Choosing Kohler Company
We appreciate your commitment to Kohler quality. Please take a few
minutes to review this manual before you start installation. If you
encounter any installation or performance problems, please don’t
hesitate to contact us. Our phone numbers and website are listed on
the back cover. Thanks again for choosing Kohler Company.
Before You Begin
Observe all local plumbing and building codes.
CAUTION: Risk of personal injury or product damage. Cast
iron lavatories are very heavy. Get help lifting the lavatory into
place.
Prior to installation, unpack the new lavatory and inspect it for
damage. Return the lavatory to its protective carton until you are
ready to install it.
Inspect the drain and supply tubing. Replace if necessary.
These instructions are for installing the lavatory to wood frame
construction. For other installations, supply suitable bracing and
fastening devices of sufficient size and strength.
Do not substitute another sealant if one is supplied with this
lavatory.
Use the template supplied with the lavatory.
For replacement installations, make sure the existing cutout is the
same size or smaller than needed for the new lavatory.
Refer to the roughing-in information to ensure proper installation
for ADA applications.
1018375-2-A 2 Kohler Co.
Page 3
Before You Begin (cont.)
Use these instructions for wall-mount, self-rimming and above
counter installations. Follow only the instructions that apply to
your installation.
You can choose between a wall-mount or countertop faucet
installation, depending upon the setting and styling you desire. A
wall-mount faucet is recommended.
1. Preparation
Install the water supplies and drain piping according to the
roughing-in information.
Wall-Mount Bracket Installations
Install the lavatory according to the instructions packed with the
bracket.
Self-Rimming Installations
Determine the faucet centerline location. Consider the faucet and
handle escutcheon diameters, the length of the spout, and the
clearance between the spout and the lavatory rim.
Calculate the faucet centerline measurement by first dividing the
escutcheon diameter by 2, and then add 1/4″ (6mm) to the result.
If necessary, round the calculation up to the nearest 1/16″ (2mm).
Carefully draw the calculated faucet centerline on the cut-out
template. Choose the most suitable location based upon the
following factors:
•
compliance with all local plumbing codes
•
minimum 2″ (5.1cm) distance from the water stream to the
lavatory rim edge. This is important to ensure adequate clearance
for hand washing
•
a minimum 1/4″ (6mm) distance between the faucet spout and
the lavatory rim
Redraw the faucet centerline as needed to meet these
requirements.
Draw a line on the cut-out template a minimum of 2″ (5.1cm)
behind the final faucet centerline. This is the minimum
backsplash locator line.
Kohler Co. 3 1018375-2-A
Page 4
Preparation (cont.)
NOTE: Some Kohler faucets require a minimum of 2-1/2″ (6.4cm)
behind the final faucet centerline.
Cut along the backsplash locator line on the template.
Cut out the template along the inside of the template cut-out line
labeled ″Self-Rimming Cut-Out″.
Position the template on the countertop to ensure clearance
between the lavatory, faucet, and backsplash.
Verify cabinet clearance beneath the countertop.
Use a pencil to trace the template on the countertop.
Check the clearance between the lavatory, faucet, backsplash, and
cabinet. Adjust the traced cut-out line accordingly.
Mark the faucet and handle centerline on the countertop.
Above-Counter Installation
Cut out the template along the inside of the template cut-out line
labeled ″Above-Counter Cut-Out″.
Position the template on the countertop.
For Wall-Mount Faucets: Provide sufficient spout overhang into
the lavatory basin. The faucet spout length must be at least 5″
(12.7cm) to provide proper performance.
For Countertop Faucets: Pay special attention to the spout and
handle fit clearance when locating the faucet. Use the template to
locate the faucet spout hole centerline on the countertop. This
centerline is recommended to provide adequate clearance
between the edge of the lavatory and the spout.
Check for adequate clearance between the backsplash, faucet
spout and handles, and lavatory. Kohler Co. recommends a
clearance of at least 1″ (2.5cm). See illustration.
Refer to the faucet installation instructions for required clearance,
and mark the preferred faucet hole locations using a soft lead
pencil.
Trace the template on the countertop.
1018375-2-A 4 Kohler Co.
Page 5
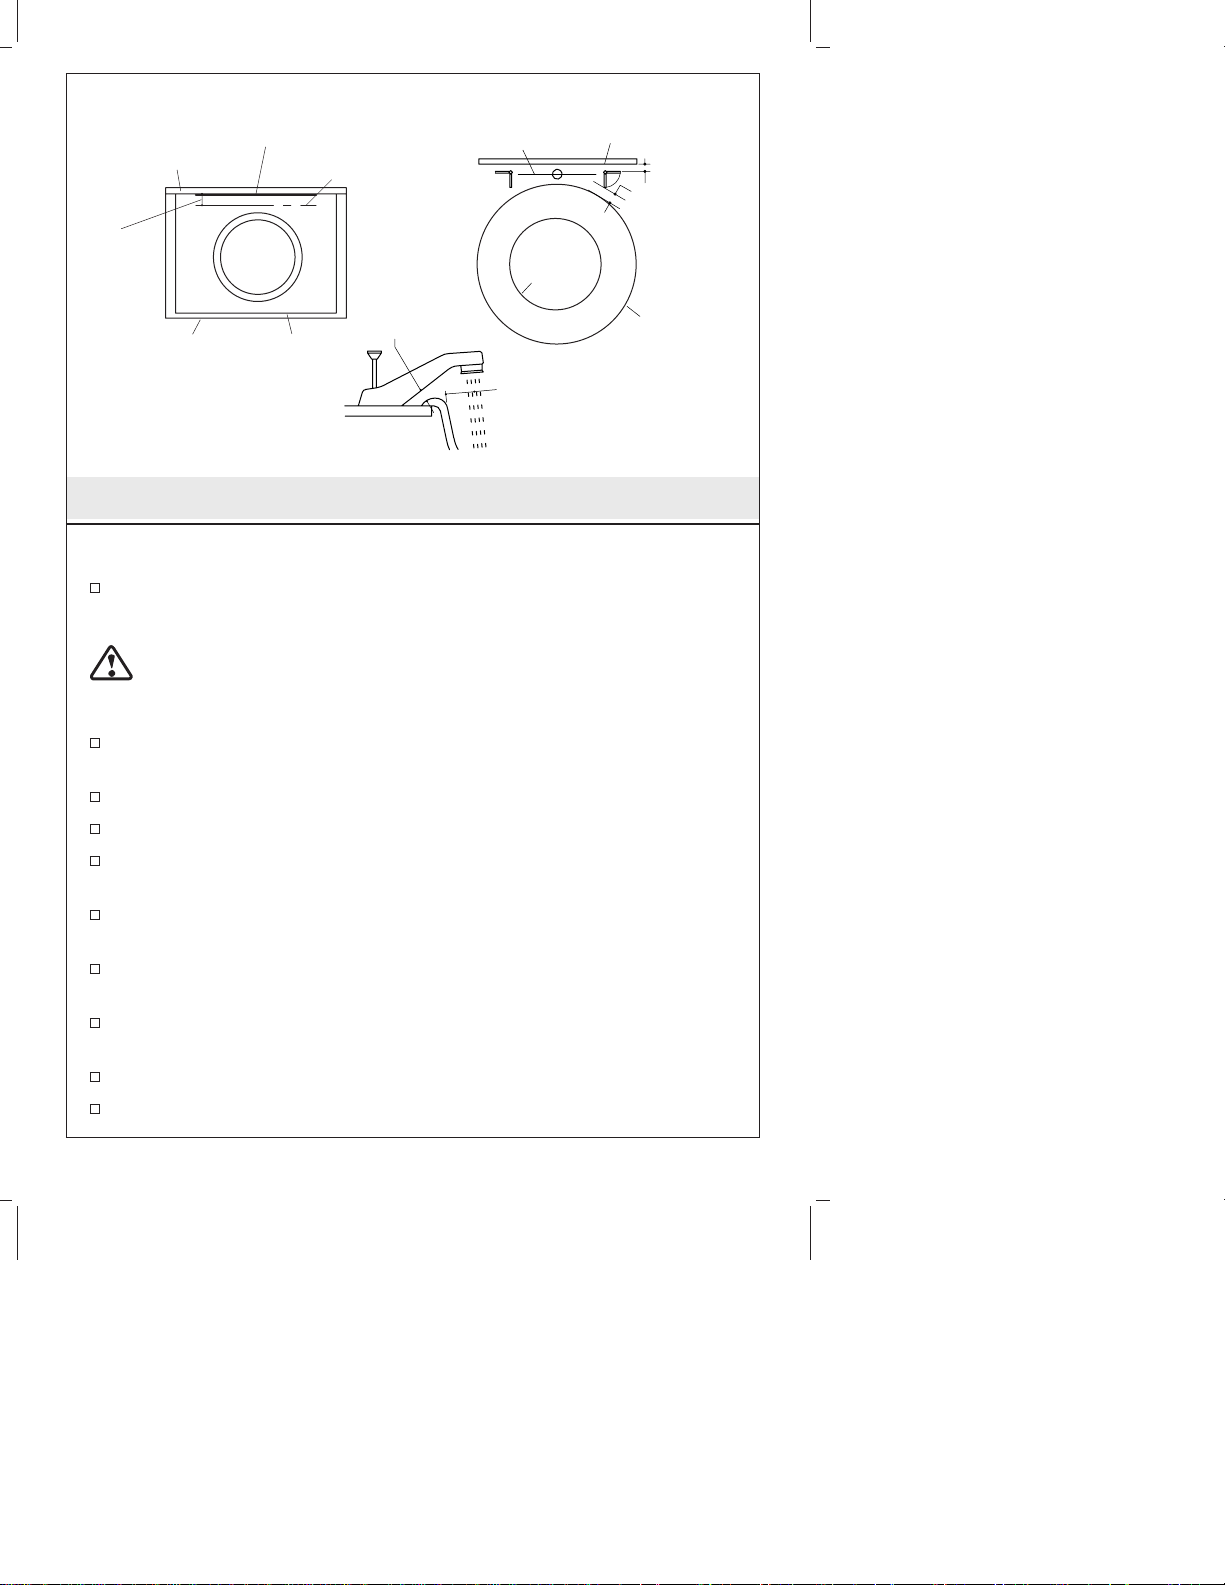
Spout
Centerline
Cut-out
Line
2" (5cm)
Min.
Backsplash
Countertop
Backsplash
2" (5cm)
Min.
Countertop
Backsplash
Locator Line
Cut-Out
Template
Faucet
Centerline
1/4"
(6mm)
Min.
2. Install the Lavatory
Self-Rimming Installations
Cut out the opening by carefully following the pencil line traced
from the template.
CAUTION: Risk of personal injury or product damage. Cast
iron lavatories are very heavy. Get help lifting the lavatory into
place.
1" (2.5cm)
Minimum
Clearance
Outside
Edge of
Lavatory
Temporarily position the lavatory in the countertop cutout so the
“Kohler” logo is to the back. Adjust to fit.
Remove the lavatory.
Drill the faucet holes.
Install the faucet and drain according to the manufacturer’s
instructions.
Clean the countertop, and carefully position the lavatory in the
countertop opening so the “Kohler” logo is to the back.
Apply a thin, continuous bead of sealant around the lavatory
edges.
Immediately wipe away any excess sealant, and fill any voids as
needed.
Verify that the lavatory has not moved out of position.
Allow the sealant to cure at least 30 minutes before proceeding.
Kohler Co. 5 1018375-2-A
Page 6

Install the Lavatory (cont.)
Connect and tighten the trap to the drain, and complete the water
supply connections to the faucet according to the instructions
packed with the faucet.
Run water into the lavatory and check for leaks.
Clean up with a non-abrasive cleaner.
Above-Counter Installations
Cut out the opening by carefully following the pencil line traced
from the template.
CAUTION: Risk of personal injury or product damage. Cast
iron lavatories are very heavy. Get help lifting the lavatory into
place.
Temporarily position the lavatory in the countertop cutout so the
“Kohler” logo is to the back.
Inspect for proper fit.
Remove the lavatory.
Drill the faucet holes.
Install the faucet to the countertop according to the
manufacturer’s instructions.
Install the drain to the lavatory according to the drain installation
instructions.
Apply a 1/8″ (3mm) bead of sealant around the countertop
cut-out hole. Apply sealant about 1/4″ (6mm) away from the
cut-out hole edge.
Carefully position the lavatory in the countertop cutout so the
“Kohler” logo is to the back.
Use care to avoid smearing the sealant bead. Wipe away any
excess sealant with a clean cloth. Fill any voids as needed.
Allow the sealant to cure for at least 30 minutes before
proceeding.
Connect and tighten the trap to the drain, and complete the water
supply connections to the faucet according to the instructions
packed with the faucet.
Run water into the lavatory and check for leaks.
Clean up with a non-abrasive cleaner.
1018375-2-A 6 Kohler Co.
Page 7
Guide d’Installation
Lavabo Sur Comptoir
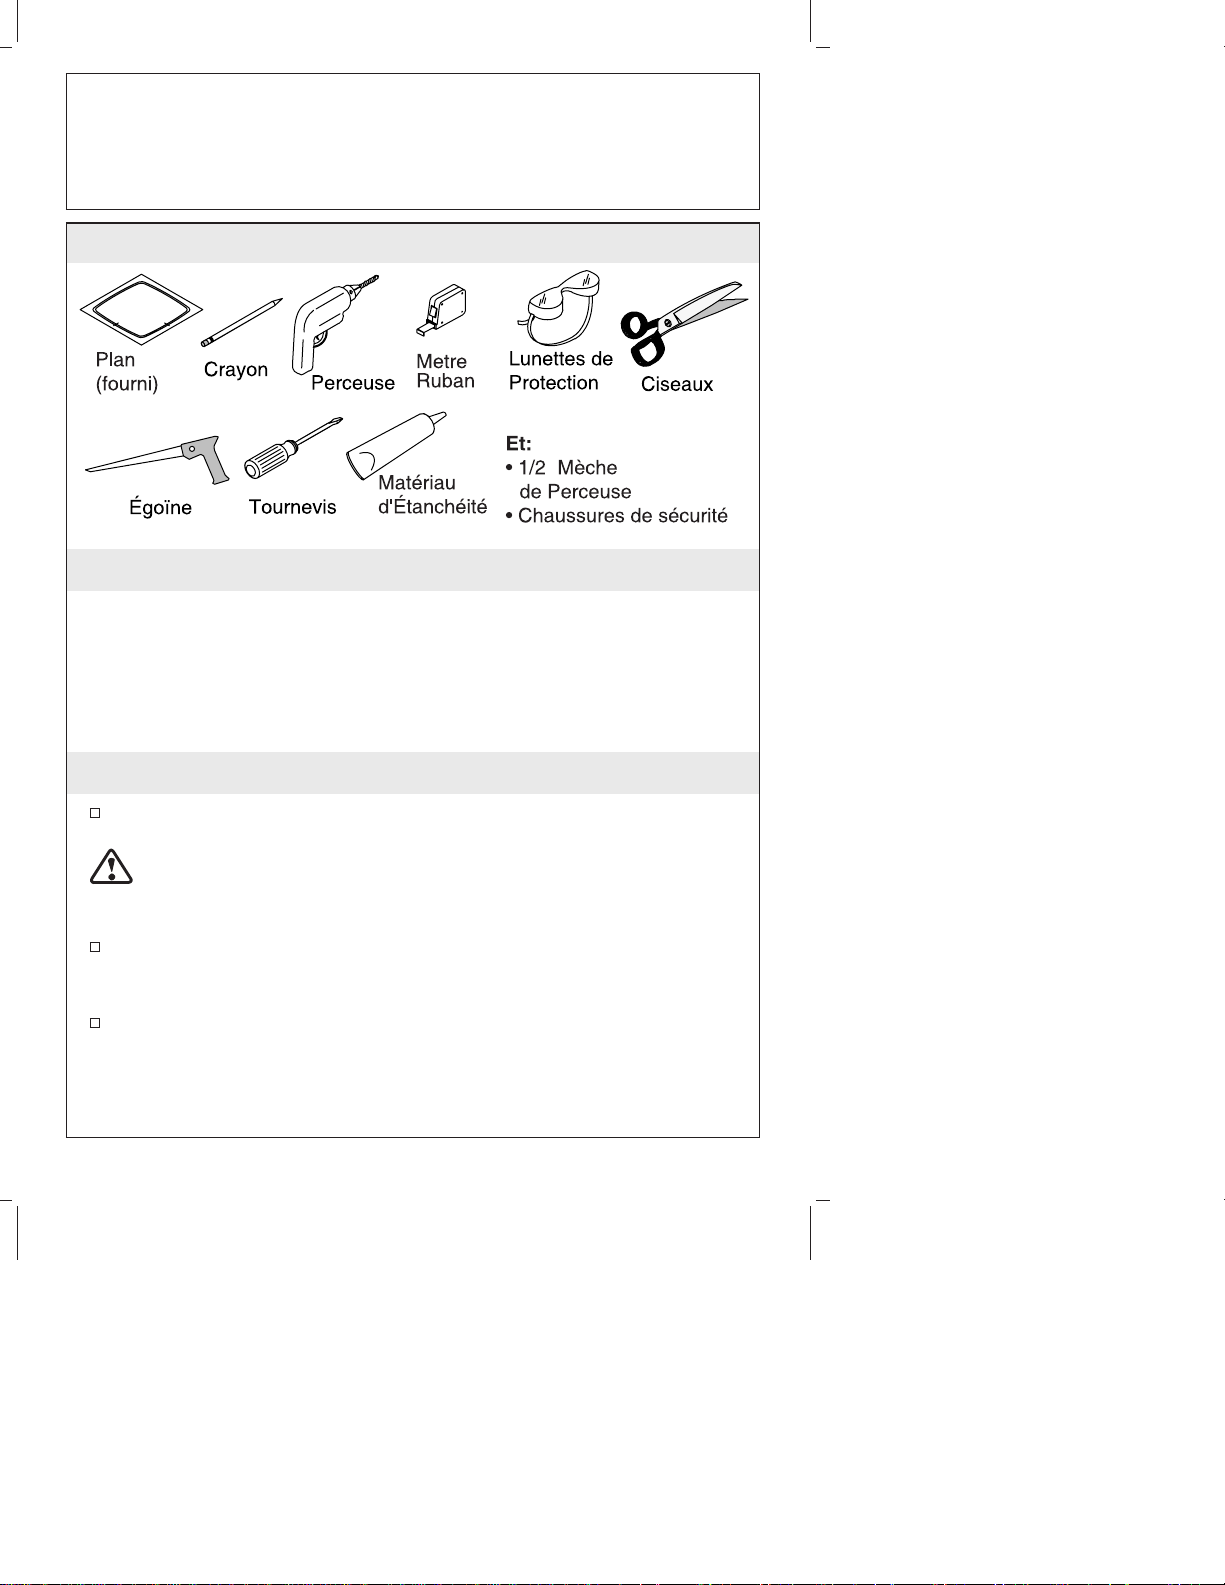
Outils et Matériaux
"
Merci d’avoir choisi un produit KOHLER
Nous apprécions votre engagement envers la qualité KOHLER. S’il
vous plait, prenez quelques minutes et lisez attentivement ce guide
avant de commencer votre installation. N’hésitez pas à nous contacter
en cas de problème d’installation ou de fonctionnement. Nos numéros
de téléphone et notre adresse du site Internet sont au verso. Merci
encore d’avoir choisi un produit KOHLER.
Avant De Commencer
Respectez tous les codes locaux de plomberie et de bâtiment.
ATTENTION : Risque de blessures ou d’endommagement du
produit. Les lavabos en fonte sont très lourds. Demandez de
l’aide pour soulever et mettre en place le lavabo.
Avant l’installation, déballez le nouveau lavabo et examinez le
pour en déceler tout dommage. Remettre le lavabo dans son
emballage de protection en attendant de commencer l’installation.
Vérifiez l’état du drain et les tuyaux. Remplacez si besoin.
Kohler Co. Français-1 1018375-2-A
Page 8

Avant De Commencer (cont.)
Ces instructions sont pour l’installation d’un lavabo mural avec
un cadre de support en bois. Pour tous autres types d’installation,
fournissez les supports et fixations ayant les dimensions et la
résistance appropriés.
Utilisez uniquement le mastic fourni avec le lavabo.
Utilisez le plan de découpe fourni avec le lavabo.
Pour le remplacement d’un lavabo, assurez vous que la découpe
originale soit de la même taille ou plus petite que celle requise
pour le nouveau lavabo.
Reportez-vous au plan pour garantir une installation ADA
conforme.
Utilisez ces instructions pour des installations murales, à rebord
intégré et encastré. Suivez uniquement les instructions qui
s’appliquent à votre installation.
Vous pouvez choisir entre un robinet mural ou monté sur
comptoir, selon le style désiré. Un robinet mural est conseillé.
1. Préparation
Installez les tuyaux d’arrivée d’eau et d’évacuation, selon
l’information du diagramme de raccordement.
Installation avec Supports Muraux
Installez le lavabo suivant la notice d’installation qui accompagne
le support.
Installation du Lavabo à Rebord Incorporé
Déterminez l’emplacement de l’axe central du robinet. Tenez
compte du diamètre des rosaces du robinet et des poignées, la
longueur du bec et le dégagement entre le bec et le rebord du
lavabo.
Calculez la dimension de l’axe central du robinet en divisant par
deux le diamètre de la rosace, puis y ajouter 1/4″ (6 mm).
Arrondissez au plus proche cette dimension à 1/16″ (2 mm), au
besoin.
1018375-2-A Français-2 Kohler Co.
Page 9

Préparation (cont.)
Tracez soigneusement l’axe central du robinet sur le plan de
découpage. Choisissez l’emplacement le plus adéquat, selon les
éléments suivants :
•
Conformément aux codes de plomberie locaux
•
un minimum de 2″ (5,1 cm) de distance entre le jet d’eau et le
rebord du lavabo est requis. Ceci est important pour garantir
l’espace nécessaire
•
d’un minimum de 1/4″ (6 mm) de distance entre le bec du
robinet et le rebord du lavabo
Redessinez la ligne centrale de l’axe du robinet pour garantir ces
exigences.
Tracez une ligne sur le plan de au moins 2″ (5 cm) derrière l’axe
final du robinet. Ceci est le minimum requis pour la location de
la ligne du dosseret.
REMARQUE : Certains robinets de KOHLER requièrent au moins
2-1/2″ (6,4 cm) derrière la ligne de l’axe centrale définitive du
robinet.
Coupez le long de la ligne du dosseret sur le plan.
Coupez le plan le long de la ligne intérieure du plan marqué
″Découpage du Rebord Incorporé″
Placez le plan sur le comptoir de façon à assurer un dégagement
entre le lavabo, le robinet et le dosseret.
Vérifiez l’espace requis pour le meuble situé sous le comptoir.
Tracez le pourtour sur le comptoir à l’aide d’un crayon.
Vérifiez les espaces entre le lavabo, le robinet, le bord du
comptoir et le meuble. Ajustez la ligne de découpe en
conséquence.
Marquez l’axe central du robinet et des poignées sur le comptoir.
Installation Encastrée dans le Comptoir
Coupez le plan le long de la ligne intérieure du plan marquée
″Découpage du Rebord Incorporé″
Placez le plan sur le comptoir.
Kohler Co. Français-3 1018375-2-A
Page 10

Préparation (cont.)
Pour Robinets Muraux : Prévoyez un dégagement suffisant du
bec verseur part rapport au lavabo. Le bec verseur doit avoir au
moins 5″ (12,7 cm) de longueur pour un bon fonctionnement.
Pour Robinets sur Comptoir : Tenez compte des espacements
pour l’ajustement du bec et des poignées, au moment de
déterminer l’emplacement du robinet. A l’aide du plan,
déterminez la location de l’axe central du robinet sur le comptoir.
Cet axe central est recommandé pour prévois suffisamment
d’espace entre le bord du lavabo et le bec.
Vérifiez les espaces entre le dosseret, le bec, les poignées du
robinet, et le lavabo. La Société KOHLER recommande un
espacement de au moins 1″ (2,5 cm). Voir l’ilustration.
Consultez le dégagement requis dans la Notice d’Installation du
robinet mural, et marquez l’emplacement désiré des orifices du
robinet en utilisant un crayon à papier doux.
Tracez en le pourtour sur le comptoir.
1018375-2-A Français-4 Kohler Co.
Page 11

2. Installez le Lavabo
Installation du Lavabo à Rebord Incorporé
Découpez l’ouverture du comptoir tout en suivant la ligne du
plan tracée au crayon.
ATTENTION : Risque de blessures ou d’endommagement du
produit. Les lavabos en fonte sont très lourds. Demandez de
l’aide pour soulever et mettre en place le lavabo.
Placez temporairement le lavabo sur l’ouverture du comptoir, de
façon à ce que le logot de “KOHLER“ soit vers l’arriére.
Ajustez-le et cadrez-le.
Retirez le lavabo.
Percez les orifices pour le robinet.
Installez le robinet et le vidage conformément à la notice du
fabricant.
Nettoyez le comptoir et placez le lavabo sur l’ouverture, de façon
à ce que le logo de “KOHLER” soit vers l’arriére.
Appliquez un boudin mince de matériau d’étanchéité le long des
bords du lavabo.
Essuyez immédiatement tout excédent de matériau et étanchéifiez
toutes les cavités au besoin.
Vérifiez si le lavabo ne c’est pas déplacé de sa position initiale.
Kohler Co. Français-5 1018375-2-A
Page 12

Installez le Lavabo (cont.)
Avant de continuer, laissez sécher le mastic pendant au moins 30
minutes.
Raccordez et fixez le siphon au drain, puis complétez les raccords
d’arrivées d’eau au robinet, selon la notice qui accompagne le
robinet.
Laissez couler l’eau dans le lavabo et vérifiez s’il y a des fuites.
Utilisez des nettoyants non abrasifs.
Installation Encastrée dans le Comptoir
Découpez l’ouverture du comptoir tout en suivant la ligne du
plan tracée au crayon.
ATTENTION : Risque de blessures ou d’endommagement du
produit. Les lavabos en fonte sont très lourds. Demandez de
l’aide pour soulever et mettre en place le lavabo.
Placez temporairement le lavabo sur l’ouverture du comptoir, de
façon à ce que le logot de “KOHLER“ soit vers l’arriére.
Contrôler le bon positionnement.
Retirez le lavabo.
Percez les orifices pour le robinet.
Installez le robinet sur le comptoir suivant la notice du fabricant.
Installez le drain au lavabo selon la notice du fabricant qui
accompagne le produit.
Appliquez deux boudins de 1/8″ (3 mm) de matériau d’étanchéité
autour de l’ouverture du comptoir. Appliquez du mastic à
environ 1/4″ (6 mm) de distance du bord de l’ouverture.
Placez temporairement le lavabo sur l’ouverture du comptoir, de
façon à ce que le logot de “KOHLER“ soit vers l’arriére.
Soigneusement étendre le mastic. Essuyez tout excédent de mastic
à l’aide d’un linge propre. Colmatez au besoin.
Avant de continuer, laisser prendre le mastic pendant au moins 30
minutes.
Raccordez et fixez le siphon au drain, puis complétez les raccords
d’arrivées d’eau au robinet, selon la notice qui accompagne le
robinet.
1018375-2-A Français-6 Kohler Co.
Page 13

Installez le Lavabo (cont.)
Laissez couler l’eau dans le lavabo et vérifiez s’il y a des fuites.
Utilisez des nettoyants non abrasifs.
Kohler Co. Français-7 1018375-2-A
Page 14

Guía de Instalación
Lavabo con borde terminado/sobre el mostrador
Herramientas y materiales
Gracias por elegir los productos de Kohler
Apreciamos su elección por la calidad de Kohler. Por favor, tome unos
minutos para leer este manual antes de comenzar la instalación. En
caso de problemas de instalación o de funcionamiento, no dude en
contactarnos. Nuestros números de teléfono y nuestra página web se
encuentran en la solapa posterior. Gracias nuevamente por escoger a
Kohler.
Antes de comenzar
Cumpla con todos los códigos locales de plomería y de
construcción.
CAUTION: Riesgo de lesiones personales o daños al producto.
Los lavabos de hierro fundido son muy pesados. Obtenga ayuda
para colocar el lavabo en su lugar.
Antes de la instalación, revise con cuidado todas las piezas para
ver si están dañadas. Después, vuelva a poner el lavabo en su
empaque como protección hasta el momento de la instalación.
Examine el tubo de suministro y de desagüe. Reemplácelos de ser
necesario.
Kohler Co. Español-1 1018375-2-A
Page 15

Antes de comenzar (cont.)
Estas instrucciones son para la instalación del lavabo sobre
estructuras de madera. Para otro tipo de instalaciones, suministre
un soporte adecuado y sujetadores de suficiente tamaño y
resistencia.
Si se incluye un sellador con el lavabo no utilice ningún otro
como sustituto.
Utilice la plantilla incluida con el lavabo.
Si va a reemplazar el lavabo, verifique que la abertura existente
sea de igual o menor tamaño que la necesaria para el nuevo
lavabo.
Consulte el diagrama de instalación para asegurarse que esté bien
instalado conforme a la norma ADA.
Utilice estas instrucciones para las instalaciones murales, con
borde terminado o sobre el mostrador. Siga solamente las
instrucciones correspondientes a su instalación.
Se puede elegir entre una instalación de grifería mural o sobre el
mostrador, dependiendo del decorado y estilo deseado. Se
recomienda el uso de grifería mural.
1. Preparación
Instale las tuberías de suministro de agua y desagüe, conforme al
diagrama de instalación.
Instalación de montaje mural con soporte
Instale el lavabo conforme a las instrucciones incluidas con el
soporte.
Instalación con borde terminado
Determine el lugar de la línea central de la grifería. Considere los
diámetros del chapetón de la grifería y de las manijas, la longitud
del surtidor y el espacio libre entre el surtidor y el borde del
lavabo.
Para calcular la medida de la línea central de la grifería, divida
primero el diámetro del chapetón entre dos y luego añada 1/4″ (6
mm). Si es necesario, redondee el cálculo al 1/16″ (2 mm) más
próximo.
Kohler Co. Español-2 1018375-2-A
Page 16

Preparación (cont.)
Trace con cuidado la línea central calculada para la grifería en la
plantilla de corte. Escoja la mejor ubicación en función de los
siguientes factores:
•
cumpla con todos los códigos locales de plomería
•
distancia mínima de 2″ (5,1 cm) desde el flujo de agua al borde
del lavabo. Es importante asegurarse que haya suficiente espacio
para lavarse las manos;
•
distancia mínima de 1/4″ (6 mm) entre la parte superior del
surtidor y el borde del lavabo
Vuelva a trazar la línea central de la grifería según sea necesario
para cumplir con estos requisitos.
Trace una línea sobre la plantilla de corte, al menos 2″ (5,1 cm)
por detrás de la línea central final de la grifería. Esta línea indica
la ubicación mínima de la pared posterior.
NOTE: Algunas griferías de Kohler requieren un mínimo de 2-1/2″
(6,4 cm) por detrás de la línea central final de la grifería.
Corte a lo largo de la línea correspondiente a la pared posterior
en la plantilla.
Recorte la plantilla a lo largo de la línea interior demarcada como
″ Abertura con borde terminado″.
Coloque la plantilla sobre el mostrador para asegurarse de que
haya suficiente espacio entre el lavabo, la grifería y la pared
posterior.
Verifique el espacio existente para el gabinete debajo del
mostrador.
Trace la plantilla sobre el mostrador con un lápiz.
Revise el espacio existente entre el lavabo, la grifería, la pared
posterior y el gabinete. Ajuste la línea trazada para el corte.
Marque la línea central de la grifería y de las manijas sobre el
mostrador.
Instalación sobre el mostrador
Recorte la plantilla a lo largo de la línea interior demarcada con
″Abertura sobre el mostrador″.
Coloque la plantilla sobre el mostrador.
1018375-2-A Español-3 Kohler Co.
Page 17

Preparación (cont.)
Para la grifería de montaje mural: Proporcione suficiente espacio
para el surtidor dentro del lavabo. La longitud del surtidor debe
ser de al menos 5″ (12,7 cm) para el funcionamiento correcto.
Para la grifería sobre el mostrador: Cuando determine la
ubicación de la grifería, preste especial atención al espacio libre
necesario para encajar el surtidor y las manijas. Utilice la plantilla
para marcar la línea central del orificio de surtidor en el
mostrador. Se recomienda emplear la línea central para
proporcionar el espacio libre adecuado entre el borde del lavabo y
el surtidor.
Verifique que haya espacio libre suficiente entre la pared
posterior, la grifería con surtidor y manijas y el lavabo. La
empresa Kohler Co. recomienda un espacio de al menos 1″ (2,5
cm). Vea la ilustración.
Consulte el espacio libre necesario en las instrucciones de
instalación de la grifería y marque las ubicaciones preferidas para
los orificios de la grifería con un lápiz de mina blanda.
Trace la plantilla sobre el mostrador.
Kohler Co. Español-4 1018375-2-A
Page 18

2. Instale el lavabo
Instalación con borde terminado
Corte la abertura con cuidado, siguiendo la línea trazada con la
plantilla.
CAUTION: Riesgo de lesiones personales o daños al producto.
Los lavabos de hierro fundido son muy pesados. Obtenga ayuda
para colocar el lavabo en su lugar.
Coloque temporalmente el lavabo en la abertura del mostrador,
de manera que el logotipo de “Kohler” esté hacia atrás. Ajuste
para que encaje bien.
Retire el lavabo.
Perfore los orificios para la grifería.
Instale la grifería y el drenaje según las instrucciones del
fabricante.
Limpie el mostrador y coloque el lavabo sobre la abertura, de
manera que el logotipo de “Kohler” esté orientado hacia atrás.
Aplique una tira fina y continua de sellador alrededor de los
bordes del lavabo.
Elimine el exceso de sellador con una toalla húmeda y rellene los
huecos vacíos de ser necesario.
Verifique que el lavabo no se haya movido de lugar.
1018375-2-A Español-5 Kohler Co.
Page 19

Instale el lavabo (cont.)
Antes de continuar, permita que el sellador se seque durante 30
minutos como mínimo.
Conecte y asegure el sifón al drenaje y complete las conexiones
del suministro de agua a la grifería, conforme a las instrucciones
incluidas con la grifería.
Abra los suministros de agua y verifique que no haya fugas.
Utilice productos de limpieza que no sean abrasivos.
Instalación sobre el mostrador
Corte la abertura con cuidado siguiendo la línea trazada con la
plantilla.
CAUTION: Riesgo de lesiones personales o daños al producto.
Los lavabos de hierro fundido son muy pesados. Obtenga ayuda
para colocar el lavabo en su lugar.
Coloque temporalmente el lavabo en la abertura del mostrador,
de manera que el logotipo de “Kohler” esté hacia atrás.
Verifique que esté bien ajustado.
Retire el lavabo.
Perfore los orificios para la grifería.
Instale la grifería en el mostrador según las instrucciones del
fabricante.
Instale el drenaje en el lavabo conforme a las instrucciones del
drenaje.
Aplique una tira de sellador de 1/8″ (3 mm) alrededor de la
abertura del mostrador. Aplique sellador al menos a 1/4″ (6 mm)
del borde de la abertura.
Coloque el lavabo en la abertura del mostrador con cuidado, de
manera que el logotipo de “Kohler” esté hacia atrás.
Trabaje con cuidado para no dispersar la tira de sellador. Elimine
el exceso de sellador con un paño limpio. Rellene los huecos
necesarios.
Antes de continuar, permita que el sellador se seque durante 30
minutos como mínimo.
Kohler Co. Español-6 1018375-2-A
Page 20

Instale el lavabo (cont.)
Conecte y asegure el sifón al drenaje y complete las conexiones
del suministro de agua a la grifería, conforme a las instrucciones
incluidas con la grifería.
Abra los suministros de agua y verifique que no haya fugas.
Utilice productos de limpieza que no sean abrasivos.
1018375-2-A Español-7 Kohler Co.
Page 21

1018375-2-A
Page 22

1018375-2-A
Page 23

1018375-2-A
Page 24

USA: 1-800-4-KOHLER
Canada: 1-800-964-5590
México: 001-877-680-1310
kohler.com
© 2003 Kohler Co.
1018375-2-A
 Loading...