

Page 1
SERVICE PARTS
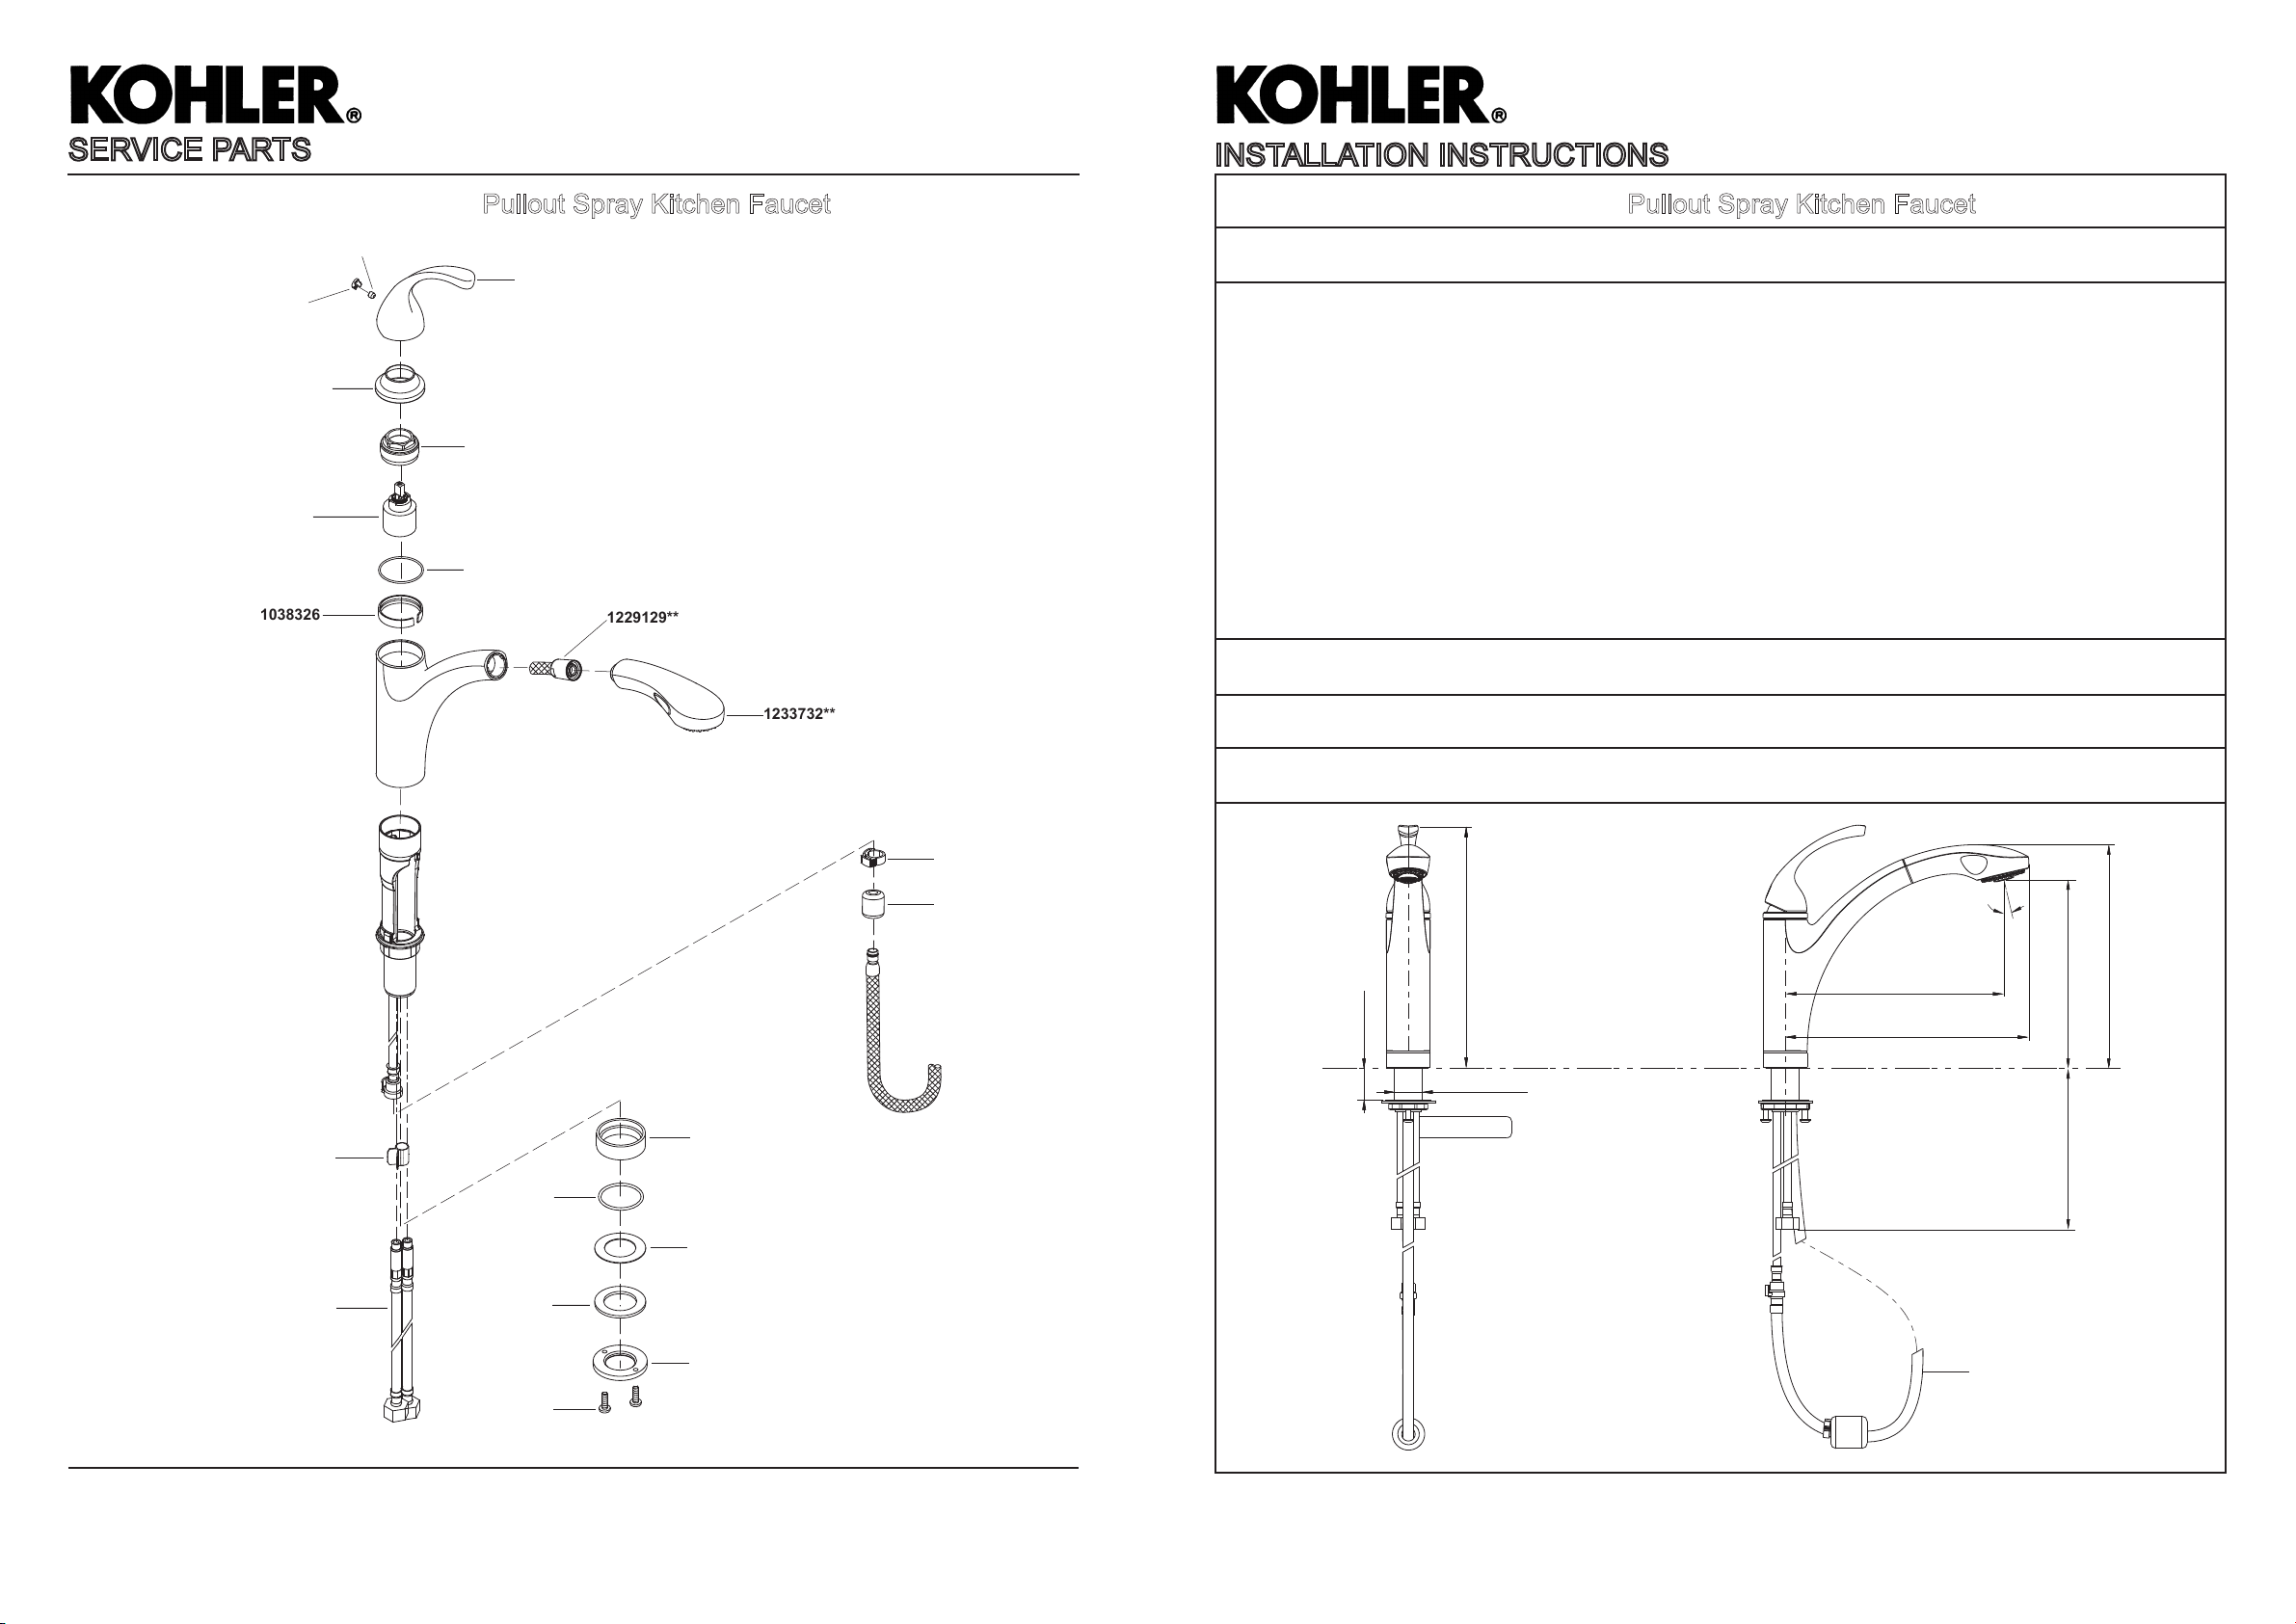
1038326
1229129**
1233732**
INSTALLATION INSTRUCTIONS
10433T-B4 Pullout Spray Kitchen Faucet10433T-B4 Pullout Spray Kitchen Faucet
FORTEFORTE
1018337**
1003662**
834793
76713
1110741**
1018336**
42043
BEFORE YOU BEGIN
All information is based on the latest product information available at the time of publication. Kohler Co. reserves
the right to make changes in product characteristics, packaging, or availability at any time without notice.
Please leave these instructions for the consumer. They contain important information.
NOTES:
1. Flush the water supply pipes thoroughly to remove debris.
2. For new installations, assemble the faucet to sink before installing.
3. The highest working pressure for handspray & shower head is 0.5MPa(5bar). If it exceeds 0.5MPa(5bar),
a pressure reducer is needed. The highest water and environment temperature is 60ºC. Please keep handspray,
shower head and the shower arm away from heater, or it may become damaged and cause injury to the user.
HANDLE OPERATION
Lift the handle gently. Turn clockwise for hot water, turn counter-clockwise for cold water.
ROUGH-IN DIMENSIONS
1153208
3006978
71940
78617
58946
1035359**
22352
1092184
101131
1046153
Max 38.1
275
Ø33.2~Ø38.1
257
13.2º
262
221
286
607
990
**Color code must be specified when ordering
1230977-2A-B 4
1230977-2A-B 1
Page 2

INSTALLATION
INSTALLATION CHECKOUT
How To Install The Faucet
Place the escutcheon(1) onto the bottom of the body assembly(2). Slide
the o-ring(3) into the groove of the escutcheon(1). Put the hoses and
shank(4) into the mounting hole of the sink. Let the bottom of the
escutcheon against the deck.
Screw two screws(7) into the threaded ring(8). From underside of the
sink, place the washer(5), the metal washer(6) and threaded ring with two
screws onto the shank. Position the faucet so that the hose(9) is toward
the back and two hoses(10) are symmetrical. Tighten two screws to
secure faucet to sink.
Attach the hoses to water supplies. When facing the front of the faucet,
the left hose is hot water, the right is cold water.
Ensure that all coupling nuts are tight. Ensure that the lever handle is in
the off position. Turn on the main water supply and drain, and check for
leaks. Repair as needed.
Remove the aerator(14) and the spray(15). Run hot and cold water about
3
2
4
1
one minute to remove any debris. Remove any debris from the aerator
and the filter washer of the spray. Shut off the faucet. Reinstall the
aerator and the spray.
15
14
CLEANING INSTRUCTIONS
5
6
8
7
10
All Finishes: Clean the finish with mild soap and warm water. Wipe entire surface completely dry with clean soft
cloth. Many cleaners may contain chemicals, such as ammonia, chlorine, toilet cleaner etc, which could adversely
affect the finish and are not recommended for cleaning.
Do not use abrasive cleaners or solvents on Kohler faucets and fittings.
Put the weight(11) and clip(13) onto the hose assembly(12). Adjust the
weight so that the distance is right from the bottom of the faucet to the
weight. Insert the hose assembly(12) into the hose(9).
How To Use Spray
Open the handle, if you want to use the spray by hand, take the spray
and pull out the hose.
Press the button(A), (B) as shown for two different forms of water flow, as
figure(a), (b) shown.
9
12
13
11
A
B
NOTE: Please pull it gently and do not draw out the spray hose too long,
or you may damage the hose and connector.
a
b
1230977-2A-B 2
"LEAD FREE" is marked on the back of the faucet signifying its compliance with the United States AB1953
1230977-2A-B 3
 Loading...