

Page 1

ULTRACLEAN G20 ROBOT VACUUM
WITH MOPPING FUNCTION
KAVACRBG20U
Page 2

Page 3
Do not over bend the power
shock.
Attention must be made to
may result in personal injury.
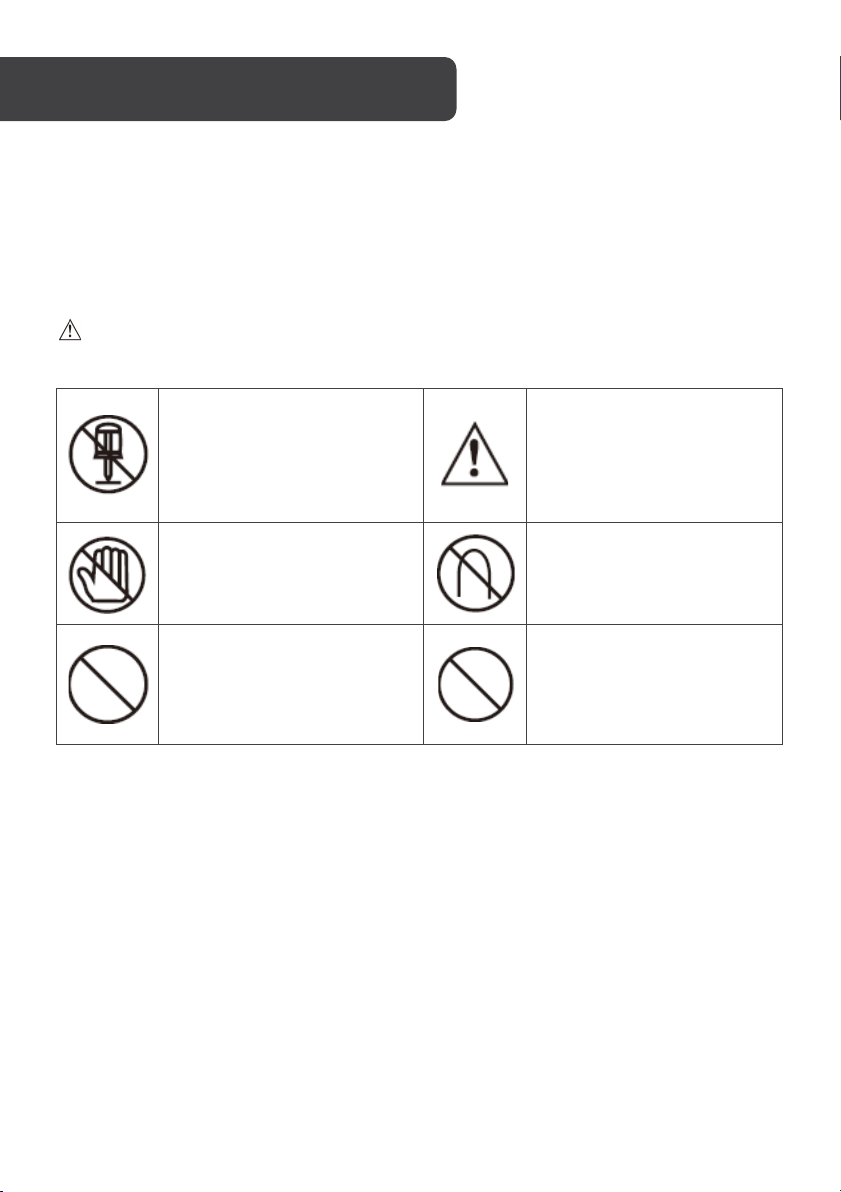
SAFETY & WARNINGS
Before using this product, read and follow all the safety instructions listed below.
• Any operation not in compliance with this guide is likely to cause damage to the
product or injury to the user.
Warning
Do not attempt to disassemble,
repair or modify the product, as
this may lead to fire, electric
shock or injury.
Do not touch any high voltage
power cable of the appliance
with wet hands, as this may
cause electric shock.
avoid clothes or any part of
body (hair, fingers, etc.) getting
caught in the brush or wheels of
the vacuum cleaner. Doing so
Do not use any charger other
than the one accompanying
this appliance. Doing so may
cause fire resulting from
product damage, electric
shock or high voltage.
cord or place heavy objects on
it. Doing so may damage the
cord, causing a fire or electric
Keep away from cigarettes,
lighters, matches and other
heat sources. Do not use
flammable materials such as
gasoline to clean the machine.
Page 4

Attention
To prolong battery life, charge
discharging cycles.
Before leaving the vacuum
appliance dry.
Prior to use, remove all
performance of the appliance.
Tu r n OFF the power before
transporting or relegating it to
prolonged storage. Otherwise,
the battery may be damaged.
Check the connection between
the charger and the socket for
reliability. Otherwise, it may
result in non-charging and
consequential fire.
cleaner idle, recharge the
battery to its full, then take the
battery to a cool place and
keep the bottom of the
Use the cleaner with caution in
the presence of children in order
to avoid hurting them.
Do not let the robot inhale
water and other liquids,
otherwise it may lead to
product damage.
Ensure the power cord is tightly
connected to the charger or it
may cause electric shock, short
circuit, smoke or fire.
robot for at least 16 hours after
the first use or before reuse
after being idle for a long
period. The battery will not
achieve its optimum
performance until 2-3
complete recharging-
damage-prone objects (lamps,
fabrics, glass bottles, etc.);
otherwise it may cause
damage to or affect the
Do not stand or sit on the
vacuum cleaner so as not to
cause damage to it or injuries
to the user.
Do not use the vacuum cleaner
in confined spaces, which may
lead to product damage.
Outdoor use is prohibited, as
doing so may cause product
damage.
Do not use the vacuum cleaner
on commercial premises.
Page 5
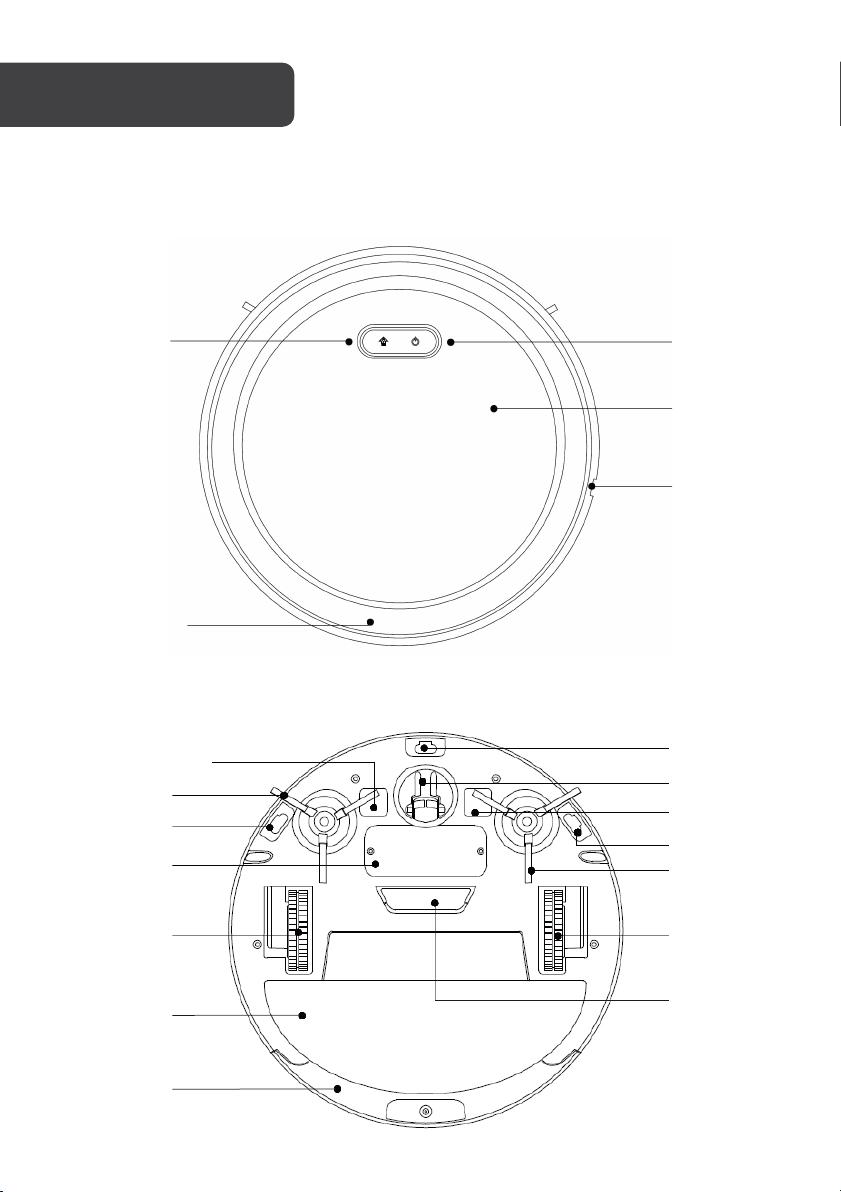
OVERVIEW
Vacuum
Top
Return home
Dustbin
Recharging
pole piece
Side brush
Down view
sensor
Battery box
cover
Start/Pause
Panel
DC recharging
port
Power switch
Bottom
Down view sensor
Universal wheel
Recharging pole
piece
Down view sensor
Side brush
Left wheel
Mop
Dustbin
Right wheel
Suction inlet
Page 6
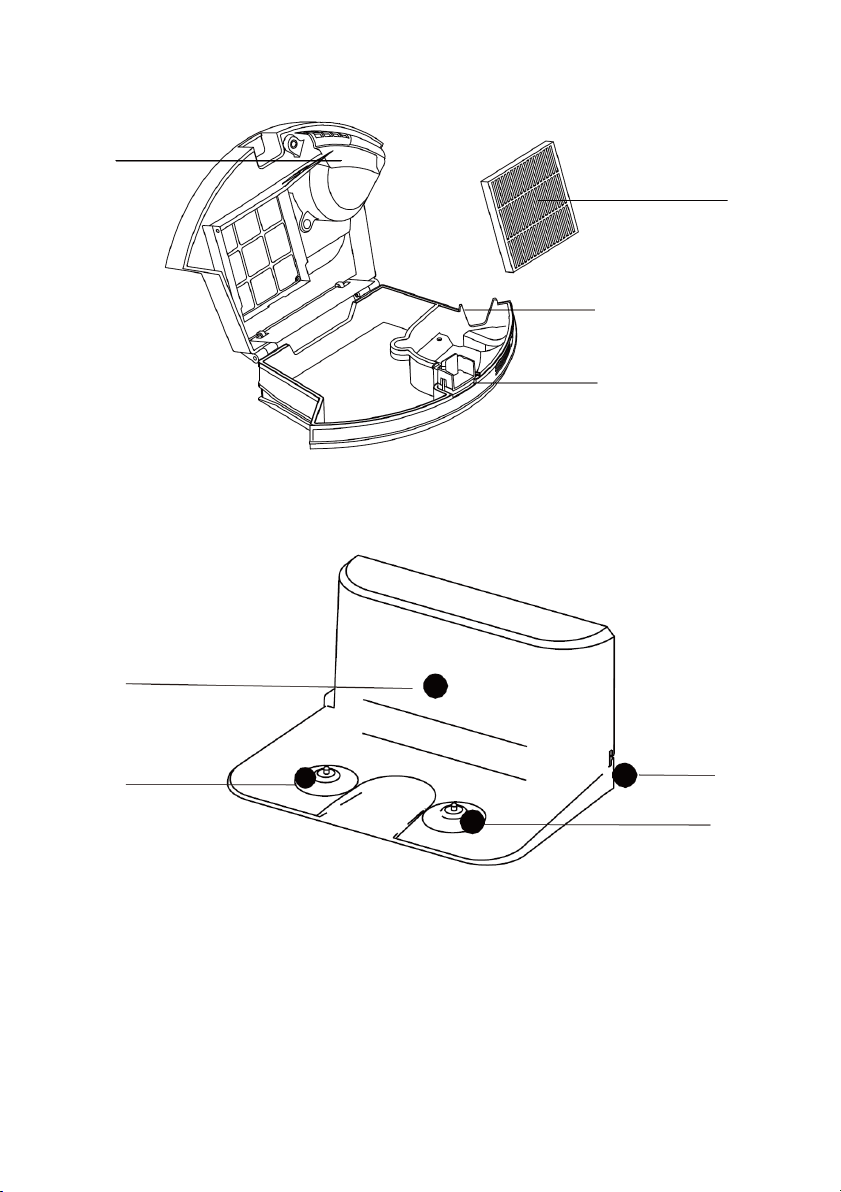
Dustbin
Fan motor
Charging Dock
Filter
Dustbin conductive pole
Dustbin button
IR signal emission
window
Negative
recharging pole
Power adapter
jack
Positive
recharging pole
Page 7

Remote Control
Forward
Return home
Left
Backward
Full go
Right
Stop
cleaning
Wall
following
Page 8

Charging
1. Connect the power adapter to the power adapter jack on the charging dock.
2. Locate an electrical outlet on the wall close to the ground and plug in the power
adapter.
3. Place the charging dock in a flat position on the ground with the back pushed up
against the wall. There should be no other object or obstruction two metres in front
of and one metre to the left, right and above the charging dock.
Turn on the robot
1. Press and hold the Start/Pause button for 2 seconds until the indicator light flashes
blue. After the indicator light starts flashing, press the Start/Pause button on the
robot to commence operation.
2. When the robot finished working, it is better to keep the power switched ON and let
the robot return to the dock station for auto charging.
Page 9

Charging status
1. If the battery power is less than 20%, the indicator will begin blinking red. If the
battery power is between 20% - 50%, the indicator will blink with a pink light. When
the battery power is above 50%, the indicator will blink blue. After the robot is fully
charged, the blue light will remain ON for few minutes before automatically turning
OFF.
2. The robot can also be charged by connecting the power adapter to the DC
recharging port on the side of the robot.
Robot operation
1. Long press the Start/Pause button for 5 seconds and the robot will enter standby
mode. Press the button again; the robot will start to clean and the blue light will
remain bright. Long press the Start/Pause button for 5 seconds, the robot will turn
OFF (Figure 1).
2. Press either button on the panel briefly when the robot is working, and the robot will
enter into standby mode and wait for the next instruction (Figure 2).
Figure 1
Figure 2
Page 10

3. Press the Return Home button on the panel when robot is in standby mode; the
robot will enter into auto charging station. If battery is low, the indicator will
illuminate red during the recharging process. The light will begin “breathing”, and
the unit is fully charged when the light turns to a solid blue.
4. Keep the robot on the charging dock after it has finished the cleaning to keep it
ready for the next cleaning cycle.
5. If the robot is not used on a regular basis, turn OFF the power switch to protect the
battery.
6. If the robot is not used on a regular basis, recharge the robot at least once a month
to maintain the battery.
Attention:
• After the robot is turned ON, it will not operate for the first 10 seconds. Press
and hold the Return Home button for 3 seconds and the robot will
automatically enter sleep mode.
Charging dock
1. Before using the dock station, make sure it is connected to the power supply and
adapter.
2. Place the charging dock in a position flat on the ground with the back pushed up
against the wall. There should be no other object with strong reflections like mirror
or obstructions two metres in front of and one metre to the left, right and above the
charging dock. And also avoid direct sunlight.
3. After the robot has finished cleaning, it will return to the charging dock
automatically.
4. During the cleaning process, if the power is too low, the robot will not return to the
dock station for charging automatically. The robot will stop cleaning and sound an
alarm. Every 5 seconds the alarm will be repeated.
Page 11

Start/Stop: Press while the robot is in standby
standby mode.
Wall following: Press this button and the robot
Spot cleaning: Press this button and the robot
another button is pressed.
Full go: Press this button and the robot will enter
Remote Control
Power: Start or pause operation
Return Home: Press for the robot to stop
cleaning and return to the charging dock.
For ward: Press while cleaning and the robot will
move in a forward direction.
Backward: Press while cleaning and the robot
will move in a backward direction.
Left: Press while cleaning and the robot will turn
in a circle to the left.
Right: Press while cleaning and the robot will
turn in a circle to the right.
mode and it will begin auto cleaning. Press when
the robot is cleaning and it will stop and return to
will enter wall following mode until finished or
another button is pressed.
will enter spot cleaning mode until finished or
full go cleaning mode until finished or another
button is pressed.
Page 12

Removal and cleaning of the dustbin
1. Press the dustbin button on the panel and take out the dustbin.
2. Open the upper cover of the dustbin and pour out the dirt and other debris.
Removal and cleaning of the side brush
1. Gently pick up the robot and lay it with down its wheels facing up.
2. Use the mop to clean the hair off the brush.
3. Firmly grasp one of the plastic spokes containing the wire brushes and pull straight
up.
4. The side brush should only be replaced if the existing side brush is damaged.
Page 13

Removal and cleaning of the mop
1. Tear off the mop to clean. After cleaning the mop pad, simply re-attach it to the
underside of the robot on the two Velcro strips.
Page 14

Robot Vacuum
Rated voltage DC 14V
Rated power 30W
Operating temperature range
Input voltage/current
Infrared remote control
Dimension
Weight
Battery
Dustbin capacity
Charging Dock
Dimension L x W x H: 194 x 15 x 105mm
Input voltage/current 14V/0.5A
Operating temperature range -10°C-45°C
-10°C-45°C
14V/0.5A
38KHz
Φ 310 x 68mm
2
kg
Lithium-ion 2600mAh
650ml
Operating humidity range 85RH
Page 15

Remote Control Specifications
Dimension L x W x H: 150 x 38 x 15mm
Battery
Remote control method Infrared
Emitting and receiving distance
Operating temperature range
Operating humidity range
DC 3V (AAA)
≤5M
-10°C-45°C
85RH
Page 16

Warning
Cause
Drive wheel
failure
Side brush failure
Fan motor failure
Ground detective
failure
Tro u bl e
processing
Low power
Sound
1 sound
3 times
2 sound
3 times
3 sound
3 times
2 sound
3 times
3 sound
3 times
4 sound
3 times
Indicator light Troubleshooting
The red indicator
light is ON.
The red indicator
light is ON.
The red indicator
light is ON.
The red indicator
light is flashing.
The red indicator
light is flashing.
The red indicator
light is flashing.
Check the wheel. If obstructed,
remove the obstacle.
Check if the side brush is
obstructed and clean the side
brush.
Empty the dustbin and clean
the suction inlet.
The robot has been lifted up;
move to ground. Clean the
ground detection sensor.
Trouble processing failure; move
to an empty space.
The voltage is too low and
needs manual assistance to
charge.
Adapter
failure
Charging failure
5 sound
3 times
6 sound
3 times
The red indicator
light is flashing.
The red indicator
light is flashing.
Replace adapter.
Check whether the robot is
turned ON and the battery is
connected correctly.
Page 17

Charging dock
station
HEPA
Side brush
Remote control
Mop
Cleaner Power adapter
Dustbin
Page 18

Page 19

Page 20

Need more information?
We hope that this user guide has given you
the assistance needed for a simple set-up.
For the most up-to-date guide for your product,
as well as any additional assistance you may require,
head online to help.kogan.com
 Loading...