

Page 1

VirtualReScan3.5
Quick Reference
10300410-000
Revision A
Page 2

Copyright
Copyright © 2004 Kofax Image Products. All Rights Reserved.
Printed in the U.S.A.
The information contained in this document is the property of Kofax Image
Products. Neither receipt nor possession hereof confers or transfers any right
to reproduce or disclose any part of the contents hereof, without the prior
written consent of Kofax Image Products. No patent liability is assumed,
however, with respect to the use of the information contained herein.
Trademarks
VirtualReScan, Kofax, ImageControls, and Adrenaline are registered
trademarks of Kofax Image Products.
ISIS is a registered trademark of Pixel Translations, a division of
Captiva Software Corporation.
TWAIN is a registered trademark of the TWAIN Working Group.
All other product names and logos mentioned herein are the property of their
respective companies.
Disclaimer
The instructions and descriptions contained in this document were accurate
at the time of printing. However, succeeding products and documents are
subject to change without notice. Therefore, Kofax Image Products assumes
no liability for damages incurred directly or indirectly from errors, omissions,
or discrepancies between the product and this document.
An attempt has been made to state all allowable values where applicable
throughout this document. Any values or parameters used beyond those
stated might have unpredictable results.
Page 3

That’s all you need for great scans. At install, VRS settings are
optimized for your scanner, making it possible to scan documents with a
variety of background colors, text quality, and paper sizes with exceptional results. Plus, you can still adjust VRS for those particularly difficult
documents that no other scanner is able to tackle. To learn about
manually adjusting images with VRS, read on...
Once you install VRS, follow these steps to start VRS.
1 Turn on your scanner, then switch on your PC.
2 Launch your scan application.
3 Go to select a scan source. This will vary depending on your scan
application. From Scan Demo, for example, you would go to
Scanner | Select Scan Source. For other applications, the Source
may be referred to as “Scanner” or “Device.”
4 Select the appropriate scan source from the list provided.
Depending on your scanner and scan application, the choice of
sources created at the time of installation will vary.
Some options may be
<Your Scanner Model> with VRS (ImageControls)
Kofax VRS Scanner (ISIS)
Kofax VRS - TWAIN (TWAIN)
5 Click OK. For ImageControls-based applications, the VRS icon
appears in the Windows taskbar. It will appear once you start to
scan if you are using an ISIS- or a TWAIN-based application.
...then scan!
Start...
3
Page 4

Customizing VRS
Open Images in the VRS Image Viewer...
The VirtualReScan Viewer and the Interactive Properties dialog box open
together so you can make real-time adjustments to a WYSIWYG image,
then accept or reject them. Here’s how to open an image and preview
image property settings:
1 Scan a document (or document type) you plan to (batch) scan.
2 Right-click on the VRS icon in the Windows taskbar.
3 Select Preview.
4
VRS Viewer and Interactive Properties Dialog Box
Page 5

5
Use the Zoom menu to magnify or reduce the image in the Viewer.
1 Click and drag the selection tool (cursor) around a zone to enlarge it.
-or1 Click on the Zoom menu.
2 Select the zoom level from the Zoom menu as shown below.
(Select Fit Window to see the entire image again.)
Zoom in on Specific Areas...
VRS Viewer With Zoom Set to 75%
Using the Cursor to Zoom
on the Viewer
Page 6
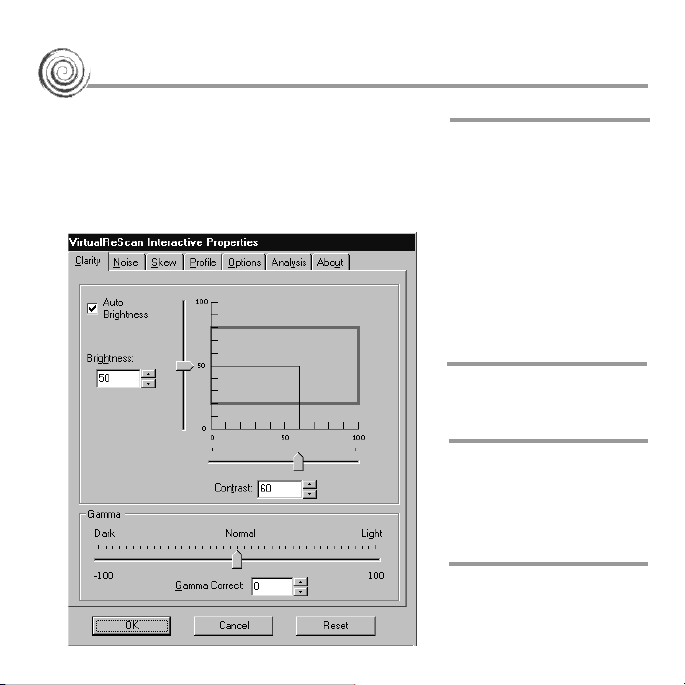
Use the Interactive Properties Dialog Box...
Move the Brightness
(vertical) slider up to
erase the background
and reveal text. Move
the Contrast (horizontal)
slider right to enhance
text and lines. A Gamma
slider and Gamma
Correct box are also
available.
Create and manage
Profiles (saved settings
from the Clarity, Noise,
and Skew tabs).
Straighten images in
the Viewer, enable
Automatic Deskew, Auto
Crop, or Edge Cleanup.
Clarity
Profile
Thin/thicken characters
or remove speckling.
Noise
6
Skew
Each tab on the Interactive Properties dialog
box controls a different aspect of an image.
Make changes to one or all the tabs and click
OK to accept changes. Click Cancel to exit with
no changes. Reset undoes any changes and
returns settings to their original values.
Page 7
View property settings for
the most recently
scanned image.
Analysis
...To Modify or Display Image Information
Get information on
VRS and Kofax Image
Products. Link to the
Kofax Web site at
www.kofax.com to find
product information and
VRS product
update downloads.
About
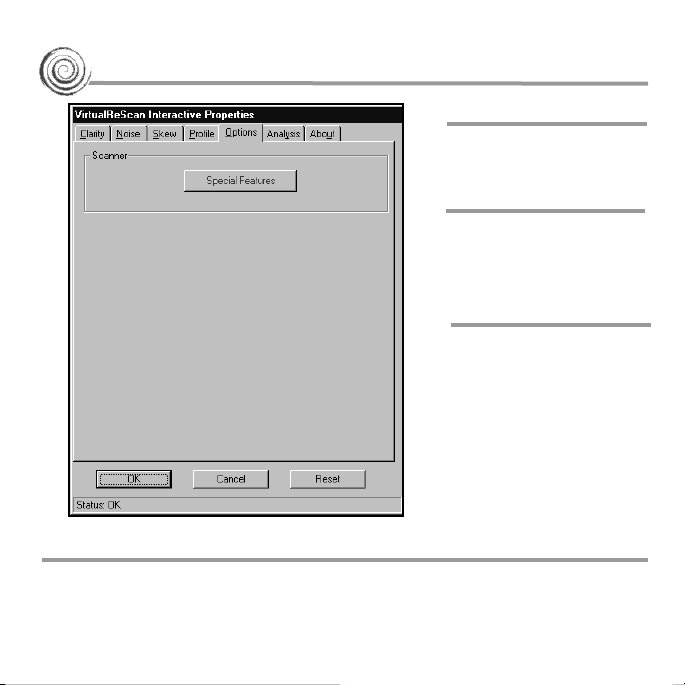
Activate optional features
specific to your scanner.
Options
Once you’ve made changes to the image, click OK. The property settings
are saved and put into effect for the next batch of scanned documents.
You can always save the settings to use again by creating a profile.
...Then Adjust or Accept the Image in the Viewer
7
Page 8
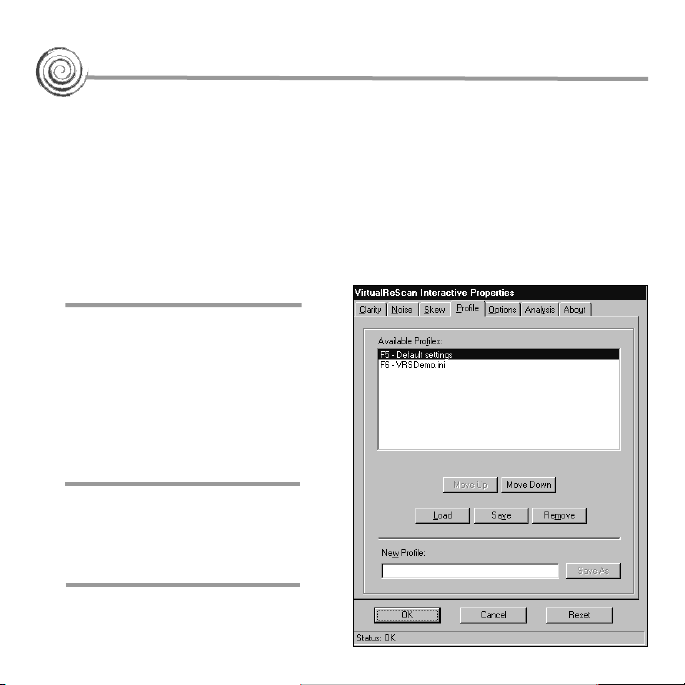
A profile “packages” and lets you assign a name to settings you make
on certain tabs of the Interactive Properties dialog box. To create a profile:
1 Open the VirtualReScan Interactive Properties dialog box.
2 Make changes to the Clarity, Noise, or Skew tabs.
3 Select the Profile tab.
4 Under New Profile, t
ype the profile name (alphanumeric characters).
5 Select Save As. The new profile becomes the active profile.
6 Click OK to close the dialog box.
Create a Profile for Difficult Documents
Select a profile and click
Load to set the new active
(current) profile.
Avoid updating or deleting
(Remove button) the default
VRS profile, called Default settings, since it can only be
restored by reinstalling the
software or by using the Restore
Default Values Utility.
Default Profile
8
To update a profile, select it,
make changes, then click Save.
Update a Profile
Active Profile
Page 9
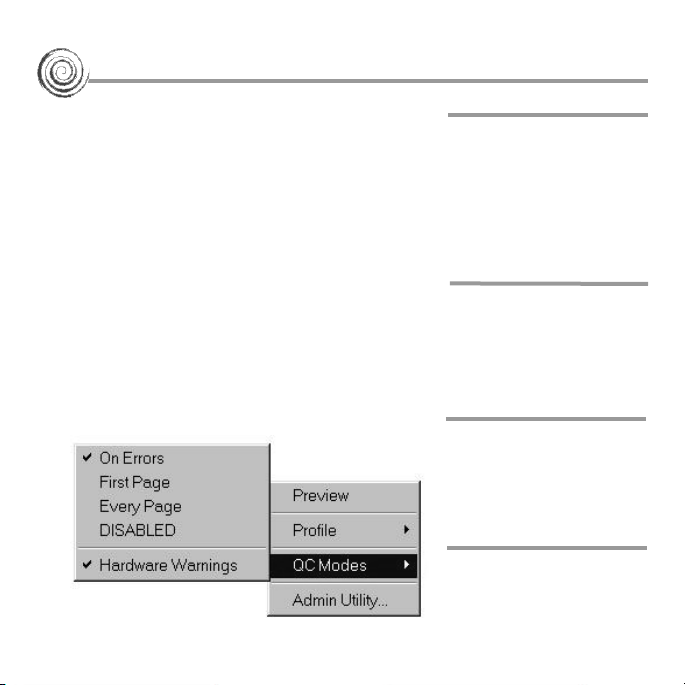
Set the QC Mode...
VRS UI opens only
when exception
conditions occur during
scanning. This is the
default setting after
installation.
On Errors
VRS UI opens after each
document or after each
side of a duplex
document scans.
Every Page
VRS UI opens when you
scan the first page of a
batch and when excep-
tion conditions occur.
First Page
VRS dialogs remain out
of view, even if excep-
tion conditions occur.
Disabled
9
QC Modes Menu
The QC Mode determines when you want
the VRS user interface (UI) to open for
image quality inspection and interactive
updates. After installation, the mode is set
to On Errors, but you can easily change it.
Once selected, a QC mode setting stays in
effect until changed, even across scanning
sessions. The currently selected QC Mode
is indicated with a check mark.
1 From the Windows taskbar, right click
on the VRS icon.
2 From the VRS menu, select QC Mode.
3 Select a QC mode from the menu.
Page 10
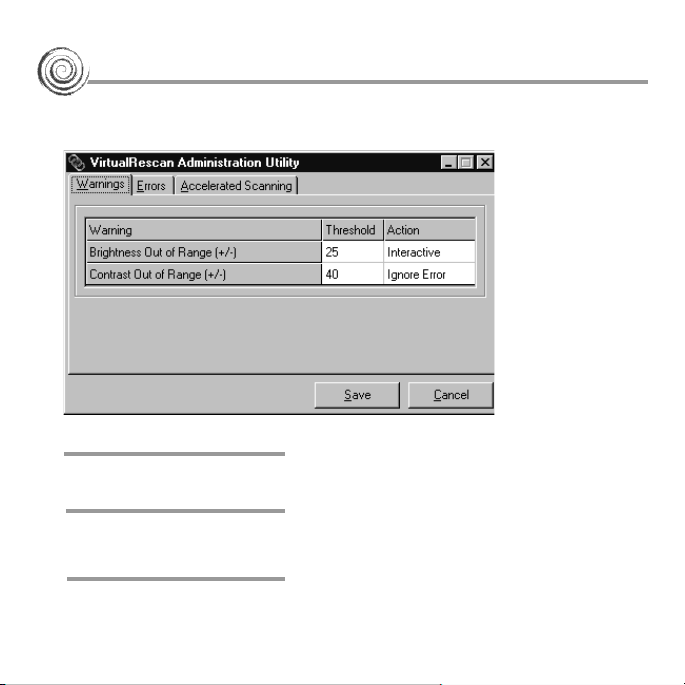
The VRS Administration Utility dialog box consists of three tabs:
Warnings, Errors, and Accelerated Scanning.
Adjust settings for image quality issues.
Adjust settings for equipment conflicts and paper transport issues.
Adjust the slider to increase the speed of your scanner.
Accelerated Scanning
Errors
Warnings
...and Go to the Administration Utility
10
Page 11

...to Adjust the Tab Settings
Use these instructions to modify the VRS Administration Utility tabs.
1 Right-click on the VRS icon in the Windows taskbar.
2 From the VRS menu, select Admin Utility.
3 Select and adjust the settings for the following tabs:
• Warnings tab-Threshold. Type directly into the Threshold text
box, or click the arrows to select a new threshold setting.
• Warnings tab/Errors tab-Action. Define a VRS response to each
exception type by clicking in the Action option and selecting
from the list.
• Accelerated Scanning tab. Click and drag the slider to make
your selection.
4 Once you are satisfied with the settings, click Save. Changes that
you have made on any of the tabs are saved until changed and will
take effect at the start of the next scan operation. When this dialog
is dismissed via the Cancel button, changes made on any of the
tabs are automatically discarded without further notice.
And You Can Always Get Help By...
VRS is equipped with context-sensitive help. Press F1 for tabspecific information to help you complete crucial tasks, without
leaving the application.
11
Page 12

12
 Loading...