

Kodak I5X50 SERIES, i5000 Series Scanning Setup Manual

Using the ISIS Driver
Contents Starting the SVT Diagnostics/Scan Validation Tool............................2
The Scan Validation Tool dialog box.................................................. 4
Configuring Image settings................................................................5
Main tab........................................................................................7
Layout tab.....................................................................................9
Scan Area dialog box................................................................. 10
Image Processing tab.................................................................12
Auto Color Detect tab.................................................................15
Dropout tab.................................................................................19
Adjustments tab..........................................................................20
Background tab.......................................................................... 22
Image Edge Fill tab ....................................................................24
Blank Image Detection tab......................................................... 25
Barcode Reading tab..................................................................27
About tab....................................................................................28
Configuring Scanner settings...........................................................29
Scanner tab................................................................................30
Multifeed Detection tab...............................................................36
Imprinter tab............................................................................... 41
Imprinter Format table.............................................................46
Indexing tab ............................................................................... 47
Patch/Batch tab..........................................................................52
Patch tab.................................................................................... 55
Stacking tab................................................................................ 57
Recommended configurations for using the Stacking option.. 59
Log tab .......................................................................................63
Debug tab................................................................................... 64
The information in this guide provides procedures for using the ISIS
Driver as well as descriptions of the features. The same features should
be available on the user interface of the scanning application you are
using.
This guide describes the default ISIS Driver interface. Your application
may change the ISIS Driver user interface to better suit its purpose. If
your application provider has customized the ISIS Driver interface, it
may not match the default screen configurations as described in this
guide.
A-61849/ISIS January 2016 1
Starting the SVT Diagnostics/Scan Validation Tool
1. Select Start>Programs>Kodak>Document Imaging>SVT
Diagnostics.
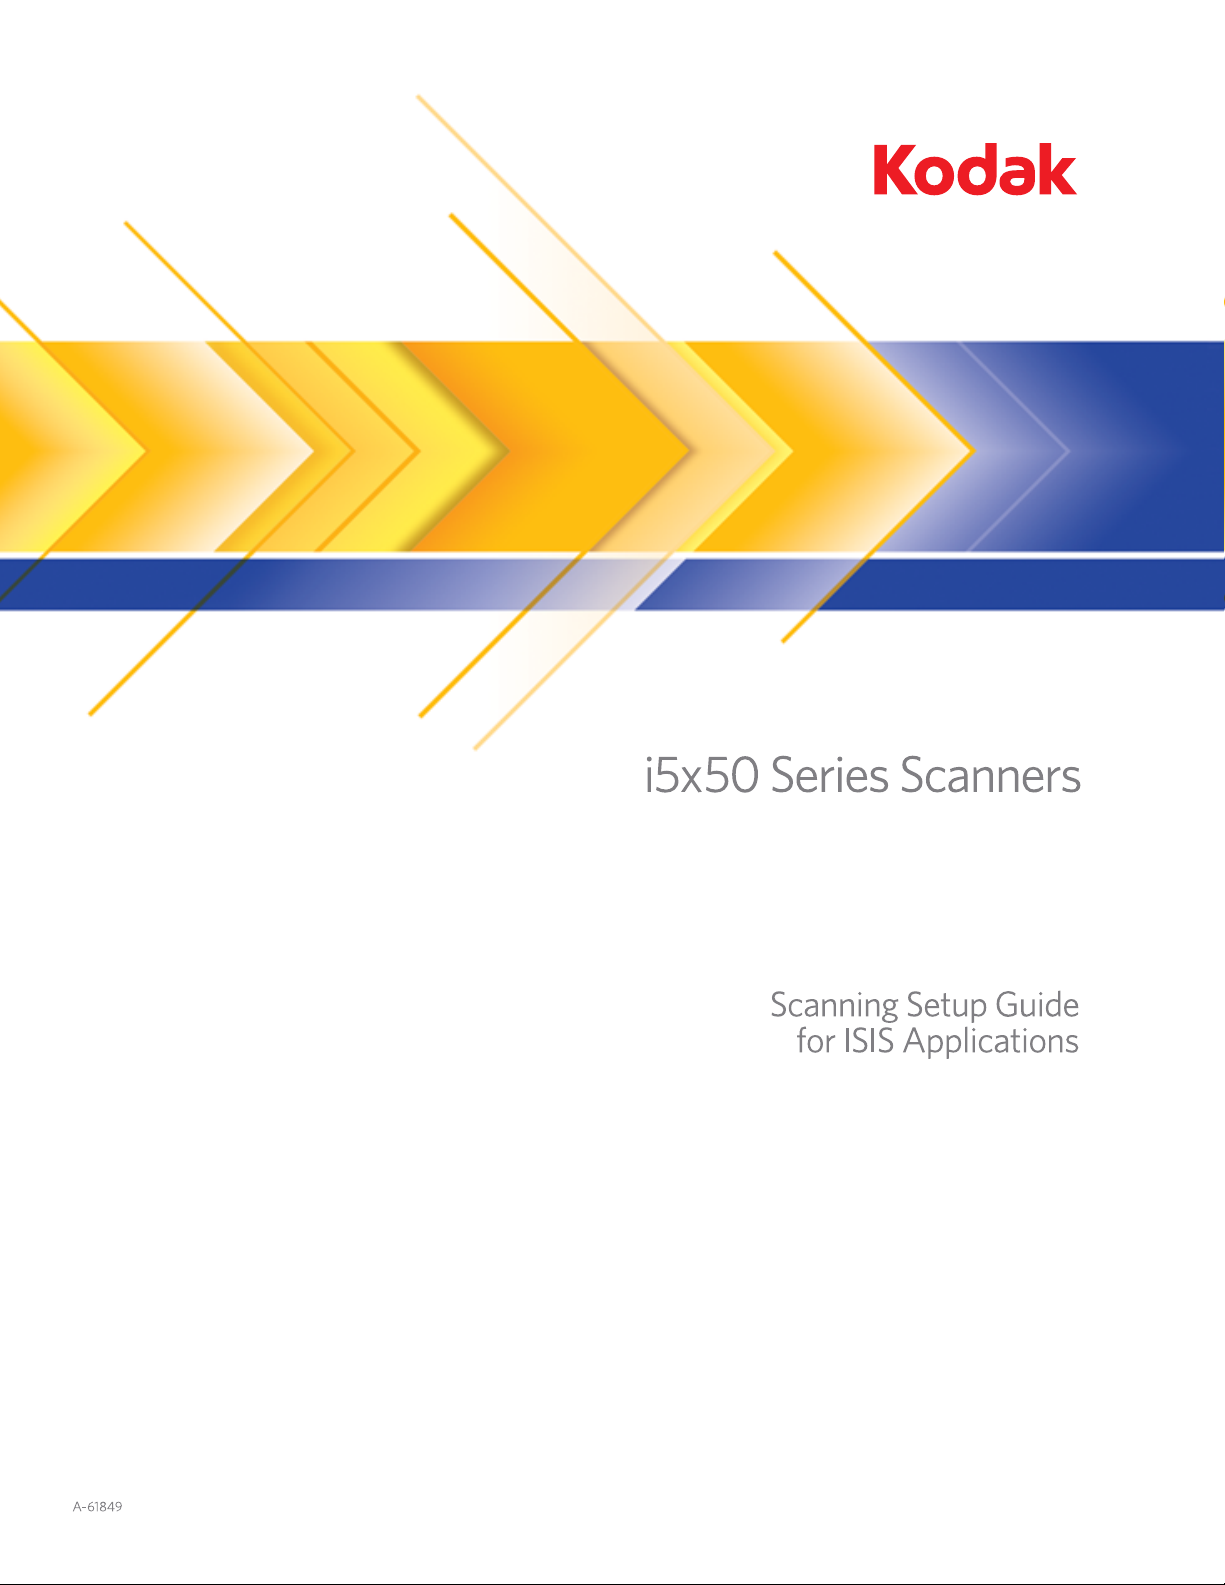
2. Select ISIS for the Driver Type and the KODAK i5250 (i5650,
i5850) as the driver and click OK.
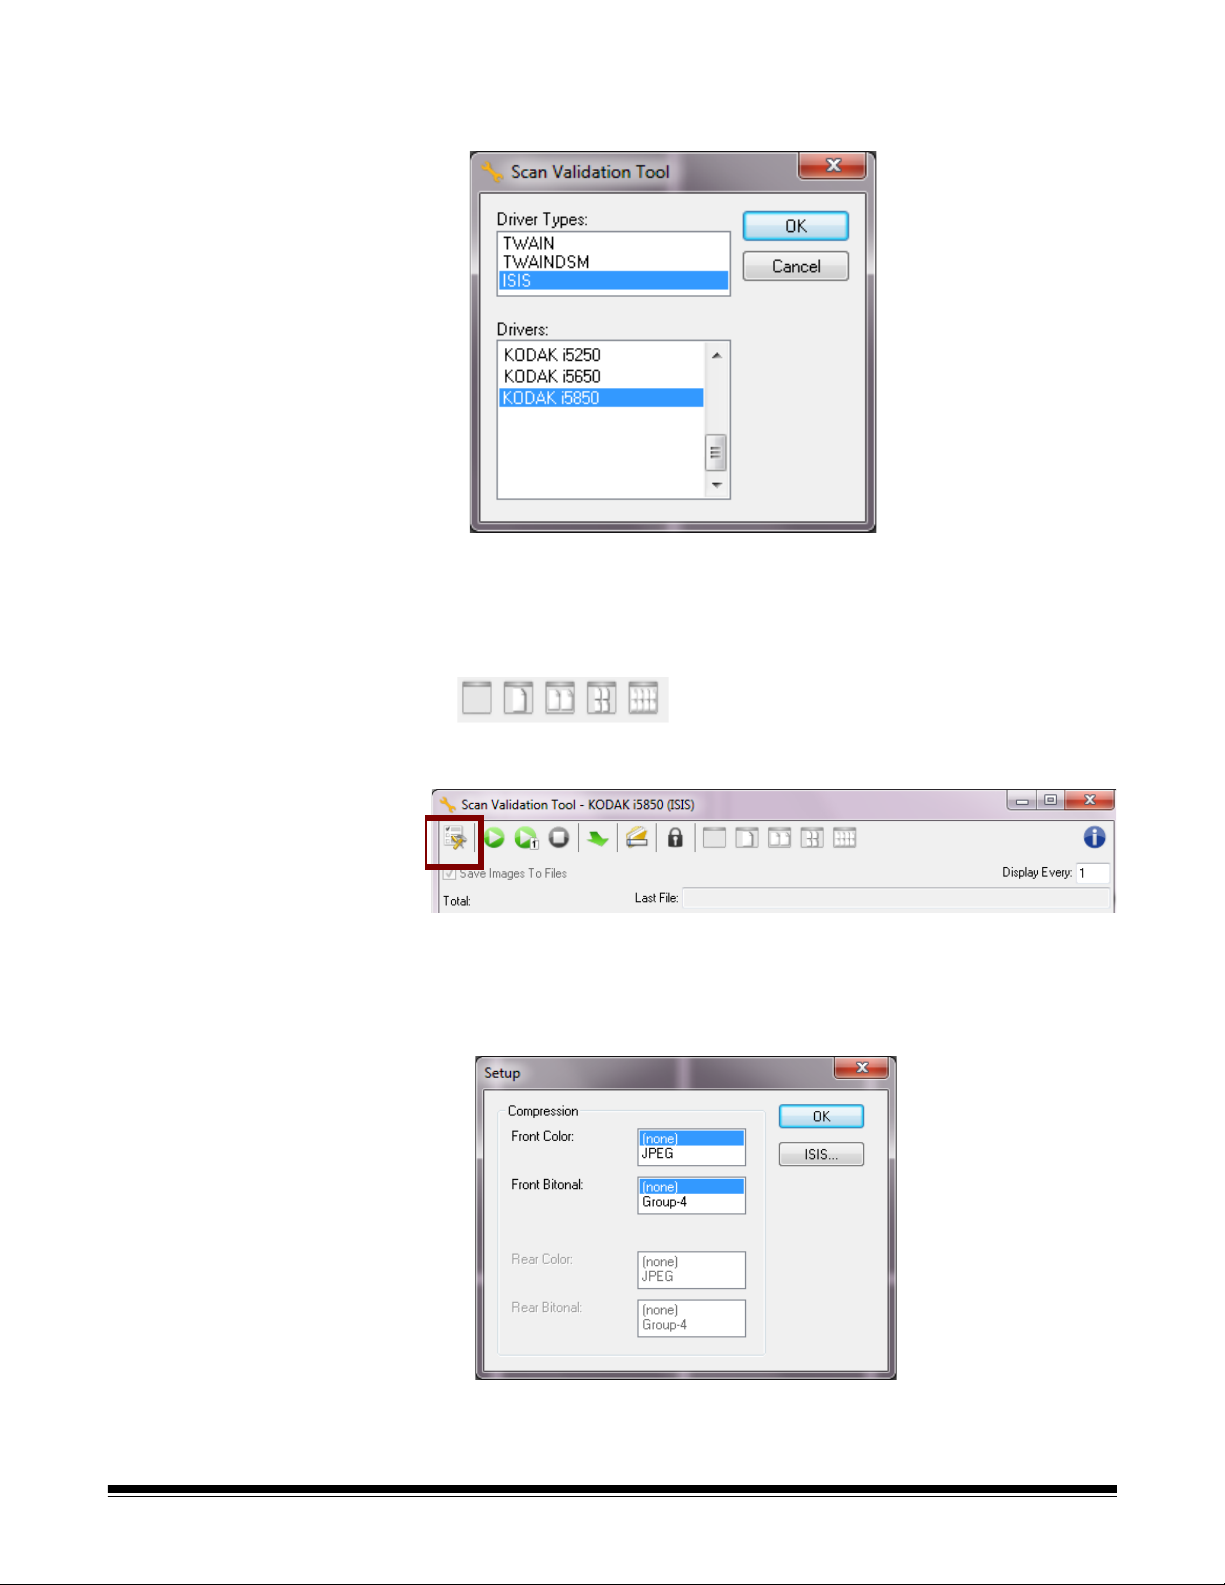
3. Click one of the Image Display mode buttons to enable the image
preview panels.
4. Click the Setup icon on the main Scan Validation Tool screen.
NOTE: For a description of the icons on this screen, see the next
section, “Scan Validation Tool dialog box”.
The Setup dialog box will be displayed.
2 A-61849/ISIS January 2016
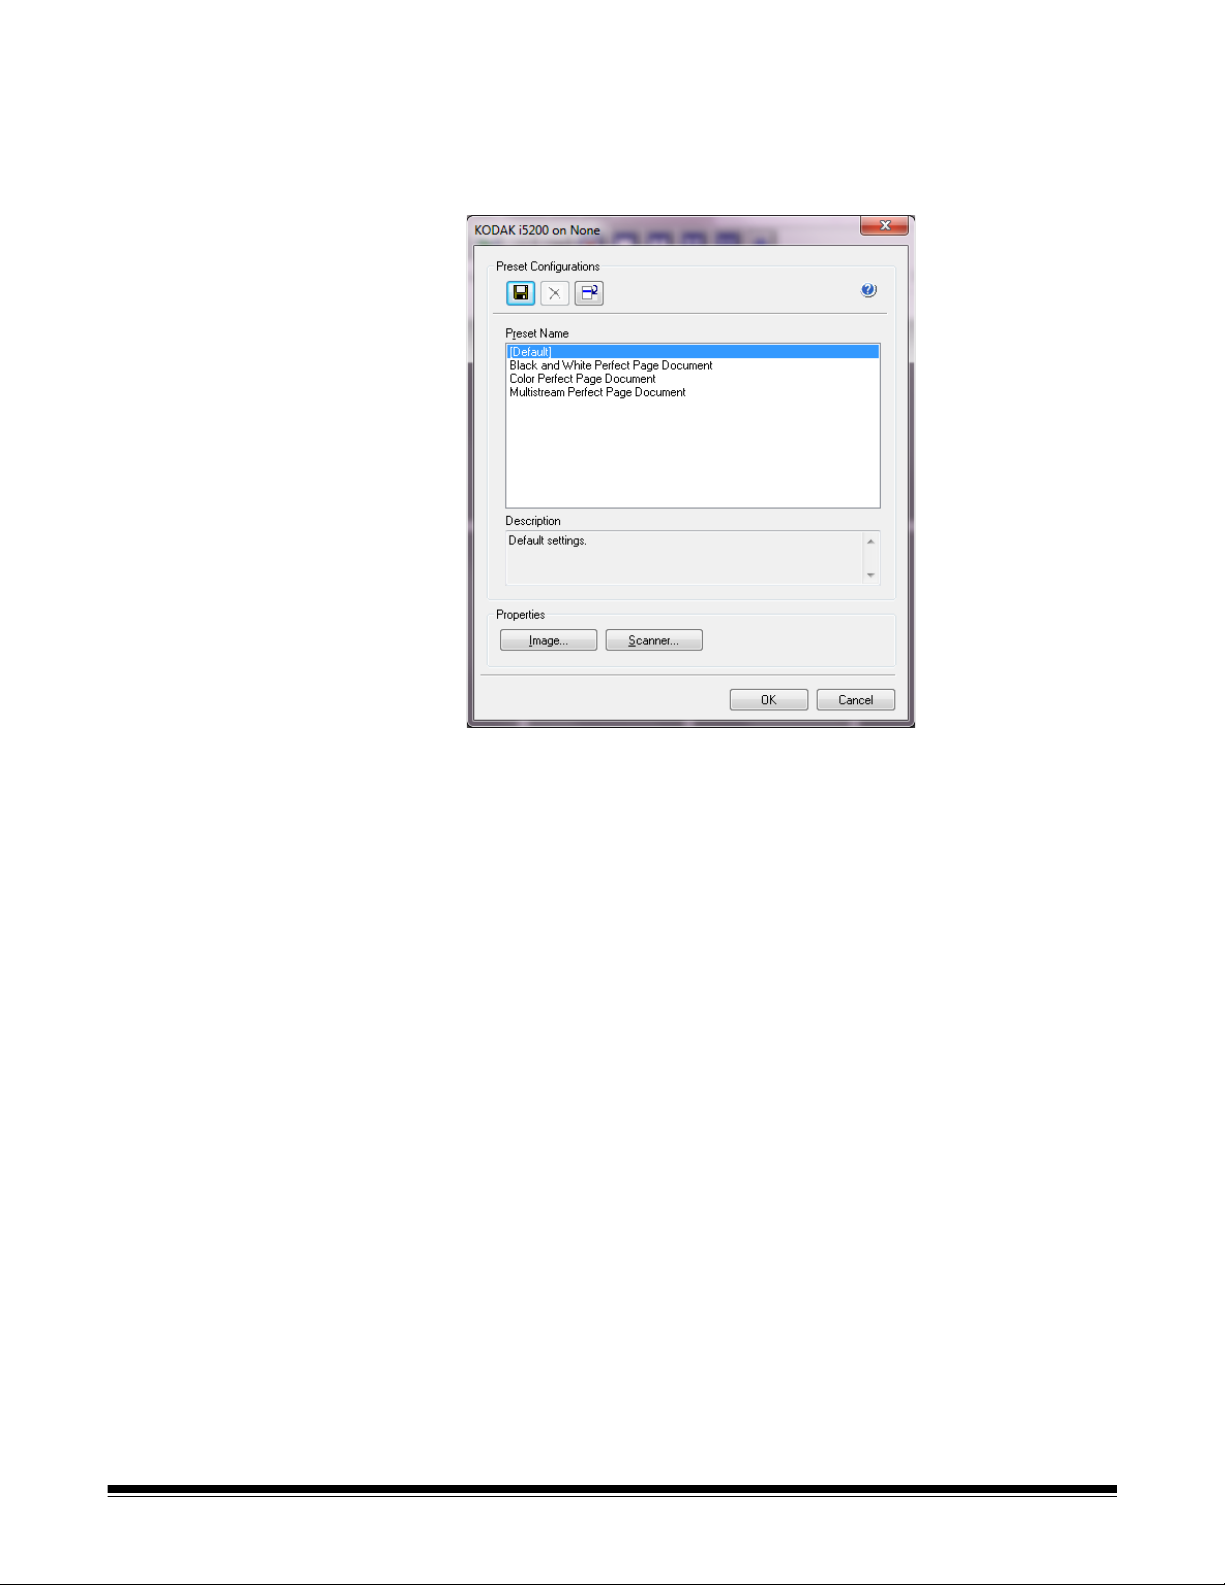
5. Click ISIS. The Preset Configurations dialog box will be displayed.
This dialog box maintains a list of saved driver settings.
You can save, delete or import a preset; or select a preset that is
already set up or one you want to modify.
6. Click Image to configure settings associated with the image.
The following sections provide descriptions and procedures for
configuring Image settings. See the section later in this chapter
entitled, “Configuring Scanner settings” for scanner configuration
procedures.
A-61849/ISIS January 2016 3

The Scan Validation Tool dialog box
The Scan Validation Tool (SVT) is a diagnostic application provided by
Kodak Alaris Inc. The SVT user interface allows access to all the
features of the scanner and is a good way to verify that the scanner is
working properly. The Scan Validation T ool allows you to verify scanne r
functionality using the ISIS Driver.
Toolbar buttons
Setup — displays the user interface for the selected driver.
Start Scanning — scans the documents in the input elevator.
Scan One Page — scans only one page.
Stop Scanning — ends the scan session.
Change/Open Driver — closes the currently opened driver and
displays the Driver Choice window.
Destination — allows you to select a directory to stor e scanned
images and their file names. This option is only available when
Save Images to Files is selected.
Delete — deletes the destination files.
License Key — displays the License Key window.
No Image Display mode — closes the Image Viewer window
(no images will be displayed).
One Image Display mode — displays one image at a time.
Two Image Display mode — displays two images at a time.
Four Image Display mode — displays four images at a time.
Eight Image Display mode — displays eight images at a time.
TWAIN Settings — displays the TWAIN Settings screen.
4 A-61849/ISIS January 2016
Configuring Image settings
The main ISIS Driver window provides a set of default tabs for
configuring images. You can select each of these tabs and make any
choices necessary to meet your scanning needs.
This section describes the ISIS Driver default interface (as it is
presented through the Scan Validation T ool). Your host application may
modify the interface by not displaying some tabs or limiting the options
presented.
NOTE: The Image Mode and Toggle Patch selections are available
with all of the Image tabs (e.g., Main, Layout, Image Processing,
etc.).
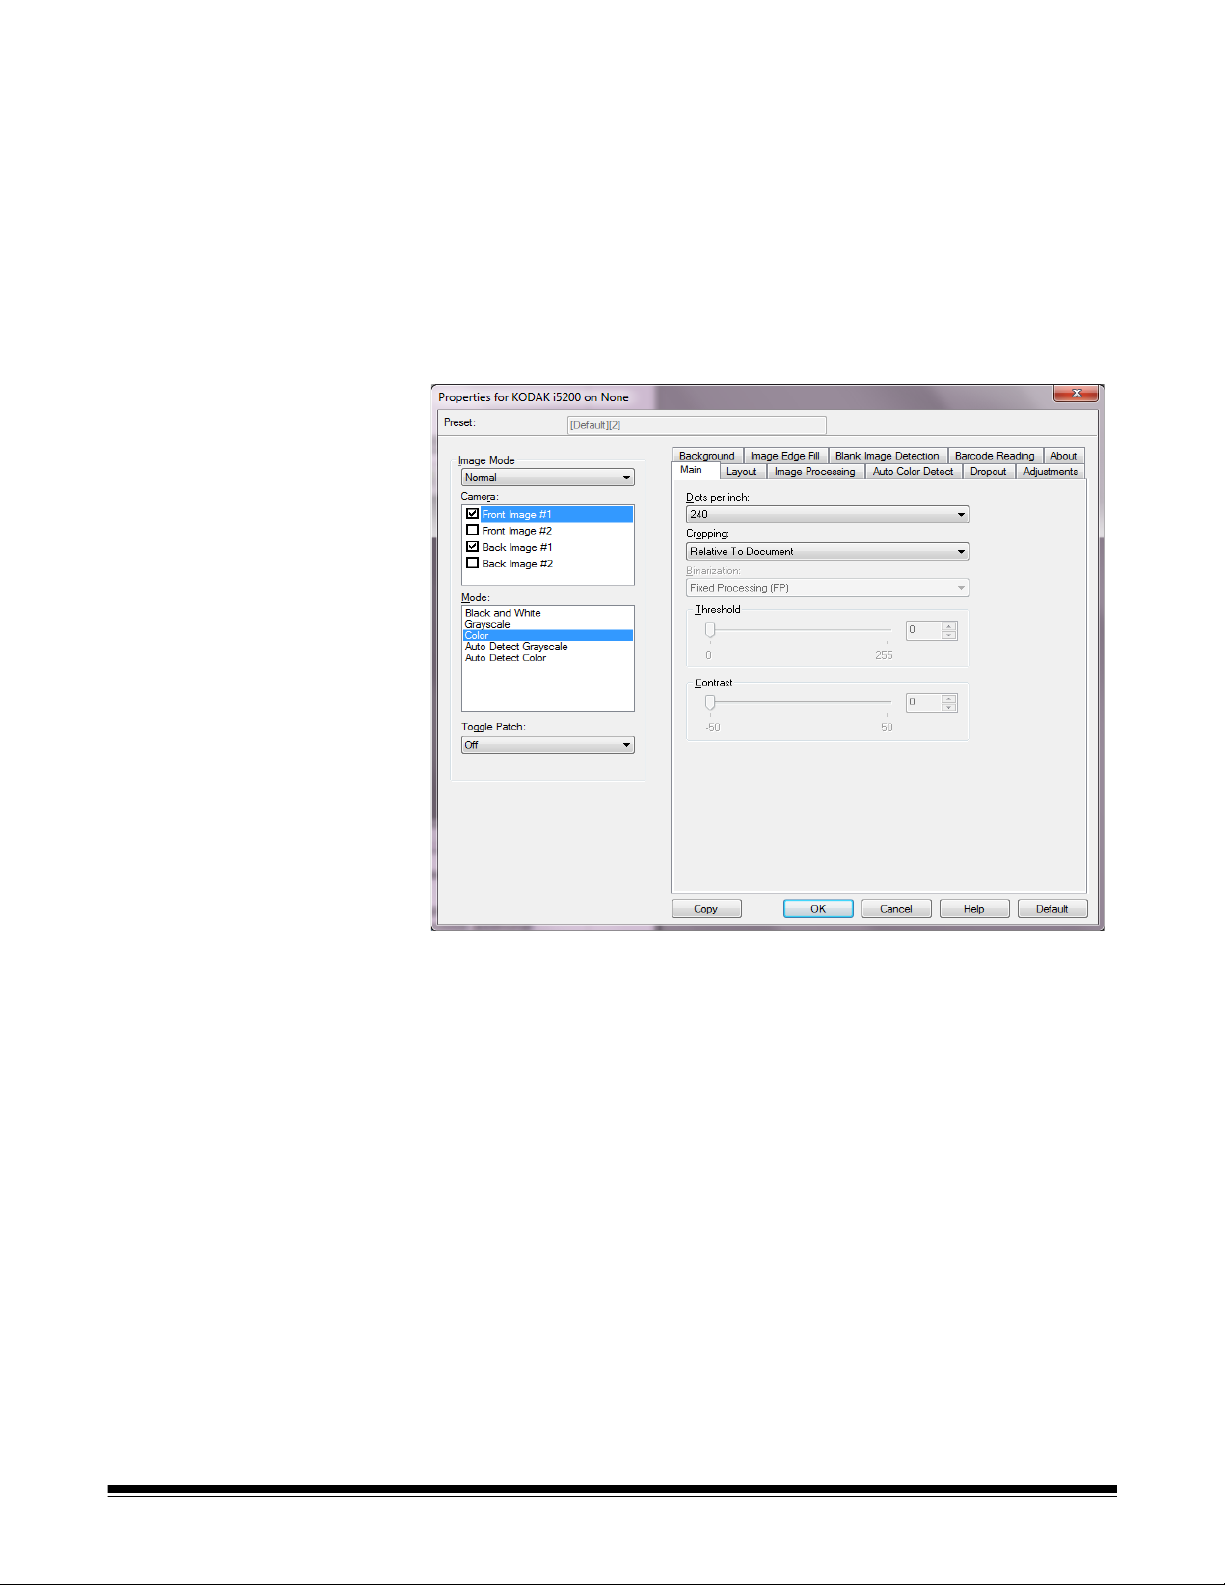
Image Mode — select one of the following options:
• Normal — typically for a document, one image is created for the front
side and another image is created for the back side. Select this
option if you want the front and back side to be individual images.
• Merged — select this option if you want one image that cont ains both
the front side and back side of the document. Image Merged options
are: Front on Top; Front on Bottom; Front on Left or Front on
Right.
Camera — the selections in the Camera box list the available sides
(front and back) of an image where you can define individual image
processing values. Options include: Front Image #1, Front Image #2,
Back Image #1 and Back Image #2.
The Kodak Scanner drivers allow you to control the camera settings
independently. Some settings apply only to black and white images,
others apply to color/grayscale images.
A-61849/ISIS January 2016 5

• Mode — select one of the following modes:
- Black and White: if you want your electronic image to represent
all elements of your document in black and white.
- Grayscale: if you want your electronic image to have a range of
varying shades of gray from black to white.
- Color: if you want your electronic image to be in color.
- Auto Detect Grayscale: sets auto color detect for grayscale. See
the section entitled, “Auto Color Detect tab” for more information.
- Auto Detect Color: sets auto color detect for color. See the
section entitled, “Auto Color Detect tab” for more information.
Toggle Patch — indicates you want to tell the scanner, via a toggle
patch document, if the document is color/grayscale or black and white.
• Off: no patches will be used.
• Front Side: only the side which recognizes the patch sheet will
toggle.
• Both Sides: a patch will be recognized on either the fro nt or the back
side.
Buttons — the buttons on the bottom of the window apply to all tabs:
• Copy ⎯ this function is only available when scanning two-sided
documents. The Copy button provides a convenient way to set up the
color, grayscale or black and white image settings on one side and
transfer them to the other. For example, if you highlight and set up
Front Image #1, you can use the Copy button to duplicate those
settings for Back Image #1.
• OK ⎯ saves the values set on all tabs.
• Cancel ⎯ closes the window without saving any changes.
• Help — displays on-line help about the options available on the
selected window.
• Default ⎯ resets the values on all tabs to the factory defaults.
6 A-61849/ISIS January 2016
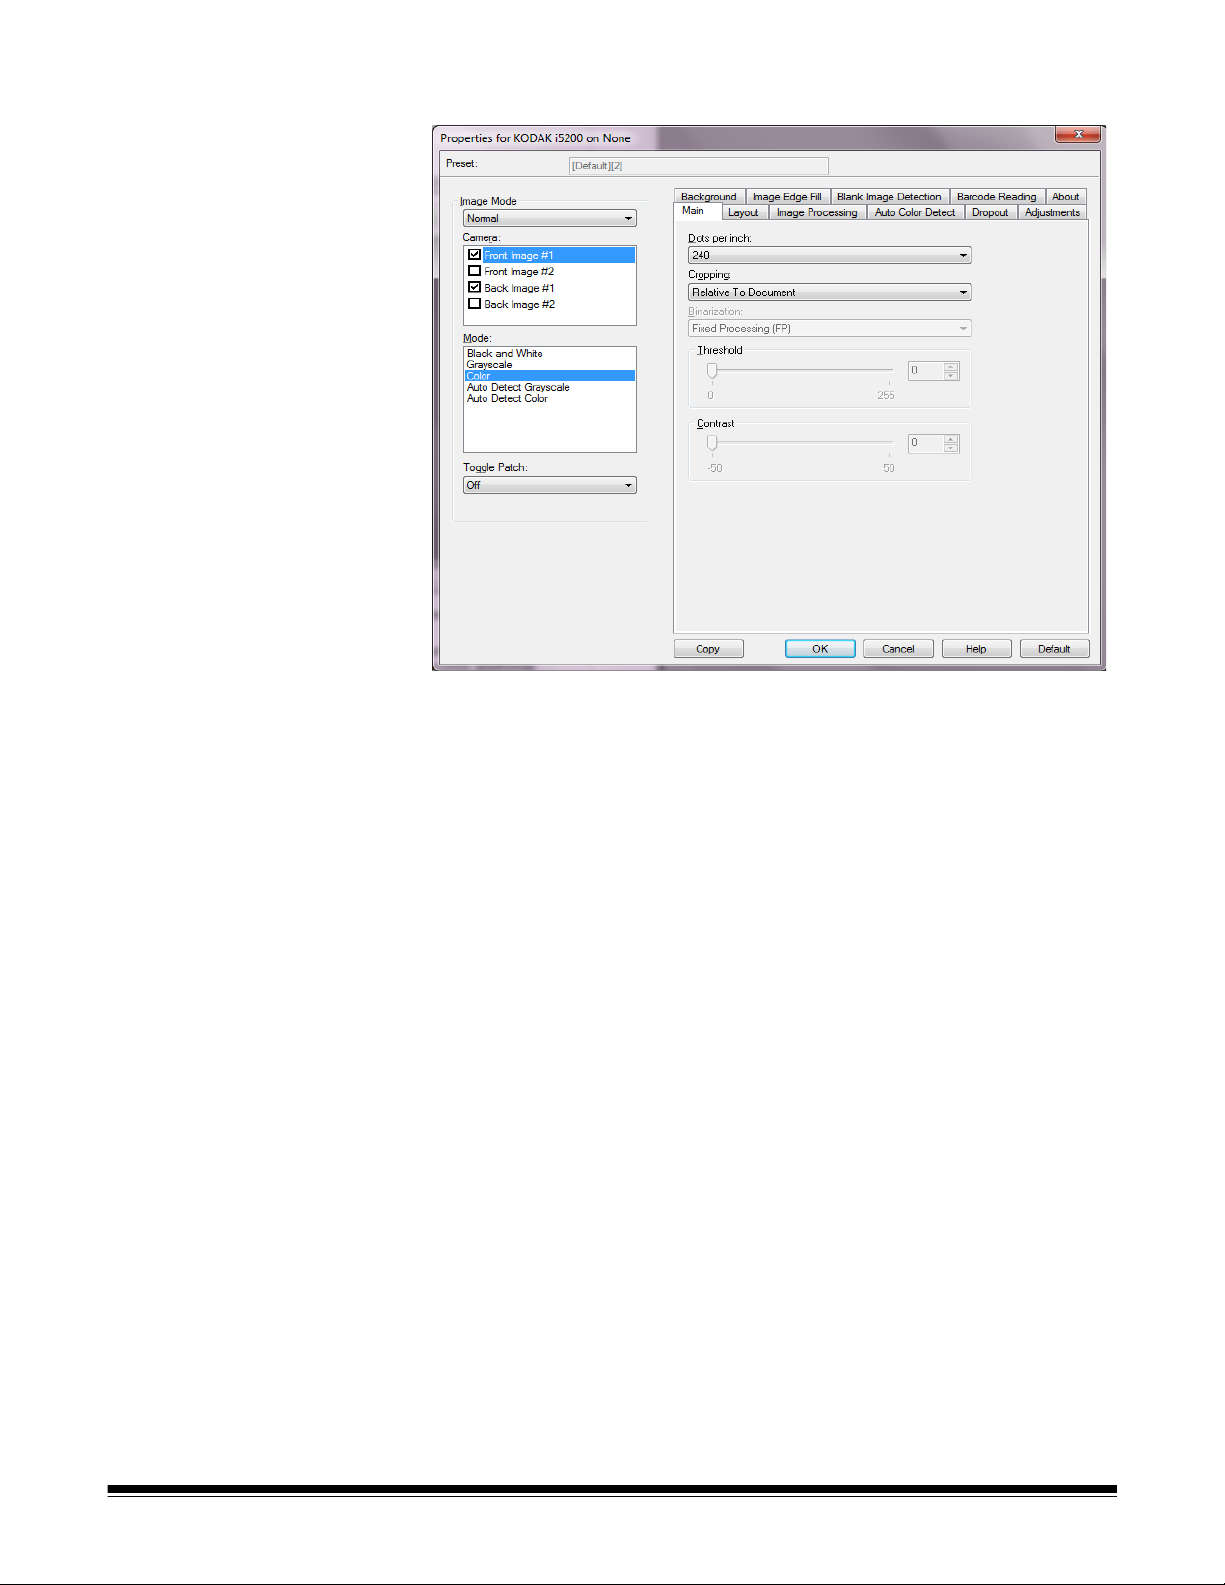
Main tab The Main tab provides the following options.
Dots per inch (dpi) or resolution ⎯ indicates the scanning resolution,
which largely determines the quality of the scanned image. The greater
the resolution, the better the reproduction. However, scanning at a
higher resolution also increases scanning time and file size.
Select a resolution value from the drop-down list. The default is 200 dpi.
Available resolutions are: 100, 150, 200, 240, 250, 300, 400, 500 and
600 dpi.
Cropping ⎯ allows you to capture a portion of the document being
scanned. All cropping options can be used with color/grayscale and
black and white images. Front and Back cropping are independent,
however, for dua l stream scanning, color/grayscale and black and white
cropping must be the same per side. Only one cropping option can be
assigned per image.
• Automatic: dynamically adjusts the cropping window for different
document sizes based on the edges of the image.
• Aggressive: eliminates any residual black border on any image
edges. In order to achieve this, there is a possibility that a small
amount of image data from the edge of the document may be lost.
• Fixed to Transport: (used for batches of same-sized documents)
allows you to define the area to be imaged. Fixed to Transport
cropping is used in conjunction with paper size and page layout and
assumes you are center-feeding your documents. If you are not using
center feeding, you must select the Layout tab to define your scan
area. See the section entitled, “Layout tab” later in this guide.
A-61849/ISIS January 2016 7

• Relative to Document: (zone processing): (used for batches of
same-sized documents) — zone processing is a floating fixed crop
window (the zone) located relative to the upper left corner of a
document. It allows you to select an area on the document to be
delivered in either color/grayscale or black and white format (a
separate window for both black and white and color/grayscale may
be defined). Different parameters may be selected for both the front
and back of the image.
This option may be used in conjunction with Automatic cropping
where a separate color/grayscale or black and white area to be
saved is desired. It is useful in applications where a photograph,
signature, embossment or seal appears in a consistent area for an
application (you may want that small area in color/grayscale and the
rest in black and white). To define a zone, select the Layout tab.
Binarization — these options work on grayscale images and outputs a
black and white electronic image. Their strength lies in the ability to
separate the foreground information from the background information
even when the background color or shading varies, and the foreground
information varies in color quality and darkness. Different types of
documents may be scanned using the same image processing
parameters and results in excellent scanned images.
• iThresholding: allows the scanner to dynamically evaluate each
document to determine the optimal threshold value to produce the
highest quality image. This allows scanning of mixed document sets
with varying quality (e.g., faint text, shaded backgrounds, color
backgrounds) to be scanned using a single setting thus reducing the
need for document sorting. When using iThresholding, only Contrast
can be adjusted.
• Fixed Processing (FP): used for black and white and other high
contrast documents. If Fixed Processing is selected, only
Brightness can be adjusted.
• Adaptive Thresholding (ATP): separates the foreground
information in an image (e.g., text, graphics, lines, etc.) from the
background information e.g., white or non-white paper background).
When using Adaptive Thresholding, Brightness and Contrast can be
adjusted. Use this option when scanning similar type documents.
Threshold (Brightness) — this option is available when you select
Fixed Processing or Adaptive Thresholding (ATP). This option
allows you to change the black and white image to be darker or lighter.
The higher the threshold value, the darker the image. Use the slider to
select a value from 0 to 255. The default is 90.
Contrast ⎯ adjust s how much of the fain t detail you want to see in the
output image. The higher the contrast value, the more fa int lin es will be
shown in the image. The lower the contrast value, the clearer (or less
detailed) the output image will be. If contrast is set too high, you may
get lines or black areas in your output image that you do not want. If the
contrast is set too low, some letters or lines may not show in the output
image. Select a contrast value from -50 to 50. The default is 50.
8 A-61849/ISIS January 2016
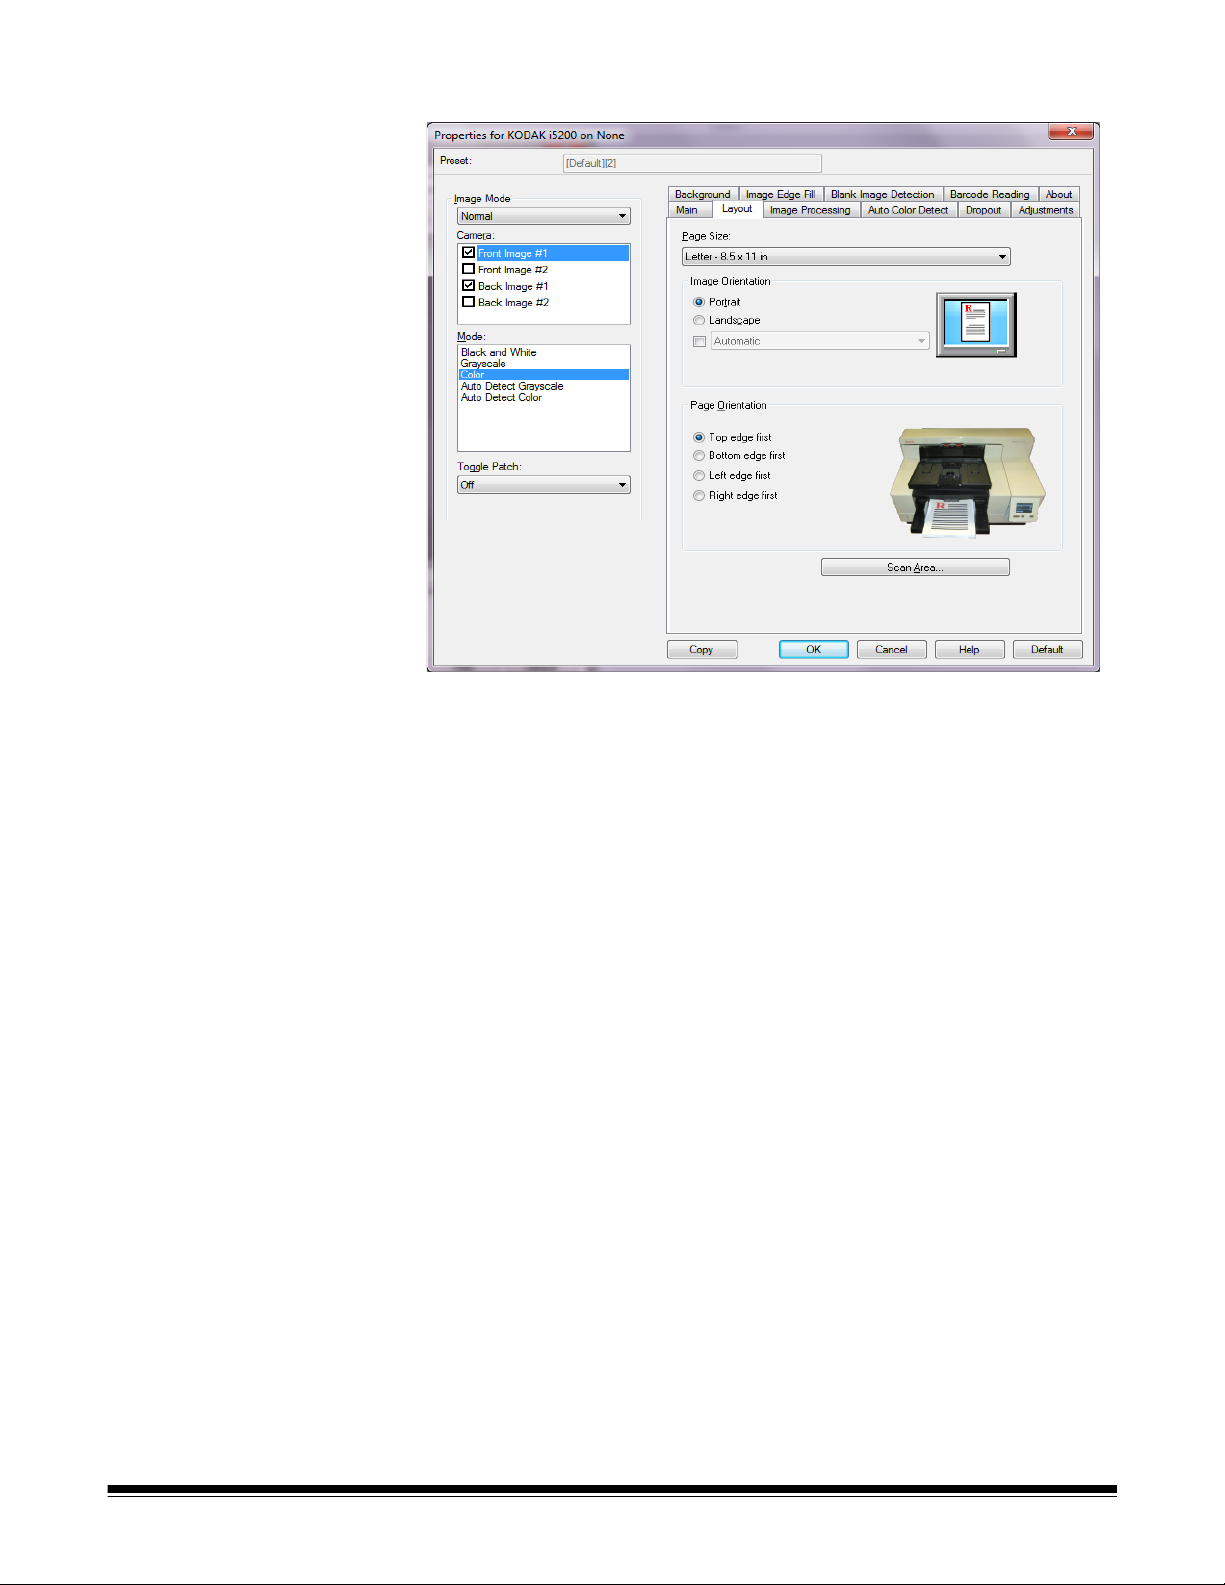
Layout tab The Layout tab provides the following options.
Page Size ⎯ the default page size is set when a scanner is first
selected. Y ou can choose a different p age size using the drop-down list.
Page size should be set to the Scanner’s maximum when using the
Automatic or Aggressive cropping option.
Image Orientation
• Portrait: displays the image orientation in the shape of a
conventional portrait, where height is greater than width.
• Landscape: displays the image orientation in the shape of a
conventional landscape painting, where width is greater than height.
• Automatic — the scanner will analyze each document to determine
how it was fed and will rotate the image to the proper orientation.
- Automatic - default to 90: the scanner will analyze the content
of each document to determine how it was fed and will rotate the
image to the proper orientation. If the scanner cannot determine
how the document was fed, it will rotate the image 90 degrees.
- Automatic - default 180: the scanner will analyze the content of
each document to determine how it was fed and will rotate the
image to the proper orientation. If the scanner cannot determine
how the document was fed, it will rotate the image 180 degrees.
- Automatic - default 270: the scanner will analyze the content of
each document to determine how it was fed and will rotate the
image to the proper orientation. If the scanner cannot determine
how the document was fed, it will rotate the image 270 degrees.
A-61849/ISIS January 2016 9
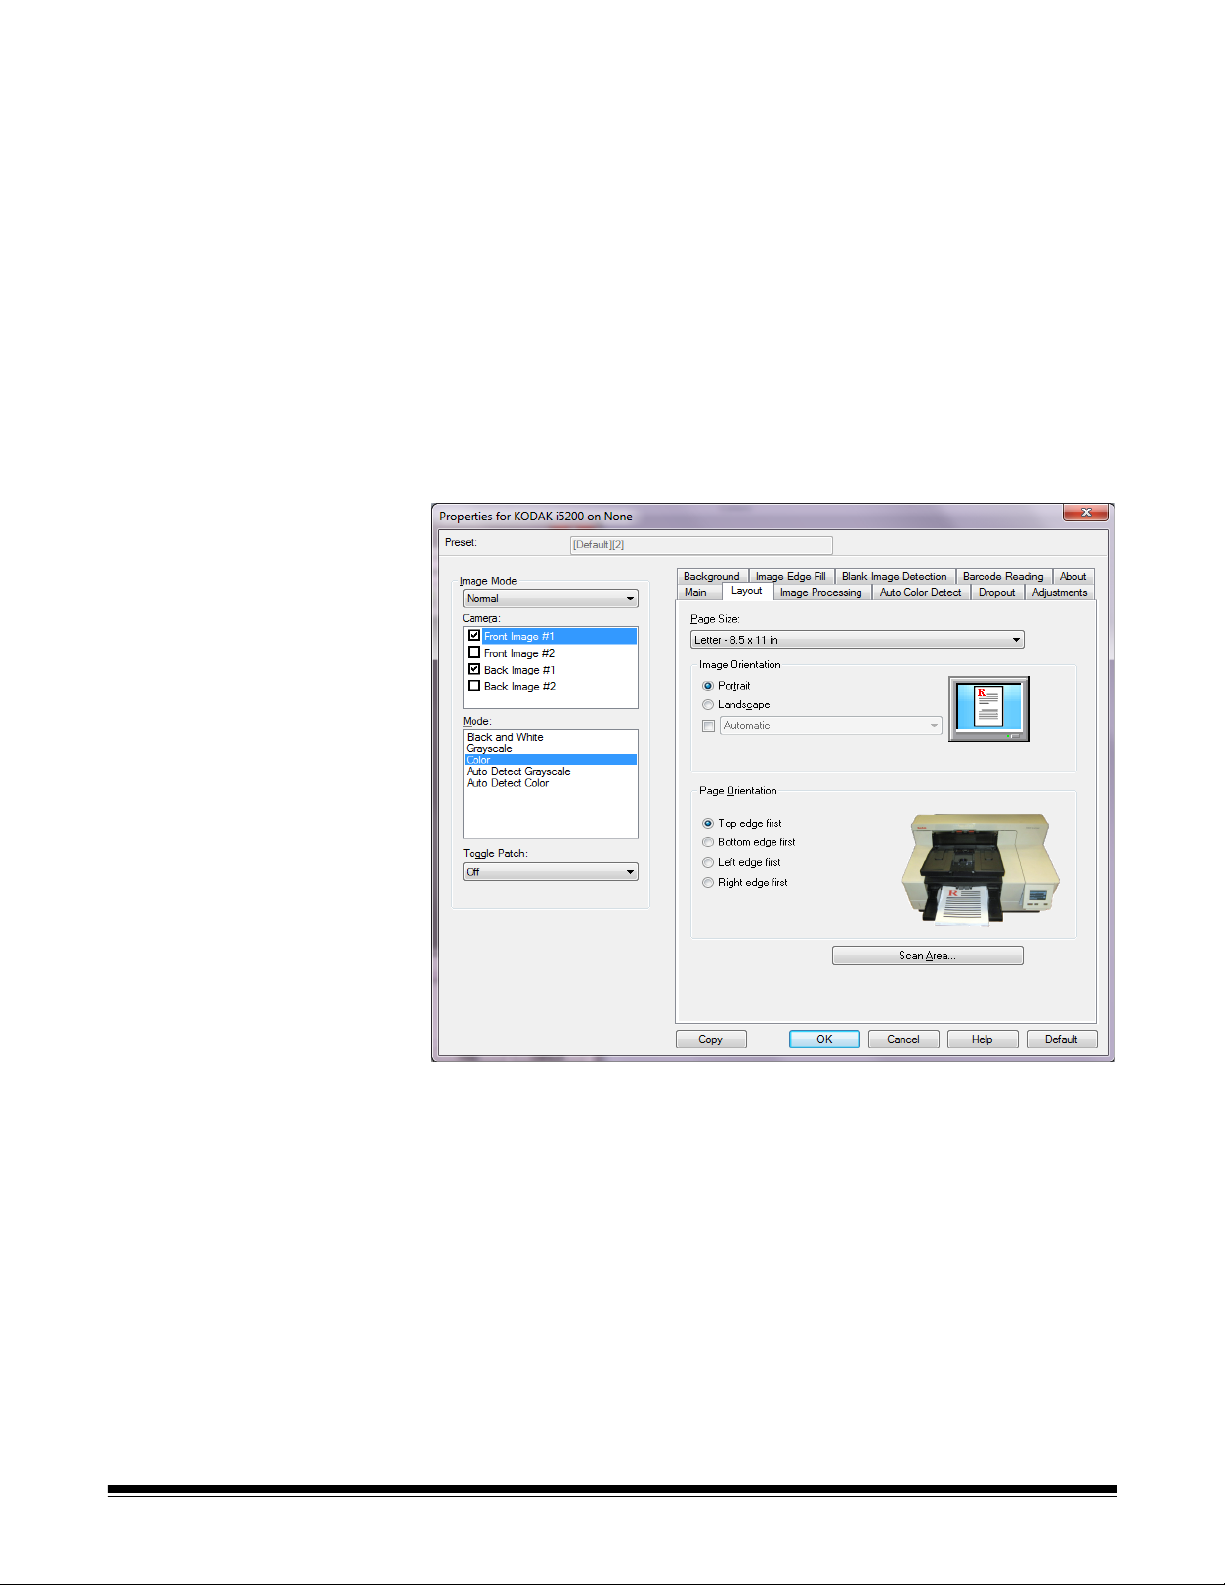
Page Orientation — allows you to select the way you place your
documents in the scanner, Top edge first, Bottom edge first, Left
edge first or Right edge first.
Scan Area — displays the Scan Area dialog box. The Scan Area
options are only available for images when the cropping option is Fixed
to Transport or Relative to Document. See the next section entitled,
“The Scan Area dialog box” for more information.
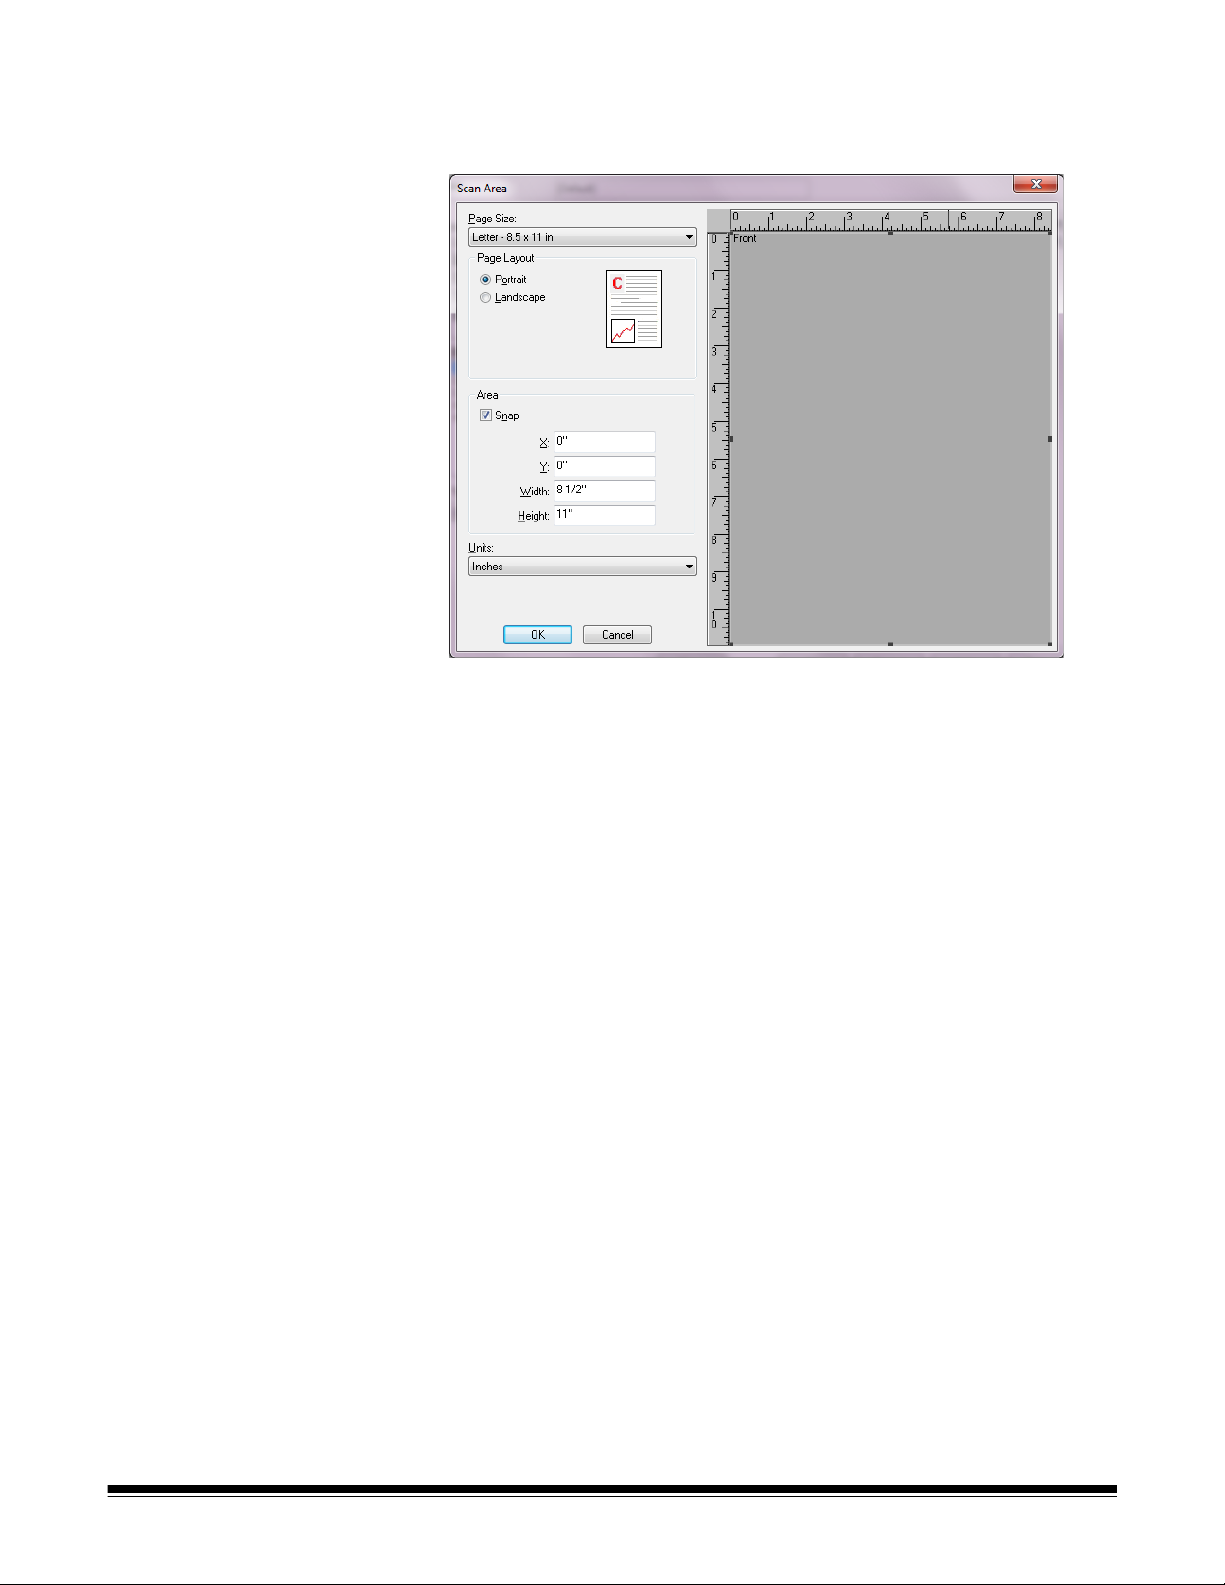
Scan Area dialog box The Scan Area dialog box allows you to define the amount of image
data which is returned to the host.
NOTE: Select the desired Camera Mode (e.g., Front Image #1, Front
Image #2, Back Image #1 and/or Back Image #2).
• Select Scan Area on the Layout tab to access the Scan Area dialog
box.
10 A-61849/ISIS January 2016
NOTE: The Scan Area dialog box is only available when Fixed to
Transport or Relative to Document is selected on the Main
tab.
Page Size ⎯ the default paper size is set when a scanner is first
selected. You can choose a different paper size using the drop-down
list.
NOTE: Page Size also appears on the Layout tab. If you make a
change on the Scan Area dialog box, the same selection
appears on the Layout tab and vice versa.
Page Layout
• Portrait: displays the image orientation in the shape of a
conventional portrait, where height is greater than width.
• Landscape: displays the image orientation in the shape of a
conventional landscape painting, where width is greater than height.
Area
• Snap ⎯ enable this option to control the dimensions of the preview
area to fixed 0.3175 cm (1/8-inch) increments. This option is not
available in Pixels mode.
• X: the distance from the left end of the scanner to the left-edge of the
scanning area.
• Y: the position from the top end of the document to the top end of the
scanning area.
• Width: the width of the scanning area.
• Height: the height of the scanning area.
Units — select whether you want the area to be defined in Pixels,
Inches or Centimeters.
A-61849/ISIS January 2016 11
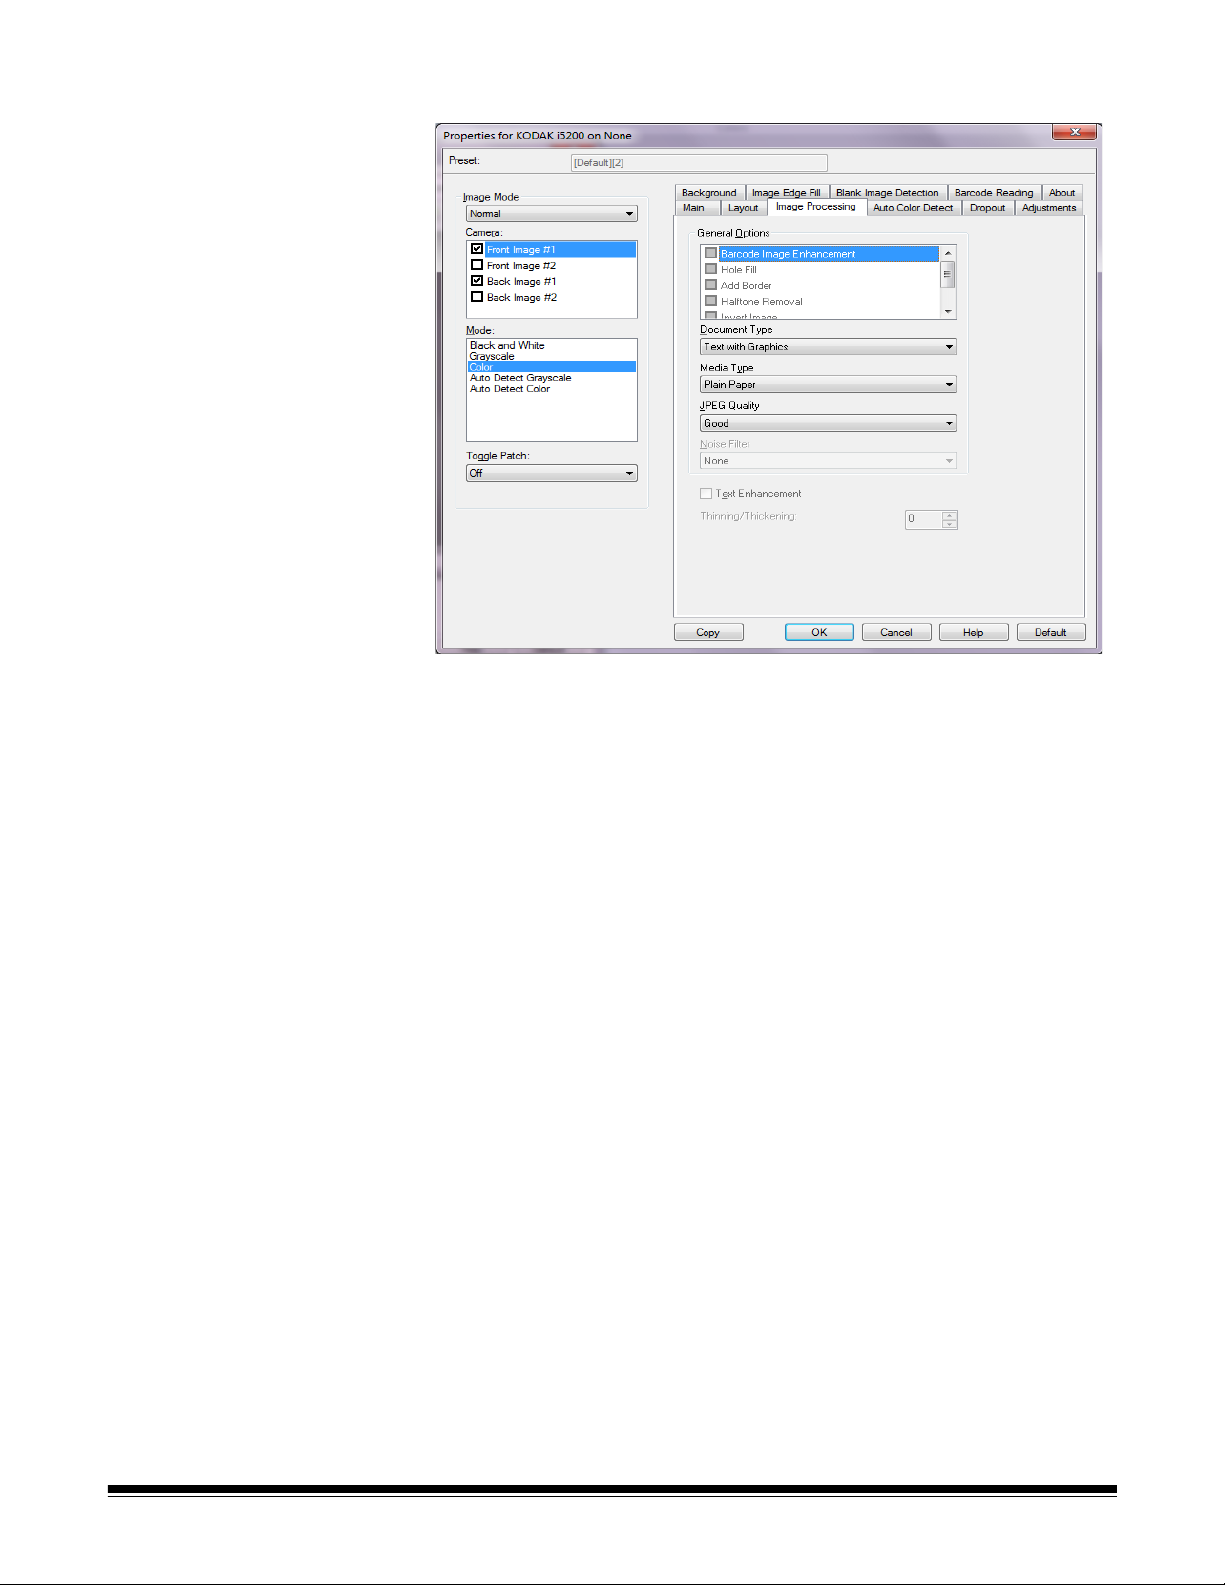
Image Processing tab The Image Processing tab provides the following options.
General Options
NOTE: Depending on your Cropping selection, some of the following
options are not available.
• Barcode Image Enhancement — allows you to configure the
scanner so it will optimize the barcodes for reading by your
application. The scanner will automatically find the 1D and 2D
barcodes in a black and white image and will apply special image
processing to the barcodes to make them easier for barcode reading
after they are scanned. Barcode Image Enhancement does not ef fect
barcode reading that is enabled in the ISIS Driver, as the barcode
reading functionality that Kodak Alaris provides is performed using
high resolution grayscale data during image processing.
• Hole Fill — allows you to fill in the holes that are around the edges of
your document. The types of holes that are filled include: round,
rectangular, and irregularly shaped (e.g., double-punched or those
having a slight tear that could have occurred when the document was
removed from a binder).
NOTE:Do not turn Hole Fill on if you are scanning photos.
• Add Border — allows yo u to add a fixed a mount of border to the left,
right, top and bottom edge of the image.
• Halftone Removal ⎯ enhances images containing dot matrix text
and/or images with shaded or colored backgrounds using halftone
screens and effectively eliminates noise caused by the halftone
screen.
12 A-61849/ISIS January 2016

• Invert Image ⎯ allows you to select how the black pixels will be
stored in the image. By default the black pixels are stored as black
and the white pixels are stored as white. Turn this option on if you
want the black pixels stored as white and the white pixels stored as
black.
NOTE:You may want to change this option if your application
misinterprets the image data and stores your image in
reverse of what you expect.
• Deskew ⎯ automatically straightens a document within ±0.3
degrees of the leading edge of the document. Deskew can detect up
to a 45-degree skew and correct up to a 24-degree angle at 200 dpi
or a 10-degree skew angle at 300 dpi.
NOTE:To prevent data loss, the document must have all four
corners within the image path.
Document Type
• Text: when the documents you want to scan contain mostly text.
• Text with Graphics: when the documents you want to scan contain a
mix of text, business graphics (bar graphs, pie charts, etc.) and line
art.
• Text with Photographs: when the documents you want to scan
contain a mix of text and photos.
• Photographs: when the documents you want to scan are comprised
mainly of photos.
Media T ype — allows you to select the type of p aper you are scanning,
based upon the texture/weight. The options are: Plain Paper, Thin
Paper, Glossy Paper, Card Stock and Magazine.
JPEG (Joint Photographic Editor Group) Quality — if you choose
JPEG compression, select one of the quality options:
• Draft: maximum compression which produces the smallest image
size.
• Good: a fair amount of compression but still produces acceptable
image quality.
• Better: some compression which produces decent image quality.
• Best: minimal compression which produces very good image quality.
• Superior: the least amount of compression which produces the
largest image size.
A-61849/ISIS January 2016 13

Noise Filter
• None
• Lone Pixel: reduces random noise by converting a single black pixel
to white when it is completely surrounded by white pixels or by
converting a single white pixel to black when it is completely
surrounded by black pixels.
• Majority Rule: sets each pixel based on its surrounding pixels. The
pixel will become white if the majority of the surrounding pixels are
white and vice versa.
• Background: locates and analyzes the background areas of the
image (e.g., non-text areas) and reduces random noise that may be
multiple pixels in size.
Text Enhancement — allows you to configure the scanner to improve
the appearance of text. Turn this option on if your document is mostly
text and the characters are disconnected or not smooth. This option
improves the readability of dot matrix printing and improves poor quality
characters if the font size and/or resolution is large/high enough.
NOTES:
• This may have no effect on small fonts and effectiveness may be
diminished if Thinning/Thickening is being used.
• If the font size is too small or the resolution is not high enough, this
option may cause characters to fill in.
Thinning/Thickening — allows you to make the lines and characters
appear to be thinner or thicker. Decreasing this setting will make the
lines and characters thinner/smaller. Increasing this setting will make
the lines and characters thicker/larger. The default is 0, no thinning or
thickening.
14 A-61849/ISIS January 2016
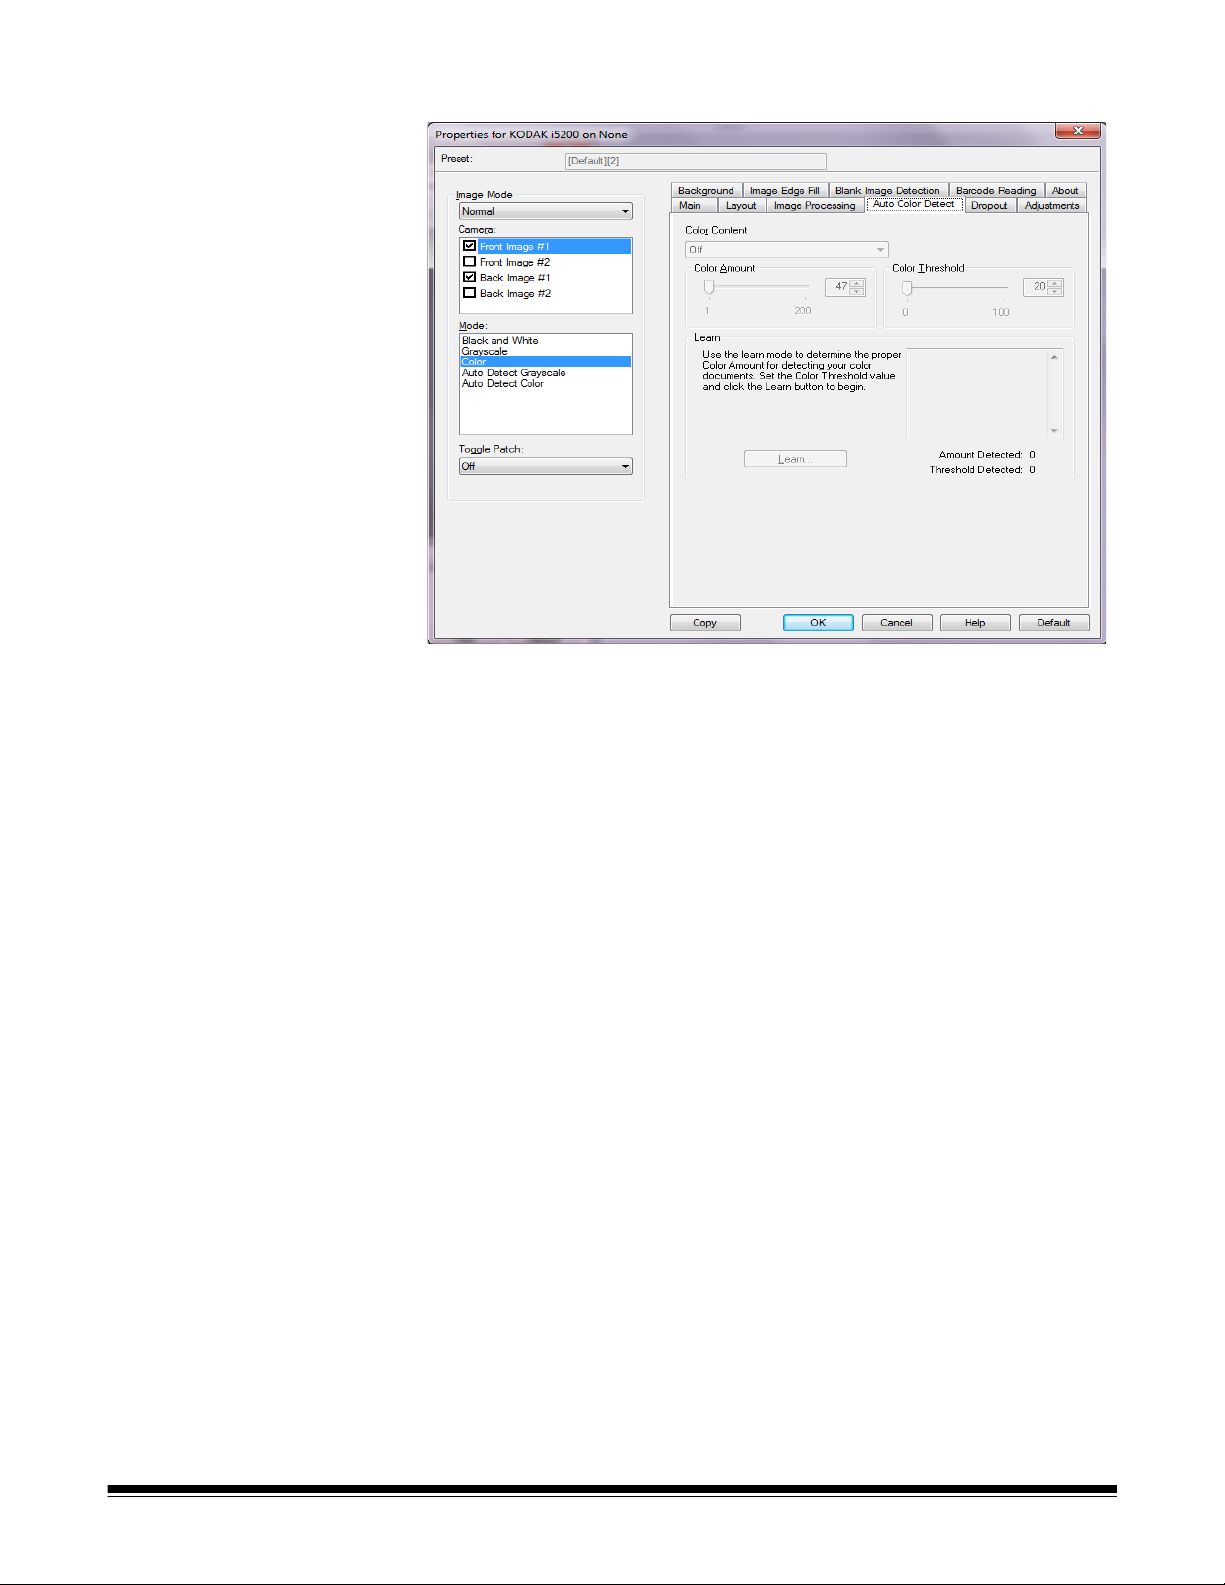
Auto Color Detect tab The Auto Color Detect tab provides the following options.
Color Content
• Off: this is the default. No color content will be detected.
• Low: documents requiring only a small amount of color to be saved
as color or grayscale images. Used for capturing documents tha t are
primarily black text with small logos, or contain small amounts of
highlighted text or small colorful photos.
• Medium: documents require more color, as compared with the Low
option, before they are saved as color or grayscale images.
• High: documents require more color, as compared with the Medium
option, before they will be saved as color or grayscale images. Used
for distinguishing documents containing medium- to large-size
colorful photos from plain black text. Photos with neutral colors may
require adjustments to the Color Threshold or Color Amount values in
order to be captured correctly.
A-61849/ISIS January 2016 15

• Custom: allows you to manually adjust the Color Amount and/or
Color Threshold.
NOTE:When setting Auto Color Detect values, it is suggested that
you start with the Medium option and scan a typical job set. If
too many documents were returned as color/grayscale vs.
black and white, then change to the High option and re-run
the job. If too few documents were returned as color/
grayscale vs. black and white, then change to the Low option
and re-run the job. If none of these options provide the
desired result, select Custom option to manually adjust Color
Amount and/or Color Threshold.
Color Amount: the amount of color that needs to be present in a
document before it will be saved as either color or grayscale. As the
value of Color Amount increases, more color pixels are required. Valid
values are 1 to 200.
Color Threshold: the color threshold or intensity (i.e., pale blue vs.
dark blue) at which a given color will be included in the color amount
calculation. A higher value indicates that a more intense color is
required. Valid values are 0 to 100.
Learn — allows you to calculate your settings based on representative
color documents scanned. Before selecting Learn, place at least 5
representative color documents in the input elevator. The documents
will be scanned and analyzed to determine the recommended Color
Amount.
NOTE: The Color Amount and Color Threshold sliders will be
updated automatically. If these values do not provide the
desired results with your job set, you may need to manually
adjust the Color Threshold.
16 A-61849/ISIS January 2016

Dropout tab The Dropout tab provides the following options.
Color Dropout — used to eliminate a form's background so that only
the entered data is included in the electronic image (e.g., remove the
form’s lines and boxes). For black and white images, these settings
effect the grayscale version of the document which the scanner
analyzes to produce that electronic image.
• Color: select the desired dropout color.
- None
- Multiple: drops colors other than dark shades (e.g., black or dark
blue ink). This feature will do a color analysis of every image
scanned and will drop out up to 5 different colors. The individual
color can be any color of more than 16 million colors. Use the
Aggressiveness slider to adjust the color. This feature is unique in
that it looks at every page that is scanned. You do not need to
pick which color(s) to drop. Multiple is available for grayscale
output.
- Predominate: drops the predominant color. Use this option even
if your forms are all the same color, as it drops a wider range of
single colors. This option is also a good choice if you have
several forms that each have one form color as you can mix the
forms in a single batch.
-Red
-Green
-Blue
- Orange
- Orange and Red
A-61849/ISIS January 2016 17

• Aggressiveness: allows you to ad just the exte nt at which colors are
dropped. The values range from -10 to 10. The default is 0. This
option is only available when Color is set to Multiple or
Predominant.
NOTES:
• All Color Dropout options are available when the Mode selection is
Black and White.
• Red, Green, Blue, Orange and Orange and Red are available for
grayscale scanning.
• Color dropout is not available for color scanning.
The following red, green and blue Pantone values should provide good
dropout performance.
These values were established by using the standard Pantone
Matching System® Colors guide (uncoated, 175-line screen). If the
background of the document you are using is not bright white, the
results may vary. iThresholding is recommended. If iThresholding does
not provide acceptable color dropout results, the ATP conversion
quality setting will provide more control for binarization.
The following is a list of colors which may be used with the red, green
and blue dropout options.
Red Dropout
144U 150U 151U 1485U 1495U 1505U Orange
021 U
157U 158U 1555U 1565U 1575U 1585U 162U 163U
164U 165U 1625U 1635U 1645U 1655U 169U 170U
171U 172U 176U 177U 178U Warm Red U179U 1765U
1775U 1785U 1788U 1767U 1777U 1787U Red 032U 182U
183U 184U 185U 186U 189U 190U 191U 192U
1895U 1905U 1915U 1925U 196U 197U 198U 199U
200U 203U 204U 205U 206U 210U 211U
213U 217U 218U 219U Rubine Red U223U 224U 225U
226U 230U 231U 232U Rhodamine
Red U
239U 240U 2365U 2375U 2385U 2395U 2405U 243U
244U 245U 246U 247U 250U 251U 252U Purple U
253U 256U 257U 2562U 2572U 2582U 2563U 2573U
2567U 263U 264U 2635U 2645U 236U 2365U 2375U
243U 244U 245U 250U 251U 256U 257U 2562U
2572U 2582U 2563U 2567U 263U 264U 2635U 2645U
1375U
236U 237U 238U
156U
212U
18 A-61849/ISIS January 2016
Green Dropout
106U 107U 108U 109U 113U 114U 115U 120U
121U 122U 1205U 1215U 127U 134U 135U 1345U
148U 317U 3245U 331U 332U 333U 337U 3375U
3385U 3395U 344U 345U 351U 352U 353U 358U
359U 360U 365U 366U 367U 368U 372U 373U
374U 375U 376U 379U 380U 381U 382U 386U
387U 388U 389U 390U 393U 394U 395U 396U
397U 3935U 3945U 3955U 3965U 317U 3294U
Blue Dropout
317U 3245U 236U 2365U 2375U 243U 244U 245U
250U 251U 256U 257U 2562U 2572U 2582U 2563U
2567U 263U 264U 2635U 2645U 236U 2365U 2375U
243U 244U 245U 250U 251U 256U 257U 2562U
2572U 2582U 2563U 2567U 263U 264U 265U 266U
2635U 2645U 2655U 270U 271U 272U 2705U 2715U
2725U 2706U 2716U 2726U 2707U 2717U 2727U 2708U
2718U 2728U 277U 278U 279U 283U 284U 285U
290U 291U 292U 293U 2905U 2915U 2925U 2935U
297U 298U 299U 300U 2975U 2985U 2995U 3005U
304U 305U 306U Process
Blue U
3105U 3115U 3125U 317U 318U 319U 324U 3242U
3252U 3245U
310U 311U 312U 313U
A-61849/ISIS January 2016 19
 Loading...