

Page 1

Getting Started
The
Printing Guide
shipped with your Kodak Professional 8660 thermal printer (8660 pr inter).
This guide assumes that you are an experienced computer user who
understands how to install programs and that y ou are familiar with printing
software and how it works.
The printing software for the 8660 printer consists of the export module, a
plug-in for Adobe Photoshop. Use the expor t module within Photoshop to
send a job to the 8660 printer. The expor t module allows you to:
•
scale an image.
•
reprint the last image sent to the 8660 printer.
•
print in landscape or por trait mode.
•
print in package mode.
•
apply print sharpening.
•
use Colorflow connector files to perform custom color rendering or
printer tables for an improved match to your monitor.
explains how to use the printing software that is
Operator’s Guide
Printing Guide
Color Management
Calibration
Network
Interface Guide
Getting Started
Using the Export
Module for Adobe
Photoshop
About Printer Tables
•
center an image on the page.
•
create a mirror image.
Since the export module runs within Photoshop, you can use Photoshop’s
image processing functions before you print. The expor t module is
compatible with Photoshop 4.0 and higher.
CONTENTS
INDEX
SEARCH
HELP
Page 2

Getting Help or Additional Information
Your Kodak dealer is the best source for information about setting up,
operating, and obtaining accessories and supplies for your 8660 printer.
Contact your dealer with any questions.
Operator’s Guide
Printing Guide
The Operator’s Guide can help you with a printing problem. For more
information, ref
er to “Troubleshooting.” For technical support in the US,
call 1-800-23KODAK (1-800-235-6325) between 9:00 a.m.and 8:00 p.m.
Eastern Standard Time on regular business days. Call this number :
•
for help setting up or operating the printer.
•
to obtain supplies.
•
for service.
•
for warranty information.
•
for infor mation about other Kodak products.
The FAX back number for product literature is 1-800-508-1531.You may
call this number 7 days a week, 24 hours a day.
Telephone numbers for help outside the US are listed in the Operator’s
Guide. Ref
er to “Getting Additional Help.”
Color Management
Calibration
Network
Interface Guide
Getting Started
Using the Export
Module for Adobe
Photoshop
About Printer Tables
CONTENTS
INDEX
SEARCH
HELP
Page 3

Getting Information from the Kodak Home Pag e
Access the Kodak Web site to download the most recent printing software
for the 8660 printer. Use the path http://www.kodak.com, and click on
Support. Click on Software and Drivers for Kodak Products, and select the
8660 printer from the Printers and Copier-Printers menu.
Operator’s Guide
Printing Guide
Color Management
Calibration
Network
Interface Guide
Getting Started
Using the Export
Module for Adobe
Photoshop
About Printer Tables
CONTENTS
INDEX
SEARCH
HELP
Page 4

Using the Export Module for Adobe
Photoshop
This chapter explains how to use the expor t module to send Photoshop
images to your 8660 printer.
Hardware and Software Requirements
Operator’s Guide
Printing Guide
Color Management
Make sure your system has the following hardware and software:
For Macintosh:
•
66 MHz PowerPC 601 processor with 32 MB of memory minimum.
•
System 8.0 or higher.
•
Color monitor (minimum resolution 640 x 480 pixels).
•
SCSI or Ethernet adapter.
For Windows:
•
133 MHz Pentium processor with 32 MB of memory minimum.
•
Windows 95, Windows NT 4.0 Workstation, or Windows NT 4.0 Server.
•
Color monitor (minimum resolution of 640 x 480 pixels).
•
ASPI compatible SCSI controller, Ethernet adapter, or available parallel
port.
CONTENTS
INDEX
SEARCH
HELP
Calibration
Network
Interface Guide
Getting Started
Using the Export
Module for Adobe
Photoshop
About Printer Tables
Page 5

Installing the Export Module
The software for the expor t module is included on the CD that came with
your 8660 printer.
Operator’s Guide
Printing Guide
To install the export module on Macintosh systems:
1.
Double-click on the icon for the 8660 printer CD on your desktop.
2.
Double-click on the Getting Started icon.
3.
Click on the appropriate language.
4.
Click on Export Module.
5.
Select Easy Install from the list, and follow the prompts.
To install the export module on Windows systems:
1.
Double-click on Windows 95/98 icon or the My Computer icon for
Windows NT.
2.
Double-click on the Kodak 8660 printer icon.
3.
Double-click on Setup32 exe.
4.
Click on the appropriate language.
5.
Click on Export Module, and follow the prompts.
Color Management
Calibration
Network
Interface Guide
Getting Started
Using the Export
Module for Adobe
Photoshop
About Printer Tables
CONTENTS
INDEX
SEARCH
HELP
Page 6

Printing a File
The following steps describe how to send a Photoshop file to the 8660
printer. For instructions on package printing, refer to “Using Package
Printing.” For instructions on applying a color connector file to your print
job ref
NOTE: The layout icon on the General tab displays the
er to “Using the Expor t Module with Color Connector.”
1.
Open Photoshop, and open an image file.
2.
From the File menu choose Expor t and then Kodak 8660 Printer.
3.
If a message tells you that no 8660 printer is selected, choose Select.
Refer to “Selecting an 8660 Printer.”
4.
Make your selections from the General, Media, Color Management,
and Printer tabs.
er to “Dialog Box Options.” for more infor mation on the options on
Ref
the General, Media, Color Management, and Printer tabs.
relationship between the image size and location to
the page and printable area.The icon changes when
you change the settings for Page Size, Orientation,
Center, Mirror, Scaling, and Package. Any portion of
the image that is outside the printable area and will
be cropped is displayed in red.
Operator’s Guide
Printing Guide
Color Management
Calibration
Network
Interface Guide
Getting Started
Using the Export
Module for Adobe
Photoshop
About Printer Tables
5.
Click on Print.
CONTENTS
INDEX
SEARCH
HELP
Page 7

Selecting an 8660 Printer
Use the Select a Kodak Professional 8660 thermal pr inter dialog box to
choose the appropriate 8660 printer to print your file.
Operator’s Guide
Printing Guide
To select an 8660 printer with a SCSI connection to your
host computer:
1.
Click on the Printer tab in the Kodak Professional 8660 thermal
printer dialog box.
2.
Click on Select Printer.
3.
Select the number of the SCSI host adapter.
NOTE: The ribbon and paper for the selected 8660 printer are listed in
the Page Media and Ribbon columns. If the 8660 printer cannot
detect the paper and ribbon information, Unknown appears in the
Page Media and Ribbon columns. Other devices on the SCSI bus,
unrecognized or unavailable SCSI or network devices are
disabled.
4.
Click on the radio button for the correct 8660 printer.
5.
Click on OK.
Color Management
Calibration
Network
Interface Guide
Getting Started
Using the Export
Module for Adobe
Photoshop
About Printer Tables
CONTENTS
INDEX
SEARCH
HELP
Page 8

To select an 8660 printer with a network connection to your
host computer:
1.
Click on the Printer tab in the Kodak Professional 8660 thermal
printer dialog box.
2.
Click on Select Printer.
3.
Click on Network in the Select an 8660 thermal printer dialog box.
4.
Use the dialog boxes that open to locate (Macintosh) or browse
(Windows) to the 8660 printer you wish to use.
Operator’s Guide
Printing Guide
Color Management
Calibration
5.
Click on OK.
CONTENTS
INDEX
SEARCH
Network
Interface Guide
Getting Started
Using the Export
Module for Adobe
Photoshop
About Printer Tables
HELP
Page 9
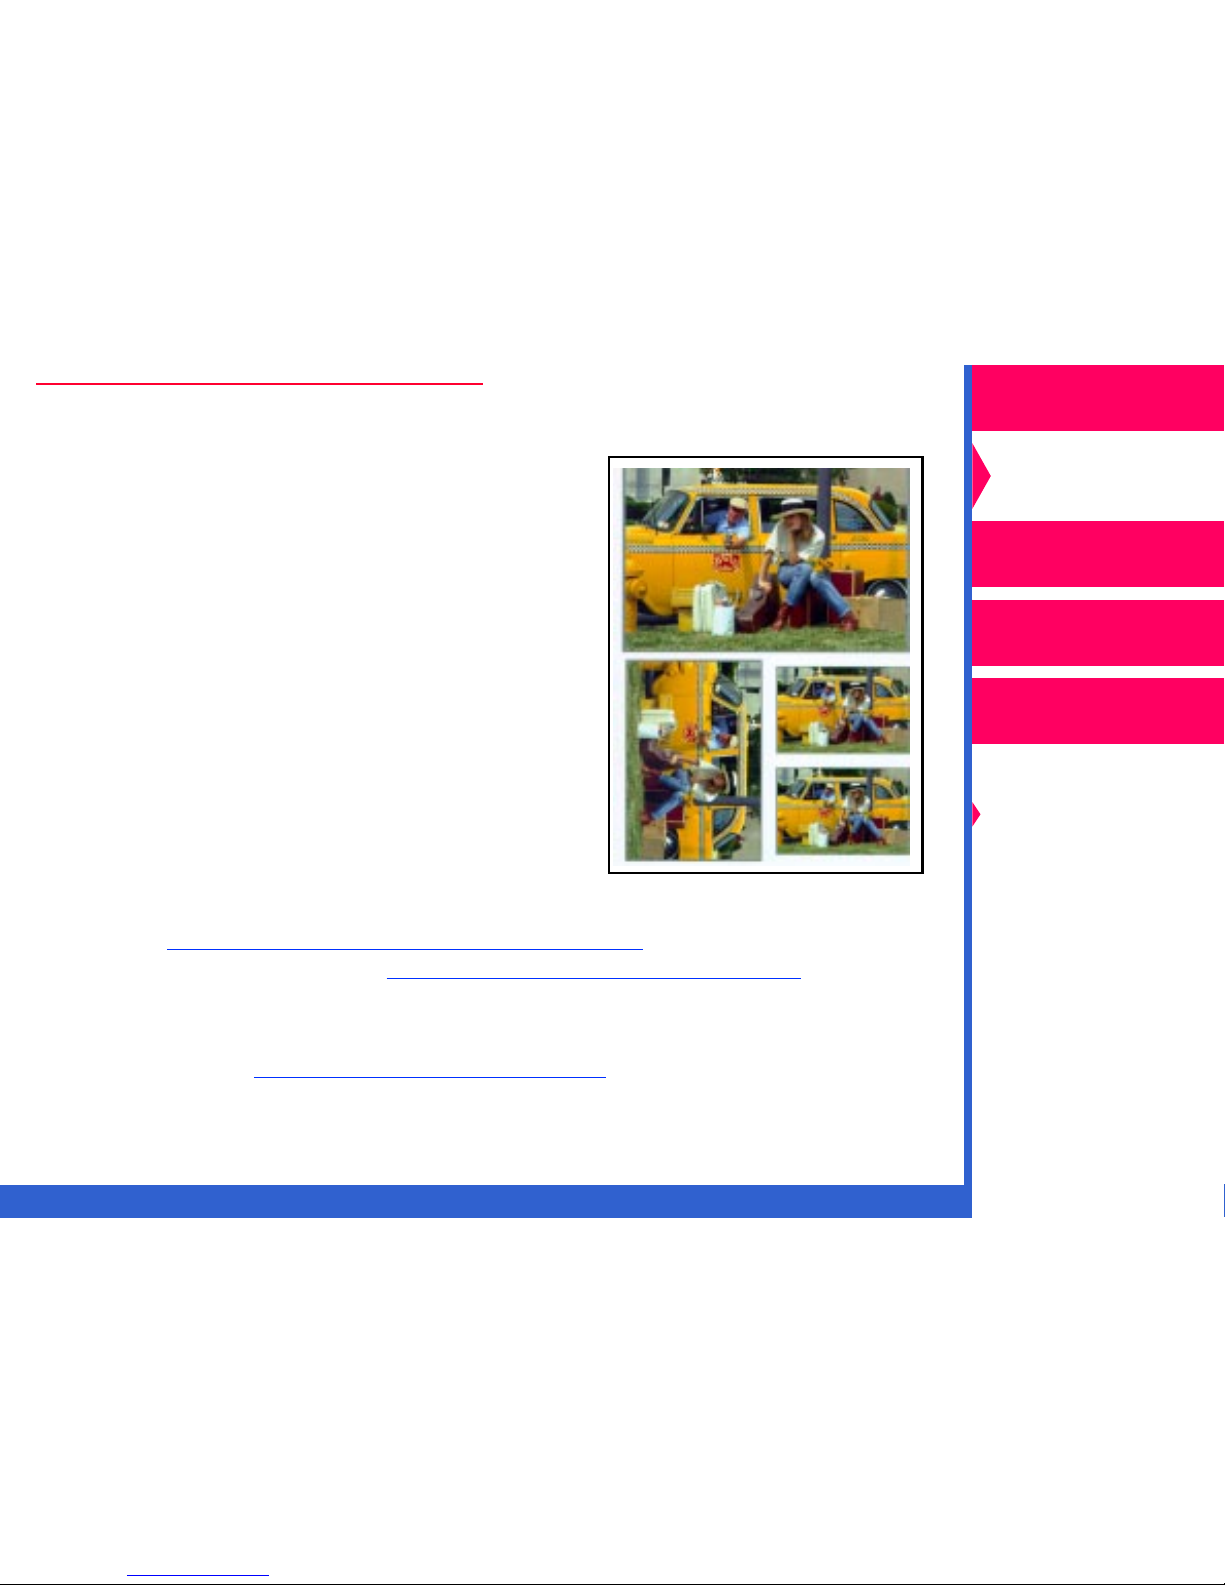
Using Package Printing
With package printing, you send a single
image to the 8660 printer and get multiple
image sizes on your print. For example, by
selecting the package 5x7 in. and 3.5x5 in.
and Wallets your copy will contain one
5 in.x7in. print, one or more 3.5x5 in. print,
and a number of wallet size prints (depending
on the paper size selected) on a single
printed page.
The print sizes may not be exact because of
the height-to-width ratio of the images. To fill
the entire print area, you may need to resize
the image in Photoshop before printing.
You can select from several preformatted
packages, or you can create your own
custom packages. For infor mation on how to use the preformatted
packages, ref
to set up a custom package, ref
er to “Using Preformatted Packages.”For information on how
er to “Using Custom Packages.”
Operator’s Guide
Printing Guide
Color Management
Calibration
Network
Interface Guide
Getting Started
Using the Export
Module for Adobe
Photoshop
About Printer Tables
When you select a printing package, the 8660 printer automatically sets
the Scaling, Center, Mirror, and Orientation options. For more information
on these options, ref
CONTENTS
er to “Dialog Box Options.”
INDEX
SEARCH
HELP
Page 10

Using Preformatted Packages
To select a preformatted printing package to apply to your print job:
1.
Click on the General tab in the Kodak Professional 8660 thermal
printer dialog box.
2.
Select the preformatted package you wish to use from the Package
menu.
Operator’s Guide
Printing Guide
Color Management
NOTE: The icon on the General tab displays the
number of images and the layout of the
package on the printable area on the page.
If the package does not fit on the page, the
layout icon changes to a not symbol; and a
message appears indicating that you
should select a larger page size.
3.
Check the layout icon for paper mismatch
messages. If necessary, select a paper size to
accommodate the package.
CONTENTS
INDEX
SEARCH
A Larger Page Size Will
Provide More Images
HELP
Calibration
Network
Interface Guide
Getting Started
Using the Export
Module for Adobe
Photoshop
About Printer Tables
Page 11

Using Custom Packages
To select a custom package to apply to your print job:
1.
Click on the General tab in the Kodak Professional 8660 thermal
printer dialog box.
2.
Choose Select from the Package menu.
3.
Select a custom package in the file selection box for Macintosh
systems, or click on Browse to locate a custom package for Windows
systems.
Operator’s Guide
Printing Guide
Color Management
Calibration
OR
Select one of previously-selected custom packages listed on the
bottom of the Package menu.
4.
Check for any paper size mismatch messages. If necessar y, select a
different paper size.
NOTE: When you select a custom package, the icon changes to a
diskette. If the images do not fit on the page, the icon changes to
a not symbol; and a message indicating that all the images are off
the page appears under the symbol. If some of the images do not
fit on the page, a message appears indicating that some of the
images are off the page.
To learn more about creating your own custom packages, ref
er to
“Creating Custom Packages.”
CONTENTS
INDEX
SEARCH
HELP
Network
Interface Guide
Getting Started
Using the Export
Module for Adobe
Photoshop
About Printer Tables
Page 12

Creating Custom Packages
Create your own custom packages in a file that defines the template for
the custom package. Using pixels as the dimensional units, specify the
size of the images and where you want the images to appear on the
printed page. Use any word processing application to create the file, and
save it as an ASCII text file. You can then select the file to apply to your
print job.
Operator’s Guide
Printing Guide
Color Management
NOTE: The CD that was shipped with the 8660 printer contains samples
of custom package template files. Use these files as examples for
creating your own custom package template files.
For each image, type four numbers in pixels denoting:
•
distance from the left side of the paper’s imageable area to the upper
left corner of the image
•
distance from the top of the paper’s imageable area to the upper left
corner of the image
•
width of the image
•
length of the image
CONTENTS
INDEX
SEARCH
HELP
Calibration
Network
Interface Guide
Getting Started
Using the Export
Module for Adobe
Photoshop
About Printer Tables
Page 13

Use the following format to define the placeholders
for the images in your custom template:
Operator’s Guide
Type: KPKG<EOL>
Version 1.0<EOL>
#<comments>EOL>
x1,y1,xdim1,ydim1<EOL>
x2,y2,xdim2,ydim2<EOL>
......
xN,yN,xdimN,ydimN<EOL>.
Guidelines for creating a template file:
•
The Type field is always KPKG.
•
The Version is always 1.0.
• The # sign designates the beginning of a comment (used to identify
your file or to add any comments).
• The upper left corner of placeholder N is identified by xN, yN as
referenced from the 0,0 datum of the imageable area of the page.
• The dimensions of placeholder N are in integers identified by xdimN,
ydimN with no integers at a value less than 6.
• The x and y values are non-negative integers separated by commas.
Printing Guide
Color Management
Calibration
Network
Interface Guide
Getting Started
Using the Export
Module for Adobe
Photoshop
About Printer Tables
• The end of a specification for an image placeholder is indicated by
<EOL>, a hard carriage return.
NOTE: The export module does not support overlapping images.
CONTENTS
INDEX
SEARCH
HELP
Page 14

Example of a custom package file to make two prints on a
page:
Operator’s Guide
#Custom file with two placeholders
Type: KPKG<CR>
Version: 1.0<CR>
100, 200, 500, 600<CR>
1100, 1100, 1050, 750<CR>
Printing Guide
Color Management
Calibration
Network
Interface Guide
Getting Started
Using the Export
Module for Adobe
Photoshop
About Printer Tables
CONTENTS INDEX SEARCH HELP
Page 15

Using the Export Module with Color Connector
Color connector is a color management application that is shipped with
the 8660 printer. Color connector allows you to make prints that match the
colors produced by an input device such as a scanner or monitor. It also
allows you to simulate a job as if it were pr inted on a commercial printing
press. For more information on creating color connector files ref
“Using Color Connector.”
Applying a Default Color Connector File to your Job
er to
Operator’s Guide
Printing Guide
Color Management
Calibration
You can store frequently-used color management information in the 8660
printer as a default color connector file. These default files eliminate the
need for individual users to apply color management to their print jobs.
er to “Exporting a Color Connector to the Printer as a Default.”
Ref
After you create a color connector file and export it to your 8660 printer as
a default, do the following steps to apply it to your print job:
1. Click on the Color Management tab.
2. Select Colorflow connector file from the Mode menu.
3. Select the Printer’s Default for Current Media.
4. Click on Print to send the job to the 8660 printer.
CONTENTS INDEX SEARCH HELP
Network
Interface Guide
Getting Started
Using the Export
Module for Adobe
Photoshop
About Printer Tables
Page 16

To select a color connector file other than a default:
1. Click on the Color Management tab.
Operator’s Guide
2. Select Colorflow connector file from the Mode menu.
3. Choose Select from the file menu for Macintosh, or click on Browse
for Windows.
4. Locate the folder containing the color connector files in the open file
dialog box.
5. Select the color connector file you wish to apply to your print job, and
click on Open for Macintosh or OK in Windows.
Printing Guide
Color Management
Calibration
Network
Interface Guide
Getting Started
Using the Export
Module for Adobe
Photoshop
About Printer Tables
CONTENTS INDEX SEARCH HELP
Page 17

Error Messages
Many of the error messages displayed by the export module are selfexplanatory. The following list provides additional information for
frequently-encountered messages. If you do not find an error message in
the list, refer to your Macintosh, Windows, or Photoshop documentation.
Error Message Solution
Operator’s Guide
Printing Guide
Color Management
The Media File which identifies the
ribbon and paper characteristics of the
media you are using needs to be located.
The file is too large for the Kodak 8660
Printer! Resize the image in Photoshop
before printing. The maximum size is 150
MB
The selected printer is not available.
Check connections, make sure the
printer is turned on, or select another
8660 printer.
For Macintosh, locate the Media File
using the path System Folder/Application
Support/Kodak/Plug-ins (Printing)/Media
Files.
For Windows, locate the Media File using
the path C:\Windows\Kodak\Plug-ins
(Printing)\Media Files.
Make the image smaller to print the file.
To make the image smaller, select Image
Size from the Image menu, and enter a
smaller height or width or change the
resolution with the resample option
checked.
Make sure that the printer is connected
and turned on.
CONTENTS INDEX SEARCH HELP
Calibration
Network
Interface Guide
Getting Started
Using the Export
Module for Adobe
Photoshop
About Printer Tables
Page 18

Error Message Solution
Operator’s Guide
The printer cannot scale the image (up or
down) enough to completely fit (fill) the
page! The expor t module will set the
scaling to the limit of the printer
The selected Kodak printer on ___ is
busy.
Jobs in process, waiting to print: ___
Current job, copies to print: ___
Because of the resolution of the image,
the printer scaling required is below
(above) the limit of the printer.
Various media mismatch messages The requested print media does not
There is a problem with the contents of
the file.
Check the file for correct syntax.
Indicates that the scaling limits in the
printer were exceeded. The export
module will readjust the scaling to the
limits of the printer.
Indicates the printer is busy and reports
on job status and jobs in queue. The
dialog box closes when the printer
becomes available.
The export module sets the scaling
control to the smallest (largest)
supported value.
match the media loaded in the printer.
Follow the instructions in the message to
resolve the problem.
Check your custom package file for the
correct syntax.
For other errors, check all the 8660 printer’s connections, and make sure
that the display panel shows the READY prompt. If the problem persists,
restart the 8660 pr inter and the computer. If you still have trouble, try
reinstalling the export module. The
solve printing problems. Ref
er to “Troubleshooting.”
Operator’s Guide
can also help you to
Printing Guide
Color Management
Calibration
Network
Interface Guide
Getting Started
Using the Export
Module for Adobe
Photoshop
About Printer Tables
CONTENTS INDEX SEARCH HELP
Page 19

Dialog Box Options
The following are descriptions of the options in the Kodak Professional
8660 thermal printer dialog box:
Operator’s Guide
Printing Guide
General T ab
• Copies—enter the number of copies you wish to print, from 1 to 100.
• Print Mode—options are “Normal” for standard printing and “Reprint” to
print the image currently stored in the 8660 printer.
• Sharpen—allows you to specify the type of image enhancement to
improve the sharpness of your images. “Normal” or “High” enhances
image sharpness. Select “High” to improve the shar pness of continuous
tone images; for example, photographic images. Selecting “None” adds
no sharpening and is appropriate for computer-generated graphics.
Package—allows you to select from several printing package formats.
By selecting a specific printing package, you can send a single image to
the 8660 printer and get multiple image sizes on your print. For
example, by selecting the package “5x7 in and 3.5x5 in and Wallets”
your print will contain a 5 x 7 in. print, and a number of 3.5 x 5 in. and
wallet-sized prints (depending on the paper size selected).
NOTE: The print sizes may not be exact because of the height-to-width
ratio of your images. To fill the entire print area, resize the image
in Photoshop before you print.
Color Management
Calibration
Network
Interface Guide
Getting Started
Using the Export
Module for Adobe
Photoshop
About Printer Tables
CONTENTS INDEX SEARCH HELP
Page 20

• Scaling—scales an image by a specified percentage or to fit or fill the
page. You can select from the following scaling options:
Operator’s Guide
– To Fit Page—images that are larger or smaller than the page are
scaled to fit the dimensions of the page without cropping.
– To Fill Page—images that are larger or smaller than the dimensions of
the page are scaled and cropped to fill the page.
– By size—images are scaled based on the dimensions of the image
and the percentage entered in the text box.
– By pixels—images are scaled based on the number of pixels in the
width and height of the image and the percentage entered in the text
box.
• Center—centers the image on the page. If you do not check this option,
images appear starting in the upper left cor ner of the page.
• Mirror—reverses the image on the page producing a mirror image.
• Orientation—allows you to manipulate the orientation of an image on
the page. You can select from:
– Automatic—automatically orients the image on the page in the
landscape or portrait mode depending on the size of the image.
(Square images will have portrait orientation.)
Printing Guide
Color Management
Calibration
Network
Interface Guide
Getting Started
Using the Export
Module for Adobe
Photoshop
About Printer Tables
– Portrait—orients the image vertically on the page.
– Landscape—orients the image hor izontally on the page.
• Layout Icon—displays the relationship of the current image size and
location to the page and printable area.
CONTENTS INDEX SEARCH HELP
Page 21

Media T ab
• Ribbon Type—selects the ribbon to print with. The options are:
Operator’s Guide
– Three-Color (CMY)
– Black
– Any Available—to print with whatever ribbon is loaded in the 8660
printer
• XtraLife—applies an overcoat to the print. If you select Any Available as
the Ribbon Type, XtraLife lamination is applied to prints.
• Page Size—allows you to select the page size for the job. The options
are:
– Letter 8.5x11 in
– A4 210x297 mm
– 7x8.5 in (178x216 mm)
– 8.5x12 in (216x307 mm)
– 8.5x14 in (216x358 mm)
– 210x358 mm
Printing Guide
Color Management
Calibration
Network
Interface Guide
Getting Started
Using the Export
Module for Adobe
Photoshop
About Printer Tables
CONTENTS INDEX SEARCH HELP
Page 22

Color Management Tab
• Mode—allows you to select the method of color management to apply
to your print. The options are:
– None—applies no color management from the export module. Select
this option if you are using Photoshop for color management.
– Printer Table—allows you to select one of the printer tables shipped
with the 8660 printer.
– Colorflow connector file—allows you to select a color connector file to
apply to your print job.
• File—allows you to select the 8660 printer’s default connector file or
Printer Table or select another Printer Table or connector file.
• Description—displays the description of the selected connector file or
printer table.
Operator’s Guide
Printing Guide
Color Management
Calibration
Network
Interface Guide
Getting Started
Using the Export
Module for Adobe
Photoshop
About Printer Tables
CONTENTS INDEX SEARCH HELP
Page 23

Printer T ab
• Select Printer—allows you to choose the 8660 printer to which you wish
to export the image.
• Update Information—updates all the current information for the 8660
printer.
• Printer Information—lists information such as the ribbon loaded and the
paper installed.
• Job Information—gives the printing status of the current job and other
jobs sent to the selected 8660 printer.
• Printer Default Connector Files—lists any default connector files that
are stored in the 8660 printer.
Clicking on Select Printer opens a dialog box that allows you to select
the 8660 printer.
Operator’s Guide
Printing Guide
Color Management
Calibration
Network
Interface Guide
Getting Started
Using the Export
Module for Adobe
Photoshop
About Printer Tables
CONTENTS INDEX SEARCH HELP
Page 24

About Printer Tables
The printer tables included with the export module allow you to obtain the
closest possible match between an image displayed on your monitor and
a print of that image.
Additive and Subtractive Color
Operator’s Guide
Printing Guide
Color Management
Displayed images and printed images have different appearances due to
the nature of the processes used to produce the colors on monitors and in
prints.
A monitor’s cathode ray tube (CRT) uses an additive color process to
produce a screen image. Red, green, and blue light from the color
phosphors in the tube are added together
mixtures of the three colors produce a variety of colors. A color printer
uses a subtractive color process where ambient light passes through
layers of color dyes (cyan, magenta, yellow, and black), reflects off of a
white paper base, and passes back through the color dye layers to your
eyes. The dyes produce color by absorbing portions of the spectrum from
the light striking the surface of the print. The perceived color of a print is
also strongly influenced by the type and intensity of the light in which it
is viewed.
to produce white light. Various
Calibration
Network
Interface Guide
Getting Started
Using the Export
Module for Adobe
Photoshop
About Printer Tables
CONTENTS INDEX SEARCH HELP
Page 25

A color gamut is the range of visible colors that can be produced by a
or
specific set of primary colors such as red, blue, and green
magenta, yellow, and black. Monitors, scanners, and color printers all
have different color gamuts. Many different CRT phosphors and color
dyes are available, and each produces a different range of colors.
Phosphors generally produce a wider color gamut than printing dyes,
particular ly in the blue and green regions. However, some printable colors
cannot be displayed on typical monitors.
cyan,
Table Descriptions
Each printer table is named according to its correction formula. The
printer tables are combinations of one of the available gamma correction
values,1.0, 1.4, 1.8, 2.2, 2.6, and one of the available black level values, 40, -30, -20, -10, 0. For example, the printer table CMYK G1.8 B-30 has a
gamma correction value of 1.8 and a black level value of -30.
The tables are all set for a hue shift of 0°, a saturation level of 100%, and
an automatic contrast calculation.
Operator’s Guide
Printing Guide
Color Management
Calibration
Network
Interface Guide
Getting Started
Using the Export
Module for Adobe
Photoshop
About Printer Tables
CONTENTS INDEX SEARCH HELP
Page 26

RGB Printer Tables
There are 45 standard printer tables included with both the Macintosh and
Windows versions of the expor t module. These tables are for monitor
gamma values of 1.0, 1.2, 1.4, 1.6, 1.8, 2.0, 2.2, 2.5, 2.8, and black level
values of 0, -10, -20, -30, and -40. The table names for Macintosh have
the prefix XLS followed by a G and the gamma value and followed by B
and the black level; for example, XLS G2.2 B-30. The table names for
Windows are the same with the addition of a TBL extension; for example,
XLS G2.2B-30.TBL.
Also, four custom TableMaker tables are included:
• DS Linear Table/DS Linear Table.TBL—a linear table that does not
modify the color data.
• DS Graphic Arts Yellow Table/DS Graphic Arts Yellow Table.TBL—a
yellow table for photographic applications.
• DS Photo CD Table/DS Photo CD Table.TBL—a Photo CD table for use
with Photo CD images.
• DS PostScript Level 1 Table/DS PostScript level 1 Table.TBL—a table
for simulating PostScript Level 1 response.
Operator’s Guide
Printing Guide
Color Management
Calibration
Network
Interface Guide
Getting Started
Using the Export
Module for Adobe
Photoshop
About Printer Tables
NOTE: All of the tables are intended for use with the CMY and black
ribbons.
CONTENTS INDEX SEARCH HELP
Page 27

Using Printer Tables
You can use the default printer table stored in the 8660 printer, or you can
select one of the monitor-matching printer tables that is shipped with the
export module.
Operator’s Guide
Printing Guide
To select the default printer table:
1. Click on the Color Management tab.
2. Select Printer Table from the Mode menu.
To select a printer table other than the default:
1. Click on the Color Management tab.
2. Choose Select from the File menu for Macintosh, or click on Browse
for Windows.
3. Locate the folder containing the printer tables, and select the
appropriate table.
4. Click on Open for Macintosh or on OK for Windows.
Color Management
Calibration
Network
Interface Guide
Getting Started
Using the Export
Module for Adobe
Photoshop
About Printer Tables
CONTENTS INDEX SEARCH HELP
 Loading...