

Page 1

Page 2

Safety
• Place the Kodak Scan Station 500 on a level work surface capable of supporting 13.6 kgs (30 lbs).
• When placing the Scan Station, make sure that the electrical power outlet is located within 1.52 metres (5 feet) of the Scan
Station and is easily accessible.
• When relocating the Scan Station, it is recommended that two people lift the Scan Station and use safe lifting techniques.
• Do not install the Scan Station in a location subject to dust, humidity or steam. This may cause electrical shock or a fire. Only
use the Scan Station indoors in a dry location.
• When disconnecting equipment from the electric socket, be sure to grasp the plug, not the cord.
• Be sure the power cord is securely plugged into the wall outlet. Failure to do so may cause electrical shock or fire.
• Do not damage, knot, cut or modify the power cord or use a damaged power cord. This may cause electrical shock or fire.
• The Scan Station requires a dedicated and properly grounded power outlet. Do not use an extension cord or power strip with
the Scan Station.
• Leave sufficient space around the power outlet so it can be easily unplugged in case of an emergency.
• Do not use the Scan Station if it becomes inordinately hot, has a strange odor, emits smoke, or makes unfamiliar noises.
Immediately stop the Scan Station and disconnect the power cord from the power outlet. Contact Kodak Service.
• Do not disassemble, service or modify the Scan Station except as explained in the User’s Guide.
• Do not move the Scan Station with the power cord and interface cable attached. This may cause damage to the cord/cable.
Remove the power cord from the wall outlet before moving or relocating the Scan Station.
• Follow the Kodak recommended cleaning procedures. Do not use air, liquid or gas spray cleaners. These cleaners displace
dust, dirt and debris to other locations within the scanner, which may cause the Scan Station to malfunction.
• Material Safety Data Sheets (MSDS) for chemical products are available on the Kodak website at: www .kodak.com/go/msds.
When accessing the MSDSs from the website, you will be required to provide the catalog number of the consumable you
want the Material Safety Data Sheet for.
Environmental information
•The Kodak Scan Station 500 is designed to meet worldwide environmental requirements.
• Guidelines are available for the disposal of consumable items that are replaced during maintenance or service; follow local
regulations or contact Kodak locally for more information.
• For recycling or reuse information, contact your local authorities, or in the USA, go to: www.kodak.com/go/recycle .
• The product packaging is recyclable.
• Parts are designed for reuse or recycling.
European Union
This symbol indicates that when the last user wishes to discard this product, it must be sent to appropriate facilities
for recovery and recycling. Please contact your local Kodak representative or refer to www.kodak.com/go/recycle
for additional information on the collection and recovery programs available for this product.
Please consult www.kodak.com/go/REACH for information about the presence of substances included on the candidate list
according to article 59(1) of Regulation (EC) No. 1907/2006 (REACH).
Battery Information
This product contains a Lithium Ion button cell battery. This battery can only be removed or replaced by a qualified Service
Engineer.
Acoustic emission
Maschinenlärminformationsverordnung – 3, GSGV
Der arbeitsplatzbezogene Emissionswert beträgt <70 db(A).
[Machine Noise Information Ordinance — 3, GSGV
The operator-position noise emission value is <70 dB(A).]
phase est de 230 V.
Page 3

EMC statements
声明,该产
此为A级产品,在生活环境中品可能会造成无线电干扰。在这种情况下,可能需要
用户对其干扰采取切实可行的措施
United States: This equipment has been tested and found to comply with the limits for a Class A digital device pursuant to Part
15 of the FCC rules. These limits are designed to provide reasonable protection against harmful interference when the
equipment is operated in a commercial environment. This equipment generates, uses, and can radiate radio frequency energy
and, if not installed and used in accordance with the instruction manual, may cause harmful interference to radio
communications. Operation of this equipment in a residential area is likely to cause harmful interference in which case the user
will be required to correct the interference at his own expense.
European Union: WARNING: This is a Class A product. In a domestic environment this product may cause radio interference
in which case the user may be required to take adequate measures.
Japan: This is a Class A product based on the standard of the V oluntary Control Council for interference by information
Technology Equipment (VCCI). If this is used in a domestic environment, radio disturbance may arise. When such trouble
occurs, the user may be required to take corrective actions.
Taiwan: WARNING: This is a Class A product. In a domestic environment this product may cause radio interference in which
case the user may be required to take adequate measures.
Peoples Republic of China: WARNING: This is a Class A product. In a domestic environment this product may cause radio
interference in which case the user may be required to take adequate measures.
Korea: Please note that this equipment has obtained EMC registration for commercial use. In the event that it has been
mistakenly sold or purchased, please exchange it for equipment certified for home use.
Page 4

OVERVIEW 1-1
PRE-INSTALLATION CHECKLIST 2-1
SCAN STATION INSTALLATION AND CONFIGURATION 3-1
CONFIGURING SCAN SETTINGS FOR THE SCAN STATION 4-1
SETTING UP AND MANAGING DESTINATION GROUPS 5-1
ADMINISTRATION SPECIFICS 6-1
MAINTENANCE 7-1
TROUBLESHOOTING 8-1
GLOSSARY 9-1
APPENDICIES A – C
Specifications
Supported Network Protocols
Warranty
Page 5

1 Overview
Contents Chapter summary ...........................................................................1-1
System requirements......................................................................1-2
What’s in the box ............................................................................1-2
Setting up the Scan Station.............................................................1-2
Scan Station components...............................................................1-3
The Kodak Scan Station 500 is designed as a walk-up device that
requires no host PC or application software. It works with and uses an
existing network and network shared services to communicate with
other network devices or destinations. The Scan Station 500 is a
capture solution that allows you to quickly send your documents via
email, network, networked printers, USB flash drives or fax with a
simple touch.
This Administrator’s Guide provides the information you need to setup
and administer the Kodak Scan Station 500 and Kodak Scan Station
520EX. For the purpose of this manual both models will be referred to
as Kodak Scan S t ation 500. An y dif ference s between these models will
be noted.
Chapter summary Chapter 1, Overview — provides system requirements, instructions for
setting up the Scan Station, and an overview of Scan Station
components.
Chapter 2, Pre-Installation Checklist — fill in this Pre-Installation
Checklist before you set up the Scan Station. It will save you time and
make the setup procedures easier.
Chapter 3, Scan Station Installation and Configuration — provides
installation and configuration procedures to get your Scan Station up
and running.
Chapter 4, Configuring Scan Settings for the Scan Station —
provides procedures for customizing scan settings and creating Setting
Shortcuts and tasks.
Chapter 5, Setting up and Managing Destination Groups —
provides information and procedures for setting up and managing your
destination groups, (e.g., email addresses, network shares, printers).
Chapter 6, Administration Specifics — provides information about
password-protecting and updating your Scan Station.
Chapter 7, Maintenance — provides cleaning and maintenance
procedures.
Chapter 8, Troubleshooting — provides a problem solving chart that
you should refer to before calling Kodak Support.
Chapter 9, Glossary — provides descriptions for terms used
throughout this document.
Appendices — provides Scan Station specifications and information
about supported network protocols.
A-61628 December 2011 1-1
Page 6

System requirements The Kodak Scan Station 500/520EX - Scanner Administration which is
installed on a separate PC, requires one of the following operating
systems:
• Windows XP Service Pack 2 and 3
• Windows Vista, Service Pack 2
• Windows 7
All require Microsoft .Net 2.0 Framework and Microsoft Installer v3.0,
which will automatically be installed if not detected.
What’s in the box Before you begin open the box and check the contents:
• Kodak Scan Station 500
• Power cord bundle
• Portable USB flash drive
• Welcome Folio which includes:
- Installation CDs:
Scanner Administration and Supporting Documentation
User Configuration Organizer and Supporting Documentation
- Registration sheets
- Printed User’s Guide, English
- Printed Administrator’s Guide, English
- Maintenance Reference Guide
- User Reference Guide
- Installation Guide
- Country Contact sheet
- Miscellaneous flyers
Setting up the Scan Station
Carefully unpack the Scan Station 500 and place it on a clean, dry and
level surface. Refer to the “Rear view” illustration later in this chapter for
port locations.
1. Select the appropriate AC power cord and plug one end of the
power cord into the power port of the Scan S tatio n and the other end
into the wall outlet.
2. Plug one end of the 10/100 Base T network cable (customer
provided) into the Ethernet port of the Scan Station and plug the
other end of the network cable into the network drop’s wall outlet.
3. When the Scan Station is properly connected, press the power
button and wait a few moments for the Scan Station to start up and
display the application.
4. Proceed to Chapter 2, Pre-installation Checklist to review and
gather the necessary configuration information before installing the
Kodak Scan Station 500/520EX - Scanner Administration and
creating your administrative configuration file.
1-2 A-61628 December 201 1
Page 7

Scan Station
Input tray extender
Input tray
Side guides
Scan Station cover
Touch screen
Go button Output tray
Stop/Logout
Power
extender
Output tray
panel
button
button
components
Front view
Input tray extender (not shown) — pull this extender out to
accommodate document sizes over 8 1/2 x 11 inches (A4).
Input tray — holds up to 75 sheets of 75 g/m
2
(20 lb.) paper.
Side guides — slide the guides back and forth to accommodate
document size.
Scan Station cover — provides access to the internal components for
maintenance and clearing jams.
Touch screen — allows you to easily navigate through selections with
a simple touch.
Go button — press to start scanning documents.
Output tray extender— pull this extender out when scanning
documents longer than 11 inches (28 cm).
Output tray panel — covers the transport when not in use. When
opened, collects the scanned documents. The Scan Station cover
cannot be opened when the output tray panel is closed.
Stop/Logout button — press to cancel the current operation or return
to the previous screen. At the end of a scan job, pressing the red X
button will log the user off.
Power button — turns the power on and off. When the power is on, the
LED is blue.
A-61628 December 2011 1-3
Page 8

Inside view
Separation module
release lever
Gap release lever
Scan Station cover
release lever
Rollers
Separation module
Imaging guides
Paper
present
sensor
Feed module
cover
Feed module
USB port
Multifeed detection
sensor
USB port — use this port to insert your USB flash drive.
Separation module release lever — push the release lever down to
remove the separation module for cleaning or replacement.
Gap release lever — allows you to manually adjust the sp ace between
the feed module and separation module for documents that require
special handling.
Scan Station cover release lever — opens the Scan Station to allow
access to the paper path for cleaning or clearing a document jam.
Feed module, separation module and rollers — provides smooth
document feeding and separation of various sizes, thicknesses and
textures of documents.
Imaging guides — for optimum image quality, keep the imaging guides
clean. There are two guides: one upper and one lower.
Multifeed detection sensor — detects if more than one document
enters the paper path at a time.
Paper present sensor — detects the presence of documents in the
input tray.
Feed module cover — this cover needs to be removed when cleaning
or replacing the feed module or feed module tires.
1-4 A-61628 December 201 1
Page 9

Rear view
Flatbed connector
Power port
Modem port
USB ports
Ethernet port
Security lock
port
Flatbed connector — connects the optional A3 Flatbed Accessory to
the Scan Station.
Modem port — connects the fax modem to a phone line.
Power port — connects the power cord to the Scan Station.
Ethernet port — connects the Scan Station to the network.
USB ports — connects peripheral devices (i.e., keyboard, mouse and
other accessories) to the Scan Station.
Security lock port — connects a security lock to the Scan Station. You
can purchase a standard security lock at an of fice supply store. Refer to
the instructions provided with the security lock for installation
procedures.
A-61628 December 2011 1-5
Page 10

2 Pre-installation Checklist
It is recommended that you fill out this worksheet before configuring the Kodak Scan Station 500. This
network information is needed to create an administrative configuration file to complete the installation.
Locate any information you are unsure of before creating the administrative configurat ion file. If you have
trouble filling out this worksheet, see the person who manages your network. See the section entitled,
“Administrative and user configuration files” in Chapter 3 for more information.
NOTE: This installation shows what you will need to install the Scan Station as of the date of this
document. As our products continue to improve, check the Kodak website
(to://www.Kodak.com/go/disupport) for the latest version.
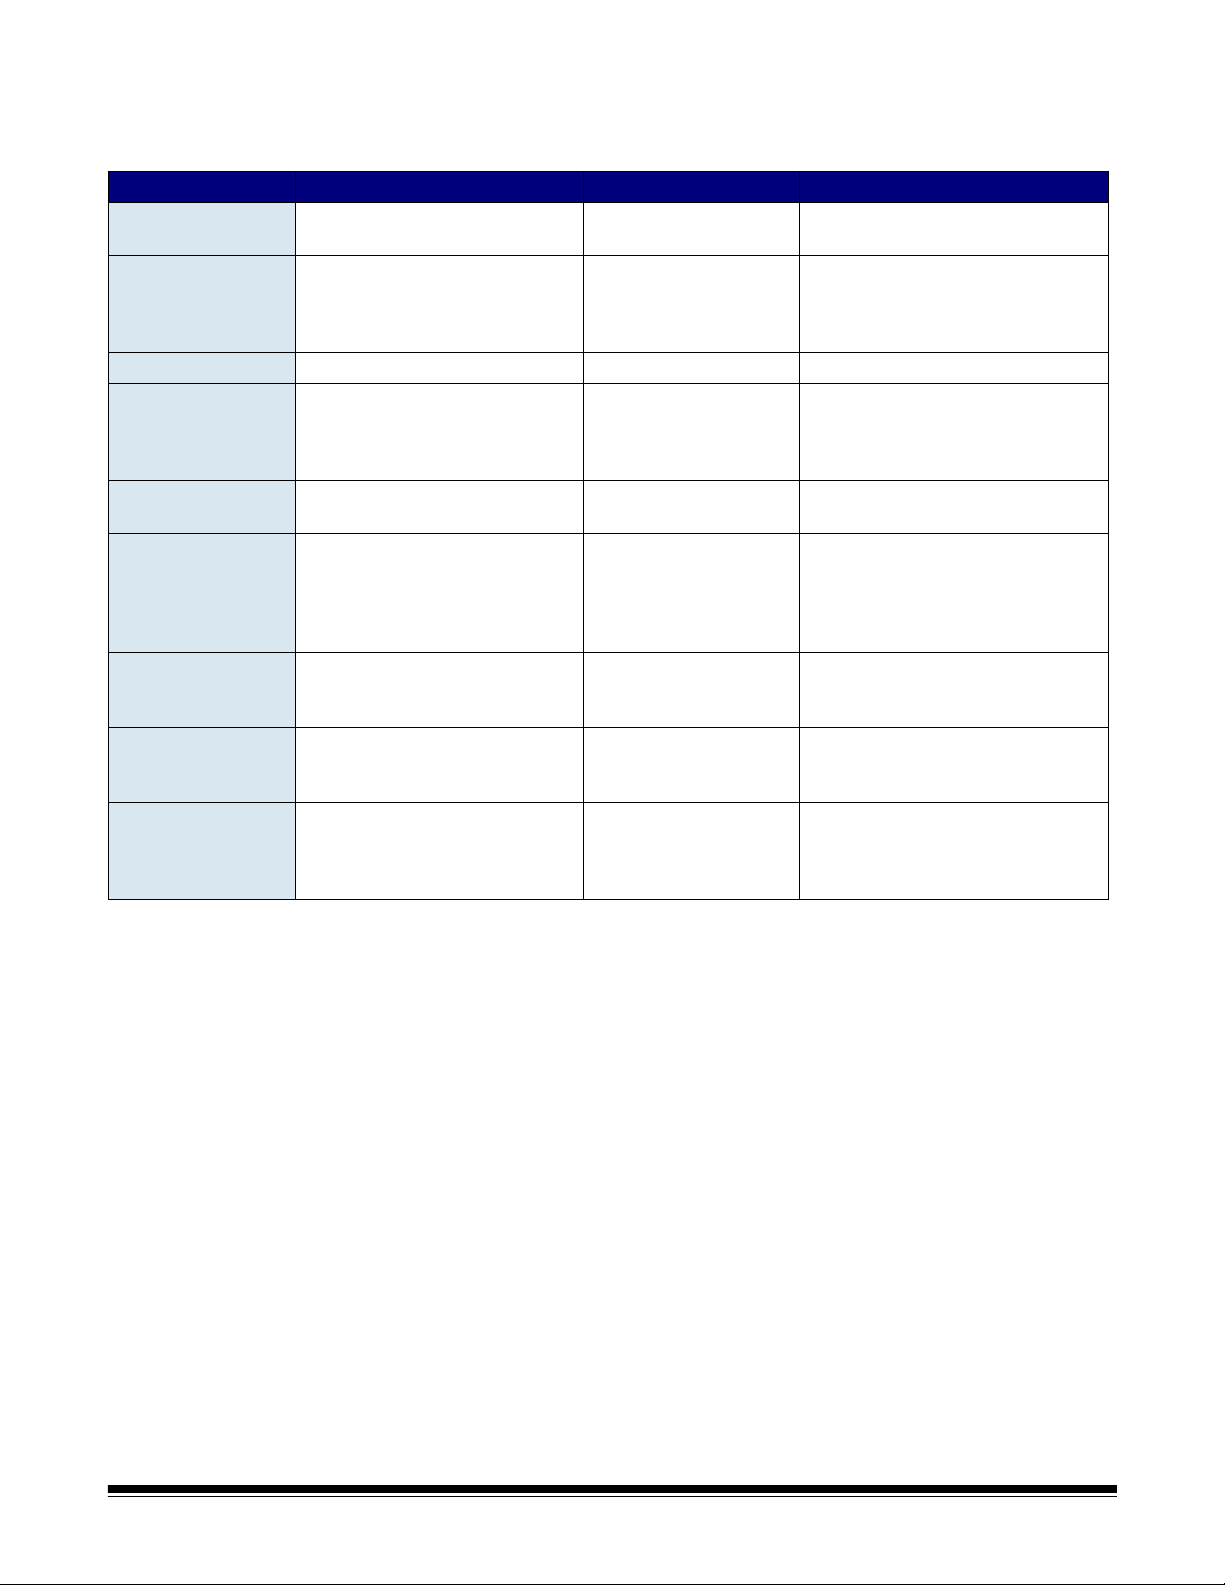
Language Settings — found under the Settings button in the Configuration Organizer or Scan Station when using the KSS500 - Scanner Admin application.
Parameter Name Description/Sample Your Setting Notes
Language The application display language Default: English.
Device Settings — found under the Settings button in the Configuration Organize r or Scan
Station when using the KSS500 - Scanner Admin application.
Parameter Name Description/Sample Your Setting Notes
Device Name NETBIOS name of the Scan
Station.
IMPORTANT: You will need the
unique device name to add a
Scan Station to the Scanner
Administration application.
The Scan Station by factory default
has its own unique name
(e.g., OEMxxxxxxx)
IP Address Settings — Automatic
Automatic (DHCP) This is the default. If selected, the IP address, subnet
IP Address Settings — Static
Static (IPv4)
• IP Address
(required)
• Subnet Mask
(required)
• Default Gateway
(required)
• Preferred DNS
Server
(required)
• Alternate DNS
Server
• Preferred WINS
Server
Standard IPv4 address
(e.g., 192.0.0.1)
Scan Station’s IP address
Scan Station’s Subnet Mask
(e.g., 255.255.255.0)
IP address of default gateway on
the network
IP address of domain name Server
#1
IP address of the alternate domain
name Server #2
IP address of Windows Internet
Name Server #1
It is recommended that you do not
change this setting. Must be unique
(up to 15 characters) on the network/
subnet.
mask, and DNS server of the Scan
Station are set automatically by the
DHCP server.
Complete this and the other
network sections only if you are
not using DHCP.
Only these numbers are allowed: 0,
128, 192, 224, 248, 252, 254 and 255.
If this number is incorrect, you may
not be able to reach some network
locations.
A-61628 December 2011 2-1
Page 11
Device Settings (continued) — found under the Settings button in the Configuration
Organizer or Scan Station when using the KSS500 - Scanner Admin application.
Parameter Name Description/Sample Your Setting Notes
• Alternate WINS
Server
Device/
Administrator
Password
Default Credentials
• User Name
• Password
• Domain
Remote
Configuration
Volume
Setup Wizard
Alphanumeric IP address of
Windows Internet Name Server #2
Optional numeric password to
restrict access to the Scan Station.
Account on the Microsoft Server
2000 or Server 2003 domain the
Scan Station uses for access to the
network devices and printers.
Domain password for network user
name (e.g., 1Df4781).
Name of Microsoft Server 2003 or
Server 2008 domain the network
user name belongs to (e.g.,
Mycompany).
Allows the Scan Station to be
configured using a folder on the
network.
Allows the administrator to set the
volume level for the fax modem
and sound playback.
Allows the selection of
configuration options (i.e., time,
date, etc.) when connecting to the
network.
Entered via the virtual keyboard at
each access. May be alpha or
numeric characters up to 30
characters long.
Novell eDirectory and Linux/Unix are
not supported for login at this time.
This is required to access shared
folders and network printers.
Must be a valid Microsoft format.
This is not necessarily the same as an
Internet domain (company.com). For
more on domain naming conventions,
see http://support.microsoft.com/kb/
909264/en-us.
Refer to Chapter 6 for more
information.
2-2 A-61628 December 2011
Page 12

Email Server Settings — found under the Settings button in the Configuration Or ganizer or Scan Station when using the KSS500 - Scanner Admin application.
Parameter Name Description/Sample Your Setting Notes
SMTP Settings
• Server Address
• Credentials
•Port
•TSL
• SSL
• Authentication
Scheme
LDAP Settings
• Server Address
• Credentials
•Port
•Base DN
• Search Field T ag
• Email Address Tag
• Full Name Field Tag
• Search Results to
Return
• Security Options
Fully qualified domain name or
IPv4 address of the SMTP server
(e.g., smtp-server.
company.com or 192.0.0.1).
User name, password and network
domain. Required to access the
SMTP server.
Default: 25 Only change if your email server
Transport Layer Security
Secure Socket Layer Typically unchecked. Check only if
The specific SMTP Authentication
Scheme used by your mail server.
Fully qualified domain name or
IPv4 address of the LDAP server
(e.g., ldap-server.
company.com or 192.0.0.1).
User name, password and network
domain. Required to access the
LDAP server.
Default: 389 Only change if your LDAP server
Base Distinguished Name
Default: sn
Default: email
Default: display name
The maximum number of records
to display (1 to 1000) when
performing a search.
Default: 50
Allows you to set the Security Type
and/or Certificate.
Use IPv4 to eliminate any DNS issues
when troubleshooting.
Required for authenticated SMTP.
NOTE: This is not necessarily the
same as the credentials defined
under Device Settings.
communicates on an IP port that is
not Port 25.
you are sure your email server
requires it.
Contact your corporate LAN
administrator for more details on this
setting.
Use IPv4 to eliminate any DNS issues
when troubleshooting.
Required for authenticated LDAP.
NOTE: This is not necessarily the
same as the credentials defined
under Device Settings.
communicates on an IP port that is
not Port 389.
Contact your corporate LAN
administrator for more details on this
setting.
A-61628 December 2011 2-3
Page 13

LDAP Settings (continued)
Return Email
Address
Maximum
Attachment Size
This is the address that bounced
emails are returned to (e.g.,
bounce@company.com). This
address will also appear as the
default “From” address when
sending email.
1-99 MB
Default: 99 MB
Select a person who will receive
notification that an email address
could not be reached.
Email operations that create files
larger than this will fail. This should
match the limitations defined by
your email server.
Fax Settings — found under the Settings button in the Configuration Organ izer or Scan
Station when using the KSS500 - Scanner Admin application.
Parameter Name Description/Sample Your Setting Notes
LDAP Fax Field Tag May be used to search for fax
numbers stored in a corporate
address box.
Sender’s Fax Number
Outside Line Prefix
Modem Country Code
Incoming Fax Settings
• Incoming Fax Folder
• Incoming Fax
Printer
• Receive Fax
Fax Notification
• Retries
• Retry Delay
This field is informational.
The prefix a user needs to access
an outside line.
Displays a list of associated codes
that configure the modem for use in
the selected country.
Configures your Scan Station to
receive incoming faxes.
Enter a fully qualified path name to
a network folder where faxes will
be delivered.
Select a network printer for
incoming fax delivery.
Allows faxes to be received at the
configured device.
Enable to receive “success” or
“failure” notification when a fax is
sent.
The number of times the Scan
Station will attempt to send a fax.
The number of minutes the Scan
Station will wait between attempts
to send a fax.
This field is not required.
A comma may be used to insert a
“pause”.
• This option is only available if the
administrator’s Email ID is
configured.
• See Chapter 3 for more detailed
information.
2-4 A-61628 December 2011
Page 14

3 Scan Station Installation and Configuration
Contents Setup Wizard ..................................................................................3-2
Installing the Kodak Scan Station 500/520EX - Scanner
Administration application............................................................3-6
Menus.............................................................................................3-8
Toolbar.......................................................................................... 3-11
Network configuration options.......................................................3-12
Adding a Scan Station ..................................................................3-12
Discovering devices......................................................................3-14
Modifying a Scan Station ..............................................................3-15
Deleting a Scan Station.................................................................3-16
Changing a password...................................................................3-16
Administrative and user configuration files ...................................3-17
Configuring your Scan Station ......................................................3-19
Language setting ......................................................................3-20
Device settings..........................................................................3-20
E-mail settings ..........................................................................3-24
SMTP settings.......................................................................3-24
LDAP settings........................................................................3-27
Return E-mail address...........................................................3-30
Maximum attachment size.....................................................3-31
Fax settings...............................................................................3-32
Transaction Log settings...........................................................3-38
Time settings.............................................................................3-39
Date settings.............................................................................3-40
Configuration options................................................................3-41
Password protecting the configuration file....................................3-44
Saving your administrative configuration file.................................3-45
Uploading configuration settings...................................................3-46
Loading configuration settings using the KSS500 - Scanner
Admin application ...................................................................3-46
Uploading the configuration settings using a USB drive...........3-46
Setting the Scan Station clock ......................................................3-47
Setting the Scan Station date........................................................3-47
A-61628 December 2011 3-1
Page 15

Setup Wizard When the Scan Station 500 is turned on for the first time, the setup
wizard automatically starts which provides a step-by-step procedure
allowing you to select configuration options (i.e., time, date, etc.) when
connecting to the network.
Other configuration options are also required for Scan Station setup
(i.e., email and fax configurations, etc.); however, these options are
setup using the KSS500 - Scanner Administration application.
Procedures regarding these additional settings are explained in more
detail later in this chapter.
NOTES:
• The procedures that follow are only for the first time you turn on your
Scan Station.
• For detailed information regarding any of the following settings, see
the section entitled, “Configuring your Scan Station” later in this
chapter.
• If Run the wizard at next boot-up is enabled, the wizard will start at
the next power up.
Upon startup the Language screen will be displayed.
1. Select the language that you want the Scan Station user interface to
be display in, then click Done. The following screen will be
displayed.
3-2 A-61628 December 201 1
Page 16

2. Select any of the options you want to configure:
• Device Name: allows you to enter the device name.
• Date: allows you to set the date on the Scan Station.
• Time Zone: allows you to select the desired time zone.
• Time: allows you to set the time on the Scan Station.
• Device/Administrator Password: allows you to set a password
that provides access to the Scan Station.
• Network Settings: allows you to configure the Scan Station’s
network address.
After you select the options you want to configure, click Done and
the screen associated with the first selected option will be
displayed.
3. If you selected Device Name, a keyboard will be displayed where
you can enter the name of the device.
4. Click Next. If you selected Date, the Date screen will be displayed.
5. Enter the desired date and click Next.
A-61628 December 2011 3-3
Page 17

If you selected Time Zone, the following screen will be displayed.
6. Select the desired time zone and click Next. If you selected Time,
the following screen will be displayed.
7. Enter the desired time and click Next. If you selected Device/
Administrator Password, the following screen will be displayed.
3-4 A-61628 December 201 1
Page 18

8. Enter the desired password and click Next. The following screen will
be displayed.
9. Select Obtain an IP Address automatically to use DHCP to obtain
an IP address to connect to the network or Assign an IP Address
to enable you to enter the desired IP address and click Next. The
following screen will be displayed.
10.Enter the required IP Address, Subnet Mask, Default Gateway,
Preferred DNS Server information and click Done.
A screen summarizing your settings will be displayed.
11. Click Yes to accept your selections.
12.When all desired setting have been made, continue with the Scan
St ation inst allation . See the next section, “Insta lling the Kodak Scan
Station 500/520EX - Scanner Administration application”.
A-61628 December 2011 3-5
Page 19

Installing the Kodak Scan Station 500/ 520EX - Scanner Administration application
You must install the KSS500 - Scanner Administration application
(KSS500 - Scanner Admin) on a separate computer. The KSS500 Scanner Admin application allows you to properly setup, configure and
manage Scan Station 500 devices over a network in an efficient and
productive manner. This application communicates with Kodak Scan
Station 500 devices over the network; thereby minimizing individual
access to multiple Scan Stations.
1. Insert the Installation CD titled, “Scanner Administration and
Supporting Documentation” in the CD-ROM drive on the computer
where the KSS500 - Scanner Admin application will be installed.
The installation software starts up automatically.
NOTE: If .NET Framework 2.0 and MSI 3.x is not already installed,
the KSS500 - Scanner Admin application installer will install
them before installing the KSS500 - Scanner Admin
application.
2. Click Next when the Kodak Scan Station 500 splash screen is
displayed.
3. Click Next when the Welcome screen is displayed.
4. Click I Agree after you have read and agreed with the terms of the
Software License Agreement, then click Next.
5. When the Select Installation Folder screen is displayed, enter or
browse to, the folder where you want to install the KSS500 Scanner Admin application or keep the default setting. You may also
install the application for Everyone or Just Me (yourself), then click
Next.
NOTE: It is recommended that you accept the default settings.
6. Click Next on the Confirmation screen. The installation will start and
several progress screens will be displayed.
7. Click Close when the installation is complete.
8. Remove the Installation CD from the CD-ROM drive.
3-6 A-61628 December 201 1
Page 20

9. After installing the application, the Kodak Scan Station 500/520EX Scanner Admin main screen will be displayed.
NOTE: The KSS500 - Scanner Admin main screen contains the specific
data to identify and connect to Scan Stations on a network.
Scanner Name — displays the name assigned to the Scan Station.
IP Address — displays the IP address that is associated with the Scan
Station.
DHCP — if the Scan Station is configured to retrieve the IP address
using DHCP this field will be checked, if the Scan Station is configured
to statically retrieve the IP address, this field will be blank.
HTTPS — select On if you want the Scan Station to use a secure
connection to communicate.
Mac Address — displays the unique identifier of the network adapter.
Status — displays the current status of the Scan station (i.e., idle,
scanning, updating, rebooting, etc.).
NOTE: When you press F5, the status of the registered sca nners will be
refreshed.
Group — displays the group (i.e., location) that the Scan St ation is p art
of. This is set up when adding a scanner. To change this information,
click in the Group field and enter the desired information.
Last Command — displays the last command that was issued by the
administrator including the date, time and the success or failure of the
action performed.
Comments — any comments added by the administrator when a Scan
Station is added will be displayed in this column. To change this
information, click in the Comments field and enter the desired
information.
A-61628 December 2011 3-7
Page 21

Menus The KSS500 - Scanner Admin application provides the following
menus: File, Edit, Scanner and Help.
File menu — the File menu provides these options:
Save — displays the Save as dialog box
which allows you to select a file name and
directory to save the Scan Station
identification data in an xml file format.
Open — displays the Open dialog box which
allows you to open a previously saved Scan
Station identification xml file format.
Configuration Organizer — displays the
Configuration Organizer application.
Recent File — lists the most recently accessed xml files which hold the
Scan Station(s) information such as Device Name, IP address, Groups
and comments.
Exit — closes the KSS500 - Scanner Admin application.
Edit menu — the Edit menu provides these options:
Add Scanner — displays the Add Scanner
dialog box, which allows you to register
Scan Stations that you want to manage
remotely.
Discover Devices — allows you to scan a
range of IP addresses and automatically
register any Scan Station within that range
that responds to the request.
NOTE: Any Scan Station that has had its
password changed will not respond to the
discovery request.
Modify Scanner — allows you to rename
the selected Scan Station and set network
settings.
Delete Scanner — deletes the selected Scan Station(s).
Select All — allows you to select all the Scan Stations that have been
added; you can also press Ctrl+A to select all Scan Stations.
Deselect All — allows you to deselect all the Scan Stations that are
currently selected; you can also press Ctrl+D to deselect all Scan
Stations.
Change Password — displays the Change Password dialog box which
allows you to change the connection password to the Scan Station.
3-8 A-61628 December 201 1
Page 22

Refresh — displays the current state of the Scan Station:
• Idle — currently active on the network.
• Scanning — Scan Station is scanning.
• Processing images — the Scan Station is processing images (i.e.,
converting images to PDF).
• Sending e-mail — the Scan Station is sending an e-mail.
• Saving — images are being saved to a USB drive, network folder,
FTP site, or a SharePoint or Evernote site.
• Printing — the Scan Station is printing images.
• Scan Completed — the Scan Station has successfully completed
the scanning session. When Done is selected, the Scan Station will
go into Idle state.
• Error — the Scan Station failed to complete the scanning session.
When Done is selected, the Scan Station will go into Idle state.
• Cancelled — the scanning session has been cancelled. After the
inactivity time period has been reached, the Scan Station will go into
Idle state.
• Preview — the Scan Station is in the Preview state.
• Sending Fax — the Scan Station is sending a fax. This is only
displayed if the Scan Station is not currently scanning.
• Receiving Fax — the Scan Station is receiving a fax. This is only
displayed if the Scan Station is not currently scanning.
• Powering down — the Scan Station is in the process of a power-
down sequence.
• Rebooting — the Scan Station is in the process of being rebooted.
• Updating — the configuration file or firmware is currently being
updated.
•In Use — when a USB flash drive is inserted, a user is logging in or is
interacting with the Scan Station, this state is displayed.
• Not found — the Scan Sta tion is not bei ng recognized (i.e., power is
turned off).
Refresh Rate — allows you to set the amount of time (in 30-second
intervals) that the application will try and communicate with all Scan
Stations (i.e., after a power shutdown).
HTTPS — turning HTTPS on will secure data as it is communicated
between the server and the Scan Station.
A-61628 December 2011 3-9
Page 23

Scanner menu — the Scanner menu provides Device, Configuration and Power Options.
Device — provides the following options:
• Retrieve Logs: allows you to save the log files retrieved from the
selected Scan Station.
• Clear Logs: when selected the following message will be displayed,
Are you sure you want to clear the log files of the selected
scanner? If you click Yes, the log files will be cleared.
• Retrieve Transaction Logs: allows you to save the transaction log
file retrieved from the selected Scan Station.
• Clear Transaction Logs: when selected the following message will
be displayed, Are you sure you want to clear the transaction log
files of the selected scanner? If you click Yes, the transaction log
files will be cleared.
• Save All Logs: saves all available log files found on the selected
Scan St ations and saves them to the selecte d directory. The logs will
be saved in the selected directory under the Device Name folder of
the Scan Station.
• Details: provides status information about the selected Scan Station.
• Update Time/Date: allows you to set all Scan Stations to the current
time and date remotely. See the section entitled, “Updating Time/
Date” in Chapter 6 for more information.
Configuration — provides a list of options for downloading and
uploading configuration files and uploading firmware to the Scan
Station.
Power Options — provides a list of options for rebooting and turning
the selected Scan Station off.
Help menu — the Help menu provides these options:
Contents — provides a list of Help topics
associated with the KSS500 - Scanner Admin
application.
Index — provides an alphanumeric listing of
keywords associated with the KSS500 -
Scanner Admin application.
About — displays a window containing software copyright and version
information.
3-10 A-61628 December 201 1
Page 24

Toolbar The Toolbar provides quick access to commonly used functions. The
toolbar is always displayed. You cannot add, delete or move toolbar
buttons.
Icon Description
Displays the Save as dialog box which allows you to select a
file name and directory to save the Scan Station identification
data xml file format.
Displays the Add Scanner dialog box, which allows you to
setup Scan Stations that will be managed remotely.
Allows you to rename the selected Scan Station, set network
settings and update group and comme n t fi eld s.
Allows you to delete the selected Scan Station.
Displays the current state of the Scan Station:
•Idle
• Scanning
• Processing images
• Sending e-mail
•Saving
•Printing
•Error
• Cancelled
•Preview
• Sending Fax
• Receiving Fax
• Powering down
• Rebooting
• Updating
•In Use
• Not found
For a description of these states see the section entitled,
“Menus” earlier in this chapter
Displays and allows the saving of the log file on the selected
Scan Station.
Displays and allows the saving of the transaction log file on the
selected Scan Station.
Displays detailed information about the selected Scan Station
(i.e., software version, IP address, etc.).
Allows you to download the configuration file of a selected
Scan Station. Once the file is downloaded you can view,
modify, save and upload to one or more Scan Stations.
Allows you to send a configuration file to one or more Scan
Stations.
A-61628 December 2011 3-11
Page 25

Network configuration options
Before you can start adding Scan Stations you must know the IP
address or the Scan Station’s device name; preferably both.
Whether you are administrating a Scan Station that is located next to
you or across the country on the same network, you must have this
information before administering a Scan Station using the KSS500 Scanner Admin application.
To get the name of your Scan Station:
1. Be sure the Scan Station is on and the application is running.
2. Click on the Information icon to display the Scan Station’s name or
IP address if the network has DHCP enabled.
If your Scan Station is currently connected to a network, the About
screen will also display the IP address that has been assigned to your
Scan Station.
Adding a Scan Station
Before adding Scan Station 500 devices to manage remotely, it is
suggested that you obtain the Scan Station name(s) and/or IP
addresses and passwords of the Scan Stations you want to add. You
must enter either a Scan Station name or IP address or both.
NOTE: The Scan Station will only have an IP address if the Scan
Station is connected to a network and has been configured.
As Scan Stations are added, the main screen will be updated.
1. Select Edit>Add Scanner. The Add Scanner dialog box will be
displayed.
2. Enter the name of the Scan Station in the Scanner Name field .
NOTE: Acceptable values in this field are: alphanumeric characters
and a dash. No spaces or other symbols are allowed.
3. Enter the IP address. The IP address must be in IPv4 format
xxx.xxx.xxx.xxx.
3-12 A-61628 December 201 1
Page 26

4. Enter the device’s password.
NOTES:
• This field can be left blank. Leave this field blank if the p assword
has not been changed.
• This field will be grayed out and not needed if the password has
not been changed.
5. Enter the name of the group (or location). For example, the Scan
Station may be located in the main branch of a corporation.
6. Enter any additional information that is important to you in the
Comment field. For example, you can enter the name of the
department where the Scan Station is located.
7. Click Add. The Scanner name and information will be added to the
listing on the KSS500 - Scanner Admin main screen.
NOTES:
• If the Scan Station is not found or if you are adding a Scan
Station that will be installed on the network at a later time, the
message, There was an error communicating with the device,
would you like to Add it anyway? will be displayed. Click Yes
to add the Scan Station.
• If an incorrect IP address is entered, you may have to delete the
Scan St ation information from the KSS500 - Scanner Admin main
screen and add it again with the correct information.
8. Follow Steps 1 - 7 to add additional Scan Stations to this group.
A-61628 December 2011 3-13
Page 27

Discovering devices The Discover Devices option allows you to scan a range of IP
addresses to find and automatically register any Scan Station that has
an IP address that falls within the defined range of addresses.
NOTE: The Discover Devices option only works on Scan Stations that
have not had their password changed from the factory default.
1. Select Edit>Discover Devices. The Discover Devices dialog box
will be displayed.
2. Enter the first IP address where you want to start the search within a
range of IP addresses in the Start IP Address field.
NOTE: The End IP address will automatically be filled in with an
address that is 10 greater than the start IP address. e.g.
Start = 192.168.1.1, End = 192.168.1.10.
3. Enter the last IP address where you want to end the search in the
End IP Address field.
4. Click Search. The search will begin. Depending on the range of the
search, this process may take a few minutes. As Scan Stations’s IP
addresses are found within the range, they will automatically be
registered.
NOTE: If you select an address range that spans the upper two
address segments of the IP address, it may take an
exceedingly long time to discover devices. e.g.,
192.168.1.1 - 192.169.1.1 or 192.168.1.1 - 193.168.1.1.
3-14 A-61628 December 201 1
Page 28

Modifying a Scan Station
1. Select Edit>Modify Scanner. The Modify Scanner dialog box will
be displayed.
2. Make any required changes.
NOTE: If you select Static IP Address, the Static IP Address
window will be displayed allowing you to change IP address
settings.
3. Click Update.
NOTE: When changing from a Static IP address to DHCP IP address,
you may have to click the Update S t atus icon on the Main
screen to see the IP Address change
A-61628 December 2011 3-15
.
Page 29

Deleting a Scan Station
1. Select Edit>Delete Scanner . The Delete Scanner dialog box will be
displayed.
2. Click Yes.
Changing a password
1. Select Edit>Change Password. The Change Password dialog box
will be displayed.
2. Enter the current Scan Station password in the Current password
field.
3. Enter the new password in the New Password field.
4. Re-enter the new password in the Confirm new password field.
5. Click OK.
NOTE: If the password has never changed, then the current password
will not be needed and should be left blank. The default will be
used and this option will be grayed out.
3-16 A-61628 December 201 1
Page 30

Administrative and user configuration files
Within the KSS500 - Scanner Admin application is the Configuration
Organizer which allows you to create administrative and user
configuration files.
The Configuration Organizer is used to create either administrative or
user configuration files that are used to configure the Scan S t ation 500.
The Configuration Organizer file is named KSS500.XML and can only
be read by the Scan Station and Co nfiguration Organizer. It can also be
password protected.
NOTE: User’s can install just the Configuration Organizer on their own
PC (see the User’s Guide). For security reasons, the KSS500 Scanner Admin application cannot be installed on a PC that has
the Configuration Organizer installed.
Differences between the administrative and user configuration files are:
Administrative configuration files
Administrative configuration files are settings that define Scan Station
default settings created by the administrator.
• When installing a configuration file using a USB drive, if the contents
of the configuration file do not match the exact contents of the
configuration file currently stored on the Scan Station, you will be
prompted to update the Scan St ation with the configuration file on the
USB drive.
• Only administrative configuration files can be used to define printers
and modify the default settings on a Scan Station.
NOTE:You can also create your own configuration files that contain
your personal Scan Station preferences using the KSS500 Scanner Admin application under File>Save As User.
User configuration files
• Users can create their own configuration files that contain personal
scanning preferences. These users can make the changes to
destinations and settings using the Configuration Organizer and save
it on their USB flash drive.
• Only user configuration files can define USB drive folders.
• The user cannot make any permanent changes to the Scan Station’s
configuration file. Instead, all of the user’s destinations will appear on
the Scan Station’s display and will be merged with the default
destination groups. A “user” profile image will be displayed as part of
the icon on the top toolbar indicating that user settings are available
during the scan session.
• If the user’s personal configuration contains changes to the scan
settings (values found on the Settings screen), these settings
temporarily replace the Scan Station’s default settings.
• When a scan job is complete, the user’s USB flash drive can be
removed from the Scan Station and the Scan Station display returns
to the normal state with the default settings restored.
A-61628 December 2011 3-17
Page 31

Configuring your Scan Station
This section provides the steps needed to configure your Scan Station.
Before you begin, you need to know some basic information about your
network configuration as well as network addresses (e.g., your Email
server and any shared folders you may want to access from your Scan
Station). Refer to the Pre-Installation Checklist in Chapter 2 as you are
configuring your Scan Station.
NOTE: Use the scroll arrows on the side and top of each screen to
display all options.
1. Double-click the KSS500 - Scanner Admin icon on your desktop to
launch the application.
2. Select File>Configuration Organizer. The main Configuration
Organizer window will be displayed.
3. Click Settings.
NOTE: Some of the settings described in this section may have been
setup previously when you first installed your Scan Station,
therefore, it is not necessary to reset any of these options
unless you want to make a change.
3-18 A-61628 December 201 1
Page 32

Language setting The language you select will be used to configure the Scan Station’s
user interface.
1. Select the Language icon.
2. Select the desired language.
Device settings Clicking the Device icon displays a list of settings which will be used to
configure the Scan Station to work on your office network.
• The Scan Station is configured with a unique device name at the
factory. It is highly recommended that you do not change the default
name: “OEMXXXXXX”.
• If the device name has been changed from the factory default name
using the KSS500 - Scanner Admin application, this name will be
sent to the Scan Station.
• If you change the device name using the Configuration Organizer,
this name will be sent to the Scan Station when using a USB flash
drive to administer the Scan Station.
• Your device name must be unique on your network.
A-61628 December 2011 3-19
Page 33

1. Select IP Address to configure the device’s network address.
Select one of the following:
• If your network uses dynamic IP addresses, click Automatic
(DHCP), click Done and proceed to the next section, “E-mail
settings”.
• If your network uses static IP addresses, click Static (IPv4) and
continue.
• Make any required changes to the following Static IP Address
options. When finished making an entry in these fields, click
Done to accept the values and close the screen.
- Click IP Address and enter the address (required).
- Click Subnet Mask and enter the mask (required).
- Click Default Gateway and enter the gateway address
(required).
- Click Preferred DNS Server and enter the server address
(required).
- Click Alternate DNS Server and enter the server address.
- Click Preferred WINS Serv er and enter the server address.
- Click Alternate WINS Server and enter the server address.
NOTES:
• You must configure the IP Address, Subnet Mask, Default
Gateway and Preferred DNS Server.
• Configuring the WINS servers may not be required.
3-20 A-61628 December 201 1
Page 34

2. If desired, select Device/Administrator Password to passwordprotect the Scan St ation. Y o u will be asked to re-enter the password.
When finished, click Done.
NOTES:
• If you assign a device password, all users will be prompted to
enter this password every time they use the Scan Station. This
does not take the place of your Scan Station’s administrative
configuration file password.
• If Force User Login is enabled, this password will be used as
the administrator account password.
3. Select Default Credentials to define the Username, Password,
and Domain required to access network resources.
•Select Username. Enter the network user name assigned to the
Scan Station’s computer and click Done. For more information
see the section entitled, “Network Configuration details” in
Chapter 6.
NOTE: If you want the Scan Station to have access to network
printers or network shared folders, the user name must be
associated with a network account that has sufficient
privileges to access these resources.
•Select Password to enter the password for the network user
name. Y ou will be asked to re-enter the p assword. When finished,
click Done.
NOTE: This password is only used by the Scan Station and will
never be displayed in readable form.
•Select Domain. Enter the Microsoft NT network domain name
which the Scan Station will be connected to. In a workgroup
environment, this field can be left blank.
4. The Scan Station can be configured to have updates occur at
specific days and times. Select Remote Configuration Settings to
allow your Scan Station to be remotely configured. This method is
useful when you want to set up specific days and times for the Scan
Station to have updates automatically occur. Refer to the section
entitled, “Updating your Scan Station” (Method 2) in Chapter 6 for
more information.
A-61628 December 2011 3-21
Page 35

When selected, the Remote Configuration Settings screen will be
displayed.
- Enter a network folder where the Scan Station will find updated
configuration settings.
- Select which day(s) of the week this operation will be performed.
- Select the time of day you want your Scan Station to check for
updates.
5. Click Done.
NOTE: When updating a configuration using this method, the
following fields will not be updated: Device Name, IP
Address and Device Password.
6. Select Volume to adjust the master volume of the Scan Station.
This will typically effect the volume of the startup and shutdown
music and the speaker sound from the FAX modem.
NOTE: If you do not hear the fax dial tone after changing the
volume, you may need to reboot the Scan Station.
7. If you want to configure the Scan Station to run the Setup Wizard
when the Scan Station is restarted, click Setup Wizard.
3-22 A-61628 December 201 1
Page 36

The Setup Wizard screen will be displayed.
8. Click Run the wizard at next boot-up.
NOTE: See the section entitled, “Setup Wizard” earlier in this
chapter for more information.
A-61628 December 2011 3-23
Page 37

E-mail settings For the Scan Station to send documents to email recipients, you must
define how the Scan Station will access your email server. SMTP,
LDAP, Return Email Address and Maximum Attachment Size settings
are configured from the E-mail screen.
• Select the E-mail icon.
SMTP settings 1. Select SMTP Settings.
2. Select SMTP Server Address.
3. Enter an IP address or a fully qualified domain name (e.g.,
mailserver.mycompany.com).
4. Click Done.
3-24 A-61628 December 201 1
Page 38

5. Select Credentials to define the email server credentials.
NOTE: If you are using an unauthenticated SMTP server, you do
not need to make any selections in the Credentials fields.
6. Enter a Username, Password and an optional Domain name on
the Credentials screen for the email server account that the Scan
St ation will log into. Even though these credentials may be the same
as the Default Credentials, they must still be defined here.
7. Click Done.
8. Most email servers communicate on Port 25. If your email server
communicates on a different port, click Port.
9. Enter a new Port number and click Done.
10.Select Authentication Scheme to select the specific SMTP
Authentication Scheme used by your mail server. Select from the
following options:
• Use Strongest
• None
•Plain
• Login
• MDS Challenge Response
• NTLM
NOTE: Use Strongest will select the strongest available
authentication scheme reported by the mail server. For
more information on authentication schemes, consult your
network administrator.
A-61628 December 2011 3-25
Page 39

11. The default for SSL is to not use SSL. If your email server requires
Secure Socket Layer (SSL), check Use SSL.
12.Select Use StartTLS if you want to enable a secure SMTP
connection.
NOTE: Make sure your mail server is configured to use
STARTTLS. If it is not, the Scan Station will fail to send an
E-mail.
13.When your SMTP connection is configured, select Test Connection
to test whether your settings are correct.
The Configuration Organizer will test your settings and display a
“Success” or “Failed” message. If the test connection failed, verify
that all of your settings are correct and make any necessary
changes, until a Success message is displayed.
14.After running the test connection, click OK on the message box to
return to the SMTP Settings screen; then click Done to return to the
E-mail screen.
3-26 A-61628 December 201 1
Page 40

LDAP settings Connecting to an LDAP server allows the Scan Station and the
Configuration Organizer to connect to a network address directory . This
connection can be used to import one or more email addresses into an
email address group. It can also be used to look up addresses on the
Scan St atio n to temporarily add an email address to an ema il group list.
1. From the E-mail screen, select LDAP Settings.
2. Select the LDAP Server Address.
3. Enter an IP address or a fully qualified domain name (e.g.,
directoryserver.mycompany.com) and click Done.
4. Select Credentials.
5. Enter a Username, Password and an optional Domain name on
the Credentials screen for the LDAP server account that the Scan
St ation will log into. Even though these credentials may be the same
as the Default Credentials, they must still be defined here.
6. Click Done.
7. Most LDAP servers communicate on Port 389. If your LDAP server
communicates on a different port, select Port.
8. Enter a new Port number and click Done.
A-61628 December 2011 3-27
Page 41

9. The Base DN (Distinguished Name), Search Field Tag, Email
Address Tag, and Full Name Field Tag are strings that define the
search criteria for the LDAP server. See your network administrator
for the specific format of these strings. When you have the correct
format, enter the Base DN, Search Field Tag, Email Address Tag
and Full Name Field Tag.
10.Select Search Results To Return to set the maximum number of
records to display when performing a search. Select a number from
1 to 1000.
3-28 A-61628 December 201 1
Page 42

11. Select Security Options to set the Security Type and/or
Certificate.
• Click Security Type to setup a secure connection to your active
directory server. Selections are: None, SSL or TLS.
• Click Certificate. The displayed dialog box will allow you to
select a certificate file or enter the full path to the desired
certificate file.
NOTE:Some certificates require a password. If your certificate
requires a password, enter the password.
12.Click Done.
13.When your LDAP connection is configured, select T est Connection
to test if your settings are correct. The Configuration Organizer will
test your settings and display a “Success” or “Failed” message. If
the test connection failed, verify that all of your settings are correct
and make any necessary changes, until a Success message is
displayed.
14.After running the test connection, click OK on the message box to
return to the LDAP Settings screen; then click Done to return to the
E-mail screen.
A-61628 December 2011 3-29
Page 43

Return e-mail address Setting the Return E-mail Address allows you to receive notification if
an email sent by the Scan Station could not be delivered. This address
is also used as the default “From” email address when sending
documents via email.
IMPORTANT:Be careful about setting this option as every
undeliverable email notification will be sent to this
address and the same address will appear as the Sender
address for every email sent from the Scan Station.
3-30 A-61628 December 201 1
Page 44

Maximum attachment size This option allows you to set the maximum size of an email attachment
that can be sent successfully. This value should match the limitations
defined by your email server.
1. Select Maximum Attachment Size.
The following screen will be displayed.
2. Use the up and down arrows to select the desired size (0 to 99 MB
in 1 MB increments) then click the button to the left of the selected
number. When you have mad e your selection, the E-mail screen will
be redisplayed.
NOTE: Using the up and down arrows on the keyboard allows you
to quickly scroll through the values.
A-61628 December 2011 3-31
Page 45

Fax settings Following are procedures for configuring your fax settings.
NOTES:
• LDAP may be used to search for fax numbers that are stored on a
corporate address book. LDAP is not required to use the fax option.
• LDAP credentials for E-mail LDAP must be set up to properly use
LDAP for faxing. For more information refer to the section entitled,
“LDAP settings” earlier in this chapter.
1. Click the Fax icon.
2. Select LDAP Fax Field Tag.
3. Enter the LDAP Fax Field Tag for the tag to use when searching
LDAP for fax numbers. For more information, contact your network
administrator for the exact string to use (e.g., faxnumber).
4. Click Done.
5. If desired, select Sender’s Fax Number. This number will be
displayed on the banner of outgoing faxes.
6. Enter the sender’s fax number and click Done.
7. Select Outside Line Prefix.
8. Enter the prefix that the user needs to access an outside line
(e.g., 9, is frequently used and a comma “,” may be used to insert a
pause). Each comma pauses the dialing sequence for about 3
seconds. You can use multiple commas to increase the pause time.
9. Click Done.
3-32 A-61628 December 201 1
Page 46

10.Select Modem Country Code to display a list of countries and the
associated codes that configure the modem for use in the selected
country.
11. Select the desired country/code.
12.Select Incoming Fax Settings to configure your Scan Station to
receive faxes.
These settings can be used to define where incoming faxes will be
delivered. You can select a network folder and/or a network printer
for fax delivery.
A-61628 December 2011 3-33
Page 47

13.Select Incoming Fax Folder to enter a fully qualified path name to
a network folder where incoming faxes will be delivered, then click
Done.
14.If you want to select a network printer for incoming fax delivery , click
Incoming Fax Printer to display the list of installed printers.
NOTES:
• If no printers are installed, None will be displayed on the Select
Printer for Incoming Fax screen.
•Do not delete a printer destination that is assigned to incoming
faxes. If the incoming fax printer destination is deleted, a
message will be sent to the administrator’s Email ID.
• To install a printer, refer to the section entitled, “Configuring
printers” in Chapter 5.
15.Select a printer from the list and click Done.
16.If you want to select an email address to where the notification will
be sent, click Incoming Fax E-mail Address to display a virtual
keyboard that will allow you to enter an email address.
17.Select the desired email address and click Done.
18.Click Receive Fax to allow faxes to be received at the configured
device.
19.Click Save as PDF if you want to save the incoming fax as a PDF
file.
3-34 A-61628 December 201 1
Page 48

NOTES:
• The Incoming Fax option can only be checked if the administrator’s
Email ID is configured (see the section entitled, “Return Email
Address” earlier in this chapter). If the Return Email Address is not
configured, the following message will be displayed:
If the email address you entered is incorrect or invalid, you will not
receive notification of fax errors.
• If the destination(s) (e.g. printer and/or network folder) have not been
configured correctly , fax error email(s) will be sent to the Email I D you
provided for every incoming fax.
• If a fax is processed to any of the destinations or an error email is
sent, it is deleted from the queue and logged as “successful”.
Destination failures will also be logged.
• All corrupt fax(es) will result in an email to you and will be deleted
from the fax queue.
• If the Scan St ation’s credentials are not configured co rrectly , the Scan
Station will make multiple attempts. The account could be locked out
because of multiple network access errors.
• If there are incorrect configurations for the printer or output folders, or
if both the configurations are missing, then incoming fax messages
will stay in the fax queue and require you to change the fax settings
on the Scan Station to process the faxes.
A-61628 December 2011 3-35
Page 49

20.Select Fax Notification if you want “success” and “failure”
notifications to be sent to an email address, printer or both, every
time a fax is sent.
The following screen will be displayed.
21.Click Email Address and/or Printer to enter an email address/or
select a printer, where you want the fax notification to be sent.
22.If you want to track and monitor fax activity, you can select Fax
Console. Selecting this option will display the Microsoft Fax Service
dialog box.
NOTE: This option is only available at the Scan Station when
performing administrative duties at the device.
3-36 A-61628 December 201 1
Page 50

23.Click Retries to enter the number of times the Scan Station will
attempt to send a fax, then click Done.
24.Click Retry Delay to enter the number of minutes the Scan Station
will wait between attempting to send a fax.
If the fax service is not able to send a fax to the recipient, an email will
be sent to the sender’s email address (if available). Otherwise, the
message will be sent to the administrator’s email address. Included in
the message will be: the fax TIFF image, the sender and recipient’s fax
number and the error response from the MS Fax Service.
A-61628 December 2011 3-37
Page 51

Transaction Log settings The Scan Station can log all transactions to a separate transaction file.
This file is in XML format and can be downloaded or exported from the
Scan St ation. This is useful in environment s that are security-mind ed or
where transactions are used for billing. By default, all transactions are
logged (checked). You can disable logging on any or all of the
transaction types listed on the Transaction Log Settings screen by
unchecking the appropriate box.
1. Select Transaction Log Setting.
2. Check or uncheck any or all of the destination types you want to log.
NOTE: If you want to save these files, refer to the section entitled,
“Saving and clearing files” in Chapter 6.
3-38 A-61628 December 201 1
Page 52

Time settings 1. Click the Time icon.
2. Select Time Zone to select your appropriate time zone.
3. Select Daylight Savings and select Automatically Adjust or No
Adjustment.
4. Select Clock and select either a 12 Hour or 24 Hour time format.
5. Select Separator and select the separator symbol.
6. Click Format and select the hours, minutes, and seconds format.
A-61628 December 2011 3-39
Page 53

Date settings If the Date icon is not displayed, use the arrows on the toolbar to scroll
to the icon.
1. Click the Date icon.
2. Click Separator and select the desired separator symbol.
3. Click Format and select the desired day, month, year format.
NOTE: The actual time and date of the Scan Station can only be set
manually by using a USB flash drive that contains an
administrative configuration file. Currently, you cannot set the
time and date of the Scan Station remotely. See the sections
entitled, “Setting the Scan Station clock” and “Setting the Scan
Station date” later in this chapter for more information.
3-40 A-61628 December 201 1
Page 54

Configuration options The Configuration Options screen provides a variety of options.
• Select the Configuration options icon and check any of the
following options.
Allow custom E-mail Addresses — allows a user to enter an email
address that is not currently in the address book. By selecting Allow
custom E-mail Addresses (this is the default), users can enter new
email addresses in an ad-hoc manner. Email addresses are added
temporarily to the currently selected list and will be removed at the end
of the user’s scan session. This may be useful in more secure
environments where tighter control is required.
Allow custom E-mail Subject — allows a user to enter an email
subject line while scanning to email destinations. This may be useful in
more secure environments where tighter control is required.
Allow custom Fax Numbers — allows a user to enter a fax number
that is not on the displayed fax list.
Allow File Naming — allows a user to name both the folder and the file
name prefix used when scanning to either a network folder or a USB
flash drive. The folder will be appended to the path of the selected
destination and the file name will be used to create the actual file. The
user will optionally be able to turn on or off the date and time stamp
used when creating the file name.
A-61628 December 2011 3-41
Page 55

Allow Saving to USB Drive — allows you to disable scanning to a
USB drive. This may be useful in more secure environments where
tighter control is required.
Force User Login — when enabled, this option requires the user to
login before a scan session. At login, the user will have to enter user
name, password and domain. When Force User Login is checked, you
must configure LDAP settings. See the section entitled, “LDAP settings”
earlier in this chapter. To logout of the Scan Station, press the Stop/
Logout button (red X) on the Scan Station.
A default administrator account is available for logging onto the Scan
St a tion after enabling Force User Login. Initially the password will be
“blank” and is up to you to set this password to prevent user access to
administrative functions. For more information refer to the device
password option in the section entitled, “Device settings” earlier in this
chapter.
Allow Adding Pages To Scan Job — when enabled, the user can
continue to add pages to a scan job. After all pages in the input tray
have been scanned, a message will be displayed asking if they want to
add more pages. If the user selects Yes, the additional pages will be
scanned and the message will be displayed again until the user select s
No, or the 30-second timeout has occurred.
Hide Network Folder Location — enable this option to provide a more
secure environment by partially hiding the location of the network folder .
If this option is enabled, only the end of the network folder path will be
displayed on the Scan Station touchscreen. For example:
\\server\myfolder will be displayed as: ...\myfolder.
3-42 A-61628 December 201 1
Page 56

FAST Scanning — allows a user to scan instantly without waiting for
the 10-second delay, the Settings Review screen and the Destination
Review screen to be displayed. A message will only be displayed if the
scan session was unsuccessful.
Allow Voice Annotation — when enabled, allows a user to record a
voice annotation. By default, this option is enabled.
Enable Restricted Mode — when enabled, will only allow users to
have access to the Tasks function. These Tasks cannot be changed by
the user.
Allow Fax Notification — when enabled, allows a user to change the
fax notification settings. By default, this option is enabled.
Allow SharePoint™Index Field Changes — when enabled, allows a
user to change existing index fields.
A-61628 December 2011 3-43
Page 57

Password protecting the configuration file
Users who have access to the KSS500 - Scanner Admin application
can create an administrative configuration file and without knowing it,
replace the Scan St ation settings with their own. If using a USB drive to
install administrative configuration files instead of the KSS500 Scanner Admin application, it is suggested that you password-protect
the administrative configuration file to prevent overwriting Scan Station
settings.
1. Select User>Configuration Password. The Configuration
Password dialog box will be displayed.
2. Enter a password in the New password field.
3. Enter the password again to confirm it.
4. Click OK.
NOTE:After applying the configuration file to the Scan Station,
any attempt to modify the configuration file will require this
password. If you lose or forget this password, you must
contact Kodak Service to unlock your Scan St ation. You will
be asked to provide the latest KSS500.XML file.
3-44 A-61628 December 201 1
Page 58

Saving your administrative configuration file
After making changes to the configuration, save your configuration
settings. Configuration settings can be saved to three locations.
• USB Drive
• Local backup
• Folder
1. Click the Save icon.
The Save Configuration To dialog box will be displayed. By default
the Local backup option is selected. If you choose to create a loca l
backup, a copy of the settings will be saved in the same directory as
the KSS500 - Scanner Admin application.
NOTE: On Windows Vista and Windows 7 the file will be saved in
the public documents folder (i.e., C:\users\public\public
documents).
2. Select where you want to save the configuration settings and click
Save.
NOTES:
• Insert your USB drive into the USB port on your PC after the
Configuration Organizer is running. This will allow the
Configuration Organizer to recognize the presence of the USB
drive. If the USB drive is inserted before the application is
launched, the flash drive option will not be available on the Save
Configuration To dialog box.
• If the USB drive was inserted before the application is launched,
remove the USB drive and re-insert it.
• If you are using the KSS500 - Scanner Admin application to send
the configuration file to a Scan Station or you are using a remote
configuration, check the Folder option and Browse to the
network location where configuration files are stored.
• On Windows Vista and Windows 7, it is recommended that you
save the file in the local “Documents” folder due to the new
security measures Microsoft has implemented.
3. Click OK.
4. Click File>Exit to close the Configuration Organizer.
A-61628 December 2011 3-45
Page 59

Uploading configuration settings
After saving the administrative configuration file, the file needs to be
uploaded to the Scan St ation. The configuration file can be uploaded by
using the KSS500 - Scanner Admin application or by saving the file to a
USB drive and inserting it in the USB port of the Scan Station.
Loading configuration settings using the KSS500 - Scanner Admin application
1. From the KSS500 - Scanner Admin main screen, click on the Scan
Station(s) you want to upload the configuration file to.
NOTE: To select more than one Scan St ation, press the Ctrl or Shift
key and click the mouse button. The selected Scan Stations
will be highlighted.
2. Select Scanners>Configuration>File Upload. The Open dialog
box will be displayed.
Uploading the configuration settings using a USB drive
3. Select the configuration file that you want to upload and click Open.
The message, Uploading, please wait will be displayed while the
file is being uploaded.
NOTE: If the file fails to load, the message, Upload Error - there
was an error uploading the configuration file to:
Scanner Name will be displayed.
1. Insert your USB drive in the USB port on the Scan Station.
NOTE: If the Scan St ation configuration previously had a p assword
assigned to it, you will be prompted to enter that password
before proceeding with any changes.
2. Click Update.
3-46 A-61628 December 201 1
Page 60

Setting the Scan Station clock
The time on the Scan Station can only be set when the Scan Station is
in local administrator mode and by using a USB drive that contains an
administration configuration file.
NOTE: Currently, you cannot set the time of the Scan Station remotely
using the KSS500 - Scanner Admin application.
1. Insert a USB drive with an administrative configuration file into the
Scan Station.
2. If prompted to update the Scan Station settings, select No. The
Scan Station will now be in Settings mode.
3. Select the Time icon.
Setting the Scan Station date
4. Select Set.
5. Enter the time for the Scan Station and click Done.
NOTE: Time is entered in 24-hour format.
The date on the Scan Station can only be set when the Scan Station is
in local administrator mode and by using a USB drive that contains an
administration configuration file.
NOTE: Currently, you cannot set the time of the Scan Station remotely
using the KSS500 - Scanner Admin application.
1. Insert a USB drive with an administrative configuration file into the
Scan Station.
2. If prompted to update the Scan Station settings, select No. The
Scan Station will now be in Settings mode.
3. Select the Date icon.
4. Click Set.
5. Enter the date for the Scan Station and click Done.
6. When finished updating your Scan Station settings, remove the USB
drive from the USB port.
A-61628 December 2011 3-47
Page 61

4 Configuring Scan Settings for the Scan Station
Contents Configuring default Scan settings...................................................4-2
Settings Shortcut option..................................................................4-3
Changing default settings........................................................4-4
Creating a new Settings Shortcut............................................4-5
Renaming a Settings Shortcut.................................................4-6
Tasks option....................................................................................4-6
Creating tasks.............................................................................4-6
Renaming tasks..........................................................................4-9
Deleting tasks .............................................................................4-9
Editing tasks................................................................................4-9
File Name Settings option.............................................................4-10
Scan As option ..............................................................................4-13
File Type option.............................................................................4-15
Input Document Is option..............................................................4-17
Resolution option..........................................................................4-18
Document Type option..................................................................4-18
Black and White Adjustment option..............................................4-19
Copies for Printing option..............................................................4-20
Advanced option...........................................................................4-21
Saving your administrative configuration file.................................4-22
Updating your configuration settings.............................................4-23
Loading configuration settings using the KSS500 - Scanner
Admin application .....................................................................4-23
Uploading the configuration settings using remote
configuration.............................................................................4-23
Uploading the configuration settings using a USB drive...........4-23
Verifying your Scan Station setup.................................................4-24
Downloading configuration files....................................................4-25
Opening/modifying a configuration file..........................................4-25
A-61628 December 2011 4-1
Page 62

Configuring default Scan settings
The Scan Station can be configured with default values for Scan
Settings (e.g., Scan As, File Type, etc.) These default values are used
when scanning documents unless they are changed by the user before
scanning.
1. Double-click the KSS500 - Scanner Admin application shortcut.
2. Select File>Configuration Organizer.
3. Select Settings.
NOTE: Use the Right and Left arrows to scroll through the list
of icons and scan settings.
4. Go through each Scan setting and make the selections that meet
the needs of your organization. The following sections provide
detailed descriptions for each Scan setting.
4-2 A-61628 December 201 1
Page 63

Settings Shortcuts option
Settings Shortcuts — six Settings Shortcuts are provided at
installation. These Settings Shortcuts can be used as a template to
create other shortcuts.
• Defaults
• Black and White Document
• Black and White Document (OCR Quality)
• Color Document
• Color Document (OCR Quality)
• Color Photograph
Settings Shortcuts are a way for you to create personalized groups of
scan settings to make scanning easier. If you have scan settings that
you will use frequently (i.e., your Scan As setting will always be Black
and White), you can create a shortcut for these settings and save them
to your configuration file. For example, you could create a shortcut
called “My Color Photos” that would contain the settings:
Scan As: Color
File Type: JPEG
Input Document is: One Sided
Resolution: 300 dpi
Document Type: Photographs
To change the default settings:
1. Click Defaults.
2. Scroll through each of the scan settings (i.e., File Naming Settings,
Scan As, etc.) and make the desired changes.
A-61628 December 2011 4-3
Page 64

Changing default settings Y ou can change the u ser default se ttings to common scan se ttings tha t
meet your needs.
1. From the main Configuration Organizer screen, click Settings.
2. Select the Setting Shortcuts icon.
3. Select User Defaults.
4. Scroll through the scan settings icons to make the desired changes
to your default shortcut.
4-4 A-61628 December 201 1
Page 65

Creating a new Settings Shortcut
1. In the Configuration Organizer window, access the Settings screen
and select the Settings Shortcut icon.
2. Select Edit>Add Item. The Add New Settings Shortcut dialog box
will be displayed.
3. Enter the name of the new shortcut in the Description field.
4. Select a shortcut that most closely represents the scan settings that
you want for your shortcut from the Create From drop-down list.
For example, if you have color photos, you may want to select the
Color Photograph Settings Shortcut to use as your starting point.
The scan settings for Color Photograph will be displayed.
5. Make any desired scan setting changes (i.e., you may want to scan
your color photos at 400 dpi).
6. When finished, select File>Save. The Save Configuration To dialog
box will be displayed.
7. Select the locations where you want to save the configuration file
and click Save.
NOTE: You must have a USB drive inserted for the USB Drive
option to be available.
A-61628 December 2011 4-5
Page 66

Renaming a Settings Shortcut
1. Access the Settings screen and select the Settings Shortcut that
you want to rename.
2. Select Edit>Rename Item. The Rename Settings Shortcut dialog
box will be displayed.
3. Enter a new name in the Description field and click OK.
Tasks option Tasks allow you to group together scan settings (i.e., resolution, file
type, one-sided/two-sided, etc.) with one or more destinations.
Creating tasks Before creating a task, you must have destination groups created.
NOTES:
• You can have several items in a task group, but only one task group
is allowed per configuration file.
• If 8 or more tasks are created, a Search button will be displayed on
the screen.
1. From the Configuration Organizer select Edit>Add Group>Task. A
Task icon is added to the toolbar on the Configuration Organizer
window.
2. Select Edit>Add Item.
4-6 A-61628 December 201 1
Page 67

The Choose Destinations screen will be displayed listing the
destinations that have been setup in your configuration file.
3. Select the destination(s) that you want to add to your task. For
example, you may want to send invoices to personnel in the Billing
department, then save a copy of what you send to your personal file
on the network. In this case, you would click Billing department
and Network.
Clicking on an item in the list will display the contents of the
selected group.
4. Select one or more items in the list (e.g., in this case, an email
address) and click Done. The Choose Destinations screen will be
redisplayed where you can select another destination (e.g.,
Network) or click Done.
A-61628 December 2011 4-7
Page 68

The Choose Settings screen will be displayed with default settings.
5. Click on any of the settings in the list you want to change. For
example if the invoices you want to send to the Billing Department
should be one-sided, black and white, PDF files, you would make
those selections.
6. Click Done. The keyboard will be displayed allowing you to name
your task.
7. Enter the task name and click Done.
4-8 A-61628 December 201 1
Page 69

Renaming tasks By default, when you add a task, the group is named Task. To change
the name of the task:
1. Select the task that you want to rename.
2. Select Edit>Rename Item. The keyboard will be displayed allowing
you to rename your task.
3. Click Done.
Deleting tasks When you delete a task, all items within the task will be deleted.
Remember, you can only have one task, but many items within a
task group.
1. Select the task you want to delete.
2. Select Edit>Delete Group. The message, This will remove all the
configuration information for group: Task. Are you sure you
want to delete the group? will be displayed.
3. Click Yes to delete the task.
Editing tasks You can make changes to any task by selecting the task item you want
to change.
1. Click on the task item you want to change.
2. Review the destinations and scan settings associated with the
selected task as indicated on the bottom of the Configuration
Organizer window, and make any changes as desired.
A-61628 December 2011 4-9
Page 70

File Name Settings option File Name Settings allows you to define values that determine the
locations and file name used when creating scanned documents. You
can define a folder name where scanned documents will be placed
when scanning to a network folder, FTP location or USB flash drive
destination. You can also define the file name prefix that will be applied
to every scanned document created. Scanned documents are typically
created with this prefix and have an optional date and time stamp
appended to the prefix. For example, if you define a prefix of receipts
and a folder name of 2008, the scanned document file name will have
the format: receipts_20080117_092219.tif and is placed in a folder
called 2008.
1. Select the File Name Settings icon.
2. Select Folder Name. Enter the folder name where your scanned
documents will be placed when scanning to a network folder, FTP
location or USB drive destination.
If a Folder Name is defined, it will be appended to the full path
selected in the destination. For example, if a network folder defined
as: \\myserver\myfolder\docs is selected and the Folder Name is set
to “designdocs” then the scanned document is placed in the
following folder: \\myserver\myfolder\docs\designdocs.
If multiple folder levels are defined in the Folder Name field, the
scanned documents will be placed in the full path defined by the
destination and the “Folder Name”. In the previous example, if the
“Folder Name” was defined as “designdocs\worddocs” then the
scanned document is placed in
\\myserver\myfolder\docs\designdocs\worddocs.
4-10 A-61628 December 201 1
Page 71

In either case, if the path to the final destination does not exist, then
the Scan Station attempts to create the full path to the destination.
This is true for network destinations as well as USB flash drive
destinations. As in the previous example, if the sub-folders docs
and/or worddocs did not exist, they would be created prior to
copying the scanned document providing the Scan Station account
has appropriate user rights.
If you leave the Folder Name blank, the file will be created in the
root directory of the configured destination.
3. Select File Name Prefix. Enter the prefix you want to use as the file
name. This prefix, along with a date, time and appropriate file
extension (.pdf, .jpg, .tif), will be appended to it.
NOTE: If this field is left blank, the default file name KSS500 will be
used. However, if a special file name needs to be defined,
the user can enter the desired file name.
4. Select Advanced if you want to select one of the following options:
• Interactively Name Scanned Files — if checked, the user may
be required to enter a file name for each page scanned. If JPEG
or Single Page TIFF is selected as the File Type, you will be
prompted for each page and each side scanned.
Use this option with caution as it will require an extra step each
time a document is scanned.
• Add Date/Time Stamp — by default, the date and time are
appended to each file name the Scan Station creates. If the user
wants, they can uncheck this option. If this option is not checked,
only the file name prefix and the file name extension will be used
to create the file name.
• Device Name as Folder — if checked, scanned documents will
be stored in a folder named after the Scan S tation. This folder will
be created at the end of the path specified by the destination.
A-61628 December 2011 4-11
Page 72

• Device Name as Prefix — if checked, scanned documents will
be created with a file name that begins with the name of the Scan
Station.
• Omit Separators — when checked, no underscore character will
be placed between the constructed file names or paths unless
the underscore is part of the file name prefix or folder name.
The following examples illustrate the Resulting file name when using
the Device Name as Folder, Device Name as Prefix and Omit
Separators options:
Example 1:
Destination path: \\server\Scanned Files
Device Name: SS500-1
Device Name as Folder: checked
Device Name as Prefix: checked
File Name Prefix: Invoices
Omit Separators: unchecked
Add Date/Time Stamp: checked
Resulting file name:
\\server\Scanned Files\SS500-1\SS500-1_Invoices_201101111400.tif
Example 2:
Destination path: \\server\Scanned Files
Device Name: SS500-1
Device Name as Folder: checked
Device Name as Prefix: unchecked
File Name Prefix: Invoices
Omit Separators: checked
Add Date/Time Stamp: checked
Resulting file name:
\\server\Scanned Files\SS500-1\Invoices201101111400.tif
4-12 A-61628 December 201 1
Page 73

Scan As option When selecting a Scan As setting, your selection may have an impact
on other scan settings. The table below describes how each Scan As
selection will impact other selections.
Scan As
setting
Color PDF (Searchable/Image only)
PDF (Multi/Single page)
TIFF (Multi/Single page)
JPEG (Single page)
Grayscale PDF (Multi/Single page)
JPEG (Single page)
PDF (Searchable/Image only) Not available
Black and White
TIFF (Multi/Single page) Contrast available
File Type
setting
Best (iThresholding)
Normal (ATP)
Black and White
Adjustments
Not available
Not available
Contrast and Threshold
available
1. Select the Scan As icon.
2. Select the setting that will most typically be used by your
organization.
A-61628 December 2011 4-13
Page 74

• If you select Black and White, the Black and White screen will
be displayed. Select either Best (iThresholding) or Normal
(ATP).
- Best (iThresholding) — the Scan Station dynamically
evaluates each document to determine the optimal threshold
value to produce the highest quality image. This allows
scanning of mixed document sets with varying quality (such
as faint text, shaded backgrounds, or color backgrounds) to
be scanned using a single setting thus reducing the need for
document sorting. When Best is selected, only Contrast can
be adjusted on the Black and White Adjustments screen.
- Normal (ATP) (Adaptive Threshold Processing) — separates
the foreground information in an image (e.g., text, graphics,
lines, etc.) from the background information (i.e., white or
non-white paper background). When Normal is selected, you
can adjust both Threshold and Contrast on the Black and
White Adjustments screen.
4-14 A-61628 December 201 1
Page 75

File Type option 1. Select the File Type icon.
2. Select the File Type that will most frequently be used by your
organization.
• PDF - Searchable (Image + Text) — creates a single- or multi-
page document that contains both text and image data. This type
of document uses OCR technology to read the scanned page
and extracts text information from the image data. When you
select this option, a screen is displayed with the following options
for creating PDF files.
- Quality: allows you to select a Good, Better or Best quality
option. When saving a file as PDF, predefined scanner
resolution settings will be used when selecting Good (150
dpi), Better (200 dpi), and Best (300 dpi). The scanner dpi
settings will not be used when scanning in PDF mode.
- Language: this option is only available when you select PDF
- Searchable (Image + Text). When you select Language,
the Language screen will be displayed. Select the language
you want used in the Optical Character Recognition
employed to generate the PDF file.
- Single Pages: creates a PDF file for every page scanned. If
scanning a two-sided document, a file will be created for both
the front and back page.
- Secure: allows the user to enter a password that will be used
to encrypt the file before the file is delivered. The password
will be sent in a separate email when Email is one of the
destination selections.
A-61628 December 2011 4-15
Page 76

• PDF - Image Only — creates a single- or multi-page document
that contains only scanned data as a bitmap image. PDF files
created with this option are not text searchable. When you select
this option, a screen is displayed with the following options for
creating PDF files.
- Quality: allows you to select a Good, Better or Best quality
option. When saving a file as PDF, predefined scanner
resolution settings will be used when selecting Good (150
dpi), Better (200 dpi), and Best (300 dpi). The scanner dpi
settings will not be used when scanning in PDF mode.
- Single Pages: creates a PDF file for every page scanned. If
scanning a two-sided document, a file will be created for both
the front and back page.
- Secure: allows the user to enter a password that will be used
to encrypt the file before the file is delivered. The password
will be sent in a separate email when Email is one of the
destination selections.
• JPEG — this option is only available if your Scan As selection is
Color or Grayscale. JPEG creates multiple files, one for the front
and back of a page. If JPEG is selected, you can select Draft,
Good, Better, Best or Superior.
NOTE: The quality settings impact the final size of the file (Draft
producing the smallest file size and Superior producing
the largest file size).
• TIFF - Multi Page — creates one file that contains all of the
scanned pages. You can select either: None (Uncompressed),
Group 4 or JPEG compression.
• TIFF - Single Pages — creates multiple files, one for each side
of a scanned page. You can select either: None
(Uncompressed), Group 4 or JPEG compression.
NOTES:
• Color/Grayscale TIFF documents can only be Uncompressed or
JPEG compressed. Black and white documents can either be
Uncompressed, Group 4 or JPEG compression.
• All faxed documents will be delivered as black and white, Group 4
compressed TIFF images.
4-16 A-61628 December 201 1
Page 77

Input Document Is option The Input Document Is screen provides three options:
Two Sided — the Scan Station will scan the front and back in a single
pass.
One-Sided - Face Down — select if your organization typically scans
one-sided documents. If you select this option, the documents must be
put in the input tray face down (the side you want to scan facing the
input tray).
One-Sided - Face Up — select if your organization typically scans onesided documents. If you select this option, the documents must be put
in the input tray face up (the side you want to scan facing toward you).
NOTES:
• If permitted, the user can temporarily change this setting for a single
scan session.
• The Two Sided option can be used with Blank Page Detection for
better performance. See the section entitled, “Advanced option” later
in this chapter for more information.
A-61628 December 2011 4-17
Page 78

Resolution option Select a default Resolution from 75 to 600 dpi. 200 dpi is the default.
Higher resolutions produce better quality images, but larger file sizes.
Document Type option If your documents typically have a mixture of text and graphics, keep
this option as the default. Otherwise, select the Document Type that is
most frequently scanned by your organization.
4-18 A-61628 December 201 1
Page 79

Black and White Adjustment option
If you selected Black and White as your Scan As selection, the Black
and White Adjustments screen will be available.
1. Select the Black and White Adjustment icon.
• If you selected Best (iThresholding) on the Scan As screen,
only the Contrast value can be changed.
• If you selected Normal (ATP), both Contrast and Threshold can
be changed.
2. Use the Up and Down arrows to adjust the value, then click the
button to the left of the number to save the new value.
A-61628 December 2011 4-19
Page 80

Copies for Printing option This option is for the user during their scan session. Any changes to
this option during configuration will be ignored. The default is 1.
Advanced option 1. Select the Advanced icon. The Advanced screen provides these
options:
• Blank Image Detection — used to detect blank pages (e.g., the
back side of a document), so these pages can be discarded. Use
this option when scanning black and white documents to either
TIFF or PDF. Click Blank Page Detection to turn this feature On
or select a percentage where document images that fall below
the percentage will be discarded. The default is 1%.
4-20 A-61628 December 201 1
Page 81

• Cropping — allows you to select either Automatic or
Aggressive cropping.
- Automatic: automatically detects the border of an image and
straightens it if necessary.
- Aggressive: automatically detects the border of an image,
straightens it if necessary, and eliminates any residual black
border on any image edges. In order to achieve this, there is
a possibility that a small amount of image data from the edge
of the document may be lost.
• Use Multifeed Ultrasonic Detection — multifeed ultrasonic
detection aids in document scanning by detecting documents
that may go through the feeder overlapped. Multifeeds can
happen due to stapled documents, adhesives on documents, or
electrostatically charged documents. Check this option if you
want the Scan Station to detect double-fed documents.
NOTE: If this option is on and a multifed document is detecte d,
the Scan Station will “ding”. The user will need to check
their scanned images to be sure they are correct. If
necessary, they may need to rescan the job
• Enable Auto-Orient — if enabled, the Scan Station will analyze
each document to determine how it was fed and will rotate the
image to the proper orientation.
• Reverse Page Order — if enabled, the Scan Station will reverse
the order of the scanned images from the order in which the
documents were scanned.
• Color Adjustments — when checked, displays the Color
Adjustments screen, which allows you adjust the Red, Green
and Blue color intensity. Values range from 1 to 100; 1 is the
lowest amount of color; 100 is the highest amount of color. The
default is 50.
2. Enable any of these options above and click Done.
A-61628 December 2011 4-21
Page 82

Saving your administrative configuration file
After making changes to the configuration, save your configuration
settings. Configuration settings can be saved to three locations:
• USB Drive
• Local backup
• Folder
1. Click the Save icon.
The Save Configuration To dialog box will be displayed. By default
the Local backup option is selected. If you choose to create a loca l
backup, a copy of the settings will be saved in the same directory as
the KSS500 - Scanner Admin application.
2. Select where you want to save the configuration settings and click
Save.
NOTES:
• Insert your USB drive into the USB port on your PC after the
Configuration Organizer is running. This will allow the
Configuration Organizer to recognize the presence of the USB
drive. If the USB drive is inserted before the application is
launched, the USB Drive option will not be available on the Save
Configuration To dialog box.
• If the USB drive was inserted before the application is launched,
remove the USB drive and re-insert it.
• If you are using the KSS500 - Scanner Admin application to send
the configuration file to a Scan Station or you are using a remote
configuration, check the Folder option and Browse to the
network location where configuration files are stored.
3. Click OK.
4. Click File>Exit to close the Configuration Organizer.
4-22 A-61628 December 201 1
Page 83

Updating configuration settings
After saving the administrative configuration file, the file needs to be
uploaded to the Scan St ation. The configuration file can be uploaded by
using the KSS500 - Scanner Admin application remote configuration or
by saving the file to a USB drive and inserting it in the USB port of the
Scan Station.
Loading configuration
settings using the KSS500 Scanner Admin application
1. From the KSS500 - Scanner Admin main screen, click on the Scan
Station(s) you want to upload the configuration file to.
NOTE: To select more than one Scan St ation, press the Ctrl or Shift
key and click the mouse button. The selected Scan Stations
will be highlighted.
2. Select Scanners>Configuration>File Upload. The Open dialog
box will be displayed.
Uploading the configuration settings using remote configuration
Uploading the configuration settings using a USB drive
3. Select the configuration file (KSS500.xml) that you want to upload
and click Open. The message, Uploading, please wait will be
displayed while the file is being uploaded.
NOTE: If the file fails to load, the message, Upload Error - there
was an error uploading the configuration file to:
Scanner Name will be displayed.
1. Browse to the configuration file (KSS500.xml) that you want to load.
2. Copy the configuration file to the network folder that the Scan
Station(s) have been configured to “watch”.
NOTE: When the configured day and time occurs, Scan Station(s)
will be updated with the new configuration.
1. Insert your USB drive in the USB port on the Scan Station.
NOTE: If the Scan St ation configuration previously had a p assword
assigned to it, you will be prompted to enter that password
before proceeding with any changes.
2. Click Update.
A-61628 December 2011 4-23
Page 84

Verifying your Scan Station setup
Verify that your Scan Station installation was successful and is
operational.
NOTE: If Save to Flash Drive is disabled, select another destination to
scan to and go to Step 3.
1. Insert a blank USB drive in the Scan Station’s USB port.
When the Scan Station recognizes the USB flash drive, an icon is
displayed showing the USB flash drive with the user profile.
2. Click Save to Flash Drive.
3. Place a document into the input tray and press the Go button. The
Destination Review screen will be displayed.
NOTE: If you enabled FAST Scanning, the Scan Station will start
automatically and the Settings Review screen will not be
displayed. Otherwise, the Scan Station will begin scanning
after 10 seconds (or you can press the Go button again to
start scanning immediately).
As the Scan Station begins to feed and process documents, a
Status screen will be displayed. The page number and a preview
image will be displayed as each page is being scanned.
When the document has been scanned, the Status screen will be
displayed as it sends your document to each selected destination.
When all destinations have been processed, the Processing
Review screen will be displayed.
NOTES:
• If Fast Scanning is enabled, these screens will not be displayed.
• This screen lists all the selected destinations (if you had more
than one). Successful destinations will be shown with a green
check mark. Unsuccessful destinations will be shown with a red
X, and the message, One or more saved destinations failed
will be displayed. To review detailed error messages, download
the error logs.
4-24 A-61628 December 201 1
Page 85

Downloading configuration files
It is possible to download a configuration file that is already installed on
a Scan Station to the KSS500 - Scanner Admin application to be
modified and/or uploaded to a Scan Station.
1. Double-click on the KSS500 - Scanner Admin shortcut icon.
2. Browse to and open the previously saved Scan Station
administration file.
3. Select the Scan Station where you want to download the
configuration file.
4. Select Scanner>Configuration>File Download. The Save As
dialog box will be displayed.
Opening/modifying a configuration file
5. Select the configuration file that you want to download and click
Save. The message, Downloading: Please wait will be displayed
while the file is being downloaded.
1. Double-click on the KSS500 - Scanner Admin application icon.
2. Select File>Configuration Organizer.
3. Select File>Open. The Open Configuration From dialog box will be
displayed.
4. Browse to the location of the KSS500.xml file that you want to open.
5. Click Open to open the configuration file.
6. Modify any settings.
7. Select File>Save to save the configuration file. Refer to the section
entitled, “Saving your configuration file settings” for more
information.
A-61628 December 2011 4-25
Page 86

5 Setting up and Managing Destination Groups
Contents Toolbar descriptions........................................................................5-2
Creating groups and adding items..................................................5-3
Renaming an email group ..........................................................5-4
Deleting an email group..............................................................5-4
Moving groups and items within groups.....................................5-5
Importing an email address book ...............................................5-6
Adding email addresses using LDAP.........................................5-7
Adding several email addresses to a single item in an email
group......................................................................................5-8
Adding a USB drive folder group................................................5-9
Renaming a USB drive group...................................................5-10
Deleting a USB drive group......................................................5-10
Adding a network folder............................................................ 5-11
Renaming a network group ......................................................5-12
Deleting a network group..........................................................5-12
Adding an FTP group ...............................................................5-13
Specifying Proxy settings..........................................................5-15
Adding a fax group and fax numbers........................................5-18
Renaming a fax group..............................................................5-19
Deleting a fax group .................................................................5-19
Adding a SharePoint group ......................................................5-20
Adding an Evernote group........................................................5-23
Configuring FTP destinations........................................................5-26
Specifying proxy settings..........................................................5-27
Configuring printers.......................................................................5-28
Connecting to a printer that is connected to a print server
on a network domain .............................................................5-29
Connecting to a printer shared by another computer on the
network workgroup ................................................................5-29
Connecting to a network printer that is directly connected
to the network...........................................................................5-30
This chapter provides procedures for adding, renaming, deleting, and
reordering destination groups (e.g., email, network folder, printer, FTP,
etc.) that will be commonly used by the personnel in your organization.
Setting up these frequently used groups makes it faster and easier for
your Scan St ation users to scan and send th eir document s. Destina tion
groups are set up using the Configuration Organizer.
For simplicity purposes, only the procedures for managing an email
group will be documented. The steps required to manage other group
types and their entries are the same, unless otherwise noted.
A-61628 December 2011 5-1
Page 87

Toolbar descriptions The Configuration Organizer’s toolbar provides quick access to
commonly used functions. The toolbar is always displayed. You cannot
add, delete or move toolbar buttons.
Icon Description
Saves the configuration file to the USB flash drive or hard
drive.
Adds a new item in the current group.
Searches for an item
Renames the selected item.
Deletes the selected item.
Moves the selected item up one position.
Moves the selected item down one position.
NOTE: For the purpose of this manual, procedures are indicated by
using the menu options. You can also use the toolbar buttons or
shortcut keys for any desired action.
5-2 A-61628 December 201 1
Page 88

Creating groups and
1. Open the KSS500 - Scanner Admin application.
adding items
2. Select File>Configuration Organizer.
3. Select Edit>Add Group>E-Mail. An Email icon is added to the
toolbar on the Configuration Organizer window.
4. Select the email group you want to add an address(es) to and select
Edit>Add Item.
5. Enter a name in the Description field and email address in the
Address field, then click OK.
NOTES:
• If you do not want the email address placed in alphabetical
order, uncheck Add to list alphabetically.
• You can also rename items and delete items from a group by
using the Edit>Rename Item and Edit>Delete Item menu
selections.
The email address will be added to the selected email group and
the address will be listed on the Configuration Organizer window.
6. Repeat steps 3-5 for each email address you want to add to an
email group.
A-61628 December 2011 5-3
Page 89

Renaming an email group By default, when you add an email group, the group is named E-mail.
From the Configuration Organizer:
1. Select Edit>Rename Group. The Rename Group dialog box will be
displayed.
2. Make the desired change in the Description field and click OK. The
new group name will be displayed on the Configuration Organizer
screen.
Deleting an email group When you delete an email group, all email addresses within the email
group will also be deleted.
1. Access the Configuration Organizer and select the email group you
want to delete.
2. Select Edit>Delete Group. The following message will be
displayed:
3. Click Yes to delete the email group.
5-4 A-61628 December 201 1
Page 90

Moving groups and items within groups
The order in which the groups are displayed in the Configuration
Organizer is the same order they will be displayed on the Scan Station.
If you want a specific group to be displayed as the first selection or in a
special order, you can reorder the groups the way you want them
displayed.
1. Click the group you want to move.
2. Select Layout>Move Group Left or Layout>Move Group Right.
The group will be moved one position to the left or right.
Moving items within groups
1. Select the item within the list that you want to move.
2. Select Layout>Move Item Down or Layout>Move Item Up. The
item will be moved up or down one position.
NOTE: If you want to move items/groups many times, it is
recommended that you use the Ctrl key sequences (Ctrl-Up
arrow/Ctrl-Down arrow) as this will be faster.
A-61628 December 2011 5-5
Page 91

Importing an email address book
CSV files are data files that represent database information. Each row
contains data values that are separated by a comma. Each comma
found on a line of text represents a column of data from the original
database. The example below shows typical data exported from
Microsoft’s Outlook Express.
NOTE: The first row may contain the data column header information
and not actual data.
First Row
First Name,Last Name,E-mail Address
Smith,John,johnsmith@rochester.rr.com
Tom,Brown,Tombrown123@yahoo.com
William,Doe,wdoe@msn.com
Outlook Express allows you to export your email address book to a
comma-separated file. When you export your email address book, you
can select which data columns you want to export.
NOTE: Other mail programs may not allow you to select which data
columns to export.
It is recommended that you only export the first name, last name, and
email address. Once the file is exported, it can be imported into the
Configuration Organizer.
To import your email address book:
1. Select the email group where you want to import your email address
book.
2. Select Edit>Import Email Addresses. The Import E-mail
Addresses dialog box will be displayed.
3. Enter the file name in the File field that contains the email addresses
you want to export. If necessary, use the Browse button to help
locate the file.
5-6 A-61628 December 201 1
Page 92

4. Many email client applications automatically export the column
headings as the first row of data. If you do not want to export the
column headings as the first row, check Skip first row of data.
NOTE: Some email applications also export the data with
additional quote characters surrounding the data. The
quote characters will be removed while importing data.
5. Enter the column numbers where the First Name, Last Name and
Email Address appear in the CSV file.
After selecting a CSV file and column locations, a preview will be
displayed showing the results of the file Column Location
selections. If the column selections are changed, the preview will
reflect these changes.
For example, if the three File Column Location values are 1, 2, and
3 the preview would display the following:
First Name Last Name Email Address
The First Name and Last Name are combined to form the email
address display name. The Email Address is used to create the
email address.
If all three File Column Location values were set to 1, then the
preview would look like this:
Adding email addresses using LDAP
First Name First Name First Name
6. Click Import. The email addresses will be added to the selected
Email group.
If the LDAP server is correctly configured, you can use this connection
to search the network address book for email addresses. Any
addresses found while searching can be added to the currently
selected email group.
1. Click the Search icon on the main Configuration Organizer toolbar.
The keyboard will be displayed.
2. Enter the last name of the person you are searching for and click
Done. The Address Search Results list will be displayed.
3. Select one or more of the addresses found in the list and click
Done. The addresses will be added to the email group.
NOTES:
• If more than 20 addresses are found that match the search criteria,
you may want to refine your search by adding more information, such
as the first name of the person you are searching. e.g., “smith joe”
instead of just “smith”.
• Wildcards are added before and after the search criteria.
A-61628 December 2011 5-7
Page 93

Adding several email addresses to a single item in an email group
Typically ema il groups cont ain a list of entries that consist of one e-ma il
address per entry. However, you can create a list within a single entry
within the email group. The following describes the typical case of one
email address per item and an example of multiple addresses per entry.
Example 1
The Description field contains an email recipient’s name, and the
Address field contains a single email address.
Example 2
The Description field contains a group name, and the Address field
contains multiple email addresses separated by commas.
Description: Linda’s Group
Address: Jimmy@gmail.com, Joe@gmail.com, John@gmail.com
Each email address in the Address field is validated to ensure the
proper format. If an improper email address is entered, the message
The E-mail address is not in a valid format. Typical format:
person@serviceprovider.domain will be displayed. Click OK on the
message and verify the format is correct.
5-8 A-61628 December 201 1
Page 94

Adding a USB drive folder group
If you want to add a folder to a USB drive group that already exist s, skip
to step 2:
1. From the Configuration Organizer select Edit>Add Group>USB
Drive Folder. A USB Drive icon is added to the toolbar on the
Configuration Organizer window.
2. To add a folder to a USB drive group, click the USB drive group you
want to add the folder to and select Edit>Add Item. The Add dialog
box will be displayed.
3. Enter description and folder name in the Description and Folder
fields and click OK.
NOTES:
• If you do not want the USB drive folder placed in alphabetical
order, uncheck Add to list alphabetically.
• You can also rename items and delete items from a group by
using the Edit>Rename Item and Edit>Delete Item menu
selections.
The folder is added to the selected USB drive group.
4. Repeat steps 2 and 3 for each USB drive folder you want to add.
A-61628 December 2011 5-9
Page 95

Renaming a USB drive group
Deleting a USB drive group When you delete a USB drive group, all folders within that group will
By default, when you add a flash drive group, the group is named USB
Drive.
1. Select the USB drive group that you want to rename.
2. Select Edit>Rename Group. The Rename Group dialog box will be
displayed.
3. Make the desired change in the Description field and click OK. The
change will be displayed on the main Configuration Organizer
window.
also be deleted.
1. Select the USB drive group you want to delete.
2. Select Edit>Delete Group. The following message will be
displayed:
3. Click Yes to delete the USB drive group.
5-10 A-61628 December 201 1
Page 96

Adding a network folder If you want to add an item to a network folder that already exist s, skip to
step 2.
1. From the Configuration Organizer select Edit>Add
Group>Network Folder . A Network folder icon is added to the
toolbar on the Configuration Organizer window.
2. Select the Network group you want to add a folder to, and select
Edit>Add Item. The Add dialog box will be displayed.
3. Enter the name and fully qualified folder path in the Description and
Folder fields and click OK.
NOTES:
• You must use a full network path if you are scanning to a DFS
based network.
• If you do not want the network folder placed in alphabetical
order, uncheck Add to list alphabetically.
• You can also rename items and delete items from a group by
using the Edit>Rename Item and Edit>Delete Item menu
selections.
The folder is added to the selected Network group.
4. Repeat steps 2 and 3 for each network folder you want to add.
A-61628 December 2011 5-11
Page 97

Renaming a network group By default, when you add a network group, the group is named
Network.
1. Select the network group that you want to rename.
2. Select Edit>Rename Group. The Rename Group dialog box will be
displayed.
3. Make the desired change in the Description field and click OK. The
change will be displayed on the main Configuration Organizer
window.
Deleting a network group When you delete a network group, all folders within that group will also
be deleted.
1. Select the network group you want to delete.
2. Select Edit>Delete Group. The following message will be
displayed:
3. Click Yes to delete the network group.
5-12 A-61628 December 201 1
Page 98

Adding an FTP group To add an FTP group to your configuration:
1. From the Configuration Organizer select Edit>Add Group>FTP. An
FTP icon is added to the toolbar on the Configuration Organizer
window.
2. Select the FTP group you want to add to and select Edit>Add Item.
The Add: Ftp Folder dialog box will be displayed.
3. Make an entry in the Description, Folder, Username and Password
fields. The Folder field should contain a complete path to the FTP
site including the subfolder into which scanned documents will be
placed. For example, //ftp.acme.com/documents would connect to
the FTP site ftp.acme.com and place the scanned documen ts in the
folder documents.
NOTES:
• Any additional folders defined in the File Naming Settings screen
will also be used when creating the scanned documents.
• If you do not want the FTP site placed in alphabetical order,
uncheck Add to list alphabetically.
A-61628 December 2011 5-13
Page 99

4. Select the desired Protocol option: FTP, FTPS or SFTP.
• If you select FTP the following options are available:
- If the FTP site communicates on a port other than Port 21,
change the value using the up and down arrows.
- You may optionally select Passive if required by the FTP
server. Passive is most commonly used if the FTP site is
outside the firewall.
• If you select FTPS the following options are available:
- FTPS servers will allow secure (encrypted) communications
when Explicit and Port 21 is selected. Any other combination
of settings will result in unsecured (unencrypted)
communications between the Scan Station and the FTPS
server.
- By default, Active port negotiation is used. Selecting
Passive will enable Passive port negotiation.
- Select an Encryption option: Implicit or Explicit. Consult
the FTP Server administrator for the appropriate encryption
option.
- Check Require verifiable SSL server certificate if your
network environment is more security conscious and you
require your certificates to be up to date and signed by
certificate authority.
• If you select SFTP the following options are available:
- If the SFTP site communicates on a port other than Port 22,
change the value using the up and down arrows. When you
select SFTP, the Port value will automatically change to the
default value of Port 22.
5-14 A-61628 December 201 1
Page 100

- A Private Key File is an encrypted key that is used to access
the SFTP server. There are several different types of Private
Key files. Use the Browse button to select the Private Key
file stored on your computer or network. Consult the SFTP
administrator for the appropriate Private Key file to use.
NOTE:Private Key files encrypted with DSA 2048, 4096 bits
and Putty SSH1 RSA are not supported.
- If you entered a Private Key File, you must enter a
Passphrase. The passphrase is used to decrypt the Private
Key file.
NOTE: You can also rename items and delete items from a group by
using the Edit>Rename Item and Edit>Delete Item menu
selections.
5. If your company requires the use of proxy servers, click the Proxy
button and go to the next section; otherwise click OK.
Specifying Proxy settings If your company requires the use of a proxy server before
communicating with an FTP or SFTP site, define these proxy settings
by clicking on the Proxy button.
FTP If you selected FTP as your protocol, the following dialog box will be
displayed:
1. Select USER after login for the Proxy Type.
A-61628 December 2011 5-15
 Loading...