

Page 1

1 Your wireless setup guide
Perform each of these step-by-step procedures to set up your wireless Kodak digital
picture frame. Then view and share pictures and videos from your computer – on your
frame – wirelessly!
1. Install and set up Windows Media player 11 page 2
2. Install and set up EasyShare software page 10
3. Set up your wireless frame page 13
4. Share your media with your frame page 17
5. Set up your gallery account (US, Canada, and Europe only) page 21
If you have problems with your wireless setup or connection, see
Troubleshooting starting on page 25.
www.kodak.com/go/digitalframesupport 1
Page 2
2 Install the software
Your frame and Windows Media player 11
IMPORTANT:
What if I already have Windows Media player 11? Go to page 8 to set up media
sharing.
How do I find out what version of Windows Media player I have? To find your
version number, see the FAQs on page 25.
The EasyShare digital picture frame uses your wireless network and Windows
Media player 11 to access the pictures on your computer. If you do not have
Windows Media player 11 on your computer, or you have an earlier version,
the EasyShare software CD packed with your frame automatically lets you
install Media player 11.
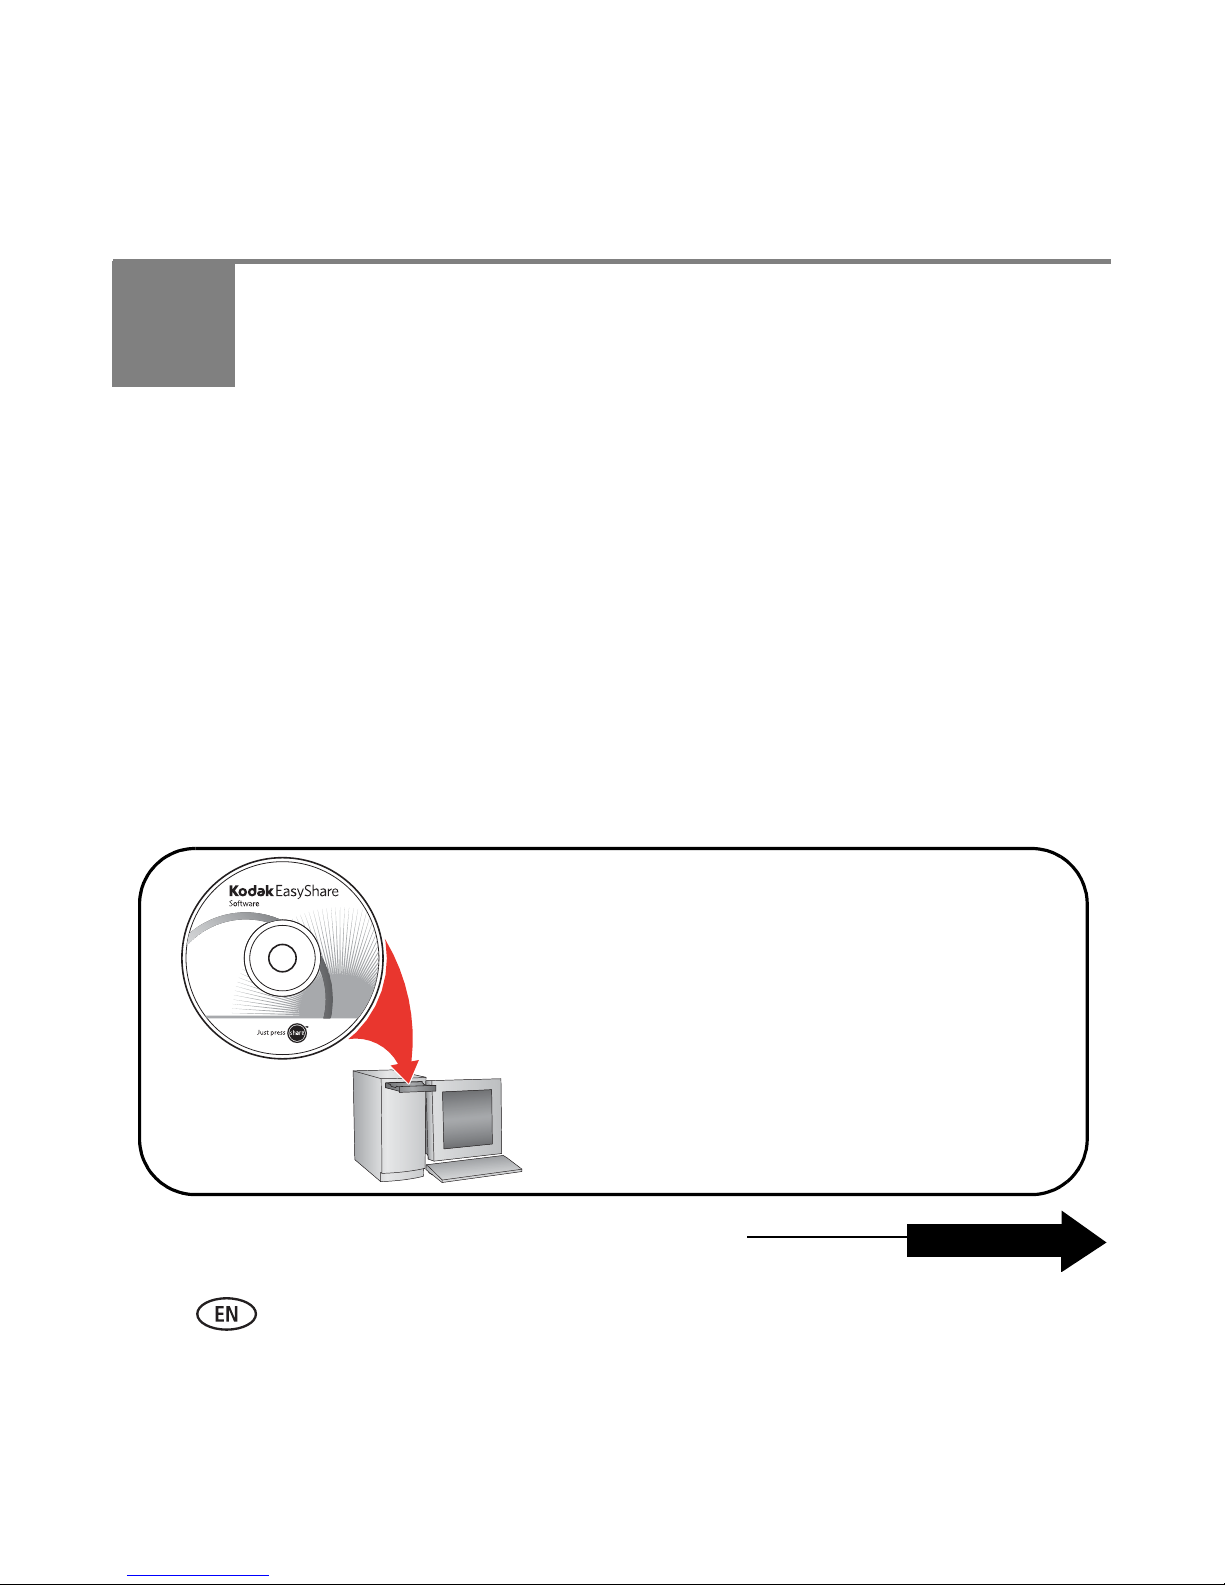
1 Insert the EasyShare software CD.
2 Go to page 2 to install Windows
Media player 11.
OR
Go to page 8 to set up media sharing
NEXT: Download and install Windows Media player 11
2 www.kodak.com/go/easysharecenter
(if you already have Windows Media
player 11).
NEXT
Page 3
Install the software
Download and install Windows Media player 11
Begin the download. You must be connected to the Internet.
If this screen does not appear, you already have Windows Media player 11, or higher,
on your computer. Go to page 8 to set up media sharing.
1
2
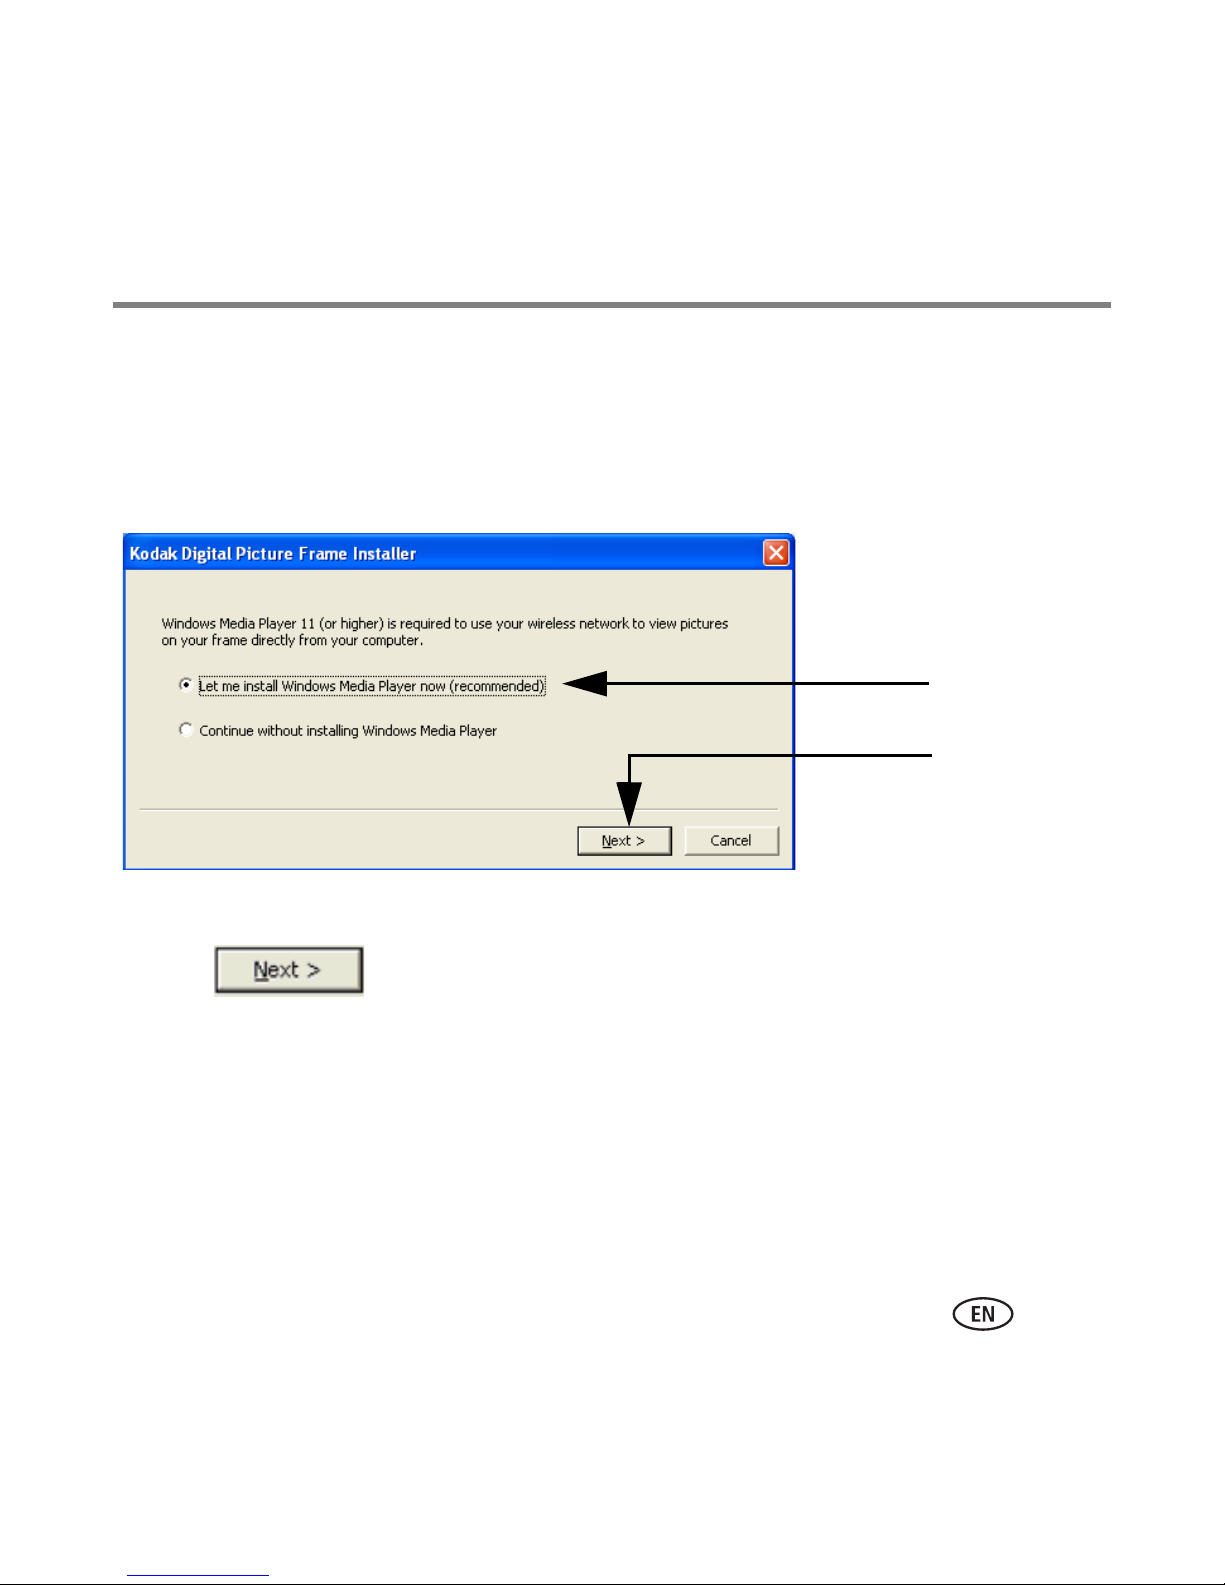
1 Select
Let me install Windows Media player now
.
2 Click .
Your browser opens and you are automatically connected to the Microsoft Windows
Media player download page.
www.kodak.com/go/digitalframesupport 3
Page 4

Install the software
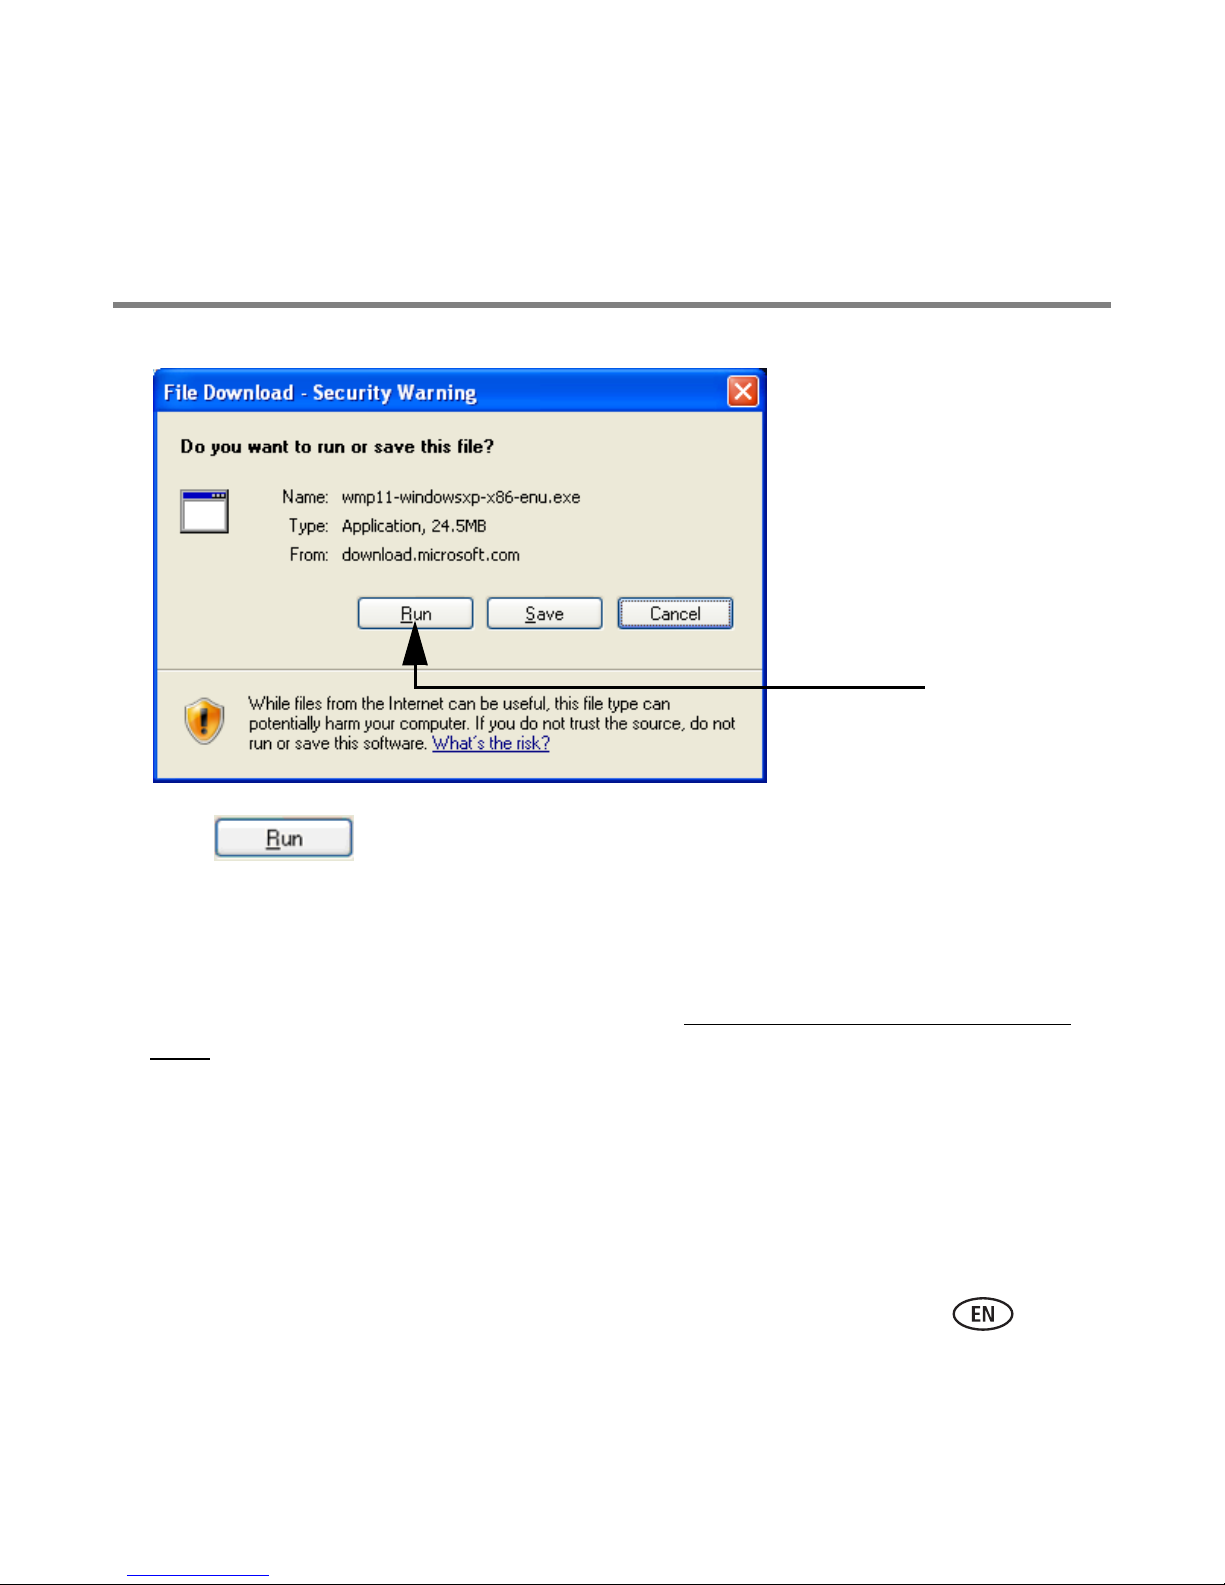
3
3 Click .
Do not close the Windows Media player installer window during the installation.
TIP—if an error screen appears, click OK on the error screen, then click Cancel on the
Digital Picture Frame Installer screen. Restart the installation by ejecting the CD and
reloading it.
4 www.kodak.com/go/easysharecenter
Page 5
Continue with the download of Windows Media player 11.
4 Click to start the download.
Install the software
4
The download usually takes less than a minute with high-speed Internet access. Dial-up
connections take longer.
A progress screen appears as the installation files are downloaded to your computer.
TIP—if the progress screen does not appear, click Click here if your download did not
begin.
www.kodak.com/go/digitalframesupport 5
Page 6
Install the software
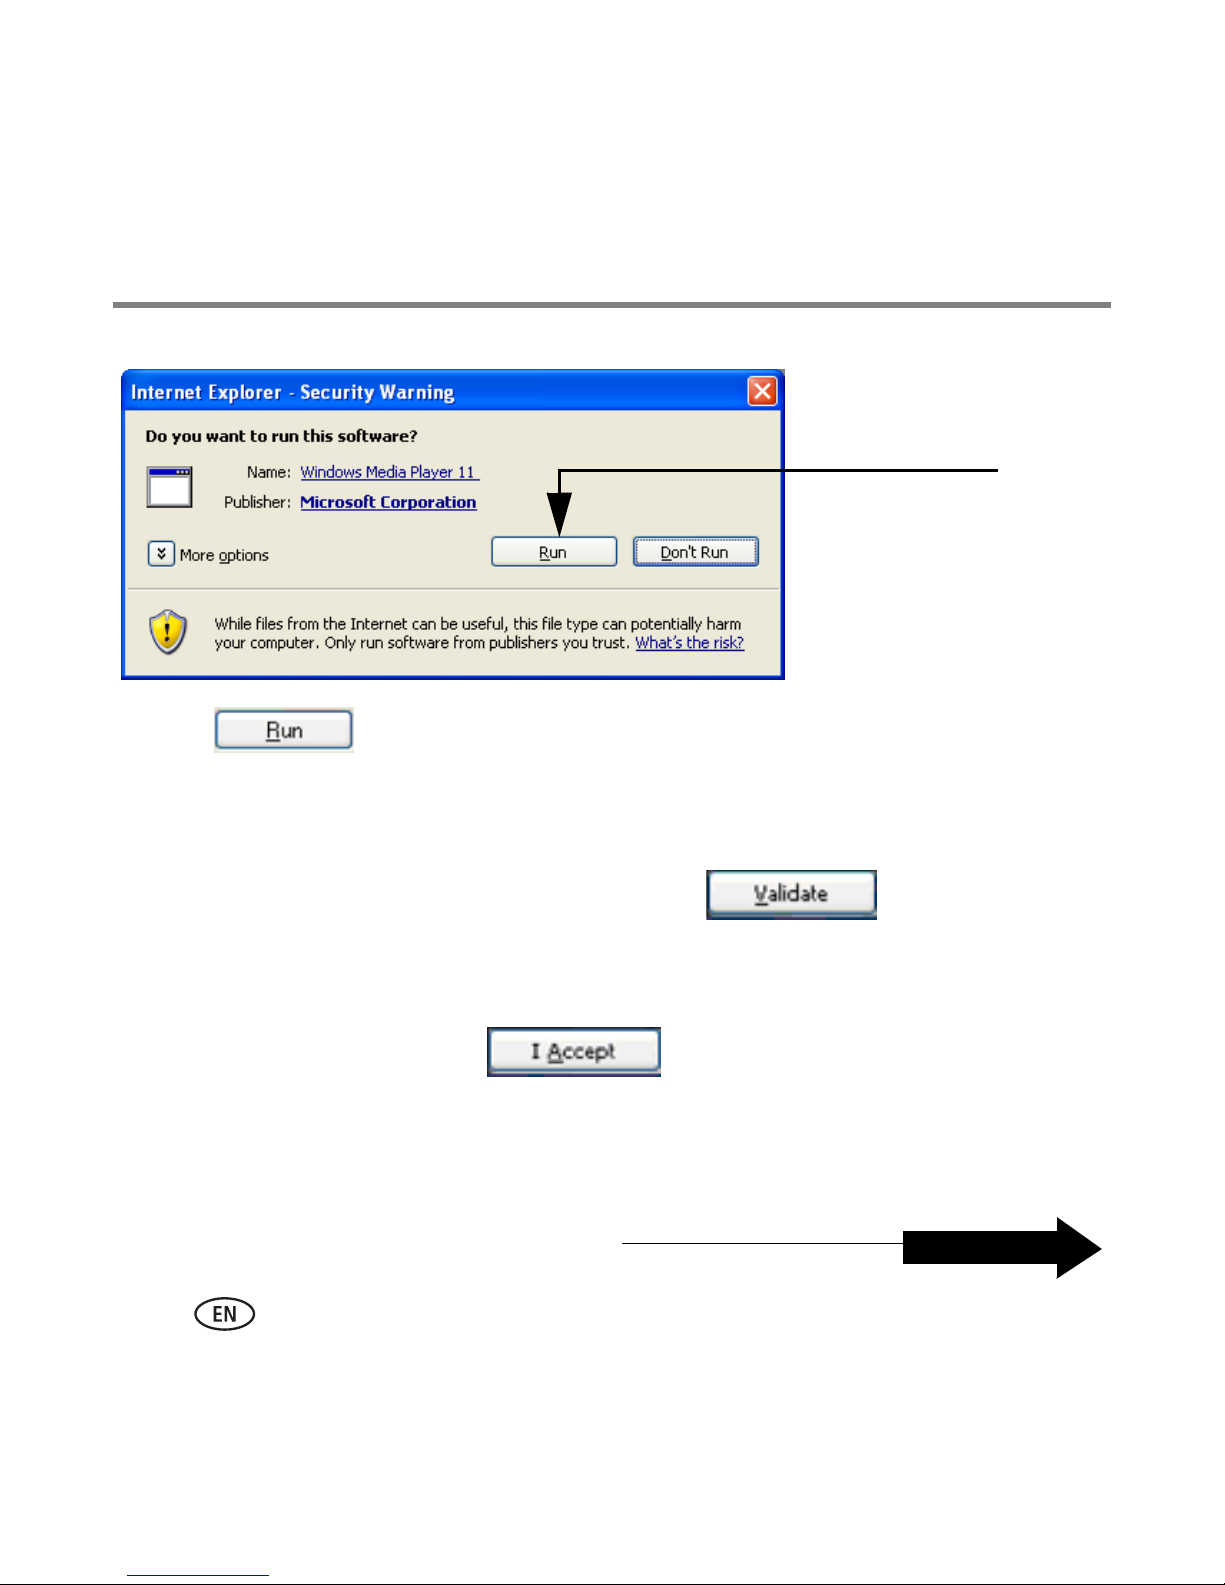
5 Click again.
A progress screen appears as the installation files are extracted on your computer.
5
6 In the
Validate your copy of Windows
screen, click to confirm that you
have a valid copy of Microsoft Windows operating system.
7 In the
Thank you
screen, click to accept the supplemental license for
Windows Media player 11.
The installation begins. A progress screen appears and monitors the installation. The
Windows Media player 11 Welcome screen opens.
NEXT: Set up Windows Media player 11
NEXT
6 www.kodak.com/go/easysharecenter
Page 7
Set up Windows Media player 11
Windows Media player is installed! Now choose your settings.
Install the software
1 On the
Welcome
We strongly recommend that you select
screen, select
Custom Settings
Custom Settings
.
. If you choose
Express
settings, the setup will take significantly longer (up to an hour).
2 Click .
3 In the following setup screens (
Options; Select the Default Music and Video Player
Select Privacy Options; Customize the Installation
), we recommend that you accept all
options as they are presented, and then click .
4 If the
Choose an Online Store screen appears
, select
Don’t set up a store now
.
We strongly recommend that you do not choose to set up a store now. If you do,
the setup will take significantly longer (up to an hour).
5 Click .
A progress screen monitors the setup. When the setup is complete, Windows Media
player 11 opens and displays available media files.
NEXT: Share media in Windows Media player 11
www.kodak.com/go/digitalframesupport 7
NEXT
Page 8
Install the software
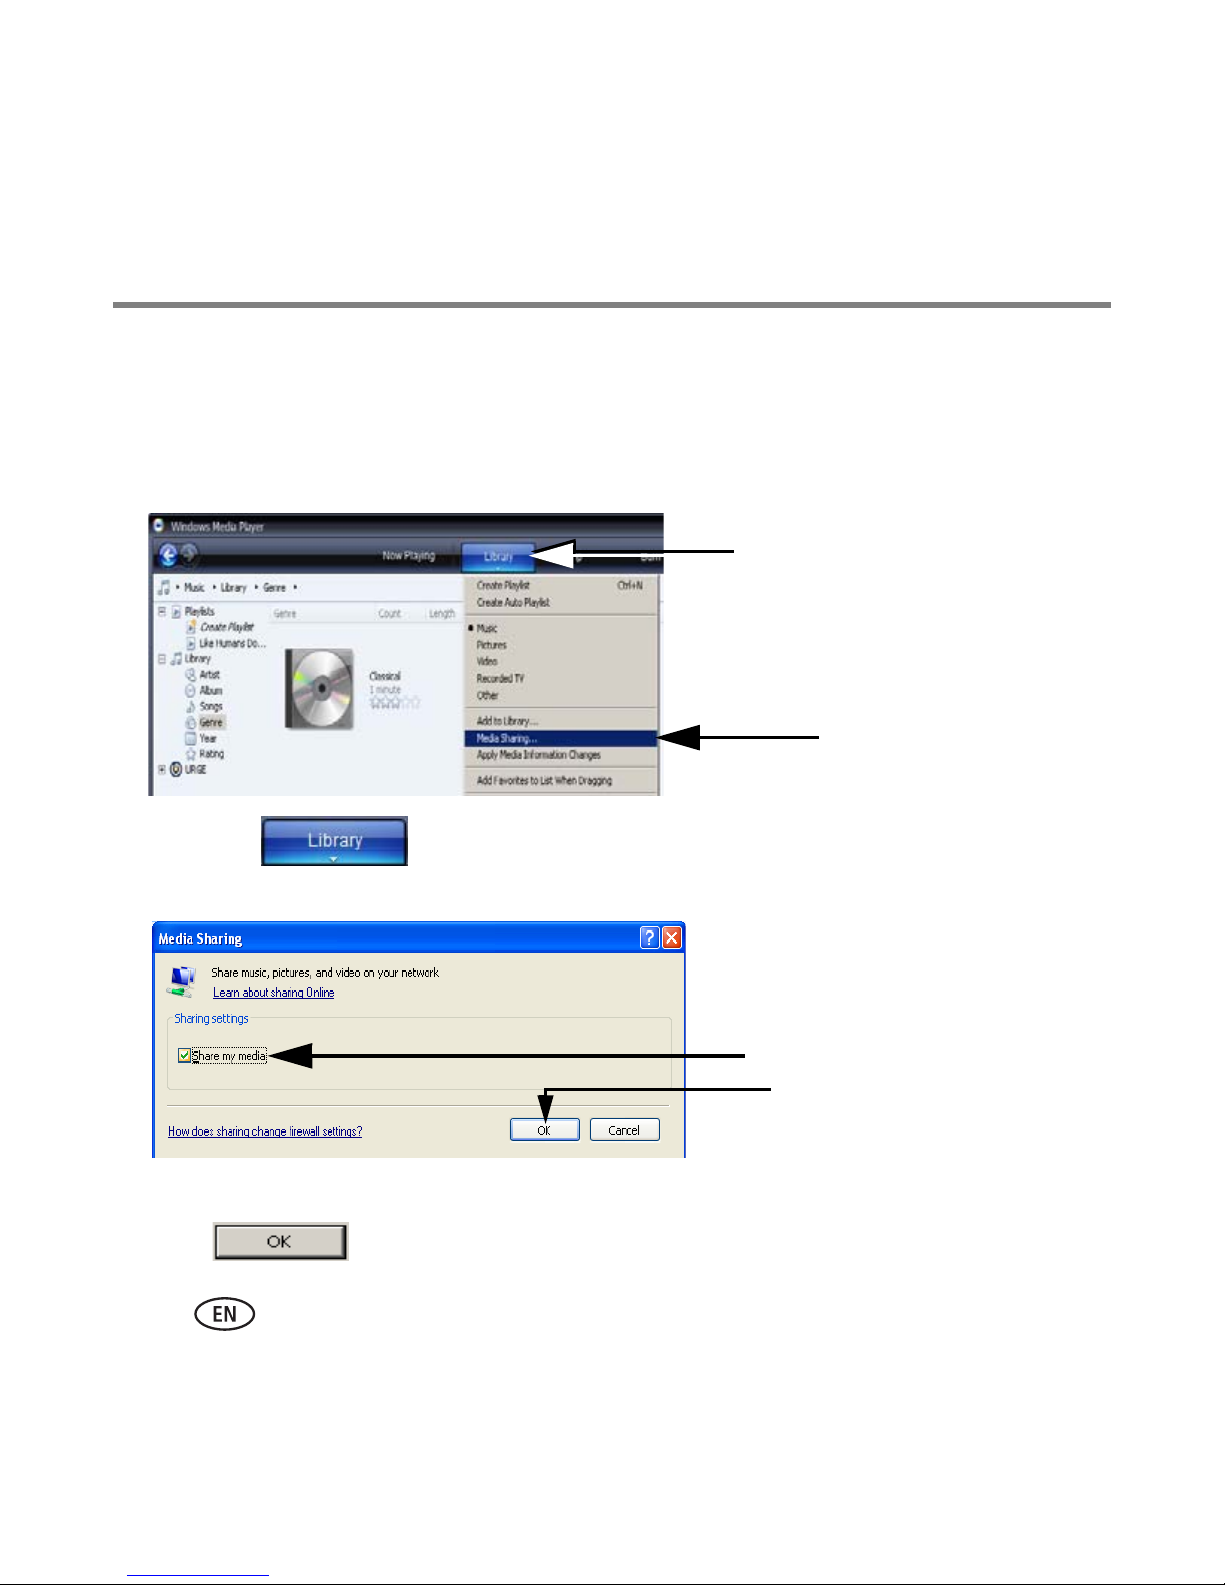
Share media in Windows Media player 11
Set up Media Sharing so your frame and Windows Media player recognize each other.
1 Open Windows Media player 11 (if you already had Windows Media player 11
installed and bypassed the installation, page 2).
2 - Library button
3
2 Click the button in the top menu bar.
3 Select
Media Sharing
from the drop-down menu.
4
5
4 In the Media Sharing screen, select
Share my media
.
5 Click .
8 www.kodak.com/go/easysharecenter
Page 9

Install the software
6
We’ll return to this screen
later in the setup.
6 Click again.Your Windows Media player 11 setup is complete!
7 Close Windows Media player by clicking in the top-right corner of the screen,
then close your browser window.
You may have seen this Digital
Picture Frame Installer screen
during your setup. It has been
open, but hidden by other setup
screens.
8
8 Click to start the Kodak EasyShare software Install Wizard.
NEXT: Install and set up EasyShare software
NEXT
www.kodak.com/go/digitalframesupport 9
Page 10

Install the software
Install and set up EasyShare software
The CD that was packaged with your frame contains a special version of Kodak
EasyShare software that lets you copy pictures between your computer and your frame.
Install EasyShare software now. Even if you already have EasyShare software on your
computer, follow these installation instructions to upgrade to this special software
version.
The Kodak EasyShare software Install Wizard opens on your computer. If you don’t see
this first screen, reload the EasyShare software CD that was packaged with your frame.
11
2
1 Follow the on-screen instructions to install the software.
2 IMPORTANT: On the
installation, not
Select a version to install screen
Web
installation.
10 www.kodak.com/go/easysharecenter
, make sure you select
CD
Page 11

Install the software
When prompted, take a few minutes to electronically register your frame and
software. To register later, visit www.kodak.com/go/register.
3
4
IMPORTANT: For Windows XP operating systems, you must restart your computer to
compete the installation.
3 Select
Yes, restart computer now
.
4 Click .
Your computer shuts down. EasyShare software opens when the computer restarts.
NEXT: Set up EasyShare software
NEXT
www.kodak.com/go/digitalframesupport 11
Page 12

Install the software
Set up EasyShare software
NOTE: It may take several seconds
for the first screen to open.
1
2
1 Follow the on-screen instructions to set up EasyShare software.
When the setup is complete, EasyShare software opens and your pictures are displayed in
My Collection.
2 Close EasyShare software by clicking in the top-right corner of the screen.
NEXT: Set up your wireless frame
NEXT
12 www.kodak.com/go/easysharecenter
Page 13

3 Set up your wireless frame
In this section, all buttons and controls, unless
backOKmenu
otherwise specified, are on the remote control that
was included with your frame.
Turn on the frame and select your language
1 Press the power switch to On.
You can leave the switch in the On position and then use
the Power button on the remote control to turn
your frame on and off.
backOKmenu
www.kodak.com/go/digitalframesupport 13
2 Press to highlight your language.
3 Press OK.
Page 14

Set up your wireless frame
Connect to your wireless network
The setup screen asks,
1 Press to highlight
If you select
No,
Do you want to connect this frame to a wireless network?
Yes
.
you can connect to your wireless network later. See page 26.
2 Press OK.
The frame scans for available wireless networks.
1
NOTE:
If the scan finds multiple
3 Press to highlight your network, then press OK.
14 www.kodak.com/go/easysharecenter
networks, your network is
usually the first one listed,
with the highest %.
Page 15

Set up your wireless frame
Enter security key (if you have security enabled)
If you have wireless network security enabled, the on-screen keyboard appears and
you are prompted to enter your security key. If not, go to step 6.
4 Enter your security key on the on-screen keyboard. On the remote control, press
to highlight each character. Press OK after each character.
back
menu
OK
OK
Keyboard tip:
<-
= backspace
Clear
= clear all
NOTE: A
WEP
key can be either:
5 or 13 characters (0-9, A-Z, some special characters, case sensitive),
10 or 26 characters (0-9, A-F, not case-sensitive).
WPA
A
key is 8-63 characters, case sensitive.
The person who set up your network can provide you with this information.
5 Highlight Done on the keyboard, then press OK on the remote control.
The Connecting screen appears, then acknowledges that you are connected!
www.kodak.com/go/digitalframesupport 15
Page 16

Set up your wireless frame
The Scanning screen appears as the frame scans your network and then lists available
computers.
6
6 Press to highlight your computer, then press OK.
Congratulations, you’ve completed your network setup!
NEXT: Share your media with your frame
NEXT
16 www.kodak.com/go/easysharecenter
Page 17

Set up your wireless frame
Share your media with your frame
You’re almost done! Now return to your computer and open Windows Media player 11.
You’ll select your frame as a device with which your computer can share media files
(pictures, videos, music).
Start
>
1 Open Windows Media player 11. Select
Windows Media Player
.
2 Click “Library.”
3 Select “Media Sharing.”
www.kodak.com/go/digitalframesupport 17
Page 18

Set up your wireless frame
4 Select your frame.
5 Select “Allow.”
6 Click “OK” to finish
and close.
Your frame is now allowed to access the content on your host computer. Note the icon for
your frame now has a green check mark.
NEXT: Add shared folders on your computer (optional)
OR
NEXT
NEXT: Set up your gallery account, page 21
18 www.kodak.com/go/easysharecenter
Page 19

Set up your wireless frame
Add shared folders on your computer (optional)
Windows Media player 11 looks for media files (pictures, videos, music) in 2 places on
your computer:
■ My Documents, these 3 folders: My Music, My Pictures, My Videos
■ Shared Documents, these 3 folders: Shared Music, Shared Pictures, Shared Videos
If you have media files in other folders on your computer, share them so you can view
them on your frame.
Share folders
1 On your computer, open Windows Media player 11.
2 Click in the top menu bar.
3 Select
Add to Library
from the drop-down menu.
4 Select “My personal folders.”
5 Click “Advanced Options>>.”
www.kodak.com/go/digitalframesupport 19
Page 20

Set up your wireless frame
6 Click “Add.”
7 Navigate to the folder you
wish to share (“Image
Data” in this example).
8 Click “OK.”
9 Click “Close.”
The contents of the shared folder are added to the Windows Media player Library. They
are now accessible to your frame. Repeat these steps to share other folders.
20 www.kodak.com/go/easysharecenter
Page 21

4 Set up your gallery account
Display pictures directly from the Kodak gallery via the Internet (this feature is currently
limited to customers in the US, Canada, and Europe).
Perform this one-time setup on your frame to connect it to your existing Kodak gallery
account. Don’t have a Kodak gallery account yet? Visit www.kodakgallery.com.
Begin the setup
1 On the remote control, press , then highlight Settings and press OK.
2 Select Kodak gallery and press OK.
The gallery setup screen appears.
3 Press on the remote control to highlight Country, then press OK.
4 Highlight your country, then press OK.
5 Highlight Username/Email address, then press OK.
www.kodak.com/go/digitalframesupport 21
Page 22

Set up your gallery account
The username keyboard is displayed on the frame screen.
Keyboard tip:
<-
= backspace
Clear
= clear all
OK
back
menu
OK
6 Enter your existing gallery username. Use to highlight each character of your
username (usually your email address). Press OK after each character.
IMPORTANT:
To back up or erase characters, use the backspace or the Clear
<-
Clear
key on the keyboard. DO NOT use the back button on the remote control or
you will lose your entries.
7 Highlight
Done
on the keyboard, then press the OK button on the remote control.
8 Highlight Password, then press OK.
Done
9 Enter your gallery password. Press OK after each character. Highlight
, then
press OK.
10 Press on the remote control. Kodak Gallery appears as a choice on the
Home screen. Congratulations, you have completed your gallery setup!
NEXT: View pictures over your wireless network
22 www.kodak.com/go/easysharecenter
NEXT
Page 23

5 View pictures over your
wireless network
Congratulations! You’re ready to view your pictures on your frame - wirelessly!
1 Make sure your computer and your picture frame are powered on.
2
3
Home screen
back
menu
OK
2 Press the Home button.
It may take up to 10 seconds for your Network Computer to appear on the Home
screen.
3 Press to highlight Network Computer , then press OK.
www.kodak.com/go/digitalframesupport 23
Page 24

View pictures over your wireless network
4 Press to highlight
Pictures
or
Video
, then press OK.
5 Press to highlight the category of pictures you
want to view, then press OK.
“All Pictures” displays every picture that your computer is
sharing, without showing folders. The categories are
established by Windows Media player 11.
6 Pictures are displayed as thumbnails. Press (on
the remote control) to play a slide show.
See the Getting Started Guide for more information
about using your frame and viewing your pictures.
24 www.kodak.com/go/easysharecenter
Page 25

6 Troubleshooting FAQs
For more information on setting up and using the wireless features of your frame, visit
www.kodak.com/go/digitalframesupport or www.kodak.com/go/wifisupport.
Frequently asked questions
I already have Windows Media player on my computer. Do I have to install
it again?
You must have Windows Media player 11, or greater, so your frame can access the
pictures on your computer.
Check your Windows Media player version number. (Right-click in the top menu bar,
Help
>
then select
upgrade to version 11. See page 3.
I already have Kodak EasyShare software on my computer. Do I have to
About Windows Media Player.
) If your version is earlier than 11,
install it again?
The CD that was packaged with your frame contains a special version of EasyShare
software that lets your computer share pictures with your frame. Install it to upgrade to
this special software version. See page 10.
I lost my Internet connection in the middle of my setup. What should I do?
Reconnect to the Internet and repeat the installation and setup, starting on page 2.
I lost my wireless connection in the middle of the setup. What should I do?
Make sure your wireless connection is live and repeat the setup, starting on page 13.
www.kodak.com/go/digitalframesupport 25
Page 26

Troubleshooting FAQs
I can’t find my network. Why?
■ Is your network set up to broadcast SSID? If so, you must enter your wireless
network information manually. The person who set up your network can help you
with this information.
■ Does your network have security enabled (WEP or WPA)? If so, follow the
instructions on page 15.
I can’t find my network computer. Why?
■ Make sure your router and your computer are on.
■ Make sure your computer is on your wireless network. See the documentation that
came with your router and your computer.
■ Is Media sharing enabled in Windows Media player 11? See page 8.
■ Is your frame allowed to share content with your computer? See page 17.
I didn’t connect to my network the first time I turned on my frame. Can I do
it now?
Yes, you can.
1 Press Home on the remote control, then select
Enable/disable connections
>
Enable
.
Settings
>
Network
>
Manual
>
2 Press the Back button.
3 Select
Network
> S
can for wireless networks
.
4 Continue with step 3 on page 14.
2F6599_en
26 www.kodak.com/go/easysharecenter
 Loading...