

Page 1

INSTRUCTION MANUAL
ET110
FRANÇAIS pg. 13
ESPAÑOL pg. 7
Carbon Monoxide Meter
• SHORT-TERM
EXPOSURE LIMIT
(STEL) ALARM
• AUDIBLE AND VISUAL
ALARMS
• CONCENTRATION
AND TEMPERATURE
READINGS
• BACKLIT
LCD SCREEN
ENGLISH
Page 2

2
GENERAL SPECIFICATIONS
Klein Tools ET110 is an easy-to-use meter that detects and measures
concentration levels of carbon monoxide (CO), a colorless, odorless,
flavorless gas that is life-threatening even at relatively low concentrations.
The meter also measures temperature.
• CO Measurement/Detection Range: 0 to 1000 ppm
• Resolution: 1 ppm
• Repeatability: +/- 3%
• Accuracy:
(Test conditions: 40 ±10% relative humidity, 1 atm)
At 32° to 59°F (0 to 15°C): +/- 10% 10 ppm (whichever greater)
At 59° to 77°F (15 to 25°C): +/- 5% 5 ppm (whichever greater)
At 77° to 122°F (25 to 50°C): +/- 10% 10 ppm (whichever greater)
• Responding Time: T90 < 60 seconds
• Sensor: Electrochemical, replaceable
• Sensor Life Expectancy: 5 years
• Alarms: Low-Level: 35 ppm
High Level: 200 ppm
Short-Term Exposure Limit (STEL): 200 ppm for 15 minutes
• Temperature Range: 32° to 122°F (0° to 50°C)
• Temperature Resolution: 1°F/C
• Temperature Accuracy: +/- 5°F/C
• Batteries: 4x AAA
• Operating Altitude: 6562 ft. (2000 m)
• Relative Humidity: <85% non-condensing
• Operating Temp: 32° to 122°F (0° to 50°C)
• Storage Temp: 23° to 131°F (-5° to 55°C)
• Dimensions: 7.75" x 2.16" x 1.45" (197 x 55 x 37 mm)
• Weight: 6.87 oz. (195 g) including batteries
• Drop Protection: 3.3 ft. (1m)
Specifications subject to change.
WARNINGS
To ensure safe operation and service of the meter, follow these
instructions. CARBON MONOXIDE IS LIFE-THREATENING EVEN AT
RELATIVELY LOW CONCENTRATIONS. Failure to observe these
warnings can result in severe injury or death.
• Read the instructions to ensure safe operation.
• Initial calibration should be performed in an area known to
be free of carbon monoxide. Calibration in an area containing
carbon monoxide will result in incorrect calibration and lower
than actual readings.
• Meter is NOT intended as personal protection equipment (PPE).
• Meter is NOT insulated. Avoid contact with areas where
energized conductive elements may be present. Shut off power
to the area before starting measurements.
• Always wear approved eye protection.
ENGLISH
Page 3

3
FEATURE DETAILS
NOTE: There are no user-serviceable parts inside meter.
1
2
4
6
8
10
3
5
7
9
Front of Meter Back of Meter
12
1.
Electrochemical Sensor
5.
TEMP/ ^ Button
9.
HOLD Button
2.
Backlit LCD Screen
6.
Backlight / Button
10.
SET Button
3.
Power Button
7.
MAX/AVG Button
11.
Battery Screw
4.
Warning Indicator Light8.Mute Button
12.
Battery Door
A.
CO measurement (ppm)
B.
Temperature measurement (°F/°C)
C.
Battery Strength Indicator
D.
Audible Alarm Icon
E.
MAX / AVG icons
F.
HI / LO Alarm Icons
G.
Shutdown Timer Icon
H.
Zero-Setting Icon
I.
Calibration Icon
J.
Device Lock Icon
K.
A1/A2/TWA/STEL Warning Icons
L.
HOLD/FAULT Icons
LCD Display Detail
A
F H J
D
I CG
E
B
K
L
11
Page 4

4
FUNCTION BUTTONS
POWER
3
A long press of the Power Button will power on and off the meter.
During the setup process, a short press will exit the current screen.
Meter will automatically power-off after 20 minutes of non-activity.
TEMP / ^
5
Press the TEMP Button to enter temperature measurement mode.
Readings wil be in Celsius (°C ) by default. Press TEMP Button again
to switch to Farenheit (°F ). In Set-Up mode, the TEMP Button is used
to increase parameter values.
BACKLIGHT /
6
When powered on, the backlight is off by default. Press the Backlight
Button to turn the backlight on or off. Backlight will remain on until it
or the meter itself is turned off. In Set-Up mode, the Backlight Button
is used to decrease parameter values.
MAX/AVG
7
Pressing the MAX/AVG Button will display the maximum
concentration value measures since powering-on, pressing again will
display the average (AVG) value. A long press will clear all data.
MUTE
8
A short press of the Mute Button will stop the active alarm for 3
minutes. A long press will reset the alarm.
HOLD
9
Press the HOLD Button to hold the current measurement on the
display. Press again to return to live measurement mode.
SET
10
Press the SET Button to enter Sensor Self-Test mode. For calibration,
short-press to choose parameters and long-press to save current
parameter values.
WARNING INDICATOR LIGHT
4
The Warning Indicator Light is NOT a button. It flashes green when
conditions are safe, and flashes red with an accompanying audible alarm
when the alarm level is reached.
ENGLISH
DEFINITIONS
TWA: Time-Weighted Average STEL: Short-Term Exposure Limit
SYMBOLS ON METER
Warning
Wear approved
eye protection
Not intended for use as Personal
Protective Equipment (PPE)
Read instructions
Page 5
5
BEFORE USING THIS METER
Carbon Monoxide (CO) is a colorless, odorless, flavorless gas that
is life-threatening even at relatively low concentrations. Before using
this meter, read and understand the information in the chart below
pertaining to CO concentration levels.
OPERATING INSTRUCTIONS
TESTING
1. Long-press the power button to power-on the meter; the ZeroSetting icon H will flash. It is at this time that the zero-point is
set, so ensure to power-on in an area free of carbon monoxide.
2. After powering-on, press the SET Button 10 to perform a
3-minute diagnostic self-test. It is strongly suggested to perform
this procedure once for every 24 hours of use.
3. Place the meter into the area to monitor. The response time to
reach T90 (90% of reading) is 1 minute.
• At CO concentration levels above the A1 Low Alarm limit of
35 ppm (TWA), the buzzer will sound, the light will flash at a
frequency of 1Hz, and the LO icon F will appear on the display.
• At concentration levels above the A2 High Alarm limit of 200 ppm,
the buzzer will sound, the light will flash at a frequency of 2Hz and
the HI icon F will appear on the display.
• The STEL icon K will appear when an average of 200 ppm
exposure is present for 15 minutes.
Once you have confirmed the alarm conditions, press the MUTE
button to stop audible alarm for approx. 3 minutes. Press again to
reactivate the audible alarm immediately.
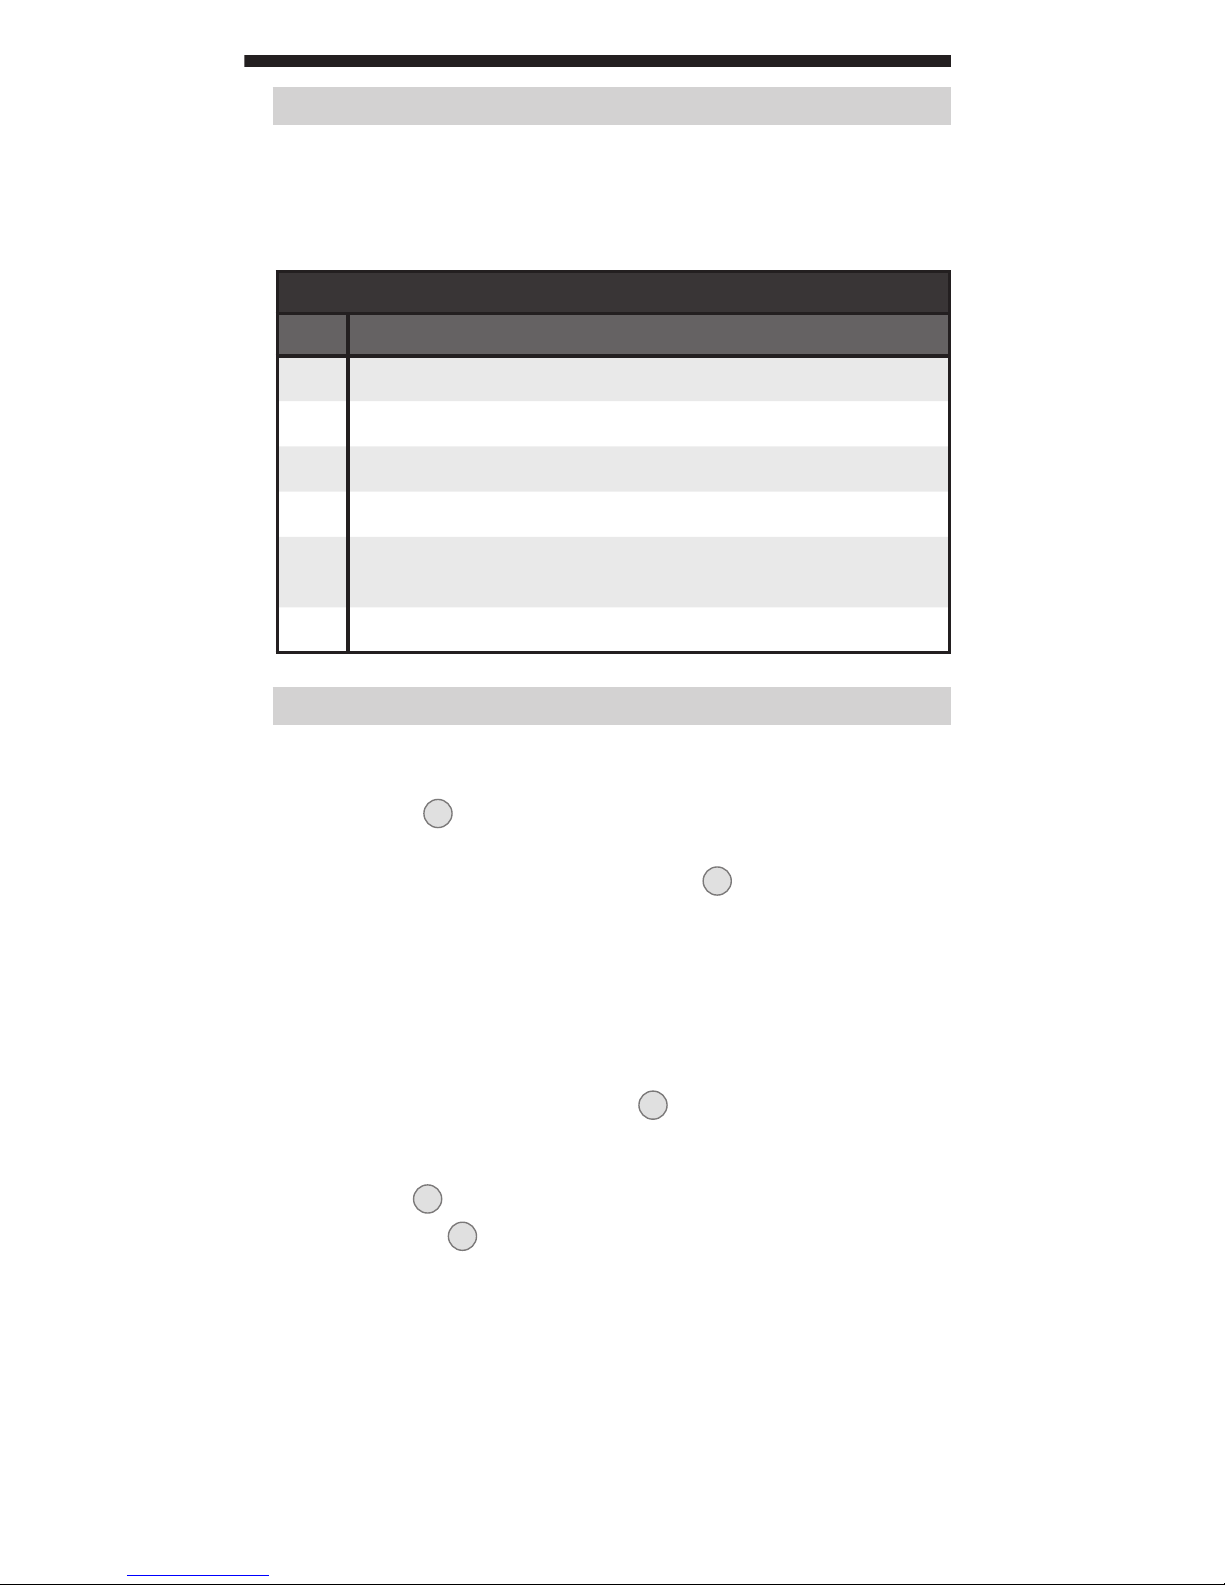
CARBON MONOXIDE CONCENTRATION LEVELS
PPM Explanation
0-1
Normal background levels.
9
EPA/ASHRAE levels for living areas.
35
OSHA/NIOSH maximum 8 hr exposure limit.
125
ACGIH ceiling limit of exposure.
200
OSHA/NIOSH upper limit of exposure: mild headache, fatigue,
nausea and dizziness within 2-3 hours.
1500
OSHA Imediately Dangerous to Life or Health (IDHL).
Page 6
6
ENGLISH
CLEANING
Be sure meter is turned off and wipe with a clean, dry lint-free
cloth.
Do not use abrasive cleaners or solvents.
STORAGE
Remove the batteries when the meter is not in use for a prolonged
period of time. Do not expose to high temperatures or humidity.
After a period of storage in extreme conditions exceeding the limits
mentioned in the General Specifications section, allow the meter to
return to normal operating conditions before using.
WARRANTY
www.kleintools.com/warranty
DISPOSAL / RECYCLE
Do not place equipment and its accessories in the trash.
Items must be properly disposed of in accordance with local
regulations. Please see www.epa.gov or www.erecycle.org
for additional information.
CUSTOMER SERVICE
KLEIN TOOLS, INC.
450 Bond Street Lincolnshire, IL 60069
1-877-775-5346
customerservice@kleintools.com
www.kleintools.com
MAINTENANCE
CALIBRATION
For best results, calibration should be performed by a professional in an
environment with a known concentration of carbon monoxide.
SENSOR REPLACEMENT
When the FAULT icon L appears on the display, the
electrochemical
sensor must be replaced.
This CANNOT be done by the user;
please
contact Klein Tools for more information.
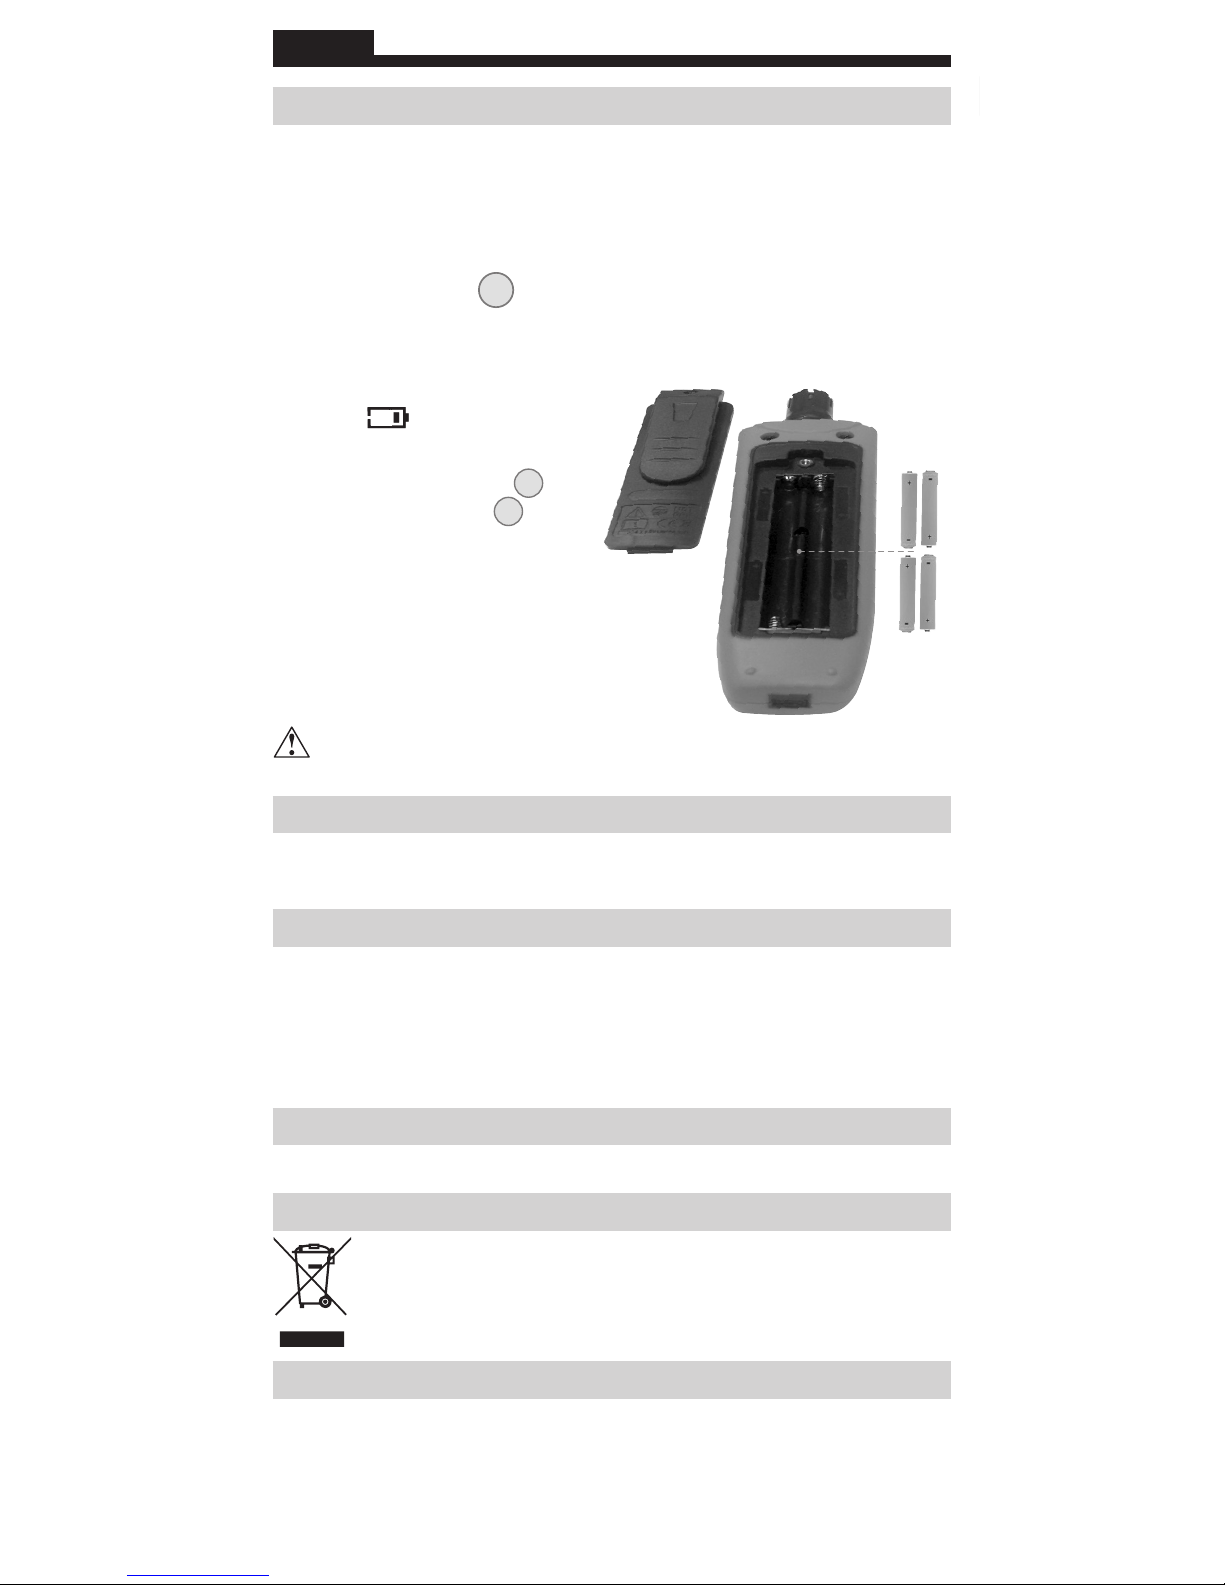
BATTERY REPLACEMENT
When the indicator is displayed,
the batteries must be replaced.
1. Loosen battery screw 11 and
r
emove battery door 12.
2. Remove and recycle spent
AAA batteries.
3. Install 4 new AAA batteries
(note proper polarity).
4. Replace battery door and
fasten securely with screw.
To avoid risk of electric shock, do not operate meter while
battery door is removed.
Page 7

ET110
ESPAÑOL
MANUAL DE
INSTRUCCIONES
Medidor de monóxido
de carbono
• ALARMA DE LÍMITE
DE EXPOSICIÓN A
CORTO PLAZO (STEL)
• ALARMAS AUDIBLES
Y VISUALES
• MEDICIÓN DE
CONCENTRACIÓN Y
TEMPERATURA
• PANTALLA LCD
RETROILUMINADA
Page 8

2
ESPAÑOL
ESPECIFICACIONES GENERALES
Klein Tools ET110 es un medidor fácil de utilizar que detecta y
mide valores de concentración de monóxido de carbono (CO), un
gas incoloro, inodoro e insípido potencialmente mortal, incluso en
concentraciones bajas. También mide temperatura.
• Medición de CO/Rango de detección: 0ppm a 1000ppm
• Resolución: 1ppm
• Repetibilidad: +/-3%
• Precisión:
(Condiciones de prueba: 40 ±10% de humedad relativa, 1atm)
A 32°F a 59°F (0°C a 15°C): +/-10% o 10ppm (el valor que sea mayor)
A 59°F a 77°F (15°C a 25°C): +/-5% o 5ppm (el valor que sea mayor)
A 77°F a 122°F (25°C a 50°C): +/-10% o 10ppm (el valor que sea mayor)
• Tiempo de respuesta: T90 <60segundos
• Sensor: electroquímico, reemplazable
• Vida útil esperada del sensor: 5años
• Alarmas: Valor bajo: 35ppm
Valor alto: 200ppm
Límite de exposición a corto plazo (STEL): 200ppm
durante 15minutos
• Rango de temperatura: 32°F a 122°F (0°C a 50°C)
• Resolución de temperatura: 1°F/°C
• Precisión de temperatura: +/-5°F/°C
• Baterías: 4 AAA
• Altitud de funcionamiento: 6562pies (2000m)
• Humedad relativa: <85% sin condensación
• Temperatura de operación: 32°F a 122°F (0°C a 50°C)
• Temperatura de almacenamiento: 23°F a 131°F (-5°C a 55°C)
• Dimensiones: 7,75" × 2,16" × 1,45" (197mm × 55mm × 37mm)
• Peso: 6,87 oz (195 g) incluidas las baterías
• Protección ante caídas: 3,3pies (1m)
Especificaciones sujetas a cambios.
ADVERTENCIAS
Para garantizar un funcionamiento y servicio seguros del medidor, siga
estas instrucciones. EL MONÓXIDO DE CARBONO ES POTENCIALMENTE
MORTAL, INCLUSO EN CONCENTRACIONES BAJAS. El incumplimiento de
estas advertencias puede provocar lesiones graves o la muerte.
• Lea las instrucciones para garantizar un funcionamiento seguro.
• La calibración inicial debe realizarse en un área donde se sepa que no
hay presencia de monóxido de carbono. De lo contrario, la calibración
no será correcta y las mediciones serán inferiores a las reales.
• El medidor NO está diseñado para que se lo use como equipo de
protección personal (PPE).
• El medidor NO posee aislamiento. Evite el contacto con áreas donde
pueda haber elementos conductores energizados. Antes de comenzar
a medir, apague el suministro de energía hacia estas áreas.
• Siempre debe usar protección para ojos aprobada.
Page 9

3
1
2
4
6
8
10
3
5
7
9
12
11
DETALLES DE LAS CARACTERÍSTICAS
Parte frontal del medidor Parte posterior del medidor
NOTA: El medidor no contiene en su interior piezas
que el usuario pueda reparar.
1.
Sensor electroquímico5.Botón TEMP (Temperatura)/^9.Botón HOLD (Retener)
2.
Pantalla LCD retroiluminada
6.
Botón de retroiluminación/
10.
Botón SET (Configuración)
3.
Botón de encendido
7.
Botón MAX/AVG (Máximo/
Promedio)
11.
Tornillo de la tapa del
compartimento de baterías
4.
Luz indicadora de
advertencia
8.
Botón de silenciamiento
12.
Tapa del compartimento
de baterías
A.
Medición de CO (ppm)
B.
Medición de temperatura (°F/°C)
C.
Indicador de carga de baterías
D.
Icono de alarma audible
E.
Iconos MAX/AVG (Máximo/Promedio)
F.
Iconos de alarma HI/LO (Alta/Baja)
G.
Icono del temporizador de apagado
H.
Icono de configuración en cero
I.
Icono de calibración
J.
Icono de bloqueo del dispositivo
K.
Iconos de advertencia: A1/A2/TWA/STEL
(A1/A2/Tiempo promedio ponderado/
Límite de exposición a corto plazo)
L.
Iconos HOLD/FAULT (Retener/Falla)
Detalles de la pantalla LCD
A
F H J
D
I CG
E
B
K
L
Page 10

4
ESPAÑOL
BOTONES DE FUNCIONES
ENCENDIDO
3
Mantenga presionado el botón de encendido para encender y apagar el medidor.
Durante el procedimiento de configuración, presionar brevemente este botón
permite salir de la pantalla en curso. El medidor se apagará de forma automática
después de 20minutos de inactividad.
TEMP (TEMPERATURA)/ ^
5
Presione el botón TEMP (Temperatura) para ingresar al modo de medición de
temperatura. De forma predeterminada, las mediciones se visualizarán en grados
Celsius (°C). Vuelva a presionar el botón TEMP (Temperatura) para cambiar la
escala a grados Fahrenheit (°F). En el modo de configuración, el botón TEMP
(Temperatura) se utiliza para aumentar los valores de los parámetros.
RETROILUMINACIÓN/
6
Al encender el dispositivo, la retroiluminación está desactivada de forma
predeterminada. Presione el botón de retroiluminación para encender o apagar
la retroiluminación. La retroiluminación permanece encendida hasta apagarla o
apagar el medidor. En el modo de configuración, el botón de retroiluminación
se utiliza para disminuir los valores de los parámetros.
MAX/AVG (MÁXIMO/PROMEDIO)
7
Al presionar el botón MAX/AVG (Máximo/Promedio), se visualizan las
mediciones de los valores de concentración máxima registrados desde el
encendido; si se vuelve a presionar el botón, se muestra el valor promedio. Si
el botón se mantiene presionado, se borran todos los datos.
SILENCIAMIENTO
8
Si se presiona brevemente el botón de silenciamiento, la alarma activa deja
de sonar durante 3minutos. Si el botón se mantiene presionado, la alarma se
reinicia.
HOLD (RETENER)
9
Presione el botón HOLD (Retener) para retener la medición en curso en la
pantalla. Presione nuevamente para volver al modo de medición activo.
SET (CONFIGURACIÓN)
10
Presione el botón SET (Configuración) para ingresar al modo de autoprueba
del sensor. Para realizar la calibración, presione brevemente para seleccionar
los parámetros, y mantenga presionado para guardar los valores de los
parámetros en curso.
LUZ INDICADORA DE ADVERTENCIA
4
La luz indicadora de advertencia NO es un botón. Parpadea en color verde
cuando las condiciones son seguras, y en color rojo acompañada de una
alarma audible cuando se alcanza el valor de alarma.
DEFINICIONES
TWA: Tiempo promedio ponderado STEL: Límite de exposición a corto plazo
SÍMBOLOS DEL MEDIDOR
Advertencia
Use protección para
ojos aprobada.
No diseñado para usarlo como equipo
de protección personal (PPE).
Lea las instrucciones.
Page 11

5
ANTES DE USAR EL MEDIDOR
El monóxido de carbono (CO) es un gas incoloro, inodoro e insípido
potencialmente mortal, incluso en concentraciones relativamente bajas.
Antes de usar el medidor, lea y comprenda la información de la siguiente
tabla respecto de los valores de concentración de CO.
INSTRUCCIONES DE OPERACIÓN
PRUEBAS
1. Mantenga presionado el botón de encendido para encender el medidor;
el icono de configuración en cero H empezará a parpadear. Este es
el momento cuando se configura el punto cero; por lo tanto, procure
encender el medidor en un área que no contenga monóxido de carbono.
2. Después de encender el medidor, presione el botón SET (Configuración)
10
para realizar una autoprueba de diagnóstico de 3minutos. Se
sugiere llevar a cabo este procedimiento una vez cada 24horas de uso.
3. Ubique el medidor en el área que desea medir. El tiempo de respuesta
para alcanzar el T90 (90% de la medición) es de 1minuto.
• Cuando se detecten valores de concentración de CO superiores al límite
de alarma bajo A1 de 35ppm (TWA), el zumbador comenzará a sonar,
laluz empezará a parpadear a una frecuencia de 1Hz y el icono de
alarma LO (Baja) F sevisualizará en la pantalla.
• Cuando se detecten valores de concentración superiores al límite de
alarma alto A2 de 200ppm, el zumbador comenzará a sonar, la luz
empezará a parpadear a una frecuencia de 2Hz y el icono de alarma
HI(Alta) F se visualizará en la pantalla.
• El icono STEL (Límite de exposición a corto plazo) K se visualizará
cuando se detecte un promedio de 200ppm de exposición durante
15minutos.
Cuando haya confirmado las condiciones de alarma, presione el botón
de silenciamiento para que la alarma audible deje de sonar durante
aproximadamente 3minutos. Presione nuevamente para volver a activar
laalarma audible de inmediato.
VALORES DE CONCENTRACIÓN DE MONÓXIDO DE CARBONO
PPM Explicación
0-1 Valores de base normales.
9 Valores estipulados por la EPA/ASHRAE para zonas habitables.
35 Límite de exposición máximo de 8horas según la OSHA/NIOSH.
125 Límite máximo de exposición según la ACGIH.
200
Límite superior de exposición según la OSHA/NIOSH: dolor de
cabeza leve, fatiga, náuseas y mareos dentro de las 2-3horas.
1500 Peligro inmediato para la vida o la salud (IDHL) según la OSHA.
Page 12

6
ESPAÑOL
LIMPIEZA
Asegúrese de que el medidor esté apagado y límpielo con un paño limpio,
seco, que no deje pelusas.
No utilice solventes ni limpiadores abrasivos.
ALMACENAMIENTO
Retire las baterías si no va a utilizar el termómetro durante un tiempo
prolongado. No lo exponga a la humedad ni a altas temperaturas. Luego de un
período de almacenamiento en condiciones extremas que sobrepasen los límites
mencionados en la sección Especificaciones generales, deje que el medidor
vuelva a las condiciones de funcionamiento normales antes de utilizarlo.
GARANTÍA
www.kleintools.com/warranty
ELIMINACIÓN/RECICLAJE
No arroje el equipo ni sus accesorios a la basura. Los elementos
se deben desechar correctamente de acuerdo con las regulaciones
locales. Para obtener más información, consulte www.epa.gov o
www.erecycle.org.
SERVICIO AL CLIENTE
KLEIN TOOLS, INC.
450 Bond Street Lincolnshire, IL 60069
1-877-775-5346
customerservice@kleintools.com
www.kleintools.com
MANTENIMIENTO
CALIBRACIÓN
Para obtener los mejores resultados, la calibración debe realizarla un profesional
en un entorno que posea una concentración conocida de monóxido de carbono.
REEMPLAZO DEL SENSOR
Cuando el icono FAULT (Falla) L aparece en la pantalla, el sensor electroquímico
debe reemplazarse.
El usuario NO DEBE efectuar el procedimiento de reemplazo;
comuníquese con Klein Tools para obtener más información.
REEMPLAZO DE LAS BATERÍAS
Cuando aparece el indicador ,
se deben reemplazar las baterías.
1. Afloje el tornillo de la tapa del
compartimento de baterías 11
y retire la tapa 12.
2. Retire y envíe las baterías
AAA agotadas a reciclaje.
3. Instale 4baterías AAA nuevas
(tenga en cuenta la polaridad correcta).
4. Vuelva a colocar la puerta del
compartimento de baterías y
apriete el tornillo firmemente.
Para evitar riesgo de choque eléctrico, no haga funcionar el
medidor sin colocar la tapa del compartimento de baterías.
Page 13

ET110
FRANÇAIS
MANUEL D’UTILISATION
Compteur de monoxyde
de carbone
• ALARME DE LIMITE
D’EXPOSITION À
COURT TERME (LECT)
• ALARMES SONORES
ET VISUELLES
• LECTURE DE LA
CONCENTRATION ET
DE LA TEMPÉRATURE
• ÉCRAN ACL
RÉTROÉCLAIRÉ
Page 14

2
FRANÇAIS
CARACTÉRISTIQUES GÉNÉRALES
Le compteur ET110 de KleinTools est un compteur facile d’usage qui détecte
et mesure la concentration de monoxyde de carbone (CO) dans l’air. Ce gaz
incolore, inodore et sans goût peut mettre la vie en danger, et ce, même à des
concentrations relativement faibles. Ce compteur mesure aussi la température.
• Plage de détection et de mesure du CO: 0 à 1000ppm
• Résolution: 1ppm
• Répétabilité: +/-3%
• Précision:
(Conditions opératoires: 40 ±10% d’humidité relative, 1atm)
De 0°C à 15°C (32°F à 59°F): +/-10% ou 10ppm (le plus élevé des deux)
De 15°C à 25°C (59°F à 77°F): +/-5% ou 5ppm (le plus élevé des deux)
De 25°C à 50°C (77°F à 122°F): +/-10% ou 10ppm (le plus élevé des deux)
• Délai de réponse: T90 <60secondes
• Capteur: Électrochimique, remplaçable
• Durée de vie moyenne du capteur: 5ans
• Alarmes: Concentration faible: 35ppm
Concentration élevée: 200ppm
Limite d’exposition à court terme (LECT): 200ppm durant
15minutes
• Plage de températures: 0°C à 50°C (32°F à 122°F)
• Résolution de température: 1°F/C
• Précision thermique: +/-5°F/C
• Piles: 4pilesAAA
• Altitude de fonctionnement: 2000m (6562pi)
• Humidité relative: <85%, sans condensation
• Température de fonctionnement: 0°C à 50°C (32°F à 122°F)
• Température d’entreposage: -5°C à 55°C (23°F à 131°F)
• Dimensions: 197x 55x 37mm (7,75x 2,16x 1,45po)
• Poids: 195g (6,87oz) en tenant compte des piles
• Protection contre les chutes: 1m (3,3pi)
Les caractéristiques techniques peuvent faire l’objet de modifications.
AVERTISSEMENTS
Pour garantir une utilisation et un entretien du compteur sécuritaires,
suivez ces instructions. MÊME À DE FAIBLES CONCENTRATIONS, LE
MONOXYDE DE CARBONE PEUT ÊTRE MORTEL. Le non-respect de ces
avertissements peut entraîner des blessures graves, voire la mort.
• Veuillez lire ces instructions afin que l’utilisation de l’appareil soit
sécuritaire.
• Veuillez effectuer le premier étalonnage dans un emplacement que
vous savez exempt de monoxyde de carbone. Si l’étalonnage se fait
dans une zone contenant du monoxyde de carbone, elle sera erronée
et la lecture sous-estimera le taux réel de gaz.
• Ce compteur N’est PAS conçu comme un équipement de protection
individuelle (EPI).
• L’appareil N’est PAS isolé. Évitez de toucher aux endroits qui
peuvent comporter des éléments conducteurs sous tension. Coupez
l’alimentation dans l’espace de travail avant de procéder aux mesures.
• Portez toujours une protection oculaire approuvée.
Page 15

3
1
2
4
6
8
10
3
5
7
9
12
11
CARACTÉRISTIQUES DÉTAILLÉES
Avant du compteur Arrière du compteur
REMARQUE: Ce compteur ne contient aucune pièce
réparable par l’utilisateur.
1.
Capteur électrochimique5.Bouton TEMP/ ^
9.
Bouton HOLD
(maintien des données)
2.
Écran ACL rétroéclairé
6.
Bouton de rétroéclairage/
10.
Bouton SET (réglage)
3.
Bouton de mise sous
tension
7.
Bouton MAX/AVG (max./moy.)
11.
Vis du compartiment
à piles
4.
Témoin d’avertissement8.Bouton de désactivation du son
12.
Compartiment à piles
A.
Mesure du CO (en ppm)
B.
Mesure de la température (°F/°C)
C.
Indicateur de puissance des piles
D.
Icône d’alarme sonore
E.
Icône MAX/AVG (max./moy.)
F.
Icônes d’alarme HI/LO (concentration
élevée/faible)
G.
Icône de la minuterie d’arrêt
H.
Icône de réglage à zéro
I.
Icône d’étalonnage
J.
Icône de verrouillage de l’appareil
K.
Icônes d’avertissement A1/A2/TWA/
STEL (A1/A2/MPT/LECT)
L.
Icônes HOLD (maintien des données)
et FAULT (anomalie)
AfchageACL détaillé
A
F H J
D
I CG
E
B
K
G
Page 16

4
FRANÇAIS
BOUTONS DE FONCTION
MISE SOUS TENSION
3
Appuyez longuement sur le bouton de mise sous tension pour allumer
et éteindre l’appareil. Durant la procédure de configuration, vous
pouvez quitter en appuyant brièvement sur ce bouton. L’appareil s’éteint
automatiquement après 20minutes d’inactivité.
TEMP/ ^
5
Appuyez sur le bouton TEMP pour activer le mode de mesure de la
température. Par défaut, la lecture se fera en Celsius (°C). Appuyez sur le
bouton TEMP pour passer en Fahrenheit (°F ). En mode de configuration, le
bouton TEMP sert à augmenter la valeur des paramètres.
RÉTROÉCLAIRAGE/
6
À la mise sous tension, le rétroéclairage est désactivé par défaut. Appuyez
sur le bouton de rétroéclairage pour allumer ou éteindre le rétroéclairage.
Le rétroéclairage demeurera actif jusqu’à ce que la fonction ou l’appareil
soit désactivé. En mode configuration, le bouton de rétroéclairage sert à
diminuer la valeur des paramètres.
MAX/AVG
7
En pesant sur le bouton MAX/AVG (max./moy.), vous verrez la valeur des
mesures de concentration maximale enregistrées depuis que l’appareil est
allumé. Appuyez de nouveau sur ce bouton pour afficher la valeur moyenne.
Appuyez longuement pour effacer toutes les données.
DÉSACTIVATION DU SON
8
Appuyez brièvement sur le bouton de désactivation du son pour interrompre
l’alarme active pendant 3minutes. Appuyez longuement pour réactiver l’alarme.
HOLD
9
Appuyez sur le bouton HOLD (maintien des données) pour conserver la lecture
actuelle. Appuyez de nouveau pour retourner au mode de lecture en temps réel.
SET
10
Appuyez sur le bouton SET (réglage) pour entrer en mode d’autoévaluation du
capteur. Pour calibrer l’appareil, appuyez brièvement pour choisir les paramètres;
appuyez longuement pour sauvegarder les valeurs actuelles des paramètres.
TÉMOIN D’AVERTISSEMENT
4
Le témoin d’avertissement N’est PAS un bouton. Il clignote en vert quand
l’environnement est sûr. À l’inverse, il clignote en rouge et émet une alarme
sonore lorsqu’une concentration alarmante est atteinte.
DÉFINITIONS
MPT: Moyenne pondérée LECT: Limite d’exposition
dans le temps à court terme
SYMBOLES SUR LE COMPTEUR
Avertissement
Porter une protection
oculaire approuvée
Ne fait pas office d’équipement
deprotection individuelle (EPI)
Lire les instructions
Page 17

5
AVANT D’UTILISER CE COMPTEUR
Le monoxyde de carbone (CO) est un gaz incolore, inodore et sans goût
pouvant être fatal, et ce, même à de faibles concentrations. Avant de
commencer l’utilisation de ce compteur, veillez à lire et à comprendre les
renseignements dans le tableau ci-dessous concernant les concentrations
de CO.
INSTRUCTIONS D’UTILISATION
TEST
1. Appuyez longuement sur le bouton de mise sous tension du compteur;
l’icône de réglage à zéro H se mettra à clignoter. Le point zéro sera
dès lors configuré; assurez-vous donc d’allumer l’appareil dans un
environnement exempt de monoxyde de carbone.
2. Une fois l’appareil allumé, appuyez sur le bouton SET 10 pour lancer
une autoévaluation de diagnostic, qui dure 3minutes. Nous vous
recommandons fortement d’effectuer cette procédure toutes les
24heures d’utilisation.
3. Placez le compteur dans la zone pour faire le suivi. Le temps de réponse
nécessaire pour atteindre T90 (90% de lecture) est de 1minute.
• À une concentration de CO supérieure l’alarme A1 (concentration faible)
établie à 35ppm (MPT), la sonnerie retentira, la lumière clignotera à une
fréquence de 1Hz et l’icône LO F apparaîtra à l’écran.
• À une concentration de CO supérieure à l’alarme A2 (concentration
élevée) établie à 200ppm, la sonnerie retentira, la lumière clignotera à
une fréquence de 2Hz et l’icône HI F apparaîtra à l’écran.
• L’icône STEL (LECT) K apparaîtra dès qu’une exposition d’environ
200ppm dure depuis 15minutes.
Une fois les conditions d’alarme confirmées, appuyez sur le bouton de
désactivation du son pour faire cesser l’alarme sonore durant environ
3minutes. Appuyez de nouveau pour réactiver l’alarme immédiatement.
CONCENTRATIONS DE MONOXYDE DE CARBONE
PPM Explication
0-1 Niveaux de fond normaux.
9 Niveaux pour les zones habitées selon l’EPA/ASHRAE.
35
Limite d’exposition pour une durée maximale de 8h conformément
à l’OSHA/le NIOSH.
125 Valeur plafond décrétée par l’ACGIH.
200
Limite d’exposition maximale décrétée par l’OSHA/le NIOSH: maux
de tête, fatigue, nausées et étourdissements modérés en l’espace
de 2-3heures.
1500 Présente un danger immédiat pour la vie ou la santé d’après l’OSHA.
Page 18

6
FRANÇAIS
NETTOYAGE
Assurez-vous d’éteindre le luxmètre, puis essuyez-le à l’aide d’un linge non
pelucheux propre.
N’utilisez pas de nettoyant abrasif ou de solvant.
RANGEMENT
Retirez les piles lorsque vous prévoyez ne pas utiliser le thermomètre pendant une
longue période. N’exposez pas l’appareil à des températures élevées ou à un taux
d’humidité élevé. Après une période de stockage dans des conditions extrêmes
(hors des limites mentionnées dans la section Caractéristiques générales), laissez
le luxmètre revenir à des conditions d’utilisation normales avant de l’utiliser.
GARANTIE
www.kleintools.com/warranty
MISE AU REBUT/RECYCLAGE
Ne mettez pas l’appareil et ses accessoires au rebut. Ces articles
doivent être éliminés conformément aux règlements locaux. Pour de
plus amples renseignements, consultez les sites www.epa.gov ou
www.erecycle.org.
SERVICE À LA CLIENTÈLE
KLEINTOOLS, INC.
450Bond Street Lincolnshire, IL 60069
1877775-5346
customerservice@kleintools.com
www.kleintools.com
ENTRETIEN
ÉTALONNAGE
Pour des résultats optimaux, un professionnel devrait se charger d’effectuer
l’étalonnage dans un environnement dont la concentration en monoxyde de
carbone est connue.
REMPLACEMENT DU CAPTEUR
Lorsque l’icône FAULT (anomalie) G apparaît à l’écran, le capteur
électrochimique doit être remplacé.
L’utilisateur NE peut PAS s’en charger;
veuillez communiquer avec KleinTools pour de plus amples renseignements.
REMPLACEMENT DES PILES
Lorsque l’indicateur apparaît,
remplacez les piles.
1. Dévissez la vis du compartiment
à piles 11, puis retirez-en le
couvercle 12.
2. Retirez et recyclez les
pilesAAA à plat.
3. Mettez en place 4nouvelles pilesAAA
(tenez compte de la polarité).
4. Replacez la porte du compartiment à pile
et fixez-la solidement à l’aide de la vis.
Pour éviter tout risque de choc électrique, n’utilisez pas le
compteur lorsque la porte du compartiment à piles est retirée.
Page 19

NOTES / NOTAS / REMARQUES
Page 20

KLEIN TOOLS, INC.
450 Bond Street
Lincolnshire, IL 60069
1-877-775-5346
customerservice@kleintools.com
www.kleintools.com
1390216 Rev 02/17 A
 Loading...