Klein-Hummel O110 User Manual

Active
Studio Monitor
O 110
Installation
and
Operation
|
058-E0016 |
|
Version 21-10-2002 |
|
|
KLEIN + HUMMEL GmbH |
Tel.: + 49 - (0)711 - 45893 - 0 |
Fax: + 49 - (0)711 - 45893 - 35 |
|
Zeppelinstr. 12 73760 Ostfildern/Germany |
email: info@klein-hummel.de |
http://www.klein-hummel. de |

Safety Instructions
It is absolutely essential that you read these safety instructions carefully before connecting and using this K+H product. Your safety depends on it. Furthermore, failure to follow these instructions voids the warranty. To ensure safe operation for years to come, keep these instructions in a safe place for future reference. K+H has manufactured this product in accordance with IEC 92 (SEC) 39 standards, then tested and delivered it in safe operating condition. To maintain it in this condition, you must:
•observe all safety instructions,
•use the product only as described herein,
•have any maintenance, repairs, or modifications performed only by K+H or other authorized personnel, and
•ensure that the room in which you use this product is wired in accordance with the local electrical code.
Warning!
•When the interior of the cabinet is exposed, touching some parts can lead to an electric shock.
•If you need to gain access to the interior electronics of the unit, always disconnect the unit from any and all power sources first.
•Any repairs, maintenance, or other service of the unit when its interior compartment is exposed may only be performed safely (in accordance with VBG 4) by authorized technicians familiar with all the risks involved. Even in an unplugged state, a fully charged capacitor in the unit can zap the unsuspecting.
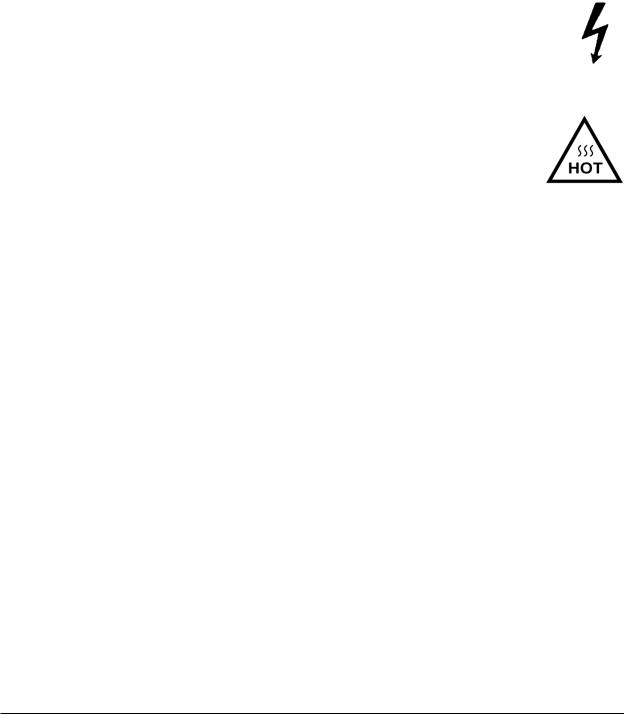
•Loudspeaker output jacks labeled with the IEC 417/5036 emblem (Fig. A, right) may be carrying dangerously high voltages. If your unit has this emblem, ensure that any connections to be made between these jacks and the speakers themselves are made before powering up the unit, and are done so only with manufacturer-approved interconnecting cables.
•If you need to replace any fuses, ensure that the replacements are of exactly the same type, value and voltage as the originals, as spelled out in the technical specifications at the rear of this manual.
•Do not use "repaired" fuses.
•If you do not have any fuses on hand of the specified size, type, and value, do not hot-wire the contacts in the holder by short-circuiting them.
•Certain areas of the cabinet, cover, and rear panel can achieve extreme temperatures and are therefore marked with a "HOT" label (Fig. B). Refrain from touching any heat sink or ventilation grille.
•High volume levels are known to cause permanent - i.e. irreversible - hearing damage, especially when listened to without sufficient breaks. The higher the levels, the more frequent and extended must be the breaks. Avoid standing too close to loudspeakers that are being driven at high
levels. If you must be exposed to high sound pressure levels over an extended period of time, use hearing protection.
Mains Connection:
Fig. A
Fig. B
•This unit is designed for continuous operation.
•Ensure that the operating voltage of the unit matches that of the local mains current (AC line voltage).
•Always check before connecting the power cable to the mains socket that the power switch on the unit itself is set to off ("O").
•Use the power cable or power supply that came with the unit to connect to the mains socket (wall outlet).
•Power supply: a damaged power cable may not be repaired. Use a new cable.
•Avoid plugging the mains cable into a power strip that already has several other power-consuming devices connected to it.
•Avoid using extension cables. The unit must be connected to a mains socket close to it, and that socket should be freely accessible.
Installation:
•This product may only be placed on a stable, clean, horizontal surface.
•Do not expose this product to vibration.
•Do not operate this product anywhere near water or other liquids. Do not use it near a sink, swimming pool, bathtub, or in any damp room or area. Electrical shocks carried through water can kill. Do not place any beverages whatsoever on or near this product, as liquids can kill electronic components.
•Ensure sufficient ventilation around the product to allow for adequate heat dissipation, especially near the rear panel and the sides of the cabinet (minimum of 8 inches from the nearest wall). The unit may only be installed in a rack if measures are taken to ensure sufficient ventilation and if the mounting instructions of the manufacturer are followed. Do not block or cover any heat sink, fan, or vent.
•Do not place the product where it will be in the path of direct sunlight, and keep it a safe distance away from radiators and other heaters of any kind.
•If you bring this product from a cold environment into a warm one (such as from a vehicle into a studio), it is quite possible that condensation will form inside the cabinet. Please allow the unit sufficient time for acclimatisation to room temperature (minimum thirty minutes) before connecting and powering up.
•To avoid accidents, do not use any accessory equipment with this product which is not approved by the manufacturer, particularly mounting accessories. Do not place this unit on any unstable platform, cart, stand or table. Should the unit fall, it can cause bodily injury to persons, or can be damaged itself.
•To protect this product from lightning damage during a thunderstorm or from power surges during an extended absence, disconnect the power cable from the wall outlet.
Page 2 |
Active Studio Monitor O 110 |

Active Studio Monitor
KLEIN + HUMMEL O 110
Installation - Operation
Figure 1: Front view of the O 110 |
Figure 2: Rear panel of the O 110 |
Table of Contents:
Safety Instructions...................................................... |
2 |
1.6 Mains Power Fuse............................................... |
5 |
Table of Contents........................................................ |
3 |
1.7 Display Functions................................................ |
5 |
|
|
1.7.1 Overload Protection.................................... |
5 |
1. Installation and Operation....................................... |
4 |
|
|
1.1 Operating Conditions........................................ |
4 |
1.8 Care of the Cabinet............................................ |
6 |
1.2 Installation......................................................... |
4 |
|
|
1.3 Connection to Mains Current............................ |
4 |
2.Diagrams................................................................. |
6 |
1.4 POWER Switch................................................. |
4 |
|
|
1.5 Level / Room Compensation / Ground Lift........ |
4 |
3.Warranty Information............................................... |
8 |
1.5.1 Input Level Adjustment................................ |
4 |
|
|
1.5.2 Equalization................................................. |
4 |
4.Technical Specifications.......................................... |
9 |
1.5.3 Ground Lift................................................... |
5 |
|
|
Active Studio Monitor O 110 |
Page 3 |
 Loading...