

Page 1
Quick Start Guide
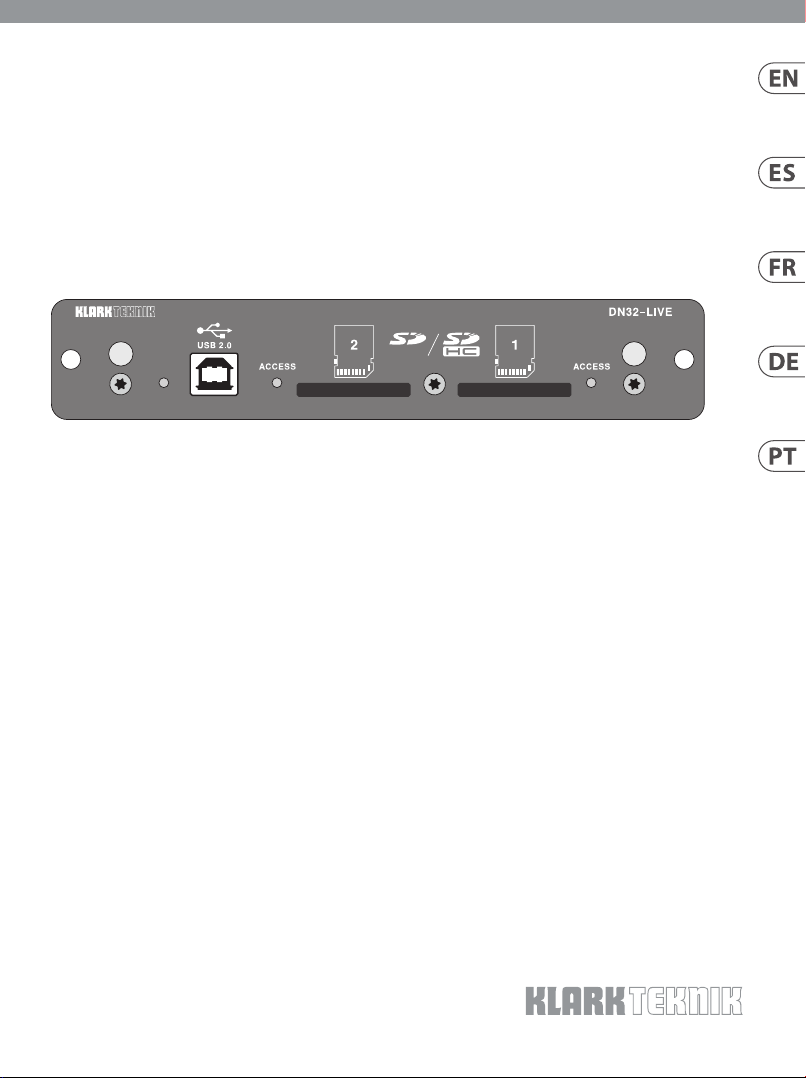
DN32-LIVE
SD/SDHC and USB 2.0 Expansion Module for 32 Bidirectional Channels of
Live Recording/Playback
Page 2
2 3Quick Start GuideDN32-LIVE
Impor tant Safety
Instructions
Terminals marked wit h
this symbol carry
electrical current of
su cient magnitude to constitute risk
of electr ic shock. Use only high-qualit y
profession al speaker cables with ¼" TS
or twist-locking plugs pre-installed.
Allother inst allation or modi c ation
should be per formed only by
quali edpersonnel.
This symbol, wherever it
appears, aler ts you to the
presence of uninsulated
dangerous volta ge inside the enclosure
- voltage that may be su cient to
constitute a r isk ofshock.
This symbol, wherever it
appears, aler ts you to
important operating and
maintenance instructions in the
accompanying literatu re. Please read
themanual.
Caution
To reduce the risk of
electr ic shock, do not
remove the top cover (or the rear
section). No user serviceable parts inside.
Refer ser vicing to quali e dpersonnel.
Caution
To reduce the risk of
re or electric shock, do
not expose t his appliance to rain and
moisture. Thea pparatus shall not
be exposed to d ripping or splashing
liquids and no obje cts lled wit h
liquids, such as vase s, shall be placed
on the appara tus.
Caution
These ser vice instructi ons
are for use by qual i ed
service p ersonnel only. Toreduce
the risk of elec tric shock do not
perfo rm any servicing other t han that
contained in the op eration instructio ns.
Repairshave to be p erformed by
quali ed servicepersonnel.
1. Read these ins tructions.
2. Keep thes e instruction s.
3. Heed all warnings.
4. Follow all ins tructions.
5. Do not use this apparatus
near water.
6. Clean only w ith dry cloth.
7. Do not b lock any ventilation
openings. Inst all in accordance with the
manufacturer’s instructions.
8. Do not ins tall near any heat
sources such as rad iators, heat registers,
stoves, or othe r apparatus (including
ampli ers) that produce heat.
9. Do not defeat the saf ety purpose
of the polarize d or grounding-type
plug. A polarize d plug has two blades
with one wide r than the other.
A grounding-t ype plug has two blades
and a third grou nding prong. The wide
blade or the thi rd prong are provided
for your safe ty. Ifthe provided plug
does not t into your outlet, consult
an electr ician for replacement of the
obsolete outlet.
10. Protec t the power cord from being
walked on or pinc hed particularly
at plugs, convenience re ceptacles,
and the point wh ere they exit from
the apparatus.
11. Use only attachments/accessories
speci ed by themanufacture r.
12. Use only with
the cart , stand,
tripod, bracket, or
table speci ed by
the manufacturer,
orsold with
the apparat us. When a cart is used,
use cautio n when moving the cart /
apparatus com bination to avoid injury
from tip-over.
13. Unplug this apparatus dur ing
lightning sto rms or when unused for
long period s of time.
14. Refer all servic ing to quali ed
service p ersonnel. Servic ing is required
when the apparat us has been damaged
in any way, such as power supply cord
or plug is damaged, liqui d has been
spilled or objec ts have fallen into the
apparatus, th e apparatus has been
exposed to r ain or moisture, does not
operate norm ally, or has beendropp ed.
15. The apparatus shall be connecte d
to a MAINS socket out let with a
protective earthing connection.
16. Where t he MAINS plug or an
appliance coupler is us ed as the
disconnec t device, the disconnect
device shall remain read ily operable.
17. Correct dispo sal of
this product: This
symbol indi cates that
this product must not
be disposed of wi th
household was te, according to the
WEEE Direct ive (2012/19/EU) and your
national law. This produc t should be
taken to a collec tion center licensed for
the recyc ling of waste electr ical and
electronic equipment (EEE).
The mishandling of th is type of waste
could have a possible ne gative impact
on the environm ent and human health
due to potentially haza rdous
substances that are generally
associate d with EEE. At the same time,
your cooperatio n in the correct disposal
of this produc t will contribute to the
e cient use of natural re sources. For
more infor mation about where you can
take your waste e quipment for
recycling, p lease contact your local c ity
o ce, or your household was te
collection ser vice.
18. Do not ins tall in a con ned space,
such as a book cas e or similar unit.
19. Do not p lace naked ame
sources, such as lighte d candles,
on the appara tus.
20. Please ke ep the environmental
aspect s of battery disposa l in mind.
Batterie s must be disposed-of at a
batter y collection point.
21. Use this app aratus in tropical
and/or moderate climates.
LEGAL DISCLAIMER
MUSIC Tribe accepts no liabilit y for
any loss which may be su ered by any
person who r elies either wholly or in
part upo n any description, photo graph,
or statement cont ained herein.
Technical speci cations, appearances
and other infor mation are subject to
change with out notice. All trademark s
are the proper ty of their respec tive
owners. MIDAS, KL ARK TEKNIK,
LAB GRUPPEN, LAK E, TANNOY,
TURBOSOUND, TC ELECTRONIC,
TC HELICON, BEHRINGER, BUGER A,
AND COOL AUDIO are trademarks
or registered trademarks of
MUSIC Tribe Global Brand s Ltd. ©
MUSIC Tribe Global Brands Ltd.
2018 All rights reser ved.
LIMITED WARRANTY
For the applic able warranty terms and
conditions and ad ditional information
regarding MUSIC Tribe’s Limited
Warranty, please se e complete details
online at musictri.be/warranty.
Instrucciones de
seguridad
Las terminale s marcadas
con este símbolo
transportan corriente
eléctr ica de magnitud su ci ente como
para constitu ir un riesgo de descarga
eléctr ica. Utilicesolo cables de a ltavoz
profesionale s y de alta calidad con
conector es TS de 6,3 mm o de bayoneta
pre ja dos. Cualquier otra instalaci ón o
modi cación debe ser realizada
únicamente por un té cnicocuali cado.
Este símbolo, siempre que
aparece, leadvi erte de la
presencia de vo ltaje
peligroso sin aislar de ntro de la caja;
estevoltaje pu ede ser su ciente para
constituir un r iesgo dedescarga.
Este símbolo, siempre que
aparece, leadvi erte sobre
instrucciones operativas y
de mantenimiento q ue aparecen en la
document ación adjunta. Por favor,
leaelmanual.
Atención
Para reducir e l riesgo de
descarga eléctrica, no
quite la tapa (olapar te posterior).
Nohay piezas en el i nterior del equipo
que puedan ser r eparadas por el
usuario. Sies nece sario, póngase en
contacto con pers onal cuali cado.
Atención
Para reducir e l riesgo
de incendio o desc arga
eléctr ica, no exponga este apa rato a la
lluvia, humedad o algu na otra fuente
que pueda salpi car o derramar algún
líquido sobre e l aparato. Nocoloque
ningún tipo de recipiente para líquidos
sobre elapar ato.
Atención
Las instrucciones
de servicio deben
llevarlas a cabo e xclusivamente
personal c uali cado. Paraevitar el
riesgo de una d escarga eléctri ca,
no realice repar aciones que no se
encuentren descritas en el manual de
operaciones. Lasreparaciones deben
ser realizadas exclusivamente por
personalcuali cado.
1. Lea las instrucc iones.
2. Conserve estas instrucciones.
3. Pre ste atención a todas
las advertencias.
4. Siga todas las inst rucciones.
5. No u se este aparato cerca
del agua.
6. Limpie es te aparato con un
paño seco.
7. No blo quee las aberturas
de ventilación. Ins tale el equipo
de acuerdo con las ins trucciones
del fabricante.
8. No instale e ste equipo cerca de
fuentes de ca lor tales como radiadores,
acumuladore s de calor, estufas u otros
aparatos (incluyendo ampli cadores)
que puedan pr oducir calor.
9. No elimine o deshabilite nunc a
la conexión a tie rra del aparato o del
cable de alime ntación de corriente.
Unenchufe polar izado tiene dos polos,
uno de los cuales ti ene un contacto
más ancho que el ot ro. Una clavija
con puesta a ti erra dispone de tres
contactos: d os polos y la puesta a
tierra. El conta cto ancho y el tercer
contacto, respe ctivamente, son los que
garantizan una mayor s eguridad. Si el
enchufe suminis trado con el equipo
no concuerda con la toma de cor riente,
consulte con un elec tricista para
cambiar la toma de corr iente obsoleta.
10. Coloque el c able de suministro de
energía de mane ra que no pueda ser
pisado y que es té protegido de objetos
a lados. Asegúrese de que el cable de
suministro de energía esté protegido,
especialmen te en la zona de la clavija y
en el punto don de sale del aparato.
11. Use únicamente lo s dispositivos
o accesorios e speci cados por
el fabricante.
12. Use
únicamente la
carretilla,
plataforma,
trípode, soporte o
Page 3
4 5Quick Start GuideDN32-LIVE
mesa espe ci cados por el fabric ante o
suministrado s junto con el equipo.
Altranspor tar el equipo, tenga cuidado
para evitar dañ os y caídas al tropezar
con algún obstáculo.
13. Desenchufe el equipo durante
tormentas o si no v a a utilizarlo durante
un periodo la rgo.
14. Confíe las reparaciones
únicamente a servicios técnicos
cuali cados. La unidad requiere
mantenimiento siemp re que haya
sufrido algún da ño, si el cable de
suministro de en ergía o el enchufe
presentar an daños, sehubiera
derramado un lí quido o hubieran caído
objetos dentr o del equipo, si el aparato
hubiera est ado expuesto a la humedad
o la lluvia, si ha dejado de fun cionar de
manera normal o si ha su frido algún
golpe o caída.
15. Al conectar la unidad a la toma de
corriente elé ctrica asegúres e de que
la conexión disponga de una unión
atierra.
16. Si el enchu fe o conector
de red sirve com o único medio
de desconexión, éste debe ser
accesiblefácilmente.
17. Cómo debe
deshacerse de este
aparato: Este símbolo
indica que es te aparato
no debe ser tr atado
como basura orgánic a, según lo
indicado en la Dir ectiva WEEE (2012/19/
EU) y a las normativa s aplicables en su
país. En lugar de ello debe rá llevarlo al
punto limpio más cerc ano para el
reciclaje de sus el ementos eléctricos/
electró nicos (EEE). Al hacer esto estará
ayudando a preven ir las posibles
consecuencias negativas para el medio
ambiente y la salud qu e podrían ser
provocadas po r una gestión inadecuada
de este tipo de a paratos. Además,
el reciclaje de m ateriales ayudará a
conservar lo s recursos naturales. Para
más informac ión acerca del reciclaje de
este aparato, pónga se en contacto con
el Ayuntamiento de su ci udad o con el
punto limpio loc al.
18. No instale esta unidad en un
espacio muy r educido, tal como
encastra da en una librería o similar.
19. No coloq ue objetos con
llama, como una vela encendi da,
sobre este aparato.
20. Tenga presentes to das las
advertencias relativas al reciclaje
y correct a eliminación de las pilas.
Las pilas deben s er siempre eliminadas
en un punto limpio y nunc a con el resto
de la basura orgánica.
21. Use este ap arato en rangos de
temperatura moderados y/o tropicales.
NEGACIÓN LEGAL
MUSIC Tribe no admite ningún t ipo
de responsabilida d por cualquier
daño o pérdida que pu diera sufrir
cualquier per sona por con ar total
o parcialmente en la des cripciones,
fotografías o a r maciones
contenidas en este documento.
Las especi caciones técnicas,
imágenes y otr as informaciones
contenidas en este documento
están sujet as a modi caciones
sin previo aviso. Todas las mar cas
comerciales que ap arecen aquí
son propiedad d e sus respectivos
dueños. MIDAS, KL ARK TEKNIK,
LAB GRUPPEN, LAK E, TANNOY,
TURBOSOUND, TC ELECTRONIC,
TC HELICON, BEHRINGER,
BUGE RA y COO LAUDIO s on marcas
comerciales o marc as registradas
de MUSIC Tribe Global Brand s Ltd.
© MUSIC Tribe Global Brand s Ltd. 2018
Reserva dos todos los derechos.
GARANTÍA LIMITADA
Si quiere conocer los d etalles y
condiciones aplic ables de la garantía
así como informa ción adicional sobre
la Garantía limit ada de MUSIC Tribe,
consulte online toda la información en
la web musictr i.be/warranty.
Consignes de sécurité
Les points rep érés par ce
symbole p ortent une
tension électrique
su sante pour consti tuer un risque
d’électrocution. Utilisez uniquement
des câbles d ’e nceintes professionnels
de haute qualité avec ches Jack mono
6,35 mm ou ches à ve rrouillages déjà
installée s. Touteautre insta llation ou
modi cation doit être e ectuée
uniquement par un personnel quali é.
Ce symbole aver tit de la
présence d’une tension
dangereuse et non i solée à
l’intérieur d e l’appareil - elle peu t
provoquer des chocs électriques.
Attention
Ce symbol signale les
consignes d’utilisation
et d’entre ! Tienimpor tantes dans
la document ation fournie. Lisez le s
consignes de séc urité du manuel
d’utilisatio n del’appareil.
Attention
Pour éviter tout risque
de choc électrique,
ne pas ouvri r le capot de l’appareil
ni démonter le pa nneau arrière.
L’intérieur de l’appareil ne possè de
aucun élément rép arable par
l’utilisateur. Laiss ertoute réparation à
un professionnelquali é.
Attention
Pour réduir e les risques
de feu et de cho c
électr ique, n’exposez pas ce t appareil
à la pluie, à la moisissure, auxg outtes
ou aux éclaboussu res. Ne posez pas
de récipient conte nant un liquide sur
l’appareil (unvase par e xemple).
Attention
Ces consignes de
sécurité et d’entretien
sont dest inées à un personnel
quali é. Pour éviter tout risque de
choc électrique, n’e ectuez aucune
réparation sur l ’appareil qui ne soit
décrite par l e manuel d’utilisation.
Les éventuelles r éparations doivent
être e ectuées uniqu ement par un
technicienspécialisé.
1. Lisez ces consigne s.
2. Conservez ce s consignes.
3. Re spectez tous les avert issements.
4. Respec tez toutes les
consignes d’utilisation.
5. N’utilisez jamais l’appareil à
proximité d’un liquide.
6. Net toyez l’appareil avec un
chi on sec.
7. Veillez à ne pa s empêcher la
bonne ventilat ion de l’appareil via ses
ouïes de ventilatio n. Respectezles
consignes du fabr icant concernant
l’installat ion del’appareil.
8. Ne placez pa s l’appareil à
proximité d’une source de chaleur telle
qu’un chau age, une cuisinière ou tout
appareil dégageant de la chaleur (y
compris un ampli dep uissance).
9. Ne supprimez jamais la sécurité
des prises b ipolaires ou des prises
terre. Les pris es bipolaires possèdent
deux contac ts de largeur di é rente.
Leplus large est le co ntact de sécurité.
Les prises ter re possèdent deux
contact s plus une mise à la terre
servant d e sécurité. Si la prise du blo c
d’alimentation ou du cordon d’alimentation fo urni ne correspond pas à
celles de votre ins tallation électrique,
faites app el à un électricien po ur
e ectuer le changement de prise.
10. Installez le cordon d’alimentation
de telle façon que per sonne ne puisse
marcher dessu s et qu’il soit protégé
d’arêtes coupantes. Assurez-vous
que le cordon d’alimenta tion est
sufsam ment protégé, notamment
au niveau de sa pris e électrique et
de l’endroit où il est r elié à l’appareil;
cela est égalem ent valable pour une
éventuelle rallonge électrique.
11. Utilisez exclusivement
des accessoir es et des appareils
supplémentaires recommandés par
lefabric ant.
12. Utilisez
exclusivement des
chariots, des
diables,
desprésen toirs,
despieds et d es
surfaces d e travail recommandés par le
fabrican t ou livrés avec le produit.
Déplacezpréc autionneusement tout
chariot ou diable chargé pour éviter
d’éventuelles blessu res en cas dechute.
13. Débranchez l’appareil de la
tension sec teur en cas d’orage ou si
l’appareil res te inutilisé pendant une
longue période de temps.
14. Les travaux d’entretien de
l’appareil doivent être e ectués
uniquement par du personnel qualié.
Aucunentreti en n’est nécessaire s auf si
l’appareil est e ndommagé de quelque
façon que ce soit (dommag essur le
cordon d’alimentati on ou la prise par
exemple), siun liquide ou un obje t
a pénétré à l’in térieur du châssis, si
l’appareil a été ex posé à la pluie ou
à l’humidité, s’i l ne fonctionne pas
correc tement ou à la suite d’une chute.
15. L’appareil do it être connecté à une
prise sec teur dotée d’une protectio n
par mise à la terr e.
16. La pr ise électrique ou la pr ise
IEC de tout appareil dé nué de bouton
marche/arrêt doi t rester accessible
enpermane nce.
17. Mise au rebut
appropriée de ce
produit: Ce symbole
indique qu’en accord
avec la direc tive DEEE
(2012/19/EU) et les lois en vigueu r dans
votre pays, ce pro duit ne doit pas être
jeté avec les déc hets ménagers.
Ce produit doit ê tre déposé dans un
point de collec te agréé pour le
recyclag e des déchets d’équipemen ts
électr iques et électron iques (EEE).
Une mauvaise manipula tion de ce type
de déchet s pourrait avoir un impac t
négatif sur l’environneme nt et la santé
à cause des subs tances potentiellement
dangereuses généralement associées à
ces équipements. En même temps,
votre coopérat ion dans la mise au rebut
de ce produit cont ribuera à l’utilisation
e cace des ressource s naturelles.
Pour plus d’inf ormations sur l’endroit
où vous pouvez dé poser vos déchets
d’équipements pour le recyclage,
veuillez contac ter votre mairie ou votre
centre local de collecte des déchets.
18. N’ins tallez pas l’appareil dans un
espace con né tel qu’une bibliothèque
ou meuble similaire.
19. Ne place z jamais d’objets
en amm és, tels que des bougies
allumées, sur l’appareil.
20. Gardez à l’esprit l’impact
environnemental lorsque vous mettez
des piles au rebu s. Les piles usées
doivent être dé posées dans un point de
collecte adapté.
21. Utilisez l’appareil dans un climat
tropical et/ou modéré.
DÉNI LÉGAL
MUSIC Tribe ne peut être tenu p our
responsable pour toute perte pouvant
être subie par tou te personne se
ant en par tie ou en totalité à
toute description, photographie
ou a rmation contenue dans ce
document. Les c aractéristique s,
l’apparence et d’autres informations
peuvent fair e l’objet de modi cations
sans noti cation. Toutes les marqu es
appart iennent à leurs proprié taires
respectifs. MIDAS, KLARK TEKNIK,
LAB GRUPPEN, LAK E, TANNOY,
Page 4
6 7Quick Start GuideDN32-LIVE
TURBOSOUND, TC ELECTRONIC,
TC HELICON, BEHRINGER,
BUGER A et COOLAUDIO sont des
marques ou marques déposées
de MUSIC Tribe Global Brand s Ltd.
© MUSIC Tribe Global Brands Ltd.
2018 Tous droits réservé s.
GARANTIE LIMITÉE
Pour connaître le s termes et conditions
de garantie applic ables, ainsi que
les informatio ns supplémentaires et
détaillées sur la G arantie Limitée de
MUSIC Tribe, consultez le site Internet
musictri.be/warranty.
Wichtige
Sicherheitshinweise
Vorsicht
Die mit dem Symbo l
markierten Anschlüsse
führen so vie l Spannung, dassdie
Gefahr eine s Stromschlag s besteht.
Verwenden Sie nur ho chwertige,
professionelle Lautsprecherkabel
mit vorinst allierten 6,35 mm
MONO-Klinkensteckern oder
Lautsprecherstecker mit
Drehverriegelung. Alle anderen
Installationen oder Modi kationen
sollten nur von quali z iertem
Fach pers onal au sgef ührt w erden.
Achtung
Um eine Gefährdung
durch Stromschlag
auszuschließen, darf die
Geräteabdeckung bzw.
Geräterück wandnicht abgenommen
werden. ImInnern de s Geräts be nd en
sich keine vom Benu tzer reparierbaren
Teile. Reparaturarbeiten dürfen
nur von quali ziertem Person al
ausgeführ twerden.
Achtung
Um eine Gefährdung
durch Feuer bz w.
Stromschlag auszuschließen, darf
dieses Ger ät weder Regen oder
Feuchtigkeit ausgesetzt werden
noch sollten Spritzwasser oder
tropfende Flüs sigkeiten in das Gerät
gelangen könne n. Stellen Sie keine
mit Flüssigkeit gefüllten Gegenstände,
wie z. B. Vasen, aufdasGer ät.
Achtung
Die Servi ce-Hinweise sind
nur durch quali ziertes
Personal zu b efolgen. Umeine
Gefährd ung durch Stromschlag zu
vermeiden, f ühren Sie bitte keinerle i
Reparatur en an dem Gerät durch,
dienicht in der B edienungsanleitung
beschrieben sind. Reparaturen
sind nur von quali ziertem
Fachpersonaldurchzuführen.
1. Lesen Sie diese H inweise.
2. Bewahren Sie die se Hinweise auf.
3. Beac hten Sie alle Warnhinweise.
4. Befolgen Sie alle
Bedienungshinweise.
5. B etreiben Sie das Gerät nicht in
der Nähe vonWasser.
6. Reinigen Sie da s Gerät mit einem
trockenen Tuch.
7. Bloc kieren Sie nicht die
Belüftungsschlitze. Beachten
Sie beim Einbau des Ge rätes die
Herstellerhinweise.
8. Stellen Sie das Gerä t nicht in der
Nähe von Wärmequellen au f. Solche
Wärmequellen si nd z. B. Heizkörper,
Herde oder and ere Wärme erzeugende
Geräte (auch Verstä rker).
9. Entfernen Sie in kein em Fall
die Sicherheitsvorrichtung von
Zweipol- oder ge erdeten Steckern. Ein
Zweipolstecker hat zwei unterschiedlich
breite Steckkont akte. Ein geerdeter
Stecker hat zwei Ste ckkontakte
und einen dritten Erdungskontakt.
Derbreitere Ste ckkontakt oder der
zusätzliche Erdungskontakt dient
Ihrer Sicherheit . Falls das mitgeliefer te
Steckerf ormat nicht zu Ihrer Steckdo se
passt, wenden Si e sich bitte an
einen Elektr iker, damit die Steckdose
entsprechend ausgetaus cht wird.
10. Verlegen Sie das Net zkabel so,
dass es vor Tritten und sc harfen Kanten
geschüt zt ist und nicht beschäd igt
werden kann. Ach ten Sie bitte
insbesonde re im Bereich der Stecker,
Verlängerungskab el und an der Stelle,
an der das Netzk abel das Gerät verlässt,
aufausreichende nSchutz.
11. Das Gerät muss je derzeit mit
intaktem Sc hutzleiter an das Stromnetz
angeschlossen sein.
12. Sollte der Hauptnetzste cker
oder eine Gerätesteckdose die
Funktionseinheit zum Abschalten sein,
muss diese immer z ugänglich sein.
13. Verwenden Sie nur Zusatzge räte/
Zubehörtei le, dielaut Herste ller
geeignet sind.
14. Verwenden
Sie nur Wagen,
Standvo rrichtungen, Stative,
Halter oder Tische,
die vom Herste ller
benannt oder im Lie ferumfang des
Geräts enthal ten sind. Falls Sie einen
Wagen benutzen, s eien Sie vorsichtig
beim Bewegen d er
Wagen- Gerätkombination,
umVerletzung en durch Stolpern
zuvermeiden.
15. Ziehen Sie den Netzs tecker bei
Gewitter o der wenn Sie das Gerät
längere Zeit nich t benutzen.
16. Lassen Sie alle Wartungsarbei ten
nur von quali ziertem Servi cePersonal ausführen. EineWartung
ist notwen dig, wenn das Gerät in
irgendeiner Weise b eschädigt wurde
(z. B. Beschädi gung des Netzkabels
oder Stecker s), Gegenstä nde oder
Flüssigkeit in das Gerätein nere gelangt
sind, das Gerät Reg en oder Feuchtigkeit
ausgeset zt wurde, das Gerät nicht
ordnungsgemäß funktioniert oder auf
den Boden gef allen ist.
17. Korrek te
Entsorgung dieses
Produkts: Dieses Symbol
weist darauf hin, das
Produkt entsprechend
der WEEE Direkt ive (2012/19/EU) und
der jeweiligen nati onalen Gesetze nicht
zusammen mit Ihren Haushaltsabfällen
zu entsorge n. DiesesProdukt sollte b ei
einer autorisier ten Sammelstelle für
Recycling elektrischer und
elektronischer Geräte (EEE) abgegeben
werden. Wegen bedenklicher
Substanzen, di egenerell mit
elektrischen und elektronischen
Geräten in Verbind ung stehen, könnte
eine unsachgemäße Behandlung dieser
Abfallart eine negative Auswirkung auf
Umwelt und Gesundheit haben.
Gleichzeitig g ewährleistet Ihr Beitrag
zur richtigen En tsorgung dieses
Produkt s die e ektive Nut zung
natürlicher Re ssourcen. Fürweitere
Informationen zur Entsorgung Ihrer
Geräte bei einer R ecycling-Stelle
nehmen Sie bit te Kontakt zum
zuständigen städtischen Büro,
Entsorgungsamt oder zu Ihrem
Haushaltsabfallentsorgerauf.
18. Installi eren Sie das Gerät nicht
in einer beeng ten Umgebung, zum
Beispiel Bücherregal oder ähnliches.
19. Stellen Si e keine Gegenstände mit
o enen Flammen, etwa brennende
Kerzen, auf das Ger ät.
20. Beachte n Sie bei der Entsorgung
von Batter ien den UmweltschutzAspekt . Batterien müssen b ei einer
Batterie-Sammelstelle ent sorgt
werden.
21. Verwenden Sie da s Gerät in
tropischen und/oder gemäßigten
Klimazonen.
HAFTUNGSAUSSCHLUSS
MUSIC Tribe übernimmt kei ne Haftung
für Verluste, die Pe rsonen entstan den
sind, die sich ganz oder teilwe ise auf
hier enthaltene Beschreibungen,
Fotos oder Aussa gen verlassen haben.
Technische Daten, Erscheinungsbild
und andere Informationen können
ohne vorherige Ankündigung
geändert we rden. Alle Warenzeichen
sind Eigentum der jeweili gen
Inhaber. MIDAS, KLARK TEKNIK,
LAB GRUPPEN, LAKE, TANNOY,
TURBOSOUND, TC ELECTRONIC,
TC HELICON, BEHRINGER, BUGERA
und COO LAUDIO si nd Warenzeichen
oder eingetragene Warenzeichen
der MUSIC Tribe Global Bran ds Ltd.
© MUSIC Tribe Global Brands Ltd.
2018 Alle Rechte vorbehalten.
BESCHRÄNKTE GARANTIE
Die geltenden Garantiebedingungen
und zusätzliche Informationen
bezüglich d er von MUSIC Tribe
gewährten beschränkten
Garantie nden Sie online unter
musictri.be.com/warranty.
Instruções de
Segurança Importantes
Aviso!
Ter mina is m arca dos
com o símbolo car regam
corrente elétrica de magnitude
su cie nte para constituir um risco de
choque elét rico. Use apenas cabos
de alto-falantes de alta qualidade
com plugues TS de ¼" ou plugues
com trava de torçã o pré-instalados.
Todas as outras inst alações e
modi cações devem ser efetuadas por
pessoasquali cadas.
Este símbolo, onde quer
que o encontre, aler ta-o
para a leitura das
instruçõe s de manuseamento que
acompanham o e quipamento. Por favor
leia o manual deinst ruções.
Atenção
De forma a dimi nuir
o risco de cho que
eléctr ico, nãoremover a cober tura
(ouasecção de trás). Não exis tem peças
substituí veis por parte do utilizad or no
seu interior. Para esse e feito recorrer a
um técnicoquali cado.
Atenção
Para reduzir o r isco de
incêndios ou cho ques
eléctr icos o aparelho não deve ser
exposto à c huva nem à humidade.
Alémdisso, não deve ser suj eito a
salpicos, nem deve m ser colocados em
cima do aparelho objectos contendo
líquidos, taiscomoja rras.
Atenção
Estas ins truções de
operação d evem ser
utilizadas, e mexclusivo, por técnicos
de assistência quali cados. Para evitar
choques eléc tricos não proceda a
reparações ou intervenções, que
não as indicadas nas ins truções
de operaçã o, salvo se poss uir as
quali -cações necessárias. Para evitar
choques eléc tricos não proceda a
reparações ou intervenções, que
não as indicadas nas ins truções de
operação. S ó o deverá fazer se possuir
as quali caçõesnecessárias.
1. Leia estas instruções.
2. Guarde estas instruções.
3. Pr este atenção a todos os aviso s.
4. Siga todas as inst ruções.
5. Não u tilize este dispositivo per to
de água.
6. Limpe ap enas com um pano seco.
7. Não obs trua as entradas de
ventilação. Inst ale de acordo com as
instruções do fabricante.
Page 5

•
•
•
•
•
•
8 9Quick Start GuideDN32-LIVE
8. Não instale p erto de quaisquer
fontes de calo r tais como radiadores,
bocas de ar que nte, fogões de sala
ou outros aparelhos (incluindo
ampli cadores) que produzam c alor.
9. Não anule o objectivo de
segurança das chas polarizadas ou
do tipo de ligação à ter ra. Uma cha
polarizada dispõe de duas palhet as
sendo uma mais larg a do que a outra.
Uma cha do t ipo ligação à terra dispõe
de duas palheta s e um terceiro dente
de ligação à terra. A p alheta larga ou
o terceiro dente sã o fornecidos para
sua segurança. S e a cha fornecida
não encaixar na sua tomada, con sulte
um electr icista para a substituiç ão da
tomada obsoleta.
10. Proteja o cabo d e alimentação de
pisadelas ou aper tos, especialmente
nas cha s, extensões, e no local de
saída da unidade. Ce rti que -se de
que o cabo eléc trico está proteg ido.
Veri que p articularmente nas chas,
nos receptác ulos e no ponto em que o
cabo sai doap arelho.
11. O aparelho tem de es tar sempre
conecta do à rede eléctrica com o
condutor de protecção intacto.
12. Se utilizar uma cha de
rede princip al ou uma tomada de
aparelhos para desligar a unidade
de funcionamento, esta deve estar
sempre acessível.
13. Utilize apenas ligações/acessórios
especi cados pelofabricante.
14. Utilize apenas
com o carrinho,
estrutura, tripé,
suporte, ou mesa
especi cados pelo
fabricante ou
vendidos com o dispo sitivo.
Quandoutiliz ar um carrinho, tenha
cuidado ao mover o conju nto carrinho/
dispositivo par a evitar danos provocados
pela terpidação.
15. Desligue este dispositivo dur ante
as trovoadas ou quand o não for
utilizado d urante longos períodos
detempo.
16. Qualqu er tipo de reparação
deve ser sempr e efectuado por
pessoal quali cado. É necessária uma
reparaçã o sempre que a unidade tiver
sido de alguma forma da ni cada,
como por exempl o: no caso do cab o de
alimentação o u cha se encontrarem
dani cados; naeventualidade de
líquido ter sido derr amado ou objectos
terem caído par a dentro do dispositivo;
no caso da unidad e ter estado exposta
à chuva ou à humidad e; seesta
não funcionar nor malmente, ou se
tiver caído.
17. Correct a eliminação
deste produ to: este
símbolo indic a que o
produto não deve se r
eliminado juntamente
com os resíduos dom ésticos, segundo a
Direct iva REEE (2012/19/EU) e a legislação
nacional. Este p roduto deverá ser levado
para um centro de reco lha licenciado para
a reciclagem de r esíduos de
equipamentos eléctricos e electrónicos
(EEE). O tratamento incor recto deste tipo
de resíduos pode te r um eventual
impacto ne gativo no ambiente e na
saúde humana devid o a substâncias
potencialmente per igosas que estão
geralmente ass ociadas aos EEE. Ao
mesmo tempo, a sua colaboraç ão para a
eliminação cor recta deste produ to irá
contribuir pa ra a utilização e ciente dos
recurso s naturais. Paramais informaçã o
acerca dos locais onde poderá deixar o
seu equipamento usado para reciclagem,
é favor contac tar os serviços munic ipais
locais, a entidad e de gestão de resíduos
ou os serviç os de recolha de
resíduosdomés ticos.
18. Não inst ale em lugares
con nados, tais como estantes ou
unidades similares.
19. Não colo que fontes de
chama, tais como vela s acesas,
sobre o apare lho.
20. Favor, obedecer os aspectos
ambientais de descarte de bateria.
Baterias devem se r descartadas em um
ponto de coletas d e baterias.
21. Use este ap arelho em climas
tropicais e/ou moderados.
LEGAL RENUNCIANTE
O MUSIC Tribe não se responsab iliza
por perda algu ma que possa ser
sofrida p or qualquer pessoa que
dependa, seja de mane ira completa
ou parcial, de qualquer descrição,
fotogra a, ou declaração aqui
contidas. Dados téc nicos, aparências
e outras info rmações estão sujeita s
a modi cações sem aviso prévi o.
Todas as marcas são propr iedade
de seus respectivos donos. MIDAS,
KLARK TEKNIK, LAB GRUPPEN,
LAK E, TANNOY, TURB OSOUND,
TC ELECTRONIC , TC HELICON,
BEHRINGER, BUGERA e COOLAUDIO
são marcas ou mar cas registradas
do MUSIC Tribe Global Brand s Ltd.
© MUSIC Tribe Global Brands Ltd.
2018 Todos direitos reser vados.
GARANTIA LIMITADA
Para obter os termos de gar antia
aplicáveis e condiçõ es e informações
adicionais a respeito da gar antia
limitada do MUSIC Tribe, favor ver i car
detalhes na ínte gra através do website
musictri.be/warranty.
1. Introduction
The DN32-LIVE in terface card e xpands on the alrea dy stellar perf ormance of the DN32-USB car d that has been stan dard in M32 consoles
for years. T he same 32-channel bi- directional a udio I/O via USB 2.0 is available, pr oviding 32 channels for r ecording and playb ack,
plus remot e operation of your DAW via HUI /MackieContro l emulation. The addi tion of twin SD/SDHC sl ots now provides f ully independent,
uncompre ssed recording /playback of up to 32-chann els in consistent se ssions up to the max ca pacity of the SD ca rds. Multi-chan nel
recordi ng without the nee d for a laptop, as well as vir tual sound chec ks and live backing t rack support , accurate marker hand ling and
adjustm ents, and full rem ote operation fr om apps or X-TOUCH control su rfaces are only s ome of the new possib ilities DN32-LIVE o e r s .
2. Installing the DN32-LIVE Card
Please make su re the M32 series mixer rmware is upda ted to the most recent r elease version. Ch eck the product p age on
klarkt eknik.com for the la test available rmware.
CAUTION: Before installi ng the interface c ard into the consol e, make sure that the conso le’s power switch is tur ned o .
Malfunc tions or elec trical shock may o ccur otherwis e.
Installation process:
1. Make su re that the mixer’s power is tu rned o .
2. Remo ve the outer screws th at hold the current c ard or slot cover in place.
3. Gen tly slide the card ou t of the slot and set it s omewhere safe alo ng with the faste ning screws.
4. Be fore removing the DN 32-LIVE car d from its protec tive bag, touch th e metal chassis of th e console to prevent el ectrostat ic discharges
from a ecting th e sensitive elec tronic componen ts. Hold the card by t he face plate or the t wo small handles, avoidin g contact with
the compo nents on the circu it board.
5. Alig n both edges of the c ard with the guide r ails inside the slot an d carefully inse rt the card into th e slot. Push the card f ully into the
slot so that i t sits ush ag ainst the console ’s rear panel, e nsuring that the con tacts are pro perly connecte d internally. The scr ew holes
should be na turally aligned.
6. Faste n the card with the in cluded screws, o r with those that or iginally held the ol d card in place. Damage o r malfunction s may occur if
the card is n ot fastened.
7. Place t he old card into the p rotective bag th at the DN32-LIVE card was p acked in, and repack age for safe stor age.
3. Recommended Minimum Hardware
Windows
• Core 2 Duo CPU, 2 GHz
• USB 2.0
• 1 GB RAM
See Spec i cations for r ecommended oper ating systems.
Mac
• 1.5 GHz CPU
• USB 2.0 port
• 512 MB RAM
Page 6

10 11Qui ck Start Guid eDN32-LIVE
4. USB Operation
The USB connec tion on the DN32-LIVE c ard provides 32 channe ls of bi-direc tion audio I/O via USB 2.0, as well as MI DI I/O and remote DAW
control v ia HUI/MackieContr ol emulation. Make sur e to download and ins tall the free ASIO d river from klark teknik.com if you a re using a
Windows PC . The DN32-LIVE is CoreAudio c ompliant and there fore does not need a d river for use on Mac co mputers.
4.1 Driver Control Panels
Once the dr iver is installed, yo u can open the contro l panel by double- clicking on the sm all tray icon. These sc reens will allow con guring
the DN32-LIVE c ard in the M32 as an audio int erface for your c omputer.
Info – displays th e driver version num ber and device IDs.
Status / USB Au dio Device – displa ys the card name and se rial number.
4.2 USB Con guration
After th e console has booted u p, you can access the Se tup screen and navi gate to the Card tab to se lect the USB inter face input/ou tput
con guration. Depe nding on your applic ation, you may want to sel ect an option oth er than the maximum 32 x 32 chan nel count to
preserve system resources.
Bu er Settings – allows the stream and A SIO sound bu ers to be set. Use sm all bu ers for sh ort latency whe n monitoring
through t he PC. Use large bu ers and longer la tency for prevent ing audio glitches o n old, low-perfo rmance PCs.
32 in / 32 out – This mo de allows the full po tential of the inter face to be tapped . Note that the compute r needs to be able to han dle that
amount of co ncurrent I/O stre am without any glitc hes. Depending on i ts speed and memo ry con gu ration, some opti mization for audio
recordi ng might be require d.
It is also pos sible to run a virt ual sound check of a ll 32 input channels by re cording them dire ctly to a computer d uring a brief line c heck.
The per formers can leave t he stage while you p lay back the recorde d instruments f rom the hard drive a nd tweak the sound ac cordingly.
Page 7

12 13Quick Star t GuideDN32-LIVE
16 in / 16 out – If you don’t ac tually need mor e than 16 concurrent inp ut and output tra cks to be exchange d between the con sole
and your PC, t hen this mode might b e more appropriat e for you. First, it w ill slow the requir ed bandwidth on th e interface down .
Second, t here will be no excess ive I/O tracks in your DAW con guration that mig ht clutter your se tup. Third, it allows yo u to run a
fully-f eatured zero-la tency overdub set up, which would be imp ossible if signals wer e run through the com puter. In this case, the 16 inp ut
signals are p ut on channels 1-16, while the tape (ca rd) returns are pu t on channels 17-32. The monitoring is di rectly fed fr om Ch1-16 as
usual, incl uding all processi ng and e ec ts. It remains ind ependent from any c omputer audio laten cy, even though you can h ear back all
the recor ded tracks wit hout any re-patc hing.
32 in / 8 out – This mo de is tailored to sui t a typical stu dio and overdub recor ding situation, wi th many input channe ls but only a few
output c hannels for monito ring of previousl y recorded takes.
8 in / 32 out – This is a u seful mode for u tilizing the excell ent audio engine and e ects proc essing of the conso le during na l mixdown
of your proj ect. All 32 track s would be fed from yo ur DAW into the console wher e all the magic happen s. Then only 2-8 track s of the
complete m ixdown would be sent b ack to the DAW.
8 in / 8 out – This s etting is light on p rocessing power wh ile still providin g enough I/O for track ing drums or multip le mics on an acoust ic
guitar or p iano.
2 in / 2 out – For re cording just the m ain stereo mix, or pl aying back from t ypical media player a pplications whe re often only two
channels ar e needed. Use this mo de in order to remove all un used channels that wo uld otherwise c lutter your PCs a udio applications.
Note that th e Routing / Home and Ca rd Out tabs allow audi o from your comput er to be sent to the desir ed destination . The Routing/home
tab now o ers to selec t two alternati ve input assignmen ts, separately fo r Recording and Playb ack operation. S ee chapter 5.3 for det ails.
5. SD Card Operation
The DN32-LIVE c ard features a pair o f SD/SDHC slots that provi de 32 channels of multit rack recording an d playback. Simple s ession
managemen t and up to 100 markers all ow playback from any d esired point, easi ly cueing up cert ain songs or backin g tracks.
Automatic o r manual switching f rom recording to p layback routing pr esets makes it eas y to monitor input cha nnels directl y while
recordi ng, and then listen to th e playback from the c ard returns. Th e SD cards operate ind ependently fro m the USB connection ,
giving you m any options for how you i ncorporate outb oard plugins, mult ichannel input and li ve recording.
5.1 Overview
Most of th e con guration and o peration for the SD c ard slots and USB conn ection are handl ed on the Setup/Car d page of the console.
From this pag e, the SD slot or USB can be sele cted for playba ck, SD slot 1 or 2 can be sel ected for recor ding or marker editi ng, and the
channel co unt can be speci ed for recor ding.
A proper ly installed and fo rmatted card w ill appear near the to p with a green square, w ith its le s ize and remaining
recordi ng time indicated. SD c ards up to 2 GB and SDHC car ds up to 32 GB are o cially sup ported, for use w ith FAT32 formatting.
It is best p ractice befo re important re cordings to press t he console’s Utilit y button and for mat the card. Form atting will dele te all data to
remove fra gmentation and to en sure proper writ e performance.
A list of rec orded sessions a nd markers for the c urrently-sele cted session a re listed below the r ecorder graphic s. Transport fun ctions are
controll ed with the rst 3 encoders. M arkers can be adde d to a session during r ecording or playb ack to indicate the s tart of a song or set.
Press the p age down to the 2nd layer of con trols to make changes to t he con gura tion.
Page 8

•
•
•
14 15Quick Star t GuideDN32-LIVE
The ‘Channe l Routing’ sec tion is explaine d in chapter 5.3.
The SD opera tion can also be cont rolled by any of the remot e apps, as well as MIDI and the o nboard assignab le controls.
In the M32-Edit s oftware, mo st of the con guration sett ings are made on the Se tup/Card page, whil e the recording fu nctions and marker
manageme nt are done in the Recor der window.
5.2 Recording and File Management
Audio reco rding on the DN32-LIVE car d can accommodate ei ther 8, 16, or 32-channel sess ions of 44.1/48 kHz / 32-bit P CM WAV le s. As
soon as re cording is initiate d to one of the SD cards, a ne w session is automat ically created, all owing the entire take t o be organized
cohesivel y. To ensure contin uous recording of t he entire perf ormance, a recordin g session that has st arted on one car d can seamlessly
span over to th e other card slot whe n the rst becom es full. In this cas e, the same session na me will appear on bot h cards.
5.3 Channel Routing
The M32 has a conven ient routing pres et that allows the inp ut channels to quick ly ip between th e desired monitor ing for the recording
process , and the playback fr om the DN32-LIVE card once r ecording is nished. While Playb ack would typic ally be used to assign t he card
output s to the mixer inputs, R ecording would patc h those signals to cha nnel inputs that sha ll be on mix, i.e. not neces sarily the ones
being rec orded on DN32-LIVE.
On the Rout ing/Home page, se lect ‘Record ’ with the 6th encoder a nd adjust the input r outing using encod ers 1-5 (most likely Local or
AES50 from a s tagebox). Then turn th e 6th encoder to selec t ‘Play’ and press t he encoder. Now Card 1-8, 9-16, etc. can be s elected using
encoder s 1-5 for the playback pre set.
On the Set up/Card page, you can n ow use the ‘Channel Rou ting’ secti on to quickly ip between the se 2 routing scenar ios. Keep in mind
that the Rec ord/Play preset s can be toggled us ing an assignable con trol button, sc ene/snippet automa tion, or even MIDI comma nd.
A third opt ion on the Setup/Car d page, ‘Automatic’, allows the shi ft from input m onitoring to playb ack monitoring to f ollow the current
operati on. When Stop or Record i s pressed in the tr ansport contr ol, the ‘Record’ ro uting will be assig ned, and when Play or Paus e is active,
the ‘Play’ p reset will be use d.
5.4 Separating WAV Files
After re cording is complete, t he session can be se parated into indiv idual WAV les in several ways:
• Play the audio from th e SD card directly i nto a DAW program, e.g. Tracktio n, Reaper, ProTools, Cubas e, Logic, Ableton
(jus t to name a few) via the USB conne ction
• Directly open t he multi-chann el le using Audacit y (brilliant open so urce audio editor ava ilable from ww w.audaci tyteam.org/ )
• Using our Python s cripts, downlo adable from klark teknik.com
Since a singl e session may includ e a full set of songs, ma rkers can be place d during recordin g or while listening to p layback. They can
also be adju sted using the remo te apps by using the ‘Edi t Marker’ sec tion. This makes it eas y to organize the se t and quickly jump to a
parti cular section o f the recording for p layback.
Visit the w iki page at behring erwiki.musi c-group.com f or more informati on about separat ing WAV les.
Page 9

16 17Quick Star t GuideDN32-LIVE
6. Battery Option
The DN32-LIVE ha s a battery slot th at can accommodate a CR123A Lit hium cell batter y. This provi des protecti on in case of power blackout,
ensuring s ecure le ha ndling.
To attach the b attery, r st turn the conso le power o and remove the D N32-LIVE car d from the expans ion slot. Locate the b attery slot and
install t he battery, makin g sure to orient the po sitive end toward the “+” mark on the slot .
Reinsta ll the DN32-LIVE card as des cribed in chapte r 2.
Speci cations
Connectors
USB 2.0 high spee d, type-B (audio/MIDI i nterface) 1
SD card slot s, SD/SDHC 2
Batter y for power blackou t protection (optio nal) CR123A Lithium cell
Input/Output Characteristics
USB Audio input / o utput channels, du plex 32, 16, 8, 2
SD card inpu t / output channels 32, 16, 8
Sample rat es (console clock) 44.1 kHz / 48 kHz
Sample wor d length 32 bit PCM
File form at (uncompressed mul ti-channel) WAV 8, 16 or 32 channels
SD/SDHC Card ca pacity, each slot 1 to 32 GB
Maximum r ecording time in on e consistent sess ion
(32-channel, 4 4.1 kHz, 32-bit on t wo 32 GB SDHC media)
Typical per formance recor ding or playback
Indicators
SD card soc ket indicator for c ard activit y 2 LEDs, amber
USB 2.0 interf ace active 1 LED, red
Recomm ended Oper ating System s
Windows DAW appl ications
(ASIO, WASAPI and WDM au dio device interf ace)
Mac OSX DAW applic ations
(Intel CPU only, no PPC su pport, CoreAudio)
Physical
Dimensio ns (H x W x D) 30 x 165 x 138 mm (1.2 x 6.5 x 5.4")
Weight 0.14 kg (0.3 lbs)
*OSX 10.6.8 Core Audio supports up to 16x16 channel audio
200 min
32 channels on cl ass 10 media,
8 or 16 channels on c lass 6 media
Win 7 32/64- bit, Win10 32/64-bit
Mac OS X 10.6.8*, 10.7.5, 10. 8, 10.9, 10.10, 10.11, 10.12
7. Firm w are Upd ate
Downloa d the latest r mware package le from the DN32-LI VE product page o n klarkteknik .com. Unpack the zip f older and load the
r mware le onto t he ash drive’s root dir ectory. Plug the ash drive into th e M32’s top panel USB port.
Press and ho ld the USB View butto n while powering on the c onsole. The consol e will automaticall y begin updating th e rmware, which
can take seve ral minutes to compl ete. When nishe d, power the console o and on again and re sume normal opera tion.
NOTE: make sur e the update le s for card rmware and console rmware a re not used in the USB root d irectory at t he same time. Do one
update af ter the other, making su re to remove the r mware le f rom the ash dr ive after succes sful installat ion. You may, however, copy
the conso le rmware l e into any subfolder o n the USB drive and star t the update from S etup/Global cons ole UI.
Page 10

18 19Quick Start G uideDN32-LIVE
Page 11

 Loading...