

Page 1
720P Tissue Box
- HD Stealth Camcorder -
User Manual
Ver. 1.4.0
F40709000
Oct 27, 2014
Page 2

Table of Contents
Quick Start Guide................................................................................................................................... - 2 -
Diagram................................................................................................................................................... - 3 -
LED Indicator Status..............................................................................................................................- 4 -
Package Contains..................................................................................................................................- 5 -
Compatible Storage............................................................................................................................... - 6 -
IR Remote Controller............................................................................................................................. - 7 -
OSD Menu Structure Tree.................................................................................................................... - 8 -
Live View Screen.....................................................................................................................- 9 -
OSD Operation ......................................................................................................................- 10 -
Specification.......................................................................................................................................... - 15 -
Page 3
- 2 -
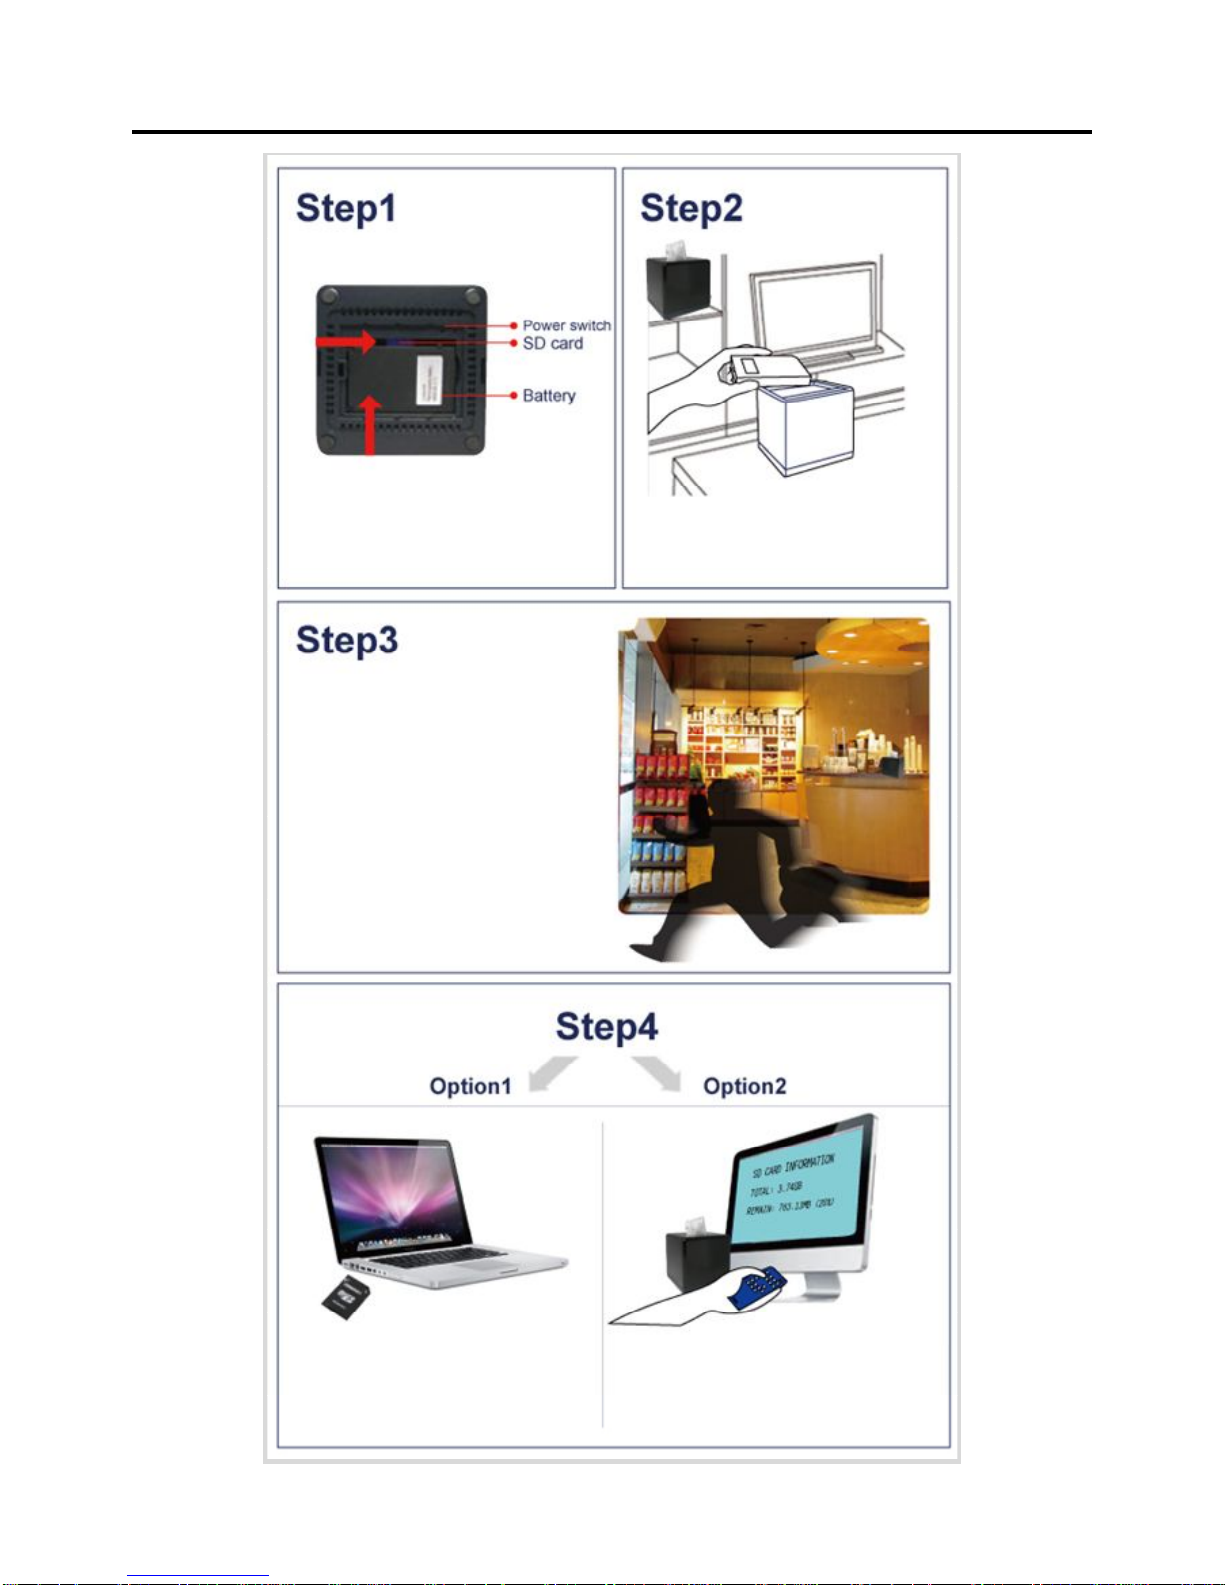
Quick Start Guide
* insert a battery and a SD card
* slide the power switch to
“On”
* locate the DVR to a proper
place
* PIR will be triggered when
movement pass by
* insert the SD card to your PC
and check the videos
* play the videos back directly
through the monitor
Page 4

- 3 -
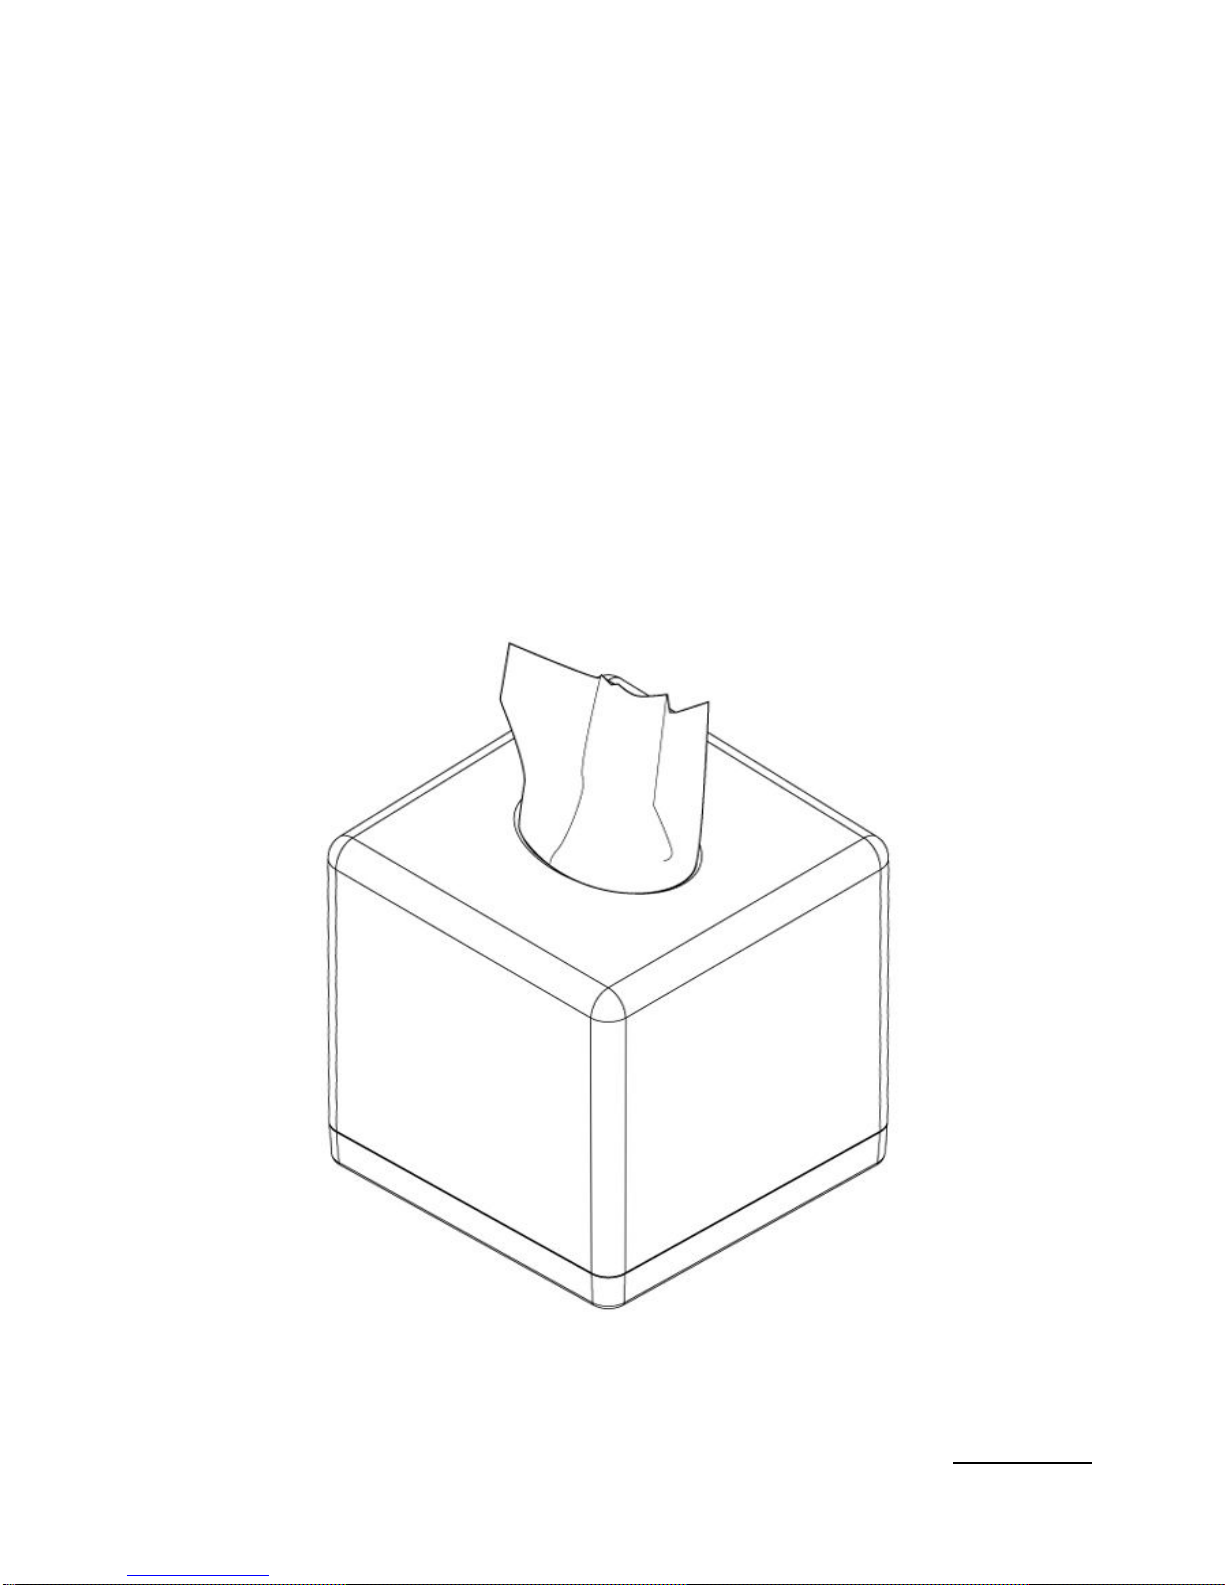
Diagram
Appearance
Perspective
Page 5

- 4 -
LED Indicator Status
LED will light up when you turn the power switch to "ON", and then LED will follow below
behavior.
Power Indicator
(Red LED)
On
Power on
Blinking
N/A
Off
Power off
Blinking
Fast Blinking (0.25s) :
SD Card Full
SD Card
Indicator
(Green LED)
On
System ready and Micro
SD card is working
normal
Blinking
Slow Blinking (1s) :
Recording
Off
Micro SD card is
abnormal or not
working
Blinking
Fast Blinking (0.25s) :
less than 20% (around)
battery power left
Battery Indicator
(Yellow LED
Device: on)
On
Powering or Battery full
of charge
Slow Blinking (1s) :
more than 20%
(around) battery power
Off
N/A
Battery Indicator
(Yellow LED
Device: off)
On
Powering
Blinking
N/A
Off
Battery full of
charge
How to Charge The Battery
Connect the provided power adapter with the cradle. The charging time is around 3 hours and
the green LED will be on. The battery, after fully charged, can last for 6.5 hours at least under
continuous recording. However, the battery power will be dramatically reduced when recording
with IR LED especially at night. Under motion activation or power saving mode, Motion
Activated Tissue Box can last for longer.
NOTE: Under low temperature conditions, the battery will have a shorter life than normal.
NOTE: Please use the bundled power adapter only. Damage which is caused by other
power adapter will be beyond warranty.
NOTE: please re-charge the battery to full when receiving SC1740
NOTE: For better performance it is recommended to charge the battery once every 3 weeks.
Page 6
- 5 -
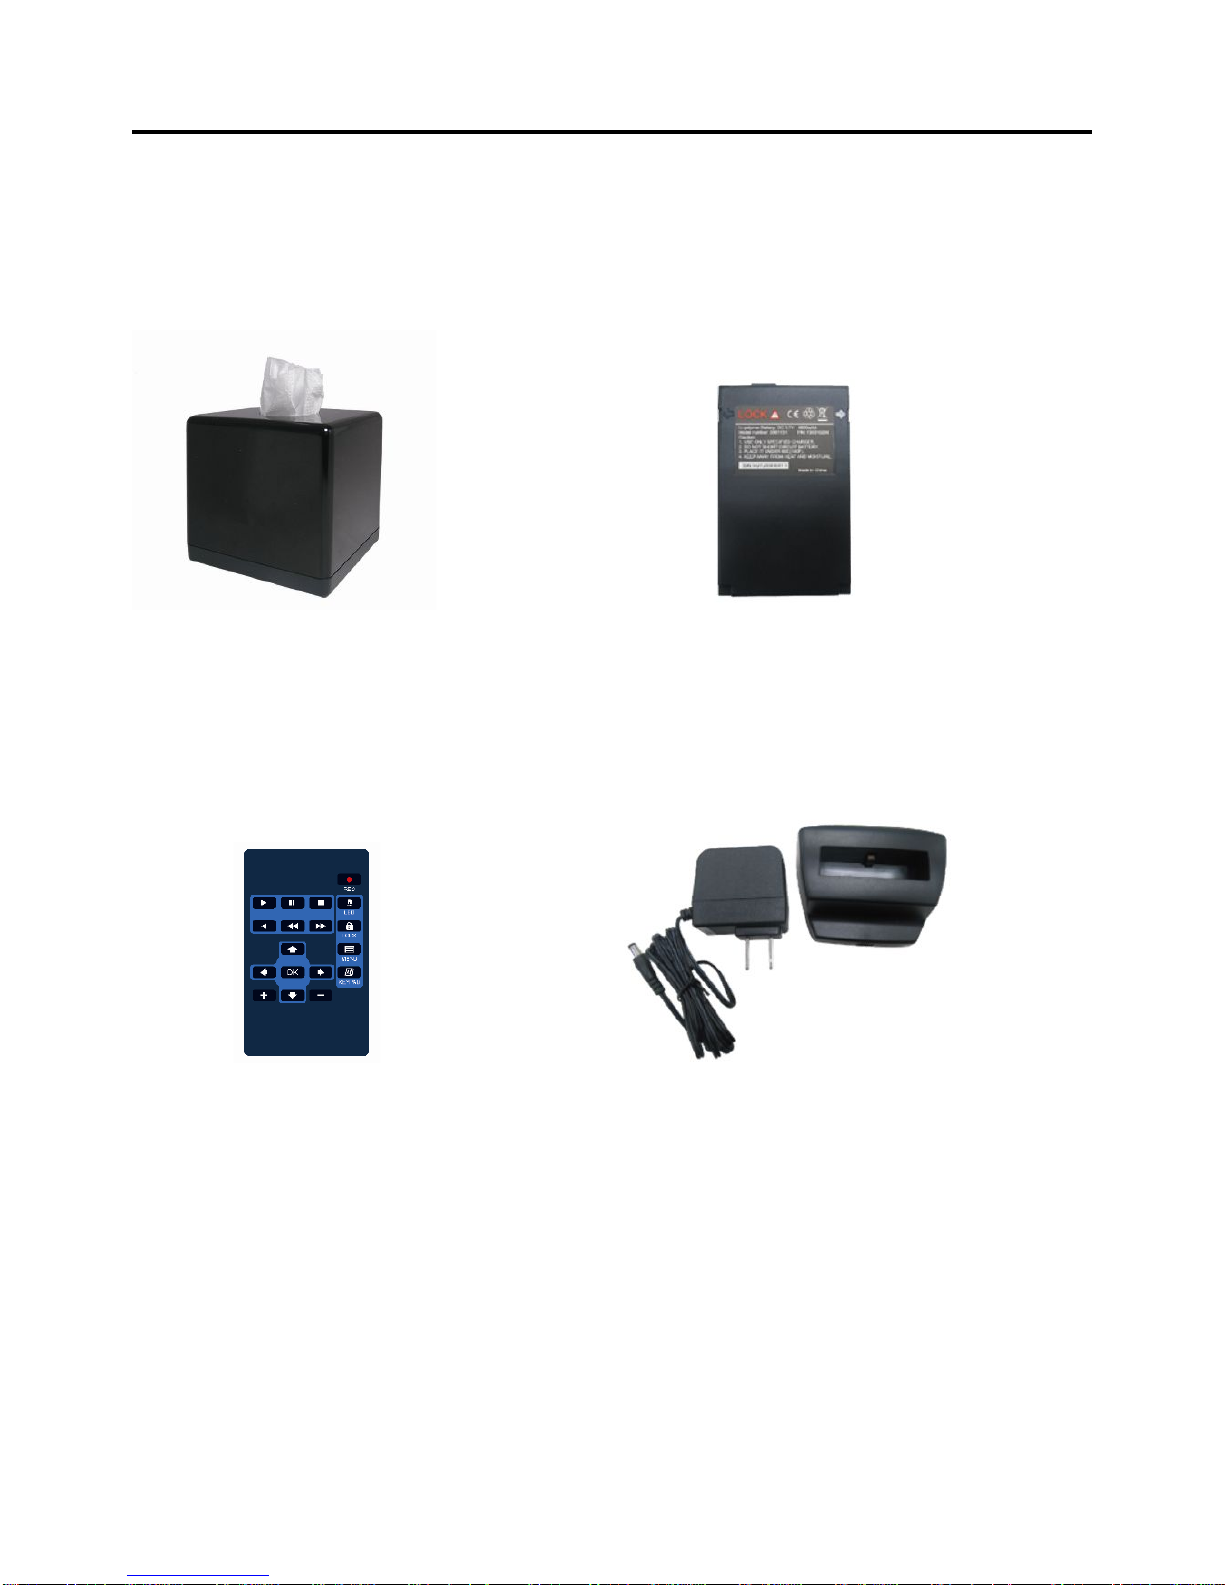
Package Contains
SC1740 Main Unit x 1 3.7V 4800mA
Li-polymer Battery x 1
Remote Control x 1 Power Adapter & Cradle x 1
Page 7

- 6 -
Compatible Storage
In order to work properly, below micro SD card brands and class 6 above are highly
recommended.
* Apacer
* Toshiba
* Sandisk
* Kingston
Micro SD card Class 6 or above is highly recommended, and will have smoother footage.
Please format the micro SD card or SD card by the 720P DVR series first before recording.
IMPORTANT:
1. Please format the SD card by tissue box first before recording.
2. Please put SD card inside first before starting to use the device.
3. Tissue box will turn off automatically under below situation.
No SD card put inside
Press menu button in playback mode
Out of OSD
Card full when storage mode is fullstop.
Schedule setting is “none”
Page 8

- 7 -
IR Remote Controller
Icon Button
Function
Description(s)
Recording
Start to recording manually or to power off the device.
Lock / unlock
Key lock / unlock
Menu
Exit to last page or enter into OSD setting.
UP / DOWN / LEFT
/ RIGHT
Enter
Confirm or enter to next page.
Playback /
1X forward
Go to playback list or move 1X forward.
Pause
Pause video playing.
Stop
Stop video playing.
Rewind
1X rewind.
Fast forward
1X / 2X / 4X / 8X fast forward
Fast rewind
1X / 2X / 4X / 8X fast rewind
LED
LED on / off
No defined
No defined
No defined
Page 9

- 8 -
OSD Menu Structure Tree
MENU
Recording
Triggering
Storage
Setting
Frame Rate
Resolution
Quality
PIR auto off time
Schedule setting
Total Space
Total Time
Mode
Format Storage
1, 2, 3, 4, 5, 10, 15, 30 fps
HD/D1
Best / Better / Fair
5, 10, 15, 20, 60 seconds
Overwrite / Fullstop
Buzzer Setup
Status Display
Audio
Date & Time
Firmware Status
Factory Default
On / Off
On / Off
On / Off
YYYY/MM/DD, MM/DD/YYYY,
DD/MM/YYYY
Time Left
Page 10

- 9 -
Live View Screen
Recording mode Storage mode power indicator
Recording resolution Frame rate
Storage information Keypad lock mode
Date/time stamp
Page 11

- 10 -
OSD Operation
Press "Menu" to get into the On-Screen-Display (OSD) page and modify the default
setting(s). There are five categories in the OSD, they are: "Recording," "Triggering,"
"Storage," and "Setting".
In this page, please press "OK" to enter into any mode, which you would like to adjust. For
example, in recording mode, using to select items and using
to change setting.
After all settings been done, press to exit the setting mode.
1) Recording:
Press to change setting.
Press to select item.
Page 12

- 11 -
2) Triggering:
In the "Schedule," you can select all / column / row to change the schedule setting by hour,
day or week at one click
Press to change setting.
Press to select item.
Page 13

- 12 -
3) Storage:
4) Setting:
Day & Time
Press to change setting.
Press to select item.
Total space and total time will be calculated
automatically.
Press to change setting.
Press to select item.
Buzzer "off" will mute the remote control sound.
Status display "on" will show all the setting icons
on the live-view screen.
MIC in "off" will mute the video recording.
Press to select item.
Press to change values
Date & time format: YYYY/MM/DD,
MM/DD/YYYY, DD/MM/YYYY
Page 14

- 13 -
Factory Default
5) Playback mode:
**File Serch mode
Factory default will show all the default
values in factory setting.
Press “Yes” to load default setting
Press to enter Playback Menu.
Press to select item.
Press OK to enter the selected item.
Select the file you would like to playback.
Press “OK” to play the file
Press back to file list
Press in file list page, and then DVR
will turn off.
Press for page up and down
Page 15

- 14 -
** Date / Time Search
Press to select item.
Press to change values
Press “OK” to play the file
Press when file playback, and
then DVR will turn off.
Page 16

- 15 -
Specification
Dimension
135*135*128 mm
Operation Temperature
0 ºC ~ + 50 ºC
Video Resolution
HD (720*1280) / D1 (720*576 PAL /
720*480 NTSC) @30fps
Power Supply
Li-polymer 4800 mAh
Video Compression
H.264
Video Recording Mode
PIR Motion / Panic
Playback
Fast Forward / Rewind
Recording Quality
Best / Better / Fair
Recording Frame Rate
1, 2, 3, 4, 5, 10, 15 & 30 fps
Video format
AVI
Recording Storage
SD card (Daughter Board)
Antenna Gain
13dBm @ 6Mbps
10dBm @ 54Mbps
Receiving Sensitivity
90dBm @ 6Mbps
72dBm @ 54Mbps
Audio Recording
Yes (Optional)
Audio Input
Condenser Microphone
Audio Output
Analog 1 channel output
Control
IR remote control
Power Consumption (recording status)
nominal 2.0W
Mission Standby Time
Around 700 hours (29 days +)
PIR Auto-off Time
5, 10, 15, 20, 60 seconds
Video Storage Mode
Full-stop or Overwrite
PIR Motion Detection
Support
Key Lock / Unlock
Support
Angle of View
120º x 96º x 72º
Low-lux Environment
Support
Page 17

- 16 -
Thank you
for purchasing our 720P Tissue Box. Please read this manual before
installation.
For customer support
, contact your dealer, keep your Invoice for further support.
Do not open/modify the device, as it may cause damage to the unit and
void the Warranty. For internal repairs, consult your dealer or an Authorized
Service Center.
Do not use any accessories other than what comes with the unit otherwise, it
would void the warranty.
Protect from humidity.
Do not put it in water and be careful to protect it from
rain, sea water, or high humidity environment etc.
Protect from high temperatures
To avoid damage or mis-operation of the device, only use in temperature of 0 ~
+40°C.
Do not bring
the device suddenly from a hot to a cold place, or vice versa. This
may cause damaged to the inside of the unit by creating condensation.
EU Environmental Protection
The symbol of crossed-out garbage shows that this product should not be treated
as household waste, and it falls into the category of electric /electronic
equipment for recycling. This electronic device should not be disposed in a
regular trash. We strongly advice you to contact related authorization before
you dispose this product.
 Loading...