How it Works
Log In / Sign Up
Buy Points
How it Works
FAQ
Contact Us
Questions and Suggestions
Users
KitchenAid
Loading...
K
KSF22C4CYY01
KSF26C4XY
2
KSF26C4XY*0 Series
KSF26C4XYB
7
KSF26C4XYB00
2
KSF26C4XYB02
2
KSF26C4XYB03
2
KSF26C4XYW
7
KSF26C4XYW00
2
KSF26C4XYW02
2
KSF26C4XYW03
2
KSF26C4XYY
9
KSF26C4XYY00
2
KSF26C4XYY01
KSF26C4XYY02
KSF26C4XYY03
2
KSF26C6XY
KSF26C6XY*0 Series
KSF26C6XYY
8
KSF26C6XYY00
2
KSF26C6XYY02
2
KSF26C6XYY03
2
KSF26C6XYY04
2
KSF26C7XY
5
KSF26C7XY*0 Series
KSF26C7XYY
6
KSF26C7XYY00
2
KSF26C7XYY02
2
KSF26C7XYY04
2
KSFS25FK
KSFS25FKBL00
2
KSFS25FKBT00
2
KSFS25FKWH00
2
KSGB900E
KSGB900EBL
6
KSGB900EBL0
KSGB900EBS
KSGB900ESS
6
KSGB900ESS0
KSGB900ESS1
2
KSGB900EWH
KSGB900EWH0
KSGG700E
KSGG700EBL
2
KSGG700EBL0
KSGG700EBS
8
KSGG700EBS1
2
KSGG700ESS
10
KSGG700ESS0
KSGG700ESS1
KSGG700ESS2
2
KSGG700EWH
2
KSGG700EWH0
KSHS22Q
KSIB900ESS
7
KSIB900ESS0
2
KSIB900ESS1
2
KSIB900ESS2
2
KSM100
KSM100PSDP0
2
KSM100PSER0
2
KSM100PSMC0
3
KSM100PSOB0
3
KSM100PSTCB0
KSM100PSWH0
3
KSM100PSWW
2
KSM100PSWW0
3
KSM100PSWW - Ultra Power Plus Stand Mixer
KSM103
7
KSM105
KSM105GBCBU0
KSM105GBCER0
KSM105GBCMC0
KSM110
5
KSM110PS - Custom - Stand Mixer
KSM120
2
KSM120BLQBU0
KSM120BLQCB0
2
KSM120BLQCL0
2
KSM120BLQCU0
KSM120BLQER0
KSM120BLQGA0
KSM120BLQGC0
KSM120BLQMY0
KSM120BLQOB0
KSM120BLQSM0
KSM120BLQTG0
KSM120BLQWH0
KSM120BLQWM0
2
KSM120ER0
2
KSM120MC0
2
KSM120OB
KSM120OB0
2
KSM120WH0
2
KSM15
KSM150
9
KSM150AGBCA0
3
KSM150AGBCS
2
KSM150AGBCS0
4
KSM150AGBES0
4
Loading...
Loading...
Nothing found
KSGG700ESS2
Installation Guide
24 pgs
1.02 Mb
1
Owner’s Manual
23 pgs
1.42 Mb
4
Table of contents
Loading...
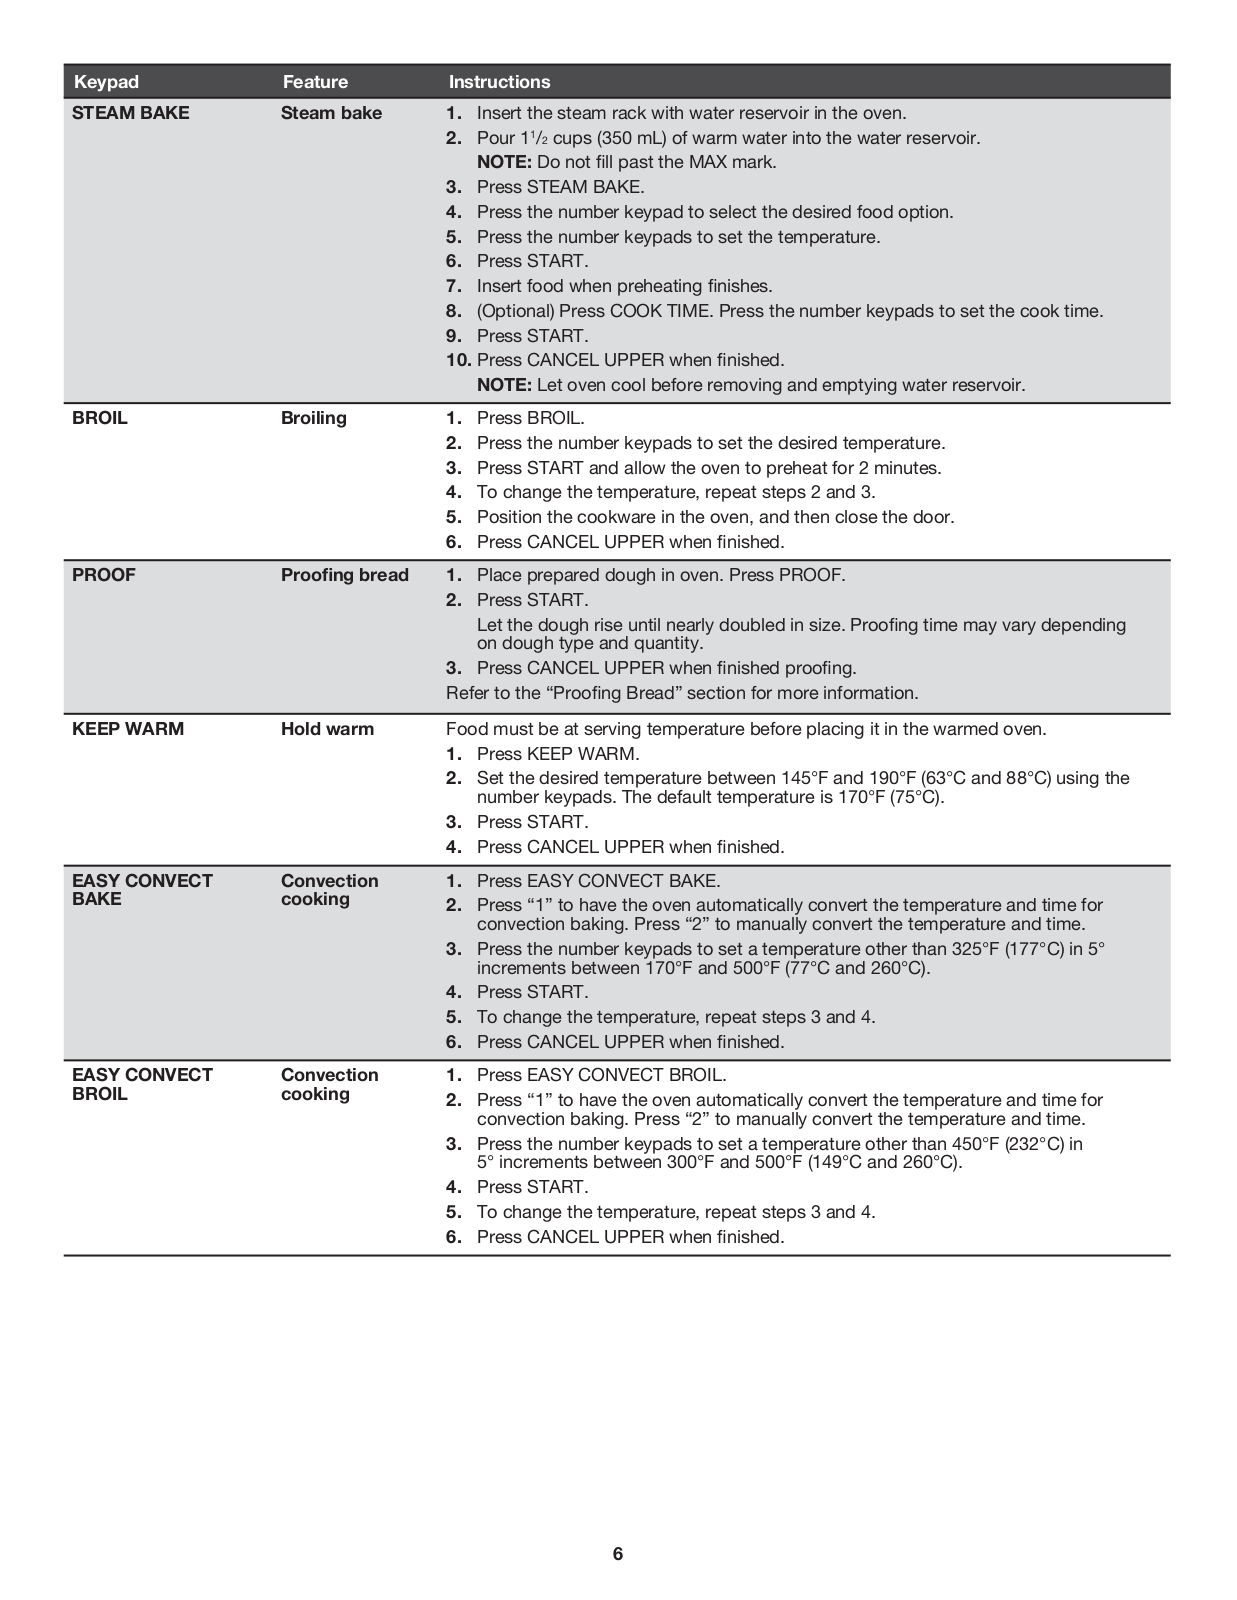
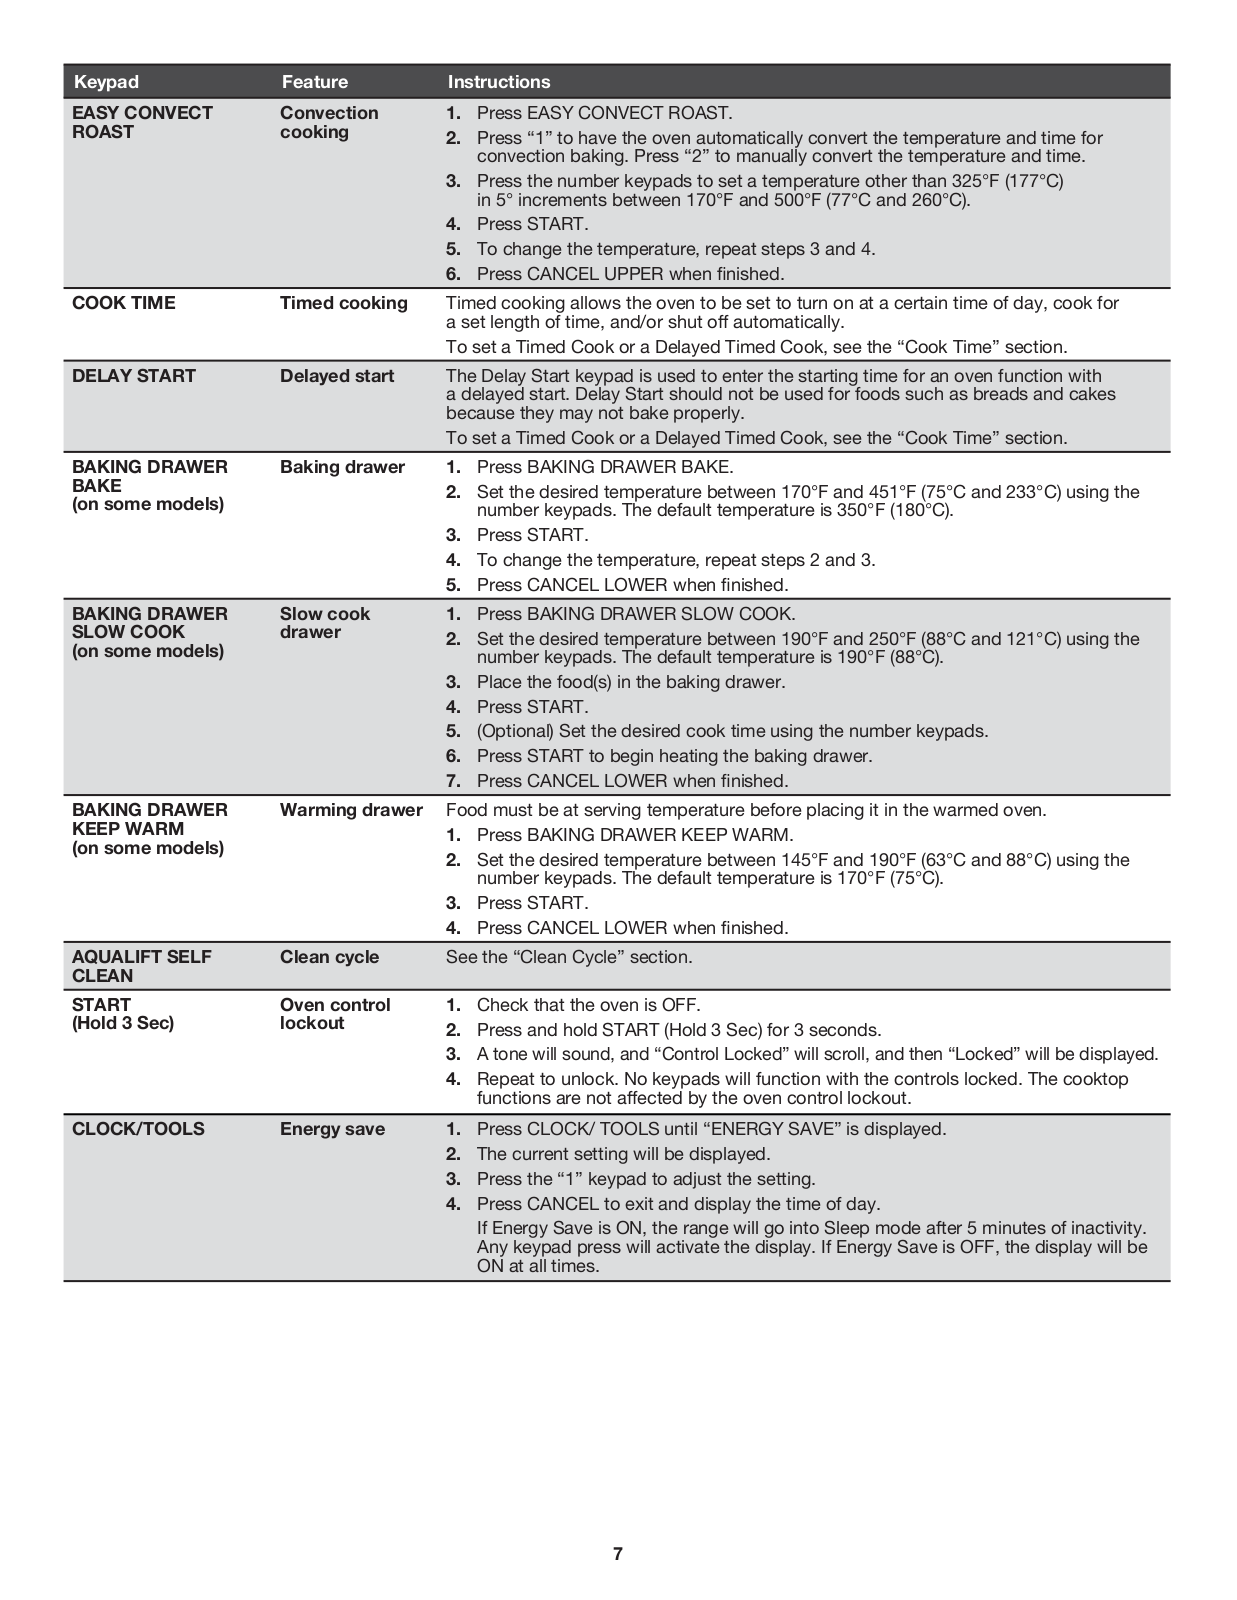
KitchenAid KSGG700ESS2 Owner’s Manual
...
KitchenAid Owner’s Manual
Download
Specifications and Main Features
Frequently Asked Questions
User Manual
Download
Loading...
+
16
hidden pages
Unhide
You need points to download manuals.
1 point = 1 manual.
You can buy points or you can get point for every manual you upload.
Buy points
Upload your manuals