

KitchenAid KSB8280CP Owner's Manual
KSB82XX
W11100672A.indb 1 4/29/2019 5:09:11 PM
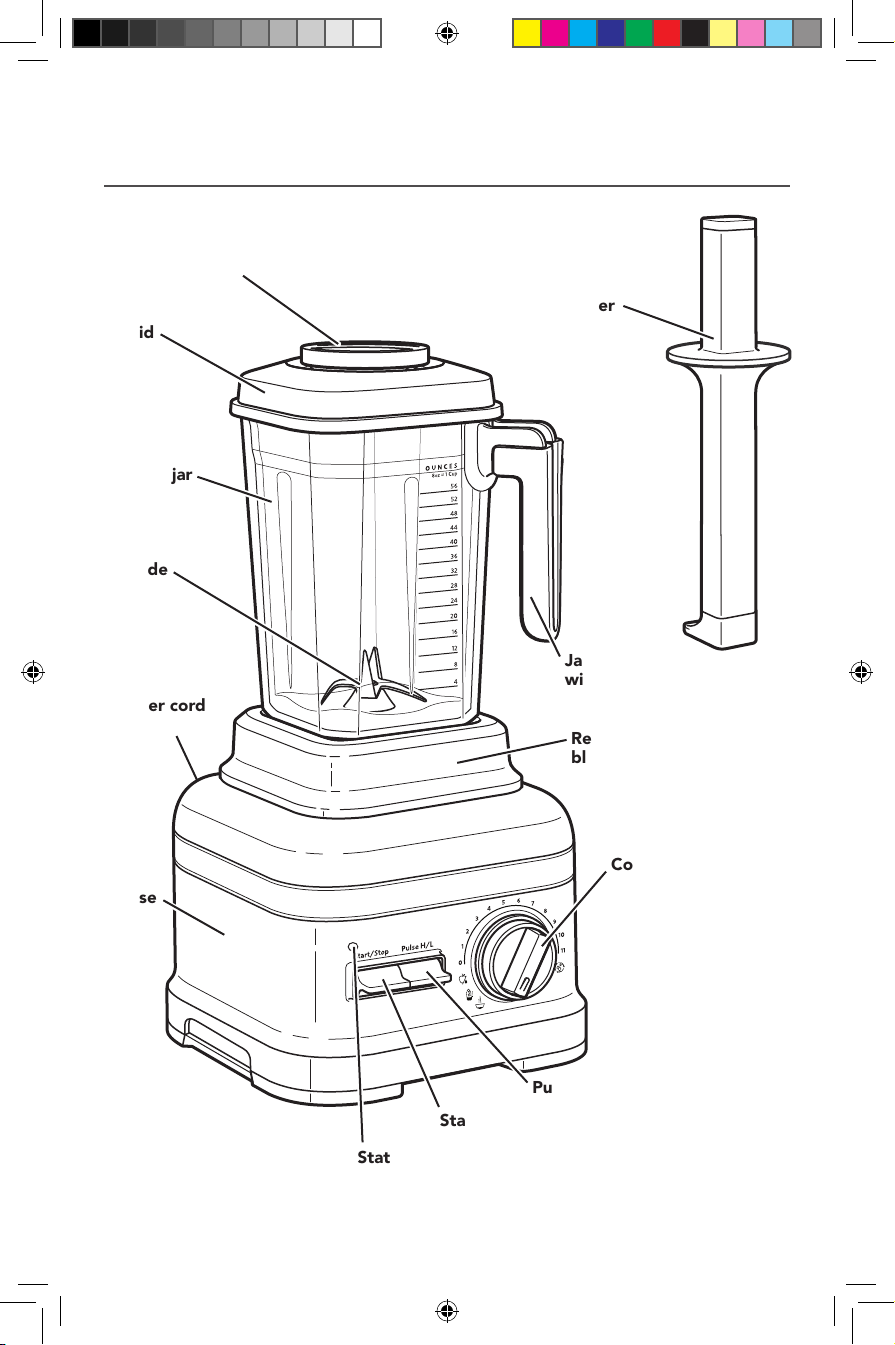
PARTS AND FEATURES
PARTS AND ACCESSORIES
Ingredient-measuring cap
Lid
Thermal control
blender jar
Blade
Power cord
(not shown)
Flex Edge
tamper
Jar handle
with Soft Touch
handle grip
Removable
blender jar pad
Control dial
Base
Pulse toggle switch
Start/Stop toggle switch
Status indicator light
W11100672A.indb 2 4/29/2019 5:09:12 PM
ENGLISH
BLENDER SAFETY
Your safety and the safety of others are very important.
We have provided many important safety messages in this manual and on your
appliance. Always read and obey all safety messages.
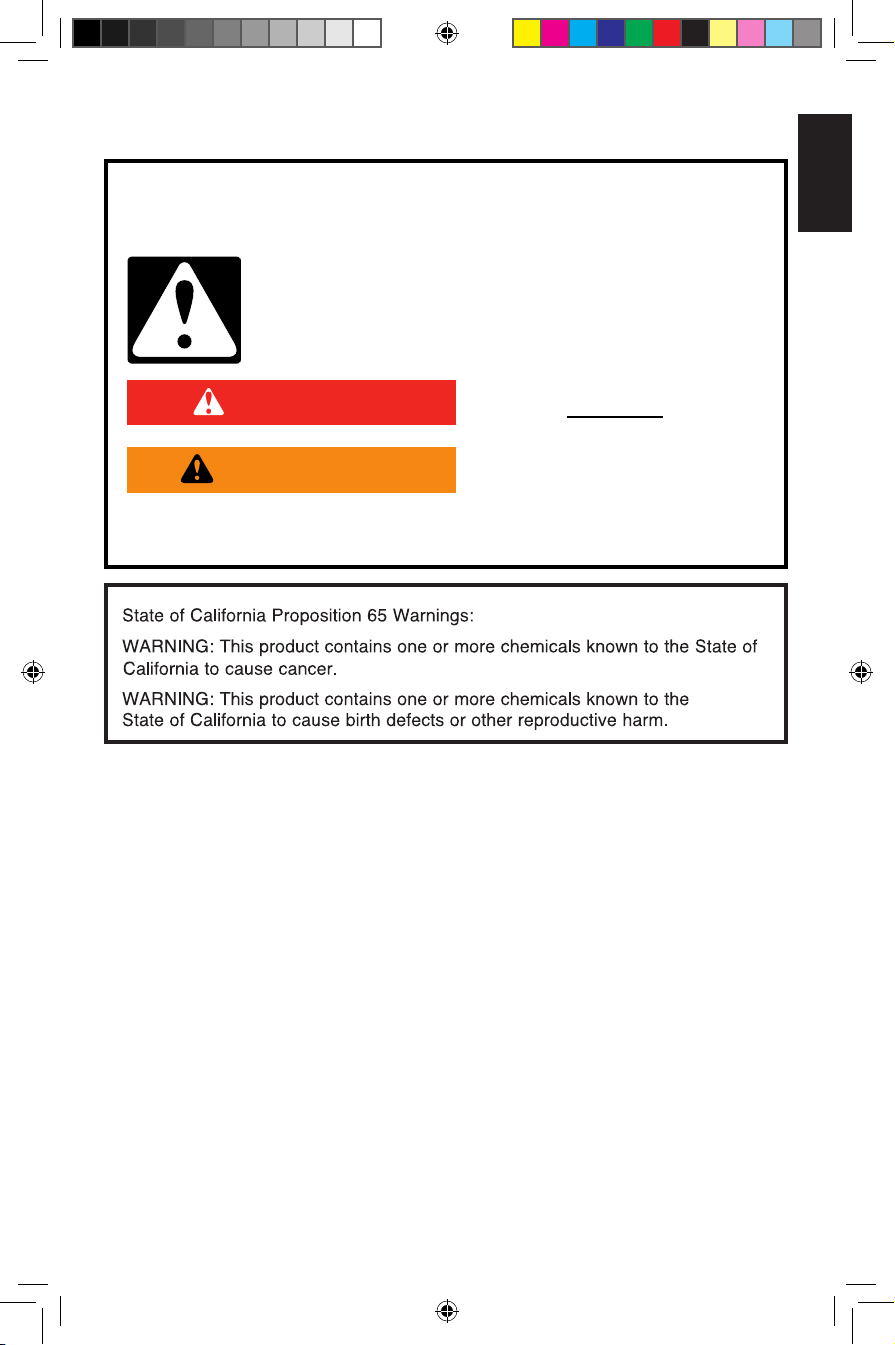
This is the safety alert symbol.
This symbol alerts you to potential hazards that can kill or hurt you
and others.
All safety messages will follow the safety alert symbol and either the
word “DANGER” or “WARNING.” These words mean:
You can be killed or seriously injured
DANGER
WARNING
All safety messages will tell you what the potential hazard is, tell you how to reduce
the chance of injury, and tell you what can happen if the instructions are not followed.
if you don't immediately follow
instructions.
You can be killed or seriously injured
if you don't follow instructions.
IMPORTANT SAFEGUARDS
When using electrical appliances, basic safety precautions should always
be followed, including the following:
1. Read all instructions.
2. To protect against risk of electrical shock, do not put Blender in water
or other liquid.
3. Close supervision is necessary when any appliance is used by or near
children.
4. Unplug from outlet when not in use, before putting on or taking off parts,
and before cleaning.
5. Avoid contact with moving parts.
6. Do not operate the Blender with a damaged cord or plug or after appliance
malfunctions, or is dropped or damaged in any manner. Return appliance
to the nearest Authorized Service Center for examination, repair, or electrical
or mechanical adjustment.
7. Do not use outdoors.
8. Do not let cord hang over edge of table or counter.
9. Keep hands and utensils out of container while blending to reduce the risk
of severe injury to persons or damage to the Blender. A spatula or scraper
other than the provided Flex Edge tamper may be used, but must be used
only when the Blender is not running.
W11100672A.indb 3 4/29/2019 5:09:12 PM
BLENDER SAFETY | 3
BLENDER SAFETY
10. Blades are sharp. Handle carefully.
11. The use of attachments, including canning blender jars, not recommended
by KitchenAid may cause a risk of injury to persons.
12. Do not use appliance for other than intended use.
13. Always operate Blender with cover in place.
14. When blending hot liquids or ingredients, ingredient-measuring cap should
remain in place over the lid opening. Always start on lowest speed and
slowly ramp to desired speed when blending hot liquids or ingredients.
SAVE THESE INSTRUCTIONS
This product is designed for household use only.
ELECTRICAL REQUIREMENTS
Voltage: 120 V
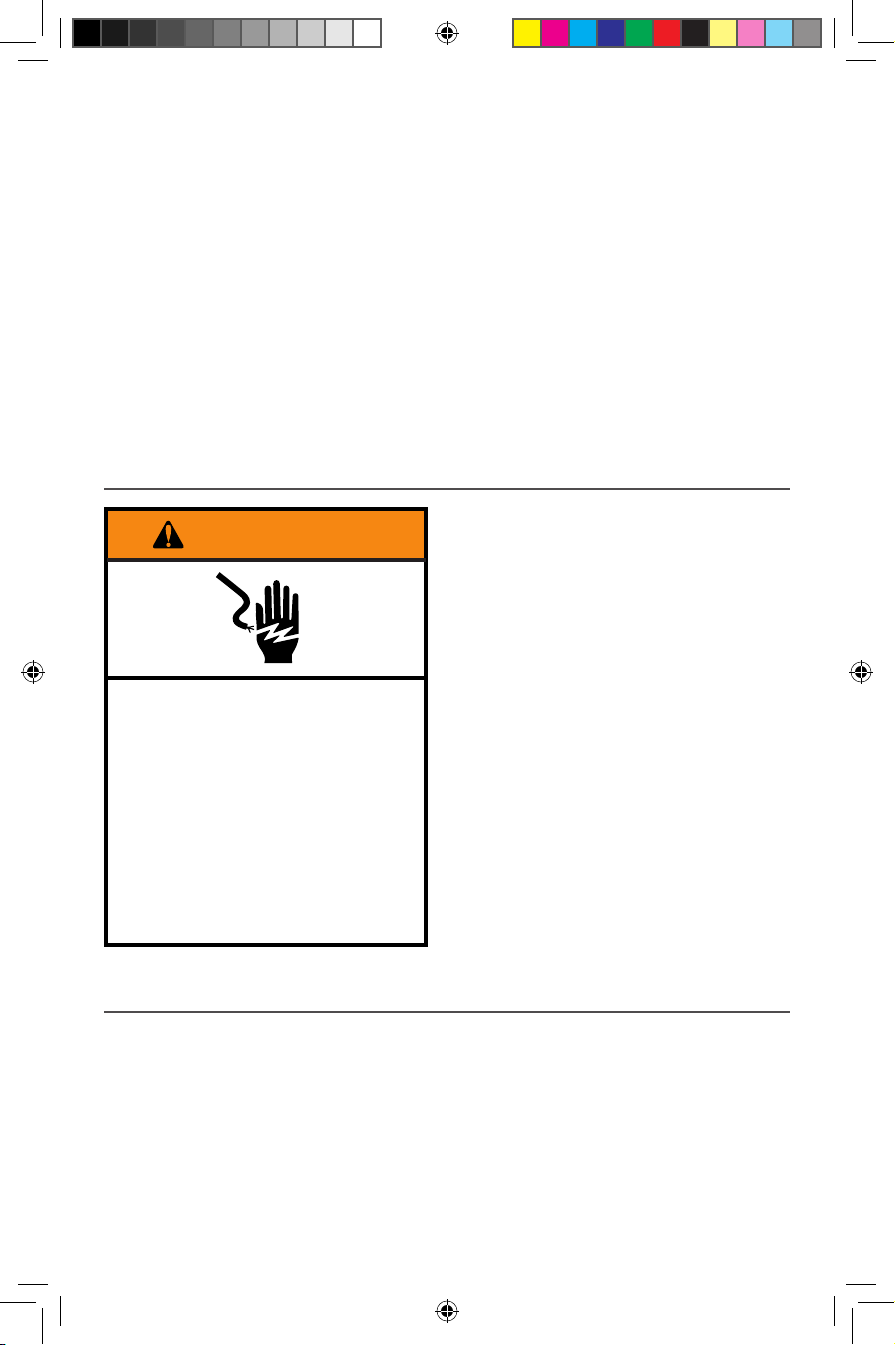
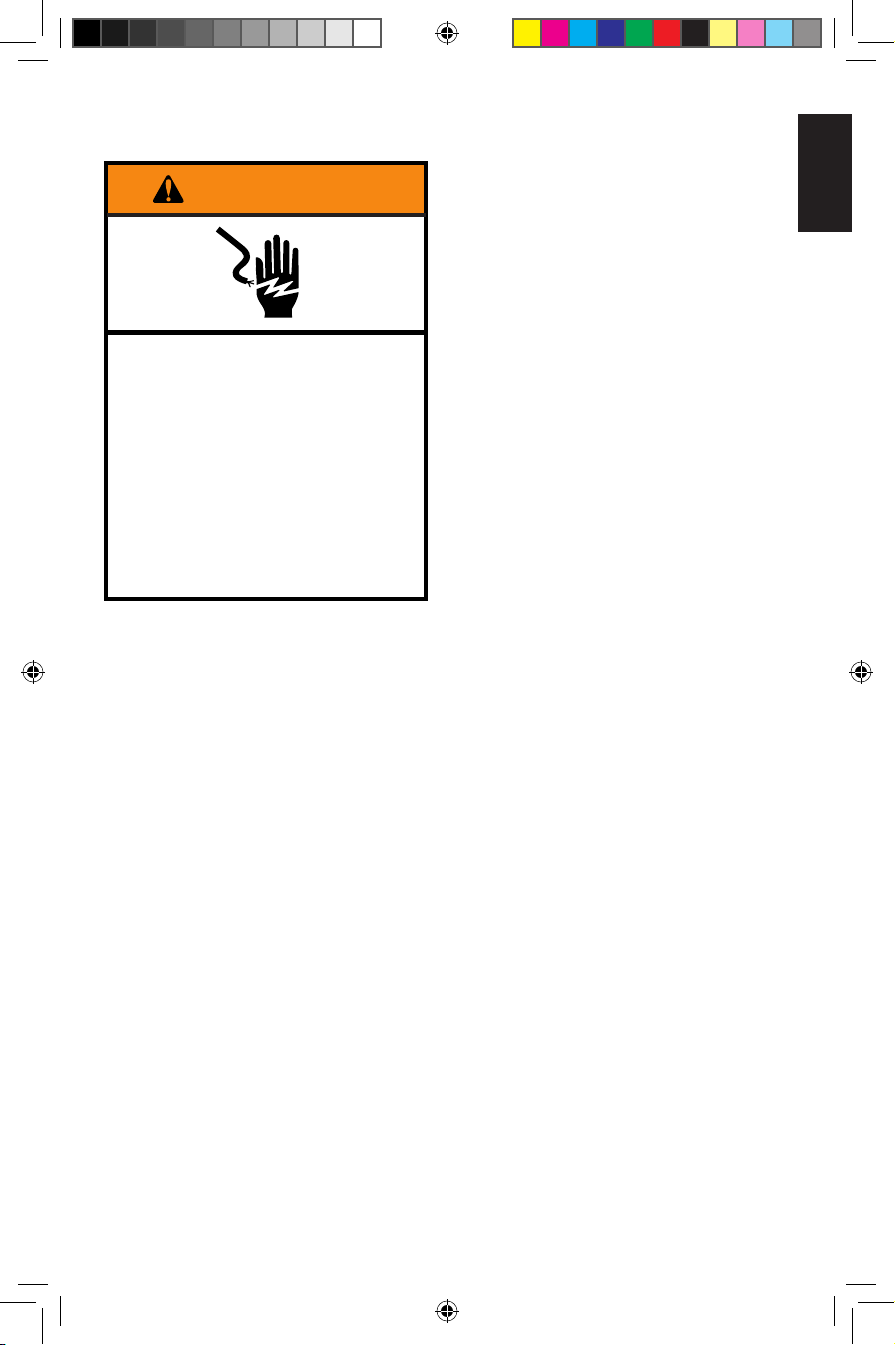
WARNING
Electrical Shock Hazard
Plug into a grounded 3 prong
outlet.
Do not remove ground prong.
Do not use an adapter.
Do not use an extension cord.
Failure to follow these
instructions can result in
death, fire, or electrical shock.
Frequency: 60 HZ
Intensity (Amp.): 15 Amps
NOTE: If the plug does not fit in the
outlet, contact a qualified electrician. Do
not modify the plug in any way. Do not
use an adapter.
Do not use an extension cord. If the
power supply cord is too short, have a
qualified electrician or serviceman install
an outlet near the appliance.
MOTOR HORSEPOWER
Motor horsepower for the blender motor was measured using a dynamometer, a machine
that laboratories routinely use to measure the mechanical power of motors. Our 3.5 peak
horsepower (HP) motor reference reflects the horsepower output of the motor itself and
not the Blender’s horsepower output in the blender jar. As with any blender, the power
output in the jar is not the same as the horsepower of the motor itself. This motor delivers
2.45 peak HP in the jar enabling your Blender to deliver robust power for all your recipes.
4 | BLENDER SAFETY
W11100672A.indb 4 4/29/2019 5:09:12 PM
ENGLISH
USING THE BLENDER
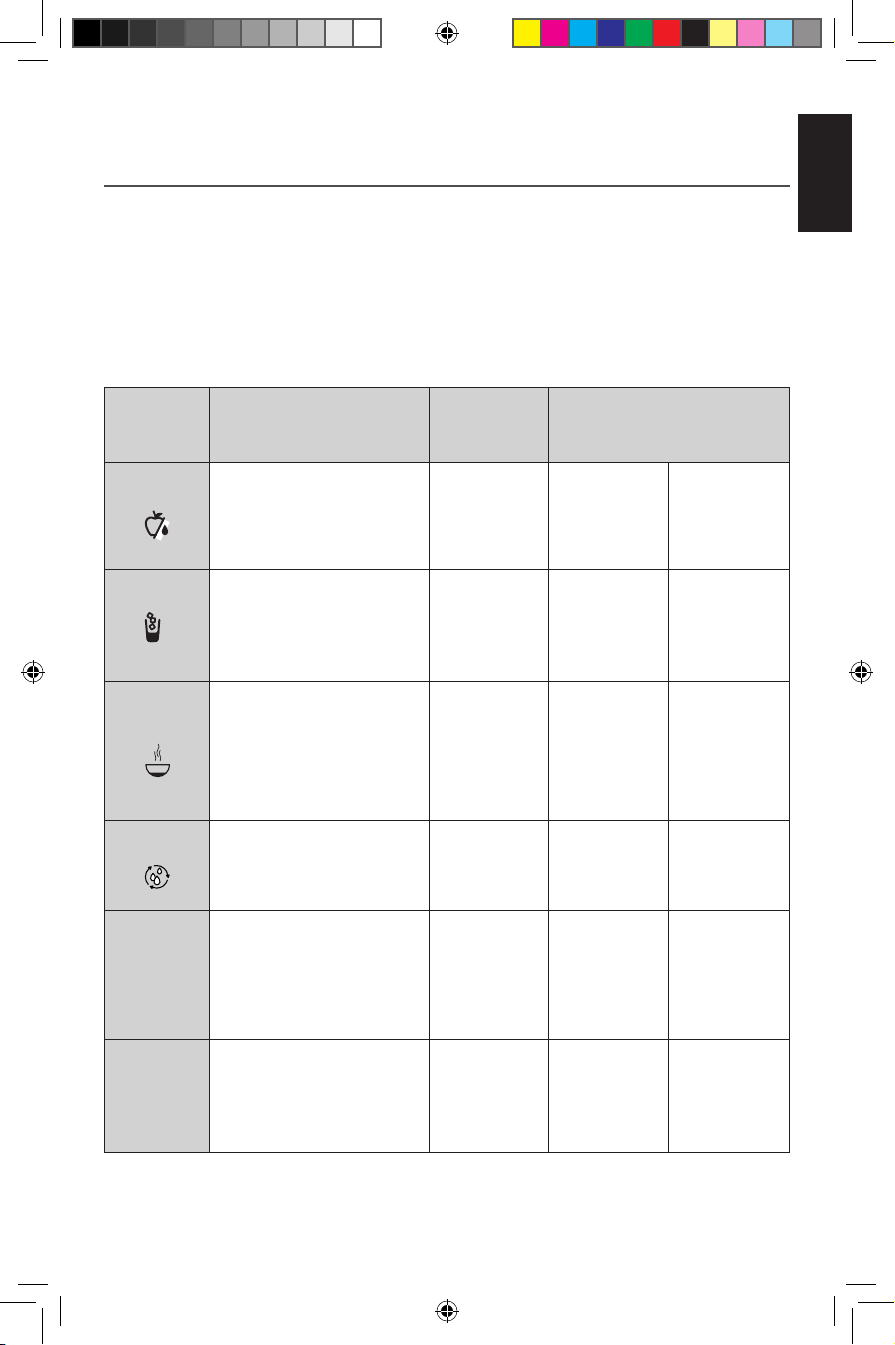
BLENDER FUNCTION GUIDE
The Blender has three preset recipe programs: Juice, Smoothies, and Soups. It also
features Variable Speed and Pulse functions that allow you to customize your blending
for any recipe you make.
The three preset recipe programs were each developed based on typical recipes of that
kind. You might find that not all recipes are exactly the same, and sometimes a recipe
might blend more to your preference on a program that is not obvious. For example,
when making a smoothie, you may prefer the finer texture that the Juice program creates.
We encourage you to experiment to find the best program for your favorite recipes.
SETTING
DESCRIPTION
BLENDING
TIME
SUGGESTED ITEMS
TO BLEND
(in min:sec)
Several variations of speed to
JUICE
SMOOTHIES
SOUPS*
CLEANING
PULSE
VARIABLE
SPEEDS
*If blending preheated ingredients, use variable speed and run for 1-2 minutes. Start on a
low speed and ramp up to the speed desired. The soup setting is designed to heat cooled
or room-temperature ingredients and is not intended for preheated ingredients.
best capture whole fruits or
vegetables to liquefy contents.
Slower speeds at conclusion of
cycle to settle ingredients and
reduce froth.
Gradually ramp
up to full power to completely
blend hard foods such as ice,
whole fruits or vegetables, or
frozen fruits.
Heat your soup from room
temperature ingredients.
Gradually ramps up to high
speed to allow for contents
to fall into the blade for a
complete blend. Slow speeds at
the end allow contents to settle
and reduce froth.
Quick pulses of power and
high speeds work to clean the
blender jar by filling 1/3 of
the jar with water and a drop
of dish soap.
Allow precise control of the
duration and frequency of
blending. Great for recipes that
require a light touch.
Alternatively, use Pulse during
manual operation to add a
boost of power momentarily.
Manual speeds offer ultimate
control of the blender. Allows
for fine-tuned chopping and
blending needs to prepare
any recipe.
1:10 Fruits Vegetables
Blended ice
drinks
0:40
5:00
0:33 Water Dish soap
0:00
0:00 - 6:00
Crushed ice
Whole fruits
and vegetables
Soup
Vegetables
Savory crumb
topping
Sweet crumb
topping
Meat salad for
sandwich filling
Fruits
Vegetables
Nuts
Dips
Frozen desserts
Frozen chopped
fruit (defrost
slightly until it
can be probed
with a knife tip)
Hot sauces
Chopped fruits
Chopped
vegetables
Ice crush
Sauces
Doughs
Butters
Seeds
Broth
Soups
USING THE BLENDER | 5
W11100672A.indb 5 4/29/2019 5:09:12 PM
USING THE BLENDER
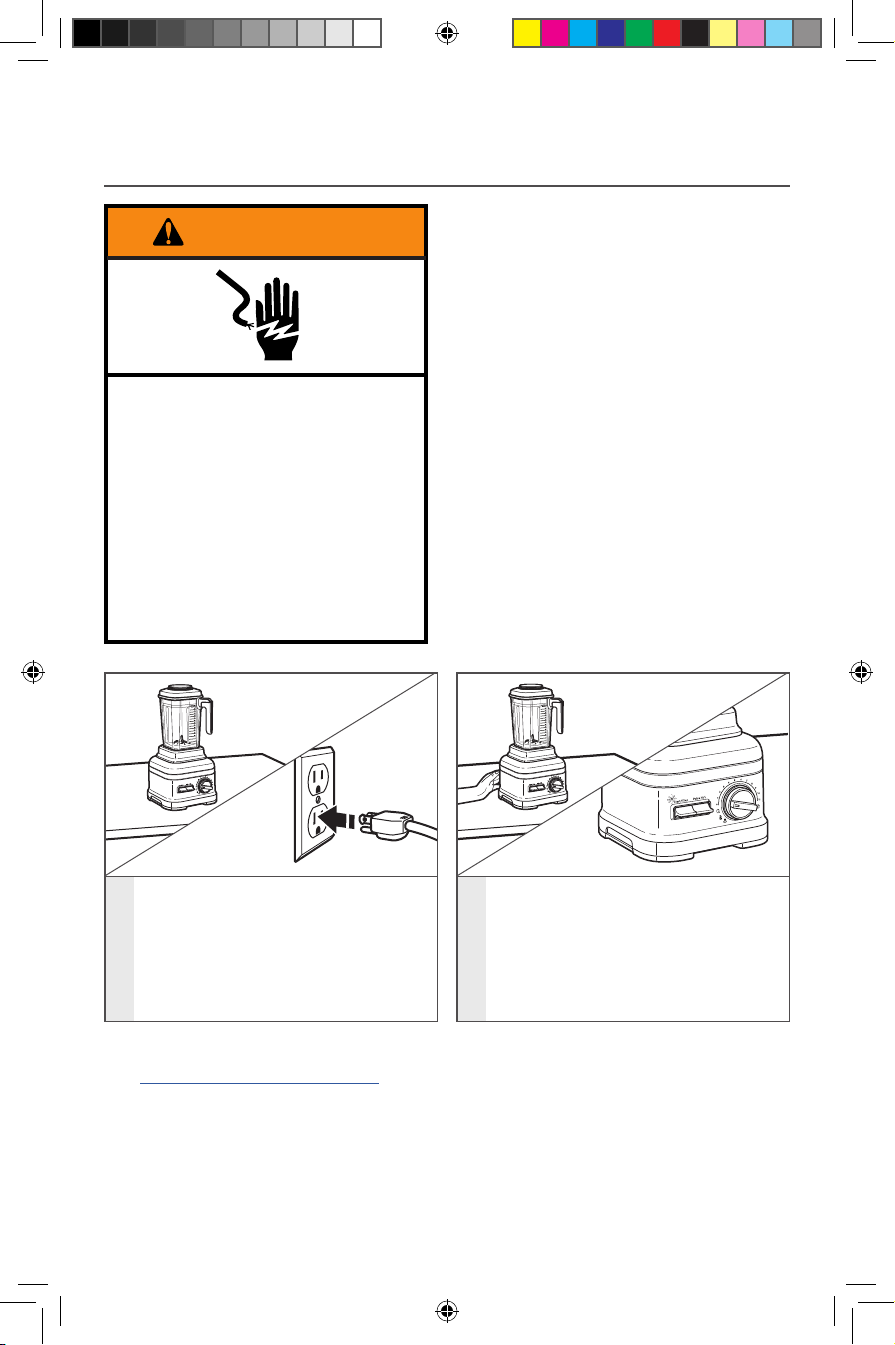
PREPARING THE BLENDER FOR USE
WARNING
Electrical Shock Hazard
Plug into a grounded 3 prong
outlet.
Do not remove ground prong.
Do not use an adapter.
Do not use an extension cord.
Failure to follow these
instructions can result in
death, fire, or electrical shock.
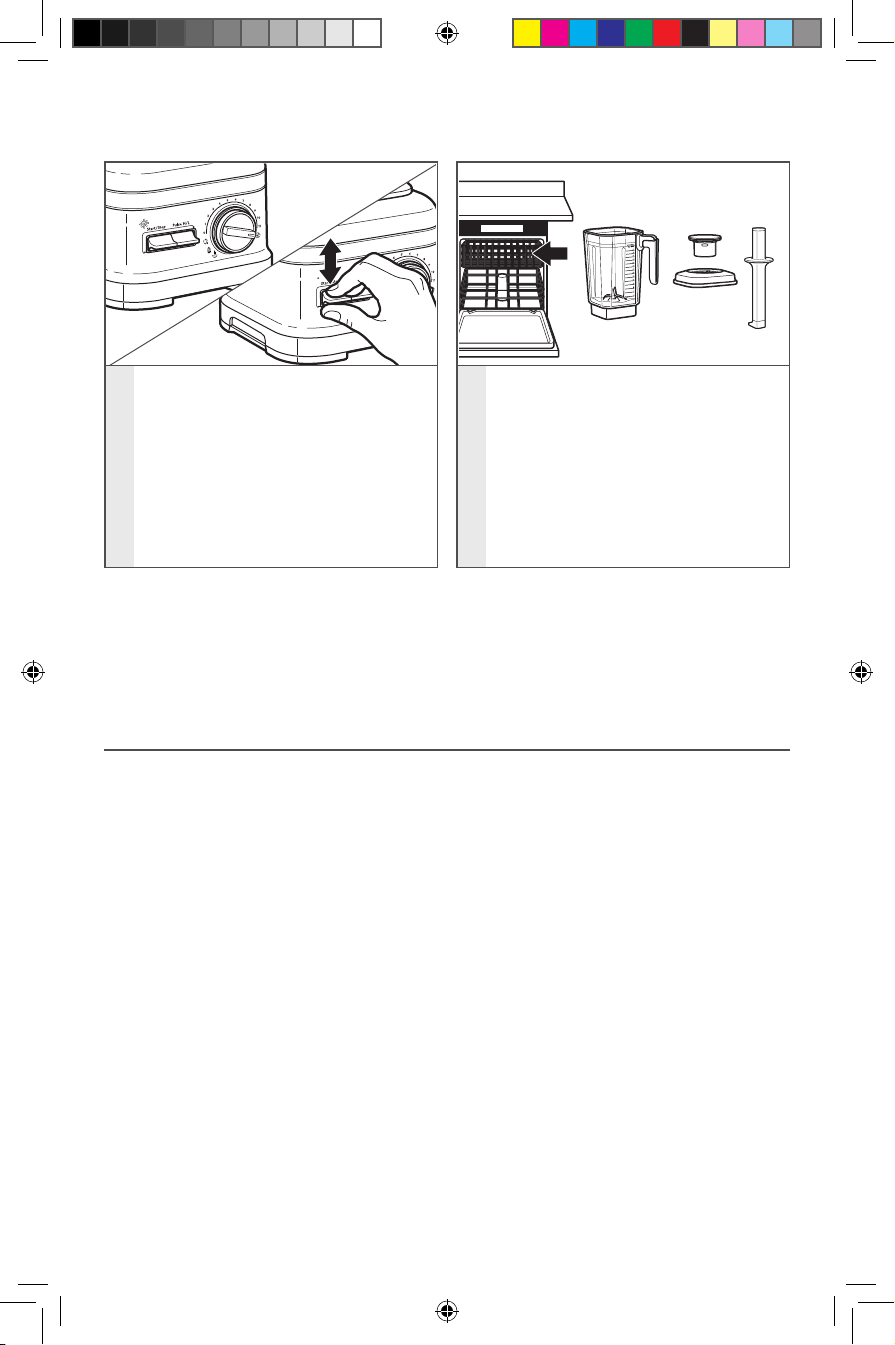
Before first use
Before using your Blender for the first time,
wipe the blender base with a warm damp
cloth, then wipe clean with a damp cloth.
Dry with a soft cloth. Wash the blender
jar, lid, Flex Edge tamper, and ingredientmeasuring cap in warm, sudsy water (see
the “Care and cleaning” section). Rinse
parts and wipe dry.
Before using the Blender, be sure
the countertop beneath the Blender
and surrounding areas are dry and
1
clean. Then plug the Blender into
a grounded 3 prong outlet.
FOR DETAILED INFORMATION ON USING THE BLENDER
Visit www.kitchenaid.com/quickstart for additional Instructions with videos, inspiring
recipes, and tips on how to use your Blender.
6 | USING THE BLENDER
W11100672A.indb 6 4/29/2019 5:09:13 PM
The main power switch is on the back
of the blender base. Flip the POWER
switch to the On position. The status
indicator light above the start toggle
2
button will begin to flash, indicating
that the Blender is in Standby mode.
The Blender is now ready to operate.
ENGLISH
USING THE BLENDER
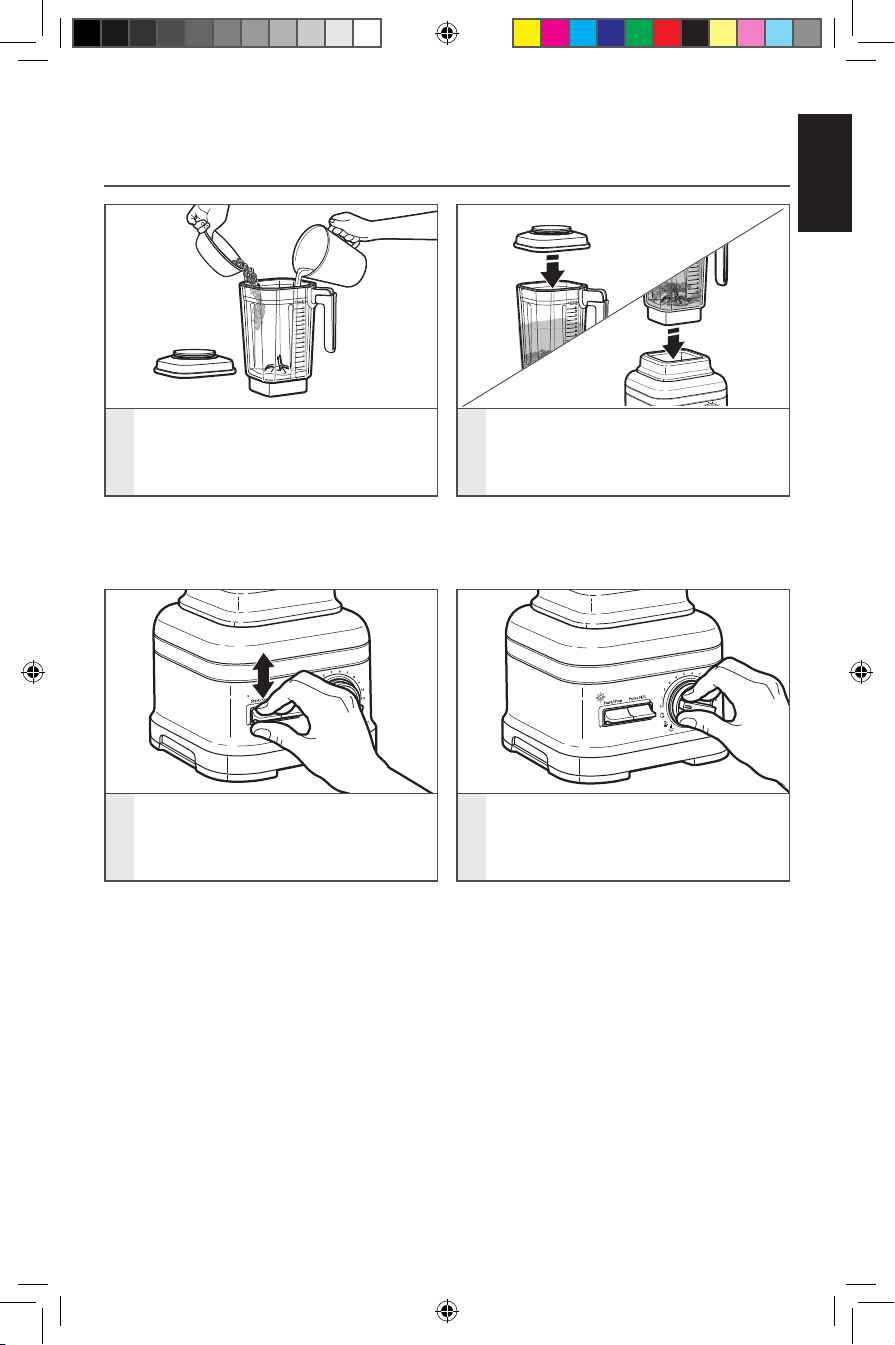
ASSEMBLING AND RUNNING THE BLENDER
Put the items to blend into the
blender jar. Add liquids first, then
1
soft foods, then leafy greens, and
ice or frozen items last.
NOTE: Do not fill the blender jar
beyond the “max fill” line, especially
when blending liquids.
Flip the START/STOP toggle switch
up or down to begin operation of the
3
Blender. The status indicator light will
now be solid.
Make sure that the lid is fully secured
on the blender jar. Next, place the
2
blender jar on the base, making sure
that it is fully aligned on the jar pad.
Turn the control dial to your desired
speed or program. See the “Blender
4
function guide” for more information.
NOTE: If you select a preprogrammed
cycle, you will need to flip the START/
STOP toggle to begin operation. The
blender will automatically stop running
once the cycle is complete.
USING THE BLENDER | 7
W11100672A.indb 7 4/29/2019 5:09:13 PM

USING THE BLENDER
Use the Flex Edge tamper accessory
as needed for optimal blending
performance. Remove
the ingredient-measuring cap only
and leave the lid in place. Stir or
5
press contents down towards the
blade. When you are finished,
replace the ingredient-measuring
cap to the blender jar lid before
resuming blending.
If desired, use the Pulse function
for a momentary boost of speed
while blending on the variable
speed settings.
6
Press and hold the PULSE toggle
switch up for a faster pulse, or down
for a slower pulse.
NOTE: The Pulse function may also be
used on its own as a separate blending
function while the Blender is in Standby
mode. Pulse is not available when running
a preset program.
After blending, flip the START/STOP
toggle switch up or down. Allow the
Blender to come to a complete stop
7
before removing the lid and pouring
your blended ingredients.
8 | USING THE BLENDER
W11100672A.indb 8 4/29/2019 5:09:14 PM
ENGLISH
CARE AND CLEANING
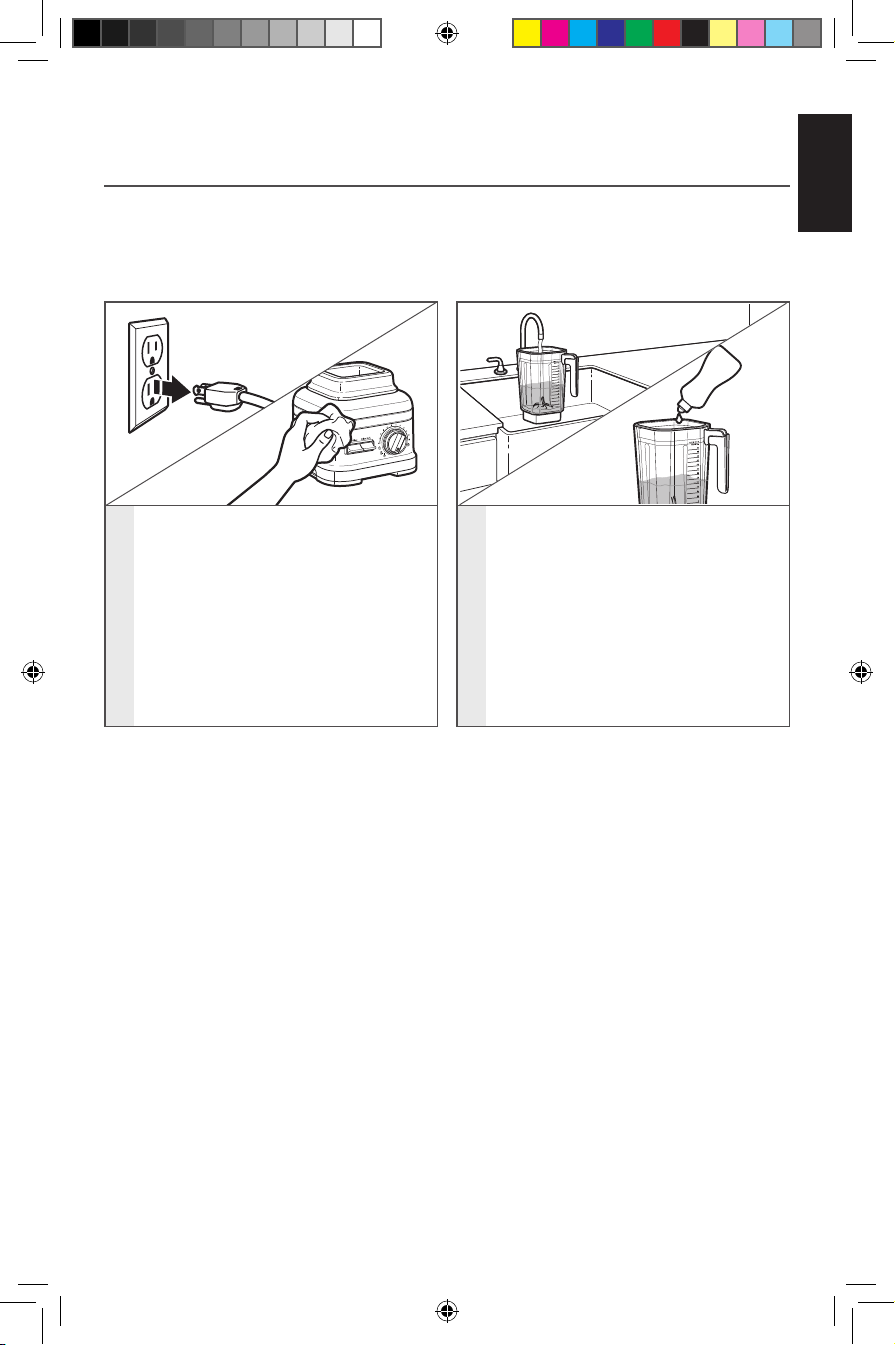
CLEANING THE BLENDER AND ACCESSORIES
Clean the Blender thoroughly after every use.
NOTE: To avoid damaging the Blender, do not immerse the blender base
or cord in water. To avoid scratching the Blender, do not use abrasive cleansers
or scouring pads.
Make sure to clean the blender jar,
lid, and ingredient-measuring
To clean the blender base and cord:
Unplug the Blender before cleaning.
Wipe the base and the cord with a
1
warm, damp cloth; wipe clean with a
damp cloth, and dry with a soft cloth.
cap after each use. Remove any
remaining contents using a spatula
from the jar and rinse with hot
water. Fill the jar with 24 oz. of hot
2
water and add 3-4 drops of liquid
dishwashing detergent. Place the lid
on the blender jar, and make sure
the blender jar is fully in place on the
blender base.
CARE AND CLEANING | 9
W11100672A.indb 9 4/29/2019 5:09:14 PM
CARE AND CLEANING
Rotate the control dial to the
Cleaning program. Flip the START/
STOP toggle switch up or down.
When the program finishes, pour
out the soapy water, and rinse the
3
blender jar with warm water. When
cleaning after some recipes (hummus,
nut butters)
it might be necessary to repeat
these steps.
The blender jar, lid, Flex Edge tamper,
and ingredient-measuring cap are
dishwasher safe; the Flex Edge
tamper, lid, and ingredient-measuring
cap should be placed in the top rack
4
of the dishwasher. If preferred, all
parts may also be washed by hand
with a damp cloth and warm soapy
water, and then rinsed with warm
water and dried with a soft cloth.
NOTE: The handle grip can remain
on the handle of the blender jar during
cleaning and dishwasher cycles. If needed,
the handle grip can be removed to run
through the dishwasher separately and
then replaced.
SANITIZING THE BLENDER
1. Remove any remaining contents from the blender jar.
2. Prepare a 200 ppm sodium hypochlorite solution* using 1.75 L of hot water in the
blender jar. Place the lid on the blender jar, and make sure the blender jar is fully in
place on the blender base.
3. Run the Blender on the High Speed setting for 35 seconds. Flip the START/STOP
toggle switch up or down to start the Blender.
4. Turn off the Blender and let the sanitizing mix sit in the blender jar for an
additional 2 minutes.
5. Pour out the sanitizing solution mix. Do not rinse the blender jar.
6. Place the lid on the blender jar. Make sure the empty blender jar is fully in place on
the blender base. Run the empty Blender for an additional 10 seconds. Do not rinse
the jar after sanitizing.
7. Allow the blender jar to air dry.
* To prepare a 200 ppm sodium hypochlorite solution: use 6.67 mL household bleach (with a 5.25% sodium
hypochlorite concentration) in 1.75 L of hot water.
10 | CARE AND CLEANING
W11100672A.indb 10 4/29/2019 5:09:14 PM
ENGLISH
TROUBLESHOOTING
WARNING
Electrical Shock Hazard
Plug into a grounded 3 prong
outlet.
Do not remove ground prong.
Do not use an adapter.
Do not use an extension cord.
Failure to follow these
instructions can result in
death, fire, or electrical shock.
1. When the Blender is plugged in
and the main power On/Off toggle
switch is on, the Blender will go into
Standby mode (flashing white indicator
light). However, after 10 minutes of
no activity the Blender will go into
Sleep mode and the indicator light
will turn off.
• To wake up the Blender simply flip
the START/STOP toggle switch up
or down. This will put the Blender back
into Standby mode.
2. If the status indicator light flashes
an orange color, the Blender is in
error mode. This can be caused by:
using a spatula in the blender jar that
locks up the blade or having an ice cube
or hard food in a location that locks up
the blade.
• Correct the problem by turning off
the Blender using the dedicated off
switch in the back, or by unplugging
the Blender. Remove the blender jar
from the base, and clear the items.
Place the blender jar back on the base,
and then turn the Blender back on to
continue regular use.
3. If the Blender stops while blending:
• After 6 minutes of run time, the
Blender will automatically shut off
and go into Sleep mode, and the
LED light will turn off. You can wake
the Blender back up using the
toggle switches (Start/Stop or Pulse
High/Pulse Low). If the Blender stops
in less than 6 minutes, it is possible
there is an internal error with the
Blender. Contact an authorized
service center for assistance.
4. If the ingredients of a recipe aren’t
blending:
• There may be times when an air
pocket is created around the blade,
causing the ingredients to miss the
blending blade. Use your Flex Edge
tamper to assist during the blend by
pushing ingredients into the blade, or
stir to move ingredients around the
blender jar. If that does not work, stop
the Blender, remove the blender jar
from the base, and use a spatula to
rearrange ingredients in the blender
jar. For certain recipes, try adding
more liquid.
5. If you experience an overflow from
the blender jar:
• Unplug the Blender. Remove the
jar and jar pad. Clean the blender
housing, jar pad, and exterior of the
jar. Dry each part thoroughly, and then
re-install the jar pad.
• If the overflow is on or over the
control dial, it can be removed by
gently and firmly pulling it off. After
cleaning and drying, reinstall the knob.
To avoid damage to the graphics,
do not apply too much force or use
abrasive cleansers.
If the problem cannot be corrected:
See the “Warranty and service” section.
Do not return the Blender to the retailer;
retailers do not provide service.
TROUBLESHOOTING | 11
W11100672A.indb 11 4/29/2019 5:09:14 PM
WARRANTY AND SERVICE
KITCHENAID® PRO LINE® SERIES TOTAL REPLACEMENT LIMITED
WARRANTY FOR THE 50 UNITED STATES, THE DISTRICT OF
COLUMBIA, PUERTO RICO, AND CANADA
This warranty extends to the purchaser and any succeeding owner for KitchenAid
Pro Line® Series Blender operated in the 50 United States, the District of Columbia,
Puerto Rico, and Canada.
Length of Warranty: Ten Years from the date of purchase.
KitchenAid Will Pay
for Your Choice of:
Hassle-Free Replacement of your Pro Line® Series
Blender. See the next page for details on how to arrange
for replacement, or call the Customer eXperience Center
toll-free at 1-800-832-7173.
OR
The replacement parts and repair labor costs to correct
defects in materials and workmanship. Service must be
provided by an Authorized KitchenAid Service Center.
KitchenAid Will
Not Pay for:
DISCLAIMER OF IMPLIED WARRANTIES IMPLIED WARRANTIES, INCLUDING ANY
IMPLIED WARRANTY OF MERCHANTABILITY OR IMPLIED WARRANTY OF FITNESS
FOR A PARTICULAR PURPOSE, ARE LIMITED TO TEN YEARS OR THE SHORTEST
PERIOD ALLOWED BY LAW. Some states and provinces do not allow limitations on the
duration of implied warranties or merchantability or fitness, so this limitation may not
apply to you. This warranty gives you specific legal rights, and you also may have other
rights that vary from state to state and province to province.
DISCLAIMER OF REPRESENTATIONS OUTSIDE OF WARRANTY KitchenAid makes
no representations about the quality, durability or need for service or repair of this
appliance other than the representations contained in this Warranty. If you want longer
or more comprehensive coverage than the limited warranty that comes with this
appliance, you should ask KitchenAid or your retailer about buying a service contract.
LIMITATION OF REMEDIES; EXCLUSION OF INCIDENTAL AND CONSEQUENTIAL
DAMAGES YOUR SOLE AND EXCLUSIVE REMEDY UNDER THIS LIMITED
WARRANTY SHALL BE PRODUCT REPLACEMENT OR REPAIR AS PROVIDED HEREIN.
KITCHENAID SHALL NOT BE RESPONSIBLE FOR INCIDENTAL OR CONSEQUENTIAL
DAMAGES. Some states and provinces do not allow the exclusion or limitation of
incidental or consequential damages, so these limitations and exclusions may not apply
to you. This warranty gives you specific legal rights, and you also may have other rights
that vary from state to state and province to province.
A. Repairs when your Pro Line® Series Blender is used in
other than normal single family home use.
B. Damage resulting from accident, alteration, misuse
or abuse.
C. Any shipping or handling costs to deliver your
Pro Line® Series Blender to an Authorized Service
Center.
D. Replacement parts or repair labor costs for Pro Line®
Series products operated outside the 50 United
States, District of Columbia, Puerto Rico, and Canada.
12 | WARRANTY AND SERVICE
W11100672A.indb 12 4/29/2019 5:09:14 PM
 Loading...