

KitchenAid KGRT507FWH1, KGRT507FWH0, KGRT507FBL1, KGRT507FBL0, KGRT507FAL1 Owner’s Manual
...
Use and Care Guide
Kitchen,Aid*
Table of Contents
(complete) .................... 2
A Note to You ................ 3
Range Safety .............. 4-6
Parts and Features ....... 7
Using and Caring
for Your Cooktop ....... 11
Using and Caring
for Your Oven .............. 20
Using EASY
CONVECT*
Conversion ................. 44
TO THE INSTALLER: PLEASE LEAVE THIS
INSTRUCTION BOOK WITH THE UNIT.
TO THE CONSUMER: PLEASE READ AND
KEEP THIS BOOK FOR FUTURE REFERENCE.
KITCHENAID* THERMAL-CONVECTION*
Gas Freestanding and Slide-in Ranges
Using the Self-
Cleaning Cycle ........... 60
Troubleshooting ........ 64
Requesting
Assistance or
Service ......................... 67
Index ............................ 70
Warranty ...................... 72
In the U.S.A. for assistance or
service, call the Consumer
Assistance Center:
1-800-422-1230
In Canada for assistance
or service, see page 68.
PART NO. 9752684 Rev. A lVlodels: YKGRTS07 YKGST307
KGRTS07 KGST307
of Contents
A Note to You ............................................ 3
Range Safety .......................................... 4-6
Parts and Features .................................... 7
Feature locations .................................. 7
The oven vent ...................................... 9
The storage drawer .............................. 9
The anti-tip bracket ............................. 10
Using and Caring for Your Cooktop ........ 11
Using the surface burners .................... 11
Energy saving tips .............................. 14
Cookware tips .................................... 14
Caring for your cooktop ...................... 15
Using and replacing the
surface light ........................................ 18
Using and Caring for Your Oven ............ 20
Using the electronic oven control ........ 20
Oven settings ..................................... 28
Setting the clock ................................. 29
Using the timer ................................... 30
Baking or convection baking ............... 31
Roasting ............................................. 33
Cooking tips ....................................... 34
Adjusting oven temperature ................ 37
Using the temperature probe .............. 39
Using CONVECT FULL MEAL ............ 42
Using EASY CONVECT*
Conversion ......................................... 44
Broiling ............................................... 46
Convection broiling ............................. 48
Timed cooking .................................... 51
Dehydrating ........................................ 54
Raising (proofing) bread ..................... 56
Cleaning your oven and controls ......... 57
Using and replacing the oven light(s) ... 59
Using the Self-Cleaning Cycle ................ 60
Before you start .................................. 60
Before setting the controls .................. 61
Setting the controls ............................. 61
For best cleaning results ..................... 63
How the cycle works ........................... 63
Troubleshooting ...................................... 64
Requesting Assistance or Service ......... 67
Index ........................................................ 70
Warranty .................................................. 72
WARNING: If the information in this manual is not followed
exactly, a fire or explosion may result causing property damage,
personal injury or death.
- Do not store or use gasoline or other flammable vapors and
liquids in the vicinity of this or any other appliance.
- WHAT TO DO IF YOU SMELL GAS
* Do not try to light any appliance.
* Do not touch any electrical switch; do not use any phone in
your building.
* Immediately call your gas supplier from a neighbor's phone.
Follow the gas supplier's instructions.
* if you cannot reach your gas supplier, call the fire department.
- installation and service must be performed by a qualified installer,
service agency or the gas supplier.
Note to You
'_hC/.t/._yOZZ for buying a KITCHENAID* appliance!
KitchenAid designs the best tools for the most important room in your house. To ensure
that you enjoy many years of trouble-free operation, we developed this Use and Care
guide. It contains valuable information concerning how to operate and maintain your
new appliance properly and safely. Please read it carefully.
Also, please complete and mail the enclosed Product Registration Card.
in the U.S.A.
For assistance or service
Call the Consumer Assistance Center toll free ................................................ 1=800=422=1230
Throughout Canada for assistance
Call the Consumer Assistance Center toll free ................................................ 1-800=461-5681
8:30 a.m. = 6 p.m. (EST)
Throughout Canada for service ..............................................................see page 68
If you need assistance or service, first see the "Troubleshooting" section of this book. After
checking "Troubleshooting," additional help can be found by checking the "Requesting
Assistance or Service" section, or by calling one of the telephone numbers above.
When calling, you will need to know your appliance's complete model number and serial
number. You can find this information on the model and serial number label (see diagrasm
in the "Parts and Features" section).
Keep this book and the sales slip together in a safe place for future reference. You must
provide proof of purchase or installation date for in=warranty service.
Model Number BuildedOealer Name
Serial Number Address
Date installed Phone
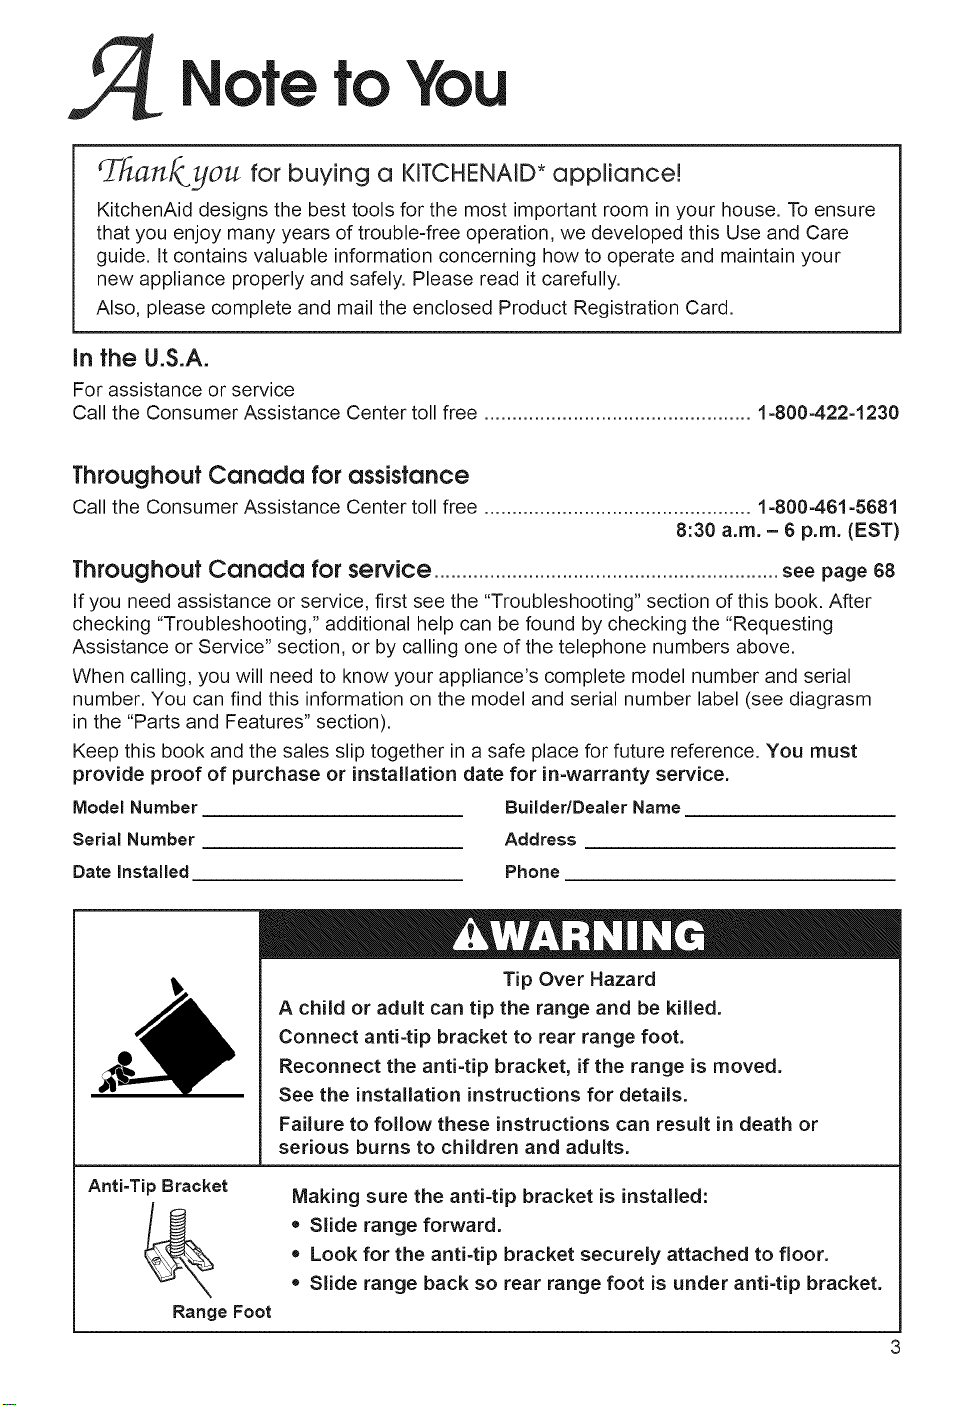
Anti-Tip Bracket
Range Foot
Tip Over Hazard
A child or adult can tip the range and be killed.
Connect anti=tip bracket to rear range foot.
Reconnect the anti=tip bracket, if the range is moved.
See the installation instructions for details.
Failure to follow these instructions can result in death or
serious burns to children and adults.
Making sure the anti=tip bracket is installed:
• Slide range forward.
o Look for the anti=tip bracket securely attached to floor.
o Slide range back so rear range foot is under anti=tip bracket.
3

Safety
Your safety and the safety of others is very important.
We have provided many important safety messages in this manual and on your
appliance. Always read and obey all safety messages.
This is the safety alert symbol.
This symbol alerts you to hazards that can kill or hurt you and others.
All safety messages will be preceded by the safety alert symbol and the
word "DANGER" or "WARNING." These words mean:
You will be killed or seriously injured
if you don't follow instructions.
You can be killed or seriously injured
if you don't follow instructions.
All safety messages will identify the hazard, tell you how to reduce the chance of injury,
and tell you what can happen if the instructions are not followed.
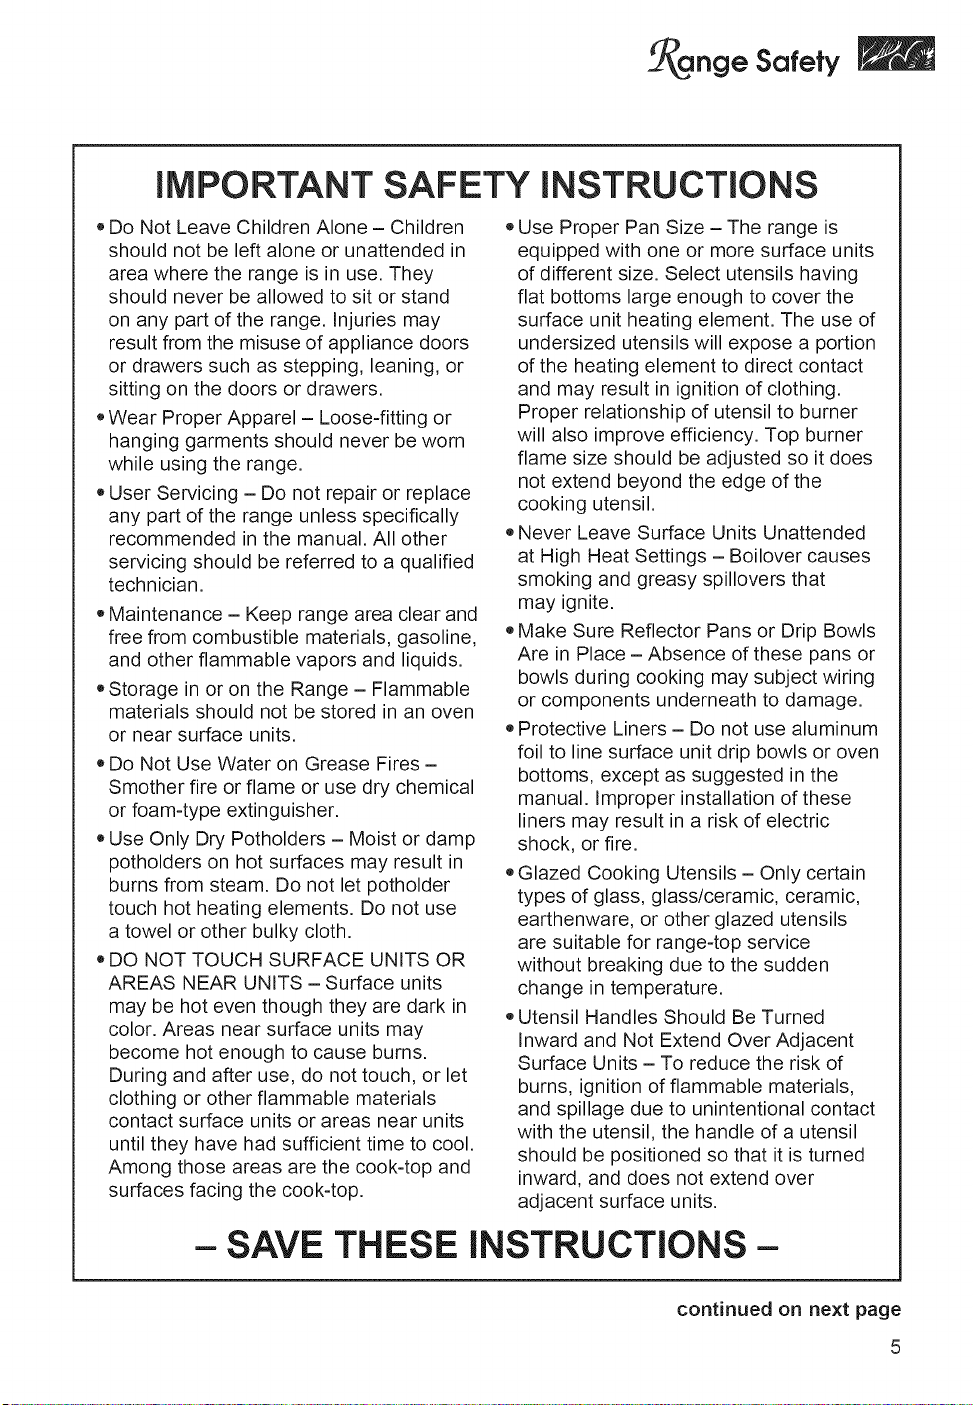
IMPORTANT SAFETY INSTRUCTIONS
WARNING" To reduce the risk of fire,
electrical shock, injury to persons, or
damage when using the range, follow
basic precautions, including the following:
.WARNING - TOREDUCETHE
RISK OF TIPPING OF THE RANGE,
THE RANGE MUST BE SECURED BY
PROPERLY INSTALLED ANTI-TIP
DEVICES. TO CHECK IF THE
DEVICES ARE INSTALLED PROPERLY,
SLIDE RANGE FORWARD, LOOK
FOR ANTI-TIP BRACKET SECURELY
ATTACHED TO FLOOR, AND SLIDE
RANGE BACK SO REAR RANGE FOOT
IS UNDER ANTI-TIP BRACKET.
. CAUTION - Donot store items of
interest to children in cabinets above a
range or on the backguard of a range -
children climbing on the range to reach
items could be seriously injured.
-SAVE THESE INSTRUCTIONS-
* Proper Installation - The range, when
installed, must be electrically grounded
in accordance with local codes or, in
the absence of local codes, with the
National Electrical Code, ANSI/NFPA 70.
Be sure the range is properly installed
and grounded by a qualified technician.
* This range is equipped with a
three-prong grounding plug for your
protection against shock hazard and
should be plugged directly into a
properly grounded receptacle. Do not
cut or remove the grounding plug from
this plug.
* Disconnect the electrical supply before
servicing the appliance.
* Never Use the Range for Warming or
Heating the Room.
4
nge Safety
iMPORTANT SAFETY iNSTRUCTiONS
®Do Not Leave Children Alone - Children
should not be left alone or unattended in
area where the range is in use. They
should never be allowed to sit or stand
on any part of the range. Injuries may
result from the misuse of appliance doors
or drawers such as stepping, leaning, or
sitting on the doors or drawers.
oWear Proper Apparel - Loose-fitting or
hanging garments should never be worn
while using the range.
User Servicing - Do not repair or replace
any part of the range unless specifically
recommended in the manual. All other
servicing should be referred to a qualified
technician.
Maintenance - Keep range area clear and
free from combustible materials, gasoline,
and other flammable vapors and liquids.
Storage in or on the Range - Flammable
materials should not be stored in an oven
or near surface units.
Do Not Use Water on Grease Fires -
Smother fire or flame or use dry chemical
or foam-type extinguisher.
Use Only Dry Potholders - Moist or damp
potholders on hot surfaces may result in
burns from steam. Do not let potholder
touch hot heating elements. Do not use
a towel or other bulky cloth.
DO NOT TOUCH SURFACE UNITS OR
AREAS NEAR UNITS - Surface units
may be hot even though they are dark in
color. Areas near surface units may
become hot enough to cause burns.
During and after use, do not touch, or let
clothing or other flammable materials
contact surface units or areas near units
until they have had sufficient time to cool.
Among those areas are the cook-top and
surfaces facing the cook-top.
Use Proper Pan Size - The range is
equipped with one or more surface units
of different size. Select utensils having
flat bottoms large enough to cover the
surface unit heating element. The use of
undersized utensils will expose a portion
of the heating element to direct contact
and may result in ignition of clothing.
Proper relationship of utensil to burner
will also improve efficiency. Top burner
flame size should be adjusted so it does
not extend beyond the edge of the
cooking utensil.
Never Leave Surface Units Unattended
at High Heat Settings - Boilover causes
smoking and greasy spillovers that
may ignite.
Make Sure Reflector Pans or Drip Bowls
Are in Place - Absence of these pans or
bowls during cooking may subject wiring
or components underneath to damage.
Protective Liners - Do not use aluminum
foil to line surface unit drip bowls or oven
bottoms, except as suggested in the
manual. Improper installation of these
liners may result in a risk of electric
shock, or fire.
®Glazed Cooking Utensils - Only certain
types of glass, glass/ceramic, ceramic,
earthenware, or other glazed utensils
are suitable for range-top service
without breaking due to the sudden
change in temperature.
Utensil Handles Should Be Turned
Inward and Not Extend Over Adjacent
Surface Units - To reduce the risk of
burns, ignition of flammable materials,
and spillage due to unintentional contact
with the utensil, the handle of a utensil
should be positioned so that it is turned
inward, and does not extend over
adjacent surface units.
- SAVE
THESE INSTRUCTIONS-
continued on next page
5

nge Safety
iMPORTANT SAFETY iNSTRUCTiONS
• Use Care When Opening Door - Let hot
air or steam escape before removing or
replacing food.
Do Not Heat Unopened Food Containers
- Build-up of pressure may cause
container to burst and result in injury.
Keep Oven Vent Ducts Unobstructed.
Placement of Oven Racks - Always
place oven racks in desired location
while oven is cool. If rack must be
moved while oven is hot, do not let
potholder contact hot heating element
in oven.
DO NOT TOUCH HEATING ELEMENTS
OR INTERIOR SURFACES OF OVEN -
Heating elements may be hot even
though they are dark in color. Interior
surfaces of an oven become hot
enough to cause burns. During and
after use, do not touch, or let clothing
or other flammable materials contact
heating elements or interior surfaces
of oven until they have had sufficient
time to cool. Other surfaces of the
appliance may become hot enough to
cause burns - among these surfaces
are oven vent openings and surfaces
near these openings, oven doors, and
windows of oven doors.
For self-cleaning ranges -
• Do Not Clean Door Gasket - The door
gasket is essential for a good seal. Care
should be taken not to rub, damage, or
move the gasket.
Do Not Use Oven Cleaners - No
commercial oven cleaner or oven liner
protective coating of any kind should be
used in or around any part of the oven.
=Clean Only Parts Listed in Manual.
Before Self-Cleaning the Oven -
Remove broiler pan and other utensils.
Wipe off all excessive spillage before
initiating the cleaning cycle.
For units with ventilating hood =
Clean Ventilating Hoods Frequently -
Grease should not be allowed to
accumulate on hood or filter.
*When flaming foods under the hood, turn
the fan off. The fan, if operating, may
spread the flame.
-SAVE THESE iNSTRUCTiONS-
and Featu
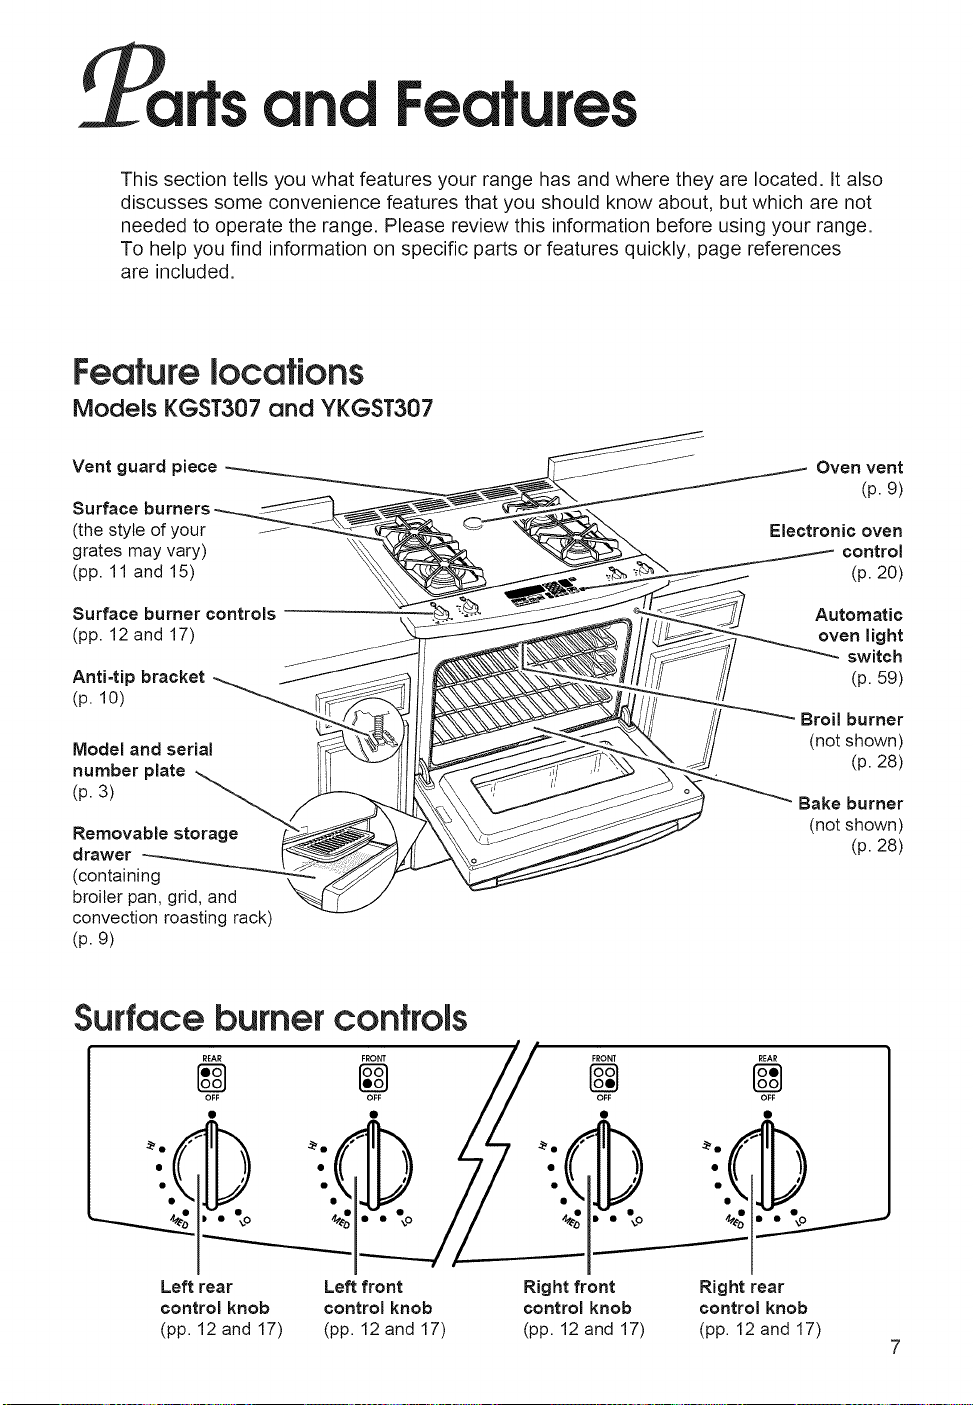
This section tells you what features your range has and where they are located. It also
discusses some convenience features that you should know about, but which are not
needed to operate the range. Please review this information before using your range.
To help you find information on specific parts or features quickly, page references
are included.
Feature locations
Models KGST307 and YKGST307
Vent guard piece _ _ Oven vent
Surface
(the style of your Electronic oven
grates may vary) control
(pp. 11 and 15) (p. 20)
Surface burner controls Automatic
(pp. 12 and 17) oven light
Anti-tip bracket (p. 59)
(p. 10)
Model and serial
(p. 3)
number plate
Removable storage
drawer
(containing
broiler pan, grid, and
convection roasting rack)
(p. 9)
Bake burner
(p. 9)
switch
Broilburner
(not shown)
(p. 28)
(not shown)
(p. 28)
Surface burner controls
REAR FRONT
OFF
Left rear
control knob
(pp. 12 and 17)
Left front
control knob
(pp. 12 and 17)
Right front
control knob
(pp. 12 and 17)
REAR
@
Right rear
control knob
(pp. 12 and 17)
7
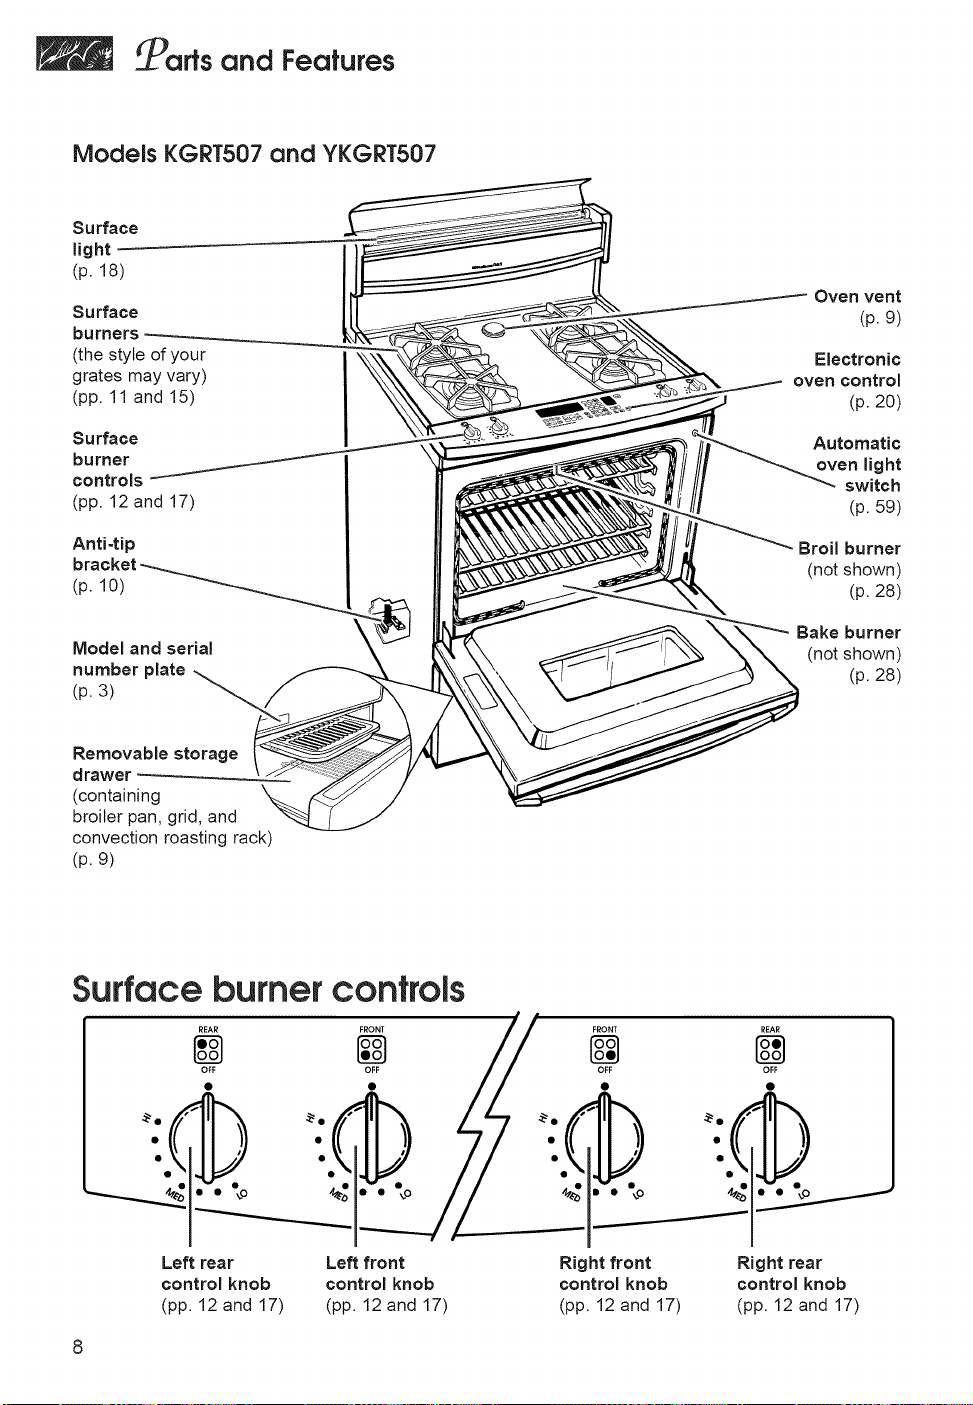
_affs and Features
Models KGRT507 and YKGRT507
Surface
light
(p. 18)
Surface
burners
(the style of your
grates may vary)
(pp. 11 and 15)
Surface
burner
controls
(pp. 12 and 17)
Oven vent
(p. 9)
Electronic
oven control
(p. 20)
Automatic
oven light
switch
(p. 59)
Anti=tip
(p. 10)
Model and serial
number plate
(p. 3)
Removable storage
drawer
(containing
broiler pan, grid, and
convection roasting rack)
(p. 9)
Surface burner controls
REAR FRONT
OFF
#o #o
- Broilburner
(not shown)
(p. 28)
Bake burner
(not shown)
(p. 28)
,,,_. • to _t,
Left rear Left front
control knob control knob
(pp. 12 and 17) (pp. 12 and 17)
Right front
control knob
(pp. 12 and 17)
Right rear
control knob
(pp. 12 and 17)
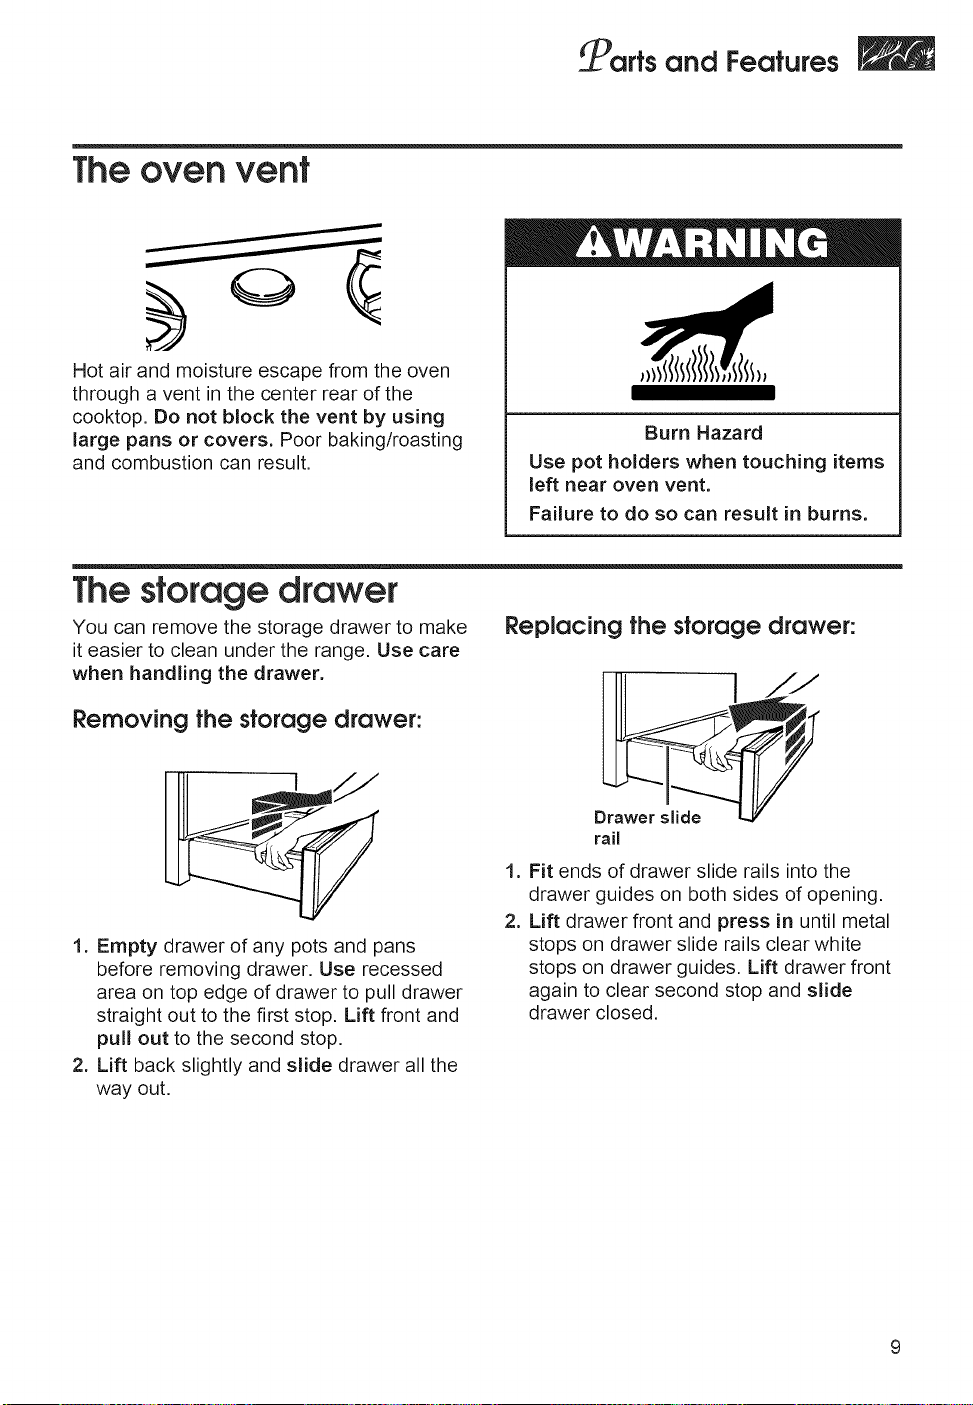
The oven vent
Hot air and moisture escape from the oven
through a vent in the center rear of the
cooktop. Do not block the vent by using
large pans or covers. Poor baking/roasting
and combustion can result.
The storage drawer
You can remove the storage drawer to make
it easier to clean under the range. Use care
when handling the drawer.
__a#s and Features
Burn Hazard
Use pot holders when touching items
left near oven vent.
Failure to do so can result in burns.
Replacing the storage drawer:
Removing the storage drawer:
1. Empty drawer of any pots and pans
before removing drawer. Use recessed
area on top edge of drawer to pull drawer
straight out to the first stop. Lift front and
pull out to the second stop.
2. Lift back slightly and slide drawer all the
way out.
Drawer slide i
rail
1. Fit ends of drawer slide rails into the
drawer guides on both sides of opening.
2. Lift drawer front and press in until metal
stops on drawer slide rails clear white
stops on drawer guides. Lift drawer front
again to clear second stop and slide
drawer closed.
9
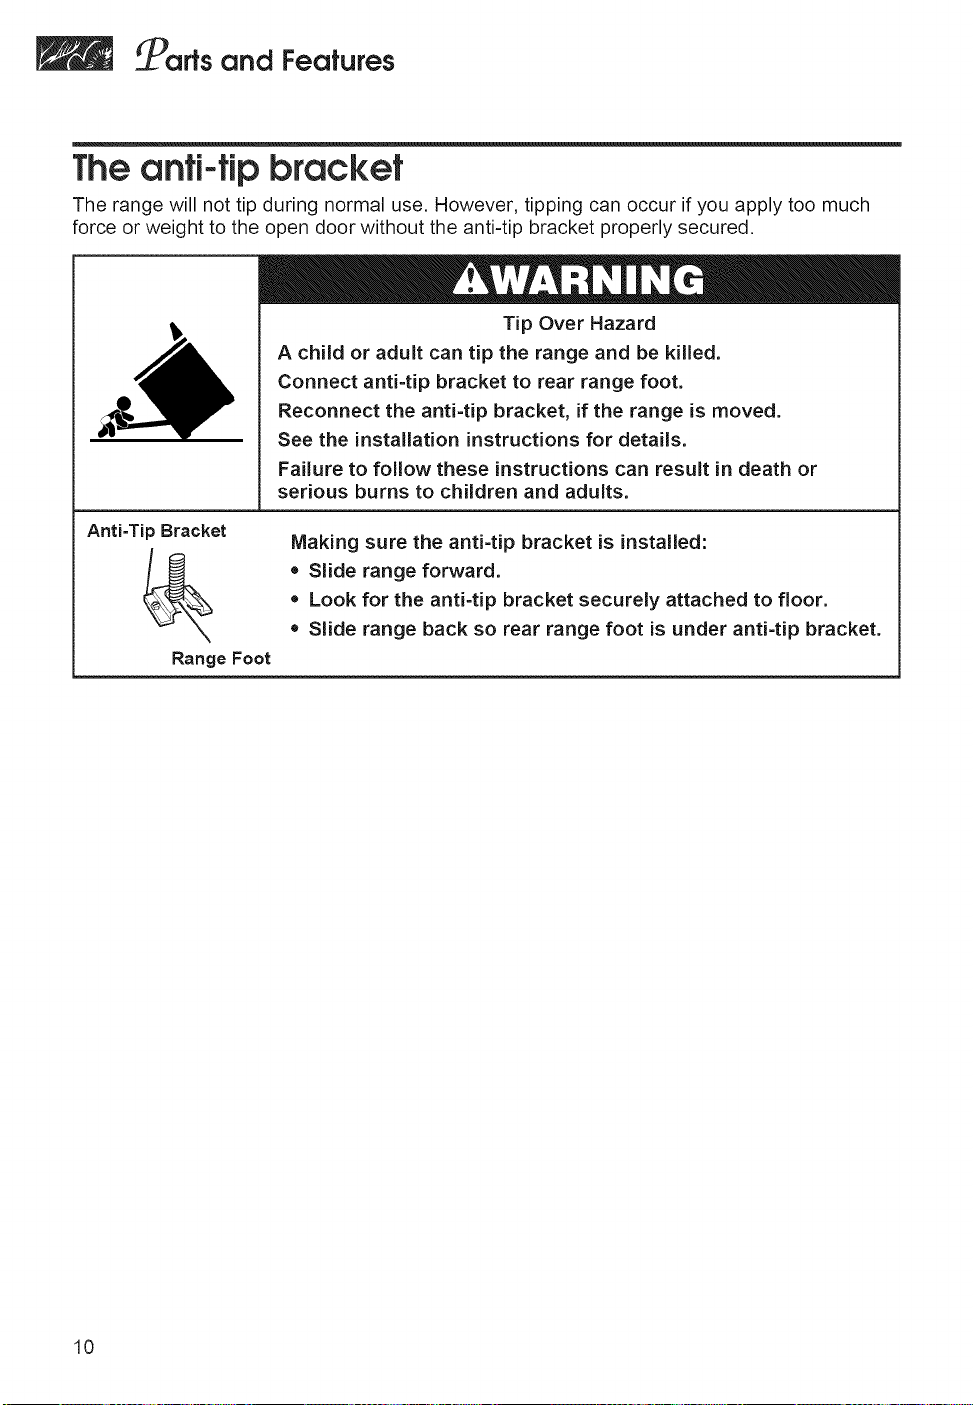
_ artsand Features
The anti-tipbracket
The range will not tip during normal use. However, tipping can occur if you apply too much
force or weight to the open door without the anti-tip bracket properly secured.
Tip Over Hazard
A child or adult can tip the range and be killed.
Connect anti-tip bracket to rear range foot.
Reconnect the anti-tip bracket, if the range is moved.
See the installation instructions for details.
Failure to follow these instructions can result in death or
serious burns to children and adults.
Anti-Tip Bracket
Range Foot
Making sure the anti=tip bracket is installed:
• Slide range forward.
• Look for the anti-tip bracket securely attached to floor.
• Slide range back so rear range foot is under anti-tip bracket.
10

" and
Caring
forYour
Cookfop
This section tells you how to operate the controls to the cooktop. It also discusses how
the sealed gas burner cooktop works, and includes tips on how to cook with and
maintain the cooktop.
Usingthe surfaceburners
Your cooktop has sealed gas burners with
an auto-reignition system. The sealed
burners spread the heat evenly across the
bottom of the cookware and provide infinite
heat control. The auto-reignition system
senses when a burner flame has gone out
and will automatically reignite that burner.
IMPORTANT: Your cooktop is factory=set
for use with Natural Gas. If you wish to
use L.P. gas, an L.P. Gas Conversion Kit
is included with your new range. See the
appropriate section of the Installation
Instructions for details on making this
conversion.
When to use the rightrear
and leftfrontburners:
10,000 BTU burner
When to use the leftrear and
rightfrontburners:
6,000 BTU burner
6,000 BTU burner
Use these burners for simmering or for cook-
ing smaller quantities of food requiring small
cookware.
10,000 BTU burner
Use these burners for cooking large quanti-
ties of food, deep-fat frying, or cooking with
large cookware.
11

sing and Caring forYour Cookfop
Carbon Monoxide Poisoning Hazard
Do not operate with a yellow flame.
Doing so can result in death,
heart attack, or convulsions.
How to use the surface burners:
1. Grasp the control knob.
2. Push down and turn to HI. The electric
spark ignitor will ignite the gas flowing
into the burner. When you hear a clicking
sound, you know that the ignitors are
working. Gas is flowing as long as knob is
not set at OFF.
3. When the burner is lit, turn the control
knob to the desired flame setting. (See
the guide under "Burner heat settings"
later in this section.) You can turn the
knobs to any of the marked settings. The
ignitor will turn off and the clicking will
stop when the burner ignites.
NOTES:
• The ignitors may click a number of times
before burner lights. This is normal.
• All four burner ignitors will spark regard-
less of which burner you are using.
Visually check that the burner has lit. If
the burner does not ignite, listen for the
clicking sound. If you do not hear the
ignitor click, TURN THE BURNER OFF.
Check that the service cord is placed
firmly in the wall receptacle. Check for a
tripped circuit breaker or blown fuse.
Check that the control knob is pressed
completely down on valve shaft. If the spark
ignitor still fails to operate, call your nearest
authorized KitchenAid servicing outlet.
Proper grounding and polarity are neces-
sary for correct operation of the electric
ignition system. If the wall receptacle does
not provide correct polarity, the ignitor will
become grounded and click every once in
a while, even after the burner has ignited.
A qualified electrician should check the
wall receptacle to see if it is wired with
correct polarity.
Fire Hazard
Do not let the burner flame extend
beyond the edge of the pan.
Turn off all controls when not
cooking.
Failure to follow these instructions
can result in death or fire.
Burner heat settings
Use correct burner heat settings (see chart
later in this section). If the heat setting is too
high, it can:
Char bacon and cause curling.
Make eggs tough and crisp at the edges.
Toughen liver, fish, and seafood.
Scorch delicate sauces and custards.
Cause a boilover.
12
_sing and Caring forYour Cookfop
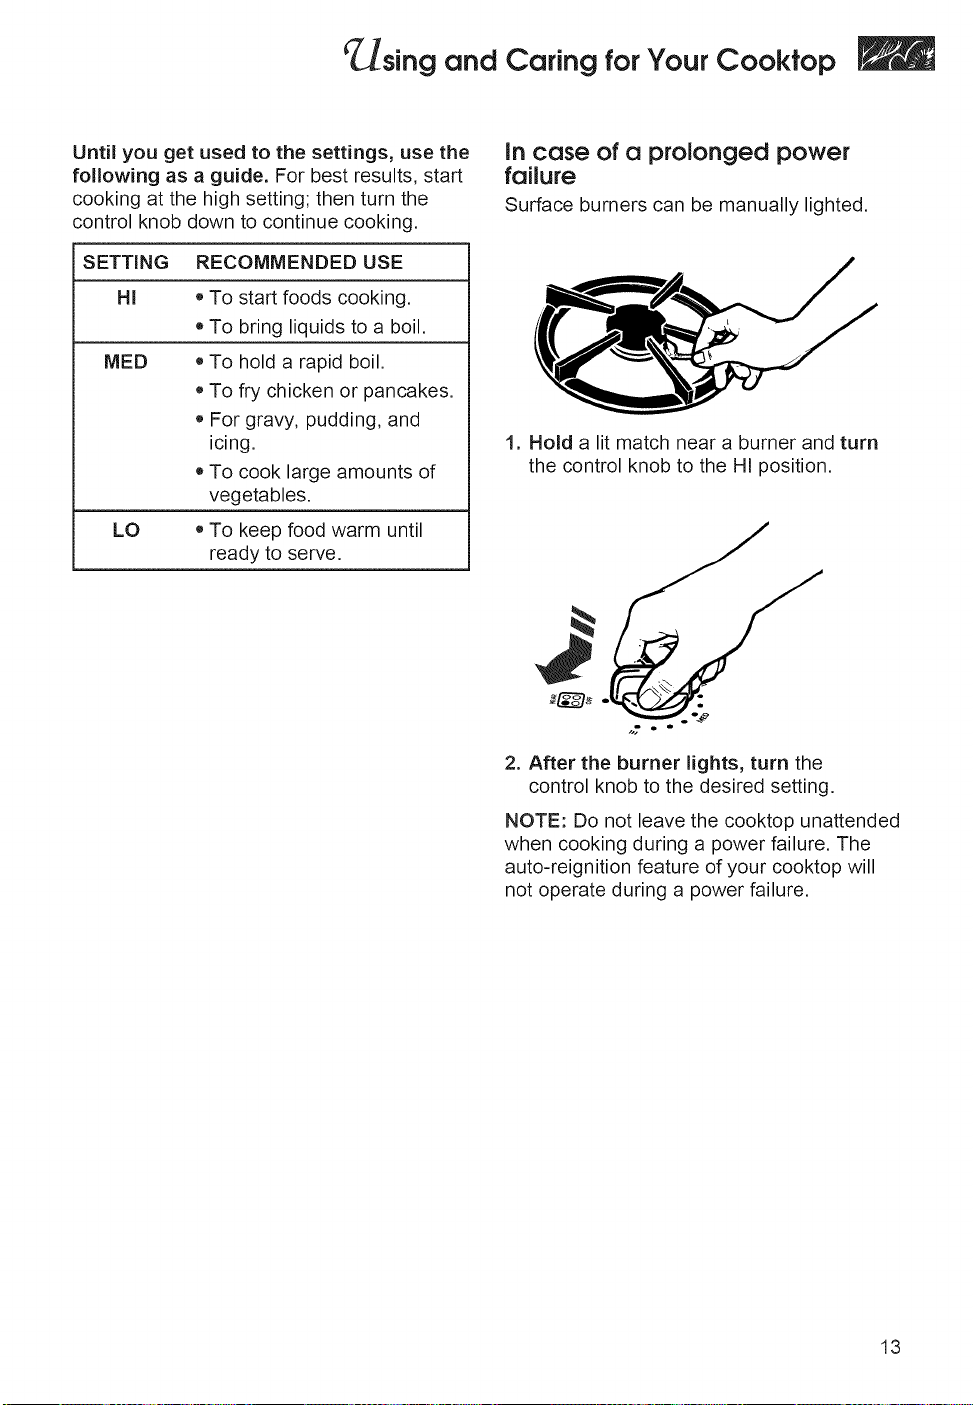
Until you get used to the settings, use the
following as a guide. For best results, start
cooking at the high setting; then turn the
control knob down to continue cooking.
SETTING RECOMMENDED USE
HI oTo start foods cooking.
• To bring liquids to a boil.
MED ®To hold a rapid boil.
To fry chicken or pancakes.
For gravy, pudding, and
icing.
To cook large amounts of
vegetables.
LO _ To keep food warm until
ready to serve.
in case of a prolonged power
failure
Surface burners can be manually lighted.
1. Hold a lit match near a burner and turn
the control knob to the HI position.
2. After the burner lights, turn the
control knob to the desired setting.
NOTE: Do not leave the cooktop unattended
when cooking during a power failure. The
auto-reignition feature of your cooktop will
not operate during a power failure.
13
¢ sing and Caring forYour Cookfop
Energy saving tips
Although the energy used for cooking is
usually a very small percentage of the total
energy used in the home, cooking energy
can be used efficiently. Here are some tips
to help you save energy when using your
range:
• Use pans with flat bottoms, straight sides,
and tight-fitting lids.
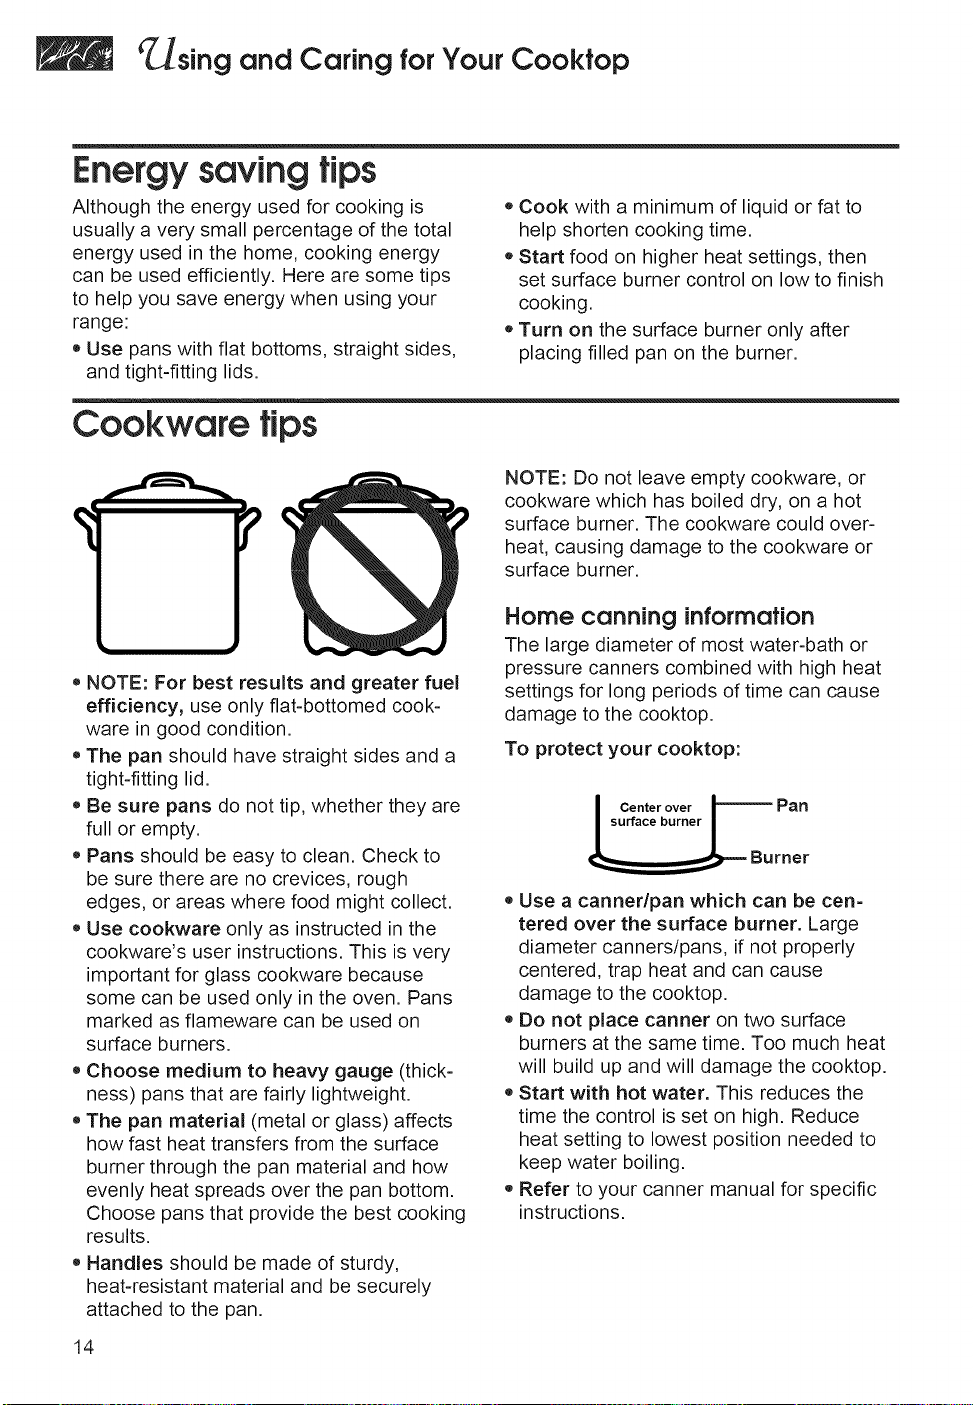
Cookware tips
®NOTE: For best results and greater fuel
efficiency, use only flat-bottomed cook-
ware in good condition.
The pan should have straight sides and a
tight-fitting lid.
Be sure pans do not tip, whether they are
full or empty.
Pans should be easy to clean. Check to
be sure there are no crevices, rough
edges, or areas where food might collect.
Use cookware only as instructed in the
cookware's user instructions. This is very
important for glass cookware because
some can be used only in the oven. Pans
marked as flameware can be used on
surface burners.
Choose medium to heavy gauge (thick-
ness) pans that are fairly lightweight.
The pan material (metal or glass) affects
how fast heat transfers from the surface
burner through the pan material and how
evenly heat spreads over the pan bottom.
Choose pans that provide the best cooking
results.
®Handles should be made of sturdy,
heat-resistant material and be securely
attached to the pan.
14
• Cook with a minimum of liquid or fat to
help shorten cooking time.
• Start food on higher heat settings, then
set surface burner control on low to finish
cooking.
Turn on the surface burner only after
placing filled pan on the burner.
NOTE: Do not leave empty cookware, or
cookware which has boiled dry, on a hot
surface burner. The cookware could over-
heat, causing damage to the cookware or
surface burner.
Home canning information
The large diameter of most water-bath or
pressure canners combined with high heat
settings for long periods of time can cause
damage to the cooktop.
To protect your cooktop:
Center over t P_n
I"uO umorI
Burner
Use a canner/pan which can be cen-
tered over the surface burner. Large
diameter canners/pans, if not properly
centered, trap heat and can cause
damage to the cooktop.
®Do not place canner on two surface
burners at the same time. Too much heat
will build up and will damage the cooktop.
®Start with hot water. This reduces the
time the control is set on high. Reduce
heat setting to lowest position needed to
keep water boiling.
Refer to your canner manual for specific
instructions.
sing and Caring forYour Cookfop
Caring for your ¢ookfop
Your cooktop is designed for ease of care.
You can do most cleaning with items found
around the home. Cleaning your cooktop
whenever spills or soiling occur will help to
keep it looking and operating like new.
NOTES:
o Before cleaning make sure all controls
are off and the cooktop is cool.
®Do not obstruct the flow of combustion
and ventilation air.
If knobs are removed while cleaning, be
careful not to spill liquids through holes in
the control area.
®Be careful not to allow moisture to collect
in control area. Moisture could cause
ignitor switches to fail.
Surface burners
The burner caps should be routinely
removed and cleaned. Always clean
burner caps after a spillover. Keeping the
burner caps clean prevents improper
ignition and an uneven flame.
For proper
burner, DO
CLEANING
MATERIAL
OPENING.
• Occasionally check the burner flames for
proper size and shape as shown later in
this section. A good flame is blue in color.
If flames lift off ports, are yellow, or are
noisy when turned off, you may need to
clean the burners.
flow of gas and ignition of the
NOT ALLOW SPILLS, FOOD,
AGENTS, OR ANY OTHER
TO ENTER THE GAS TUBE
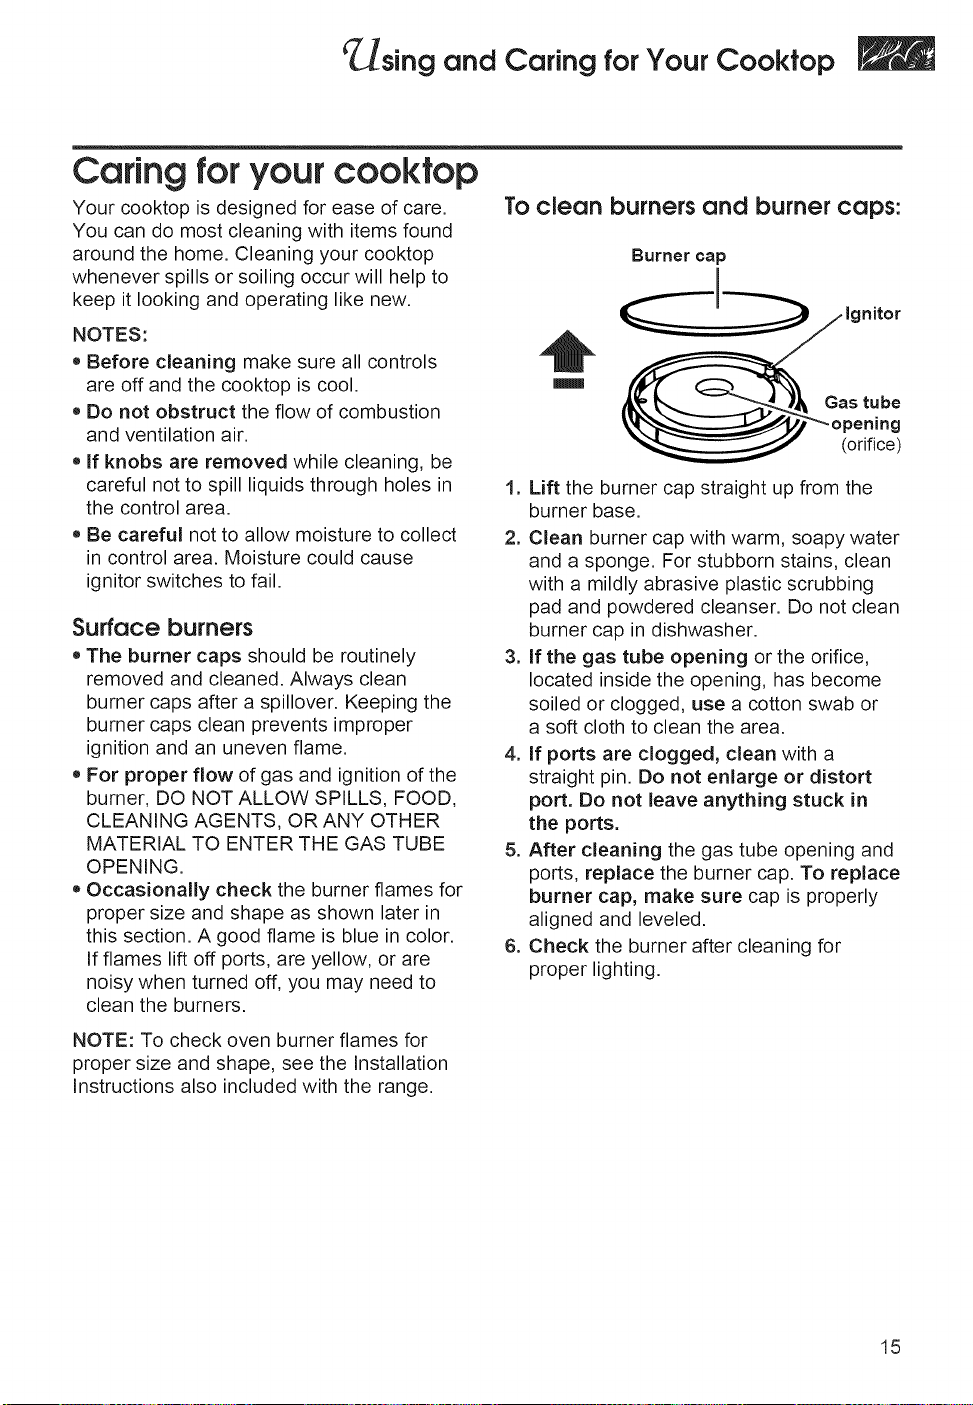
To clean burners and burner caps:
Burner cap
nitor
m
Gas tube
(orifice)
1. Lift the burner cap straight up from the
burner base.
2. Clean burner cap with warm, soapy water
and a sponge. For stubborn stains, clean
with a mildly abrasive plastic scrubbing
pad and powdered cleanser. Do not clean
burner cap in dishwasher.
3. If the gas tube opening or the orifice,
located inside the opening, has become
soiled or clogged, use a cotton swab or
a soft cloth to clean the area.
4. If ports are clogged, clean with a
straight pin. Do not enlarge or distort
port. Do not leave anything stuck in
the ports.
5. After cleaning the gas tube opening and
ports, replace the burner cap. To replace
burner cap, make sure cap is properly
aligned and leveled.
6. Check the burner after cleaning for
proper lighting.
NOTE: To check oven burner flames for
proper size and shape, see the Installation
Instructions also included with the range.
15

cL._singand Caring forYour Cookfop
Adjustingthe heightoftop burner
flames
Carbon Monoxide Poisoning Hazard
Do not operate with a yellow flame.
Doing so can result in death,
heart attack, or convulsions.
The LO burner flame should be a steady
blue flame approximately ¼ inch (6 mm)
high. It can be adjusted using the adjustment
screw in the center of the valve stem. The
valve stem is located directly underneath the
control knob.
To adjust the flame height follow the
instructions below:
1. Turn the control knob to "LO."
2. Remove the control knob. (If there is not
an adjustment screw underneath the knob
the flame height is not adjustable.)
3. Hold the valve stem with a pair of pliers.
The screw is located in the center of the
valve stem. Use a small flat head screw-
driver to turn the screw until the flame is
the proper size.
4. Replace the control knob.
Adjustment screw
Valve stem
5. Test the flame by turning the control from
"LO" to "HI," checking the flame at each
setting.
16
Low flame
_ I-nJ I-nJ I-nJ I-nJ I
Port
High flame
/r\__1 LrlJ LnJ LnJ LrlJ LnJ I
Port

sing and Caring forYour Cooktop
Explosion Hazard
Do not store flammable materials such as gasoline near this
appliance.
Doing so can result in death, explosion, or fire.
Cleaning your cookfop
PART WHAT TO USE HOW TO CLEAN
Control Sponge and warm, •
knobs soapy water
Tempered Sponge and warm,
glass soapy water
surface
OR
Paper towel and
spray glass cleaner
Turn knobs to OFF and pull straight away from
control panel.
Wash, rinse, and dry thoroughly. Do not soak.
• Do not use steel wool or abrasive cleansers.
They may damage the finish of the knobs.
Replace knobs. Make sure all knobs point to OFF.
Remove grates.
• Wash, wipe with clean water, and dry thoroughly.
Use nonabrasive, plastic scrubbing pad on heavily
soiled areas.
• Do not use steel wool, abrasives, or harsh
cleansers. They may damage the finish.
If you use soap or detergent solutions, wipe
thoroughly to prevent filmy residue.
NOTE: When cleaning cooktop with knobs removed,
do not allow water to run down inside unit.
Replace grates.
Surface Warm, soapy water
burner and a mildly abrasive
grates plastic scrubbing pad
and caps and/or powdered
cleanser
Surface See "Caring for your cooktop" earlier in this section
burners for cleaning instructions.
Clean as soon as they become dirty and when they
are cool enough to handle.
Wash with a mildly abrasive plastic scrubbing pad
and warm, soapy water.
For stubborn stains, clean with a scrubbing pad
and/or a powdered cleanser and water. Repeat
these cleaning steps as needed.
17

¢_sing and Caring forYour Cookfop
Usingand replacingthesurfacelight
(Models KGRT507 and YKGRT507)
The surface light is in the backguard. It is
controlled by the Surface light pads on the
control panel. The ON pad turns on the light
immediately and keeps it on until you press
OFF. The Night pad will turn on the surface
light automatically when the light in the room
is low enough to require a night light. When
the night light comes on, it will also dim all
lights appearing on the display. Press OFF
to turn off the regular surface light or press
NIGHT again to turn off the night light.
To turnon the surface light:
PRESS
Replacing the surface light:
1. Unplug range or disconnect power.
2. Flip up the top of the backguard.
To turnoff surface light:
PRESS 3. Pull up glass on front of backguard.
To turn on night light:
PRESS
w
4. Grasp the fluorescent light tube at both
ends. Turn the tube approximately 90°
"NIGHT LIGHT" shows on the display when
the night light is on.
in either direction until both ends come
out of the receptacles. Replace with a
20-watt cool-white fluorescent light tube.
To turn off night light:
PRESS again
B'] PltTl-'T_.'i I[_ ;#d
18
_sing and Caring forYour Cooktop
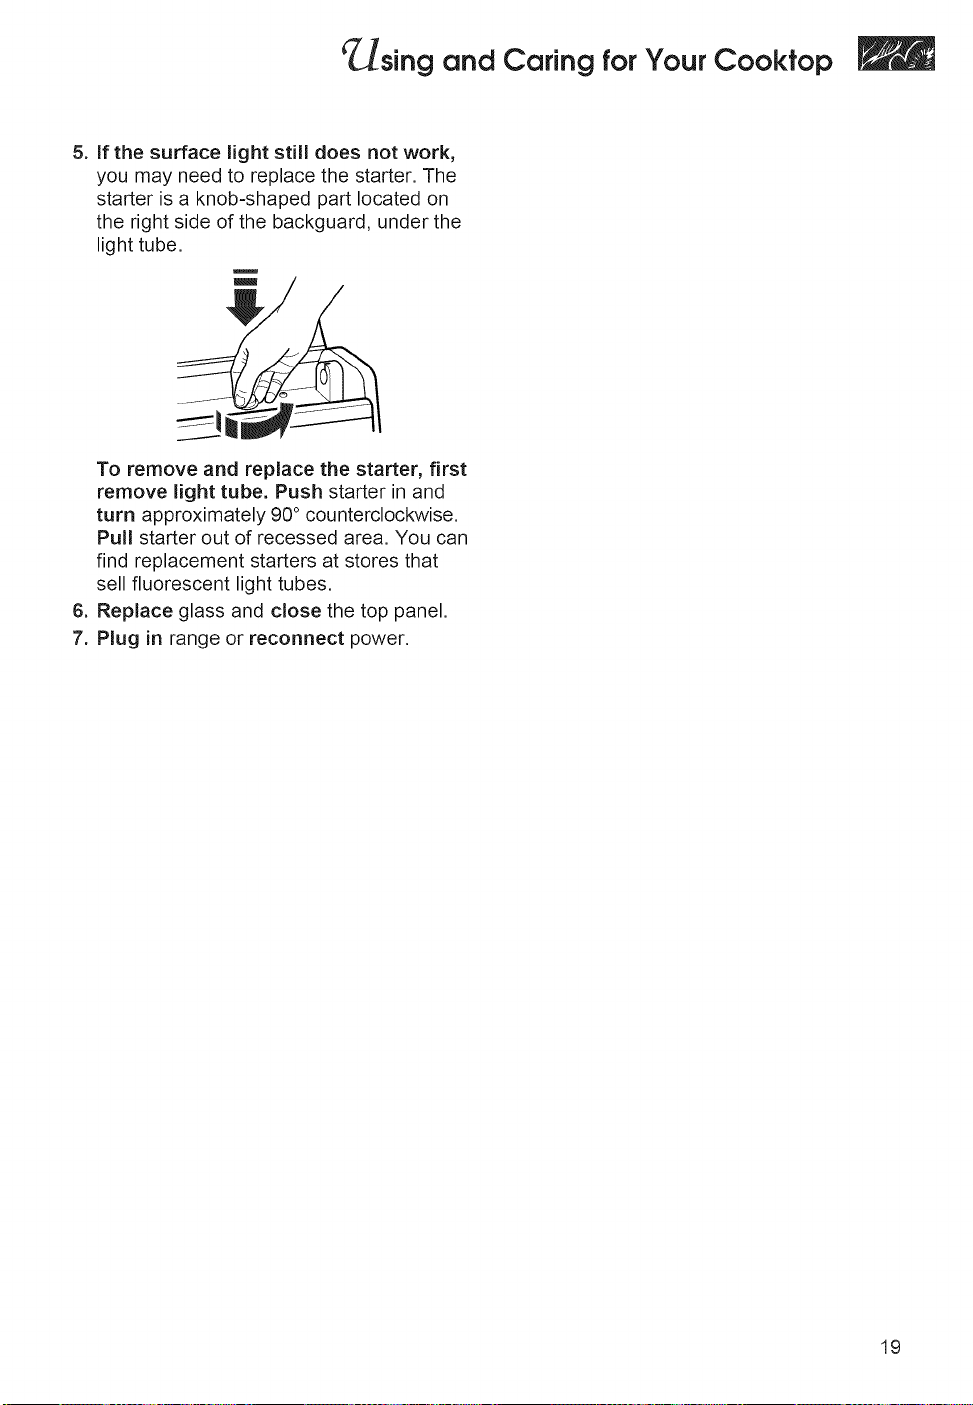
5. If the surface light still does not work,
you may need to replace the starter. The
starter is a knob-shaped part located on
the right side of the backguard, under the
light tube.
To remove and replace the starter, first
remove light tube. Push starter in and
turn approximately 90° counterclockwise.
Pull starter out of recessed area. You can
find replacement starters at stores that
sell fluorescent light tubes.
6. Replace glass and close the top panel.
7. Plug in range or reconnect power.
19

forYour
Oven
This section tells you, step by step, how to operate all oven functions controlled by the
electronic control. Carefully follow these instructions, along with the cooking tips and
cleaning information, for successful use of your range. Your model may not have all
the features shown on the control display.
Usingfheelectronicoven control
Oven
display
Timed/delayed Number Clock
cooking pads pads set/start
(p. 53) | pad
.............Ut::lIP:J
1_i
Oven EASY Convect Full
setting CONVECT* Meal pad
pads Conversion (p. 42)
(p. 28-29) pads
(p. 44)
Display/clock
, When you first plug in the range, a tone
will sound, the display will be fully lit for a
few seconds, and the display will show
the last time set and "PF" (power failure).
If, after you set the clock (See "Setting the
clock" later in this section), the display
again shows "PF," your electricity was off
for a while. Reset the clock.
, The time display will show "Err" and
3 short tones will sound if a time or
temperature is incorrectly entered.
(p. 29)
5_5
Surface light Oven
pads
(freestanding
model only)
(p. 18)
NOTE: If you press a command pad
several times, the pad can stop working.
If you wait a few seconds, you can use
the pad again. When you first use the
pad again, you may have to hold down
on the pad a short time to get it to work.
light pad pads pad
(p. 59) (pp. 30-31) (p. 28)
Time of day/ Start
timer display pad
(p. 30) (p.28)
Timer Cancel/off
20
_sing and Caring forYour Oven
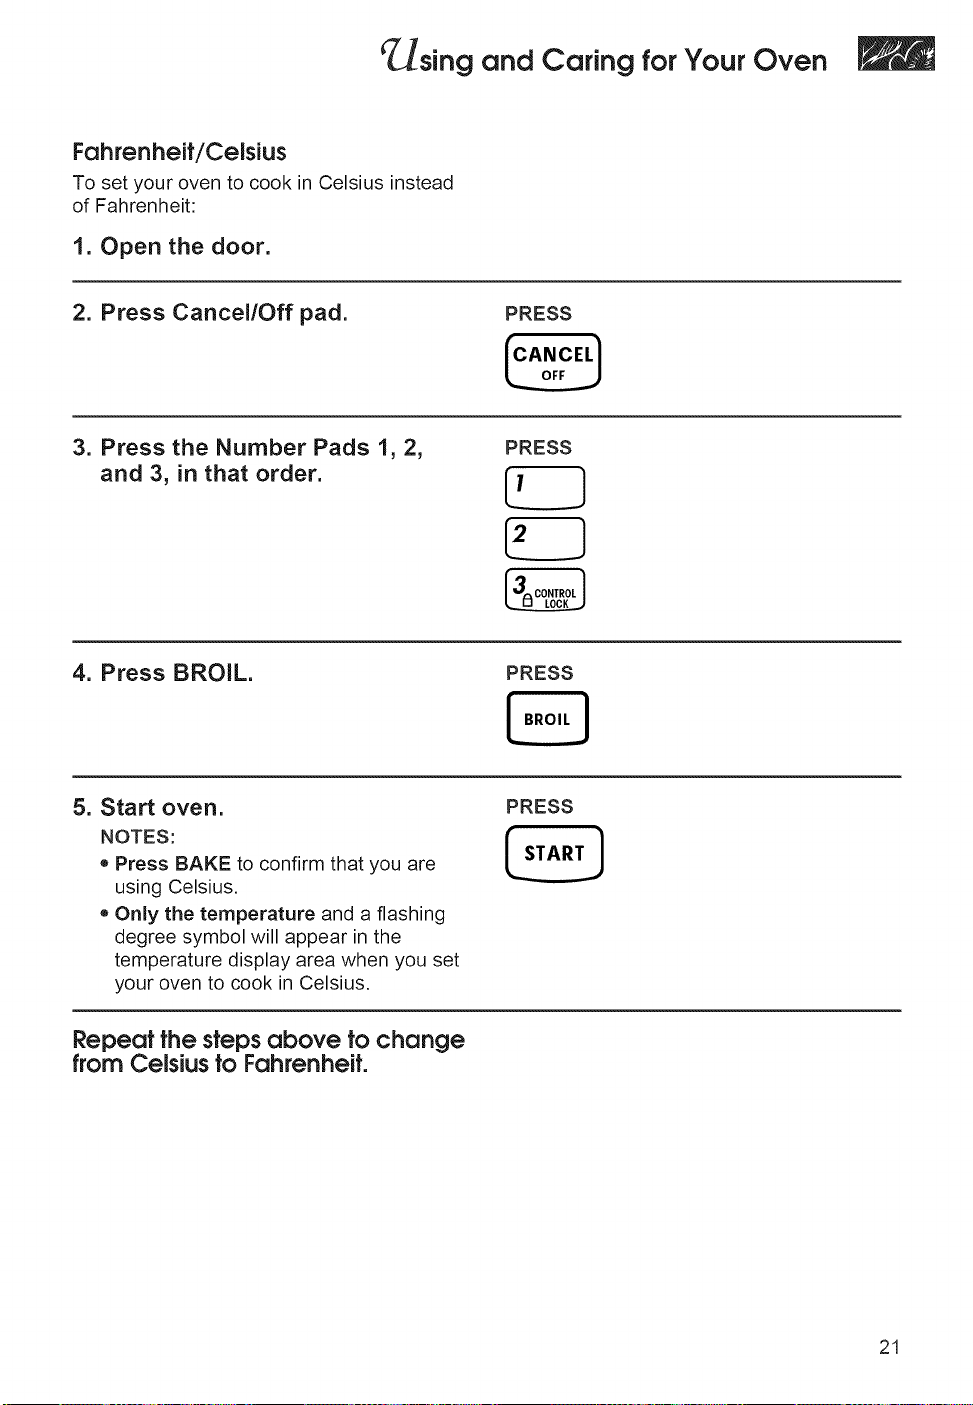
Fahrenheit/Celsius
To set your oven to cook in Celsius instead
of Fahrenheit:
1. Open the door.
2. Press Cancel/Off pad.
3. Press the Number Pads 1, 2,
and 3, in that order.
4. Press BROIL.
5. Start oven.
NOTES:
• Press BAKE to confirm that you are
using Celsius.
Only the temperature and a flashing
degree symbol will appear in the
temperature display area when you set
your oven to cook in Celsius.
PRESS
PRESS
PRESS
PRESS
Repeat the steps above to change
from Celsius to Fahrenheit.
21
sing and Caring forYour Oven
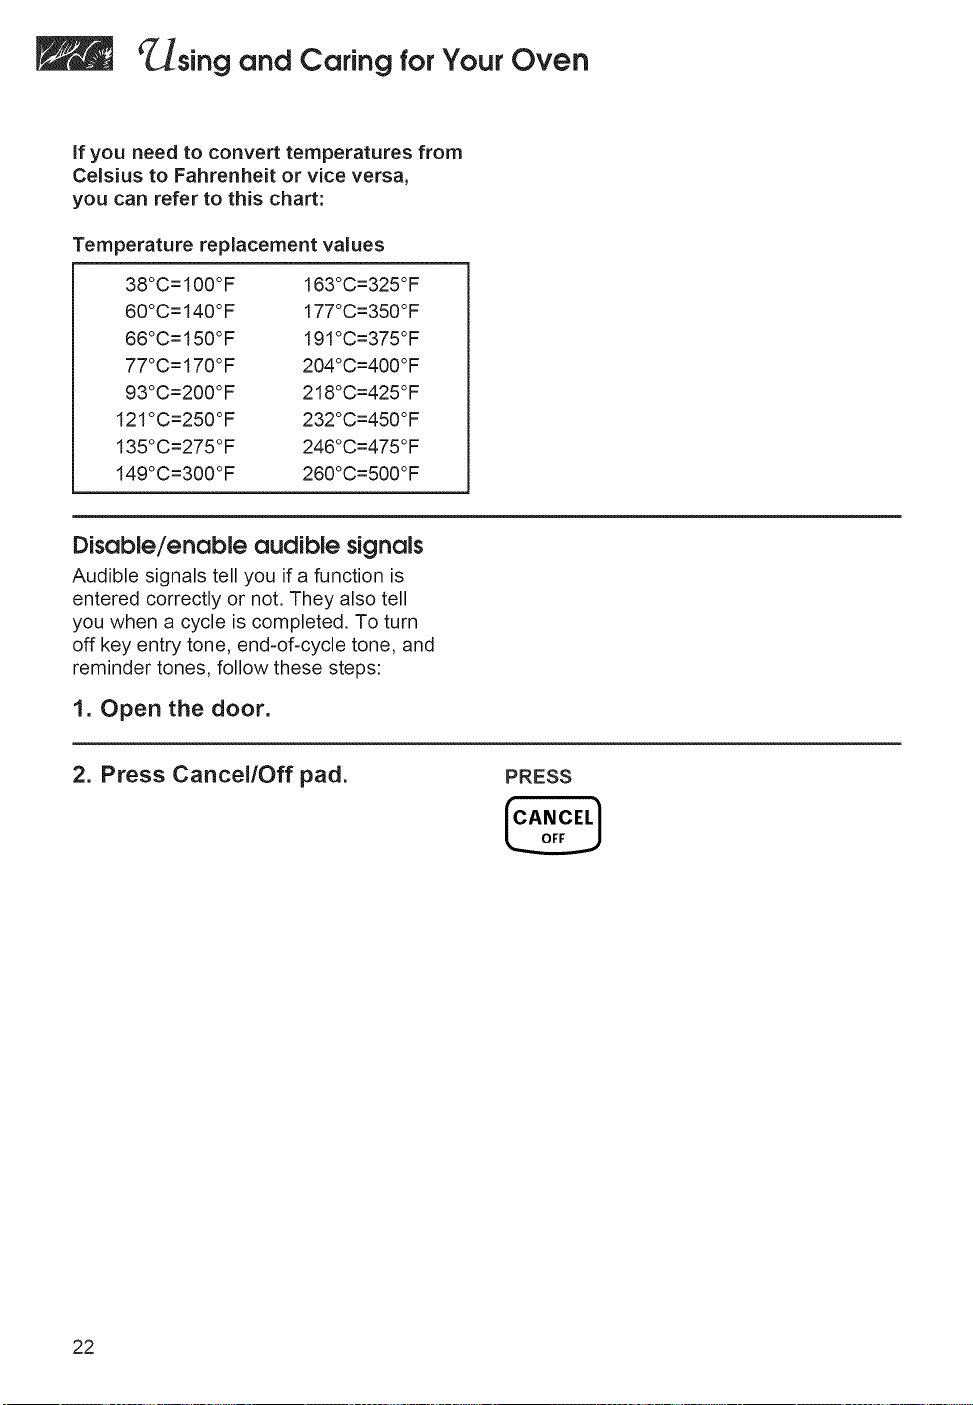
if you need to convert temperatures from
Celsius to Fahrenheit or vice versa,
you can refer to this chart:
Temperature replacement values
38°C=100°F
60°C=140°F
66°C =150°F
77°C =170°F
93°C=200°F
121°C=250°F
135°C=275°F
149°C=300°F
163°C=325 °F
177°C=350 °F
191°C=375°F
204°C=400°F
218°C=425 °F
232°C=450°F
246°C=475°F
260°C=500°F
Disable/enable audible signals
Audible signals tell you if a function is
entered correctly or not. They also tell
you when a cycle is completed. To turn
off key entry tone, end-of-cycle tone, and
reminder tones, follow these steps:
1. Open the door.
2. Press Cancel/Off pad.
PRESS
22
 Loading...