

KitchenAid KFGR383SSS Installation Instructions
INSTALLATION INSTRUCTIONS
AND USE AND CARE GUIDE
27” (68.6 CM) AND 36” (91.4 CM)
TM
ARCHITECT
(PORTABLE AND BUILT-IN — NON-COMBUSTIBLE CONSTRUCTION)
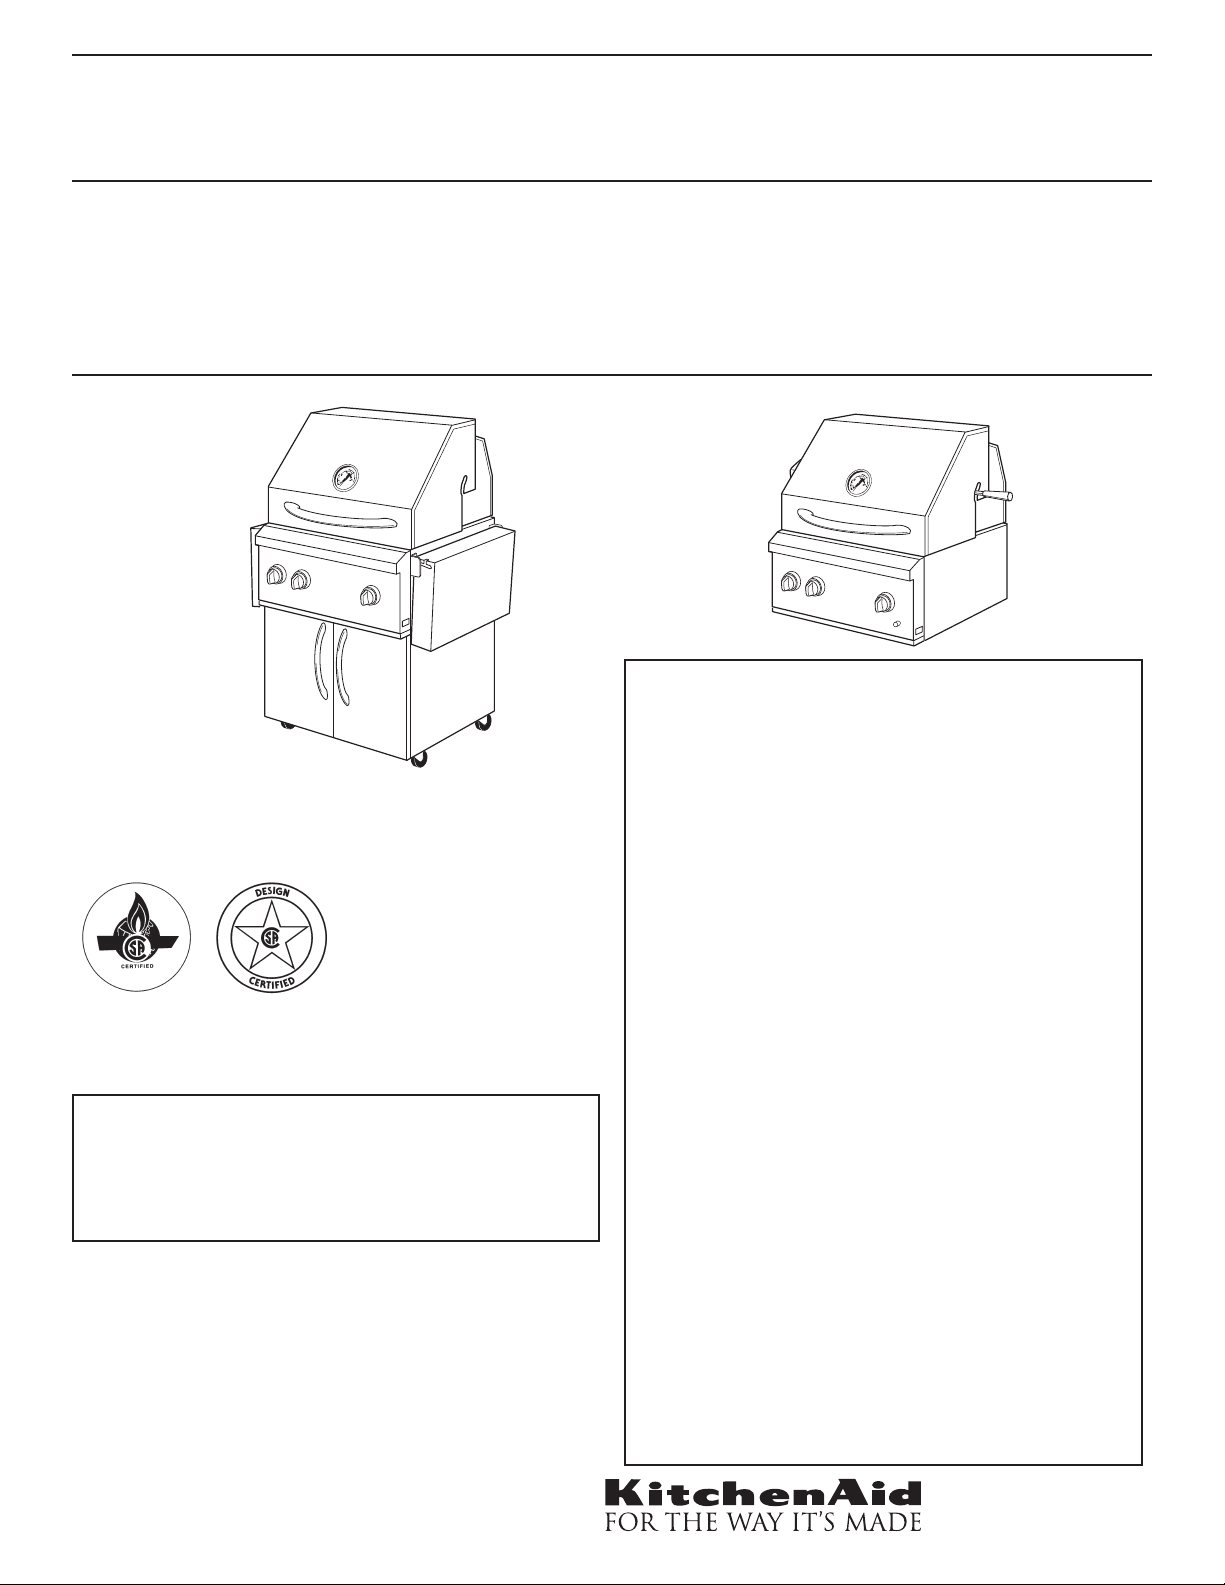
27” (68.6 cm)
Por table Outdoor
Grill without
rotisserie shown
Models
KFGR271SSS
KFGR361SSS
KFGR383SSS
IMPORTANT:
Read and save these instructions.
IMPORTANT:
Installer:
Consumer:
reference.
Save Installation Instructions for local electrical inspector’s
use.
Write the model and serial numbers in space provided below
before installing or using outdoor grill. The numbers are
stamped on the identifi cation label located on the underside of
grill drip tray. It is also located on the model/serial number
plate, located on heat shield behind control panel.
Model # ___________________________
Serial # ___________________________
Leave Installation Instructions with the consumer.
Keep Installation Instructions for future
SERIES OUTDOOR GRILLS
27” (68.6 cm)
Built-In Outdoor
Grill with
rotisserie shown
Quick Reference
Ta ble of Contents:
Pages
Outdoor Grill Safety
2
Installation Requirements
4
Location Requirements
5
Rotisserie
5
Product Dimensions
5
Built-In Installation Dimensions
6
Electrical Requirements
6
Gas Supply Requirements
7
Por table Outdoor Grills
7
Built-In Outdoor Grills
8
Installation Instructions
8-12
Por table Outdoor Grill Installation
8-9
If Converted to Natural Gas
10
Built-In Outdoor Grill Installation
11-12
Check and Adjust the Burners
13
Outdoor Grill Use
14
Using Your Outdoor Grill
14
Using the Side Burner
15
Using the Rotisserie
15
Outdoor Grill Care
16
Outdoor Grilling Tips
17
Cooking Methods
17
Grilling Chart
18-19
Rotisserie Cooking Tips
20
Rotisserie Chart
20
Cleaning
21-22
Accessories
22
Warranty
23
Requesting Assistance or Service
24
Models
KBGN274SSS
KBGN364SSS
®
Part No. 9763754 Rev. B
®
1

OUTDOOR GRILL SAFETY
Your safety and the safety of others are very important.
We have provided many important safety messages in this manual and on your appliance. Always read and obey all safety
messages.
This is the safety alert symbol.
This symbol alerts you to potential hazards that can kill or hurt you and others.
All safety messages will follow the safety alert symbol and either the word “DANGER” or “WARNING.”
These words mean:
You can be killed or seriously injured if you don't immediately
DANGER
WARNING
All safety messages will tell you what the potential hazard is, tell you how to reduce the chance of injury, and tell you what can
happen if the instructions are not followed.
follow instructions.
can be killed or seriously injured if you don't
You
instructions.
follow
FOR YOUR SAFETY
If you smell gas:
1. Shut off gas to the appliance.
2. Extinguish any open fl ame.
3. Open lid.
4. If odor continues, immediately call your
gas supplier or your fi re department.
FOR YOUR SAFETY
1. Do not store or use gasoline or other
fl ammable vapors and liquids in the
vicinity of this or any other appliance.
2. An L.P. cylinder not connected for use
shall not be stored in the vicinity of this
or any other appliance.
WARNING: For your safety, the information in this manual must be followed to minimize
the risk of fire or explosion, or to prevent property damage, personal injury, or death.
– Do not store or use gasoline or other flammable vapors and liquids in the vicinity of this
or any other appliance.
– WHAT TO DO IF YOU SMELL GAS:
Do not try to light any appliance.
•
Do not touch any electrical switch; do not use any phone in your building.
•
Clear the room, building, or area of all occupants.
•
Immediately call your gas supplier from a neighbor's phone. Follow the gas supplier's
•
instructions.
If you cannot reach your gas supplier, call the fire department.
•
– Installation and service must be performed by a qualified installer, service agency, or
the gas supplier.
2

IMPORTANT SAFETY INSTRUCTIONS
1. Do not install portable or built-in outdoor grills in or on a
recreational vehicle, portable trailer, boat or in any other
moving installation.
2. Always maintain minimum clearances from combustible
construction, see “Location Requirements” section.
3. The outdoor cooking gas appliance shall not be located
under overhead unprotected combustible construction.
4. This outdoor cooking gas appliance shall be used only
outdoors and shall not be used in a building, garage, or
any other enclosed area.
5. Keep any electrical supply cord and fuel supply hose
away from any heated surfaces.
6. Keep outdoor cooking and appliance area clear and
free from combustible materials, gasoline and other
fl ammable vapors and liquids.
7. Do not obstruct the fl ow of combustion and ventilation
air. Keep the ventilation openings of the cylinder enclosure free and clear from debris.
8. Inspect the gas cylinder supply hose before each use of
the grill. If the hose shows excessive abrasion or wear,
or is cut, it MUST be replaced before using the grill.
Contact your dealer and use only replacement hoses
specifi ed for use with the grill. If removal of an access
plate(s) or opening of a door(s) is required for this
inspection, instructions shall be provided on how to gain
access for the inspection.
9. Visually check the burner fl ames. They should be blue.
Slight yellow tipping is normal for L.P. gas.
10. Check and clean burner/venturi tube for insects and
insect nest. A clogged tube can lead to fi re under the
grill.
11. The L.P. gas supply cylinder to be used must be:
• constructed and marked in accordance with the
Specifi cation for L.P. Gas Cylinders of the U.S.
Department of Transportation (DOT) or the National
Standard of Canada, CAN/CSA-B339, Cylinders,
Spheres, and Tubes for Transportation of Dangerous
Goods; and Commission.
• provided with a listed overfi lling prevention device.
• provided with a cylinder connection device compatible
with the connection for outdoor grill appliances.
12. Always check connections for leaks each time you
connect and disconnect the L.P. gas supply cylinder.
See “Installation Instructions” section.
13. When the outdoor cooking gas appliance is not in use,
the gas must be turned off at the supply cylinder.
14. Storage of an outdoor gas grill appliance indoors is
permissible only if the cylinder is disconnected and
removed from the outdoor gas grill.
15. Cylinders must be stored outdoors and out of the reach
of children and must not be stored in a building, garage,
or any other enclosed area.
16. The pressure regulator and hose assembly supplied
with the outdoor gas grill must be used. A replacement
pressure regulator and hose assembly specifi c to your
model is available from your outdoor grill dealer.
17. The cylinder supply system must be arranged for proper
vapor withdrawal.
18. Gas cylinder must include a collar to protect the cylinder
valve.
Save These Instructions
3

If the following information is not followed exactly, a fi re
causing death or serious injury may occur.
• Do not store a spare LP-gas cylinder under or near this grill.
• Never fi ll the cylinder beyond 80 percent full.
IMPORTANT: This grill is manufactured for outdoor use only.
For grills that are to be used at elevations above 2000 feet, orifi ce
conversion is required. See “Gas supply requirements” section.
It is the responsibility of the installer to comply with the minimum
installation clearances specifi ed on the model/serial rating plate.
The model/serial rating plate can be found on the heat shield
behind control panel.
Copies of the standards listed may be obtained from:
National Fire Protection Association
One Batterymarch Park
Quincy, Massachusetts 02269
CSA International
8501 East Pleasant Valley Rd.
Cleveland, Ohio 44131-5575
The California Safe Drinking Water and Toxic Enforcement
Act requires the Governor of California to publish a list of
substances known to the State of California to cause cancer,
birth defects, or other reproductive harm, and requires
businesses to warn of potential exposure to such
substances.
WARNING: This product contains a chemical known to the
State of California to cause cancer, birth defects, or other
reproductive harm.
This appliance can cause low-level exposure to some of the
substances listed, including benzene, crystalline silica,
carbon monoxide, toluene, and soot.
In the State of Massachusetts, the following installation
instructions apply:
• Installations and repairs must be performed by a qualifi ed
or licensed contractor, plumber, or gasfi tter qualifi ed or
licensed by the State of Massachusetts.
• If using a ball valve, it shall be a
T-handle type.
• A fl exible gas connector, when used, must not exceed
3 feet.
INSTALLATION REQUIREMENTS
Tools and Parts
Gather the required tools and parts before starting installation.
Read and follow the instructions provided with any tools listed
here.
Tools needed for portable outdoor grill and built-in outdoor grill
non-combustible construction installations:
• Level
• Small, fl at-blade screwdriver
• Flat-blade screwdriver
• Phillips screwdriver
• Tape measure or ruler
• Slip-joint pliers
• Pipe wrench
• Scissors or cutting pliers to remove tiedowns
Materials required for built-in outdoor grill and built-in outdoor grill
non-combustible construction:
• Gas line shutoff valve
• 1/2” male pipe thread nipple for connection to pressure regulator
• L.P. gas-resistant pipe-joint compound
• CSA design-certifi ed outdoor fl exible stainless steel appliance
connector [4-5 ft. (1.2-1.5 m)] or rigid gas supply line as needed
• Noncorrosive leak detection solution
Materials required for portable:
• Noncorrosive leak detection solution
Parts supplied for built-in outdoor grill and built-in outdoor grill
non-combustible construction:
• Convertible regulator set for 4” W. C. natural gas.
• 2 single-prong plugs/transformer assemblies.
• Rotisserie motor.
• Rotisserie forks.
• Rotisserie spit and handle.
Parts needed for built-in outdoor grill and built-in outdoor grill noncombustible construction:
The built-in outdoor grills are manufactured for use with natural
gas.
To convert to L.P./propane gas, Gas Conversion Kit no. 4396311
must be used. Follow Instructions included with kit.
Parts supplied for portable:
• Hose and regulator assembly set for 11” W.C. L.P. gas (attached
to manifold).
Parts needed for portable:
The portable outdoor grills are manufactured for use with L.P./
propane gas.
To convert to natural gas, Gas Conversion Kit No. 4396312 must
be used. Follow Instructions included with kit.
• To connect to a fi xed L.P./ propane gas supply you must
purchase Convertible regulator kit No. 4396424 from your dealer.
4

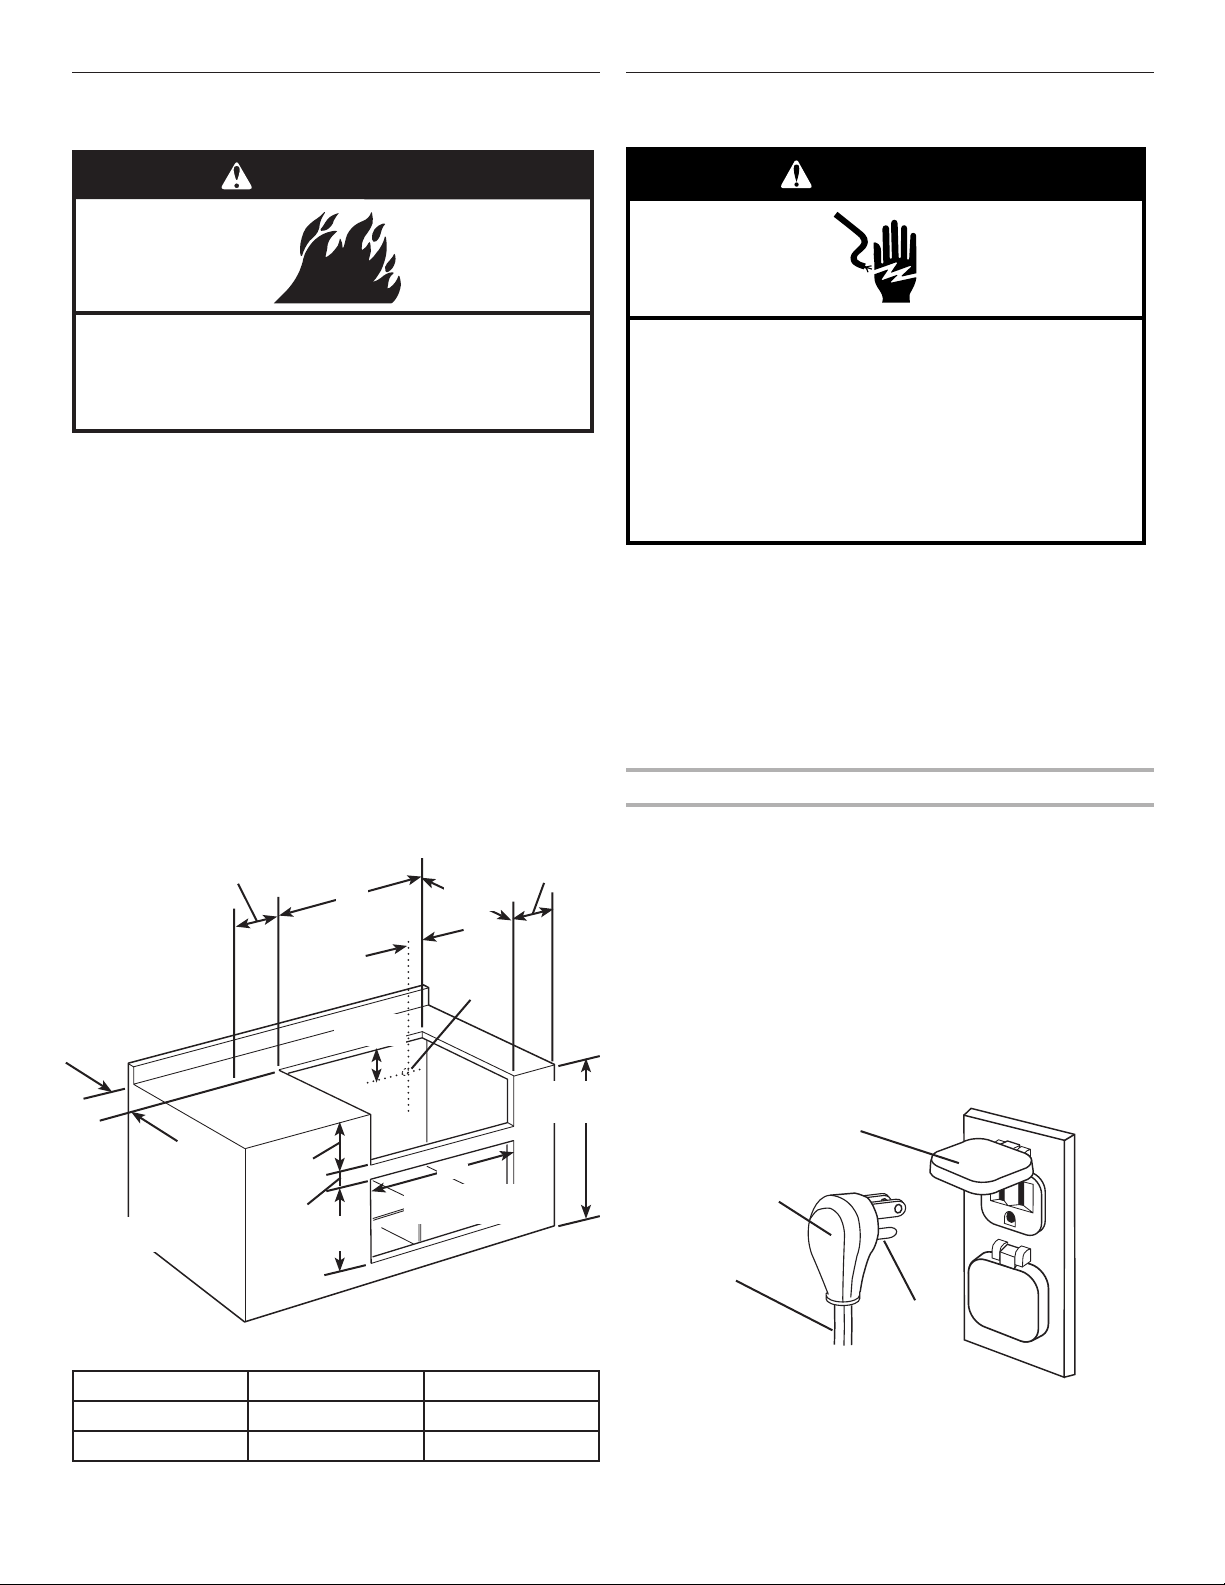
Location Requirements
WARNING
Explosion Hazard
Do not store fuel tank in a garage or indoors.
Do not store grill with fuel tank in a garage or indoors.
Failure to follow these instructions can result in death,
explosion, or fire.
WARNING
Rotisserie
If your model is equipped with a rotisserie, 6” (15.2 cm) minimum
clearance on each end is needed for the motor and skewer.
A grounded, 3-prong outlet located to the left of the grill is
required. (See “Electrical Requirements” section.)
Product Dimensions
Portable and built-in non-combustible construction
models
Clearance to combustible construction for built-in non-combustible
construction and portable outdoor grills:
• A minimum of 12” (30.5 cm) must be maintained between the
grill hood, sides and back and any combustible construction.
• A 12” (30.5 cm) minimum clearance must also be maintained
below the cooking surface and any combustible construction.
48” (121.9 cm) [36” (91.4 cm)
grill with 12
27” (68.6 cm), or
36” (91.4 cm)
” (30.5 cm) side burner]
Fire Hazard
Do not use grill near combustible materials.
Do not store combustible materials near grill.
Doing so can result in death or fire.
Select a location that provides minimum exposure to wind and
traffi c paths. The location should be away from strong draft areas.
Do not obstruct fl ow of combustion and ventilation air.
WARNING
Fire Hazard
Do not install this grill on or near combustible materials.
Doing so can result in death or fire.
If you plan to use a combustible enclosure:
return this unit and replace it with the model which is
manufactured for use in a combustible enclosure.
12”
(30.5 cm)
side tray* side tray*
*Not all models have side burner or side trays.
26” (60 cm)
25-1/2” (64.8 cm)
23” (58.4 cm)
36”
(91.4 cm)
portable
models
1/2”
male NPT
side burner*
11-1/8”
(28.3 cm)
24-5/8”
(62.5 cm)
3-5/8”
(9.2 cm)
12”
(30.5 cm)
34”
(86.4 cm)
Locking front
casters
5
Built-In Installation Dimensions
(non-combustible enclosure)
Electrical Requirements
Built-in models - rotisserie and grill light
WARNING
Fire Hazard
Do not install this grill on or near combustible materials.
Doing so can result in death or fire.
IMPORTANT: If grill is to be installed in a combustible enclosure,
return this unit and replace it with the model which is
manufactured for use in a combustible enclosure.
Enclosure and clearance dimensions that are shown must be
used. Given dimensions provide required clearances.
The installation of this grill must conform with the current
standards CSA-Z21.58a-2005, or with local codes.
For installations in a non-combustible enclosure, the grill drops
into the opening and is supported by its side fl anges. Do not use
a bottom support.
Copies of the standards listed may be obtained from:
CSA International
8501 East Pleasant Valley Rd.
Cleveland, Ohio 44131-5575
WARNING
Electrical Shock Hazard
Plug into a grounded 3 prong outlet.
Do not remove ground prong.
Do not use an adapter.
Do not use an extension cord.
Failure to follow these instructions can result in death,
fire, or electrical shock.
If codes permit and a separate ground wire is used, it is
recommended that a qualifi ed electrician determine that the
ground path is adequate.
Check with a qualifi ed electrician if you are not sure whether the
grill is properly grounded.
Do not ground to a gas pipe.
A 120-volt, 60-Hz, AC-only, 15-ampere, fused electrical supply is
required.
Recommended ground method
22”
B
6” (15.2 cm)
min. clearance
for rotisserie
” (30.5 cm)
12
minimum to
any accessory
2
” (5.1 cm)
minimum to
open hood
Center or support
surfaces must be level
Non-combustible enclosure installations
Grill size A B
27” (68.6 cm) 26” (66.7 cm) 25-1/4” (64.1 cm)
36” (91.4 cm) 35” (89.5 cm) 34-1/4” (87.0 cm)
10-7/8
(27.0 cm)
1-1/8”
(2.9 cm)
A
2-1/4”
(5.7 cm)
7-3/8”
(18.7 cm)
”
19”
(48.3 cm)
(57.2 cm)
Gas line
location at
rear of grill
optional custom
access doors
35-1/2”
(90.2 cm)
A grounded 3-prong outdoor outlet grounded in accordance with
the National Electrical Code ANSI/NFPA 70 or Canadian Electrical
Code (C22.1) — and local codes and ordinances.
Copies of the standards listed above may be obtained from:
CSA International
8501 East Pleasant Valley Rd.
Cleveland, Ohio 44131-5575
National Fire Protection Association
One Batterymarch Park
Quincy, Massachusetts 02269
3-prong polarized groundtype outdoor outlet
3-prong ground
plug
power supply
cord
ground
prong
6
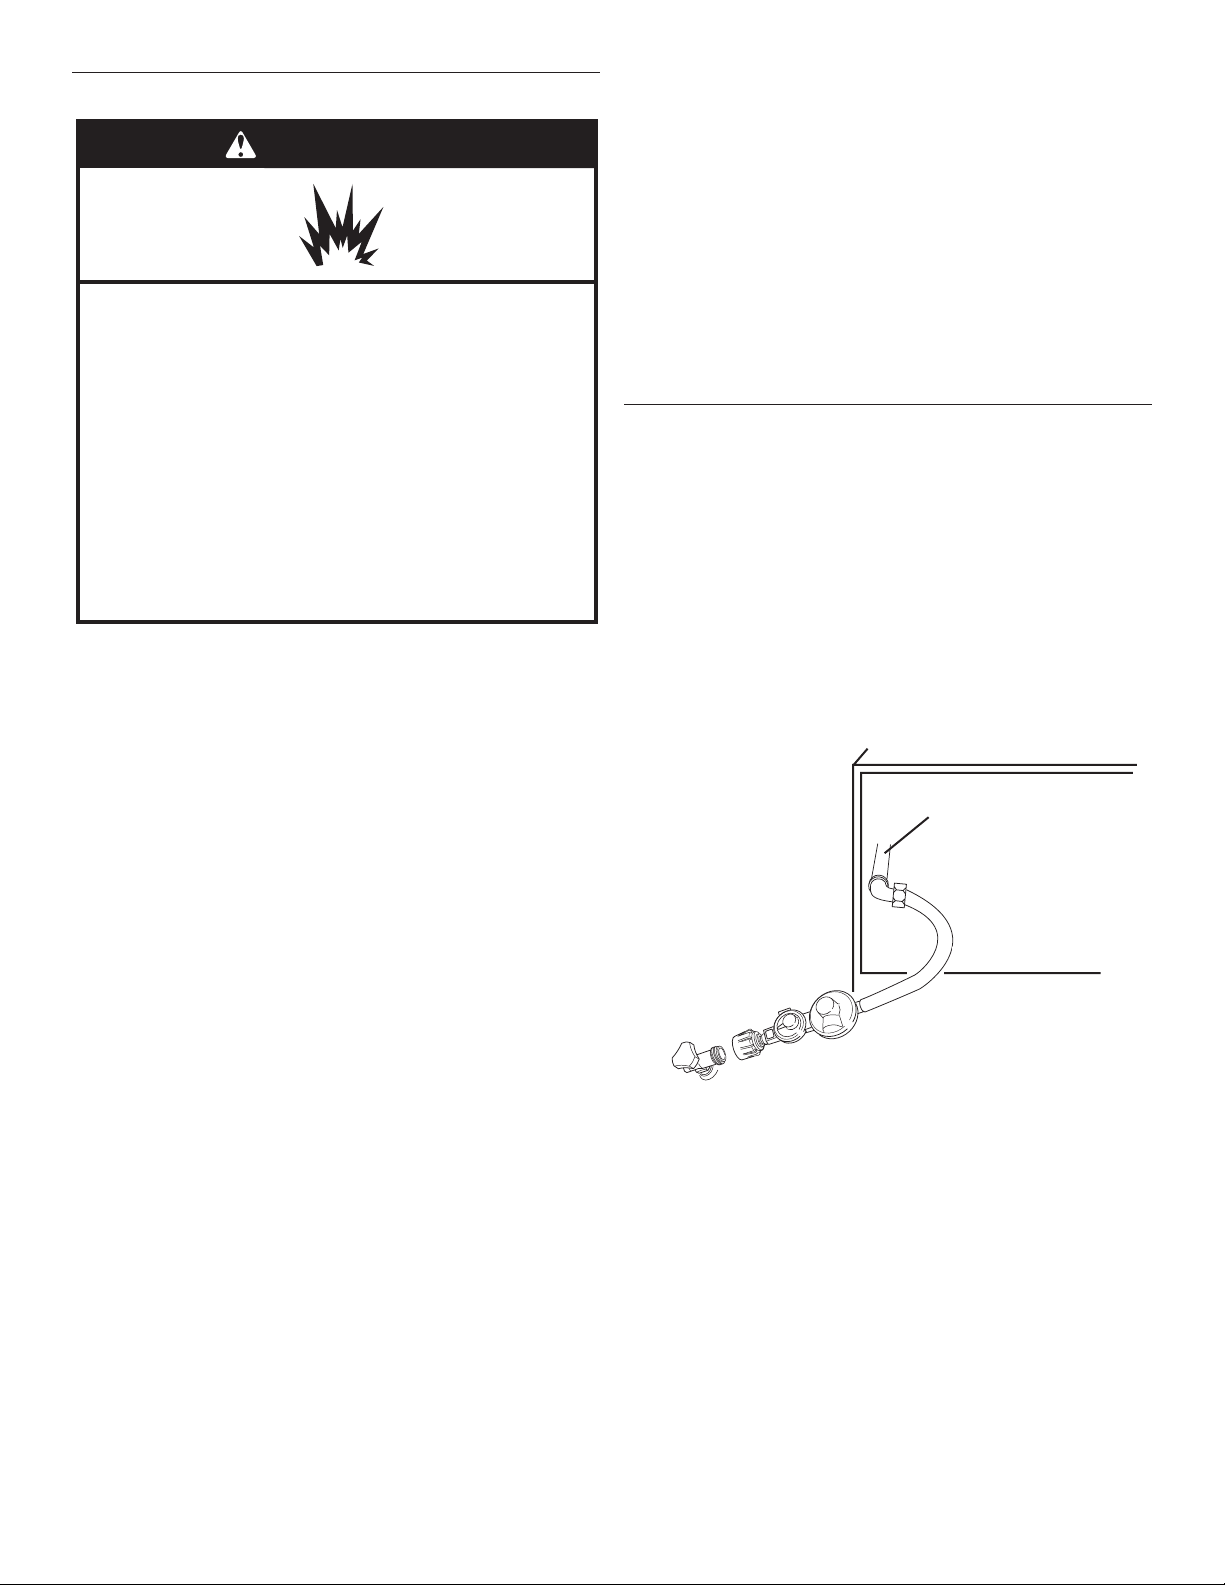
Gas Supply Requirements
WARNING
Explosion Hazard
Use a new CSA International approved “outdoor”
gas supply line.
Securely tighten all gas connections.
If connected to LP, have a qualified person make sure
gas pressure does not exceed 11” (28 cm) water
column.
Examples of a qualified person include:
licensed heating personnel,
authorized gas company personnel, and
authorized service personnel.
Failure to do so can result in death, explosion, or fire.
Observe all governing codes and ordinances.
IMPORTANT: This installation must conform with all local codes
and ordinances. In the absence of local codes, installation must
conform with American National Standard National Fuel Gas
Code ANSI Z223.1 -latest edition or CAN/CGA B149.1 -latest
edition.
IMPORTANT: Grill must be connected to a regulated gas supply.
• Input ratings shown on the model/serial rating plate are for
elevations up to 2,000 feet (610 m). For elevations above 2,000
feet (610 m), ratings are reduced at a rate of 4% for each 1,000
feet (305 m) above sea level. Orifi ce conversion is required.
Contact KitchenAid Assistance Center.
• Refer to the model/serial rating plate for information on the type
of gas that can be used. If this information does not agree with
the type of gas available, check with your local gas supplier.
No attempt shall be made to convert the grill from the gas
specifi ed on the model/serial rating plate for use with a different
gas type without consulting the serving gas supplier. The
conversion kits specifi ed must be used.
Line pressure testing:
Testing above 1/2 psi (3.5 kPa) or 14 inches (35.5 cm) W.C.
(gauge):
• The grill and its individual shutoff valve must be disconnected
from the gas supply piping system during any pressure testing
of that system at test pressures greater than 1/2 psig (3.5 kPa).
Testing below 1/2 psi (3.5 kPa) or 14 inches (35.5 cm) W.C.
(gauge) or lower:
• The grill must be isolated from the gas supply piping system by
closing its individual manual shutoff valve during any pressure
testing of the gas supply piping system at test pressures equal
to or less than 1/2 psig (3.5 kPa).
Portable Outdoor Grills
L.P. Gas:
This grill is equipped for use with an L.P. gas fuel tank. It is designcertifi ed by CSA International for local L.P. gas supply or for
Natural gas with appropriate conversion.
L.P. gas from a local L.P. gas supply:
IMPORTANT: The gas installation must conform with local codes,
or in the absence of local codes, with the National Fuel Gas Code,
ANSI Z223.1/NFPA 54 -latest edition. The qualifi ed L.P. gas
technician shall provide the L.P. gas supply to the selected grill
location in accordance with the National Fuel Gas Code, ANSI
Z223.1/NFPA 54 and local codes.
rear of grill
” grill
1/2
gas pipe
L.P. GAS:
Operating pressure: 11 inches (27.9 cm) W.C.
Supply pressure: 11 to 14 inches (27.9 to 35.5 cm) W.C.
NATURAL GAS:
Set pressure: 4 inches (10.2 cm) W.C.
Supply pressure: 7-14 inches (17.8 cm to 35.5 cm) W.C.
maximum.
Natural gas conversion:
Conversion must be made by a qualifi ed gas technician. The
qualifi ed natural gas technician shall provide the natural gas
supply to the selected grill location in accordance with the
National Fuel Gas Code ANSI Z223.1/NFPA 54 -latest edition, and
local codes. For conversion to Natural gas, the Natural gas
conversion kit must be used.
IMPORTANT: The gas installation must conform with local codes,
or in the absence of local codes, with the National Fuel Gas Code,
ANSI Z223.1/NFPA 54 -latest edition.
To convert to Natural gas, the Natural Gas Conversion
Kit No. 4396312 must be used. Follow Instructions included with
the kit.
7

Built-In Outdoor Grills
(non-combustible construction)
Natural Gas:
Built-in grill models are equipped for use with Natural gas. They
are design-certifi ed by CSA International for L.P. (propane or
butane) gases with appropriate conversion.
Built-in models are set for natural gas use and have a pressure
regulator with 1/2” female pipe threads.
” grill
1/2
rear of grill
gas pipe
INSTALLATION INSTRUCTIONS
Portable Outdoor Grill Installation
Assemble Cooking Area
Portable ArchitectTM Series Outdoor Grill
WARNING
Excessive Weight Hazard
Use two or more people to move and install grill.
Failure to do so can result in back or other injury.
fl e xible gas
connector
The supply line shall be equipped with an approved shutoff valve.
This valve should be located in the same area as the grill and
should be in a location that allows ease of opening and closing.
Do not block access to the shutoff valve. The valve is for turning
on or shutting off gas to the appliance.
Shutoff valve
“open” position
gas supply line
To grill
L.P. gas conversion from a local L.P. gas supply:
Conversion must be made by a qualifi ed person. A qualifi ed
natural gas technician shall provide the L.P. gas supply to the
selected grill location in accordance with the National Fuel Gas
Code ANSI Z223.1/NFPA 54 -latest edition, and local codes.
To convert to L.P. gas, the L.P. Gas Conversion Kit No. 4396311
must be used. Follow Instructions included with kit.
L.P. gas conversion using an L.P. fuel tank:
To convert to L.P. gas, the L.P. Gas Conversion Kit No. 4396311
must be used. Follow Instructions included with kit.
An L.P. gas cylinder, not larger than 20 pounds, must be
purchased separately.
1. Move grill into desired outdoor location.
2. Open the hood.
For models with side burners:
1. Remove side burner cover from the top of the carton that is
located on the grill grate. Remove bubble wrap from side burner
cover and set aside.
2. Open carton located on the grill grate. Remove side burner
grate, unwrap and set aside.
3. Remove burners and burner caps from carton and unwrap.
4. Install each set of burners and caps inside the side burner
cavity as shown.
burner
cap
burner
5. Install side burner grate and cover (with extension toward
grill) as shown.
extension
notch
alignment
tab
cover
burner grate
6. Dispose of/recycle all packaging material.
8
 Loading...